
New Petrol Filler Caps - The Final Lap
Discussion


The new caps and bases are being polished and plated over the next week and should be with TVR Car Parts the following week, but I have fitted the first sample to Gerald
What the end result looks like
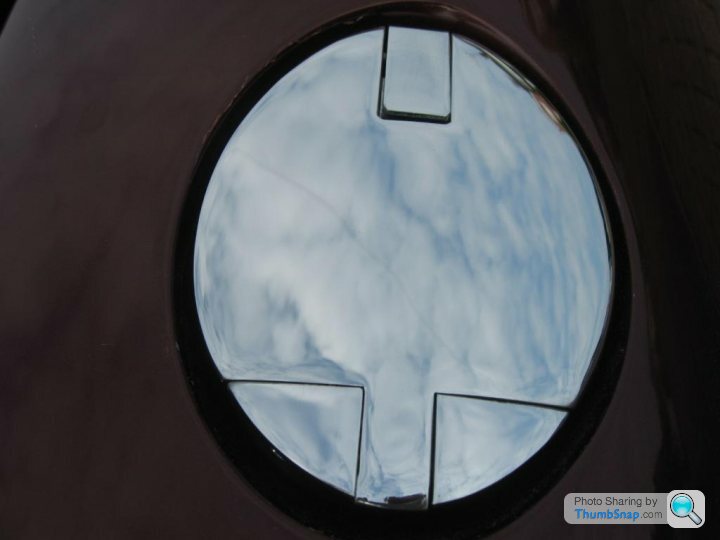
Points to note
Getting to the nuts to release the old filler cap is a bast ed but can be done
Please check the fit of the roll pins prior to re-assembly just in case them need a little easing, the fit should be fine as all the work has been done using jigs and a cnc milling machine and double checked by hand after plating
When the filler cap is off the car the first action is to release the roll pins which hold the cap to the base and the latch to the cap. They only come out one way. Both my old cap and the one borrowed from jwoffshore were the same see below for a sample of the latch

When the pin is removed there is a tiny spring under the latch -DONT LOOSE IT, I put the whole cap in a polythene bag before final removal so it couldn’t get lost.
I then fitted the latch to the new cap, carefully placing the spring first, putting the roll pin through both cap and latch and driving the pin home with a nail punch.
Next separate the cap from the base and the roll pin is the opposite of the other one

Next you have to remove the spring backed seal to the filler pipe
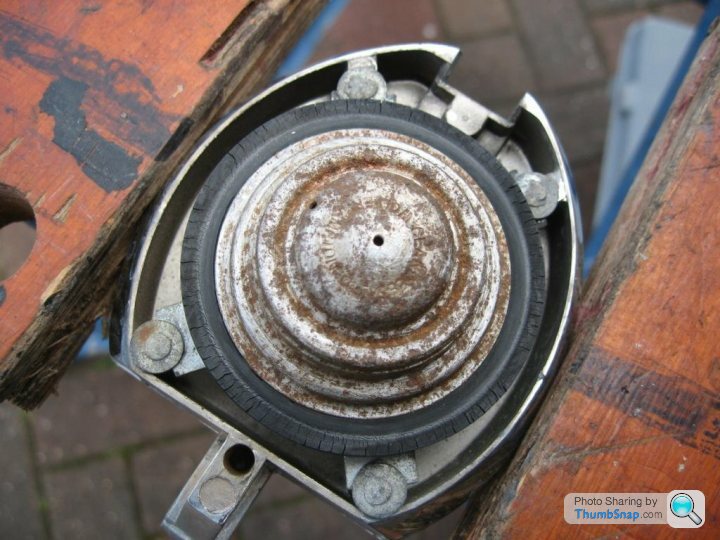
File off the peened over pins for two of the supports holding the seal as you do it, carefully save the washers, now you can remove the seal and spring easily. They remove the peening from the other two supports again saving the washers.
Take two of the washers and place on the supports on the new cap, peen them over.
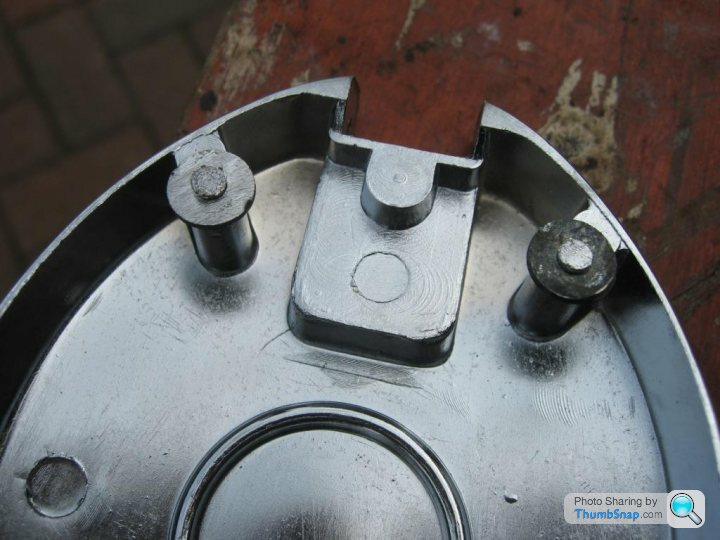
Push one end of the seal under the washers, squeeze the seal down against the spring, add the second two washers and peen away.
The metal is soft enough for you to hold the cap in one hand while peening, however I did put the cap on the work bench on a cork mat for the final peening.
End result

Replace the roll pin holding cap to base and refit to car (by for the worst part of the job).
The whole thing took about an hour start to finish and it looks the dog bollks
What the end result looks like

Points to note
Getting to the nuts to release the old filler cap is a bast
ed but can be donePlease check the fit of the roll pins prior to re-assembly just in case them need a little easing, the fit should be fine as all the work has been done using jigs and a cnc milling machine and double checked by hand after plating
When the filler cap is off the car the first action is to release the roll pins which hold the cap to the base and the latch to the cap. They only come out one way. Both my old cap and the one borrowed from jwoffshore were the same see below for a sample of the latch

When the pin is removed there is a tiny spring under the latch -DONT LOOSE IT, I put the whole cap in a polythene bag before final removal so it couldn’t get lost.
I then fitted the latch to the new cap, carefully placing the spring first, putting the roll pin through both cap and latch and driving the pin home with a nail punch.
Next separate the cap from the base and the roll pin is the opposite of the other one

Next you have to remove the spring backed seal to the filler pipe

File off the peened over pins for two of the supports holding the seal as you do it, carefully save the washers, now you can remove the seal and spring easily. They remove the peening from the other two supports again saving the washers.
Take two of the washers and place on the supports on the new cap, peen them over.

Push one end of the seal under the washers, squeeze the seal down against the spring, add the second two washers and peen away.
The metal is soft enough for you to hold the cap in one hand while peening, however I did put the cap on the work bench on a cork mat for the final peening.
End result

Replace the roll pin holding cap to base and refit to car (by for the worst part of the job).
The whole thing took about an hour start to finish and it looks the dog boll
ksEdited by Gerald-TVR on Wednesday 23 September 08:26
Gassing Station | S Series | Top of Page | What's New | My Stuff