Tamiya TT02BR build thread
Discussion


Someone asked for photos after I posted the finished thing in the "Show us your RC" thread. So here you go, with waffling.
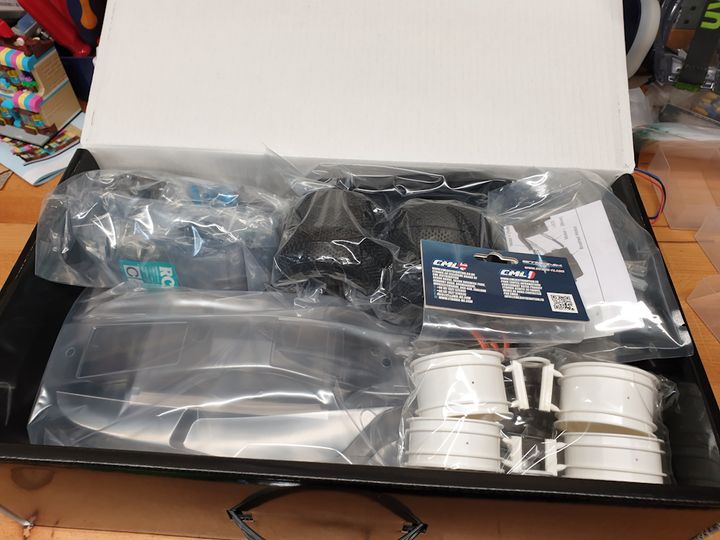
The TT-02B is a cheapish 4WD shaft-driven buggy, based (as you might guess) on the TT-02 touring car chassis. Adding an "R" on the end means you get a glass reinforced tub, full bearings, and some shiny blue aluminium bits, but no tyres. It does come with a Neo Scorcher body (different decals though) and three different wings.
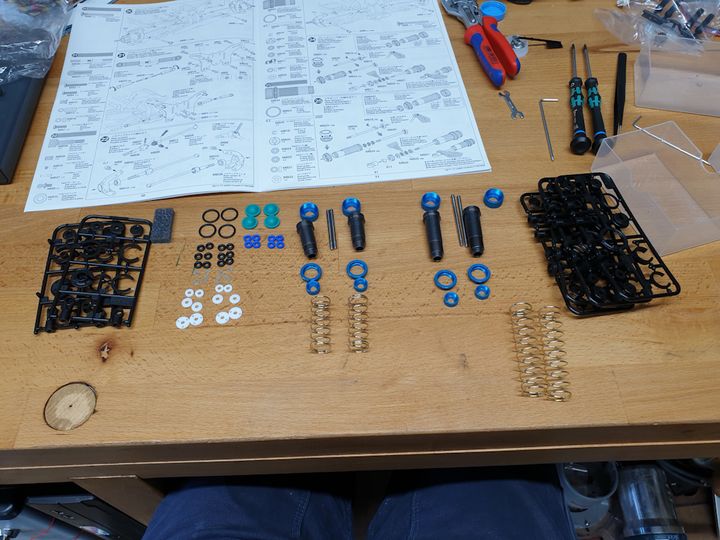
Here's what you get in the box, plus the tyres (which are about £25 for the set).
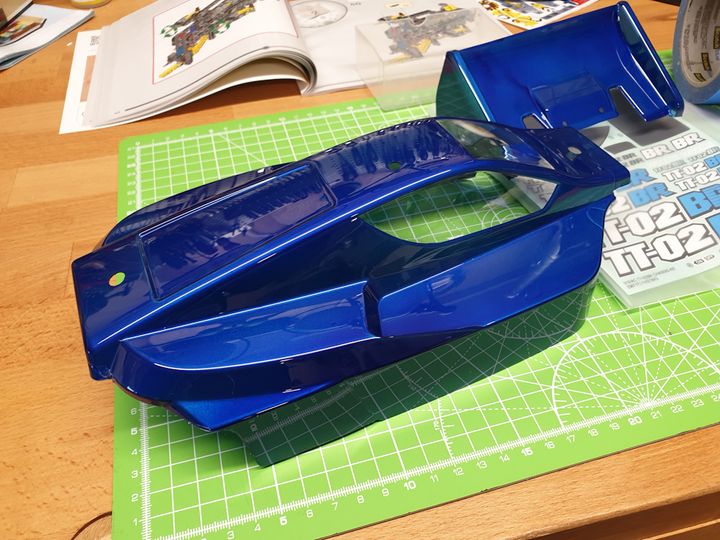
Unusually for me I didn't put off the body until last. You have to cut it away from the normal lines for it to fit right. I did three coats of Tamiya PS38 Translucent Blue, then backed with PS63 Bright Gunmetal (I found a post from someone on Reddit who used trans red over gunmetal and that looked pretty good). I got a bit of a run on the wing but it's barely visible.
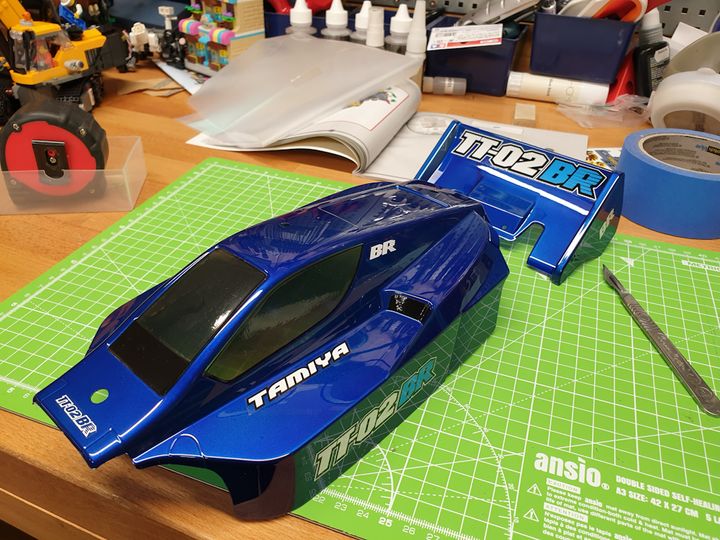
And a few of the TT02BR stickers to break it up.
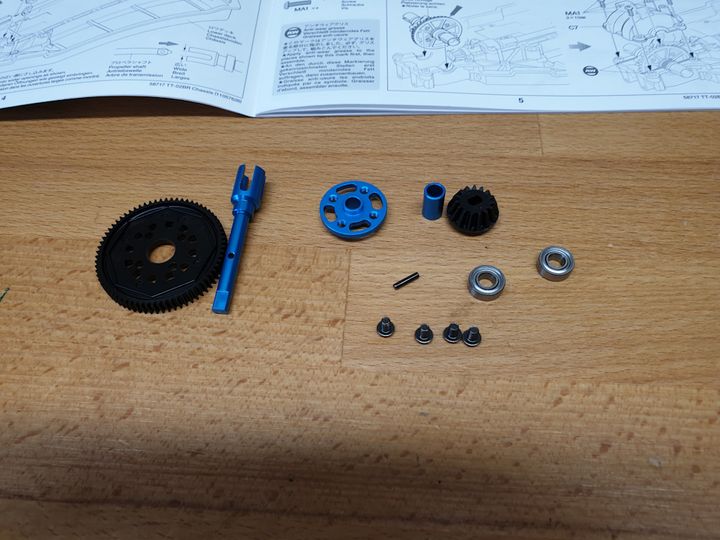
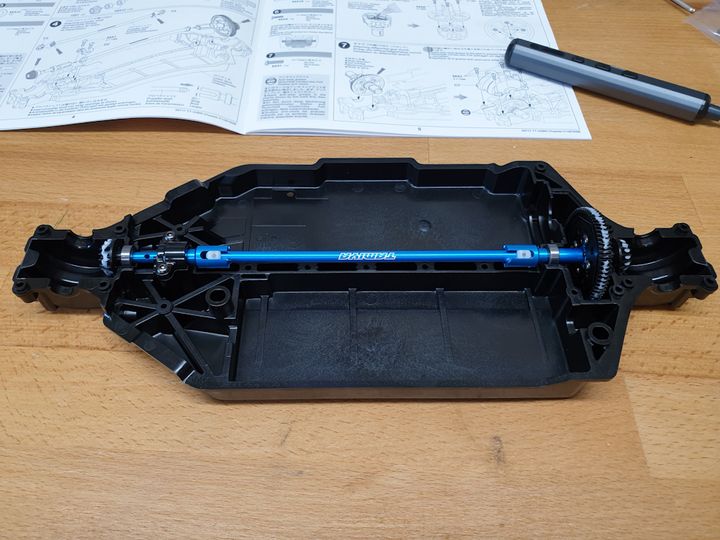
Bag A is mostly the diffs and drivetrain.
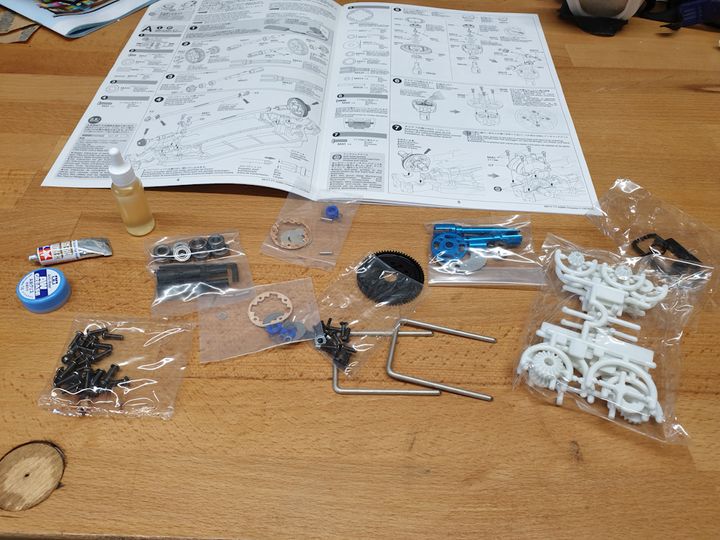
First the main drive spur bits:
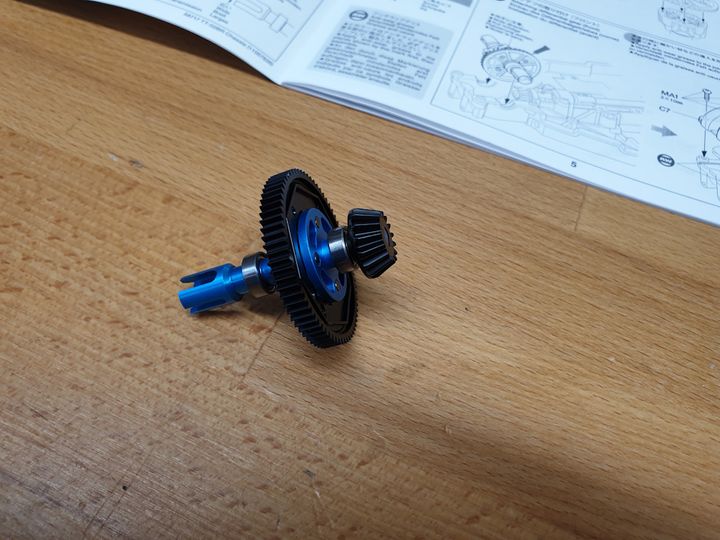
They go together pretty easily to make this:
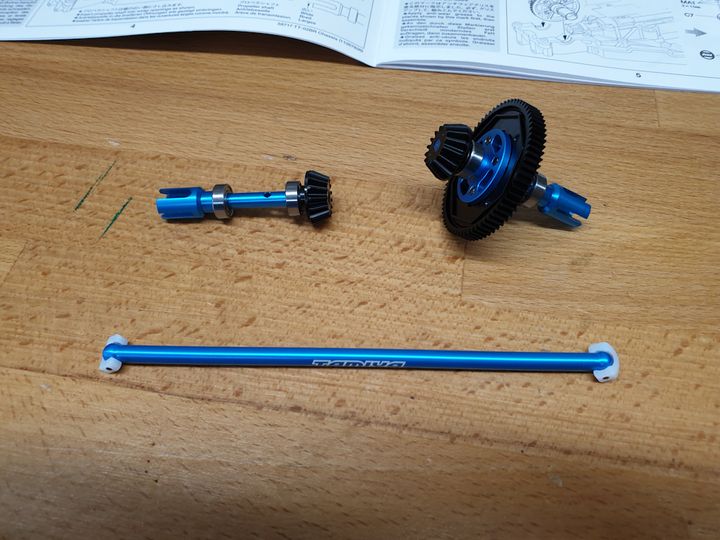
Then the front diff drive, and some nylon clips for the central driveshaft to reduce wear.
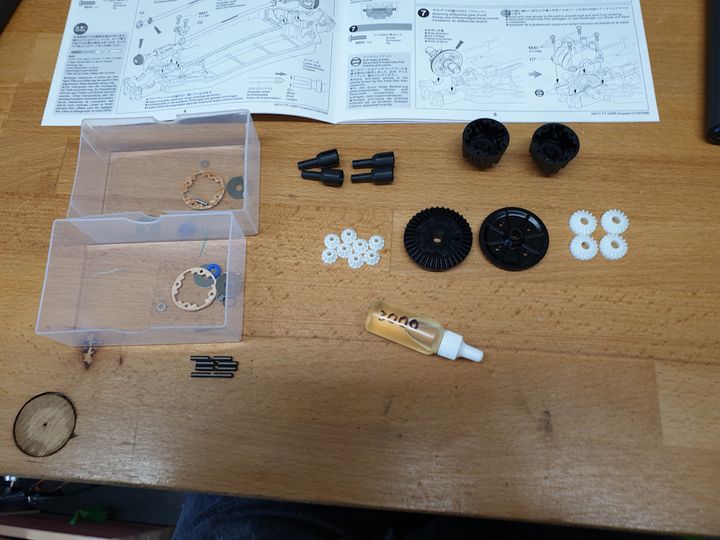
I'd just bought myself the Tamiya thread-forming tool, which I highly recommend. Except everything takes longer because there are a LOT of holes to tap. Two turns forwards, one turn back, repeat.
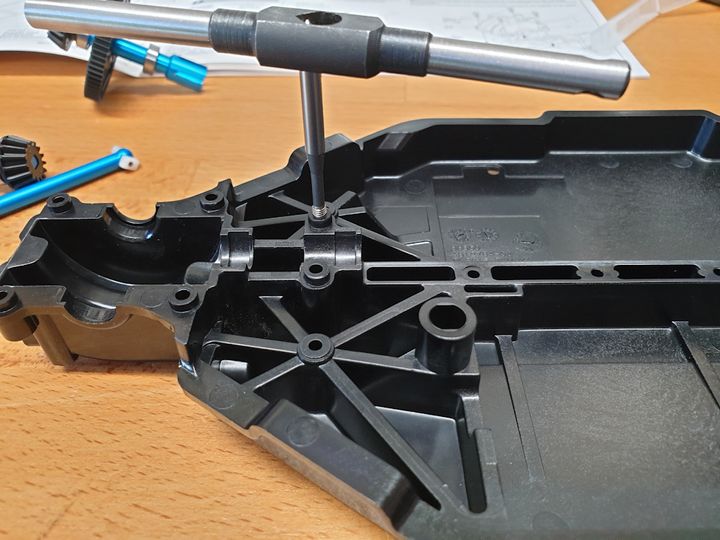
Anyways, once you've tapped all the holes, those bits drop straight in. Don't do what I did and grease them at this stage, that can wait, and is less messy if you do it later on.
The TT-02B is a cheapish 4WD shaft-driven buggy, based (as you might guess) on the TT-02 touring car chassis. Adding an "R" on the end means you get a glass reinforced tub, full bearings, and some shiny blue aluminium bits, but no tyres. It does come with a Neo Scorcher body (different decals though) and three different wings.
Here's what you get in the box, plus the tyres (which are about £25 for the set).
Unusually for me I didn't put off the body until last. You have to cut it away from the normal lines for it to fit right. I did three coats of Tamiya PS38 Translucent Blue, then backed with PS63 Bright Gunmetal (I found a post from someone on Reddit who used trans red over gunmetal and that looked pretty good). I got a bit of a run on the wing but it's barely visible.
And a few of the TT02BR stickers to break it up.
Bag A is mostly the diffs and drivetrain.
First the main drive spur bits:
They go together pretty easily to make this:
Then the front diff drive, and some nylon clips for the central driveshaft to reduce wear.
I'd just bought myself the Tamiya thread-forming tool, which I highly recommend. Except everything takes longer because there are a LOT of holes to tap. Two turns forwards, one turn back, repeat.
Anyways, once you've tapped all the holes, those bits drop straight in. Don't do what I did and grease them at this stage, that can wait, and is less messy if you do it later on.
Next is the diffs, which I believe are the same as the TT02 ones except for the metal carriers for the planet gears. Happy to be corrected, but the plastic ones were on the sprue and the metal ones separate.
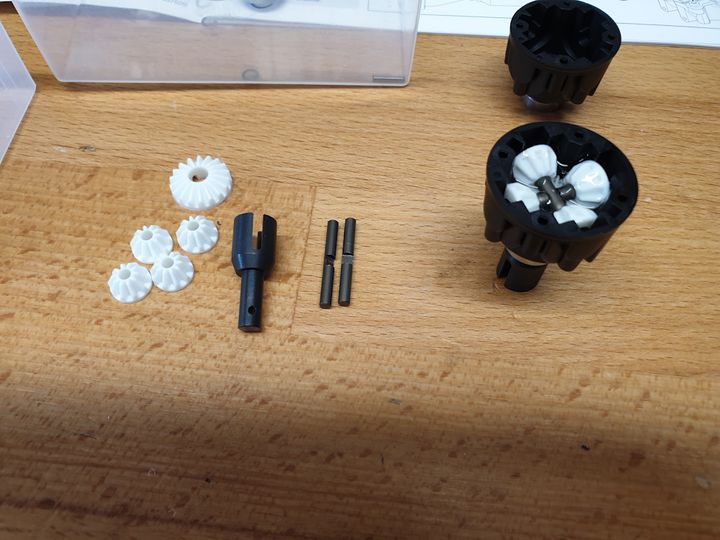
They're both the same, so the bits on the right turn into the assembly on the left. Tweezers are useful for getting the pin into the hole in the driveshaft.
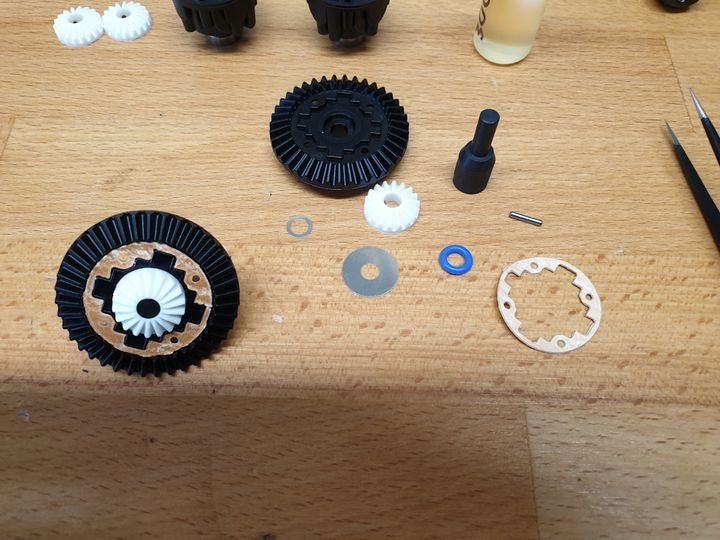
Then the buckets, which are fiddlier because you're putting a pin into the driveshaft at the bottom of said bucket. The planet gears go onto the carriers and drop in, then you add (included) oil to the top of the carrier, leaving space for it to expand when it gets hot. If you're taking it seriously you put a heavier grade of oil in the front than the back, and weigh it in (I believe 1.3g is the generally accepted amount).
Then the top goes on. Don't use a ball-end driver for these little hex screws, it'll chew them up. You can probably work out how I know that.
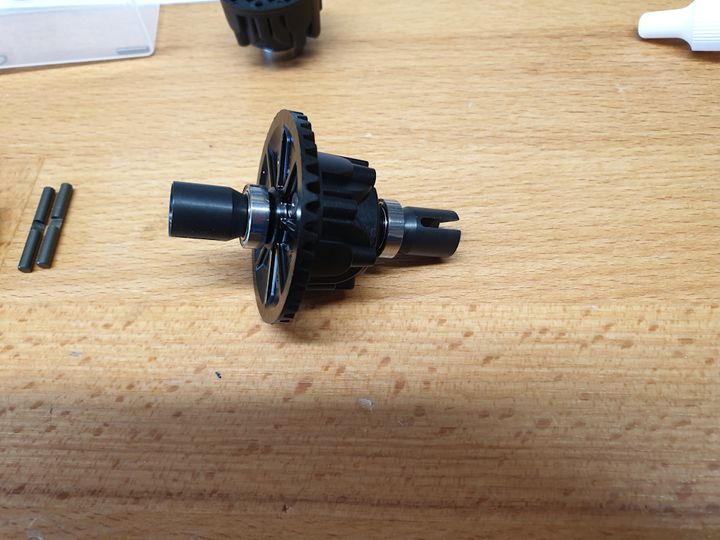
The diffs then drop in and the covers go on.
Front suspension arms are next - a U-bar holds them in place, with a popular upgrade to pins and E-clips. On mine the U-bars were fine; the arms drop under their own weight but have no discernible play.
They're both the same, so the bits on the right turn into the assembly on the left. Tweezers are useful for getting the pin into the hole in the driveshaft.
Then the buckets, which are fiddlier because you're putting a pin into the driveshaft at the bottom of said bucket. The planet gears go onto the carriers and drop in, then you add (included) oil to the top of the carrier, leaving space for it to expand when it gets hot. If you're taking it seriously you put a heavier grade of oil in the front than the back, and weigh it in (I believe 1.3g is the generally accepted amount).
Then the top goes on. Don't use a ball-end driver for these little hex screws, it'll chew them up. You can probably work out how I know that.
The diffs then drop in and the covers go on.
Front suspension arms are next - a U-bar holds them in place, with a popular upgrade to pins and E-clips. On mine the U-bars were fine; the arms drop under their own weight but have no discernible play.
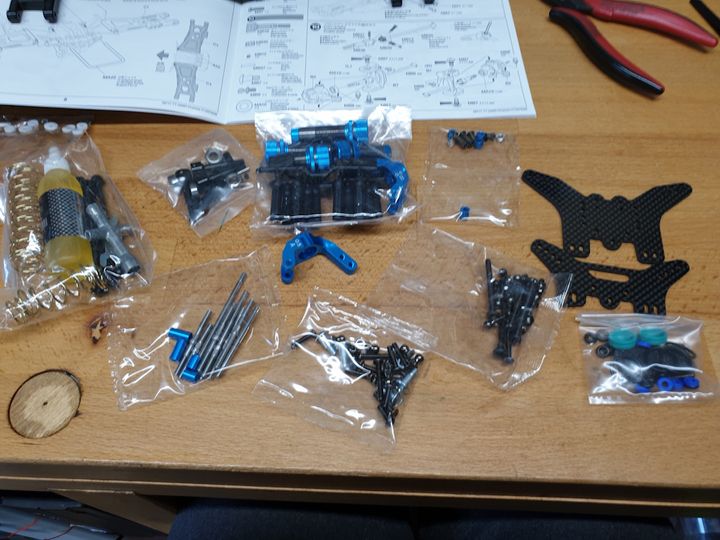
Bag B!
Ah; turnbuckles. Who doesn't love building them? Me. Though it's improved with the tap, and has since improved more as I now also have a left-hand-thread tap for the other ends. Anyways, this too shall pass.
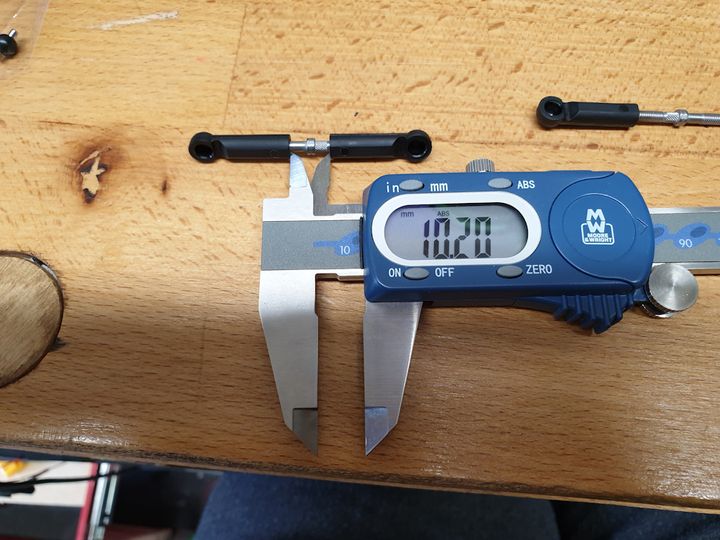
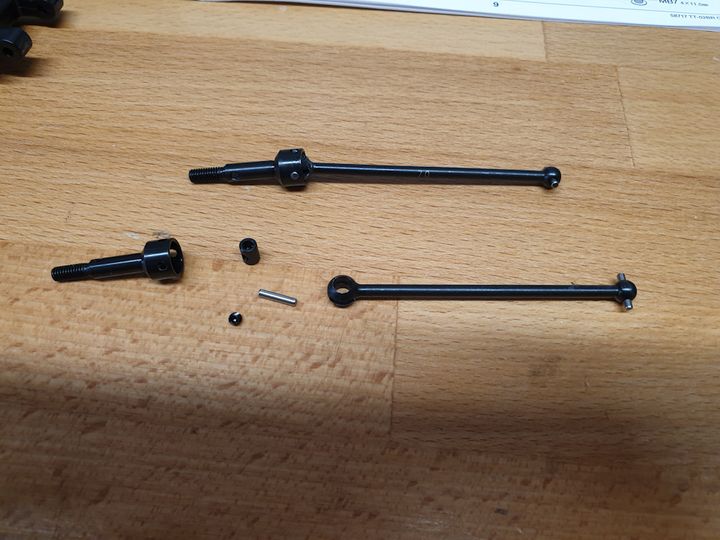
And then the front driveshafts, which I think are constant velocity. They're a teeny bit fiddly, but quite clever. The grubscrew goes into the little drum, which drops into the non-dogbone end. That goes into the other bit, the pin slots through, and you tighten the grubscrew to hold it all in place.
Next the front uprights. Knuckles? Who knows.
And they attach to the front arms with the turnbuckles I made a couple of steps ago.
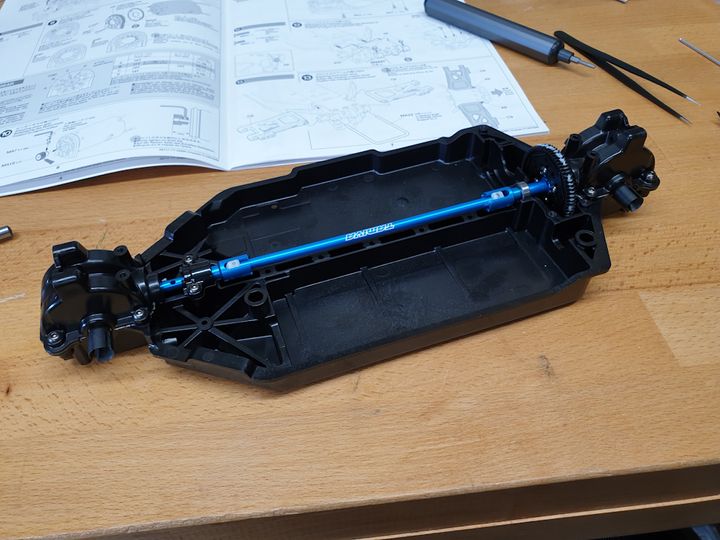
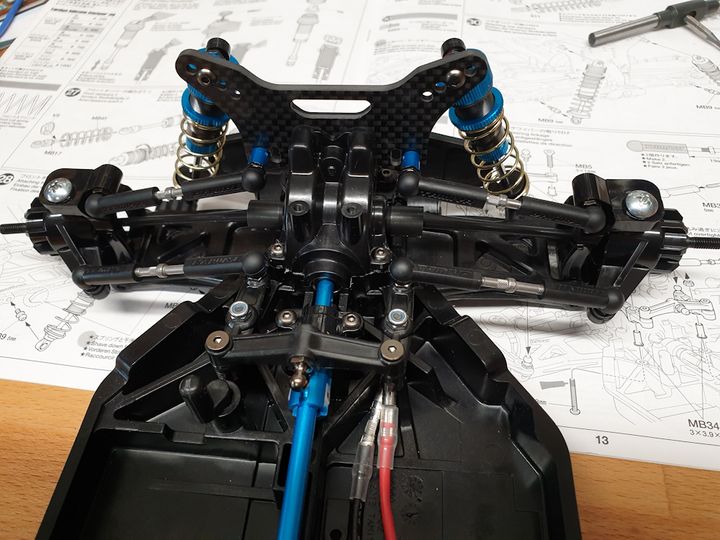
I forgot to take a picture of building the front shock tower, so here are the rear shock tower bits. Mmm. Carbon fibre. Probably you should seal the edges with CA.

That all goes together like this:
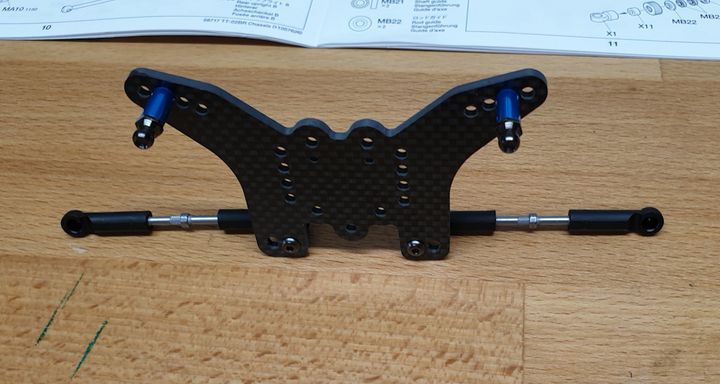
And screws onto the rear diff housing like this.
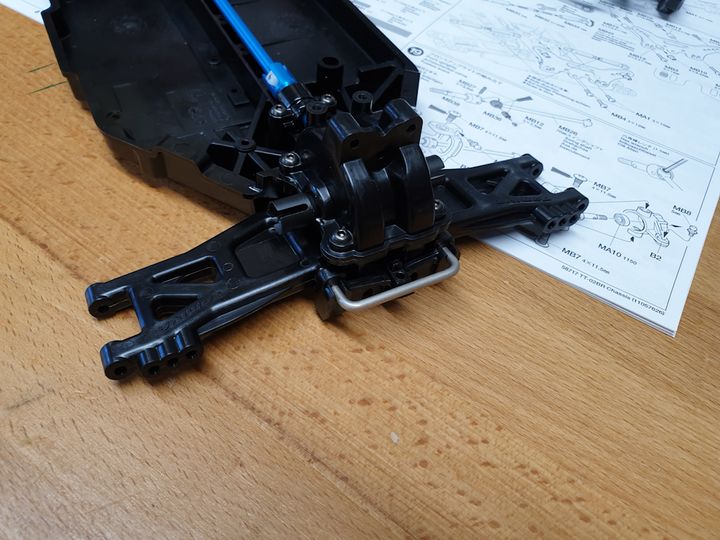
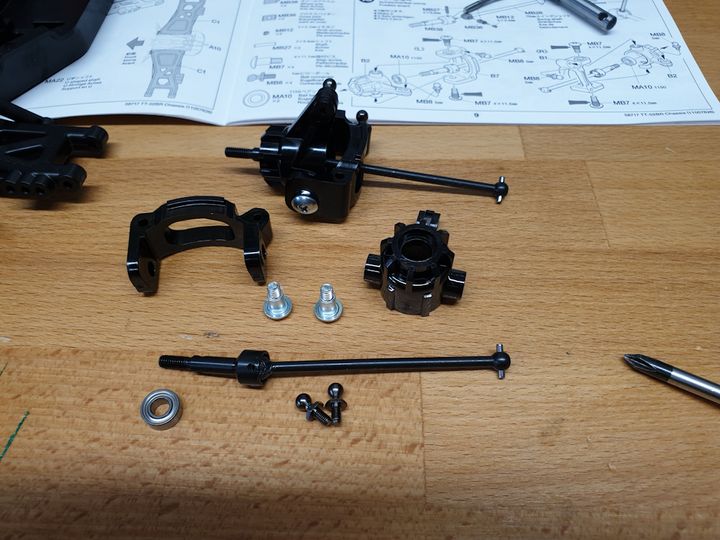
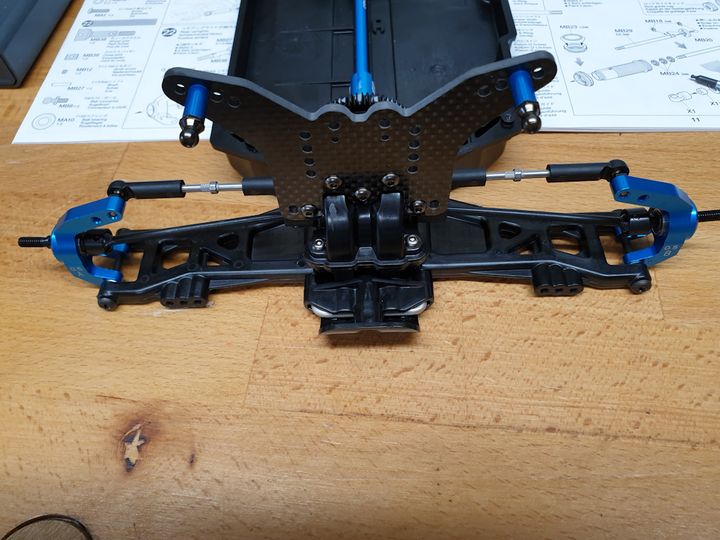
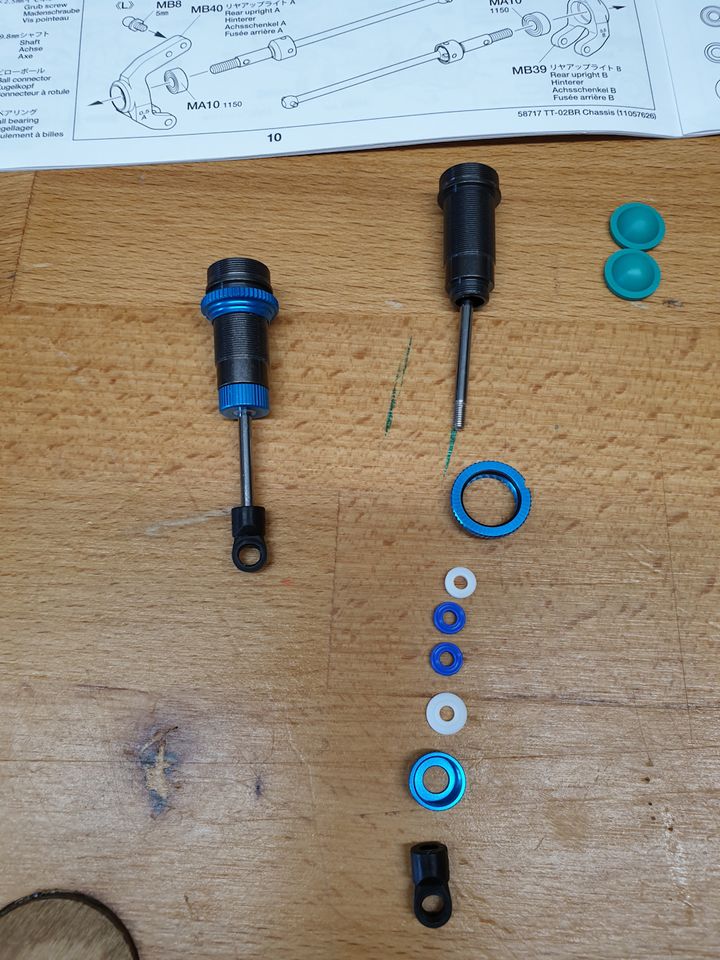
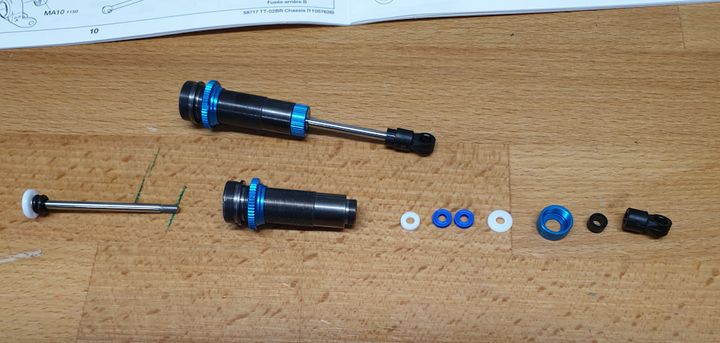
The rear upright bits (aluminium whereas the fronts are plastic):
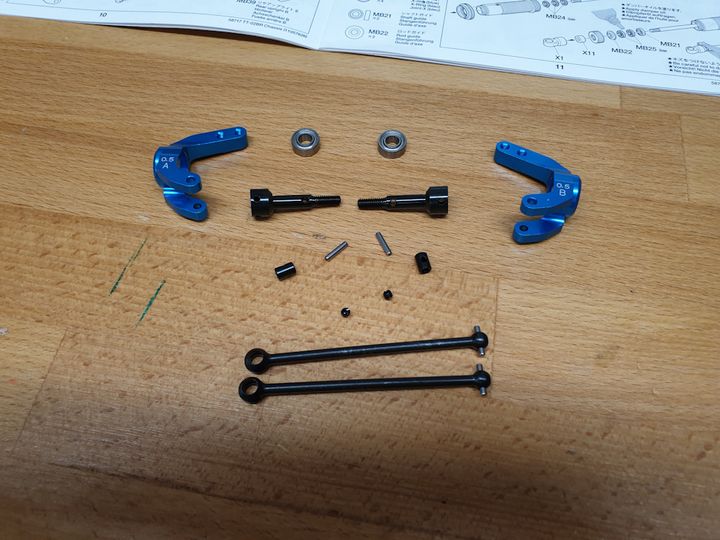
And then the rear end is assembled:
Ah; turnbuckles. Who doesn't love building them? Me. Though it's improved with the tap, and has since improved more as I now also have a left-hand-thread tap for the other ends. Anyways, this too shall pass.
And then the front driveshafts, which I think are constant velocity. They're a teeny bit fiddly, but quite clever. The grubscrew goes into the little drum, which drops into the non-dogbone end. That goes into the other bit, the pin slots through, and you tighten the grubscrew to hold it all in place.
Next the front uprights. Knuckles? Who knows.
And they attach to the front arms with the turnbuckles I made a couple of steps ago.
I forgot to take a picture of building the front shock tower, so here are the rear shock tower bits. Mmm. Carbon fibre. Probably you should seal the edges with CA.
That all goes together like this:
And screws onto the rear diff housing like this.
The rear upright bits (aluminium whereas the fronts are plastic):
And then the rear end is assembled:
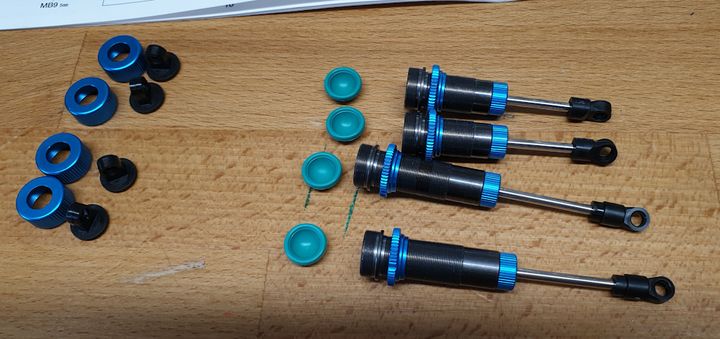
Next is the shocks - bag C. I quite like building the shocks.
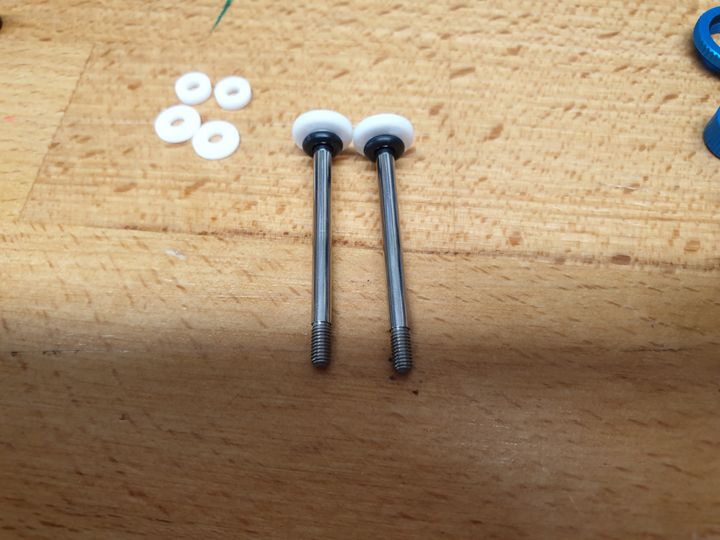
Plungers! One E-clip below the piston bit, one above. The instructions call for a lot of O-rings to go inside the dampers, but most of the internet decries that approach, so I went for one in the front, none in the rear.
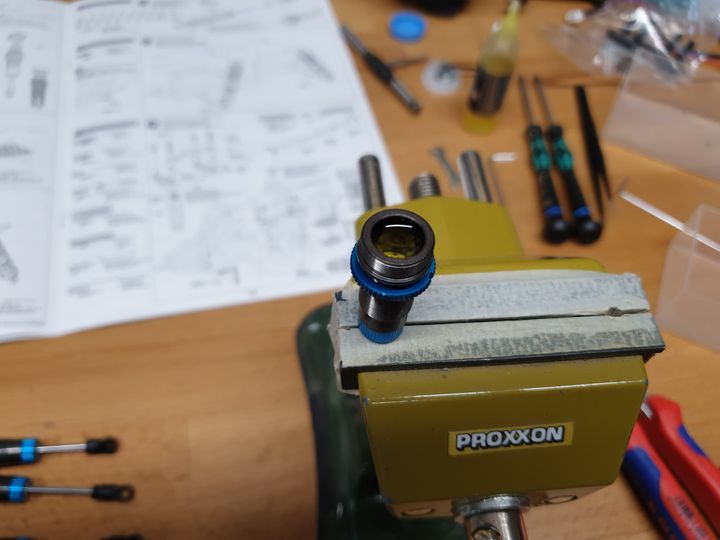
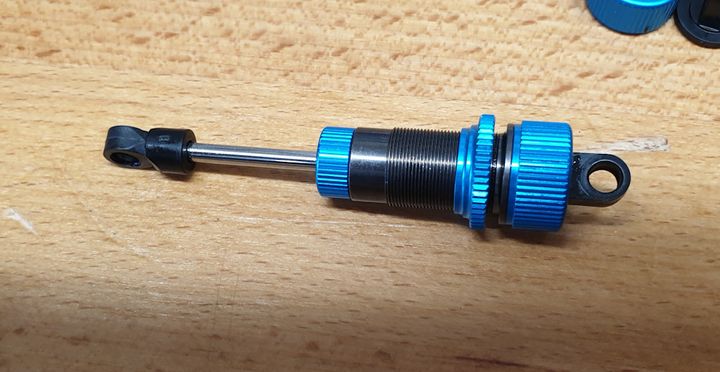
On the right, the bits to form one front damper. On the left, one assembled front damper. The little blue X-rings need a drop of shock oil to prevent leaks, and when screwing the ball ends on make sure you don't scratch the piston shafts or you'll get leaks.
The rears are longer, but the same basic idea.
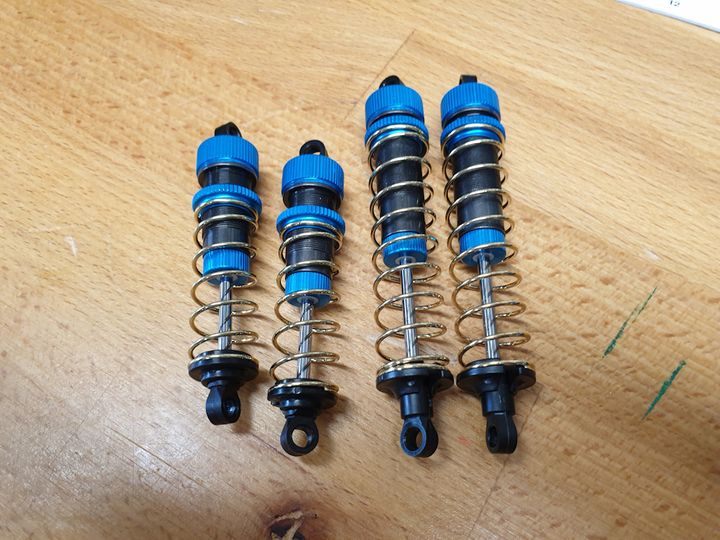
And that's four dampers ready to fill.
The kit comes with oil; again, you might want heavier at the front and lighter at the rear, but I'm just using what comes with it. Fill most of the way, wiggle the piston up and down until there are no more air bubbles...
...then pop the diaphragm on and the top cap.
Next the springs, and adjust the adjusters so they don't rattle. Later the adjusters can be used to stiffen the whole thing and reduce travel.
They push onto the ball joints on the towers and suspension arms.
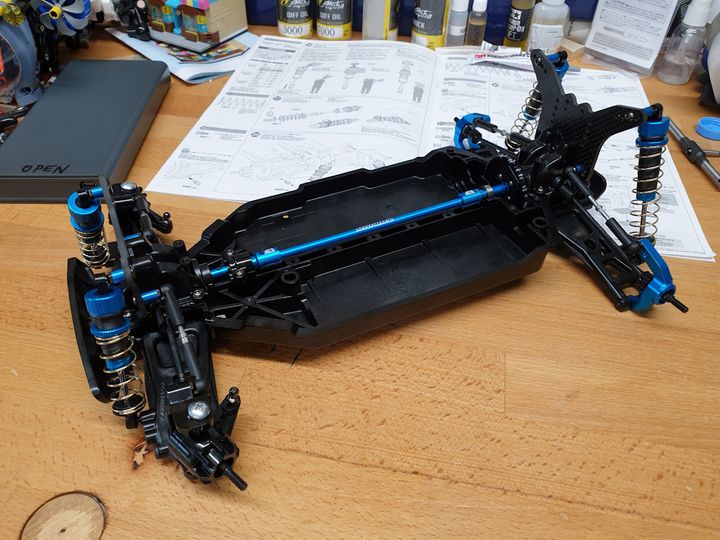
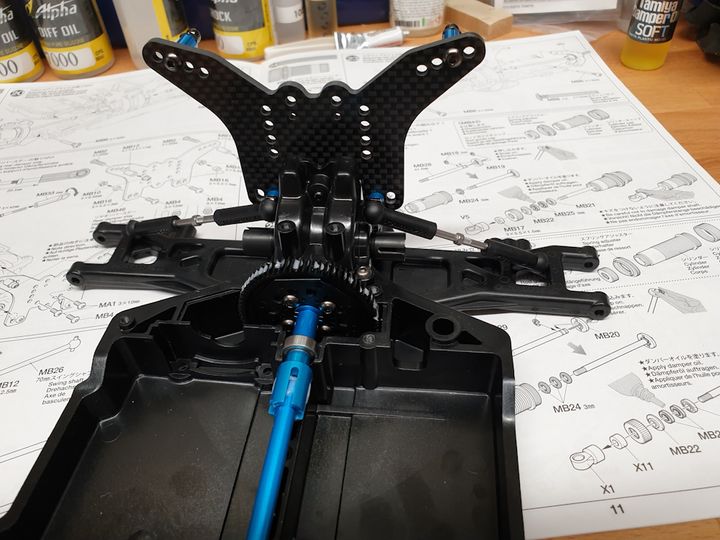
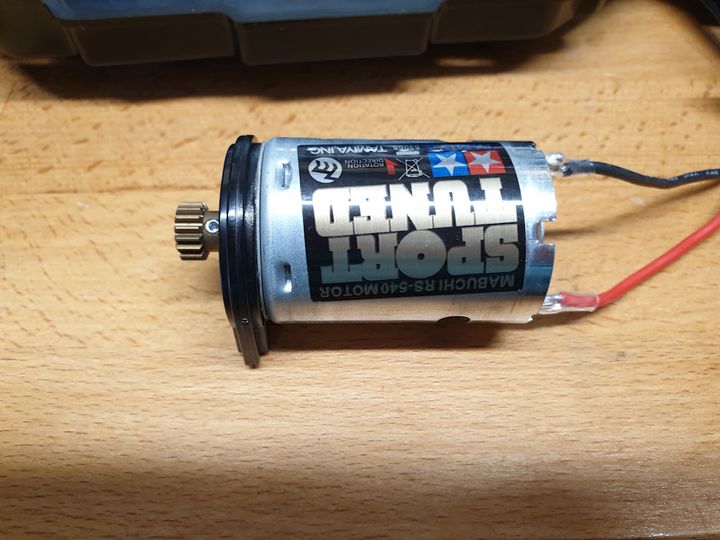
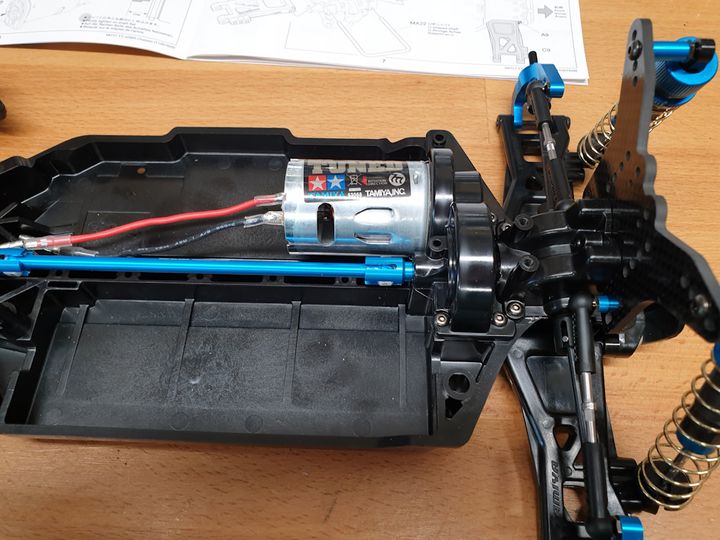
Now it's time for the motor. I am not a rowdy speed demon, so just a mid-range Tamiya 540, which goes onto a plastic mount. Blue aluminium ones are, of course, available.
And that screws onto the chassis, with a cover over the top.
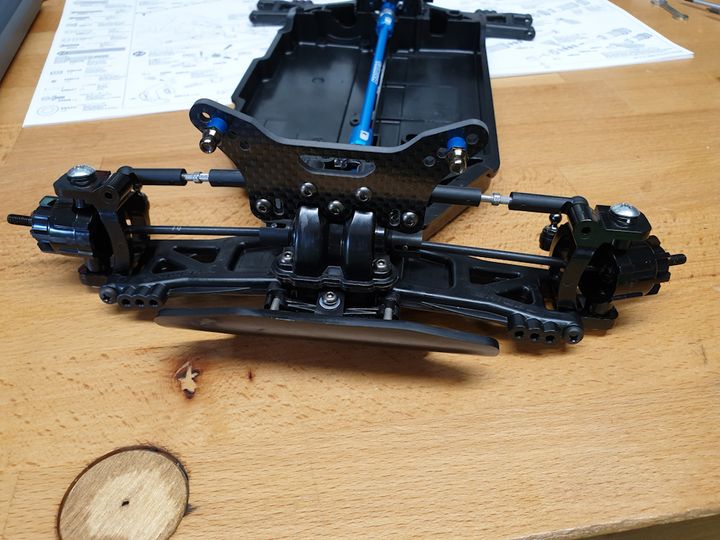
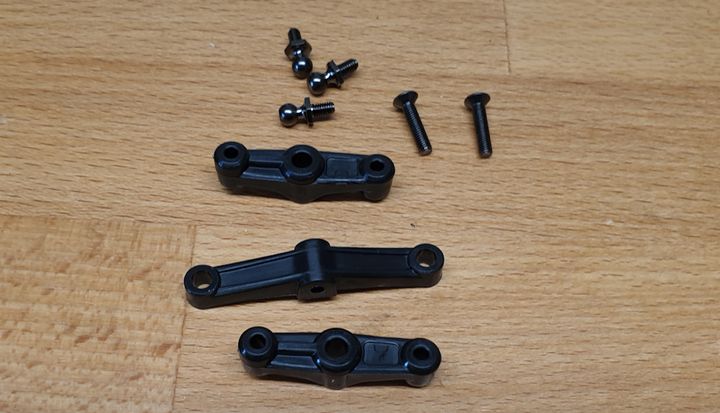
Steering bits - all plastic, no bearings, but once built it's nice and smooth and slop-free.
Installed:
Plungers! One E-clip below the piston bit, one above. The instructions call for a lot of O-rings to go inside the dampers, but most of the internet decries that approach, so I went for one in the front, none in the rear.
On the right, the bits to form one front damper. On the left, one assembled front damper. The little blue X-rings need a drop of shock oil to prevent leaks, and when screwing the ball ends on make sure you don't scratch the piston shafts or you'll get leaks.
The rears are longer, but the same basic idea.
And that's four dampers ready to fill.
The kit comes with oil; again, you might want heavier at the front and lighter at the rear, but I'm just using what comes with it. Fill most of the way, wiggle the piston up and down until there are no more air bubbles...
...then pop the diaphragm on and the top cap.
Next the springs, and adjust the adjusters so they don't rattle. Later the adjusters can be used to stiffen the whole thing and reduce travel.
They push onto the ball joints on the towers and suspension arms.
Now it's time for the motor. I am not a rowdy speed demon, so just a mid-range Tamiya 540, which goes onto a plastic mount. Blue aluminium ones are, of course, available.
And that screws onto the chassis, with a cover over the top.
Steering bits - all plastic, no bearings, but once built it's nice and smooth and slop-free.
Installed:
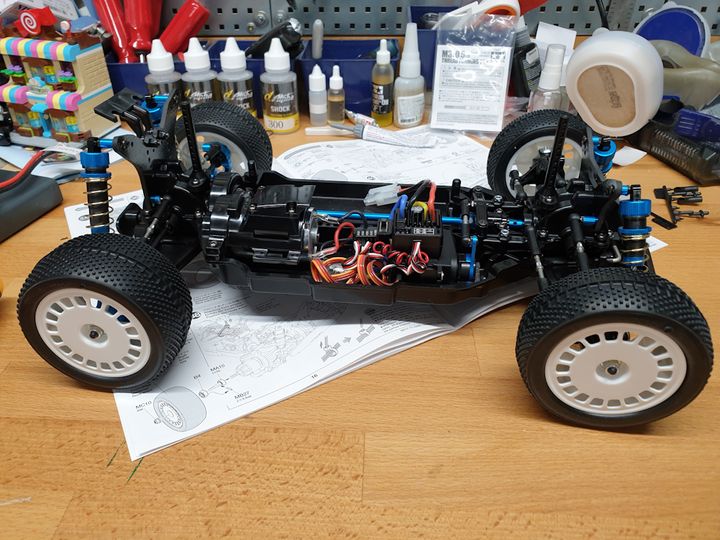
Bag D, and the home straight...
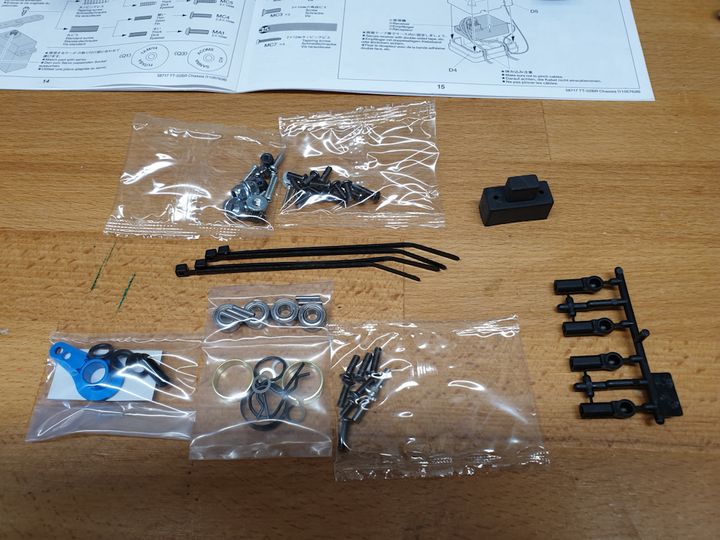
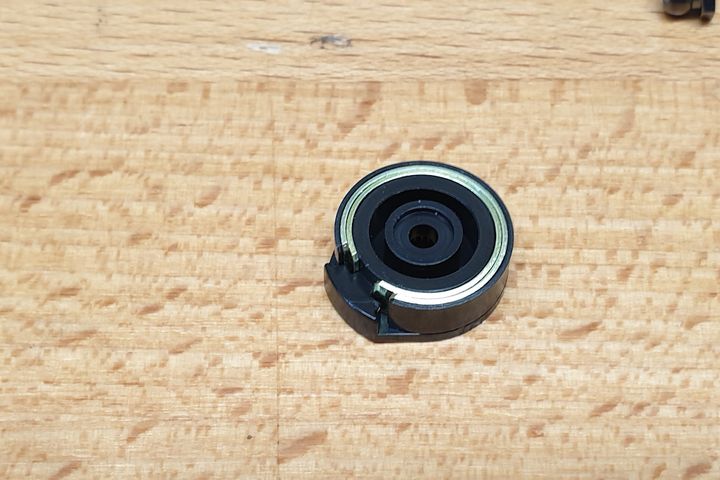
Servo saver first.
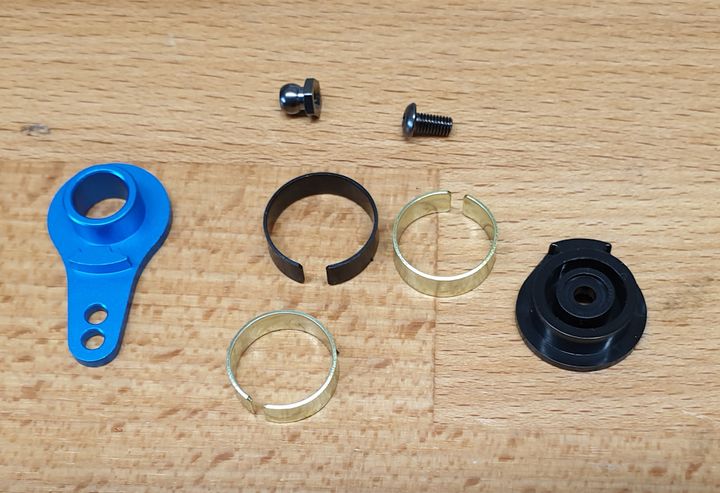
Getting the circular springs in is awkward if you don't have circlip pliers or something similar, but pretty simple if you do.
Screw onto the servo (having previously connected the latter to the receiver and made sure it's at neutral):
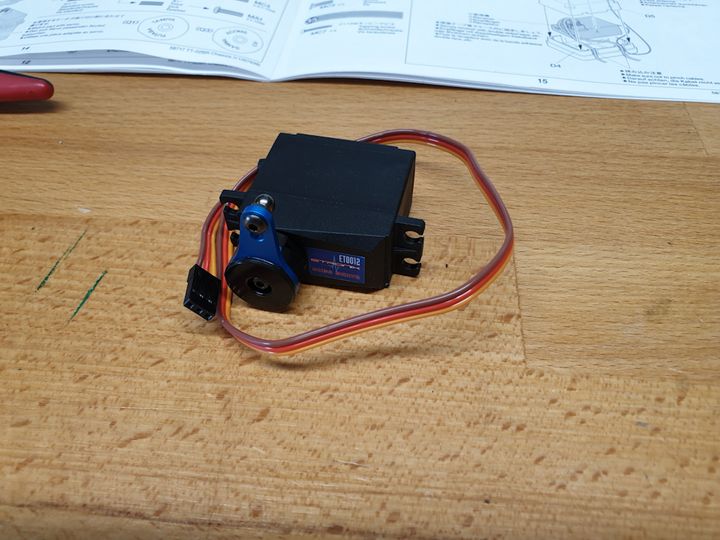
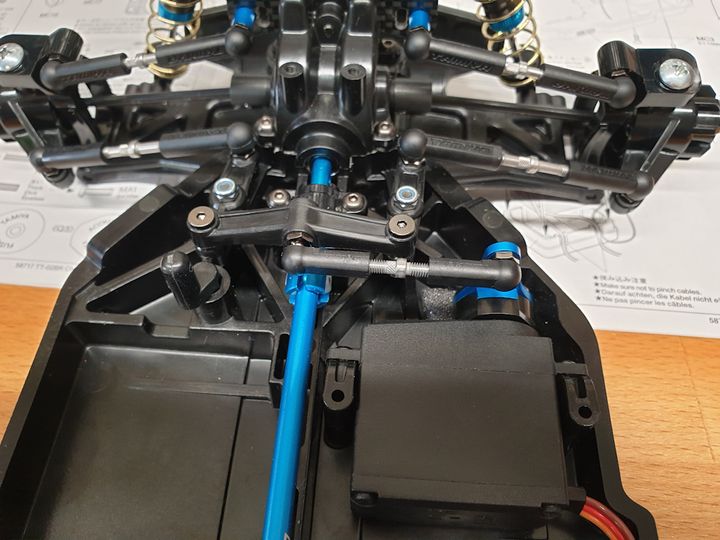
Then the servo goes into the chassis, and is connected via another turnbuckle to the steering assembly.
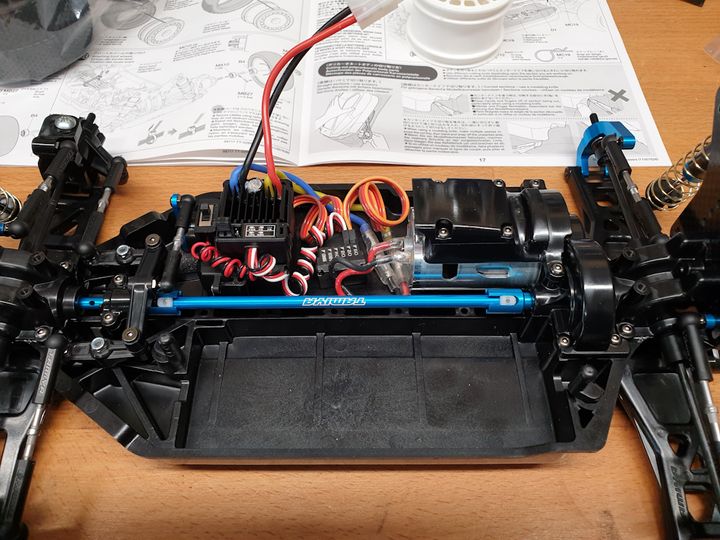
ESC (all-black version of the Hobbywing 1060) and receiver go in on sticky pads:
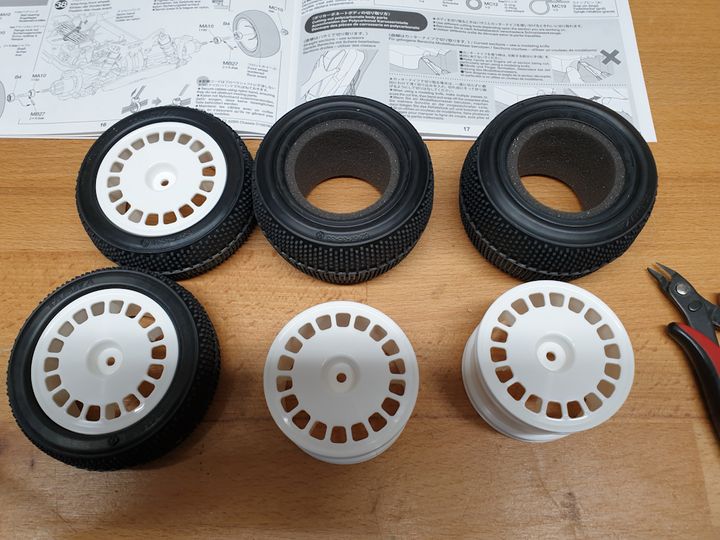
Tyres (which come with the foams) go onto the wheels - these should be glued:
Standard Tamiya plastic hexes will do for now - upgrades are, naturally, available.
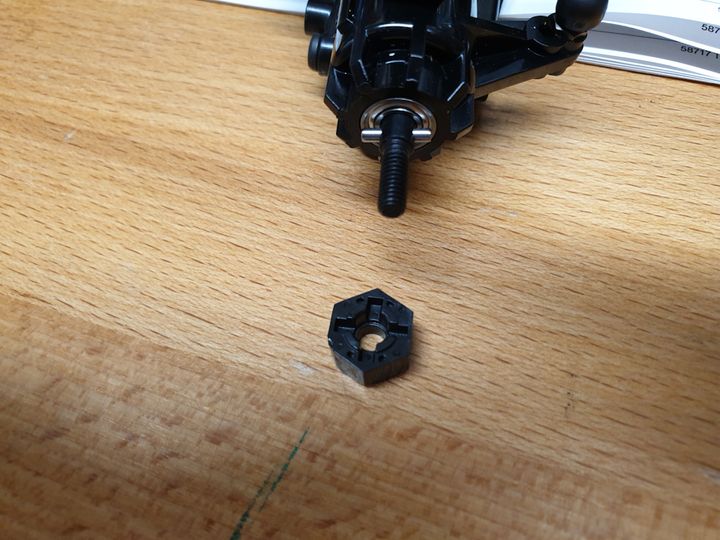
On go the wheels:
And the body mounts and body. Ta-da.
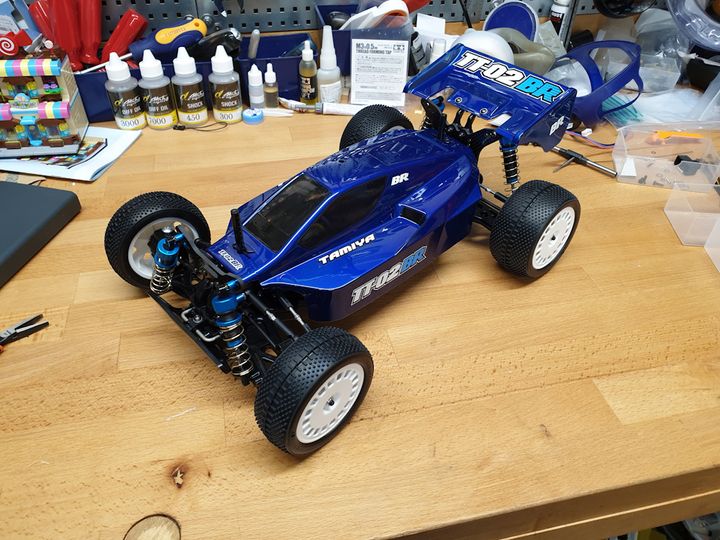
I am unlikely to win any championships, but it was a good build and pootles around the garden nicely.
Servo saver first.
Getting the circular springs in is awkward if you don't have circlip pliers or something similar, but pretty simple if you do.
Screw onto the servo (having previously connected the latter to the receiver and made sure it's at neutral):
Then the servo goes into the chassis, and is connected via another turnbuckle to the steering assembly.
ESC (all-black version of the Hobbywing 1060) and receiver go in on sticky pads:
Tyres (which come with the foams) go onto the wheels - these should be glued:
Standard Tamiya plastic hexes will do for now - upgrades are, naturally, available.
On go the wheels:
And the body mounts and body. Ta-da.
I am unlikely to win any championships, but it was a good build and pootles around the garden nicely.
Nice detailed build, thankyou!
Such a shame that the majority are RTR these days, gone are the days of sitting and building your kit and installing the electronics of your choice like I did with Dad when I was a kid. With the knowledge of actually building the car from scratch, at the age of 10-12 I was fully competent in rebuilding should anything have broken.
Really need to buy myself something to build. Loving all the re-production models that are out these days, fresh takes on the cars dad used to race when younger!
Marshall878 said:
Nice detailed build, thankyou!
Such a shame that the majority are RTR these days, gone are the days of sitting and building your kit and installing the electronics of your choice like I did with Dad when I was a kid.
Kits are definitely alive and kicking. There's probably more variety now than then.Such a shame that the majority are RTR these days, gone are the days of sitting and building your kit and installing the electronics of your choice like I did with Dad when I was a kid.
Gassing Station | Scale Models | Top of Page | What's New | My Stuff