Is this scratch DIY repairable?
Discussion


I have a 2014 BMW 730d which I purchased with knowledge of this scratch at the bottom of the drivers door which looks like a bike pedal may have caused? I'm wondering of it's worth having a go at repairing myself?
It's a beautiful car which would warrant getting a good repair, but the scratch is below a crease line in the door, and right at the bottom of the door where it bends inwards to meet the cill, so the repair would be in quite a discreet place and not glaringly obvious which makes me tempted to have a go at a DIY repair, but otherwise I'll take it to a bodywork repair centre.
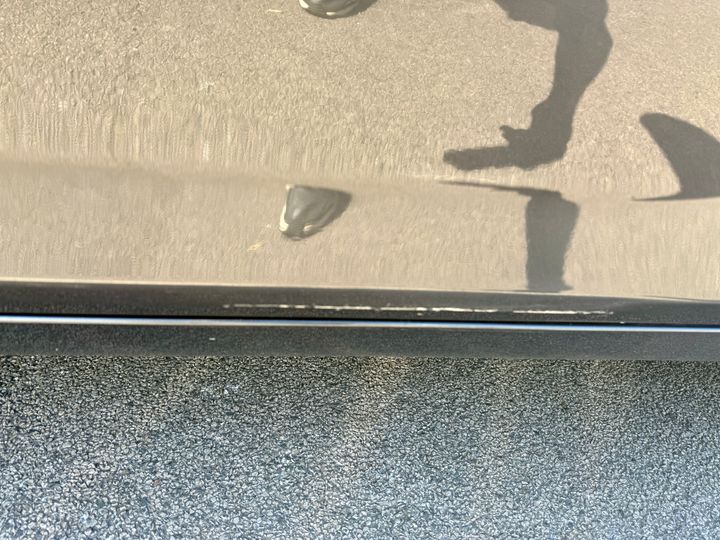
The scratch is in two parts as shown here..
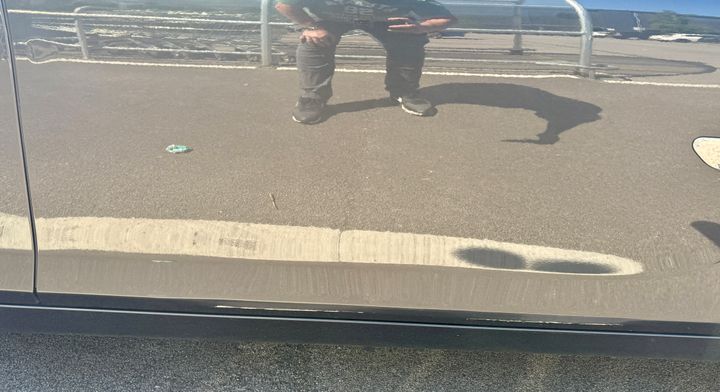
Rear part..

Front part..
It's a beautiful car which would warrant getting a good repair, but the scratch is below a crease line in the door, and right at the bottom of the door where it bends inwards to meet the cill, so the repair would be in quite a discreet place and not glaringly obvious which makes me tempted to have a go at a DIY repair, but otherwise I'll take it to a bodywork repair centre.
The scratch is in two parts as shown here..
Rear part..
Front part..
Edited by The Gauge on Saturday 17th May 16:09
Look how the shape changes above the scratch on the body line......and that continues all the way along ....put a long straight edge on the line it will make it more obvious
That will need pulling out or panel beating or a combination of the two
Edited by Bluevanman on Saturday 17th May 18:01
I’d definitely give it a go with some touch up, lacquer and compound, and some fine grit wet-sanding if you’re feeling brave, to smooth the sharp edges of the scratch and then level down the lacquer layers you build up on top of the colour. You’ll certainly get it good enough that it won’t catch the eye, maybe better than that with prep and patience.
If it looks rubbish and you need to get a pro involved then you’ll be no worse off except for your time.
If it looks rubbish and you need to get a pro involved then you’ll be no worse off except for your time.
Robertb said:
I’d definitely give it a go with some touch up, lacquer and compound, and some fine grit wet-sanding if you’re feeling brave, to smooth the sharp edges of the scratch and then level down the lacquer layers you build up on top of the colour.
Thanks. So would the correct procedure be..1- Apply primer
2- Apply paint
3- Apply lacquer
4- Use fine grit wet sand on the lacquer
5- Polish to level the lacquer
The Gauge said:
Thanks. So would the correct procedure be..
1- Apply primer
2- Apply paint
3- Apply lacquer
4- Use fine grit wet sand on the lacquer
5- Polish to level the lacquer
The principle is that you build up the lacquer layer above the surrounding clearcoat, and polish/sand it back to the same level. Ideally you want to minimise any loss of clearcoat in the surrounding area… I saw one video where the guy stuck a bit of the sandpaper on a pencil eraser tip so they could focus on the scratch. The polish stage just gets rid of the sanding marks. 1- Apply primer
2- Apply paint
3- Apply lacquer
4- Use fine grit wet sand on the lacquer
5- Polish to level the lacquer
But as said above you may be happy with the appearance with the paint/lacquer stage alone and avoid sanding, as the damage is low down.
I like to use the most gentle process first and work up if necessary, and be prepared to stop and compromise rather than make things worse suddenly!
Robertb said:
The principle is that you build up the lacquer layer above the surrounding clearcoat, and polish/sand it back to the same level. Ideally you want to minimise any loss of clearcoat in the surrounding area… I saw one video where the guy stuck a bit of the sandpaper on a pencil eraser tip so they could focus on the scratch. The polish stage just gets rid of the sanding marks.
But as said above you may be happy with the appearance with the paint/lacquer stage alone and avoid sanding, as the damage is low down.
I like to use the most gentle process first and work up if necessary, and be prepared to stop and compromise rather than make things worse suddenly!
Thanks for the advice. I'm going to give it closer inspection and see how deep the scratch is. I have fine grit wet sanding paper but if I can avoid sanding the surrounding clearcoat then that would be good, but I do have 3" polishing pad attachments fro my drill if needed.But as said above you may be happy with the appearance with the paint/lacquer stage alone and avoid sanding, as the damage is low down.
I like to use the most gentle process first and work up if necessary, and be prepared to stop and compromise rather than make things worse suddenly!
Radec said:
This guy has very good videos on diy repairs for bodywork.
Funnily enough his videos popped up on my Youtube feed recently.Edited by The Gauge on Monday 26th May 21:04
Gassing Station | Bodywork & Detailing | Top of Page | What's New | My Stuff