Testing the windscreen wiper motor
Discussion
So my wipers packed up a while ago, and seeing as the car is resting for the Winter it was a perfect time to pull out the wiper motor and try and diagnose what was going wrong.
I followed the great guide from TVRCC Luxembourg and a good thread on here from @alinton in 2007 and now have my motor out of the car ready to do some basic testing before I work out whether it needs sending off to Adrian for fixing / rebuilding or not
So, the question is the motor itself has three wires, Red and Yellow on the side of the park switch and Blue on the bottom of the park switch
According to this thread over in theminiforum (as it's a mini motor style motor) the Blue = GND and then the Red and the Yellow are one-at-a-time +12V to run the motor
Has anyone tested theirs this way to confirm that this is correct?
I managed to find this great PDF guide for mini wiper motors luckily still archived by The Wayback Machine which explains how it all works and also has a handy-for-the-future circuit diagram to add an intermittent wipe to the system
Here's some images for reference and all advice much appreciated
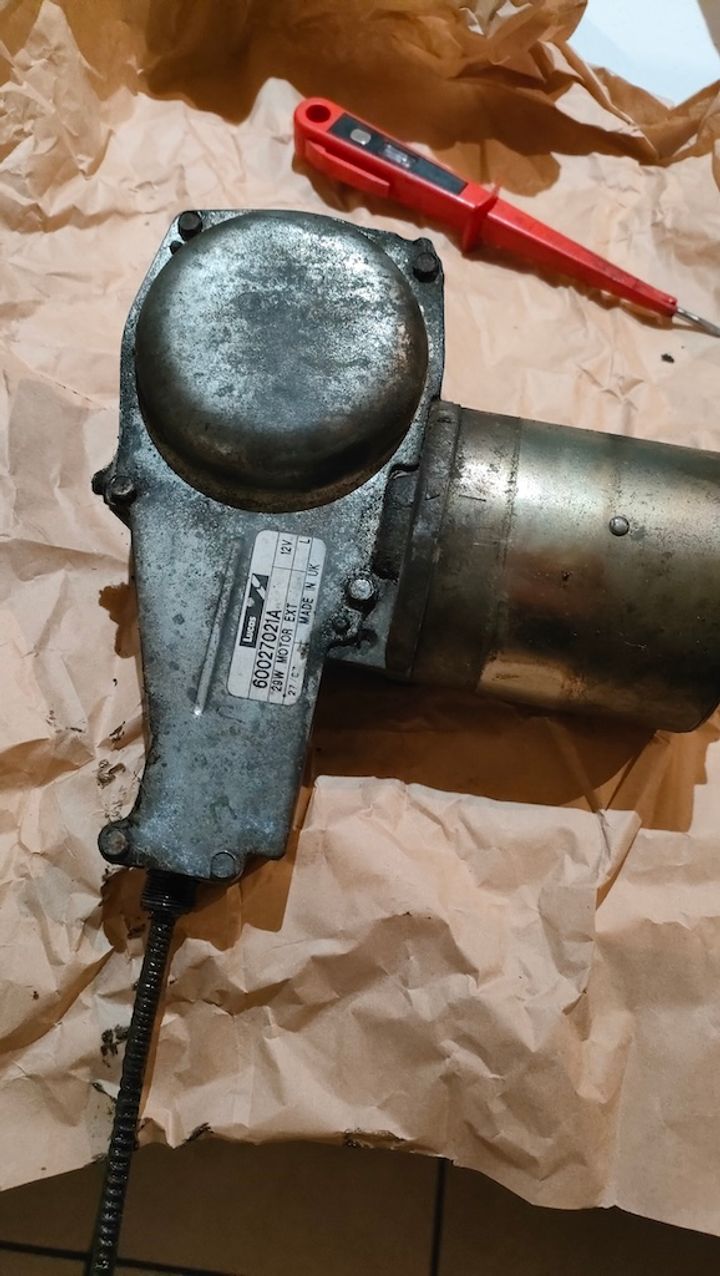
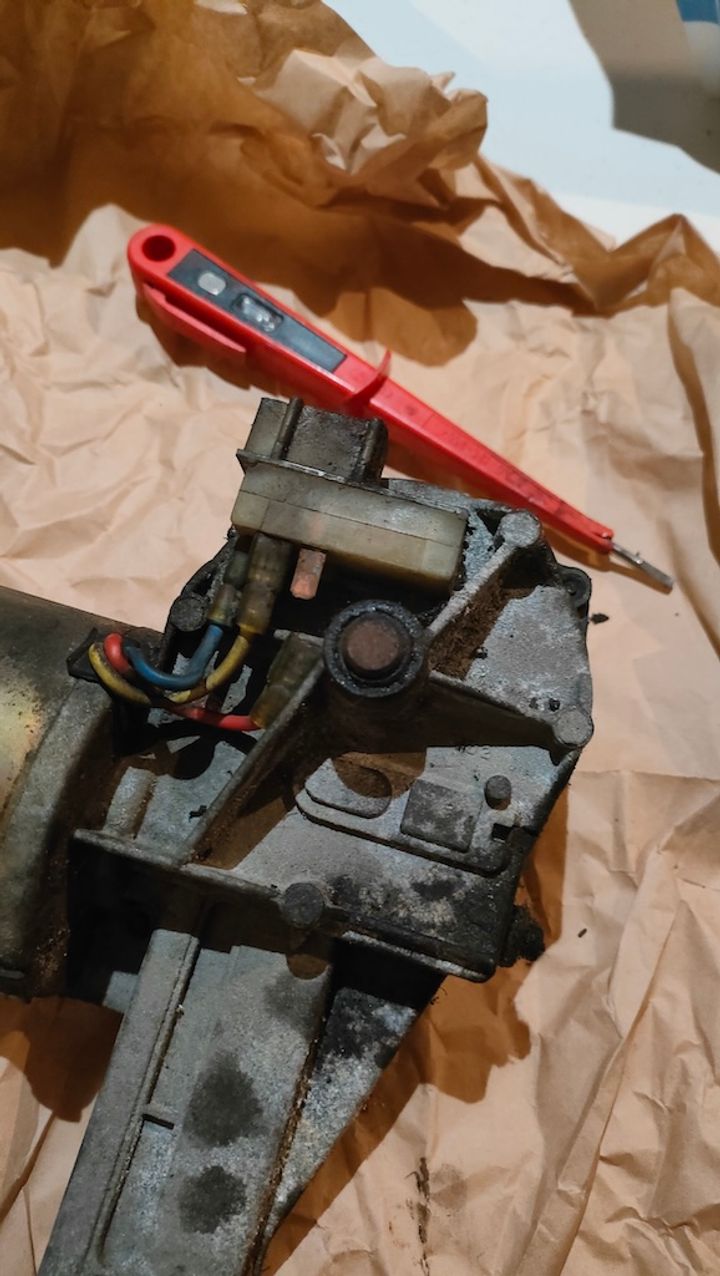
I followed the great guide from TVRCC Luxembourg and a good thread on here from @alinton in 2007 and now have my motor out of the car ready to do some basic testing before I work out whether it needs sending off to Adrian for fixing / rebuilding or not
So, the question is the motor itself has three wires, Red and Yellow on the side of the park switch and Blue on the bottom of the park switch
According to this thread over in theminiforum (as it's a mini motor style motor) the Blue = GND and then the Red and the Yellow are one-at-a-time +12V to run the motor
Has anyone tested theirs this way to confirm that this is correct?
I managed to find this great PDF guide for mini wiper motors luckily still archived by The Wayback Machine which explains how it all works and also has a handy-for-the-future circuit diagram to add an intermittent wipe to the system

Here's some images for reference and all advice much appreciated

Edited by Juddder on Wednesday 29th January 11:15
Juddder said:
"I followed the great guide from TVRCC Luxembourg"
Thanks Alex,I think summat went wrong with the URL Links so Here it is again should anyone be interested in it.

..... ETA
and here's the PH Wiper Motor Removal Guide.
and the Wiper Motor Wiring Forum.
and the 'Wyback' wiring diagram
Hope that helps everyone

Edited by Mr Cerbera on Thursday 30th January 14:29
Edited by Mr Cerbera on Thursday 30th January 14:32
Excellent - many thanks for those links and your excellent article - was super helpful when taking mine apart!
One extra tip from me is that I bought one of these to drain out all of the existing fluid from the expansion tank into a 2l water bottle - made getting to the bottom of the tank a doddle and meant that I didn't spill coolant everywhere as I did so.
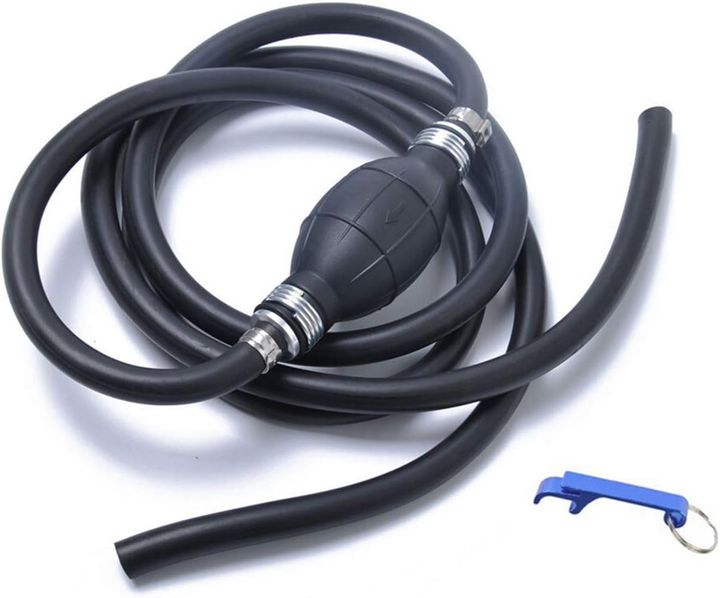
I also removed the battery as with it removed it gives you great clearance to get to the bottom of the expansion tank without much vertical movement being needed
I've decided to send my motor off to Adrian to get him to overhaul it for me (*he's a great guy) so on the way I took it apart just to have a look and see if the motor would turn on it's own (*it wouldn't)
The TVR motor, as others have mentioned before has a pretty unique 170 degree gearing, and a different 29W motor from the standard 14W mini one, which only has gearings available in sizes of 90 to 130 degrees such as from these guys
https://www.s-v-c.co.uk/categories/stafford-vehicl...
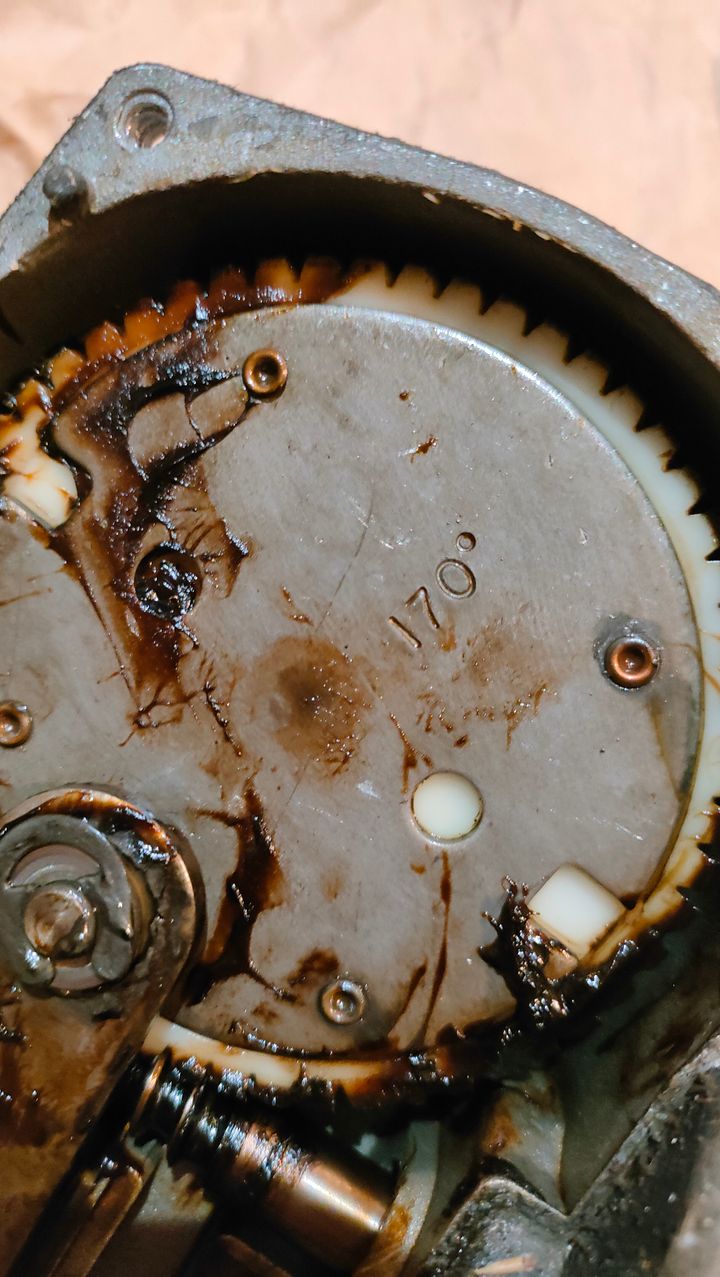
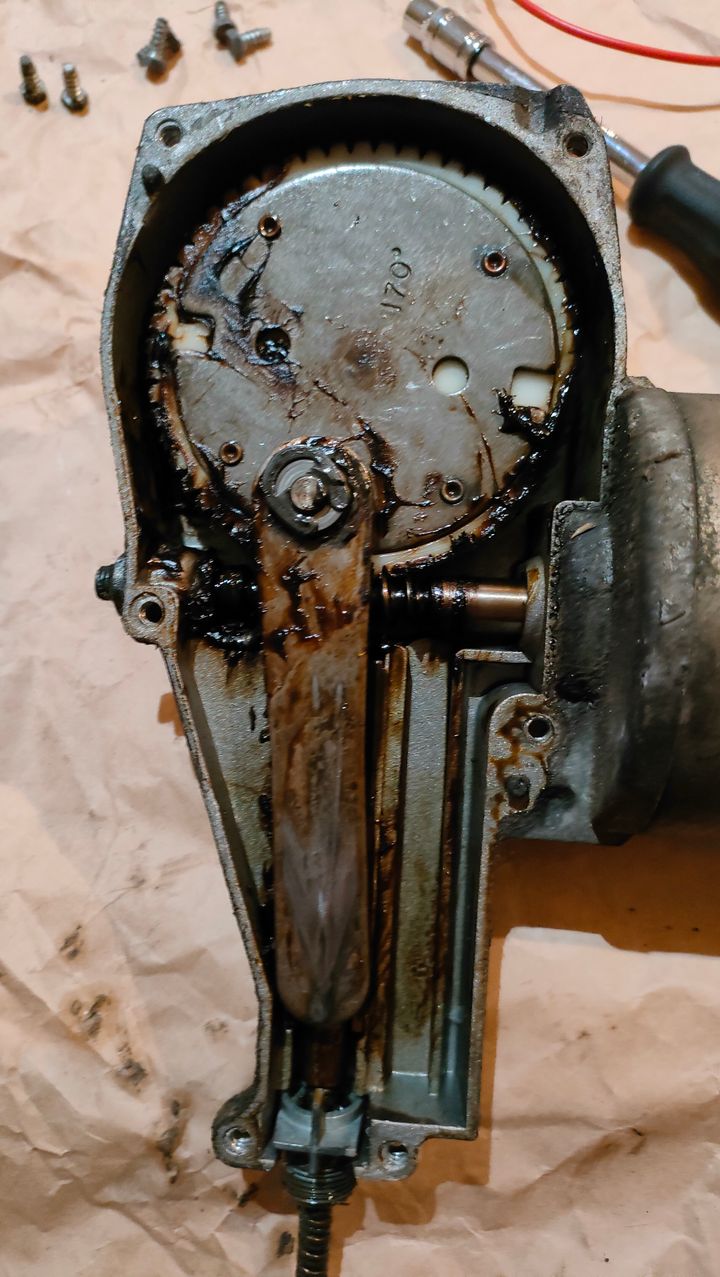
The bolts holding the case on are also Imperial, which had me flummoxed for a bit as they were neither 6mm nor 7mm - in fact they are 1/4 I believe!
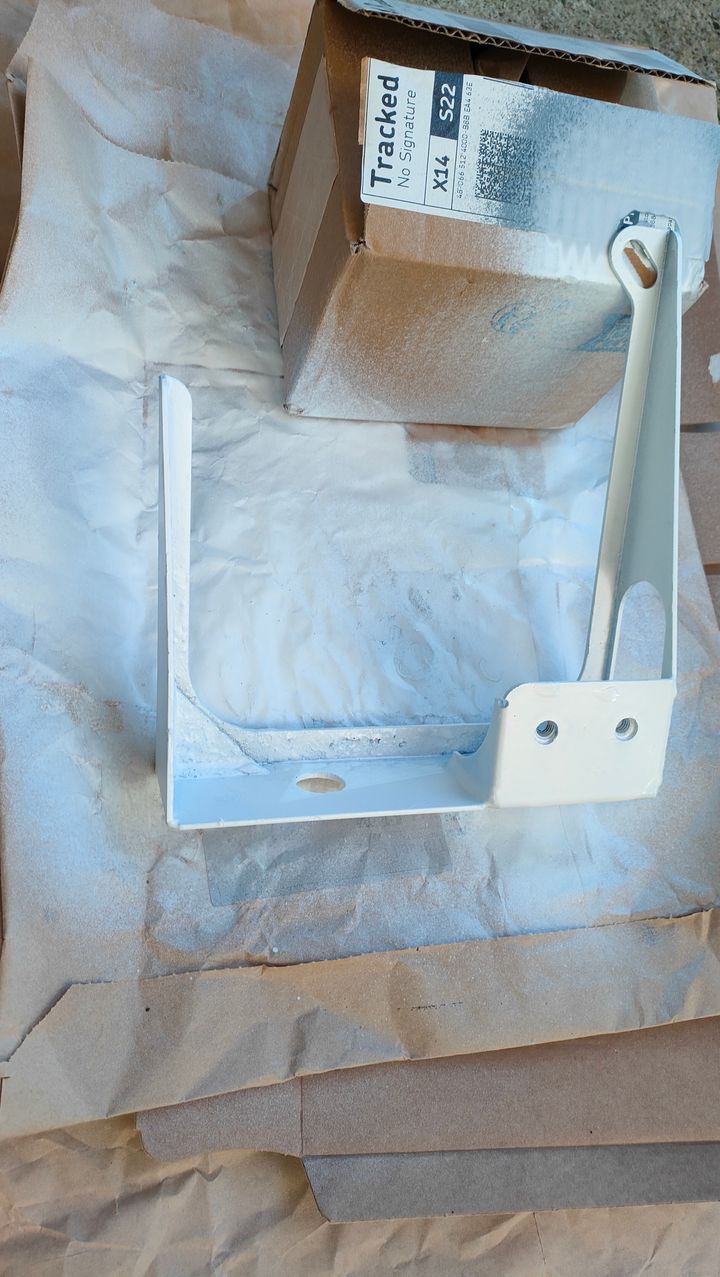
Final thing I did on the way was rustproof and respray the expansion tank bracket - might as well do a good job while it is out
Finally if you are intrigued as to how these motors are put together and thus how to take them apart, this video from Car Builder Solutions is excellent
One extra tip from me is that I bought one of these to drain out all of the existing fluid from the expansion tank into a 2l water bottle - made getting to the bottom of the tank a doddle and meant that I didn't spill coolant everywhere as I did so.
I also removed the battery as with it removed it gives you great clearance to get to the bottom of the expansion tank without much vertical movement being needed
I've decided to send my motor off to Adrian to get him to overhaul it for me (*he's a great guy) so on the way I took it apart just to have a look and see if the motor would turn on it's own (*it wouldn't)
The TVR motor, as others have mentioned before has a pretty unique 170 degree gearing, and a different 29W motor from the standard 14W mini one, which only has gearings available in sizes of 90 to 130 degrees such as from these guys
https://www.s-v-c.co.uk/categories/stafford-vehicl...
The bolts holding the case on are also Imperial, which had me flummoxed for a bit as they were neither 6mm nor 7mm - in fact they are 1/4 I believe!
Final thing I did on the way was rustproof and respray the expansion tank bracket - might as well do a good job while it is out

Finally if you are intrigued as to how these motors are put together and thus how to take them apart, this video from Car Builder Solutions is excellent
Gassing Station | Cerbera | Top of Page | What's New | My Stuff


