1.6 Ecoboost Lotus Exige S1 - Version 2.0
Discussion


My version 1.0 build thread of this project was badly out of date and all of the hosted image links had broken so I decided to start again with a 2.0 and bring things up to date.
Long story cut short, back in 2016 a friend of mine had an unfinished project that he'd bought from a chap as an unfinished project and I decided that it was the perfect base to start my unfinished project with…
The original owner was preparing the car to compete in endurance races with a circa 600bhp Audi 1.8T 20v engine, but I elected to buy the project without an engine or gearbox and go a different route with it all.
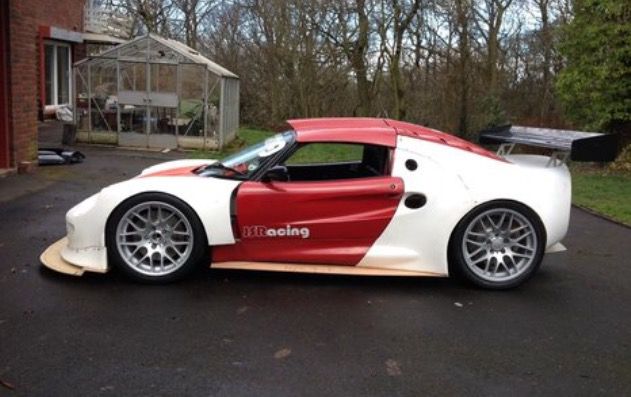
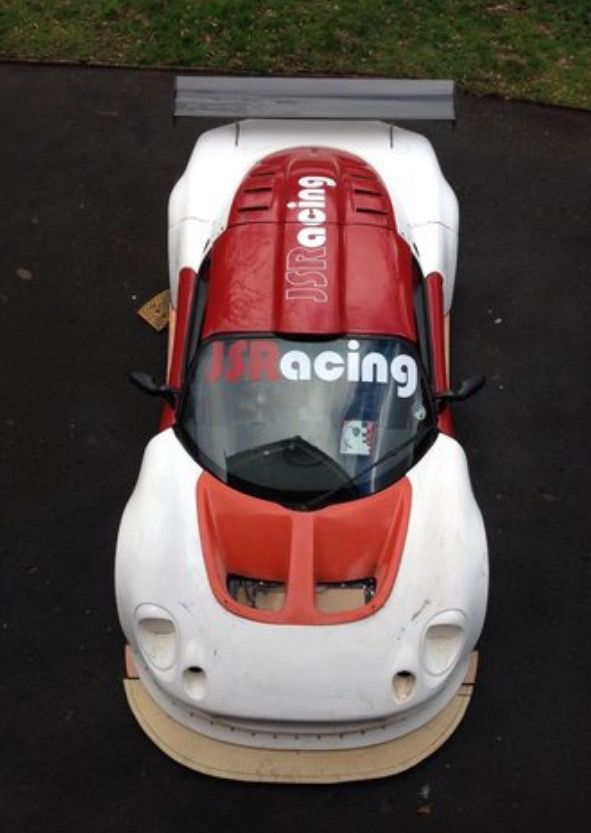
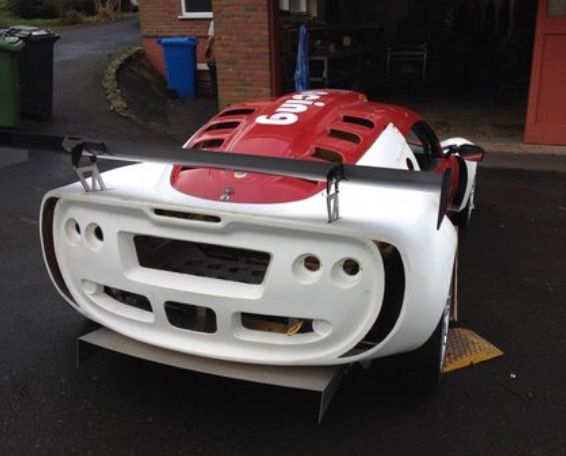
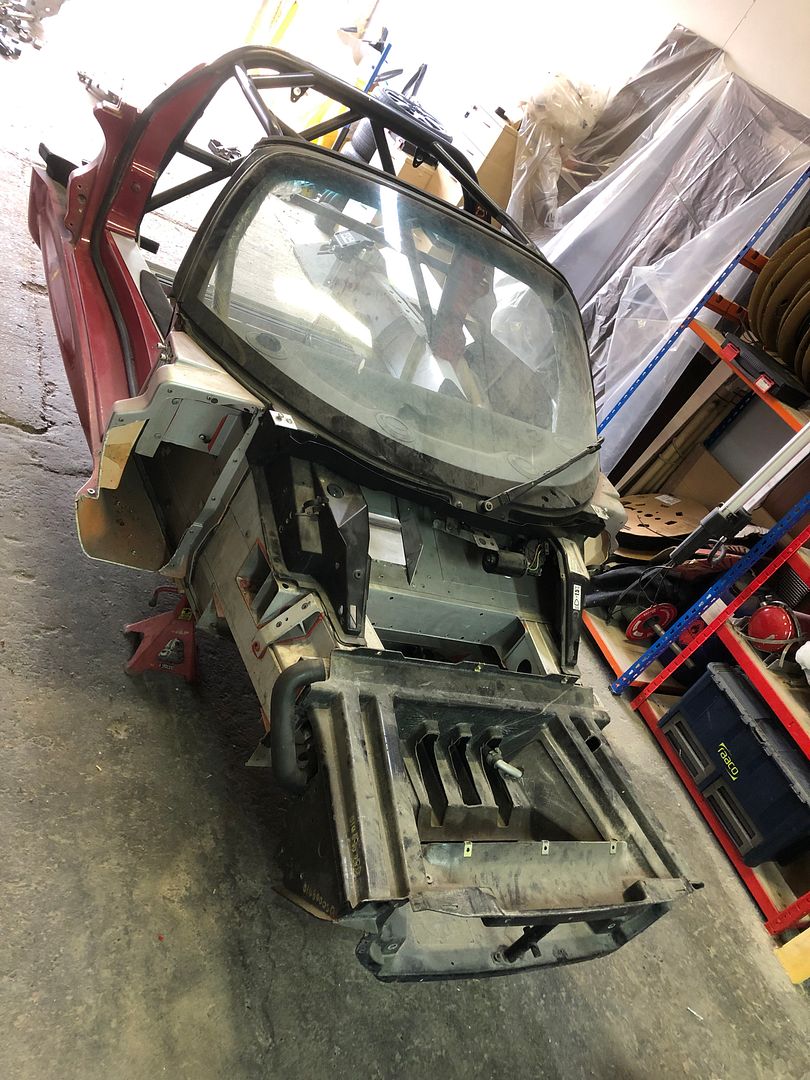
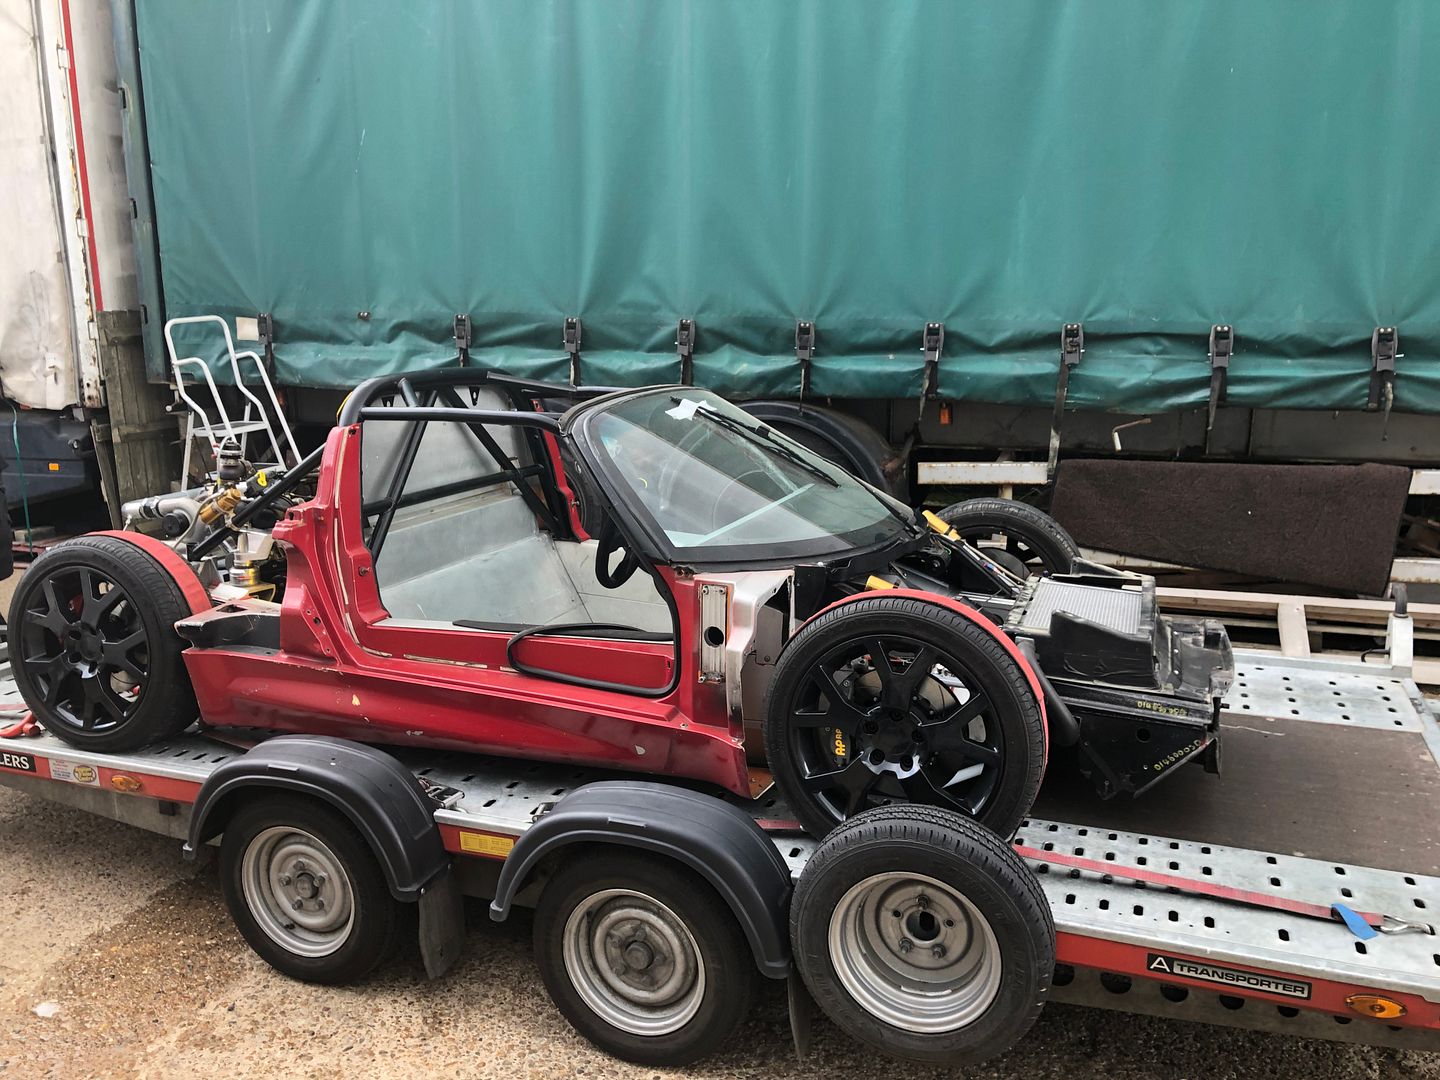
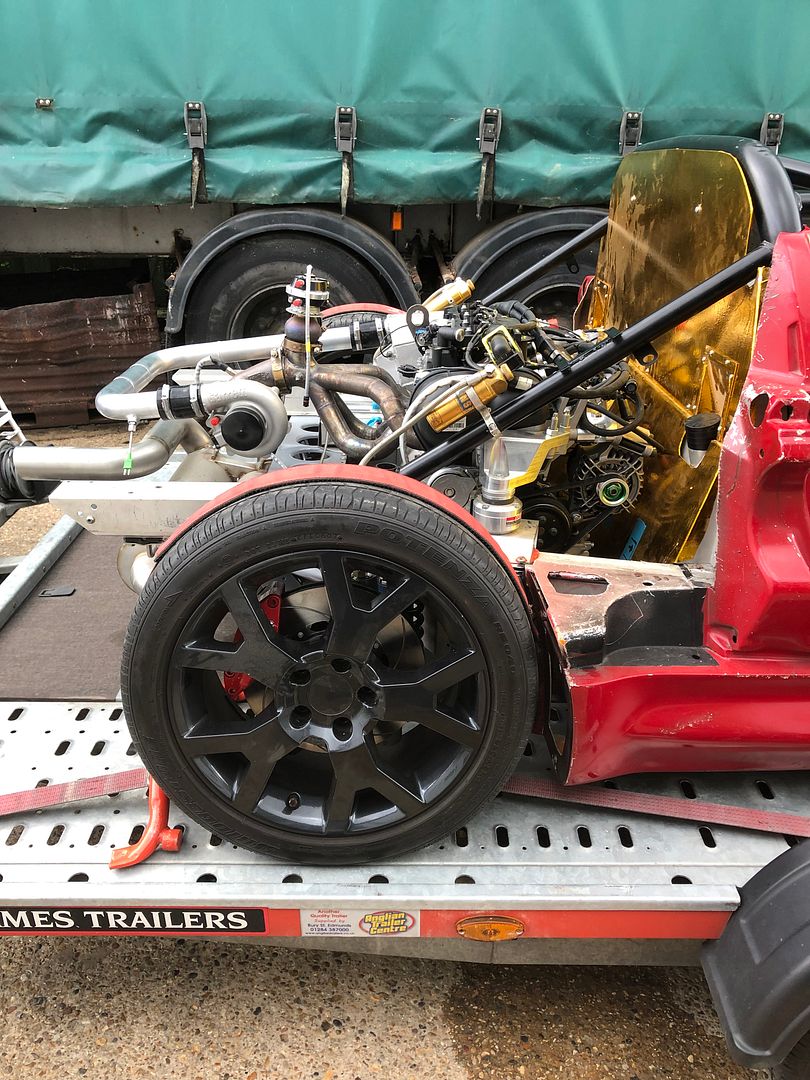
How it looked when I bought it:
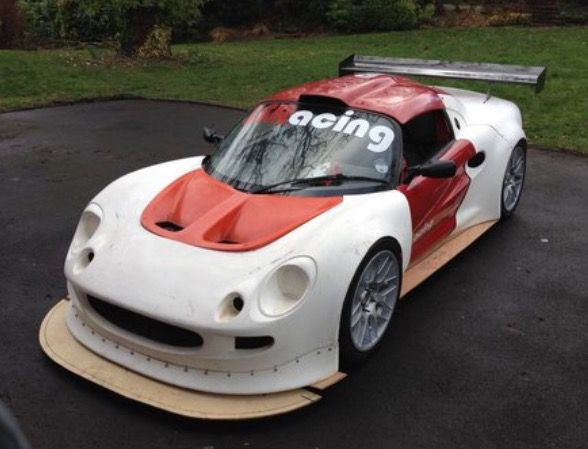

I started stripping the car down to see where things were at and working out what I wanted to keep and what I was going to sell to part fund the next steps.

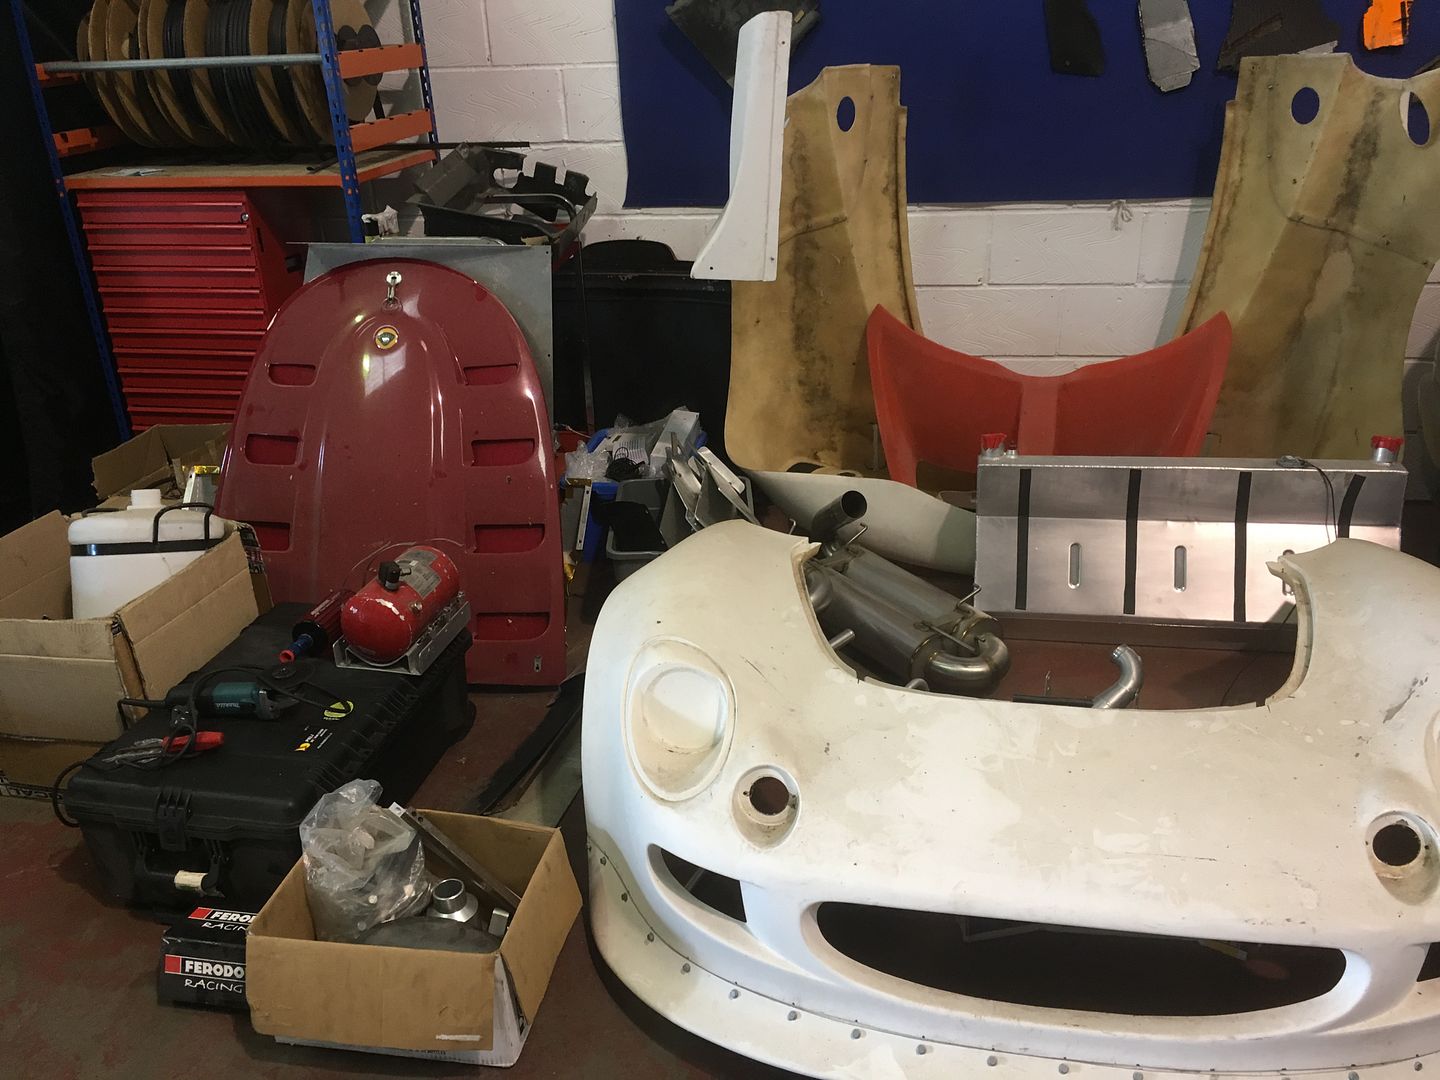

The big wheels, big wheel spacers, big brakes and big bodywork were all in preparation of it going racing with big horsepower, but that wasn’t what I had in mind…
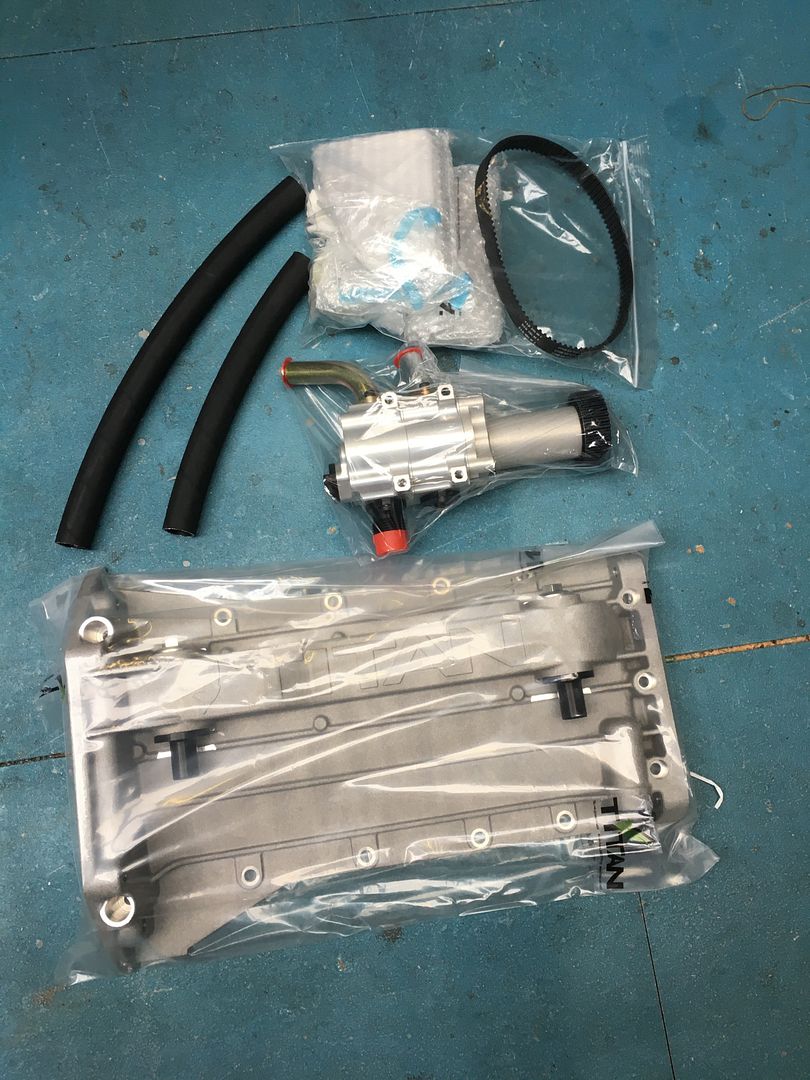
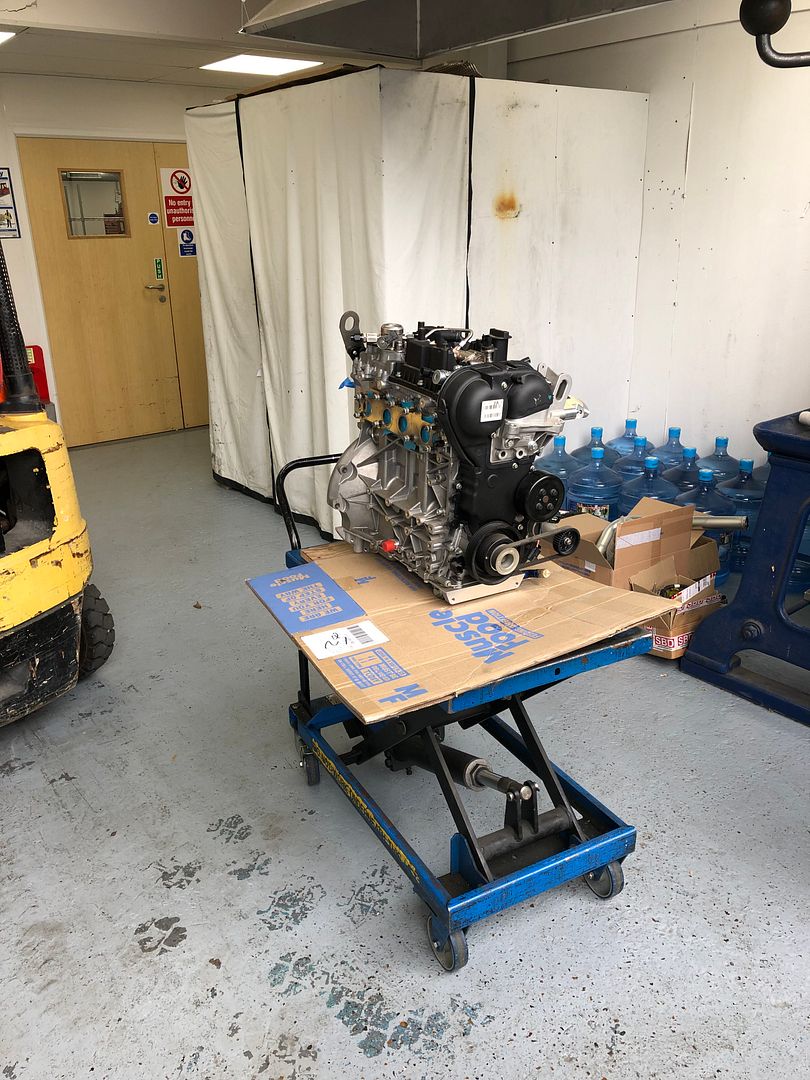
I'd already decided that I was definitely going to use a Ford 1.6 Ecoboost engine. The engineering that went in to it as a production engine was impressive and in terms of 'bang for buck', I felt it would be hard to beat. I managed to pick up a brand new complete crate engine for £1500 + VAT and immediately started looking in to what I could do to ensure that my investment would last as long as possible...
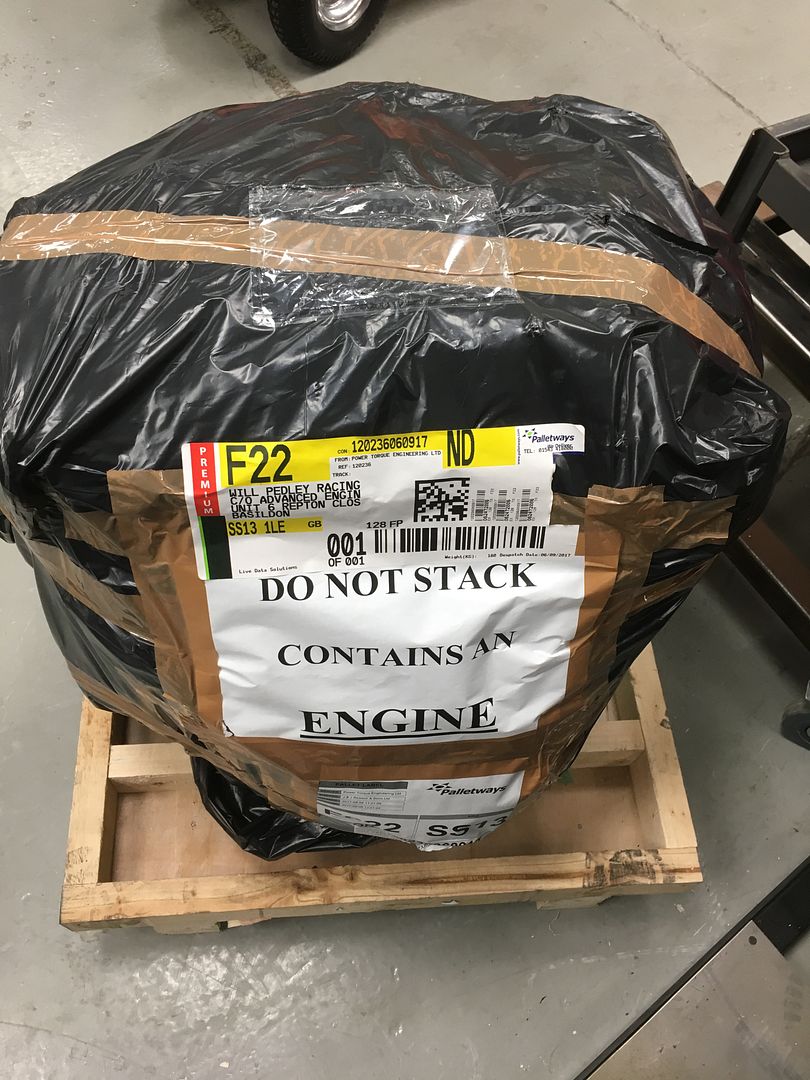
A Titan dry sump kit was quickly ordered up and the engine sent on its holidays to Piero @ X-Power engines for the dry sump kit to be fitted and the nose of the crank modified to take a woodruff key through the complete set of pulleys.
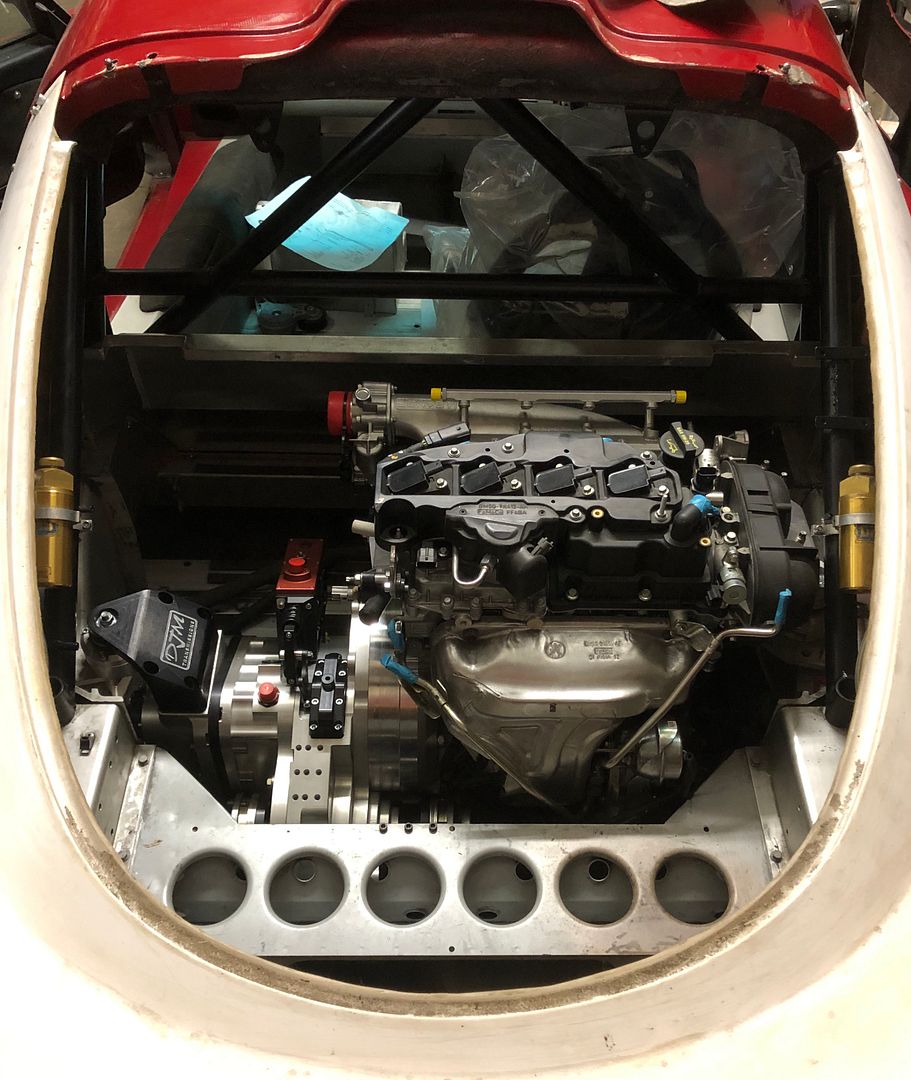
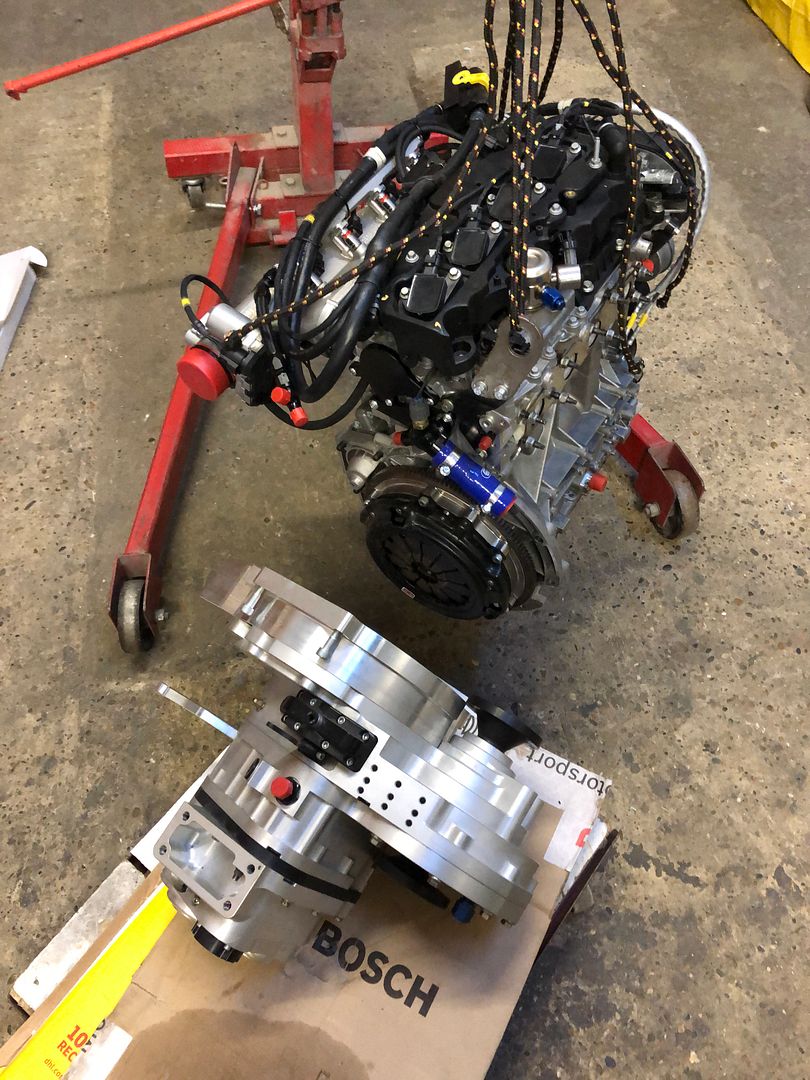
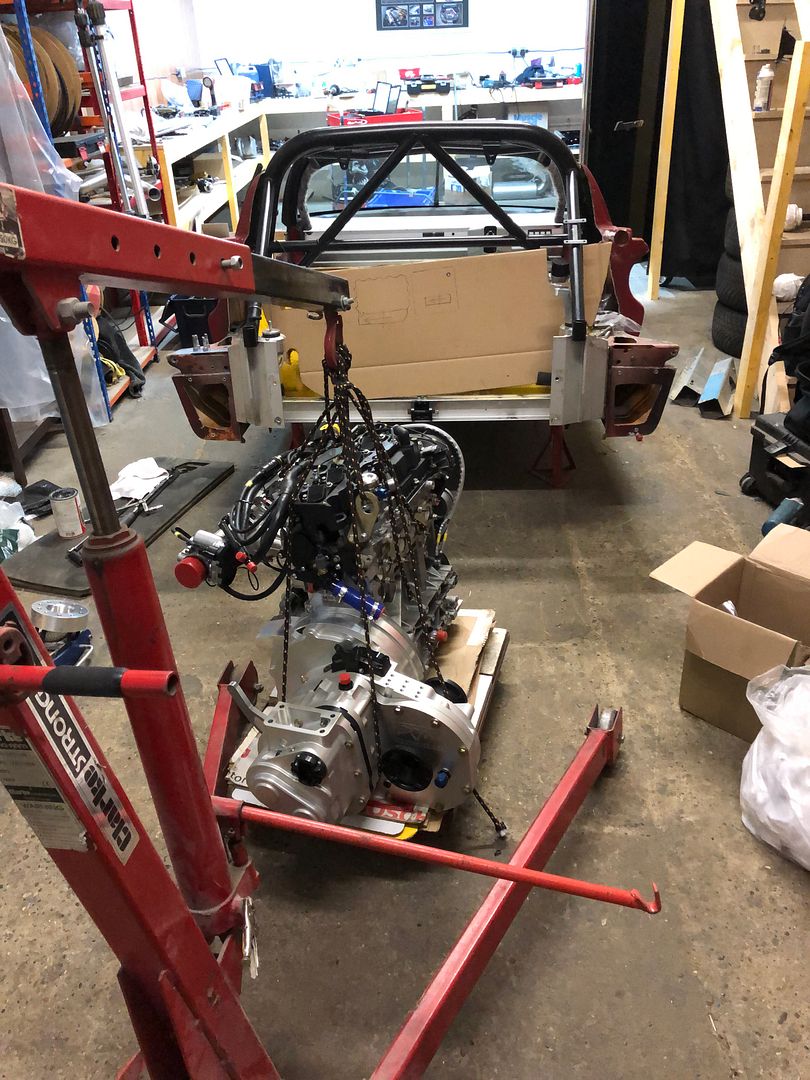
Gearbox wise, after running through a lot of options, I decided to commit to going for a sequential gearbox to get the ratios I really wanted. I ended up talking to Dave Plant of DJM and we very quickly aligned on a solution including all of the associated parts needed for the installation. The next question was, would it fit?
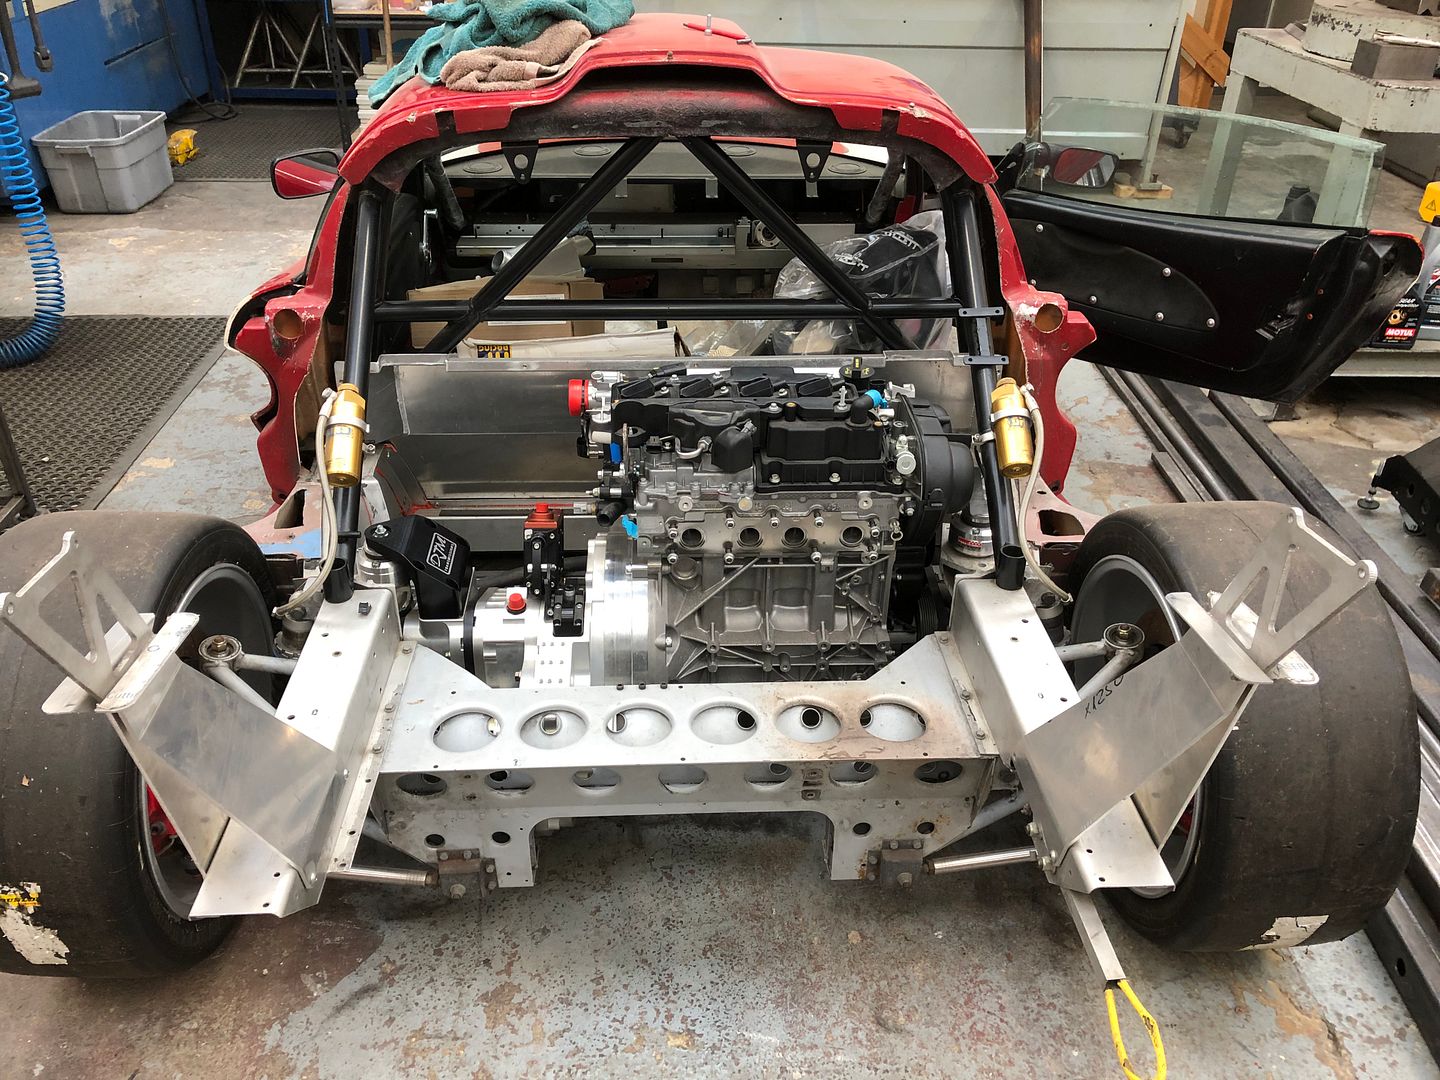
I borrowed a 1.6 Ecoboost engine from a friend to use for a mock fit and took everything up to DJM.
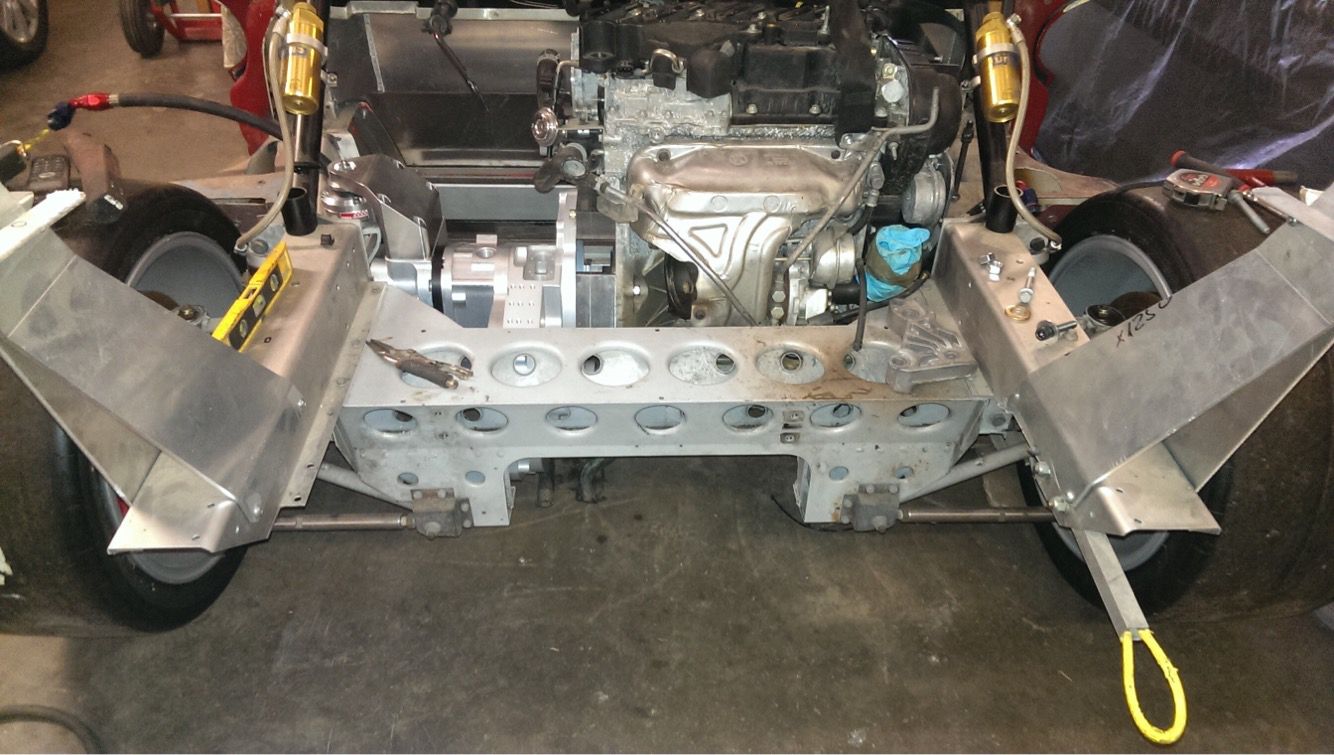
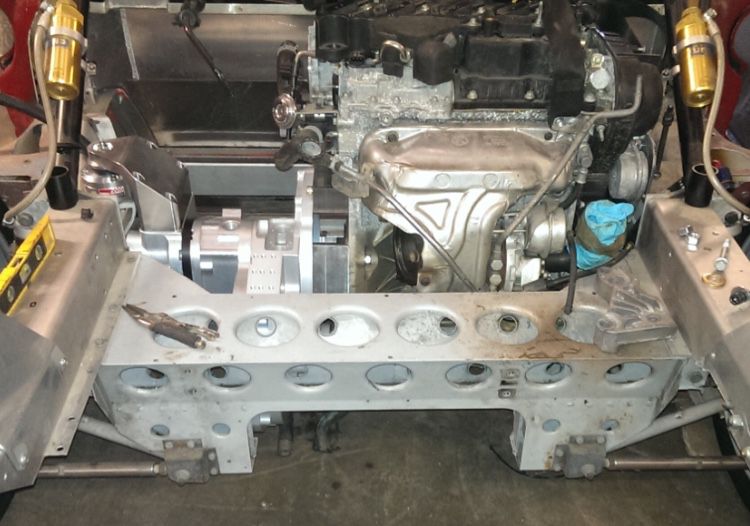
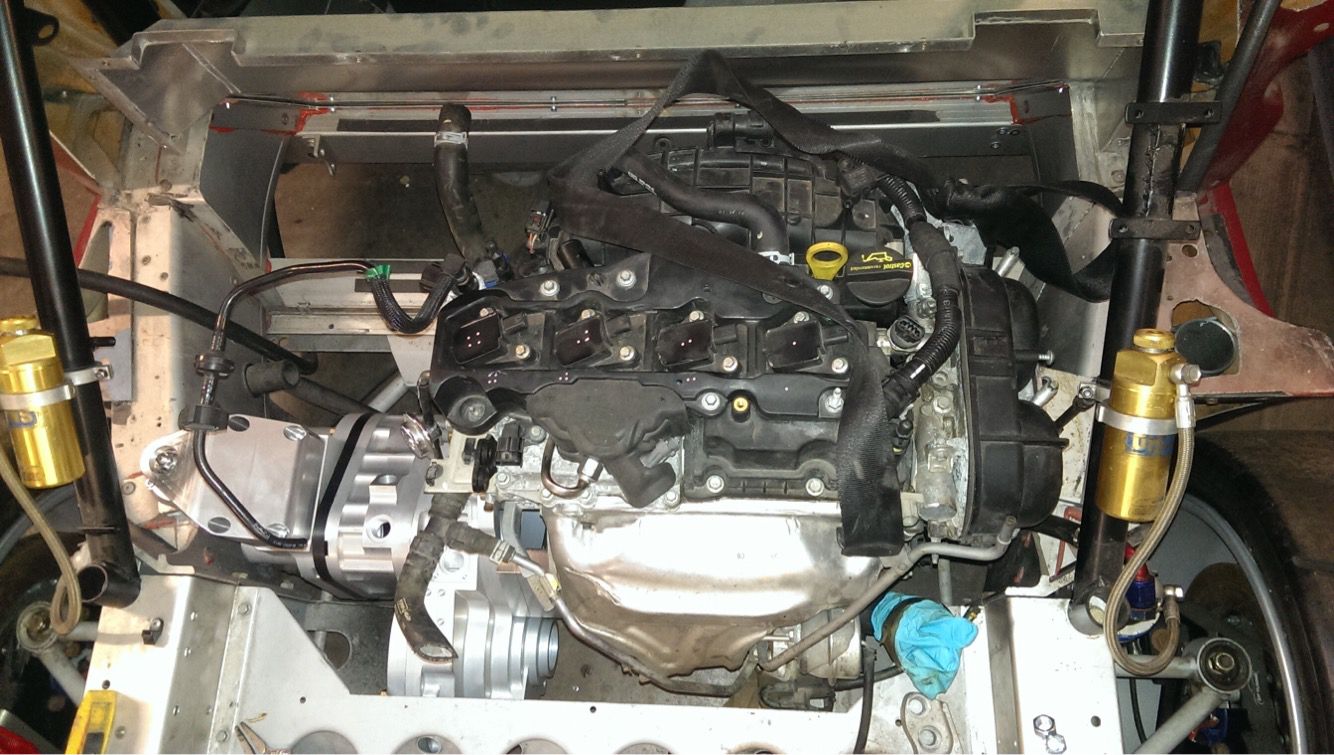
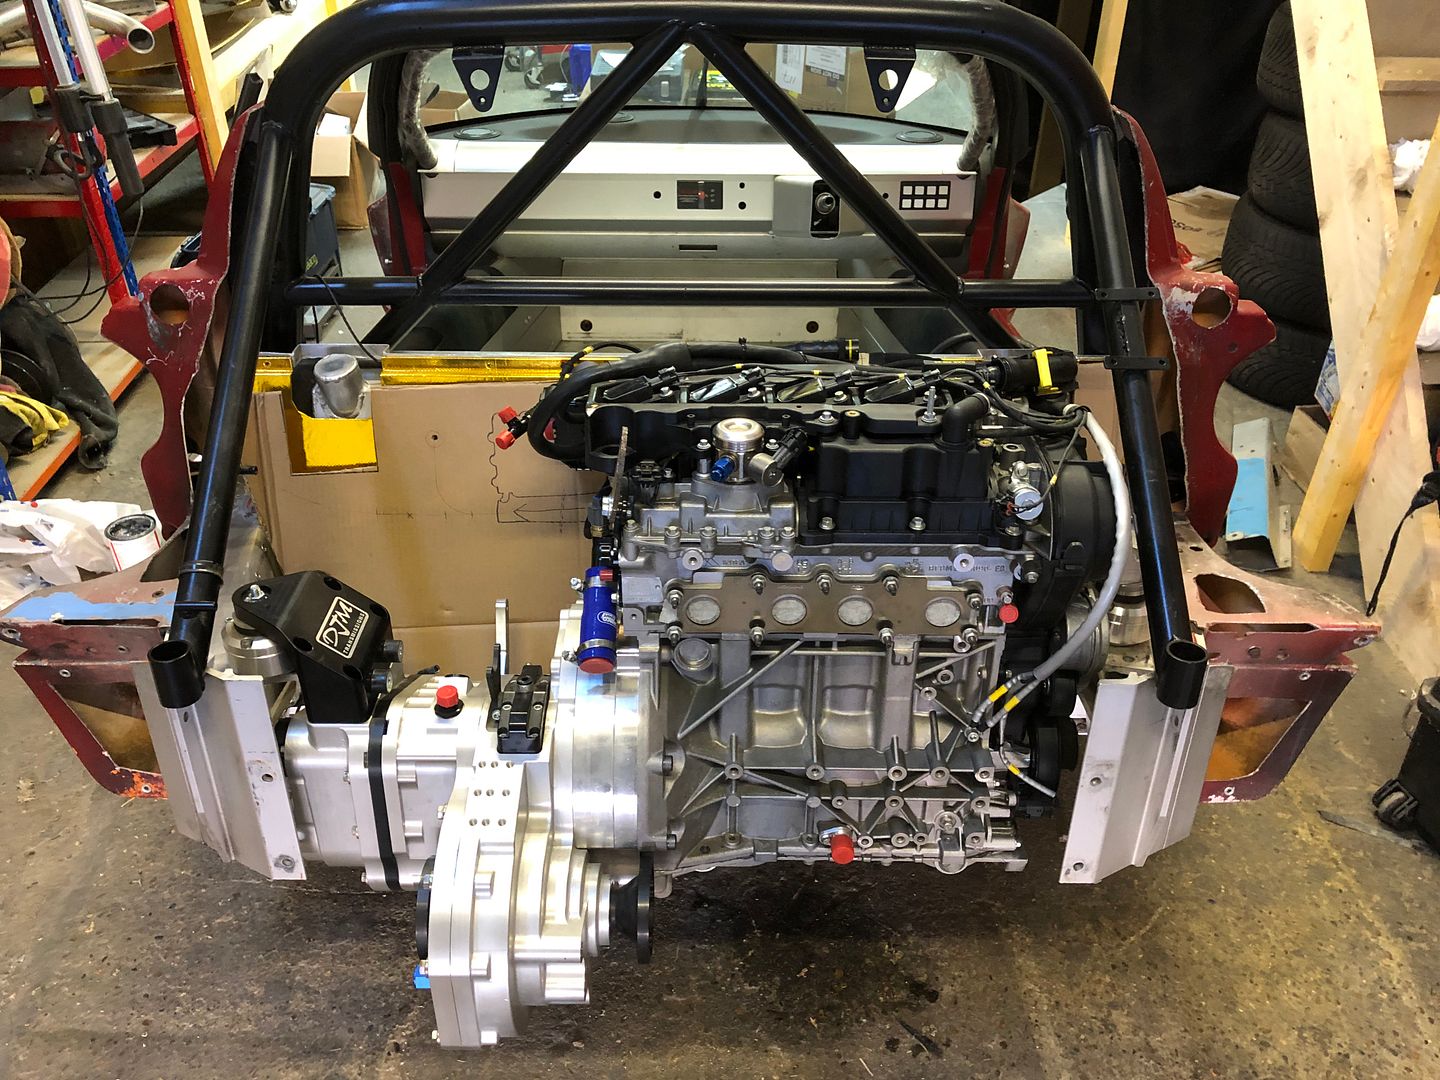
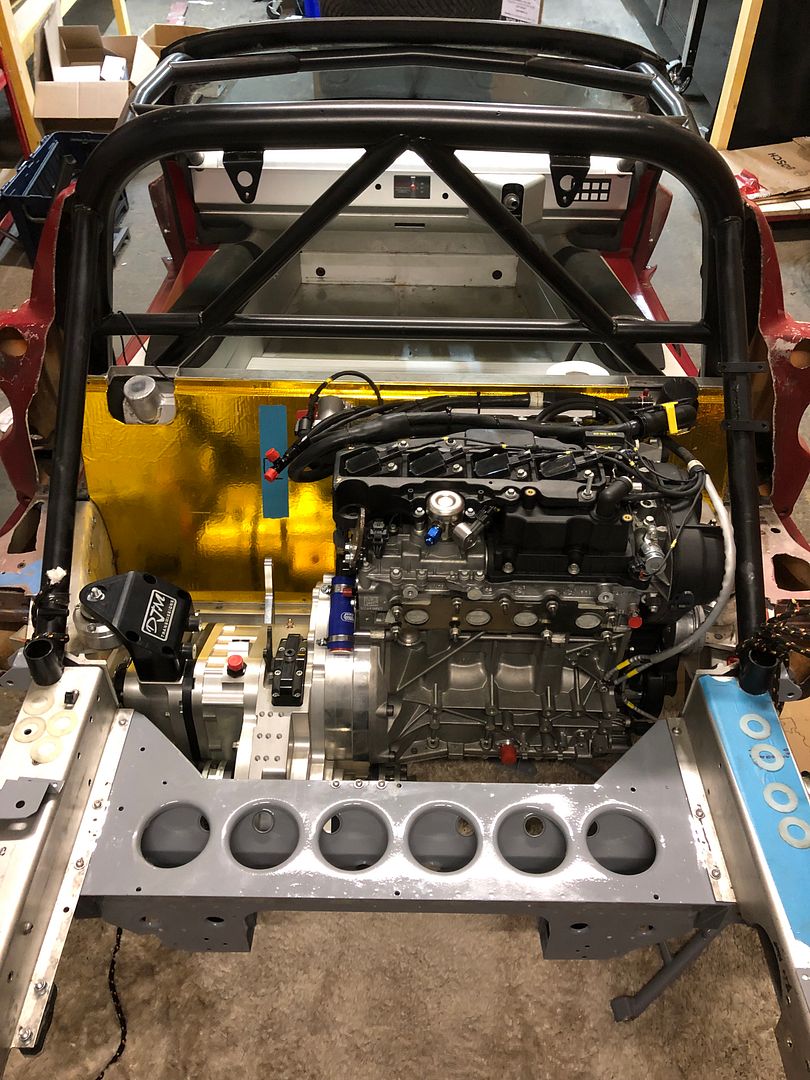
With a standard turbo setup, it couldn’t have been much better. But I already had visions of a different turbo setup…
The car stayed with DJM for a while so Dave and Euan continued to work their magic with the remaining ancillaries.
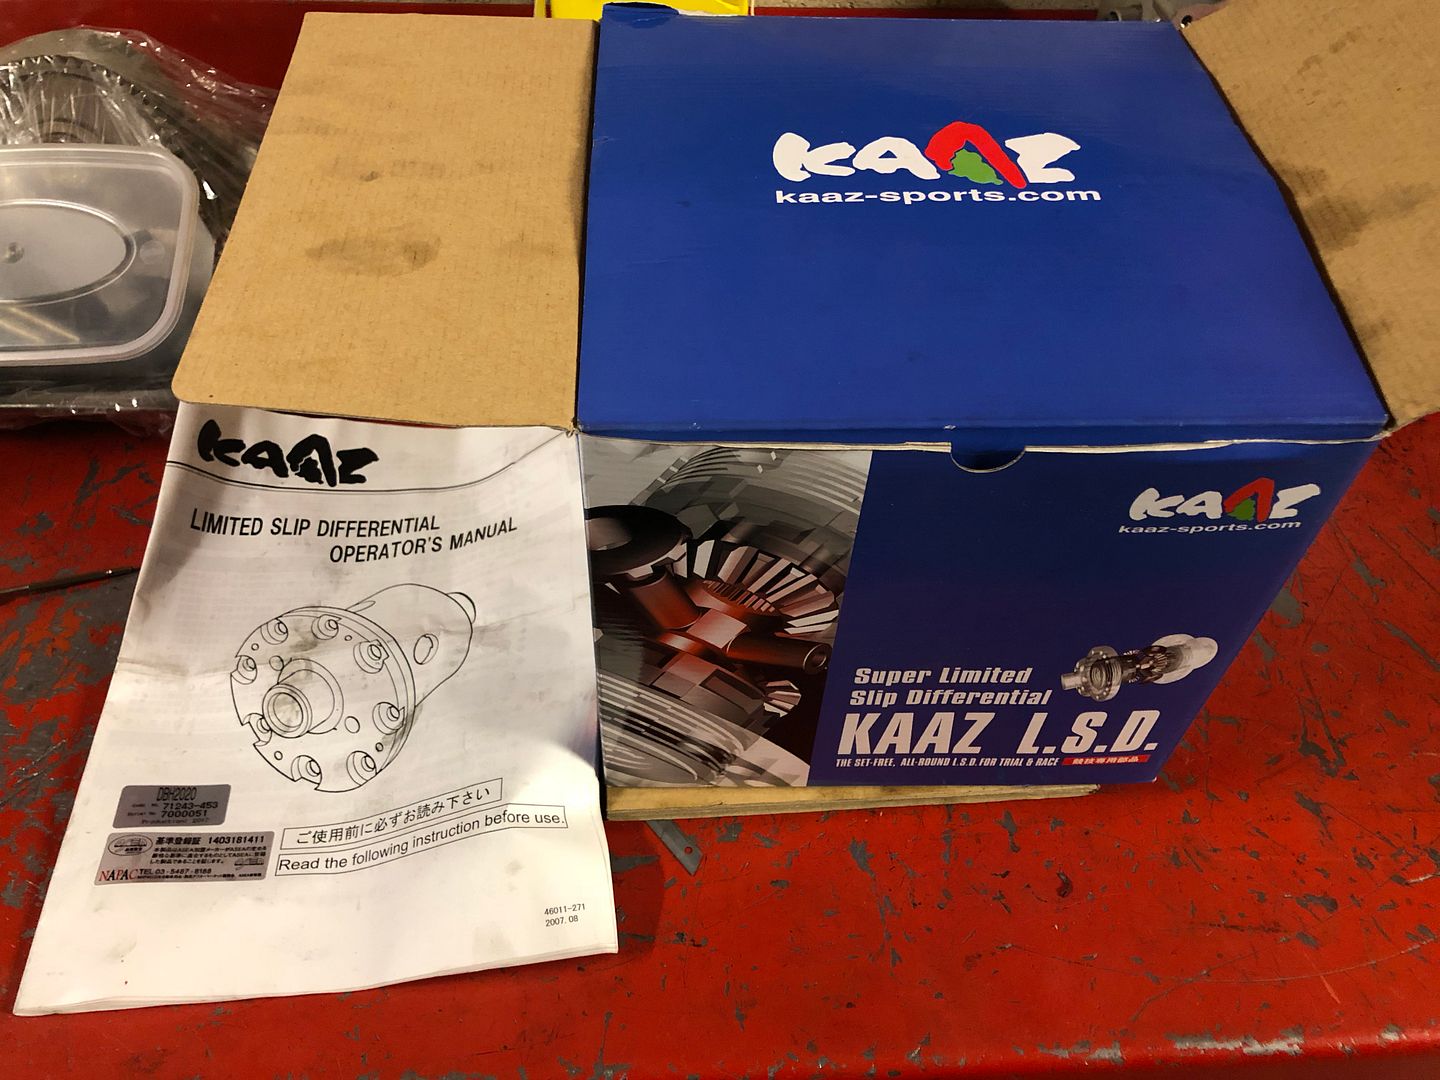
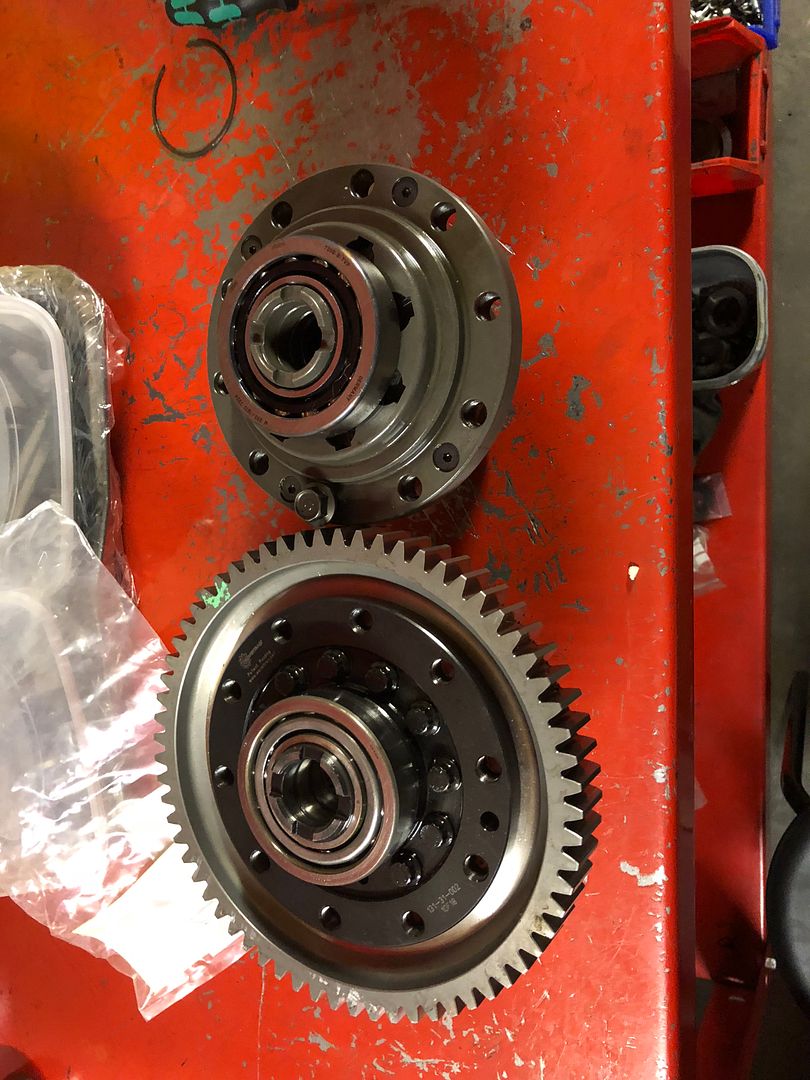
A Kaaz plated diff from my good friends at Coordsport found its way into the gearbox, slightly annoyingly with a new custom crownwheel compared to the Wavetrac which was the first idea!
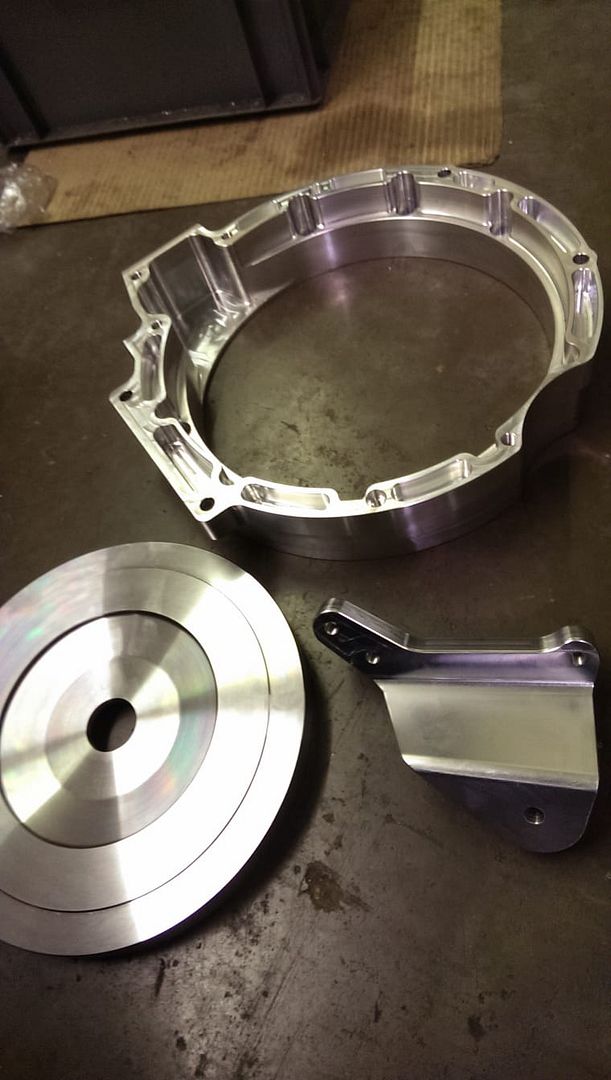
DJM making the majority of things in house:
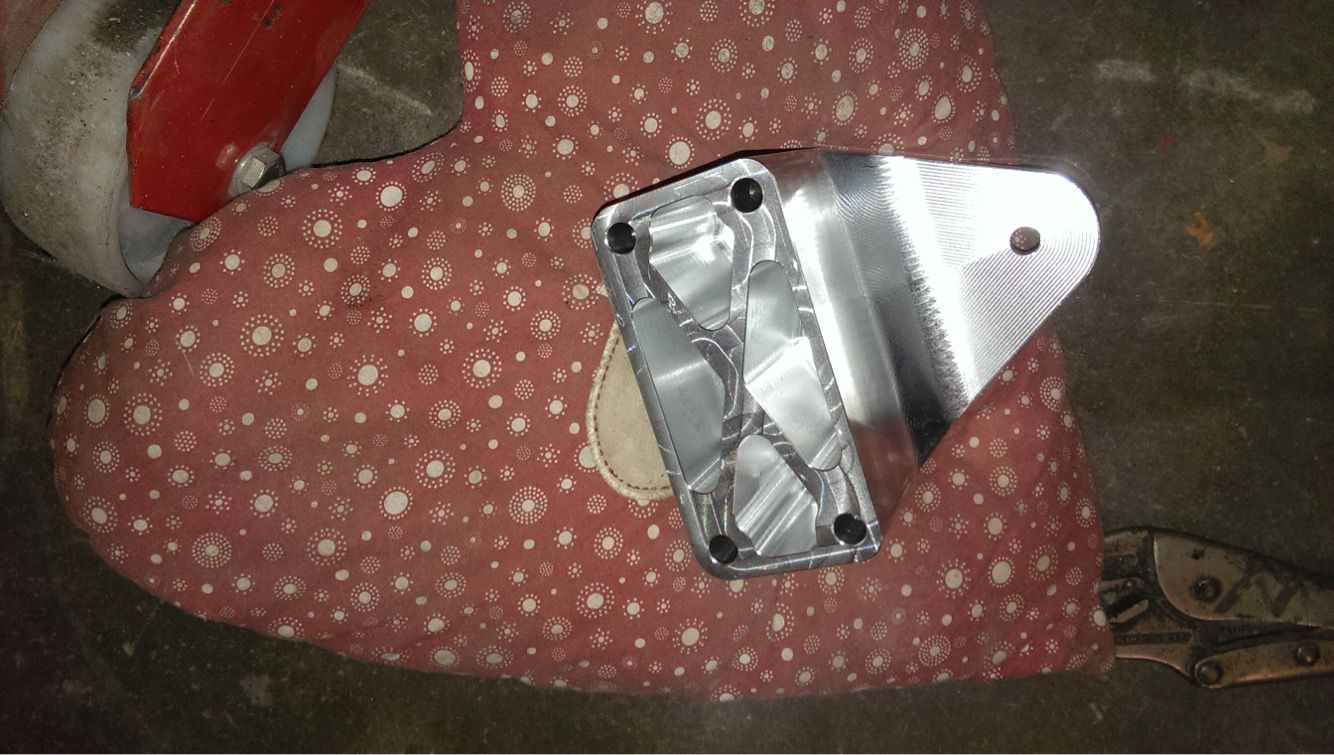
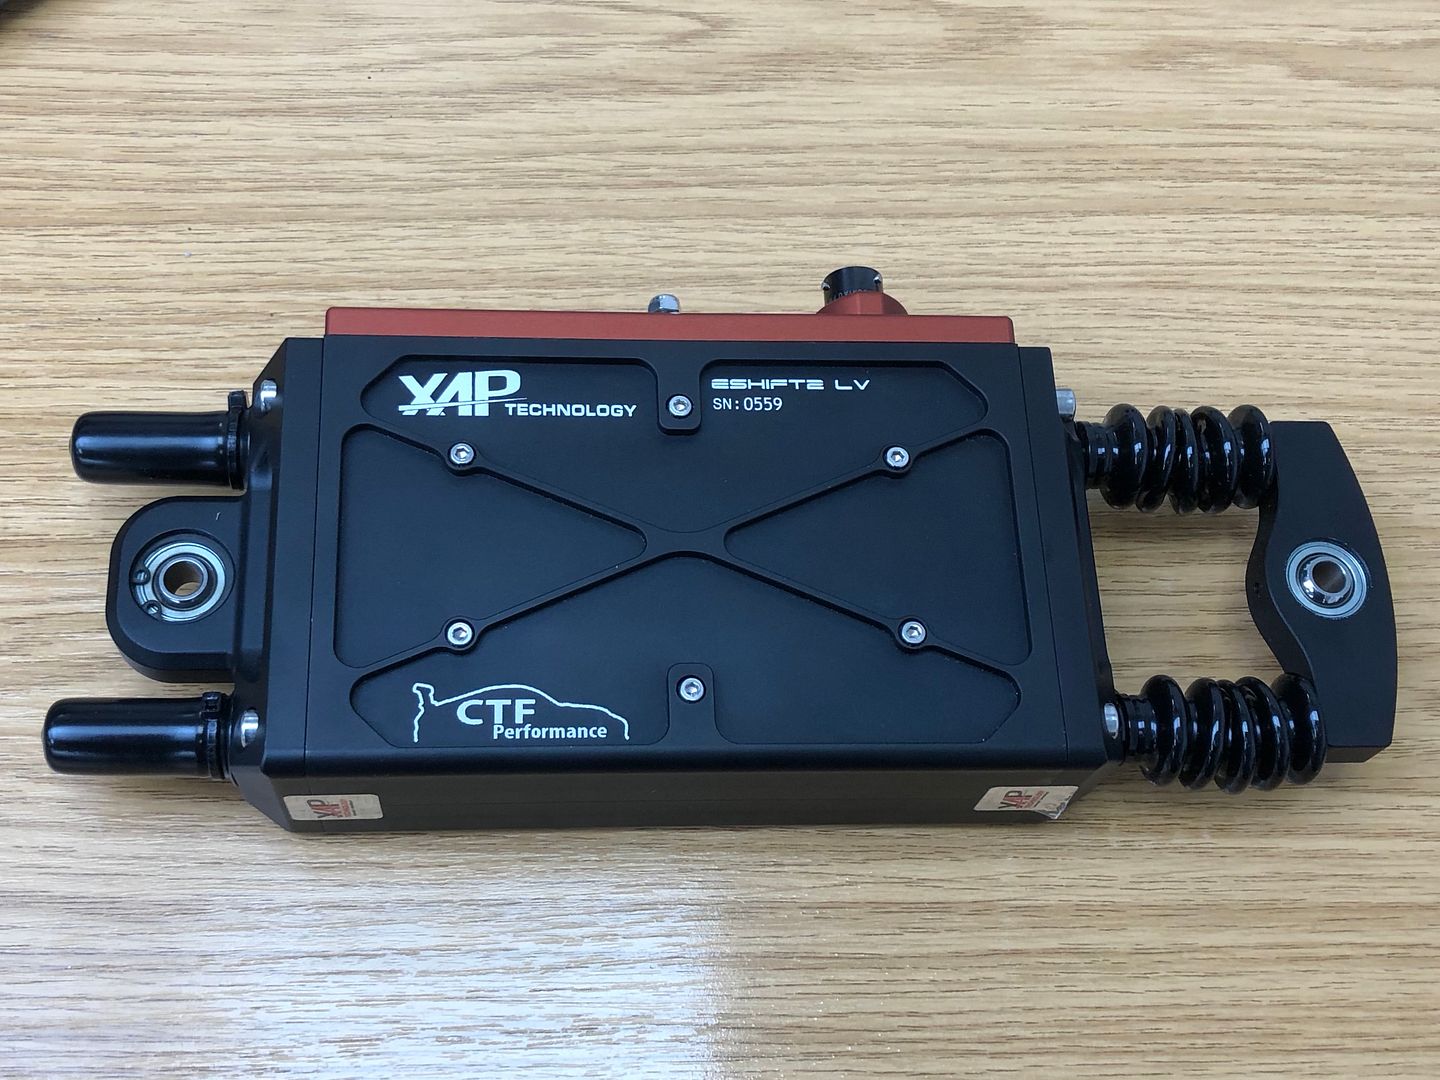
As much as a manual lever for changing gear on a sequential would have been fun, I decided I’d prefer to go paddleshift so at least there was the option for the ECU to deny downshifts and avoid damaging the engine, I wasn’t sure quite where I would package everything for a pneumatic setup so went for an XAP electric actuator instead:
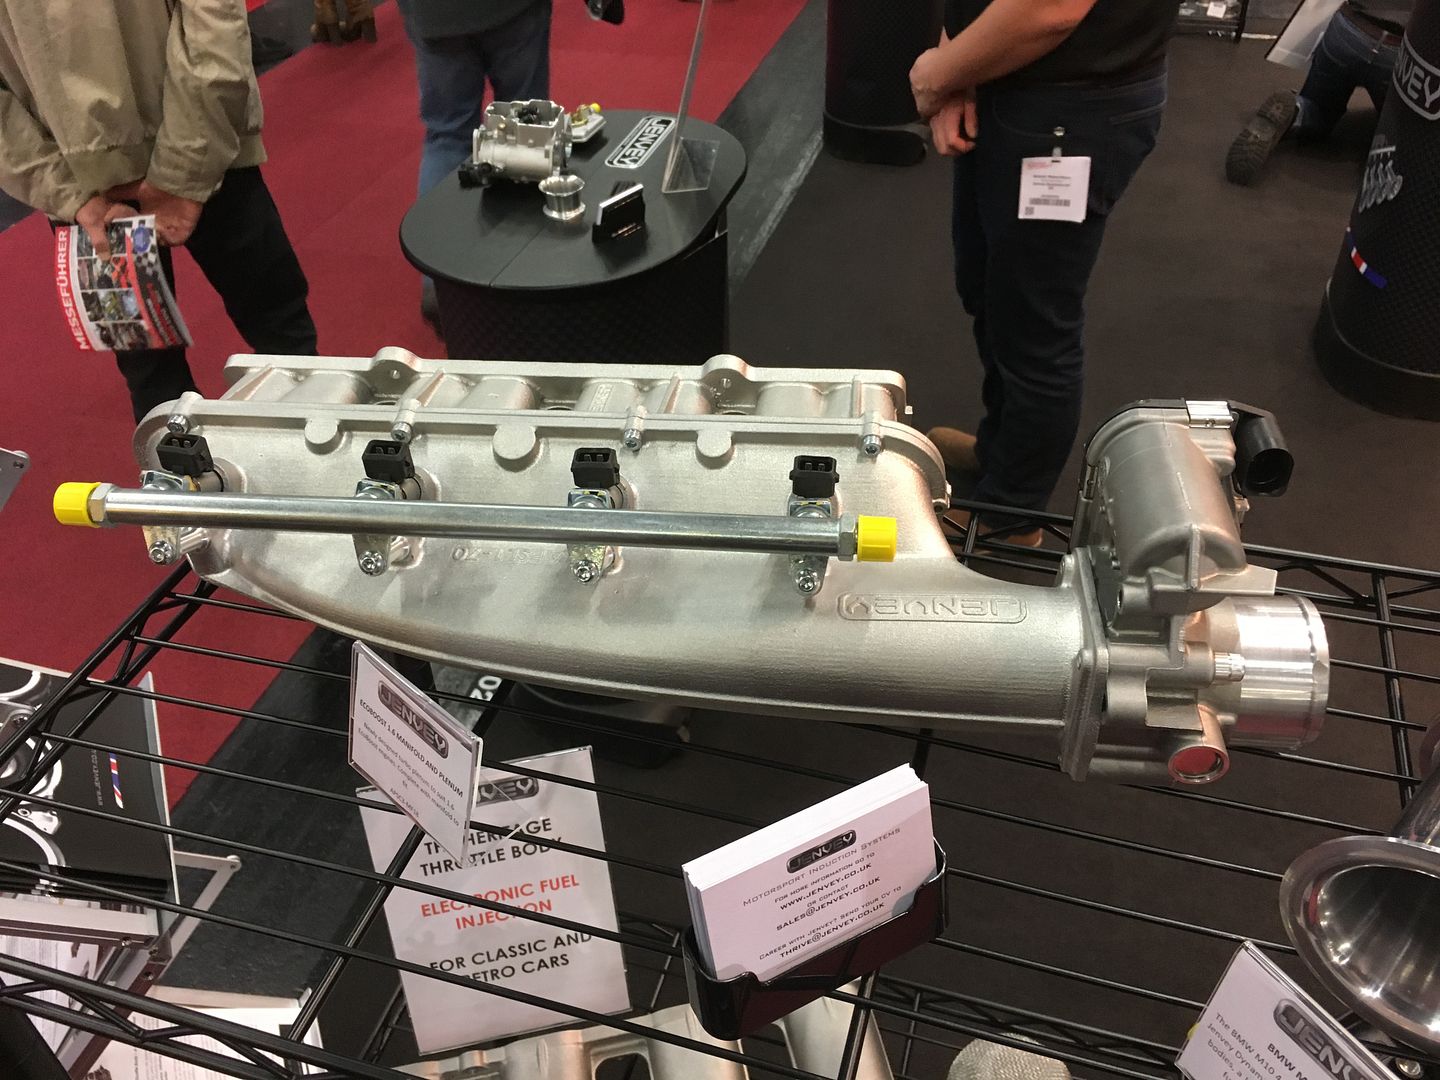
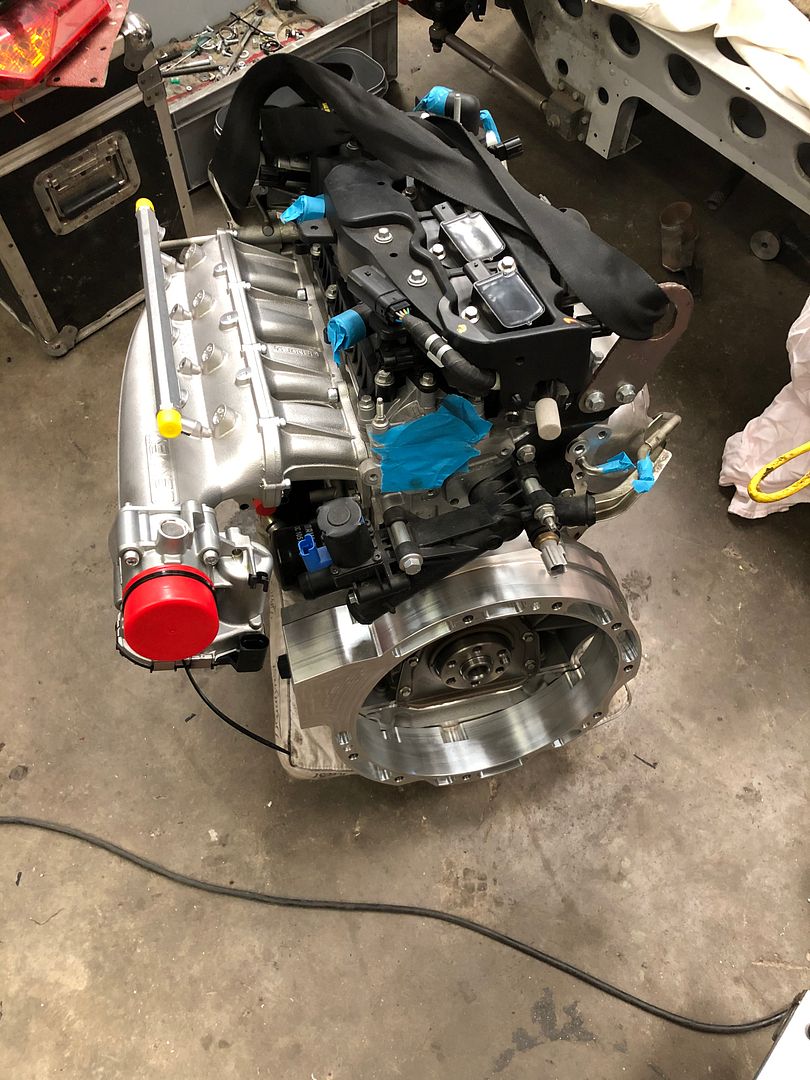
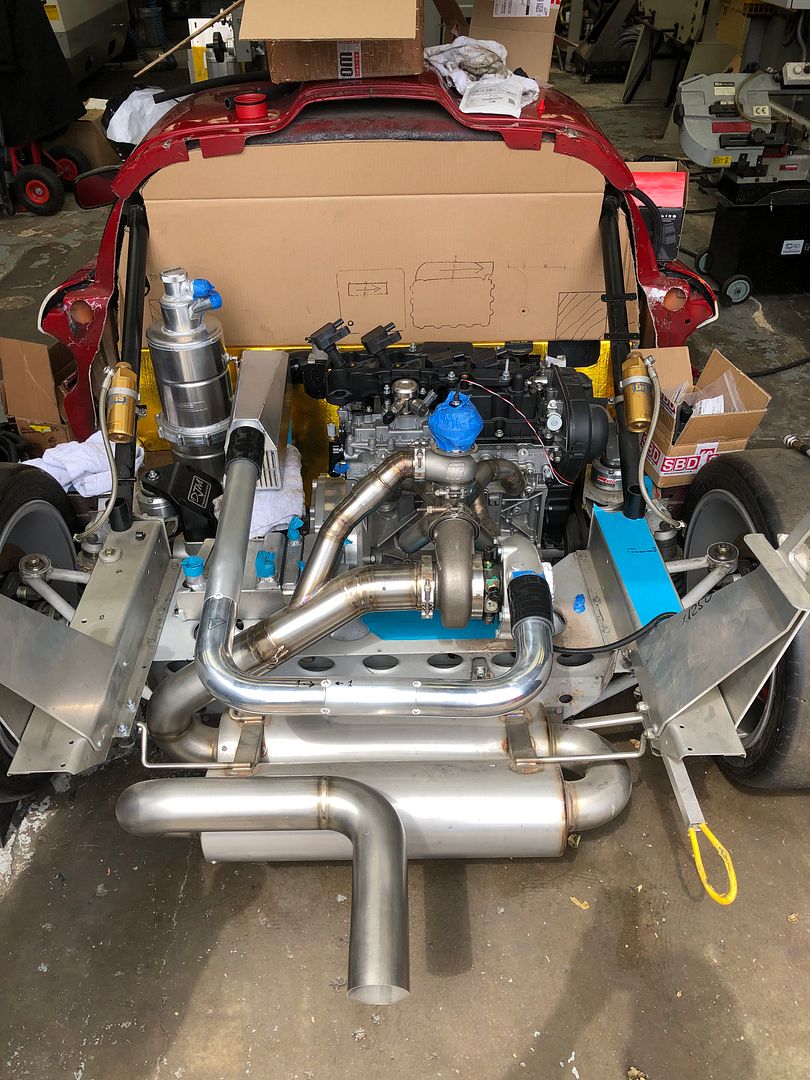
A trip out to the PMW show in Germany and a conversation with Mike Jenvey landed me with one of their side feed inlet manifolds which was fitted to the proper engine before the final fit up took place.
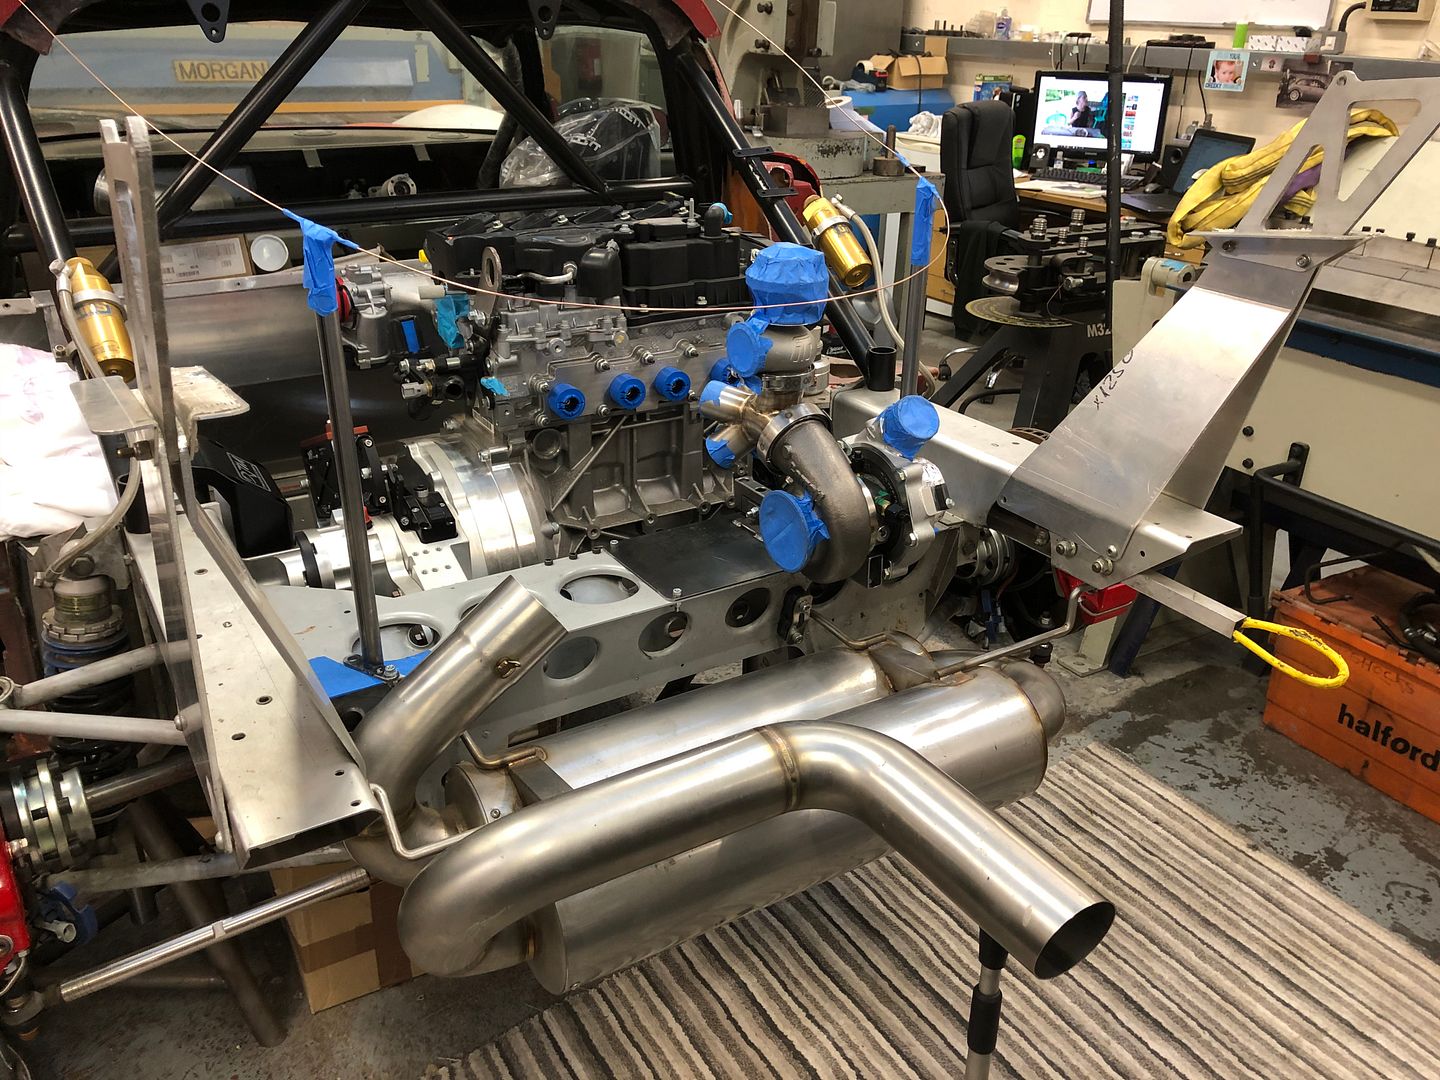
Final pics

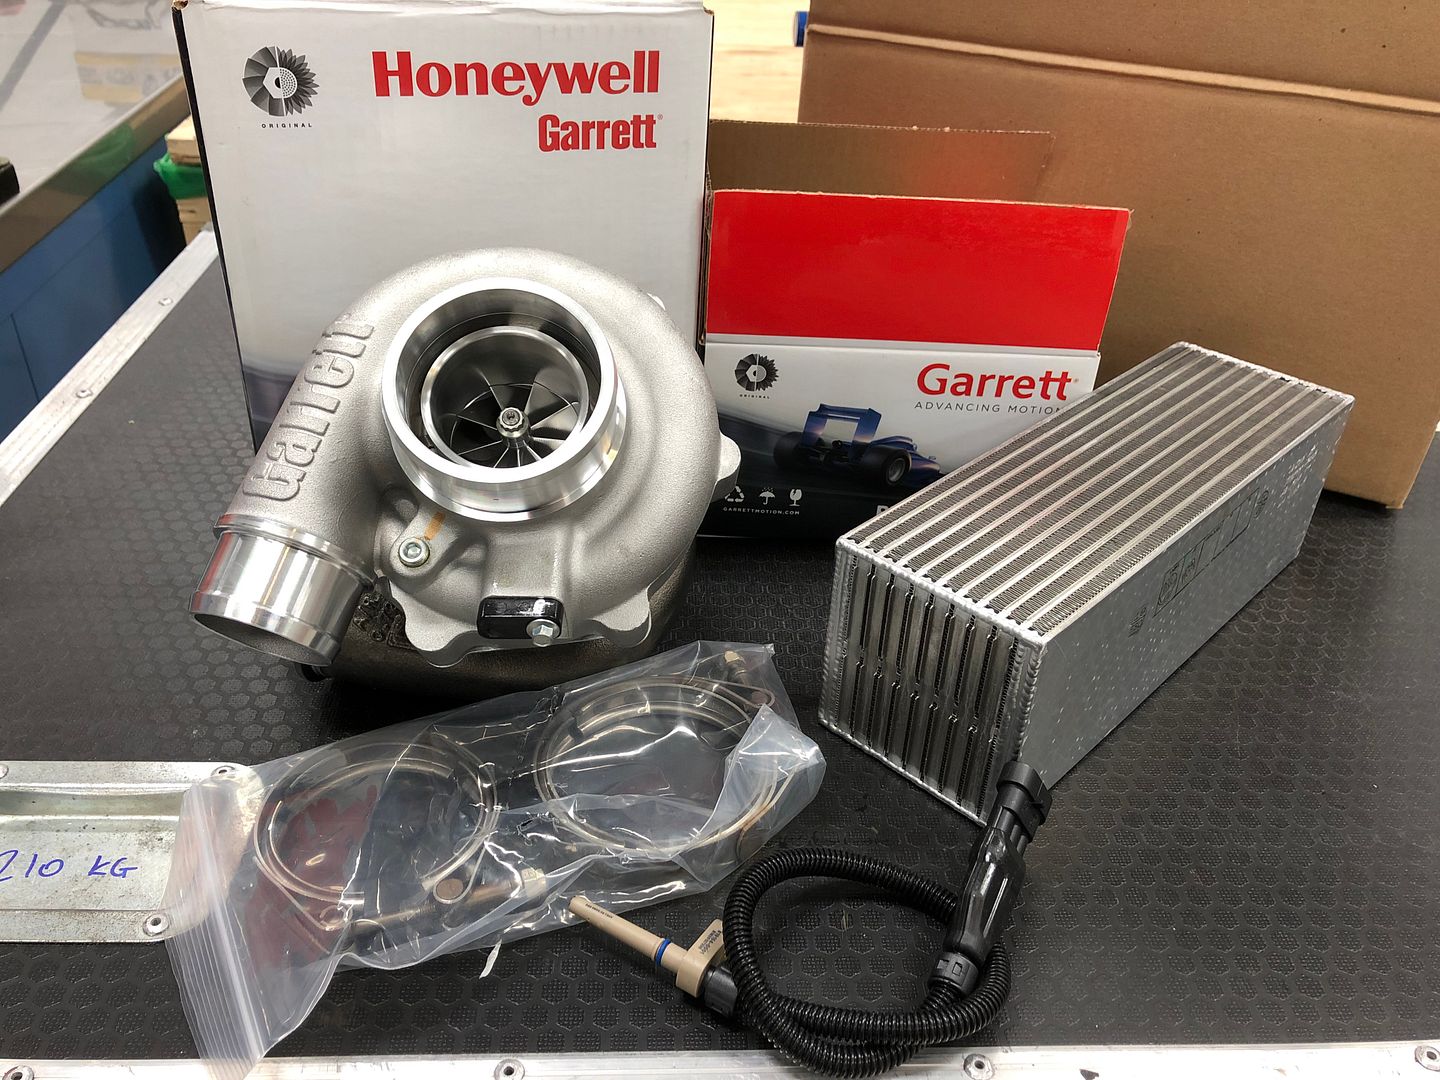
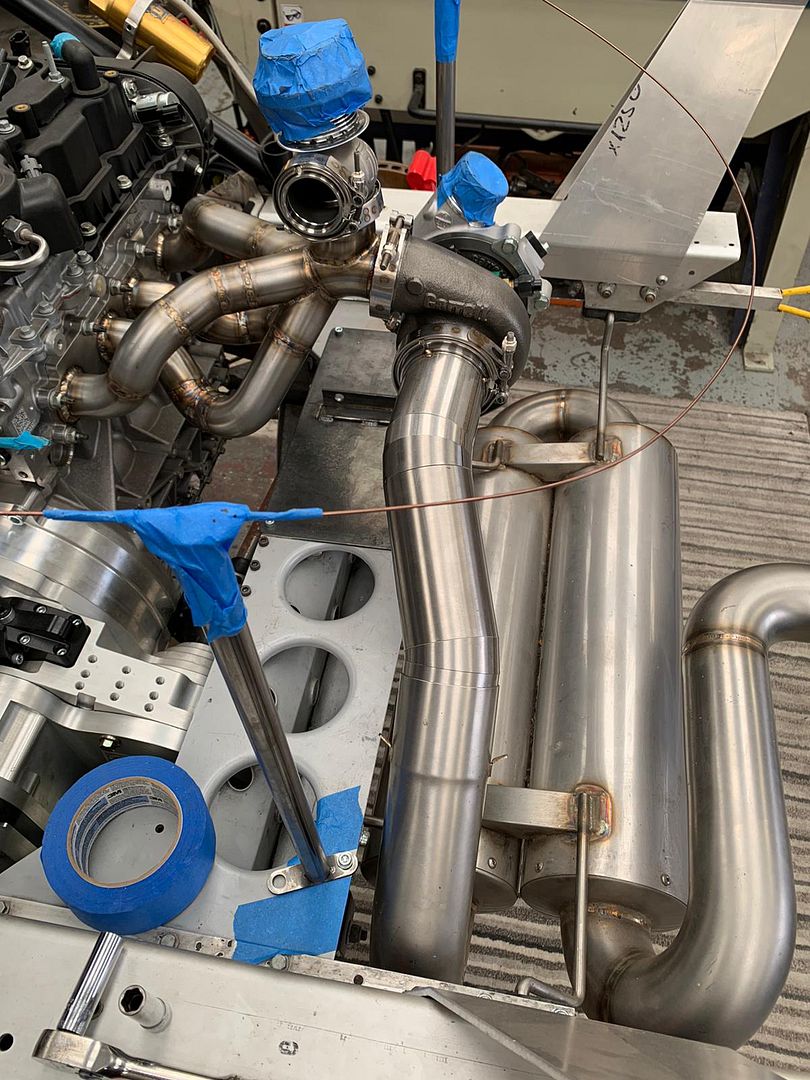
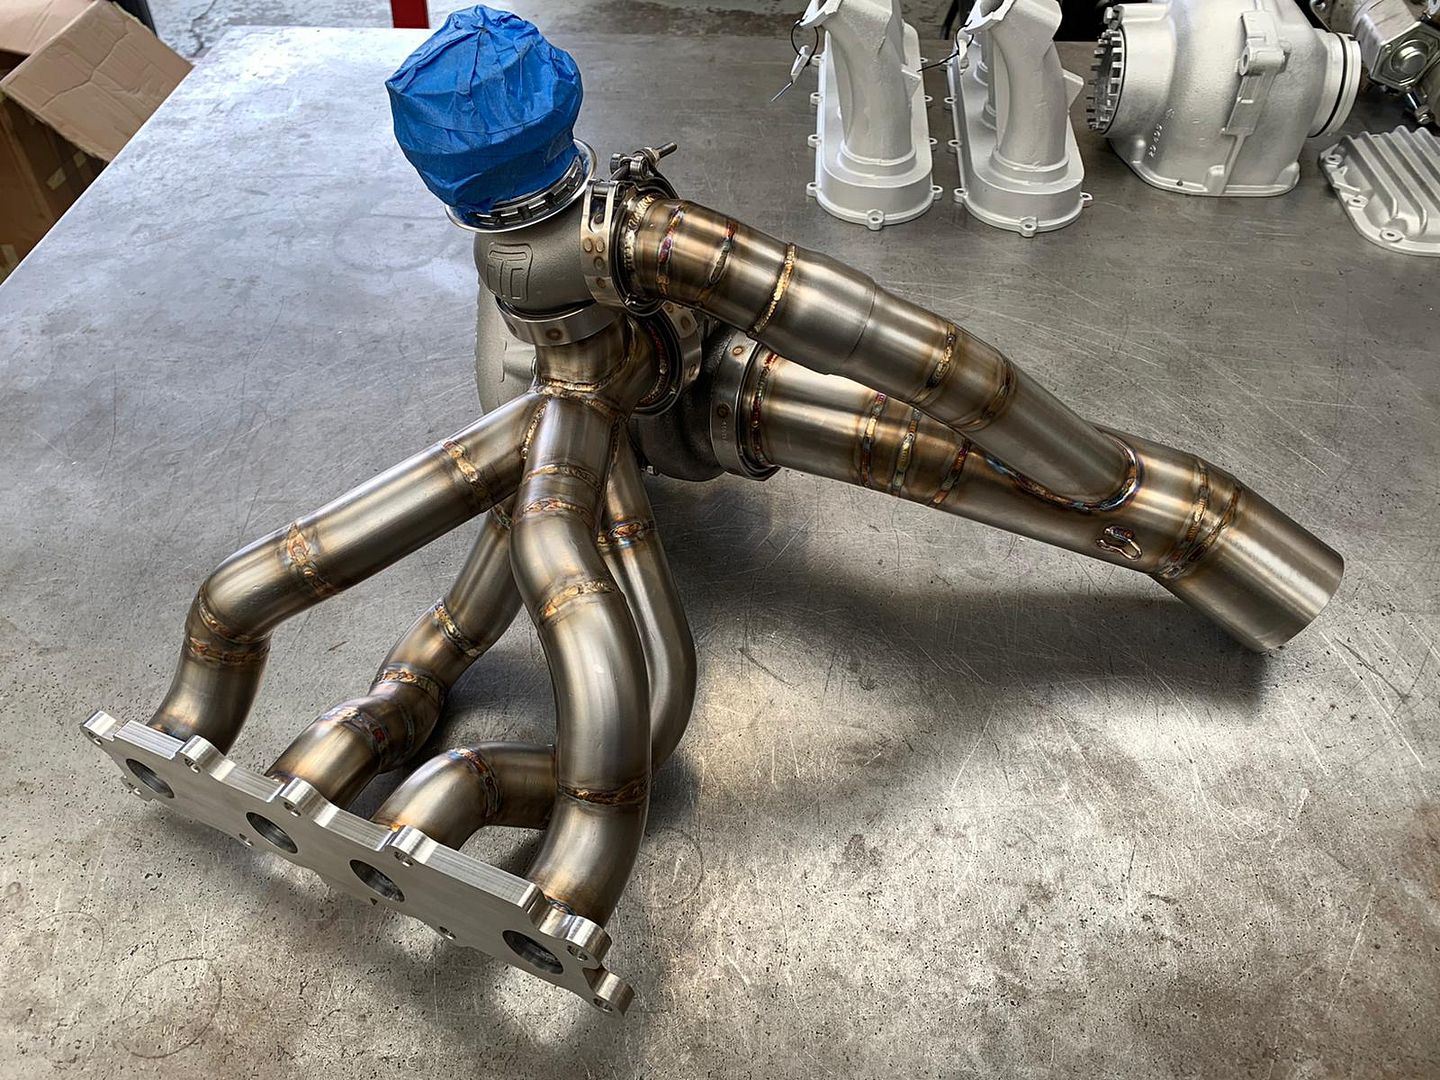
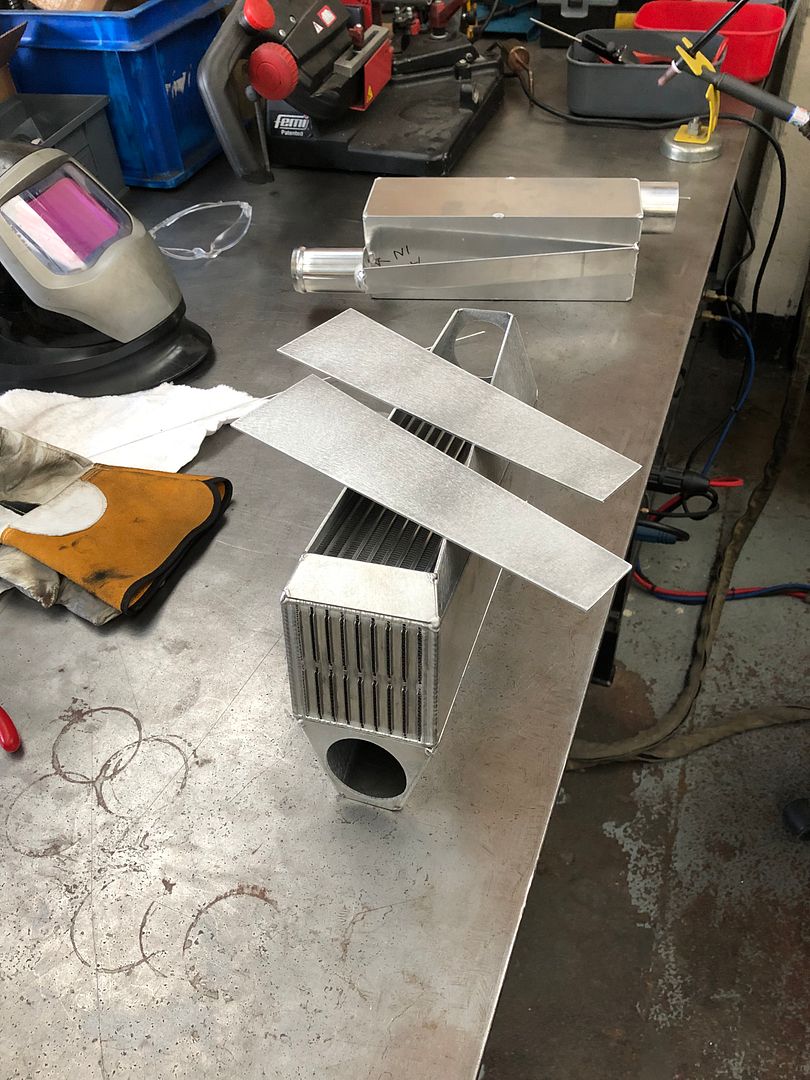
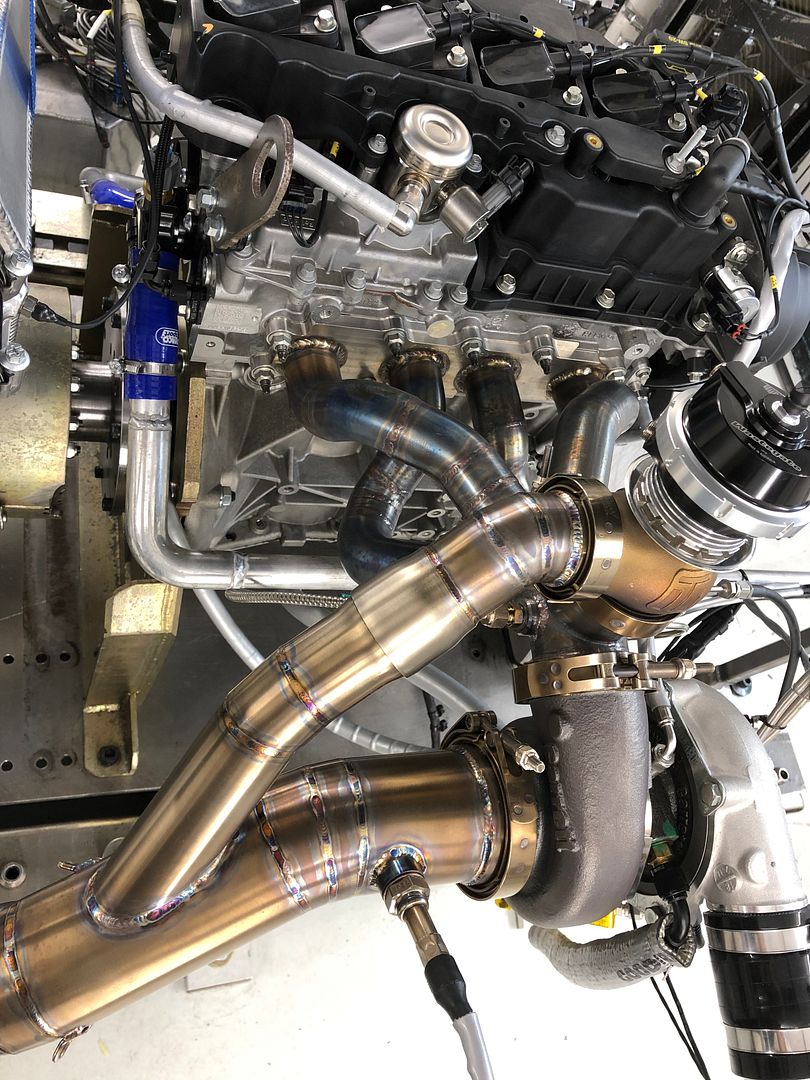
Next was to get an exhaust manifold, chargecooler and boost pipes made, so off to Kinzy Fabrications for the next stop.
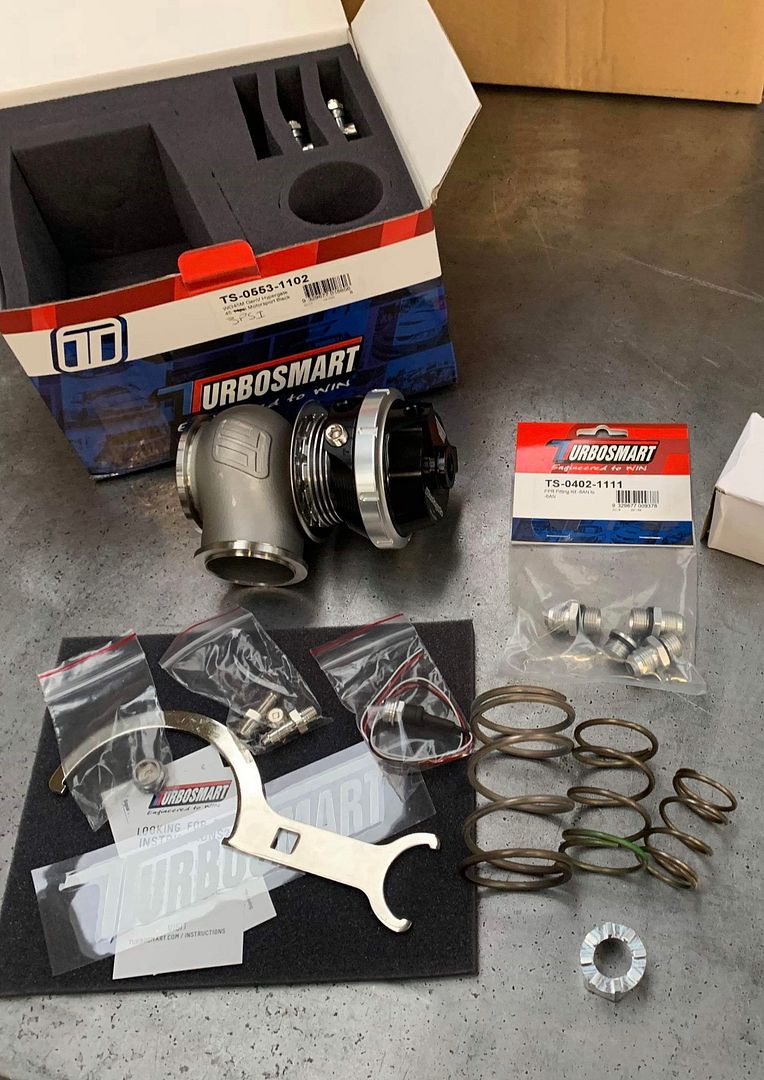
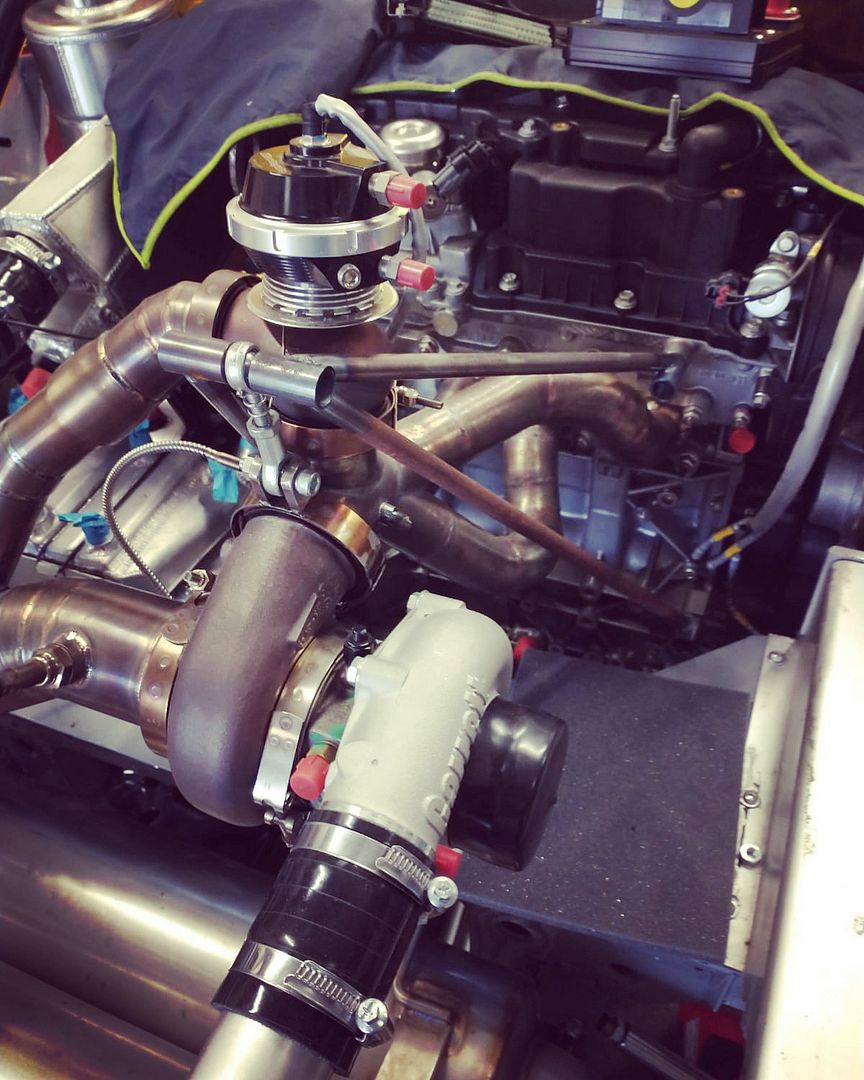
I'd already purchased a Garrett G25-550 and a Garrett chargecooler core and my good friends at Turbosmart had me covered for a wastegate (with position sensor) and a few other bits.
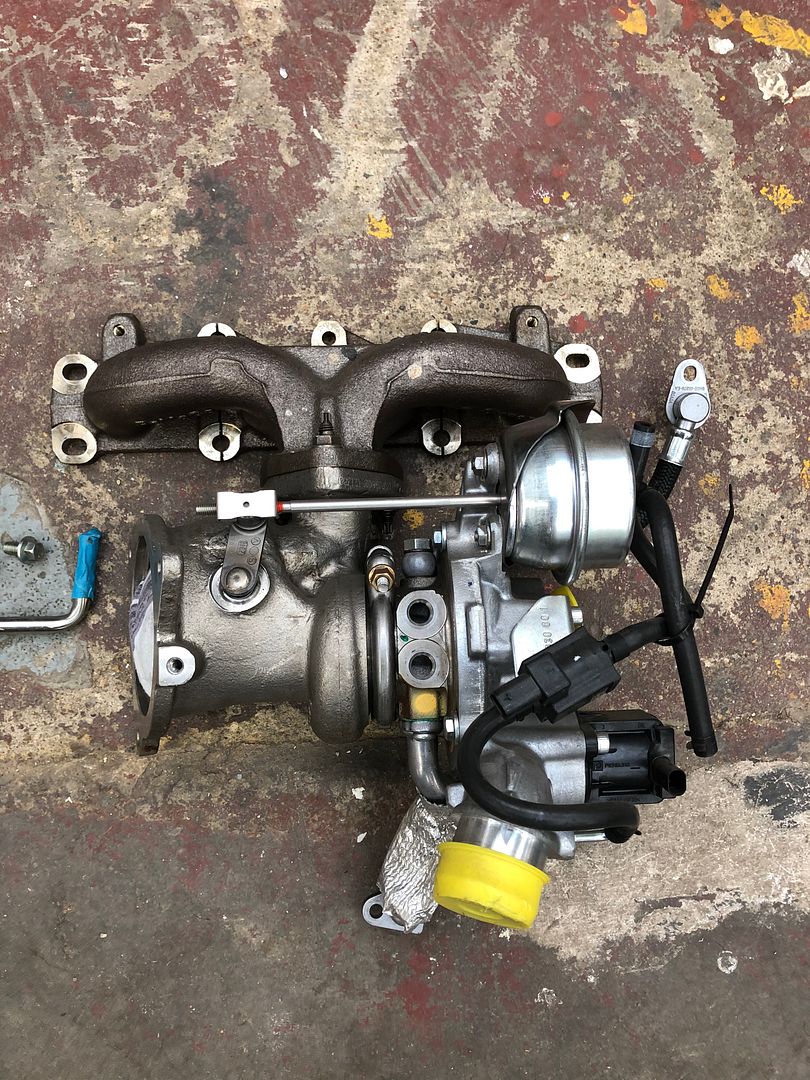
Off came the standard manifold and turbo:
Nobody was selling an exhaust flange for the 1.6 Ecoboost at this point so a quick bit of CAD and a laser cut acrylic template was test fitted before we made the real one
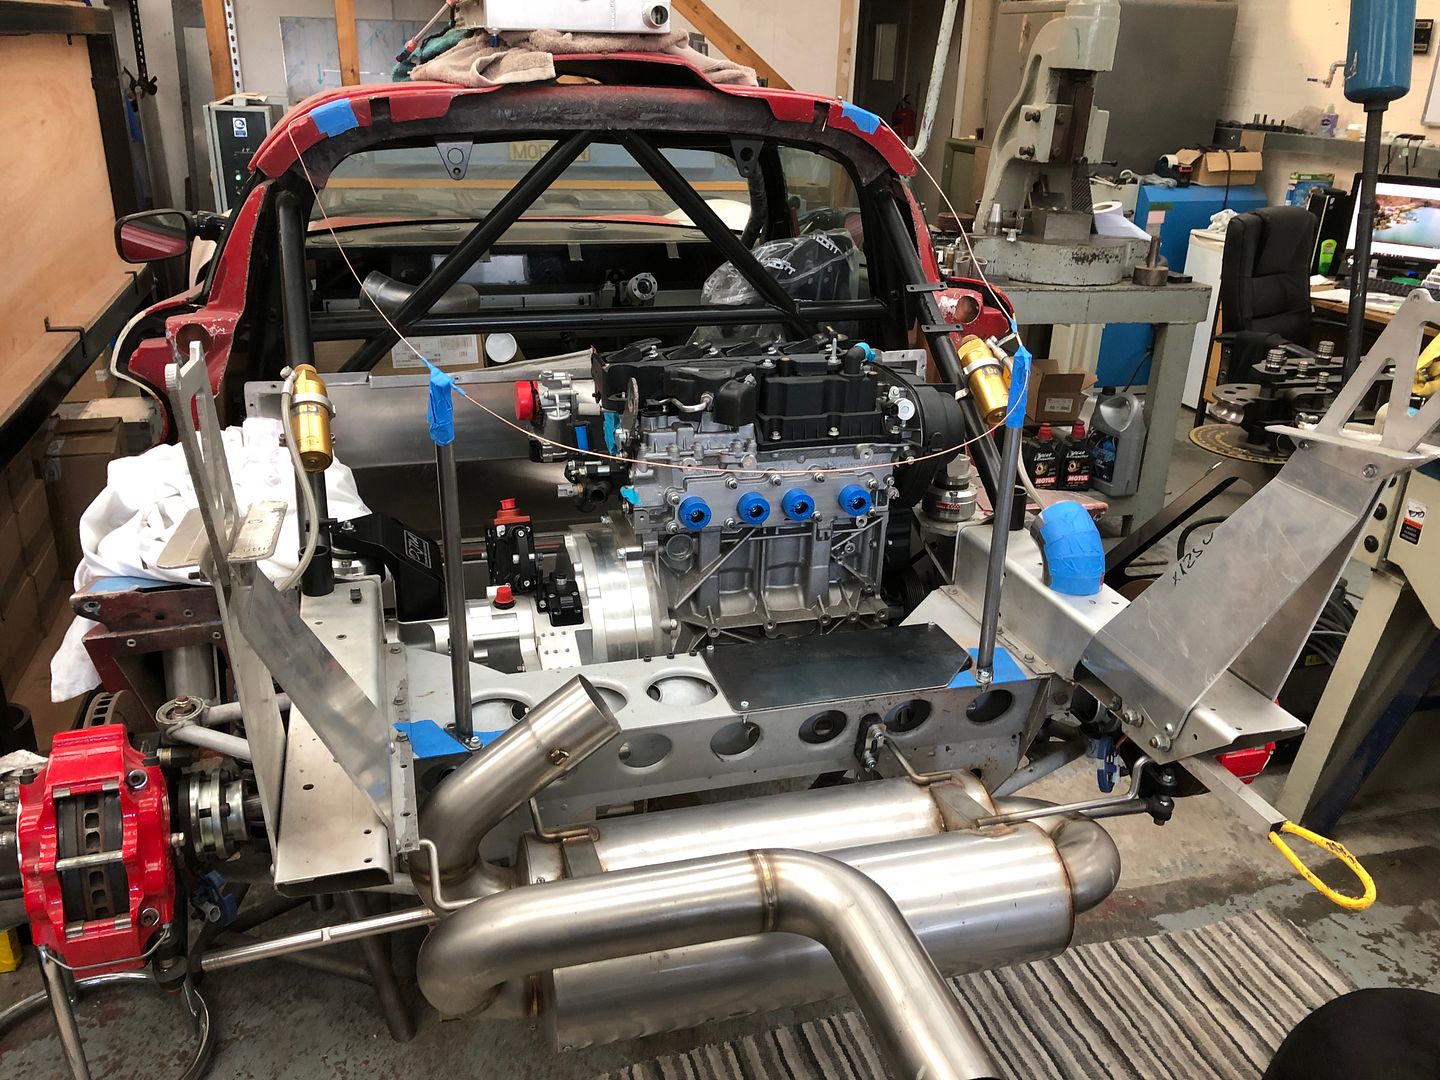
The exhaust silencers section I actually inherited when I bought the car and whilst we had talked about making changes, I decided it would probably be easier to just use it as was. With some new mounting rubbers we got it fitted up and made a welding wire frame of the clamshell aperture to keep perspective on space:
I'd already been quite specific about how I wanted the manifold collector and wastegate take off so Marc made a start on that:
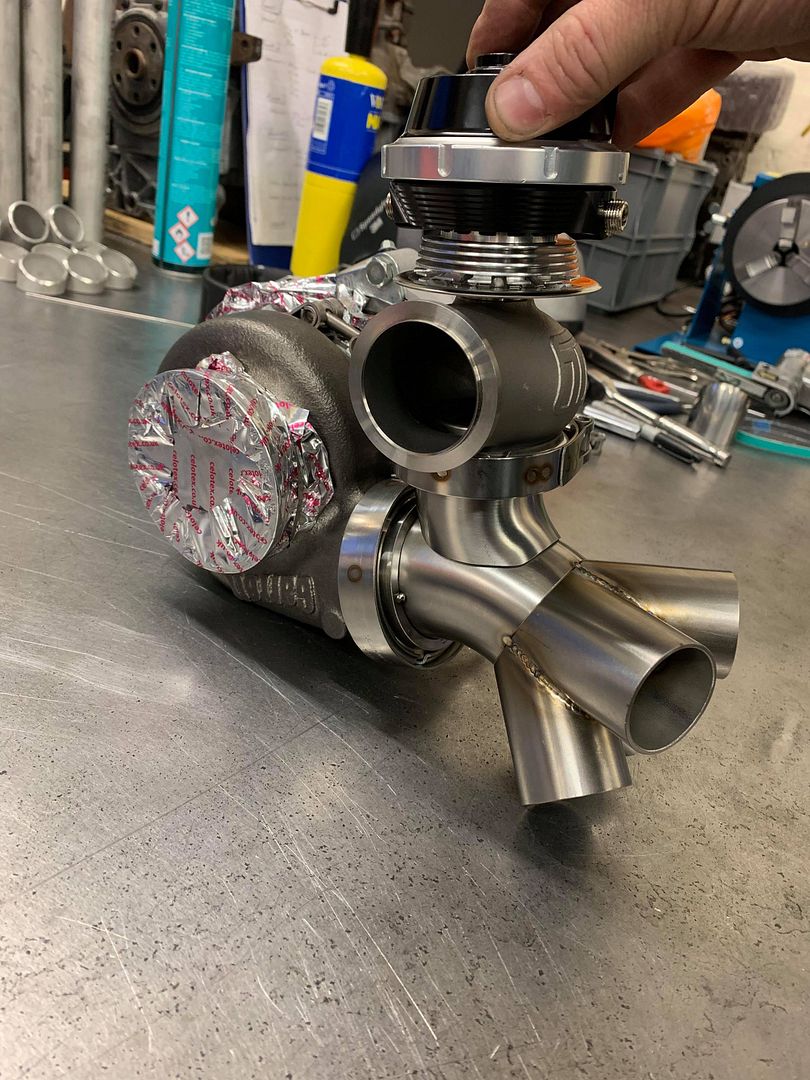
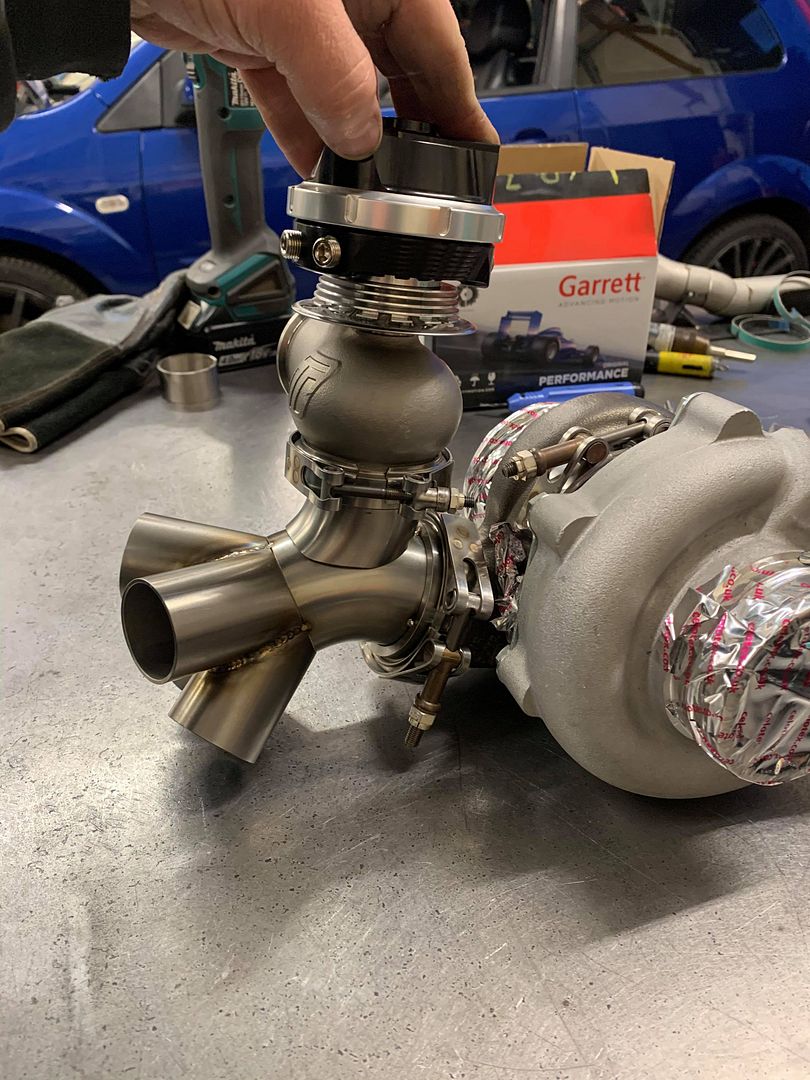
Some quick brackets later, we had the turbo where we wanted it:
Then it was on with the click together blue bends to determine the equal length primaries:
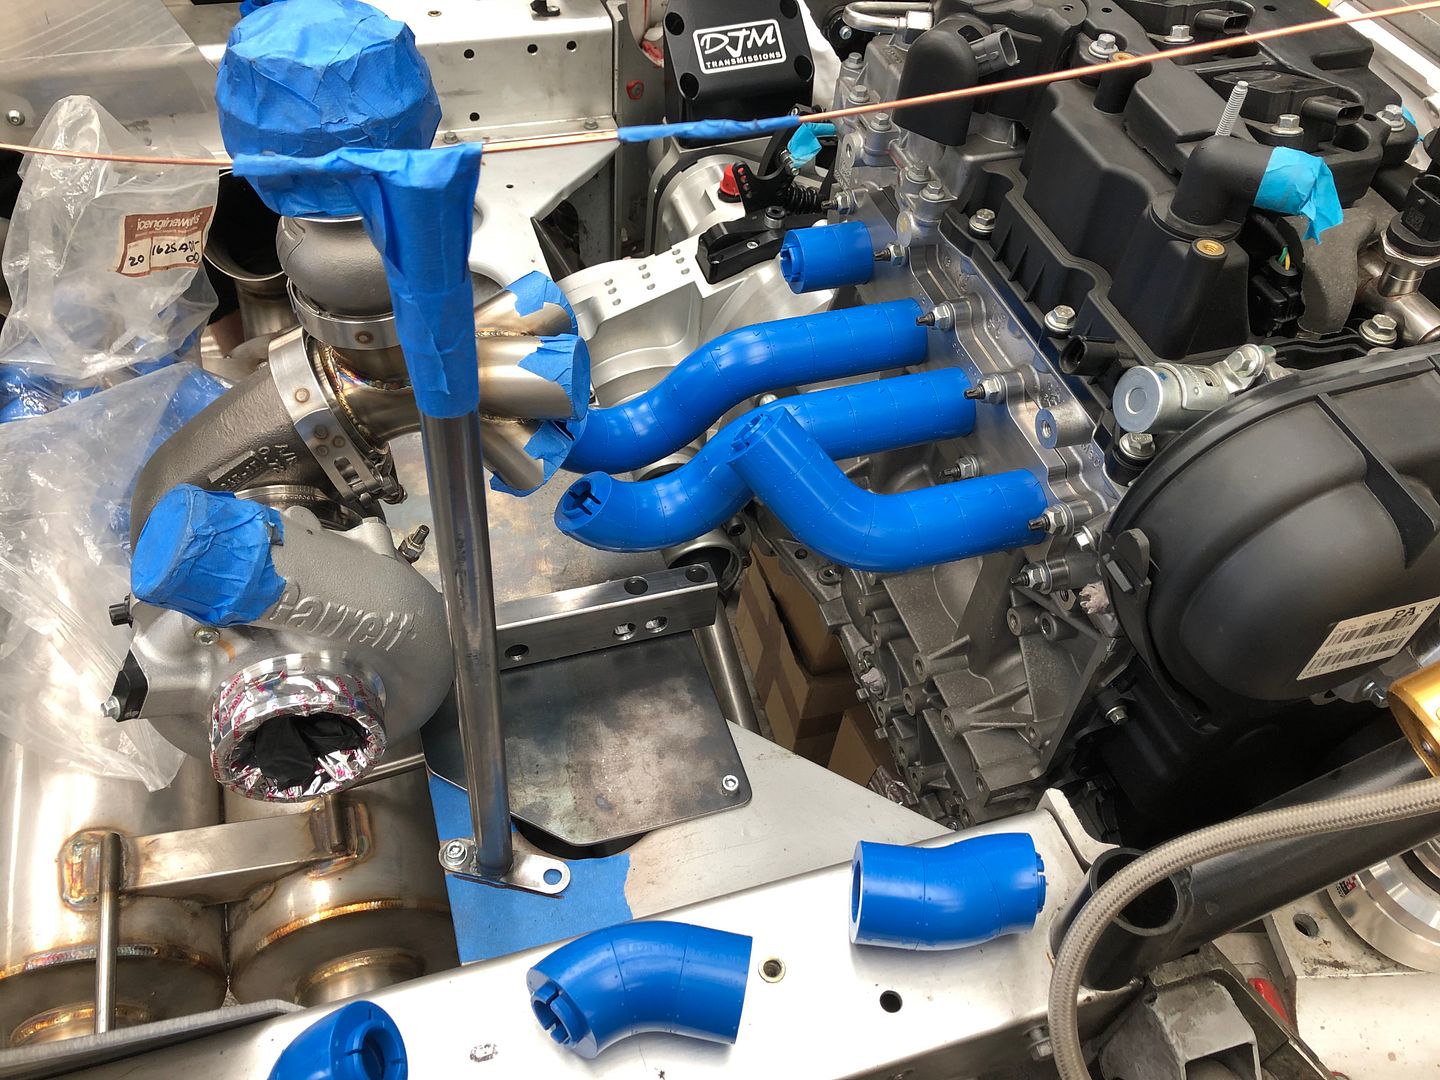
Which slowly morphed from blue plastic into 321 stainless:
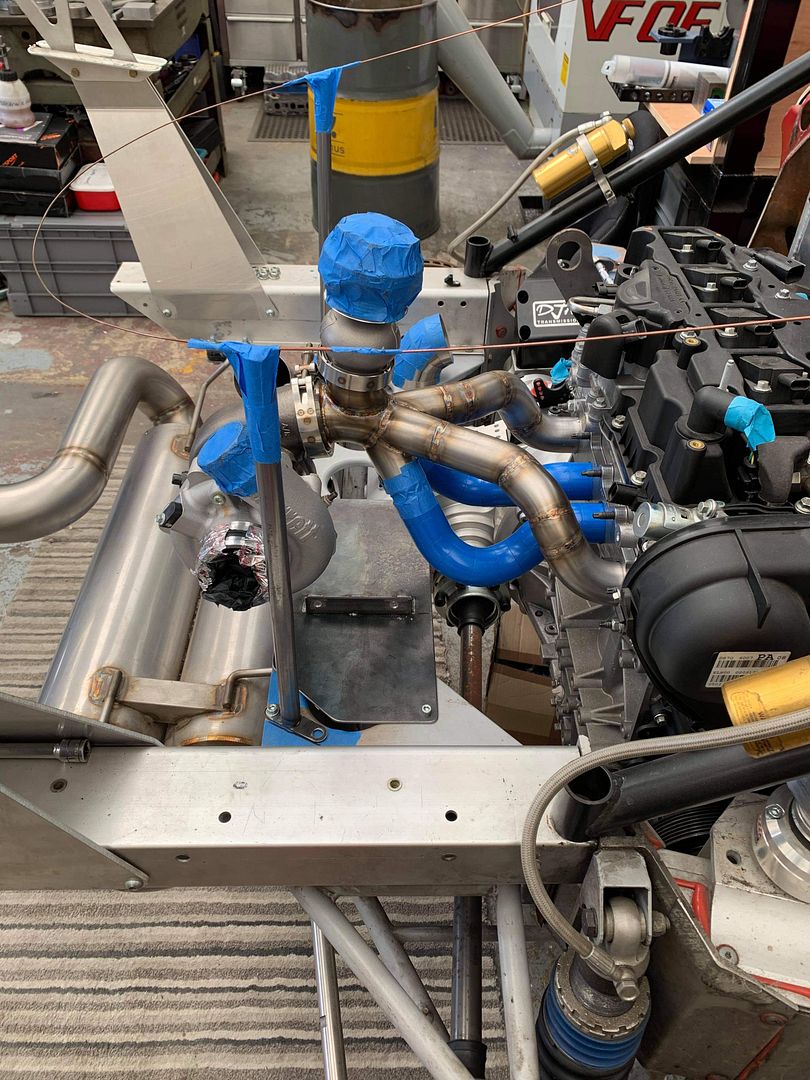
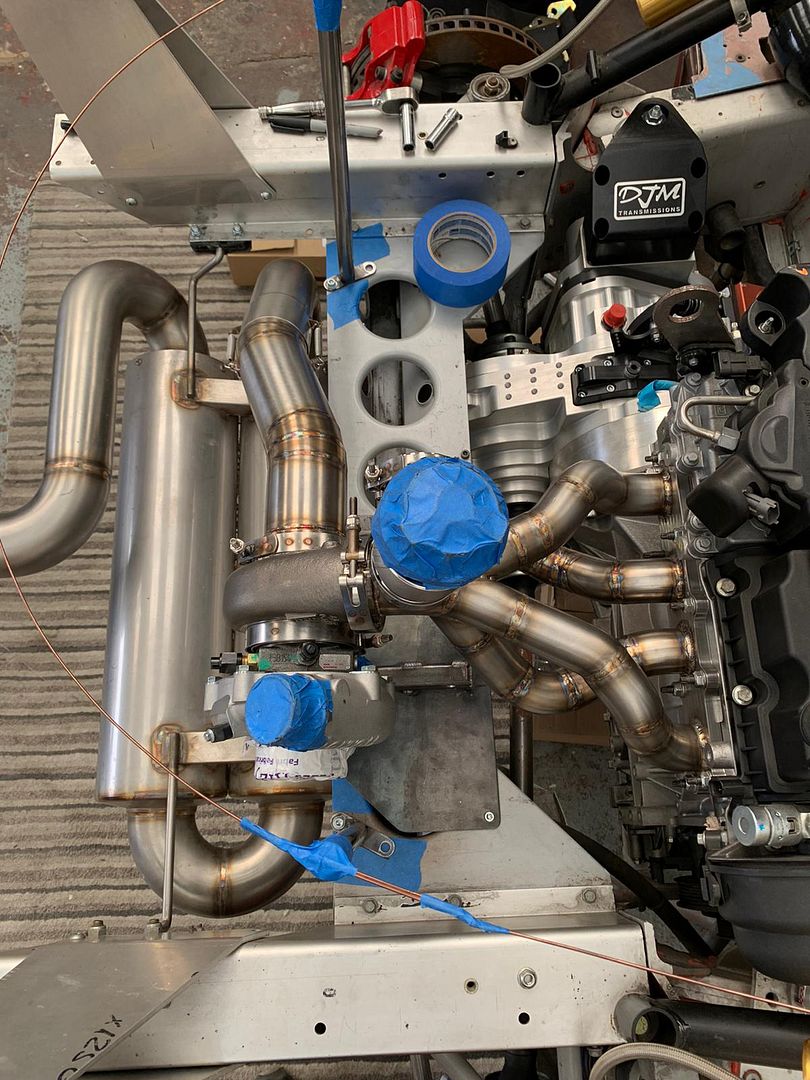
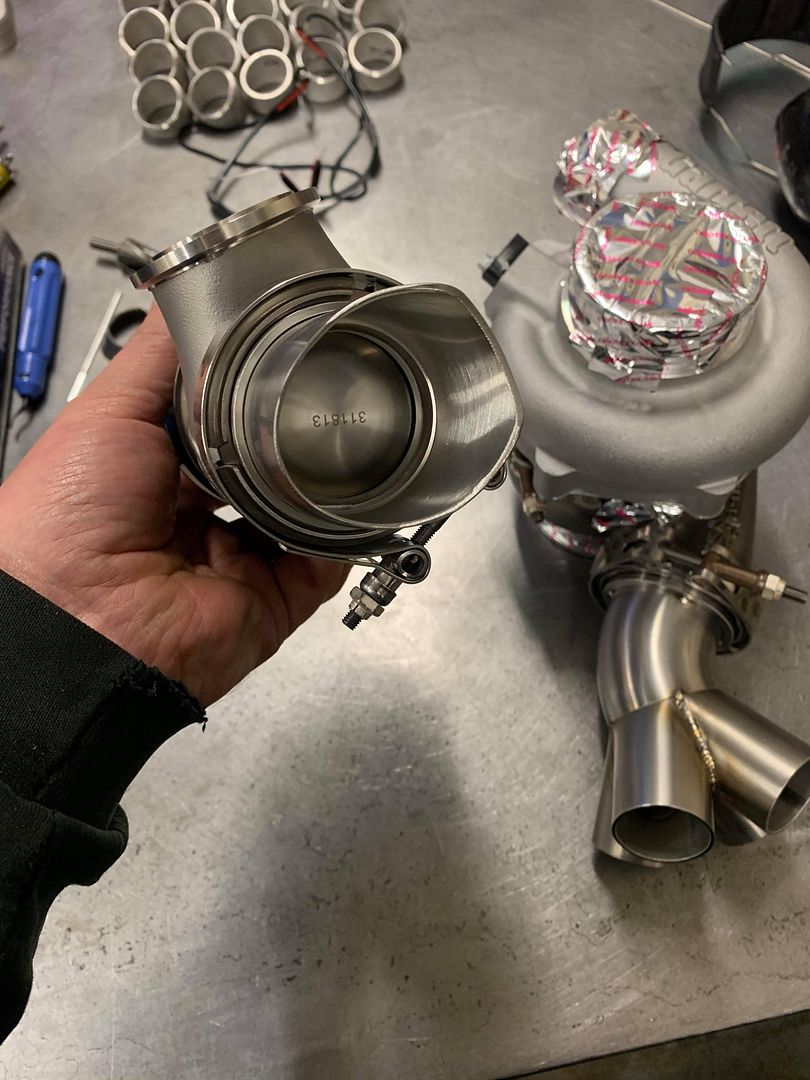
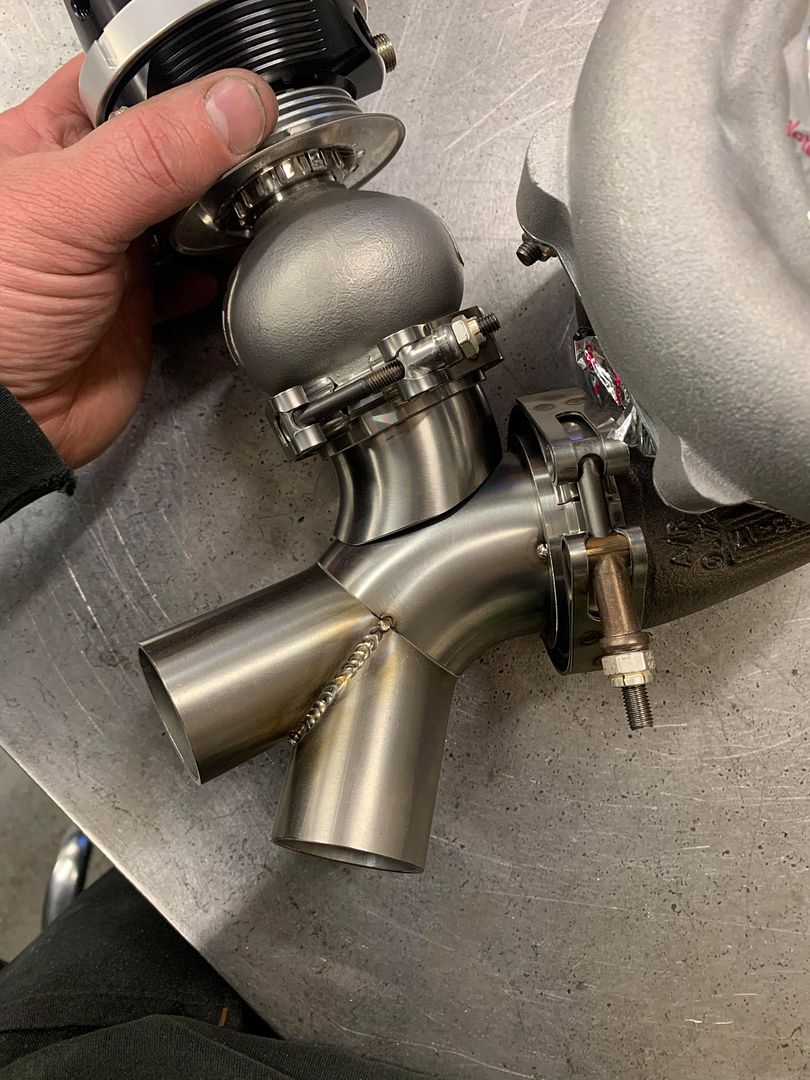
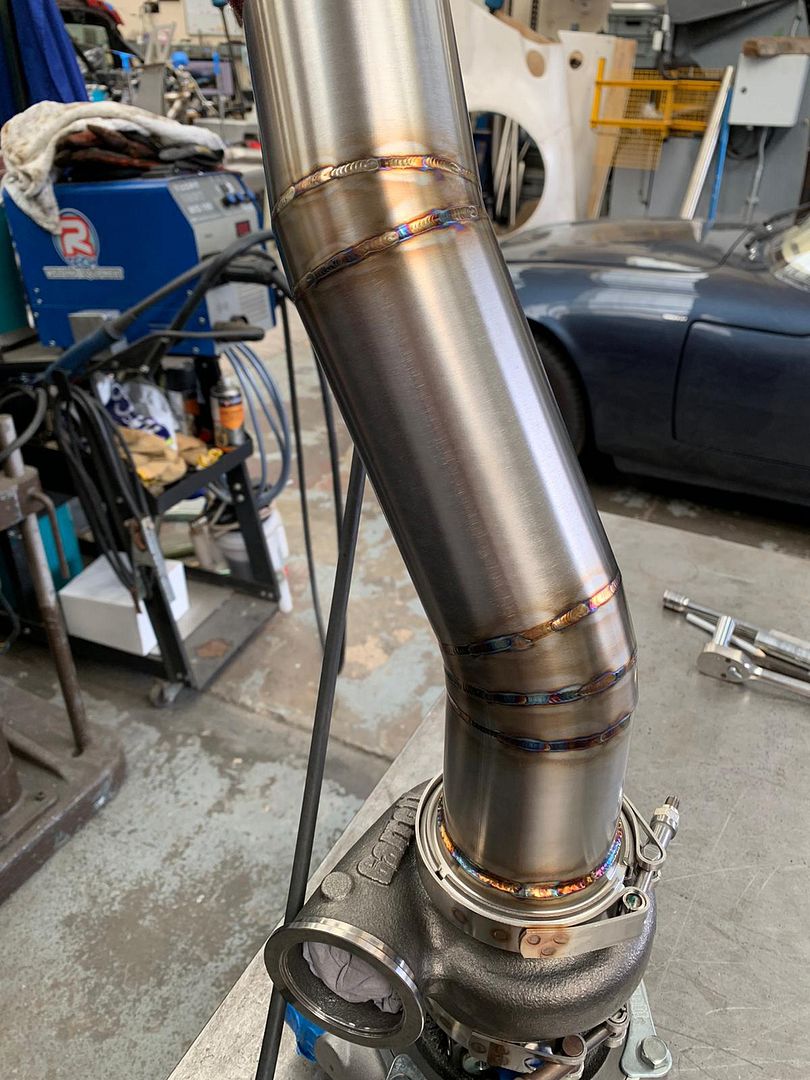
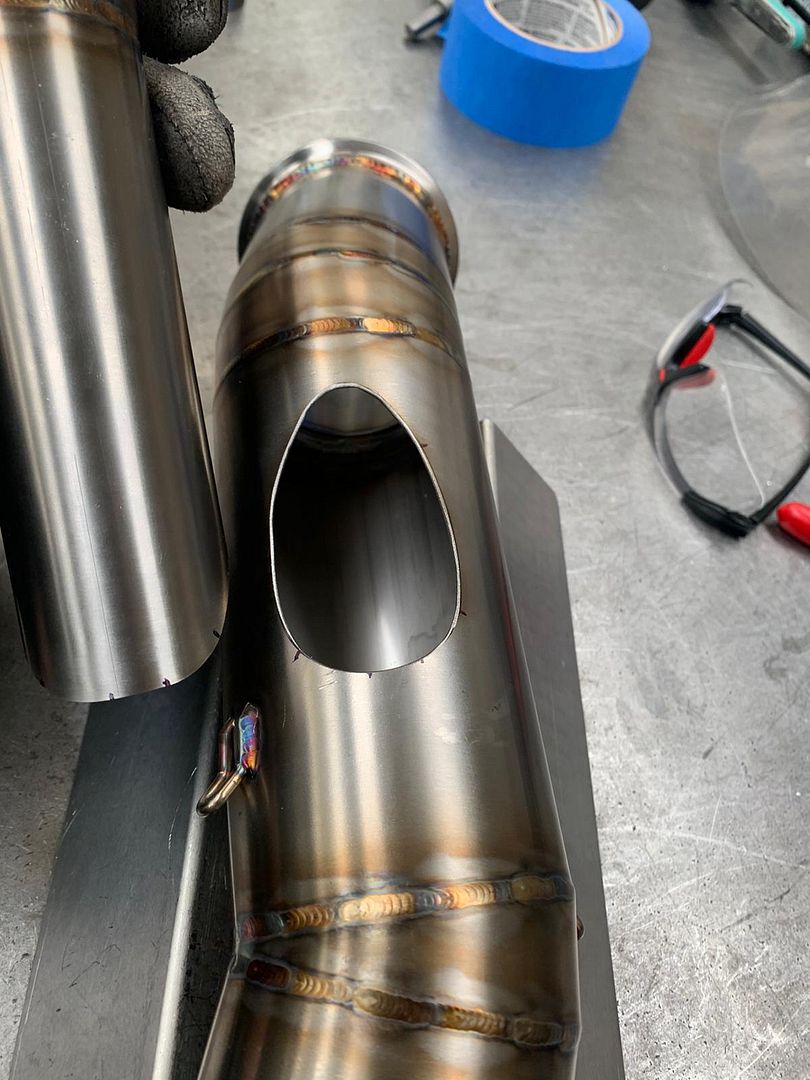
Then it was time for the downpipe:
And the wastegate re-circulation - as I want to be able to do UK track days!
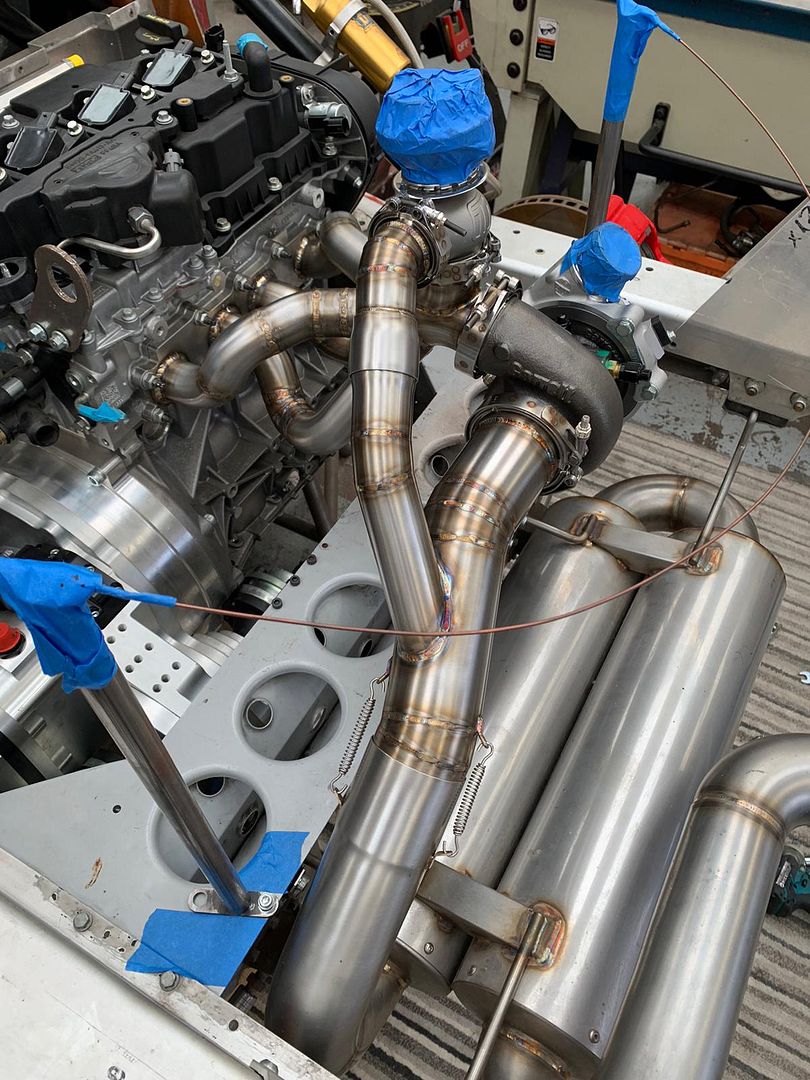
End result:
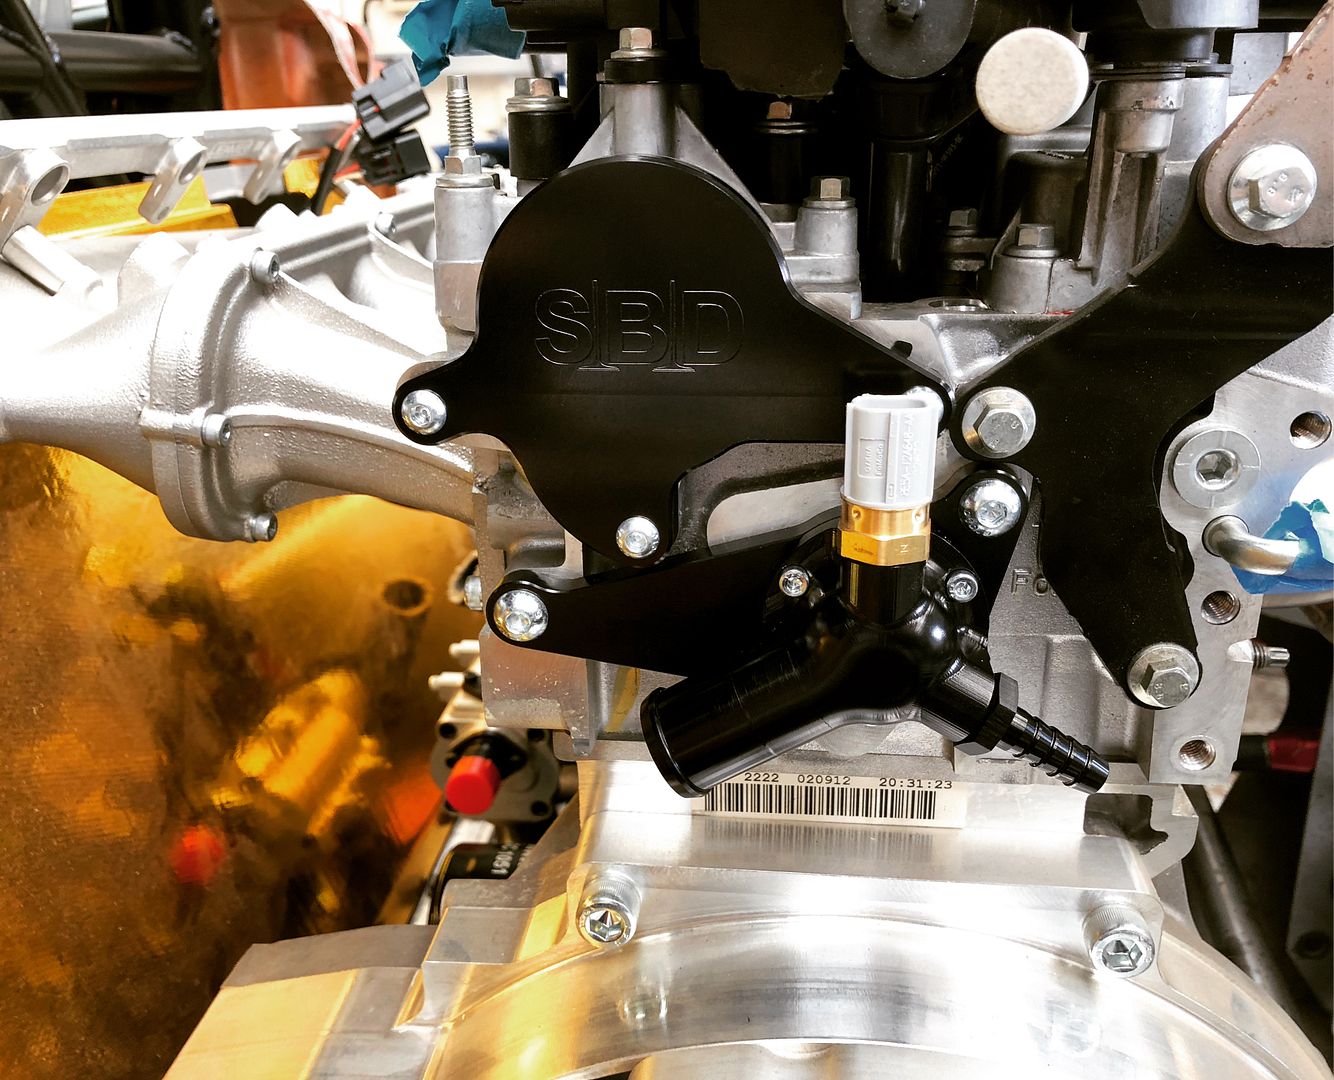
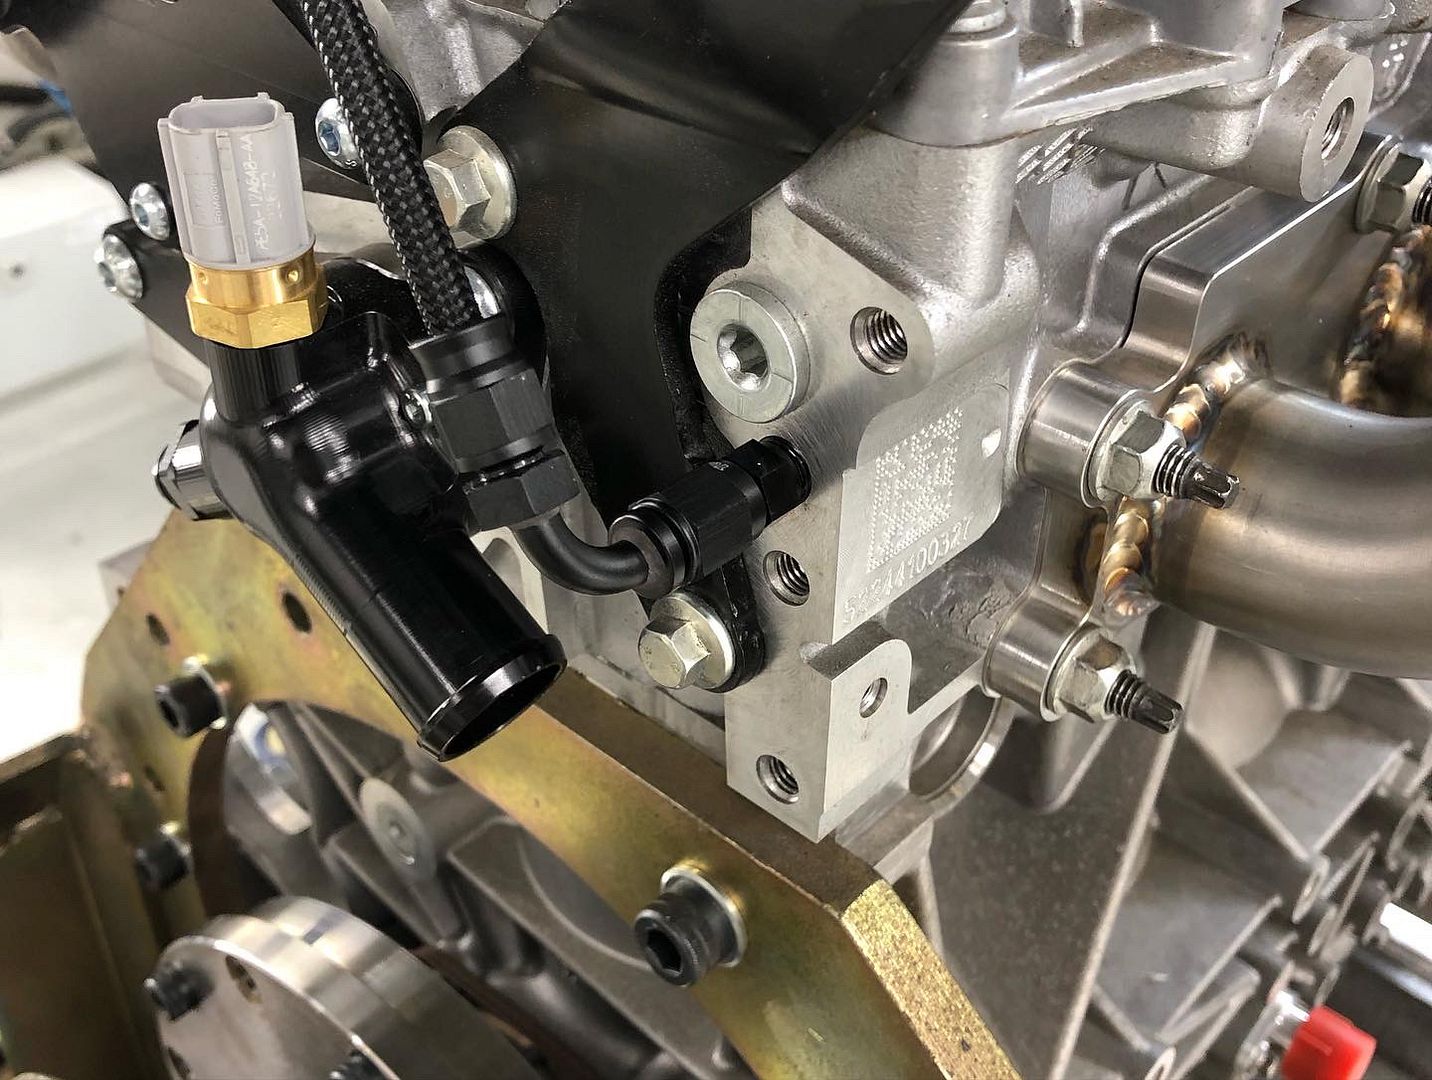
In and amongst, SBD Motorsport had already designed solutions to some of the bits I needed. Brake servo pump delete and water outlet fitting were ordered up and fitted:
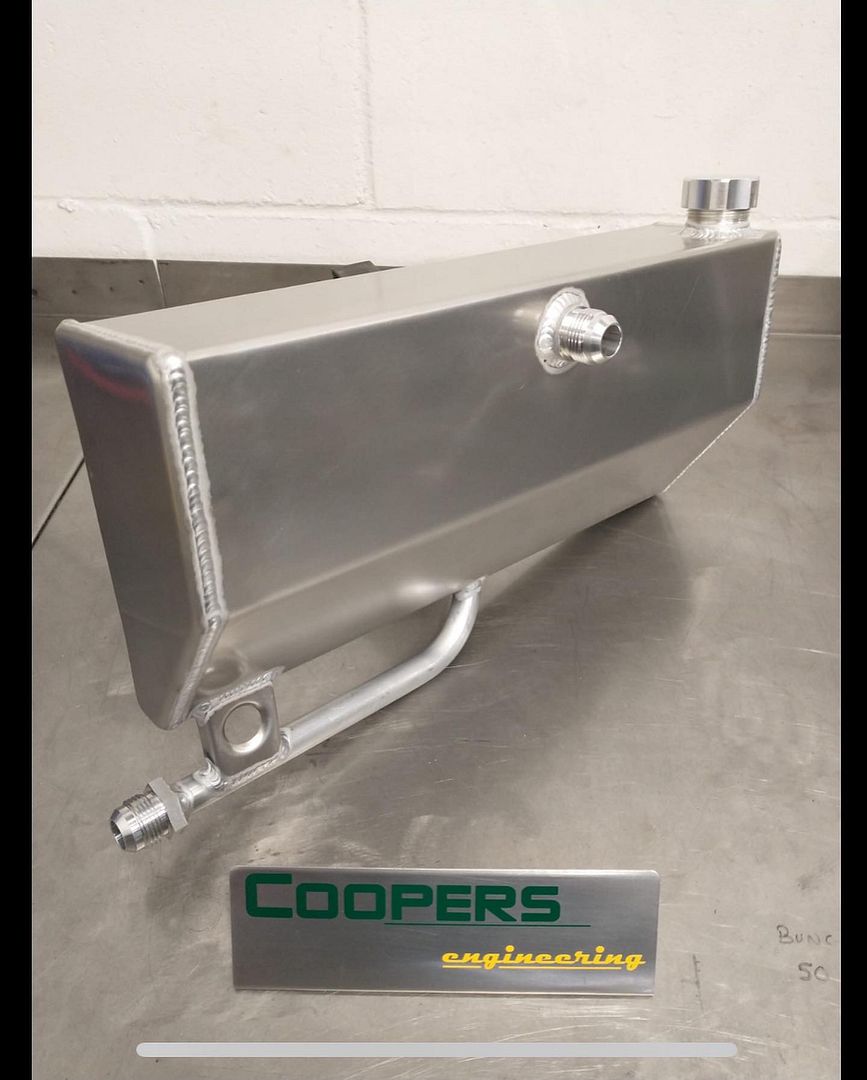
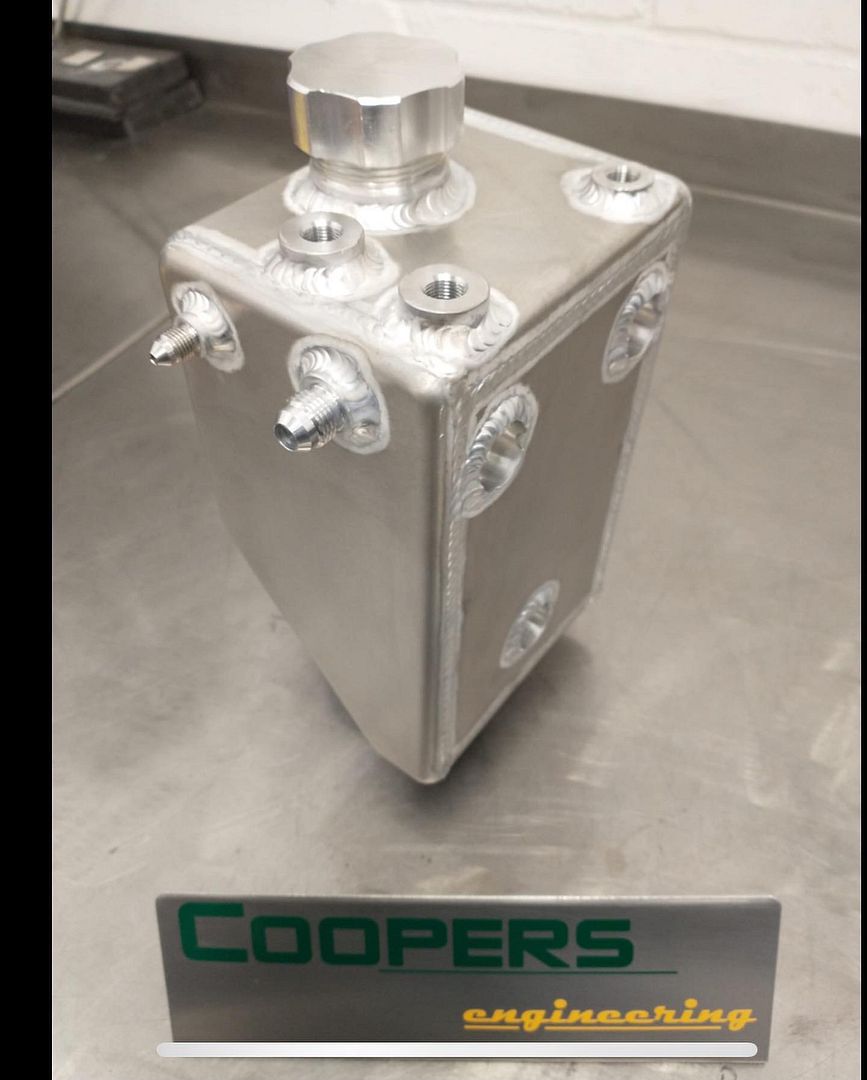
I'd been talking to Murray at Green On Engineering about a new dry sump tank and after some idea swapping, this showed up:
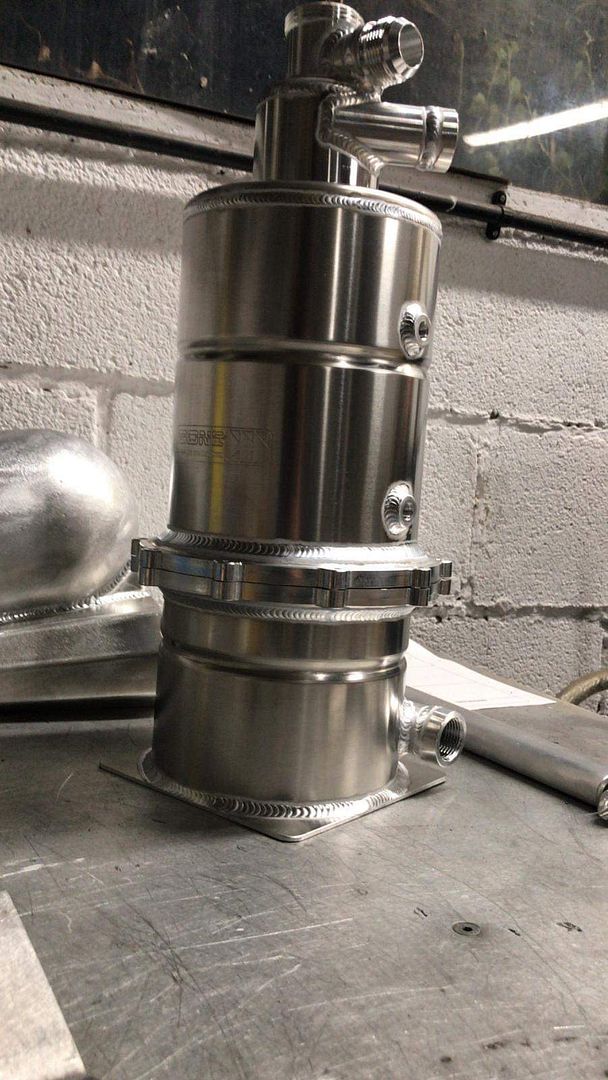
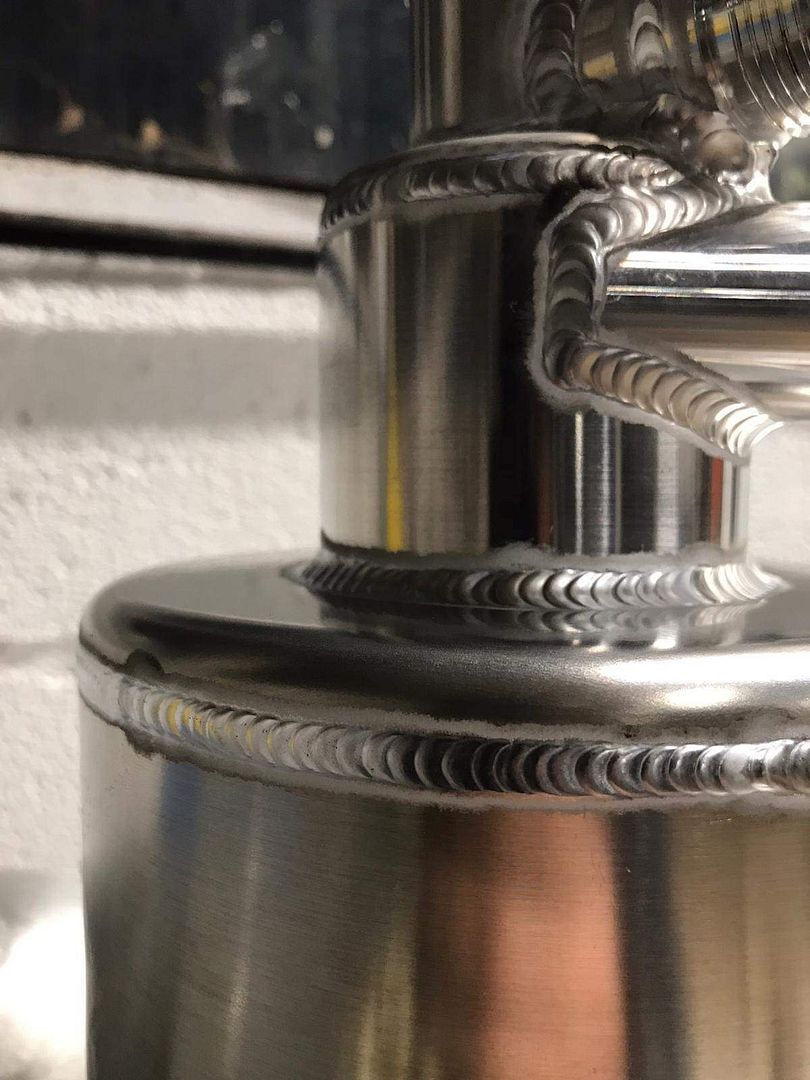
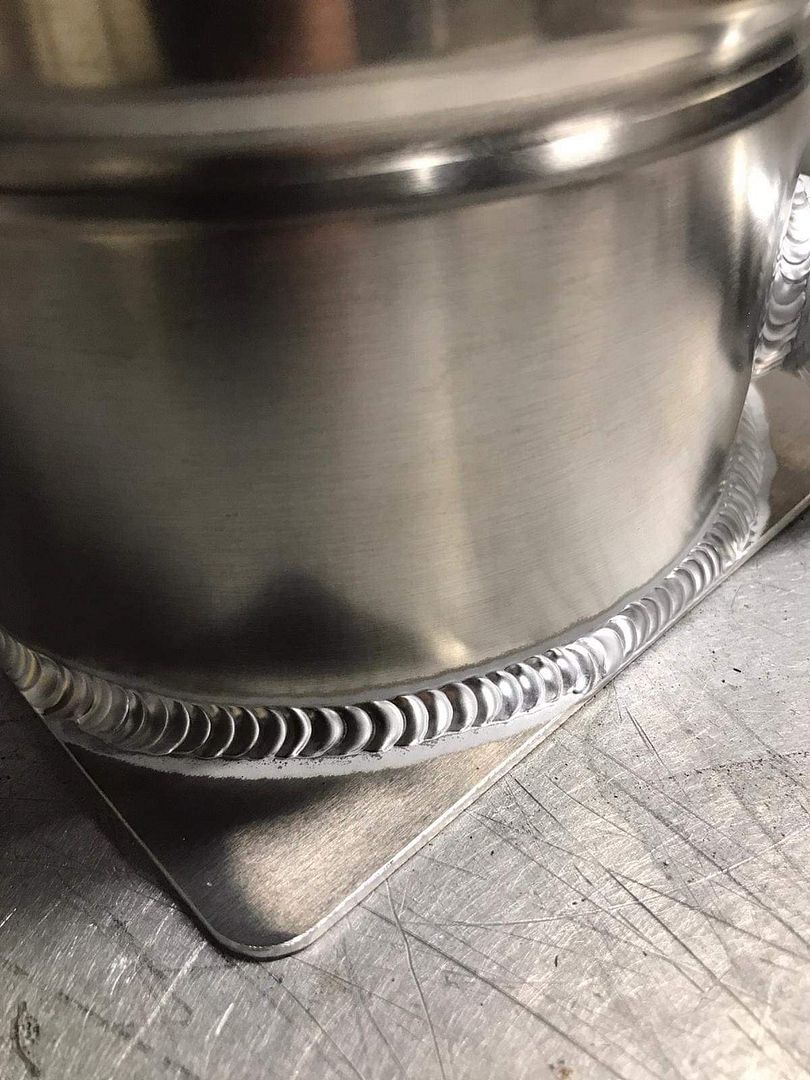
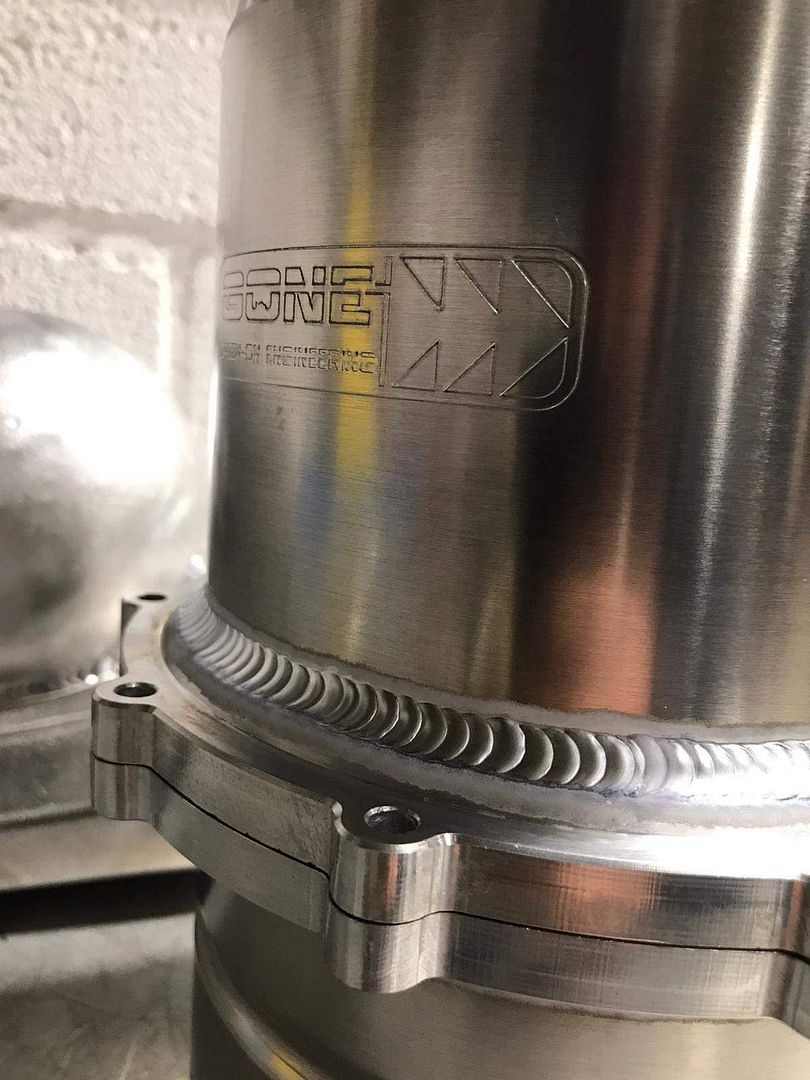
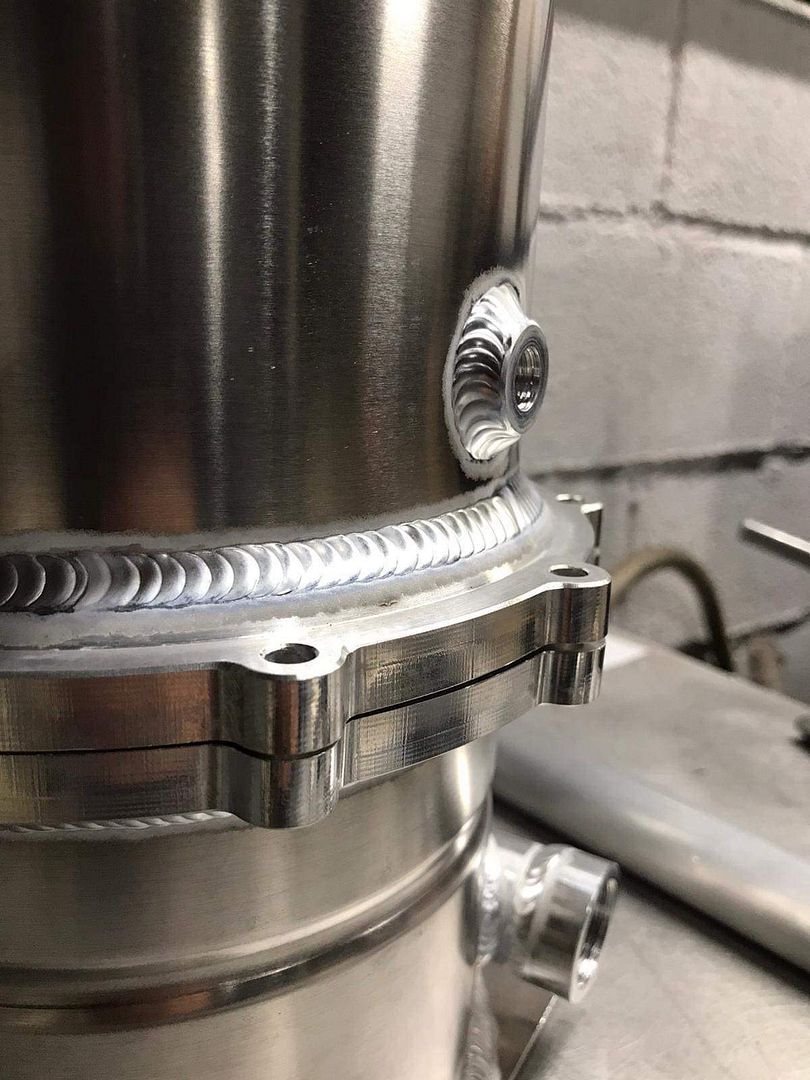
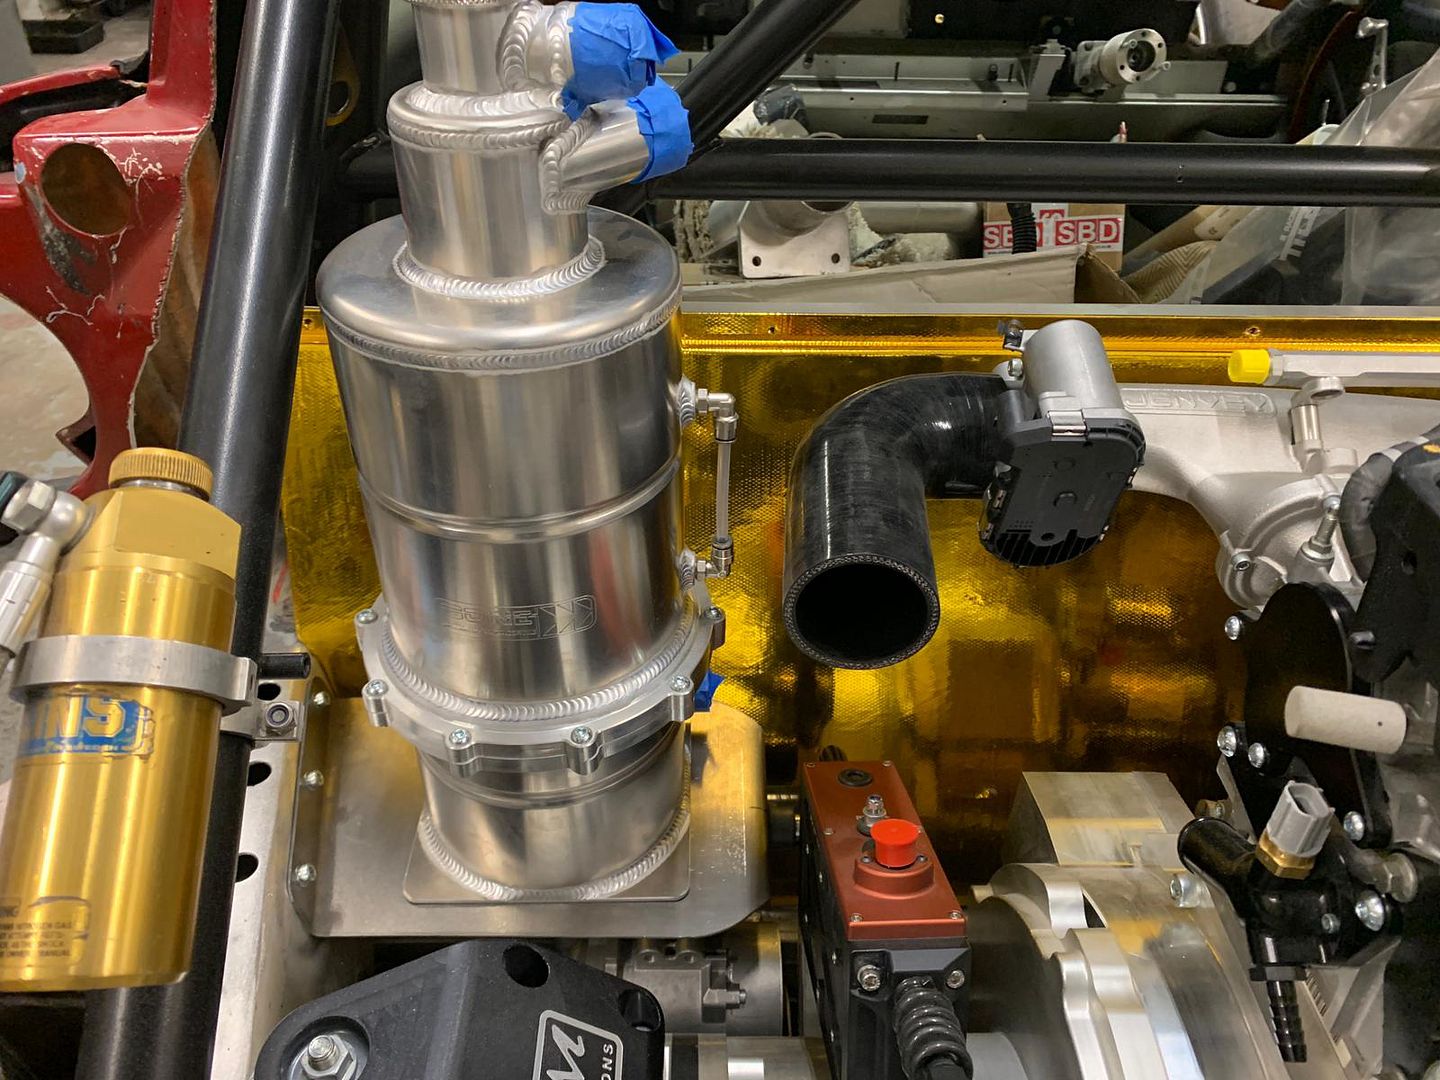
Very pleased with the finished product and quickly gave it somewhere to sit
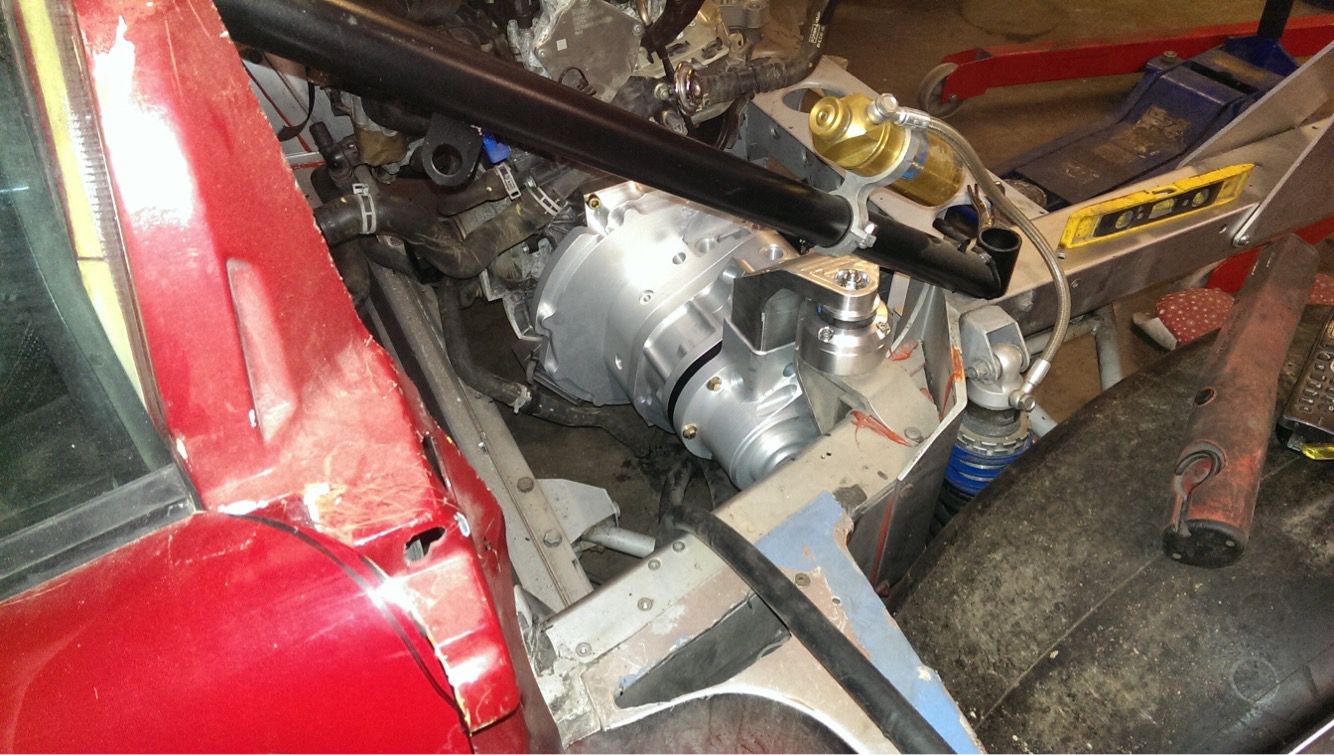
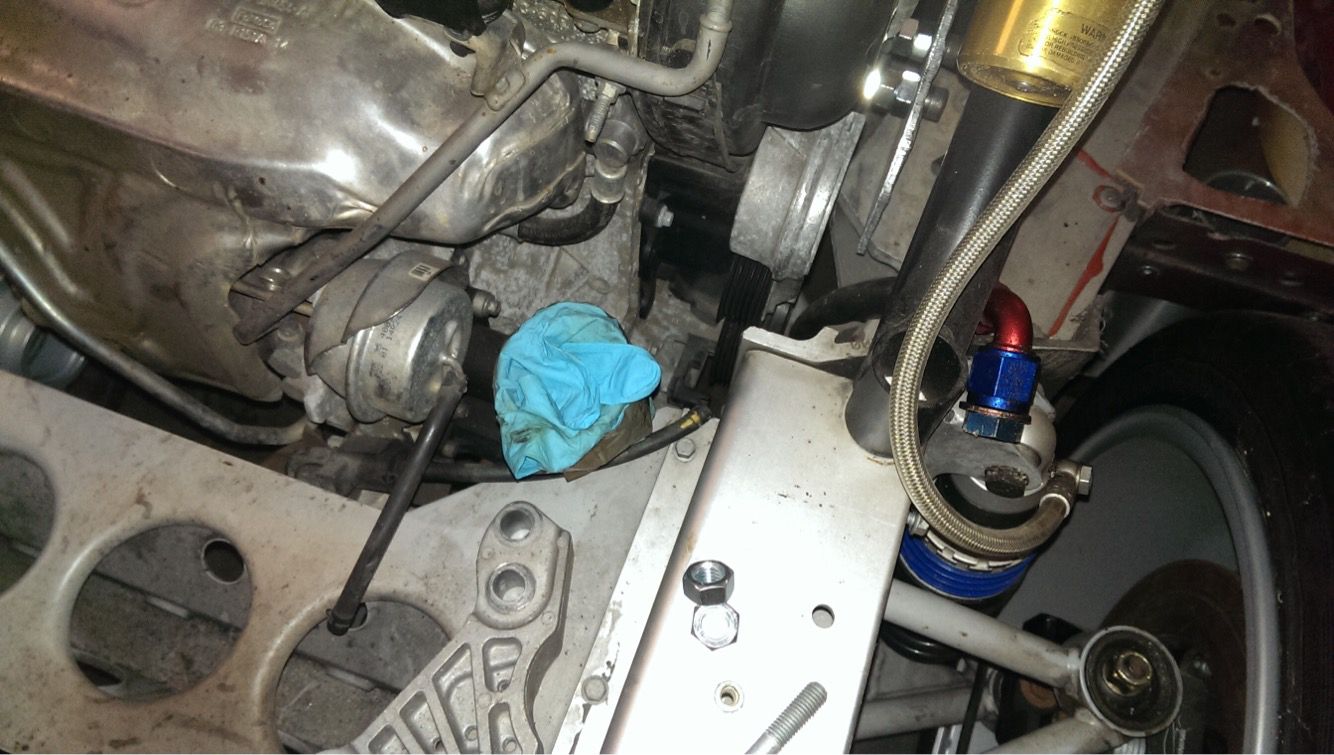
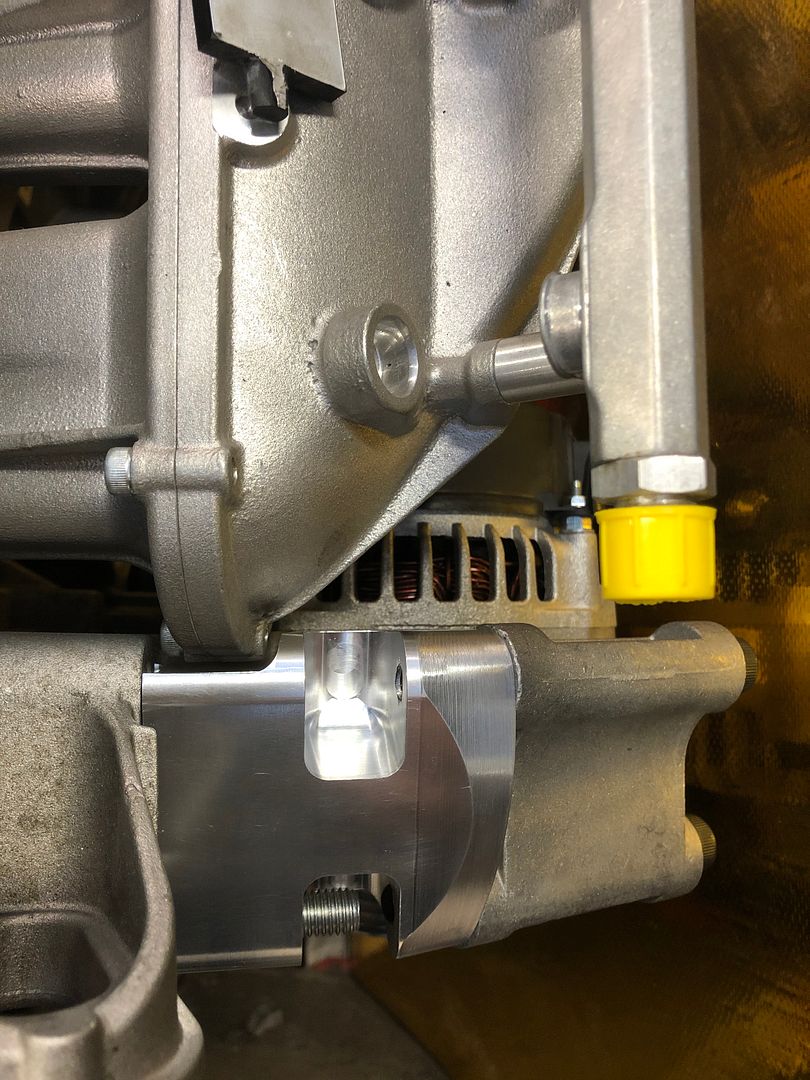
The next issue that needed addressing was the alternator clashing with the Jenvey inlet manifold. I had specifically chosen a high output 125 amp version of the Fiesta Zetec S unit to ensure that with heated windscreens, electric water pumps, chargecooler pumps, GDI systems etc. there was no risk of running out of juice when all the extra bits like lights, fans, wipers etc. come on. Unfortunately it was a hard clash in a few places...
So... A CAD model of the engine, plenum and alternator later... A test spacer to make sure the alternator would clear in the proposed position:
Testing...
With confirmation of a clash free position, it was time for an elaborate bracket!
Some swarf later:
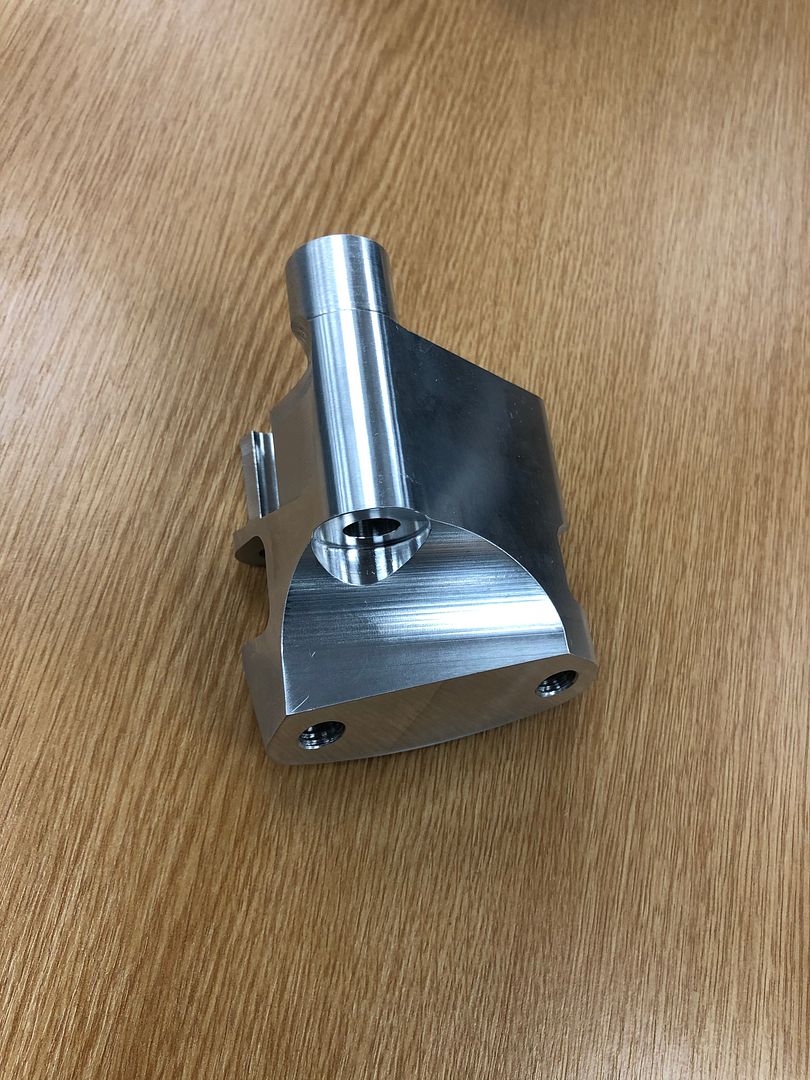
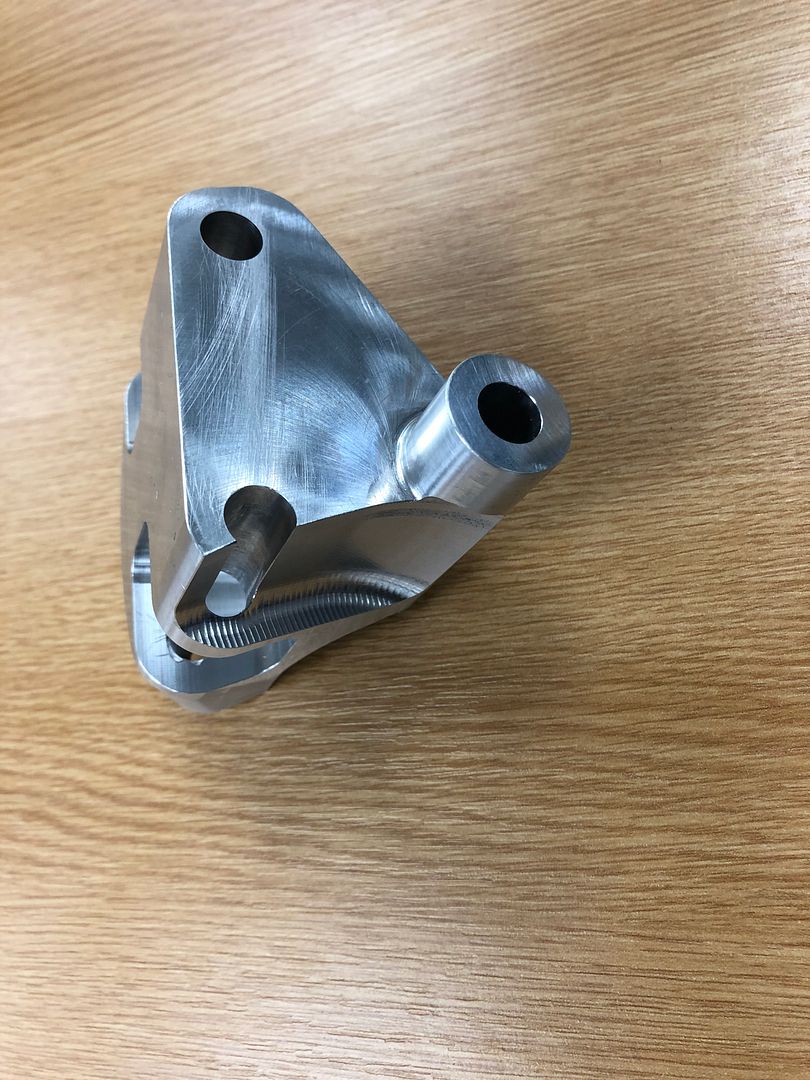
Et voila:
The only problem now is the electrical connections on the alternator were a little close to the bulkhead.
Time to strip the alternator!
The main power cable connected to an extension piece which was removed to allow a cable connection directly and the 3 pin plug connection was ground down on a sanding belt until flush with the pins inside. Then it was time to twist up a flying lead and solder to the 3 pins:

BK110 expoxy resin potted - i'll put a Raychem moulded boot over it later on when I know exactly what the cable exit routing will look like:
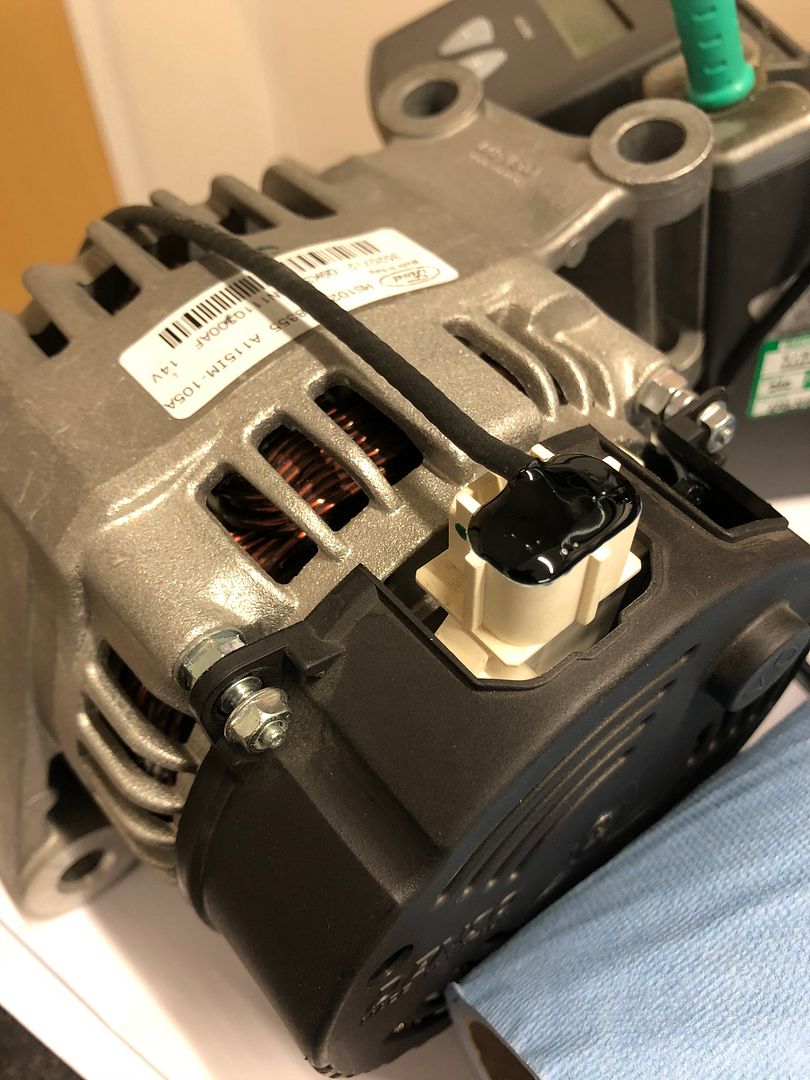
Whilst not a massive change - it's found me about another 30mm of clearance between the alternator and bulkhead - well worth the effort!
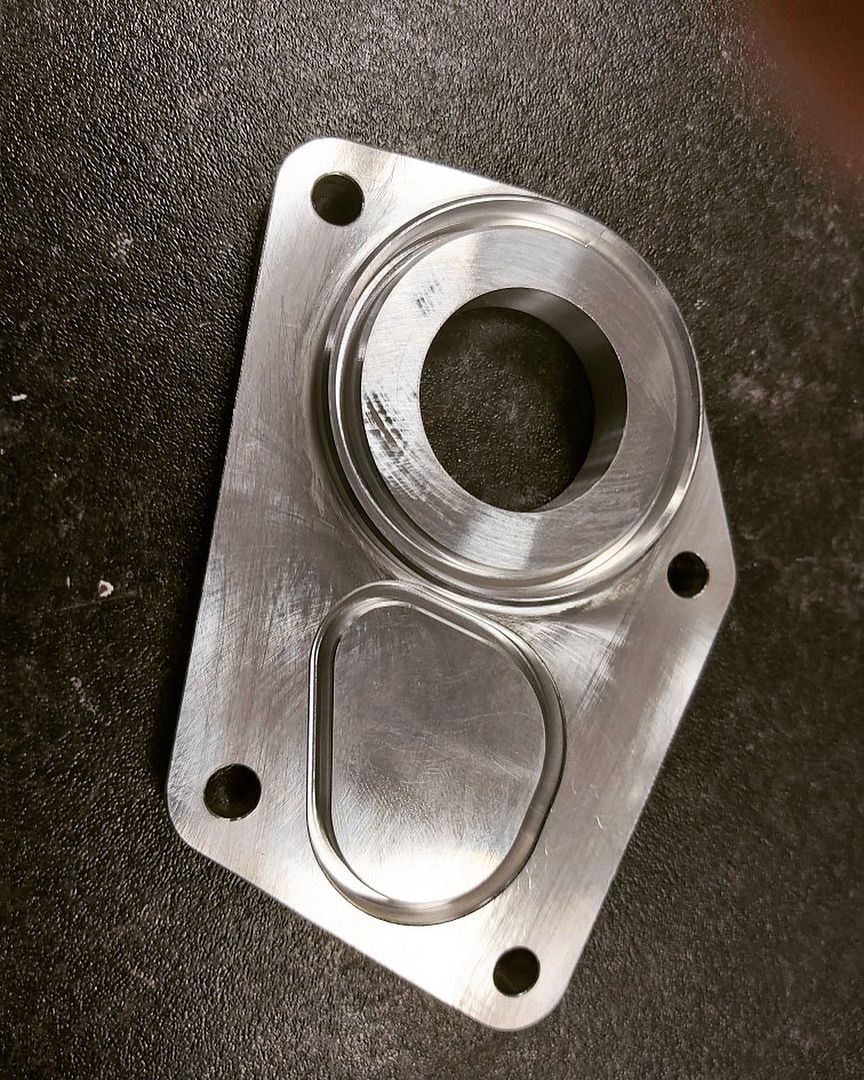
The water inlet to the engine needed to be changed to a fabricated aluminium pipe to connect to the electric water pump, a plate was needed for that and to honour the gasket / seal arrangement from Ford, another CAD exercise resulted in this:


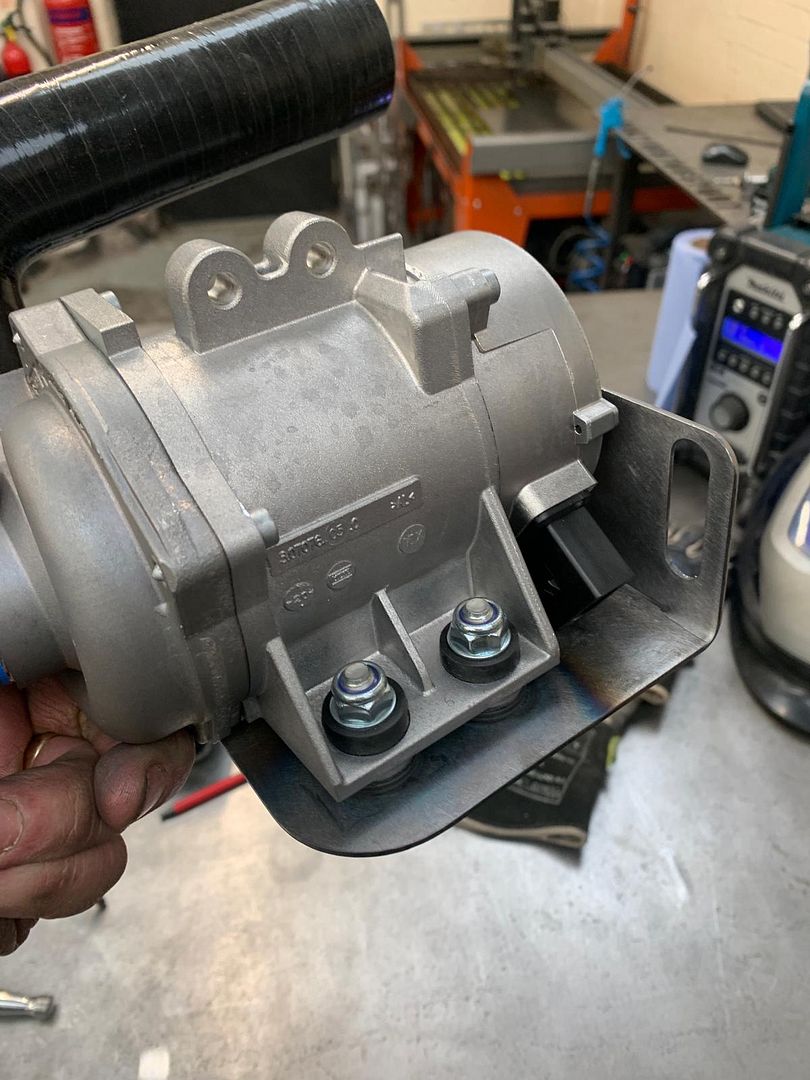
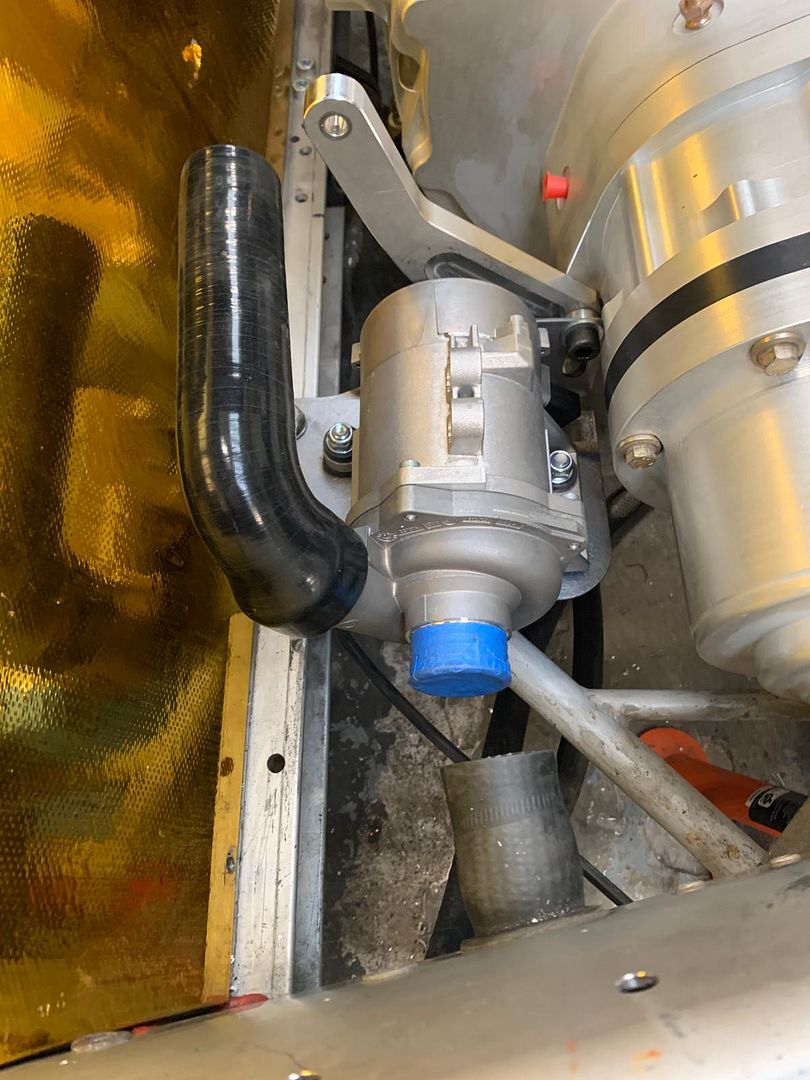
Speaking of electric water pumps, the Pierburg CWA200 got mounted up…

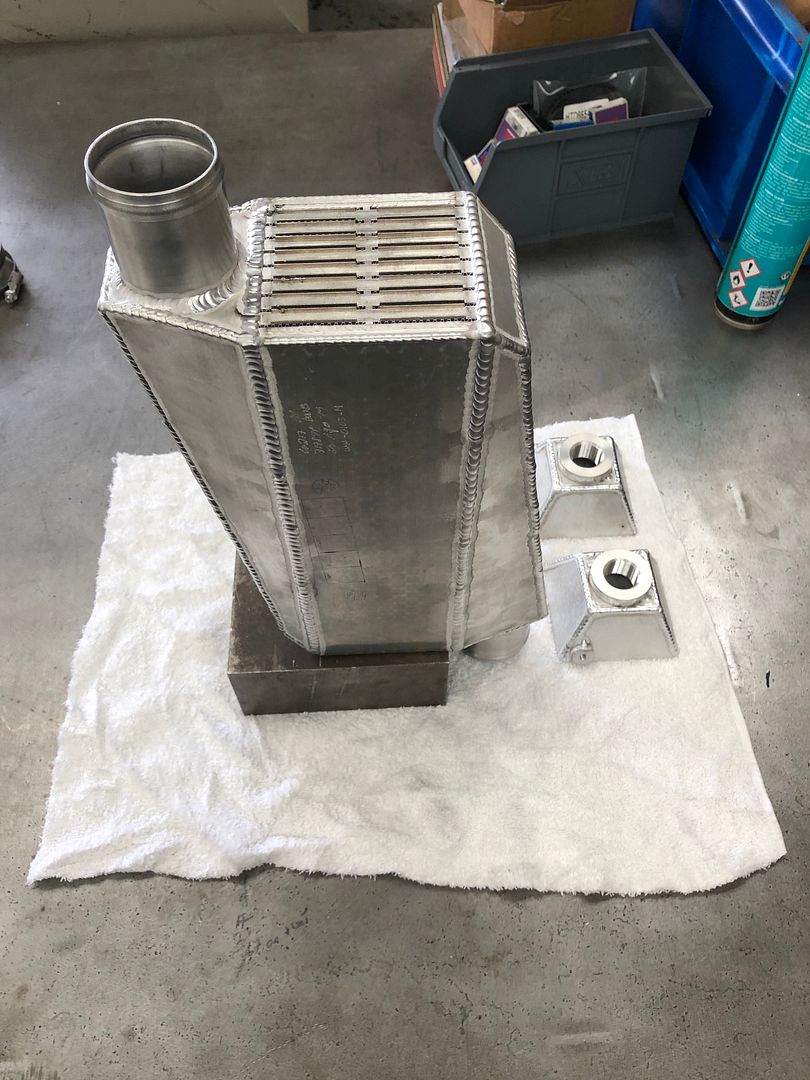
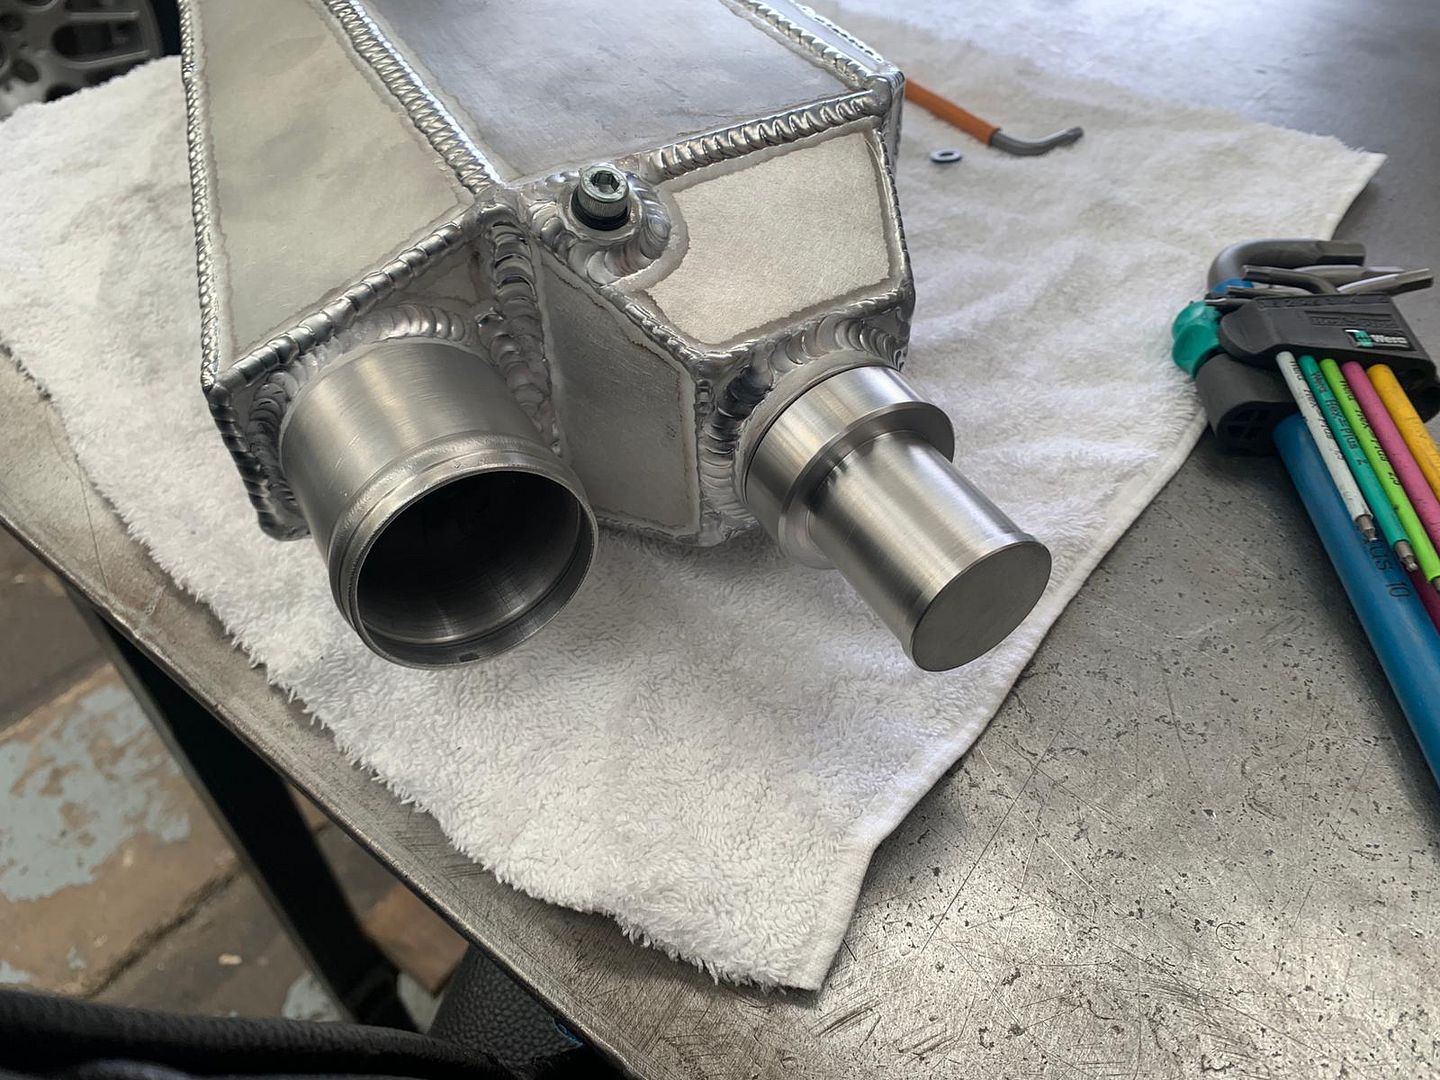
Chargecooler and boost pipes were next on the job list:

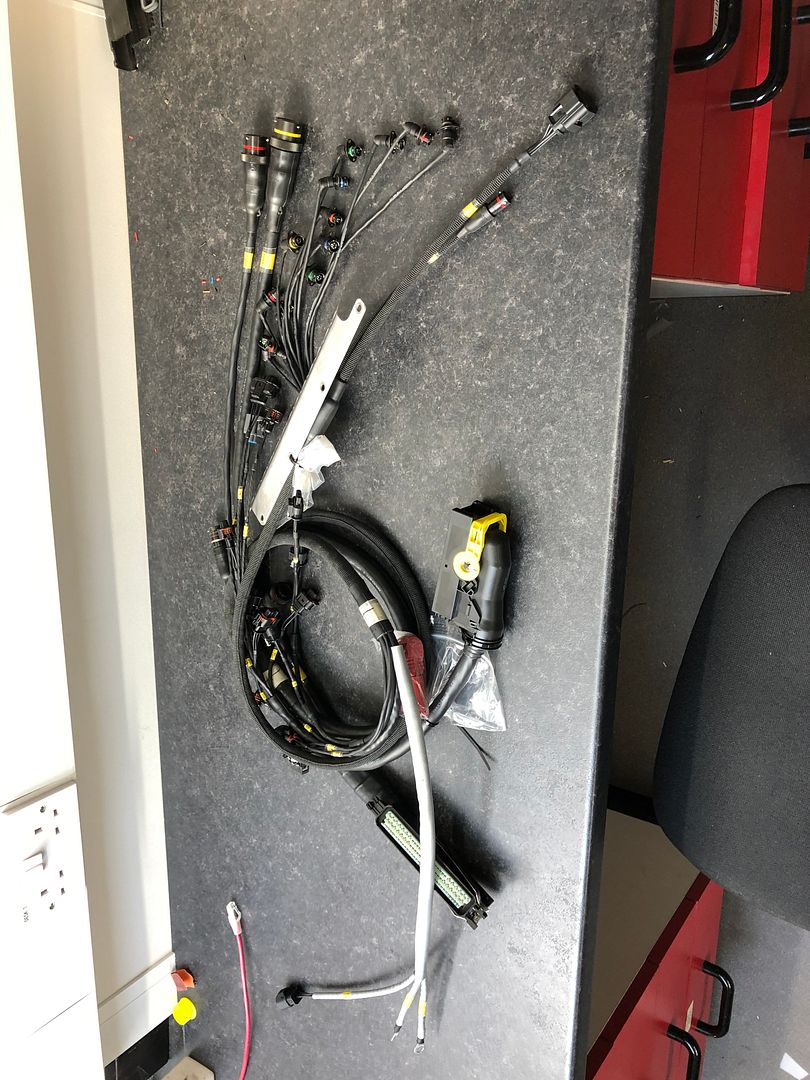
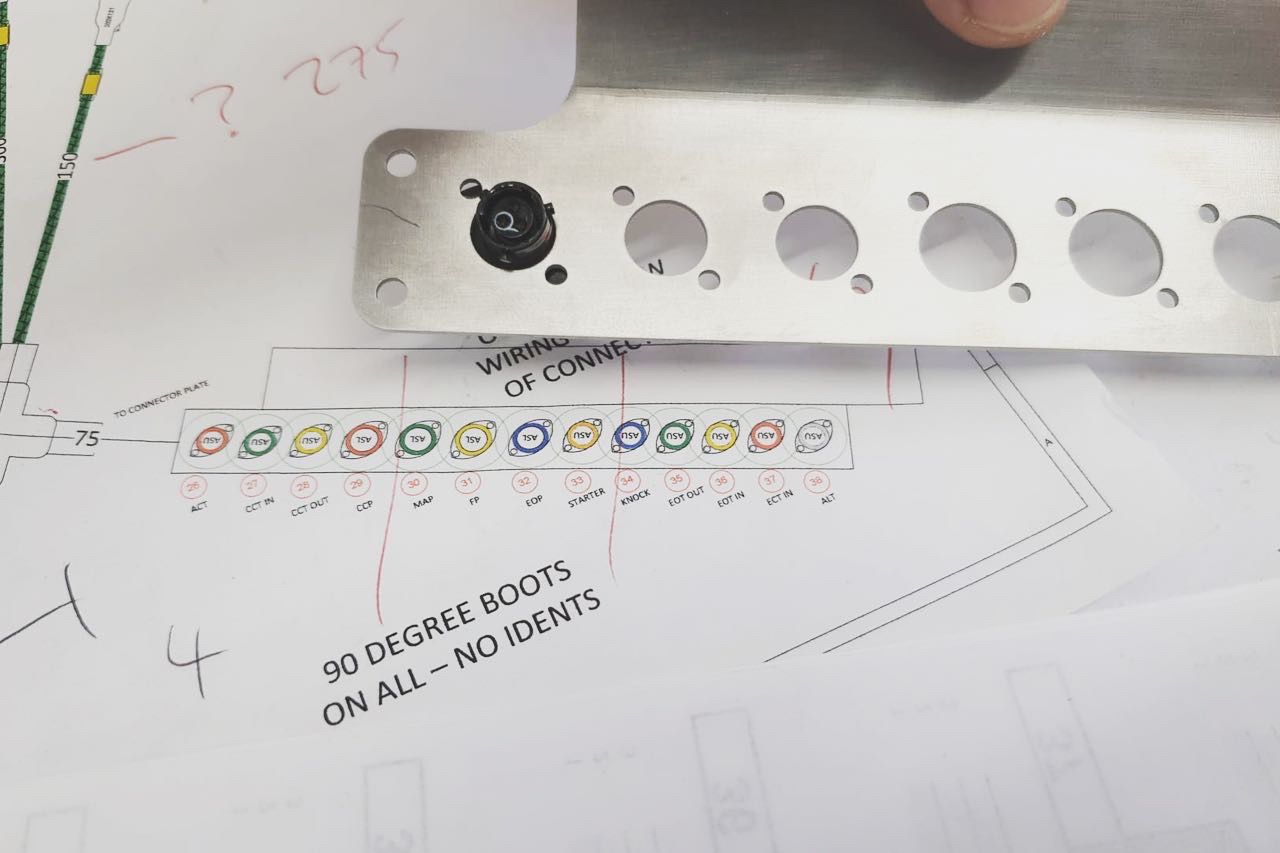
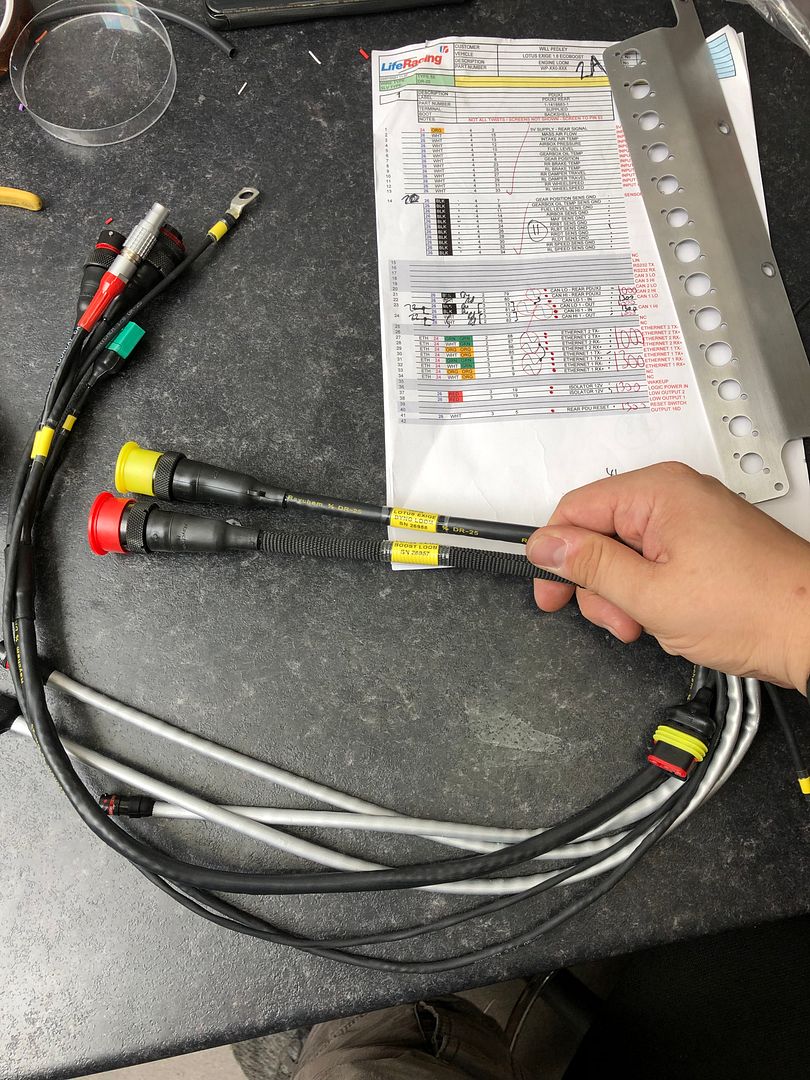
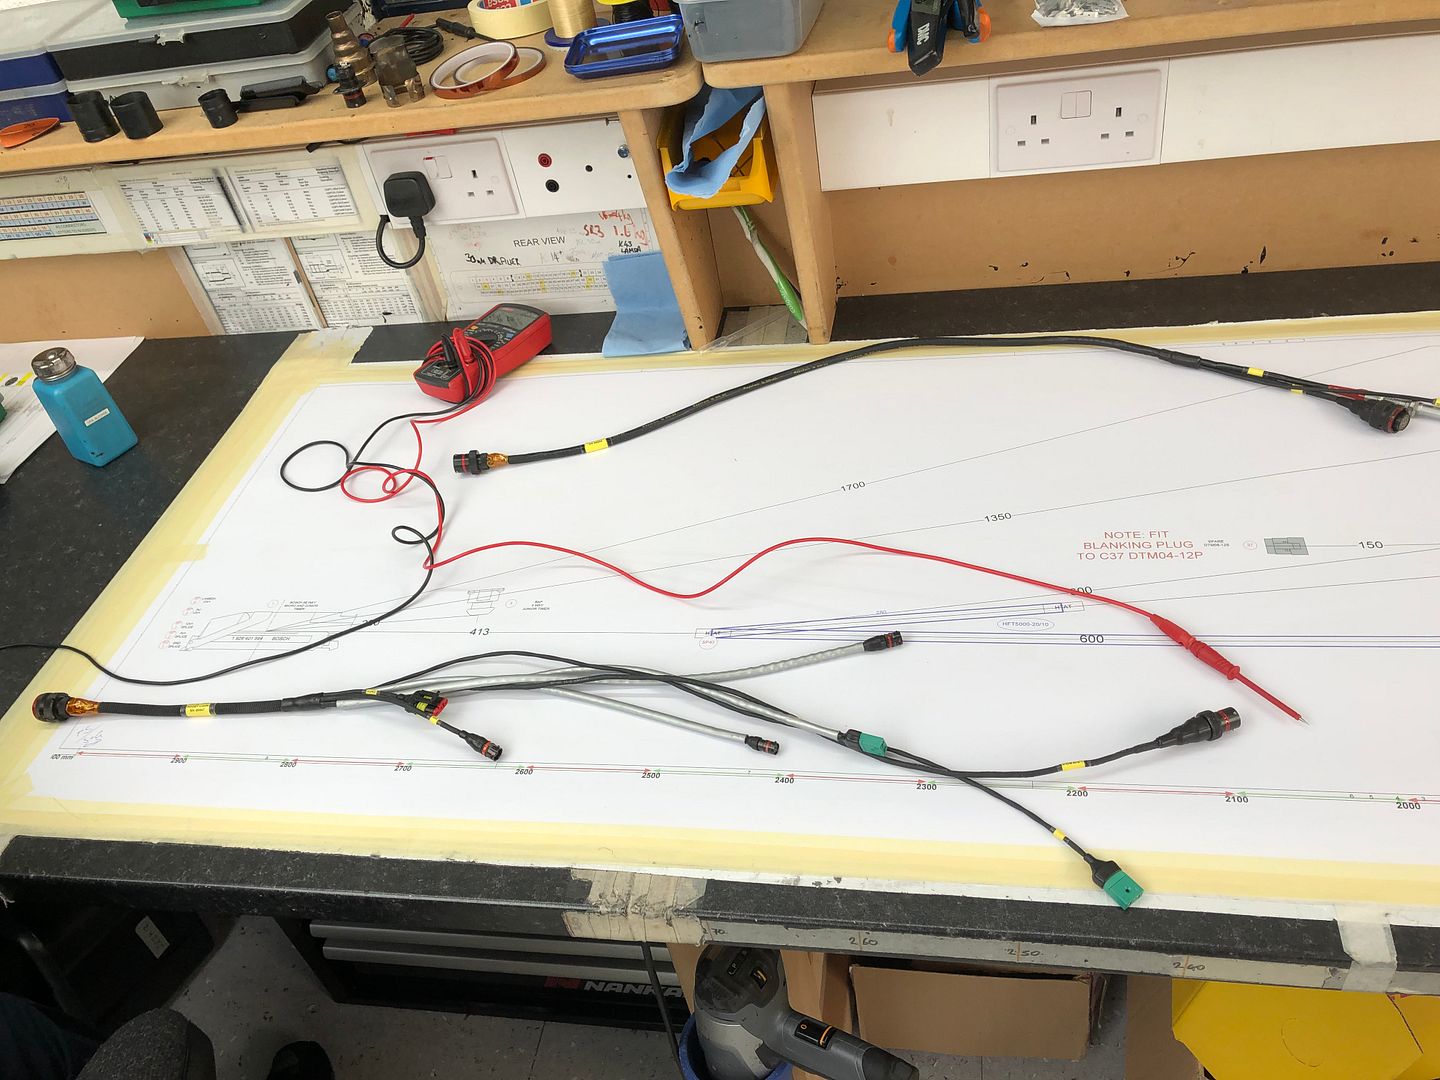
The state of the art bit of cardboard seen the last picture was actually the start of some mocking up for me to design the wiring loom for the Life Racing F88 GDI4 ECU and PDUX2 power distribution unit.
Engine out and ready for some little tweaks before the dyno:
Since fitting the dry sump kit, I knew that the cam cover would need sealing up, so after a night playing with pin gauges determining the best fit – ran up a set of bungs:
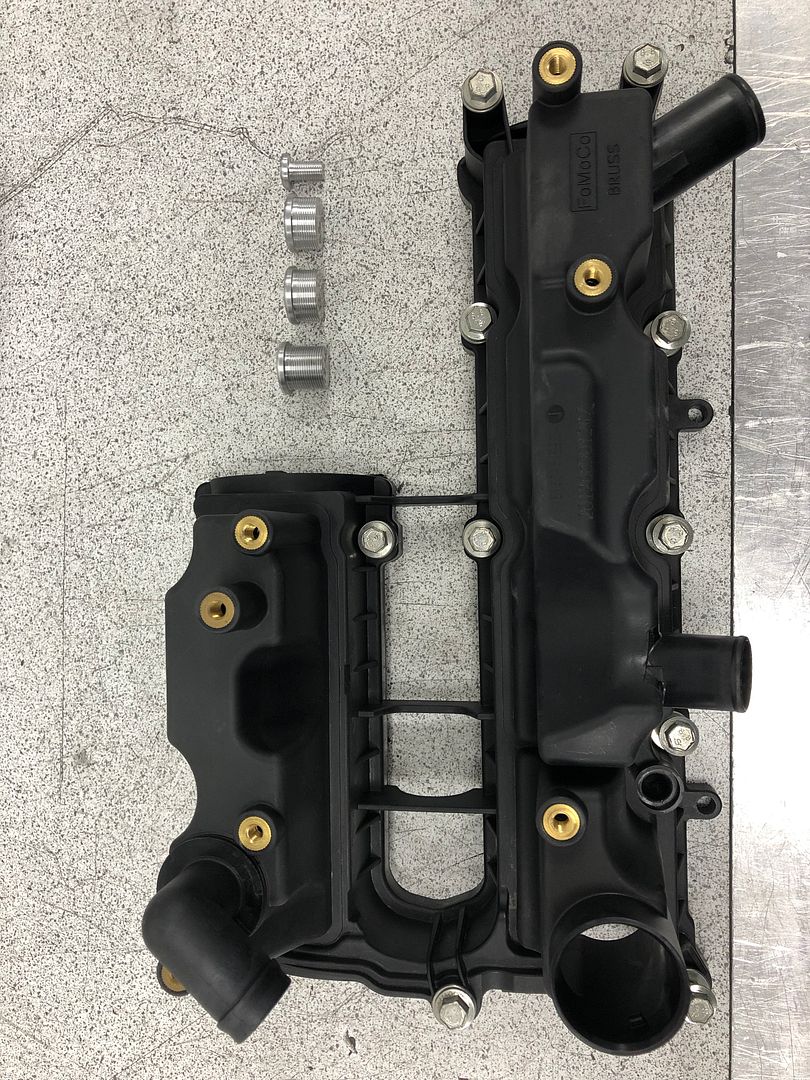
Then araldited them in:
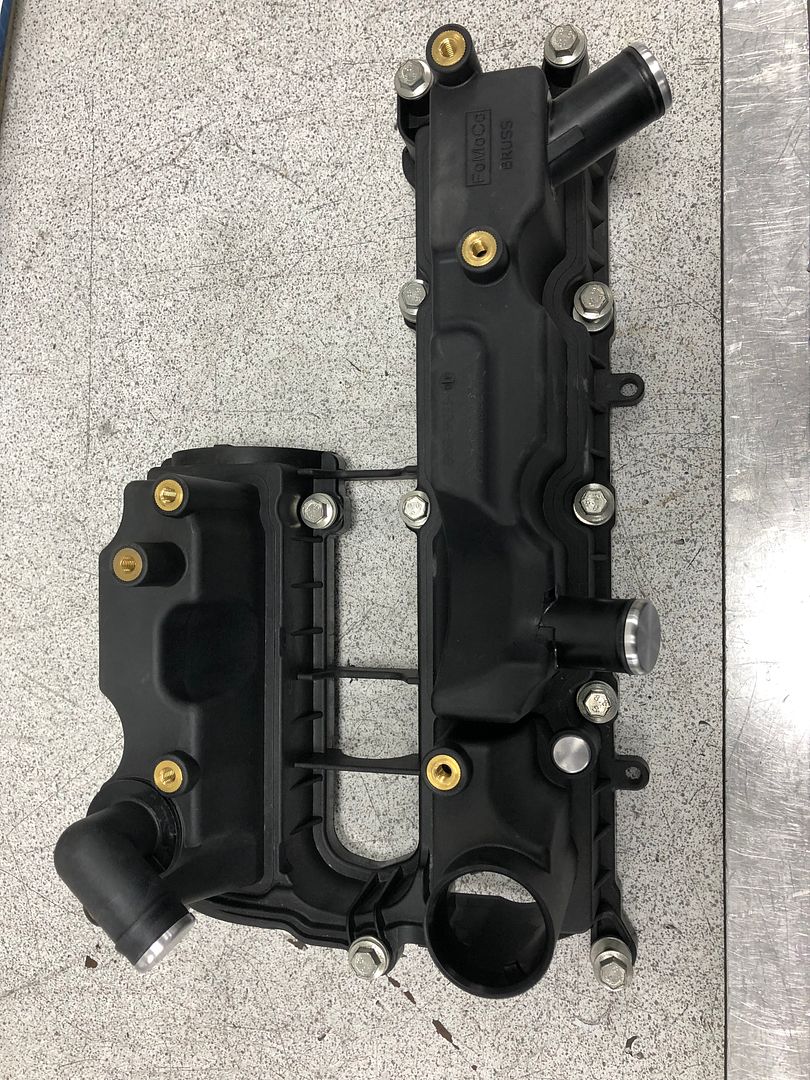
A few checks, bit of loctiting and fitment of a sandwich plate with a temp sensor in:

Machining the port injector provisions in the Jenvey inlet manifold:

Post machining hot wash clean before final assembly:
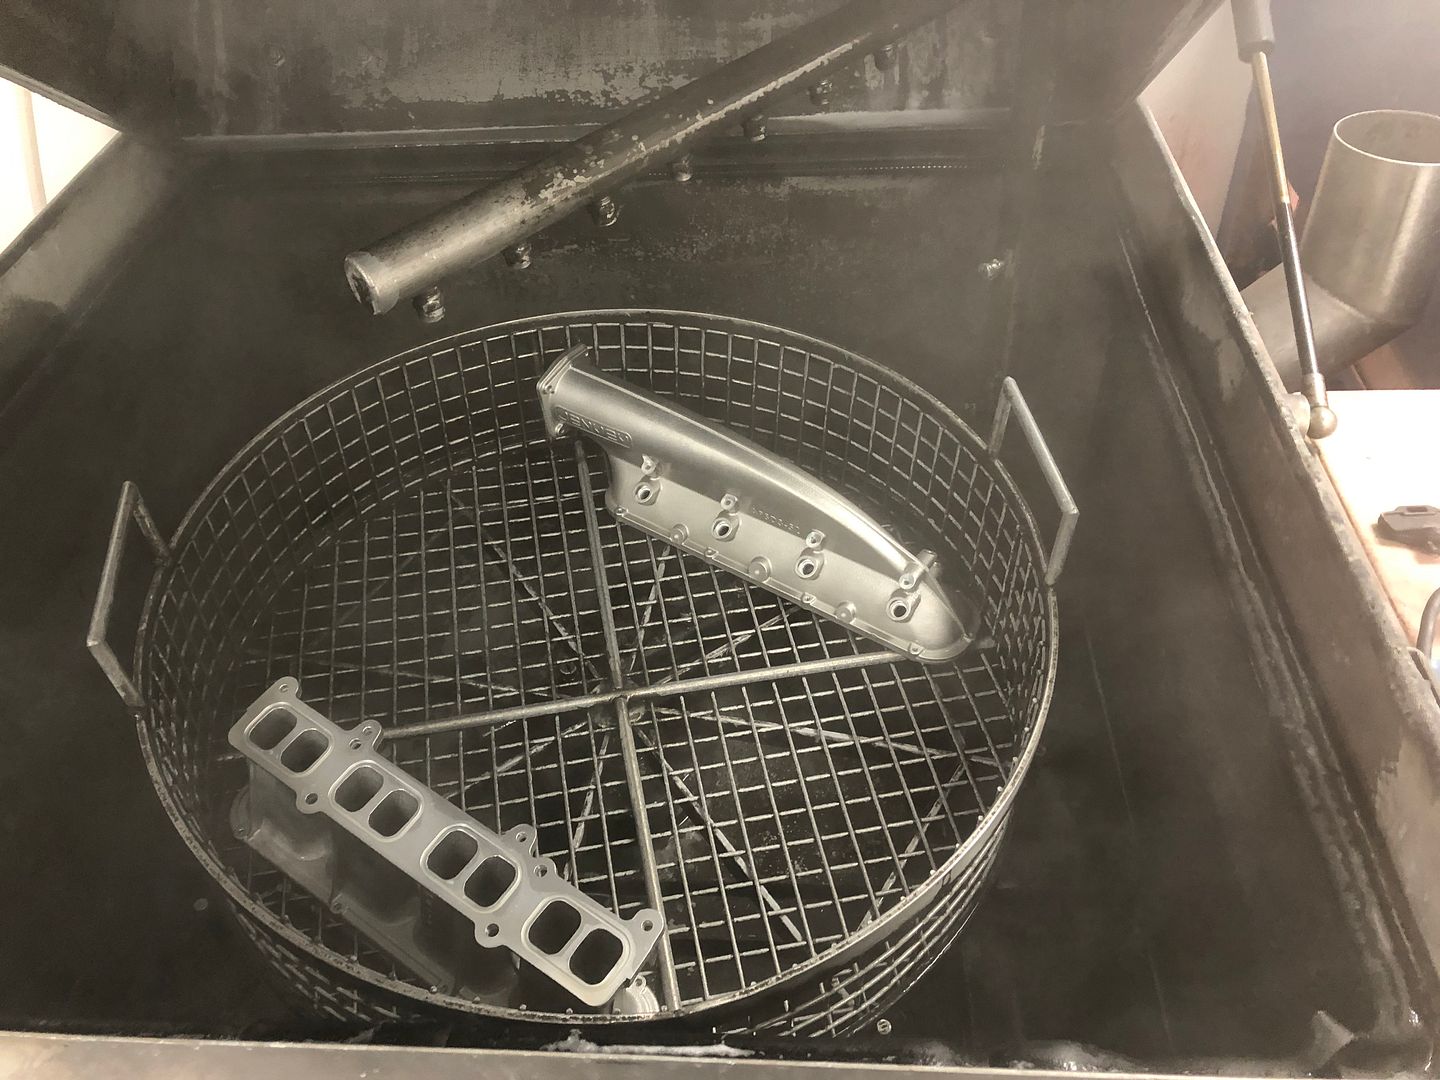
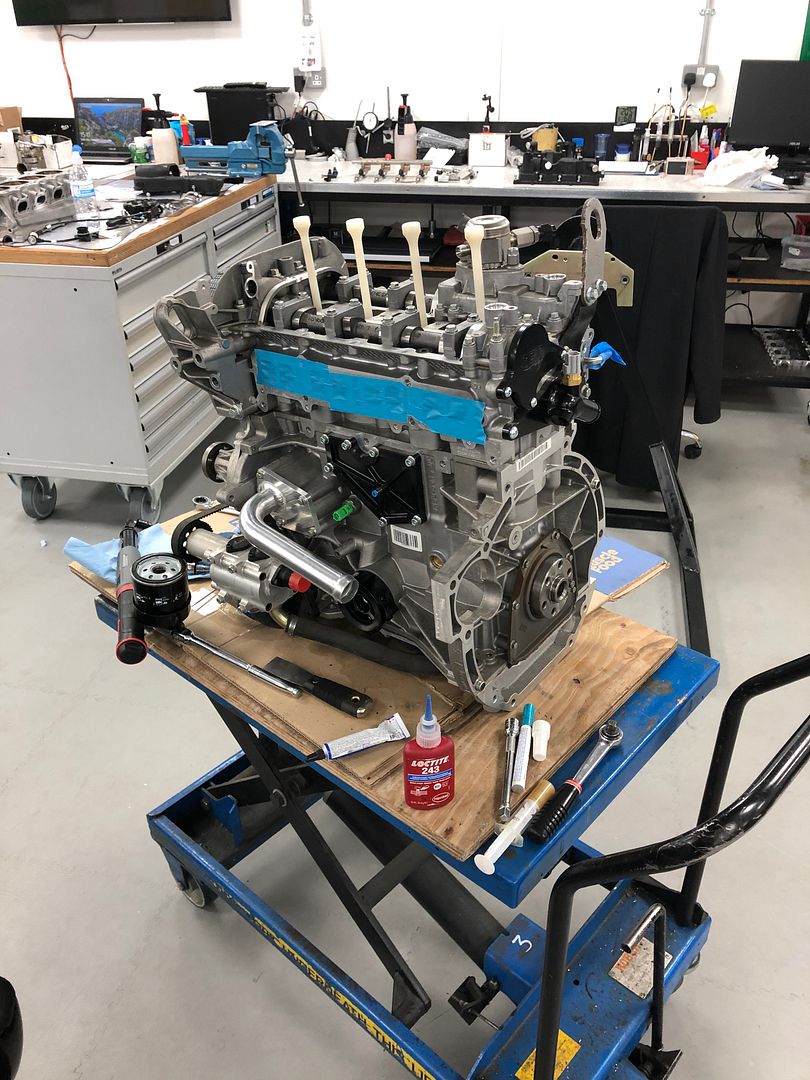
Ready for the engine dyno:

This engine dyno had very much been my playground for the previous 6 years and using it for my own engine was a bit of a leaving present from the boss! It did mean I had to make my own installation kit which was the next task:

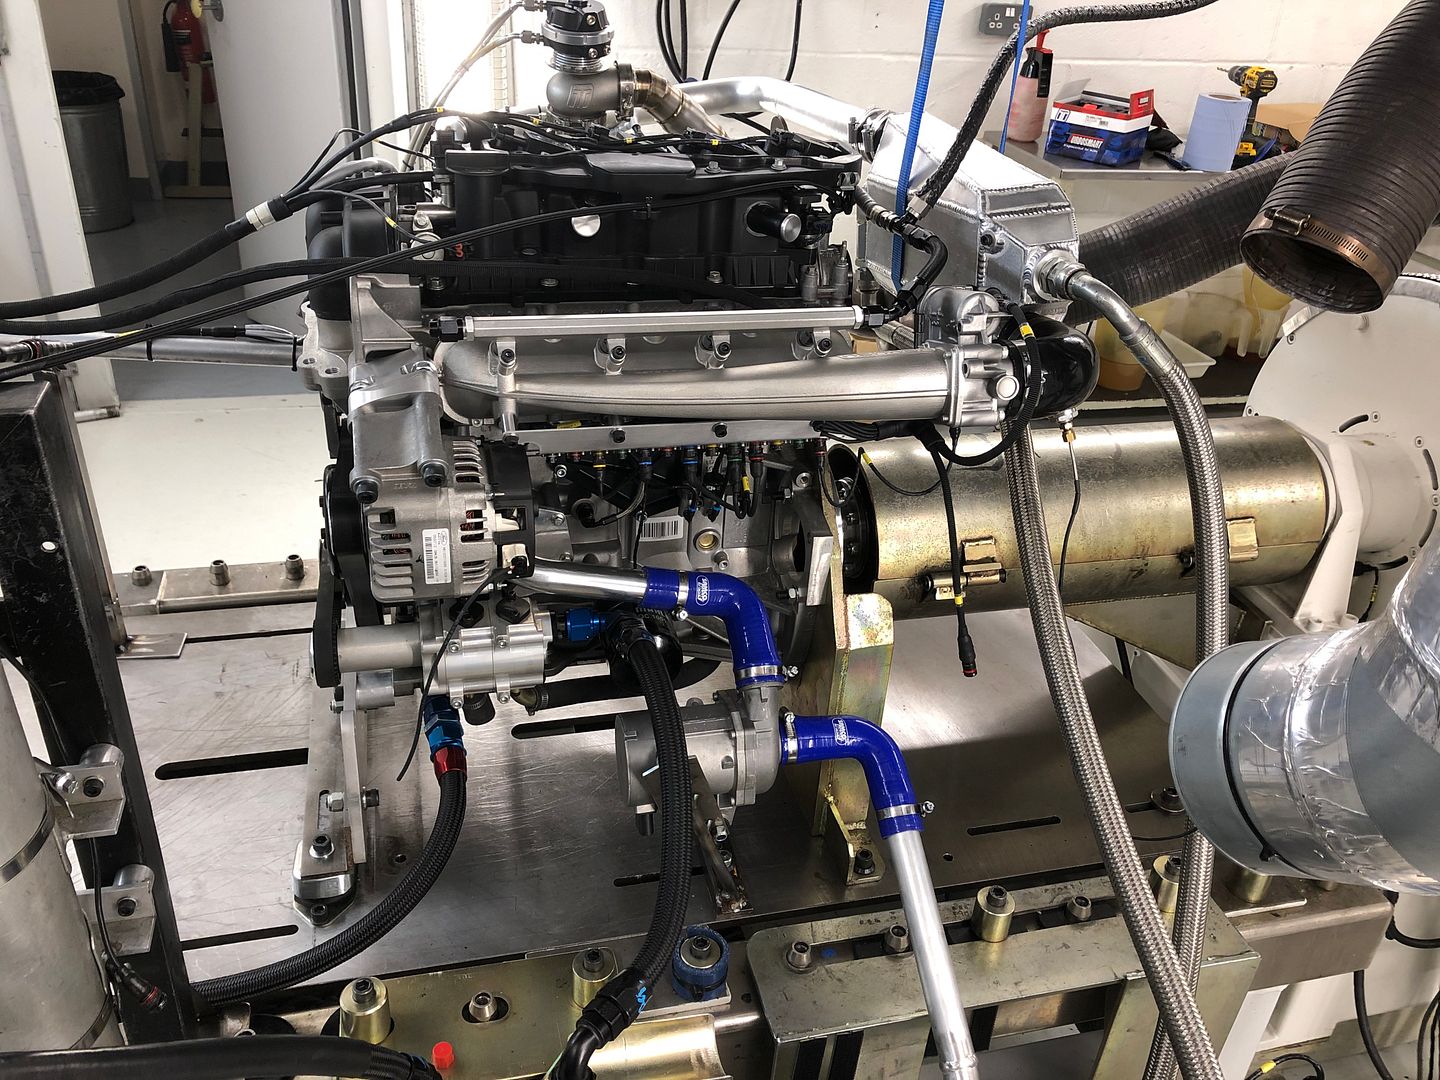
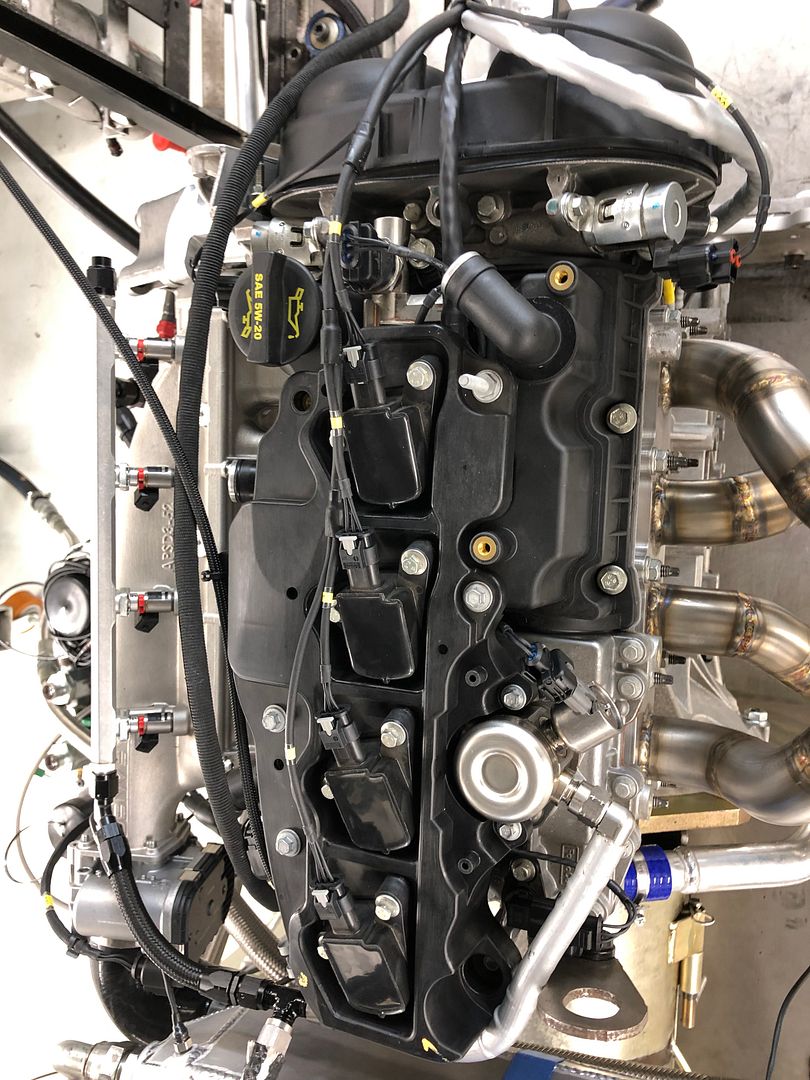

A short time later – up and running!
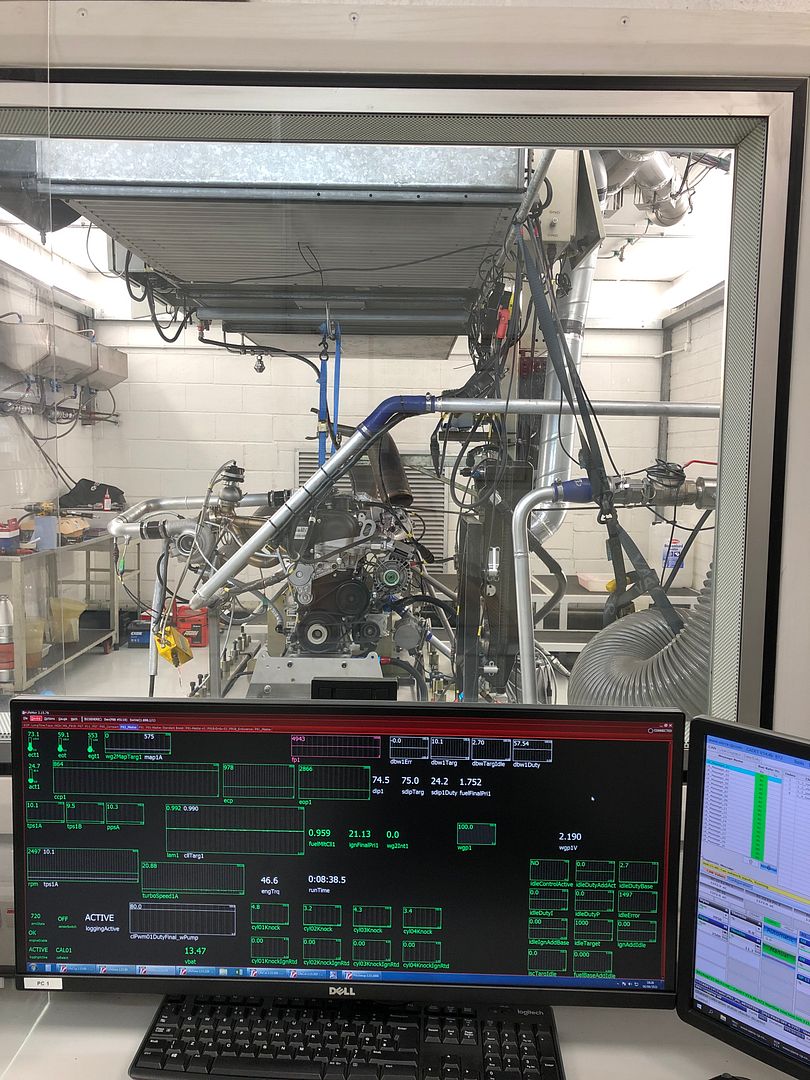
After a quick walk round inside to check for leaks etc. the engine didn’t stop running for the next 14 hours! By which point, I was happy I had been through all of the speed and load sites, the variable valve timing sweeps and sorted the transitions between direct injection and port injection for the fuelling.
A video of one of the pulls:
https://youtube.com/shorts/1HvMFjBzD-M
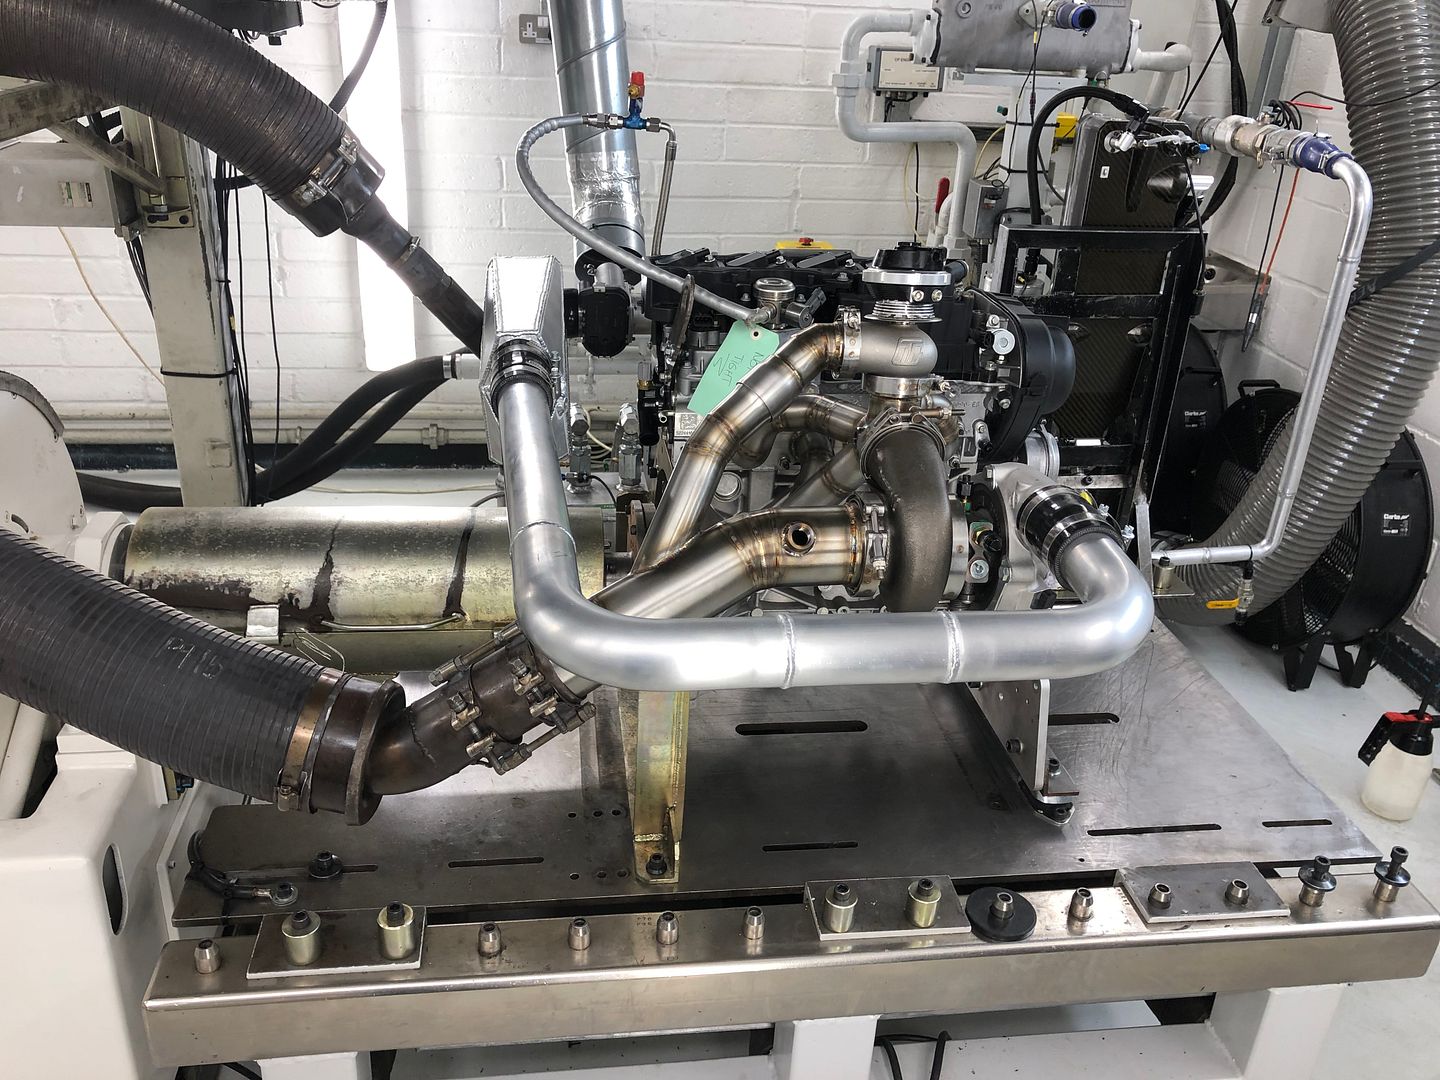
Nice to see some colour on the exhaust:
Results at 1.5bar boost:
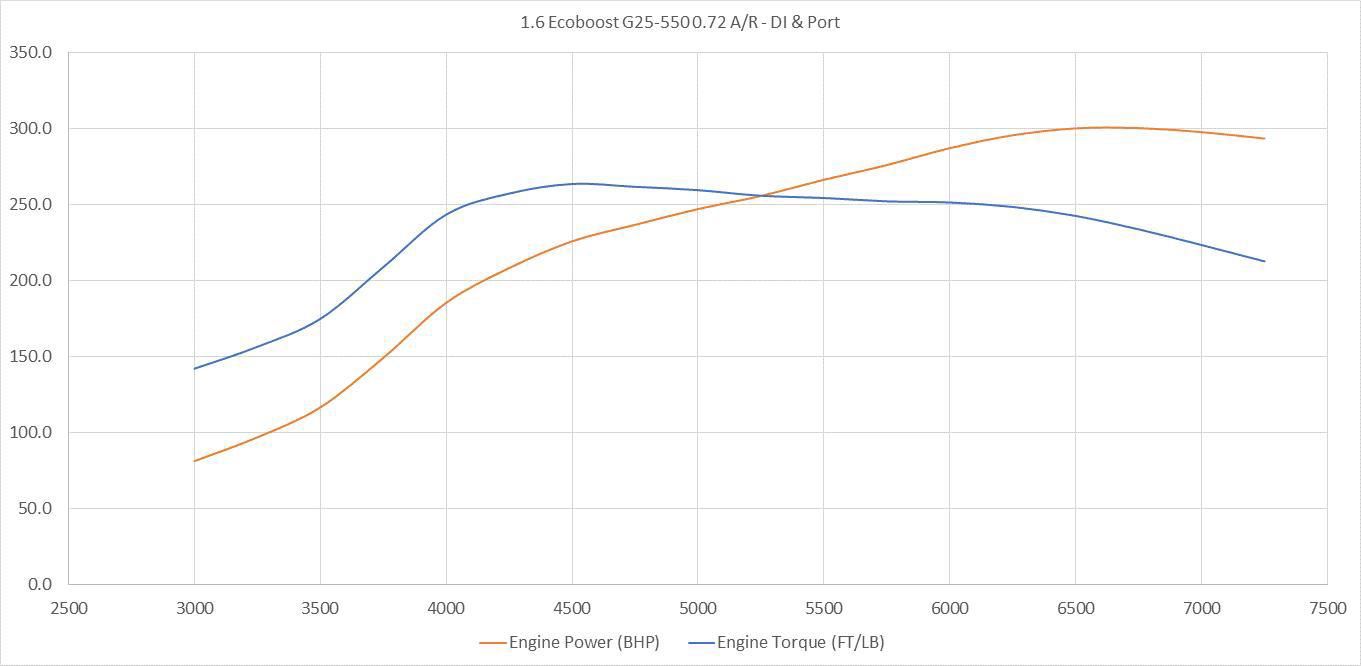
Plenty more left in there but at 1.5 bar, the turbo is in the sweet spot for compressor efficiency, the turbine entry pressure is 0.5 bar lower than the boost pressure and hopefully the engine will last many miles.
More updates to follow...
Long story cut short, back in 2016 a friend of mine had an unfinished project that he'd bought from a chap as an unfinished project and I decided that it was the perfect base to start my unfinished project with…
The original owner was preparing the car to compete in endurance races with a circa 600bhp Audi 1.8T 20v engine, but I elected to buy the project without an engine or gearbox and go a different route with it all.
How it looked when I bought it:
I started stripping the car down to see where things were at and working out what I wanted to keep and what I was going to sell to part fund the next steps.
The big wheels, big wheel spacers, big brakes and big bodywork were all in preparation of it going racing with big horsepower, but that wasn’t what I had in mind…
I'd already decided that I was definitely going to use a Ford 1.6 Ecoboost engine. The engineering that went in to it as a production engine was impressive and in terms of 'bang for buck', I felt it would be hard to beat. I managed to pick up a brand new complete crate engine for £1500 + VAT and immediately started looking in to what I could do to ensure that my investment would last as long as possible...
A Titan dry sump kit was quickly ordered up and the engine sent on its holidays to Piero @ X-Power engines for the dry sump kit to be fitted and the nose of the crank modified to take a woodruff key through the complete set of pulleys.
Gearbox wise, after running through a lot of options, I decided to commit to going for a sequential gearbox to get the ratios I really wanted. I ended up talking to Dave Plant of DJM and we very quickly aligned on a solution including all of the associated parts needed for the installation. The next question was, would it fit?
I borrowed a 1.6 Ecoboost engine from a friend to use for a mock fit and took everything up to DJM.
With a standard turbo setup, it couldn’t have been much better. But I already had visions of a different turbo setup…
The car stayed with DJM for a while so Dave and Euan continued to work their magic with the remaining ancillaries.
A Kaaz plated diff from my good friends at Coordsport found its way into the gearbox, slightly annoyingly with a new custom crownwheel compared to the Wavetrac which was the first idea!
DJM making the majority of things in house:
As much as a manual lever for changing gear on a sequential would have been fun, I decided I’d prefer to go paddleshift so at least there was the option for the ECU to deny downshifts and avoid damaging the engine, I wasn’t sure quite where I would package everything for a pneumatic setup so went for an XAP electric actuator instead:
A trip out to the PMW show in Germany and a conversation with Mike Jenvey landed me with one of their side feed inlet manifolds which was fitted to the proper engine before the final fit up took place.
Final pics
Next was to get an exhaust manifold, chargecooler and boost pipes made, so off to Kinzy Fabrications for the next stop.
I'd already purchased a Garrett G25-550 and a Garrett chargecooler core and my good friends at Turbosmart had me covered for a wastegate (with position sensor) and a few other bits.
Off came the standard manifold and turbo:
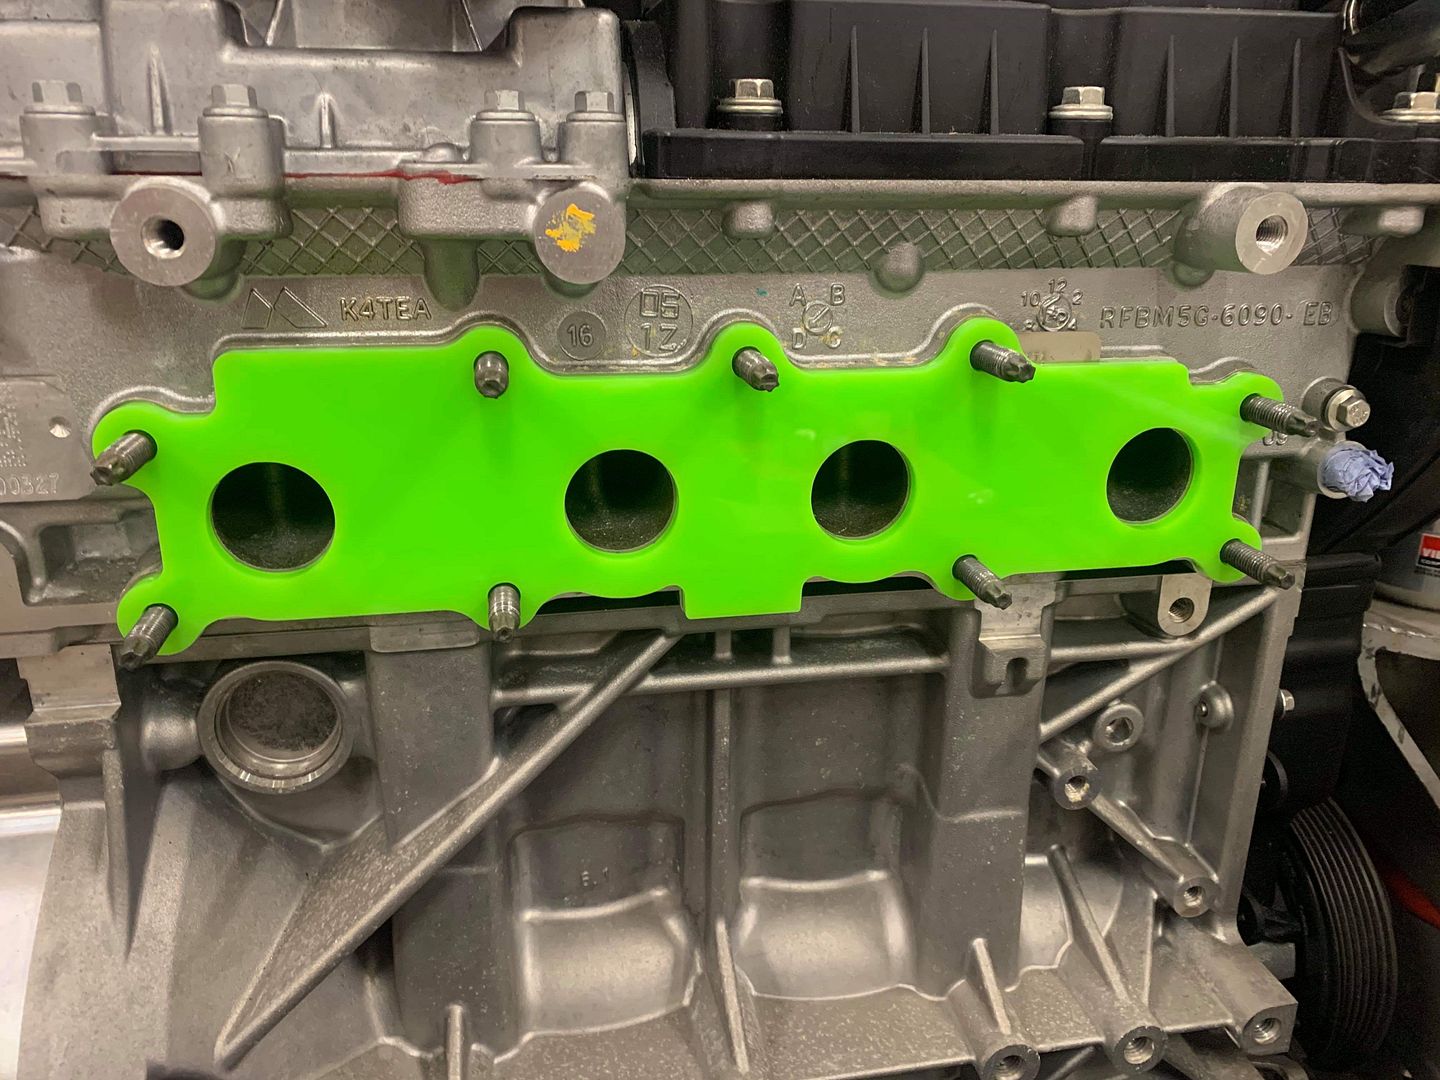
Nobody was selling an exhaust flange for the 1.6 Ecoboost at this point so a quick bit of CAD and a laser cut acrylic template was test fitted before we made the real one
The exhaust silencers section I actually inherited when I bought the car and whilst we had talked about making changes, I decided it would probably be easier to just use it as was. With some new mounting rubbers we got it fitted up and made a welding wire frame of the clamshell aperture to keep perspective on space:
I'd already been quite specific about how I wanted the manifold collector and wastegate take off so Marc made a start on that:
Some quick brackets later, we had the turbo where we wanted it:
Then it was on with the click together blue bends to determine the equal length primaries:
Which slowly morphed from blue plastic into 321 stainless:
Then it was time for the downpipe:
And the wastegate re-circulation - as I want to be able to do UK track days!
End result:
In and amongst, SBD Motorsport had already designed solutions to some of the bits I needed. Brake servo pump delete and water outlet fitting were ordered up and fitted:
I'd been talking to Murray at Green On Engineering about a new dry sump tank and after some idea swapping, this showed up:
Very pleased with the finished product and quickly gave it somewhere to sit
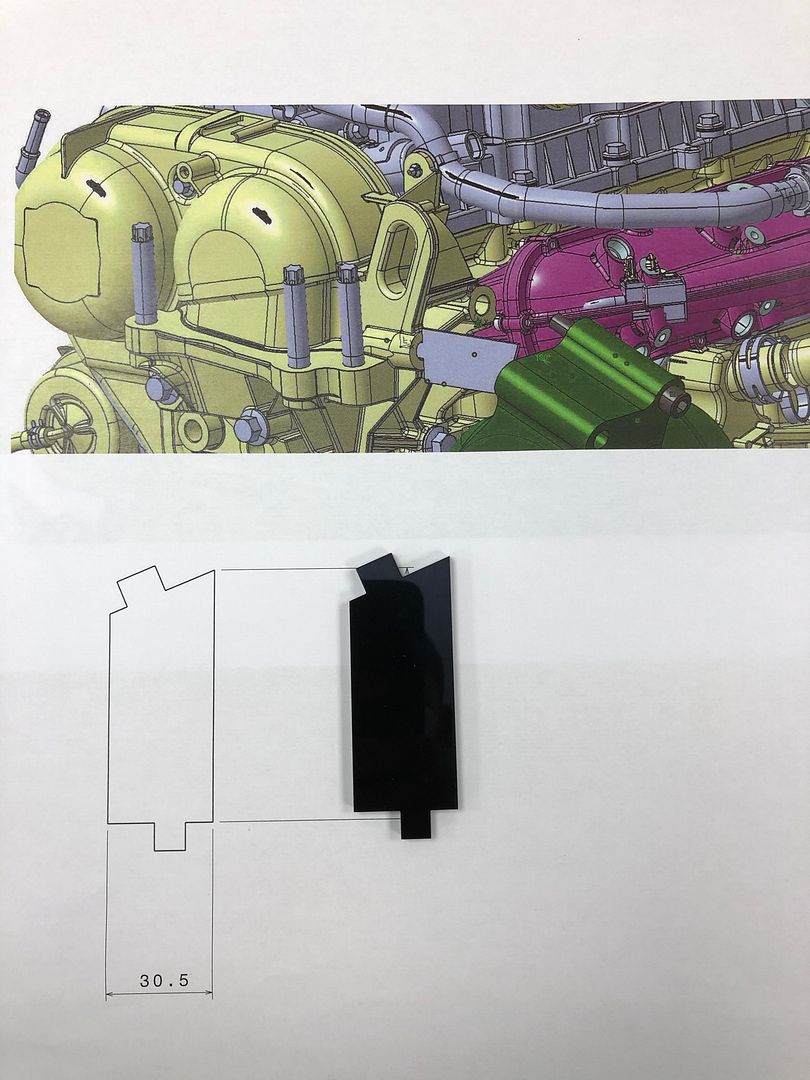
The next issue that needed addressing was the alternator clashing with the Jenvey inlet manifold. I had specifically chosen a high output 125 amp version of the Fiesta Zetec S unit to ensure that with heated windscreens, electric water pumps, chargecooler pumps, GDI systems etc. there was no risk of running out of juice when all the extra bits like lights, fans, wipers etc. come on. Unfortunately it was a hard clash in a few places...
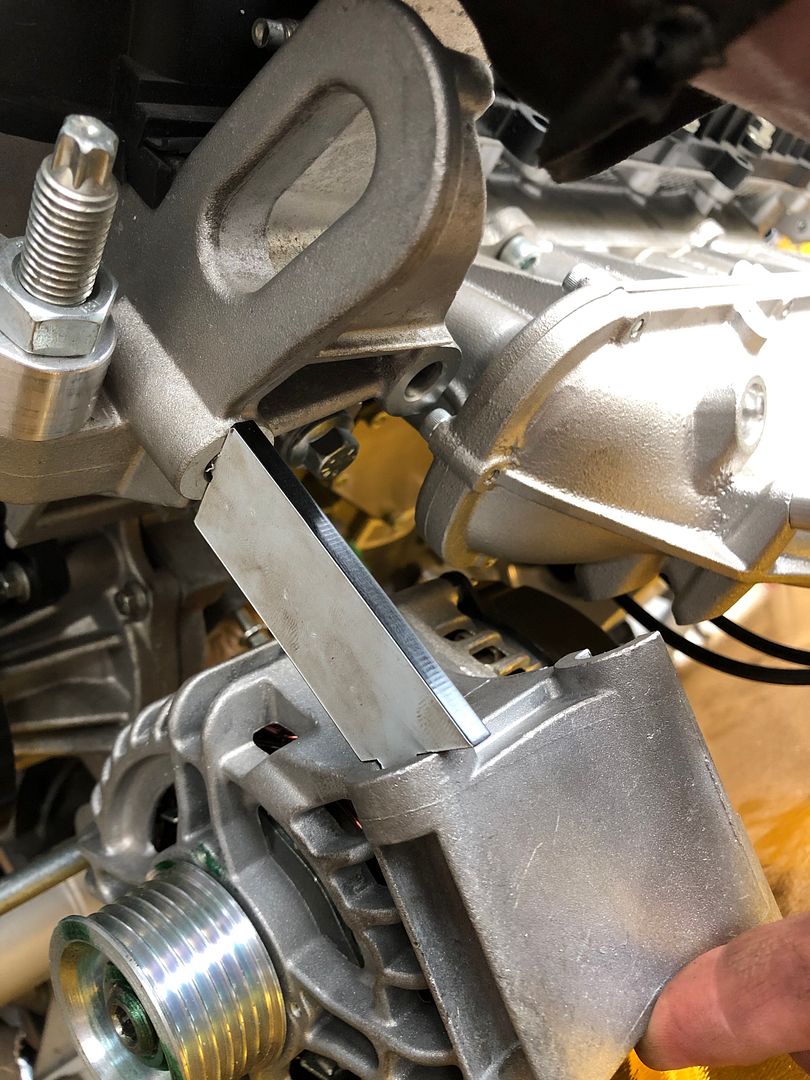
So... A CAD model of the engine, plenum and alternator later... A test spacer to make sure the alternator would clear in the proposed position:
Testing...
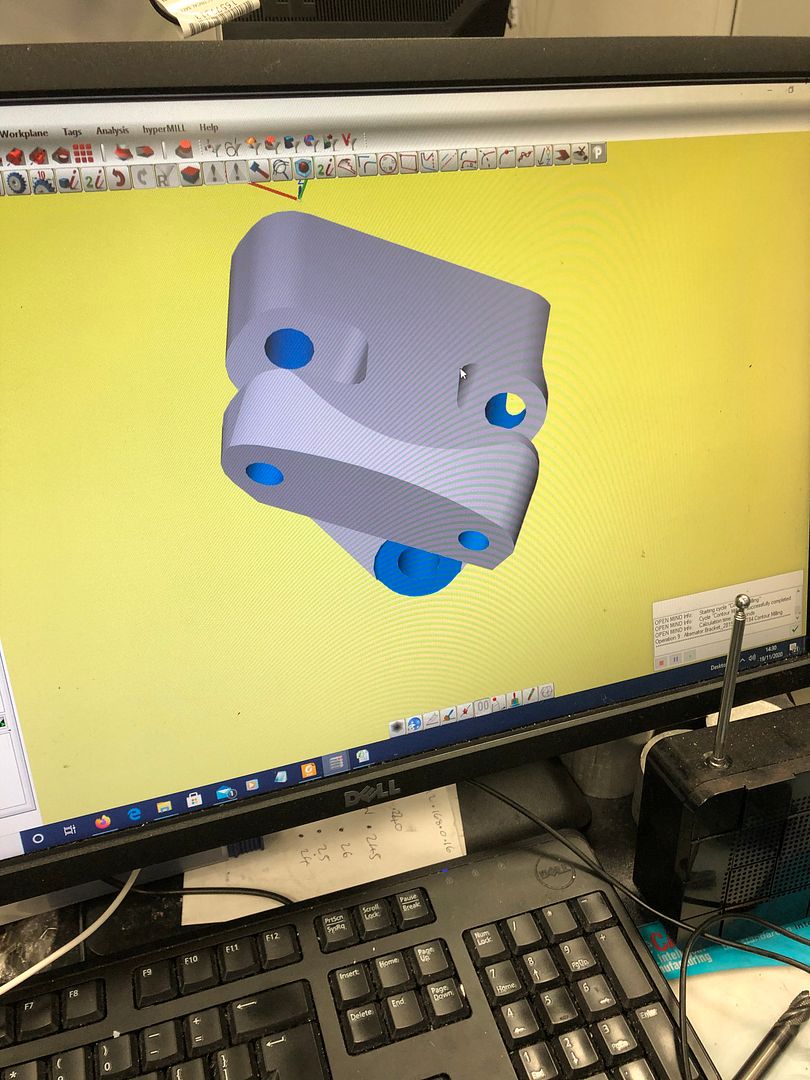
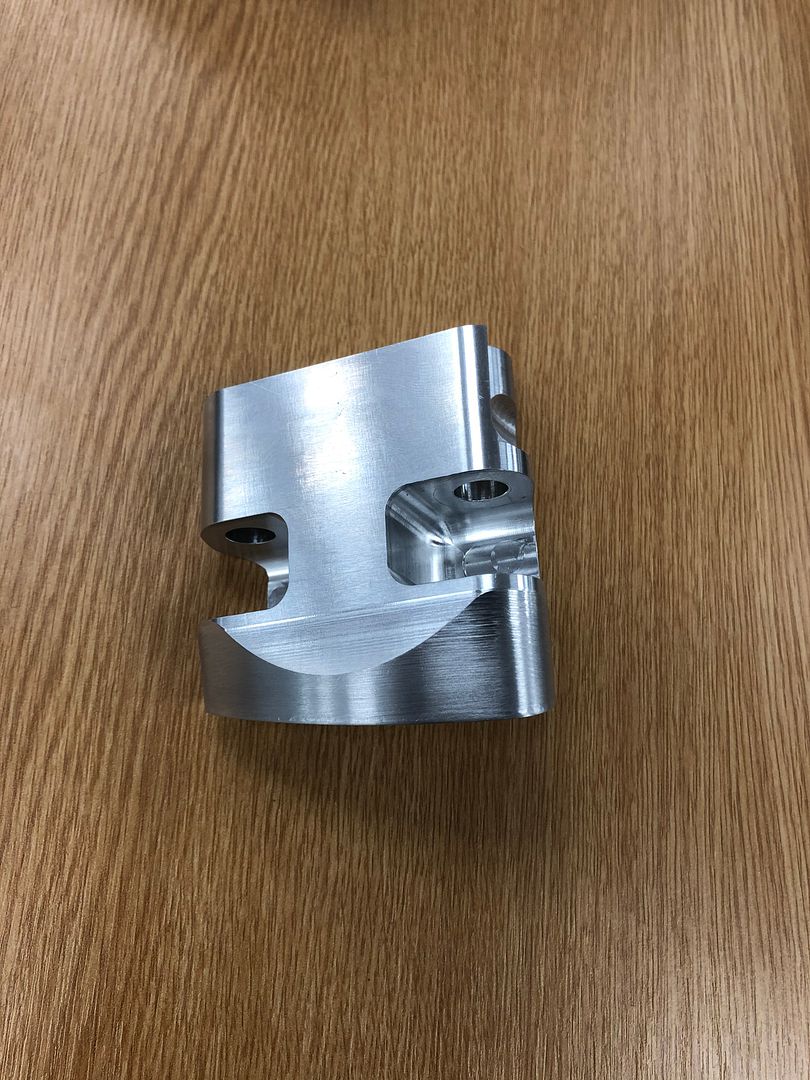
With confirmation of a clash free position, it was time for an elaborate bracket!
Some swarf later:
Et voila:
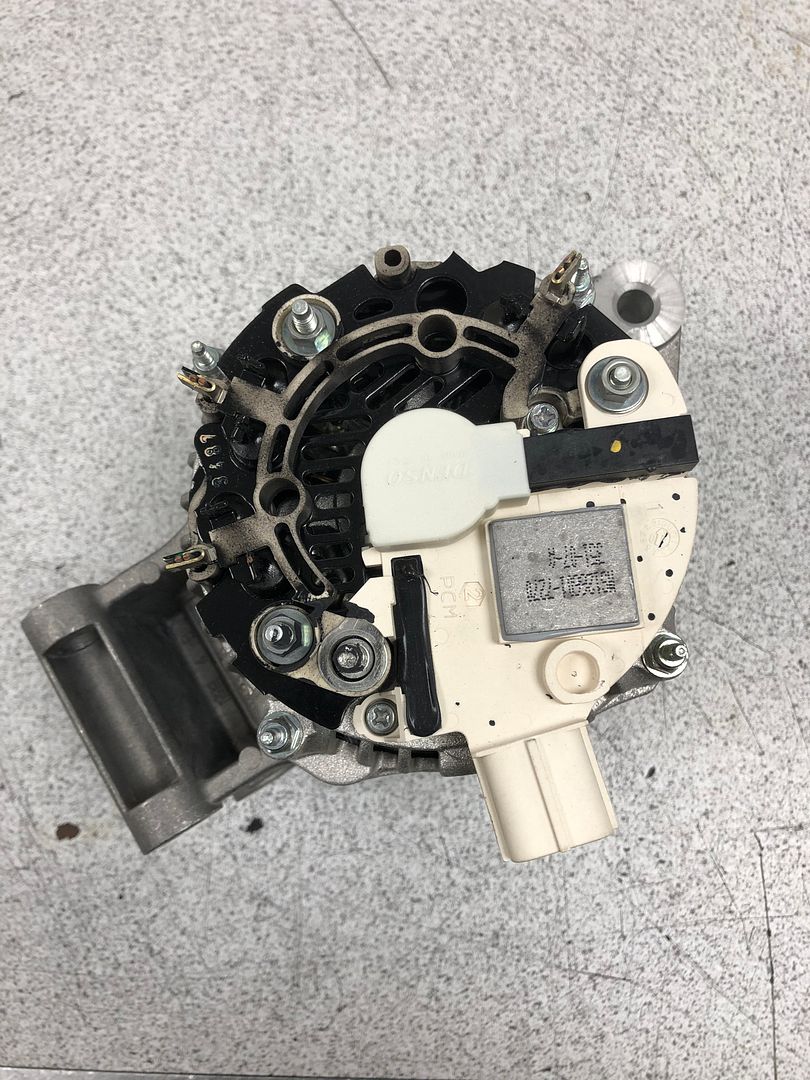
The only problem now is the electrical connections on the alternator were a little close to the bulkhead.
Time to strip the alternator!
The main power cable connected to an extension piece which was removed to allow a cable connection directly and the 3 pin plug connection was ground down on a sanding belt until flush with the pins inside. Then it was time to twist up a flying lead and solder to the 3 pins:
BK110 expoxy resin potted - i'll put a Raychem moulded boot over it later on when I know exactly what the cable exit routing will look like:
Whilst not a massive change - it's found me about another 30mm of clearance between the alternator and bulkhead - well worth the effort!
The water inlet to the engine needed to be changed to a fabricated aluminium pipe to connect to the electric water pump, a plate was needed for that and to honour the gasket / seal arrangement from Ford, another CAD exercise resulted in this:
Speaking of electric water pumps, the Pierburg CWA200 got mounted up…
Chargecooler and boost pipes were next on the job list:
The state of the art bit of cardboard seen the last picture was actually the start of some mocking up for me to design the wiring loom for the Life Racing F88 GDI4 ECU and PDUX2 power distribution unit.
Engine out and ready for some little tweaks before the dyno:
Since fitting the dry sump kit, I knew that the cam cover would need sealing up, so after a night playing with pin gauges determining the best fit – ran up a set of bungs:
Then araldited them in:
A few checks, bit of loctiting and fitment of a sandwich plate with a temp sensor in:
Machining the port injector provisions in the Jenvey inlet manifold:
Post machining hot wash clean before final assembly:
Ready for the engine dyno:
This engine dyno had very much been my playground for the previous 6 years and using it for my own engine was a bit of a leaving present from the boss! It did mean I had to make my own installation kit which was the next task:
A short time later – up and running!
After a quick walk round inside to check for leaks etc. the engine didn’t stop running for the next 14 hours! By which point, I was happy I had been through all of the speed and load sites, the variable valve timing sweeps and sorted the transitions between direct injection and port injection for the fuelling.
A video of one of the pulls:
https://youtube.com/shorts/1HvMFjBzD-M
Nice to see some colour on the exhaust:
Results at 1.5bar boost:
Plenty more left in there but at 1.5 bar, the turbo is in the sweet spot for compressor efficiency, the turbine entry pressure is 0.5 bar lower than the boost pressure and hopefully the engine will last many miles.
More updates to follow...

selym said:
That's a great read Will. Are these engines robust at this power level? Loving all the fabrication work.....whereas I'm baulking at even fitting an engine mount on my VX220!
At 300bhp, they seem pretty solid. Plenty of Fiesta STs out there running that sort of power. Normally the fuel system becomes marginal at that power, the direct injection pump is pretty much at 100% duty so a lot of people look at port injection fuelling to supplement things. I did similar to ensure everything is plenty safe and gives scope to turn the power up easily in the future. But I figured I should at least drive it first before chasing numbers... 
Austin_Metro said:
Will. This is top stuff.
This isn’t all done in your shed is it?! It all looks a bit professional!
Some of it is done in my shed, yes! But, I was self employed for a period of time building race cars, so have probably more than the average DIY'er in terms of shed contents.This isn’t all done in your shed is it?! It all looks a bit professional!
Truth be told, I've worked in motorsport for the last 20 years so this project is a bit of a 'coming together' of ideas and influences over that time
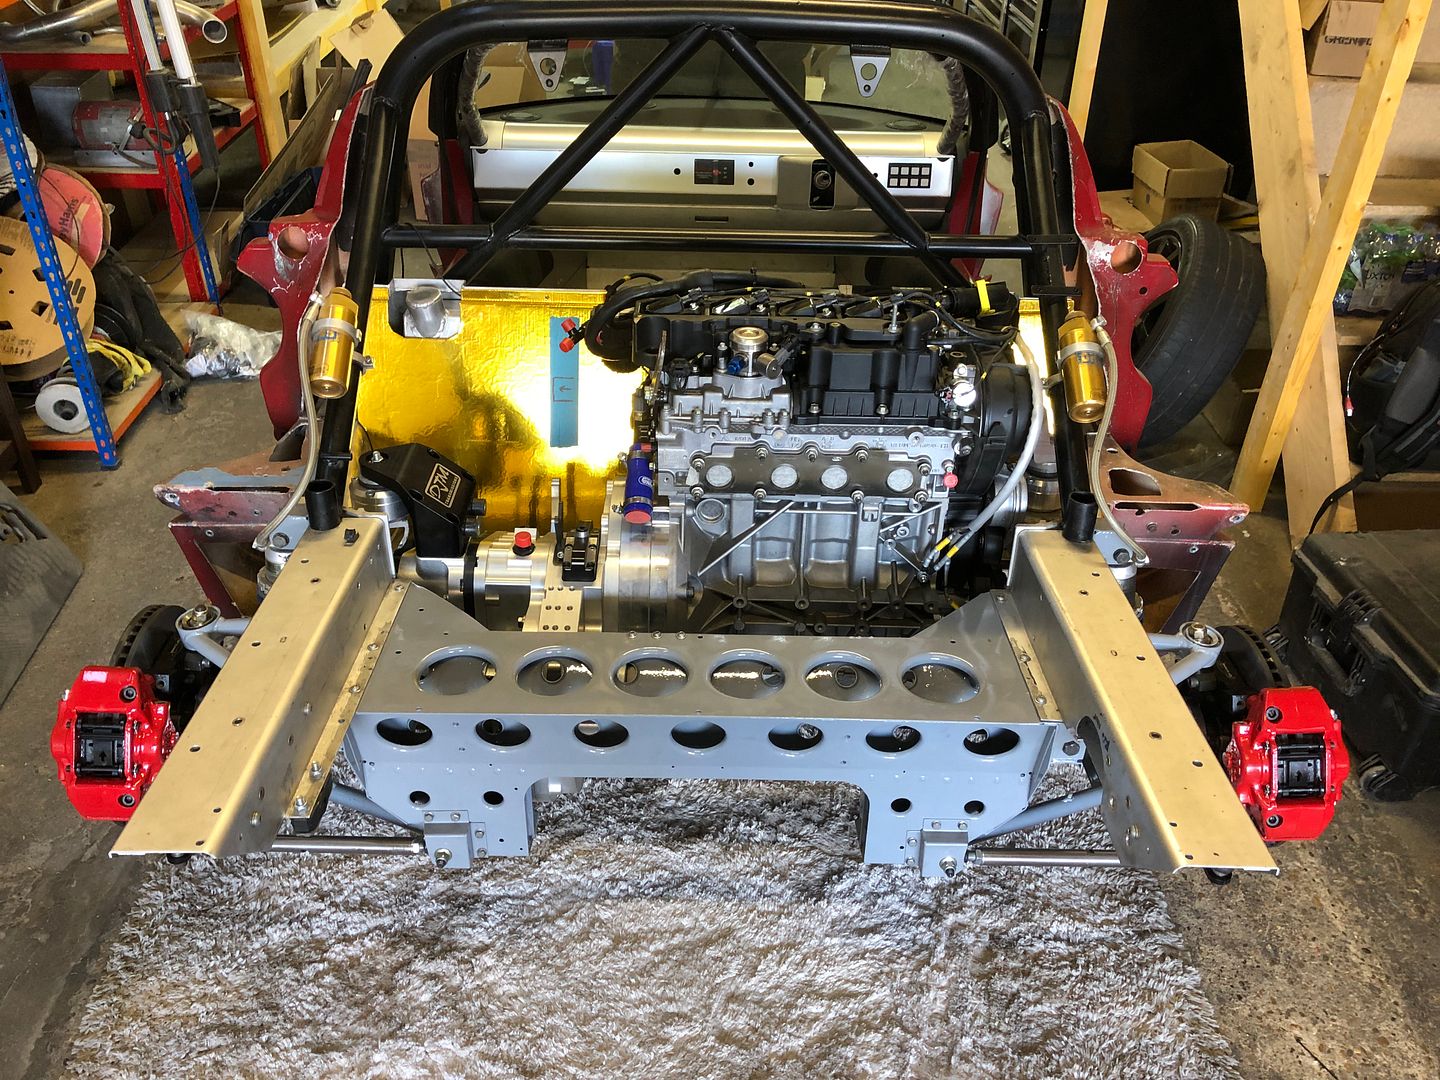
So with the engine and gearbox side of things done, it was back to the rolling shell that I'd bought and time to make a decision what I was doing with all the bits that it came with.
The answer was pretty simple, sell all the big stuff and buy the right bits for a 300bhp car.
A few adverts later and the majority of things were sold and my bank account (temporarily) looked a bit healthier...
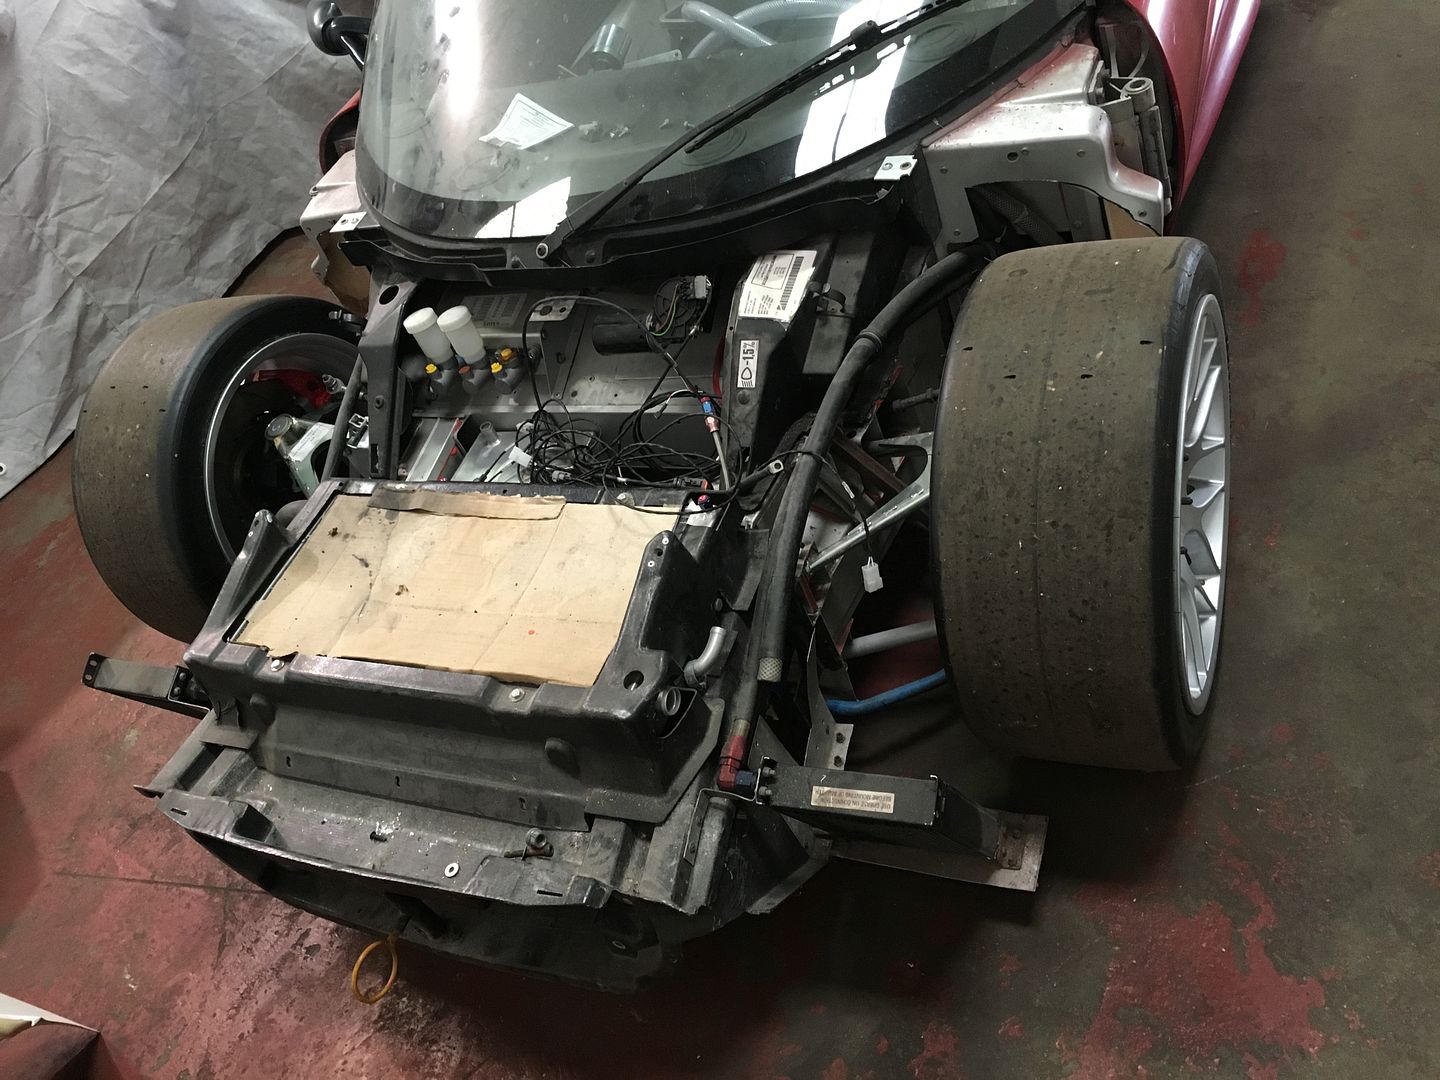
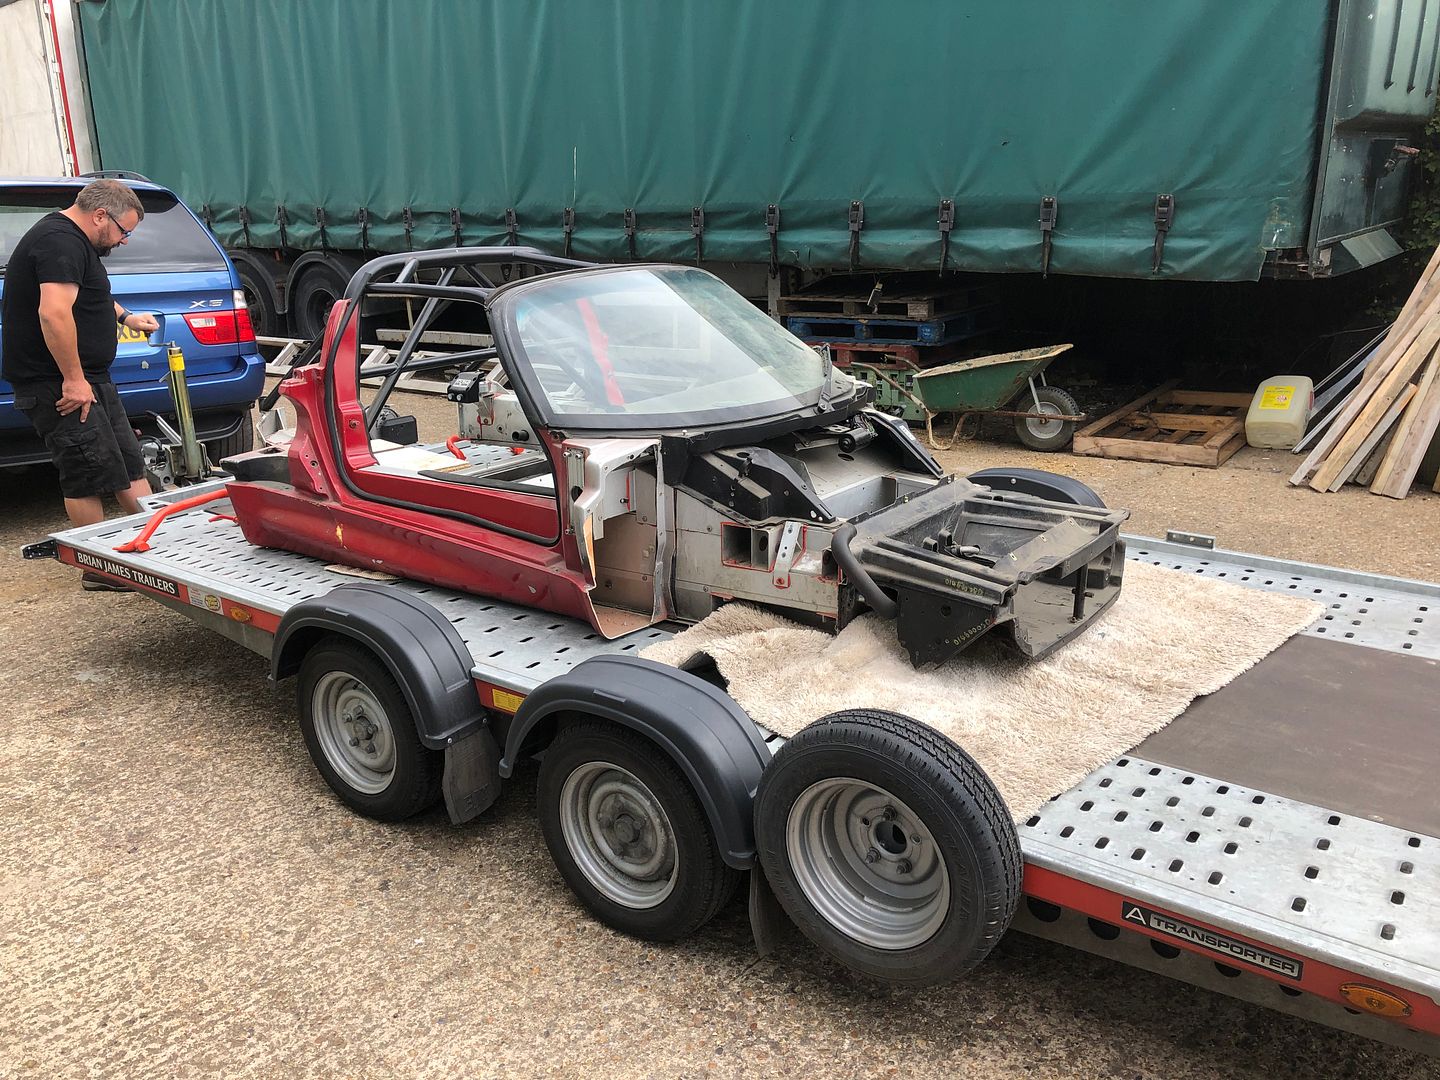
I pushed on with stripping the car down to its most minimalist form:
Then loaded it up on my friend Daves' trailer and took it to Paul Cooper for my next list of 'can you just' demands
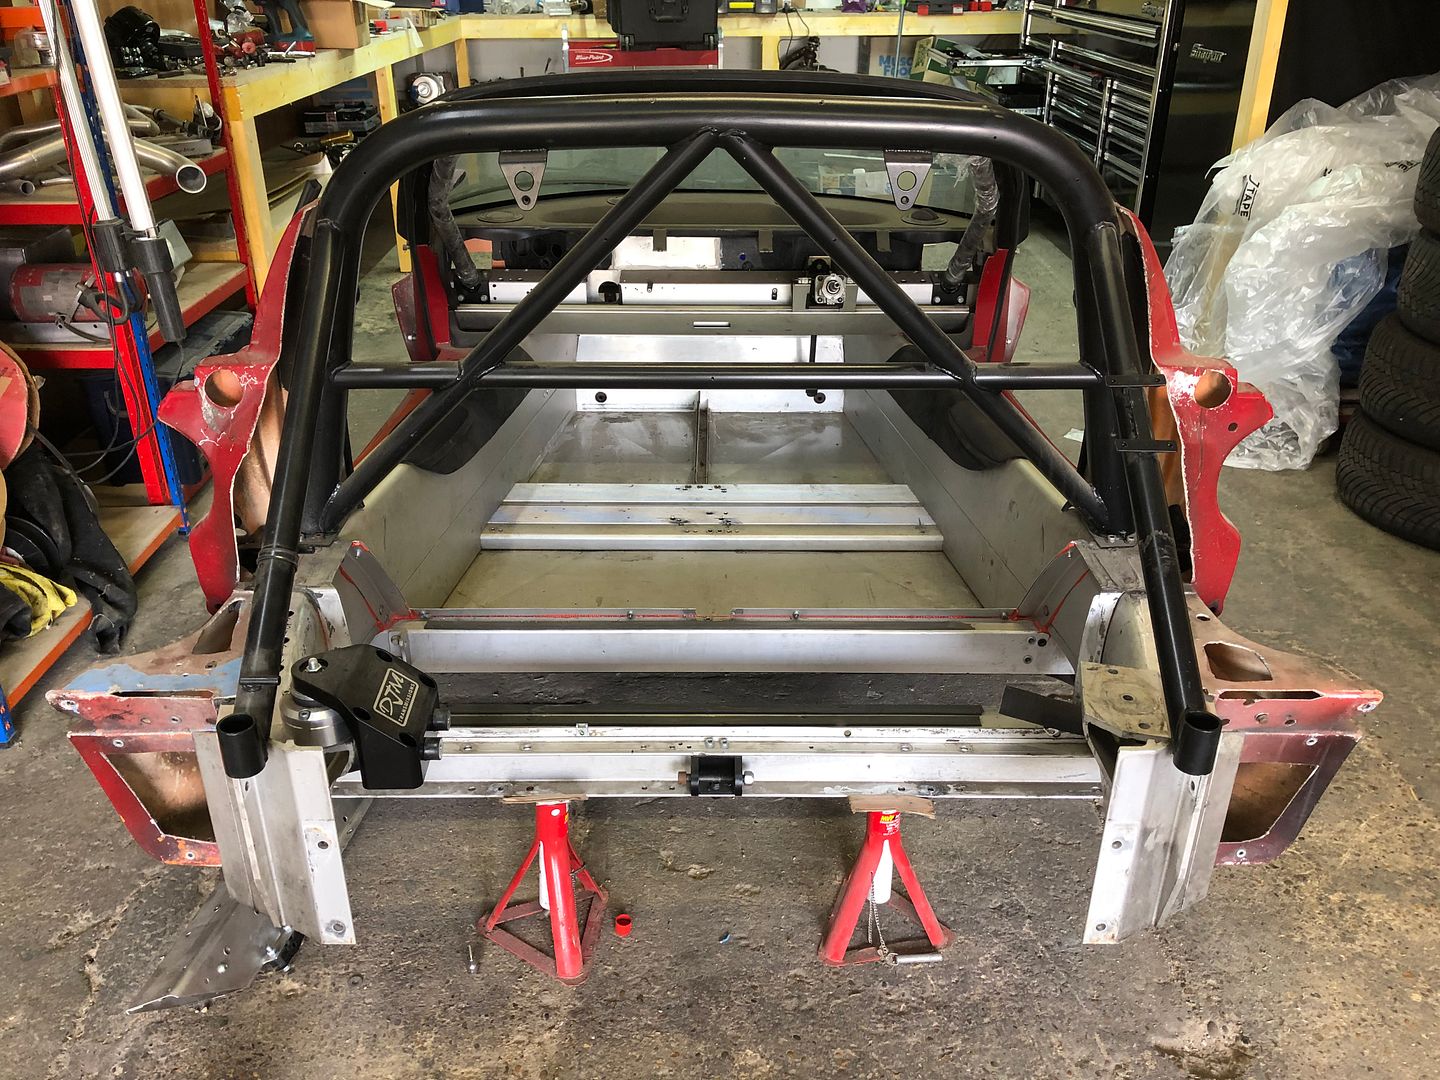
With various engine swaps and gear lever swaps, the floor resembled a bit of swiss cheese and there were a few other bits I wanted welding up.
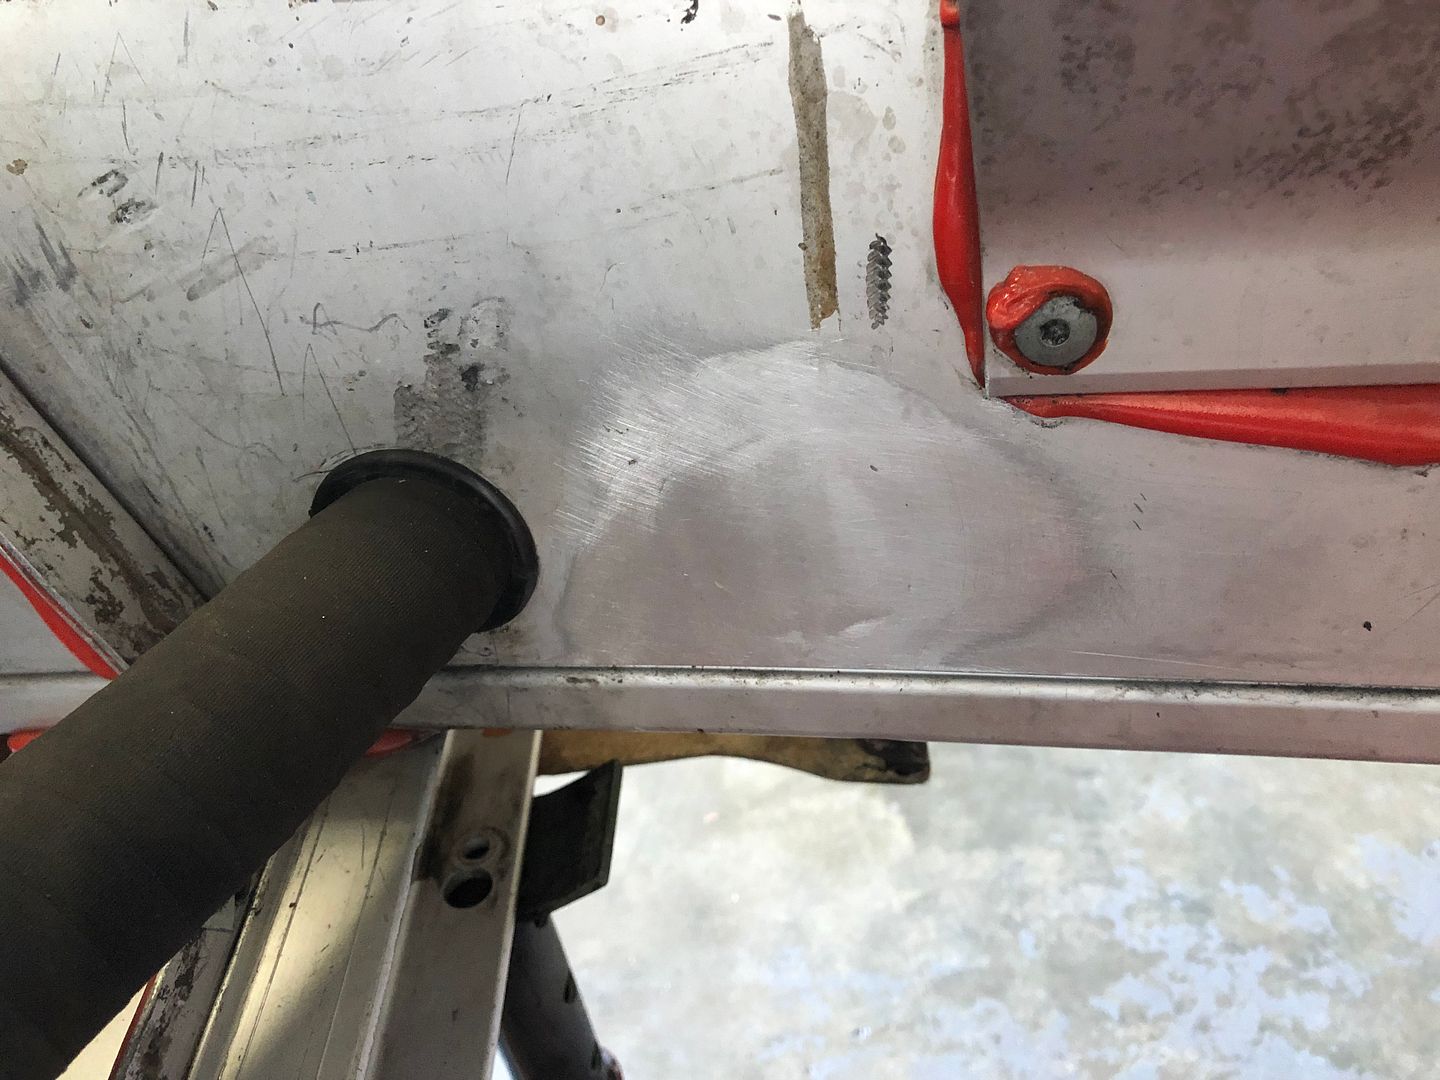
He performed some absolute magic with the floor!
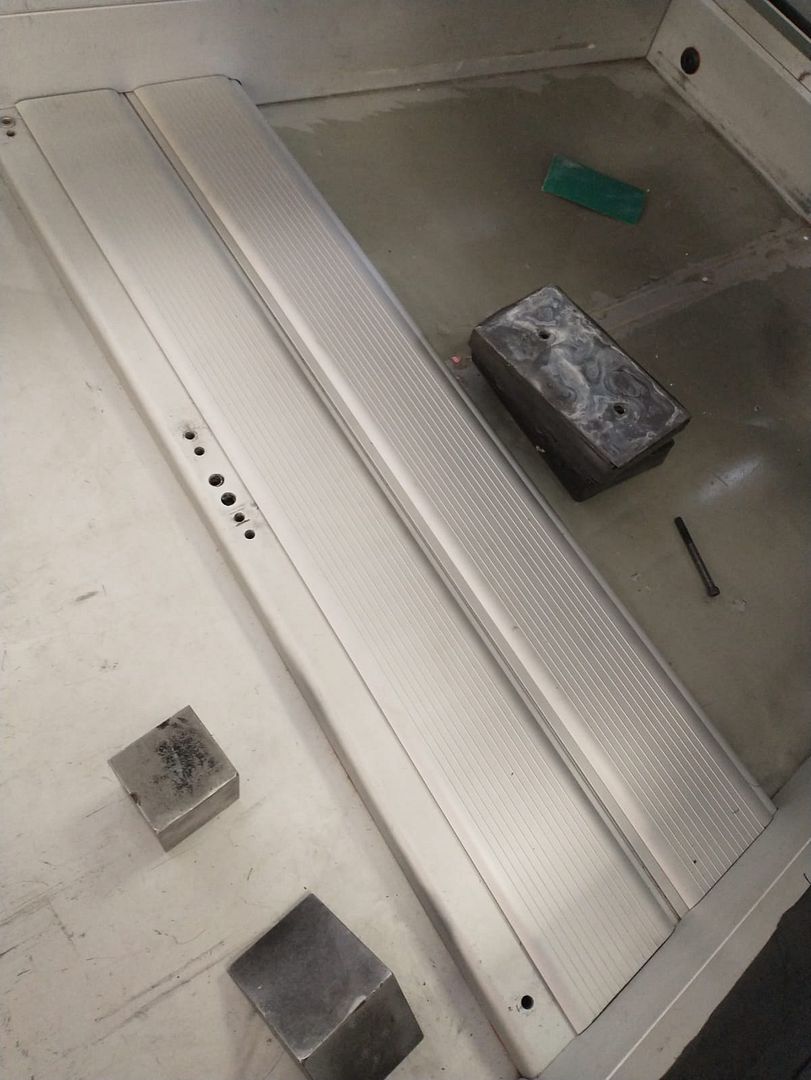
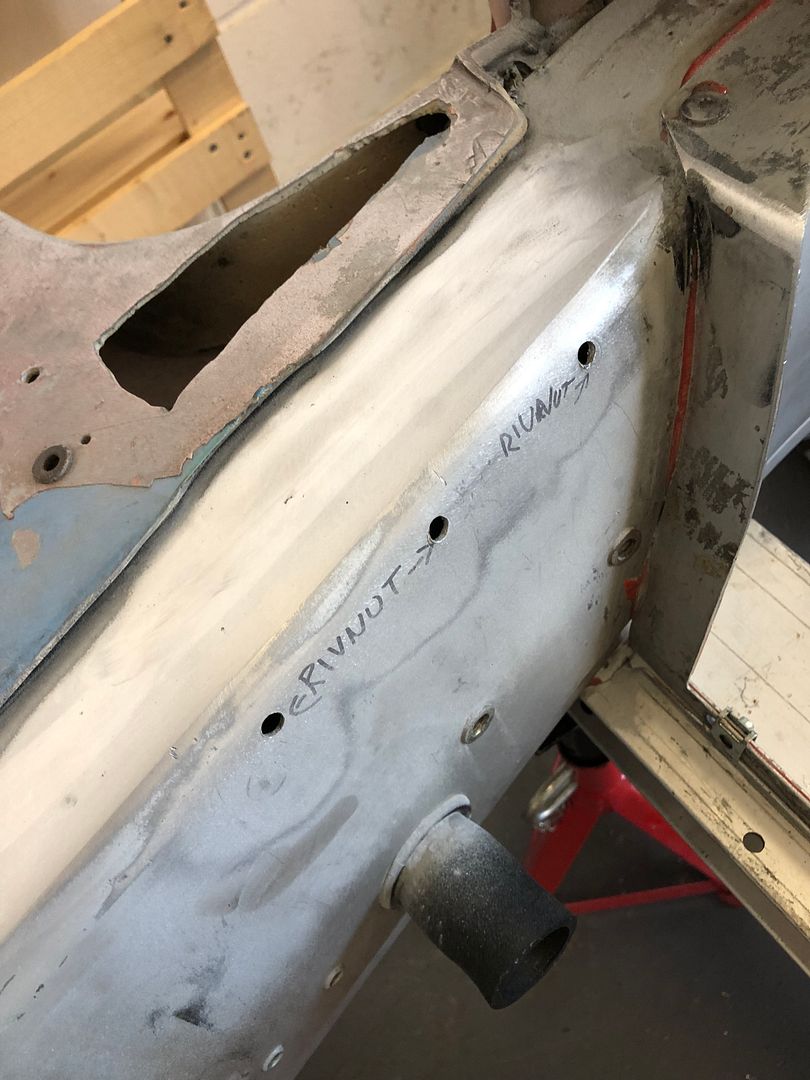
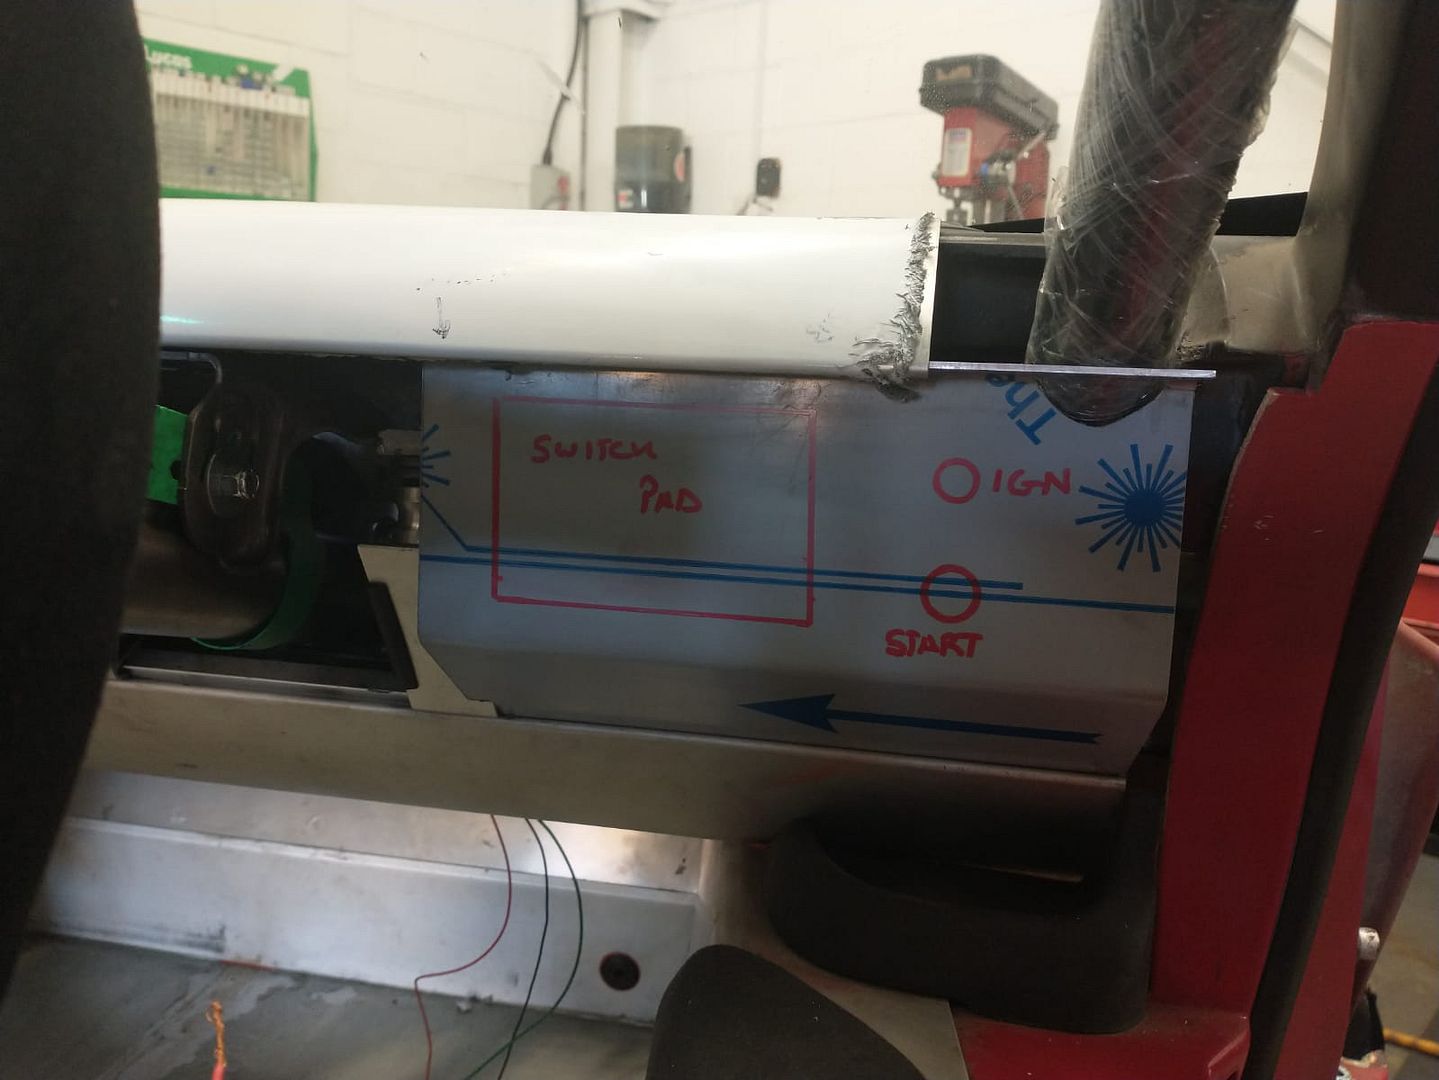
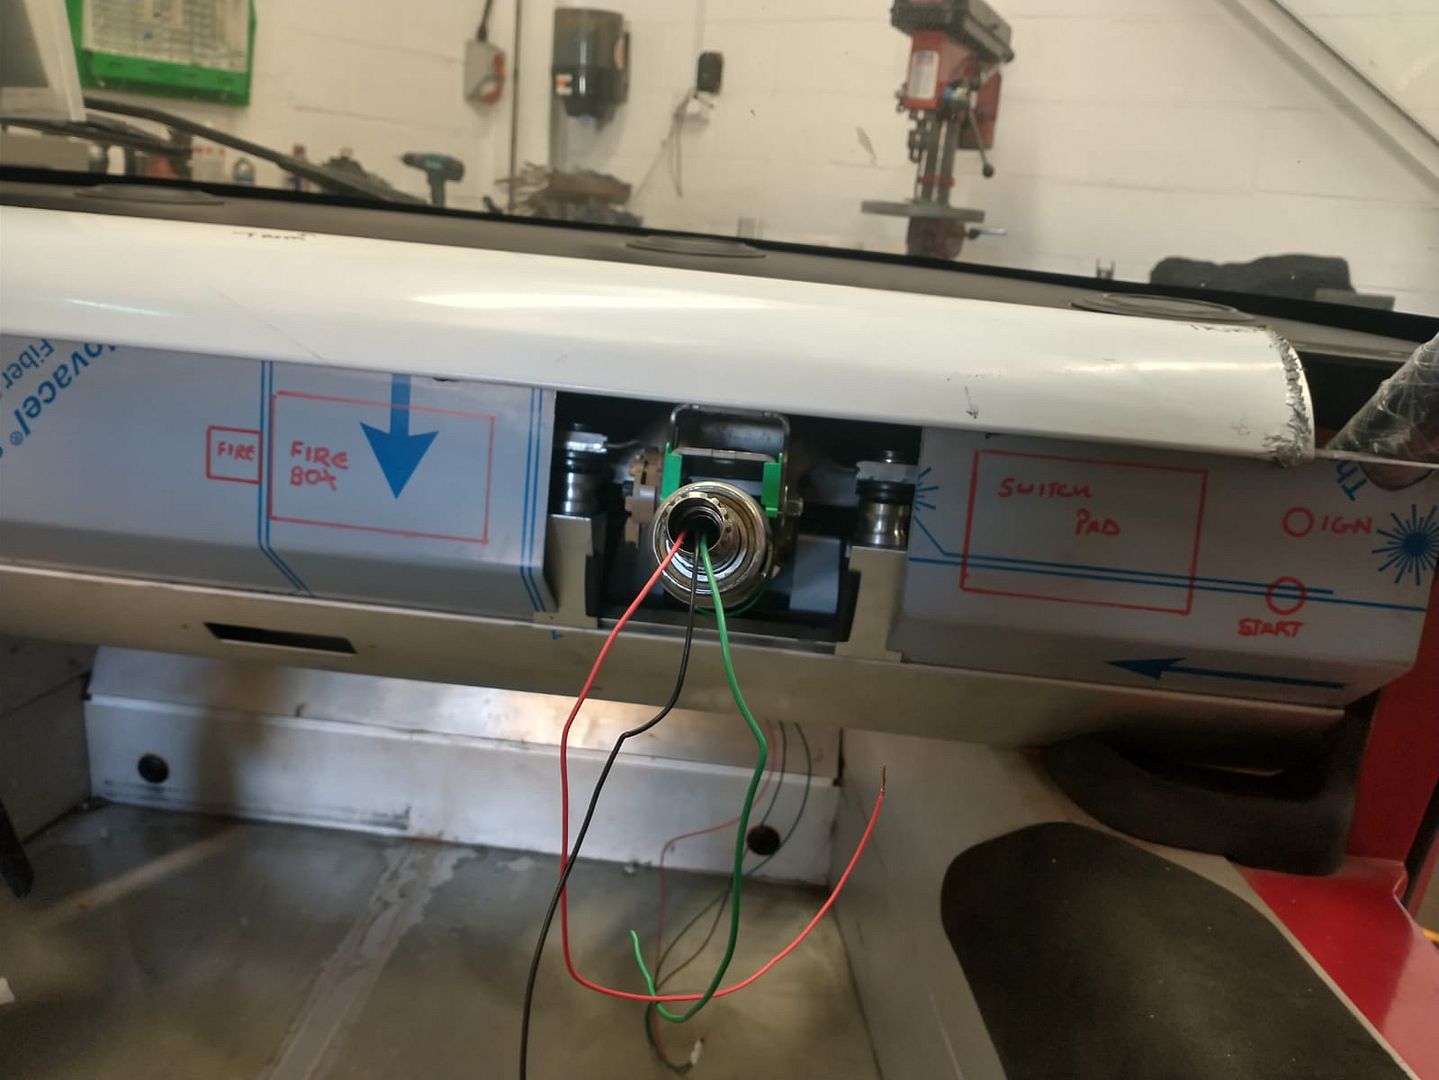
Clear instructions were written for the other bits...
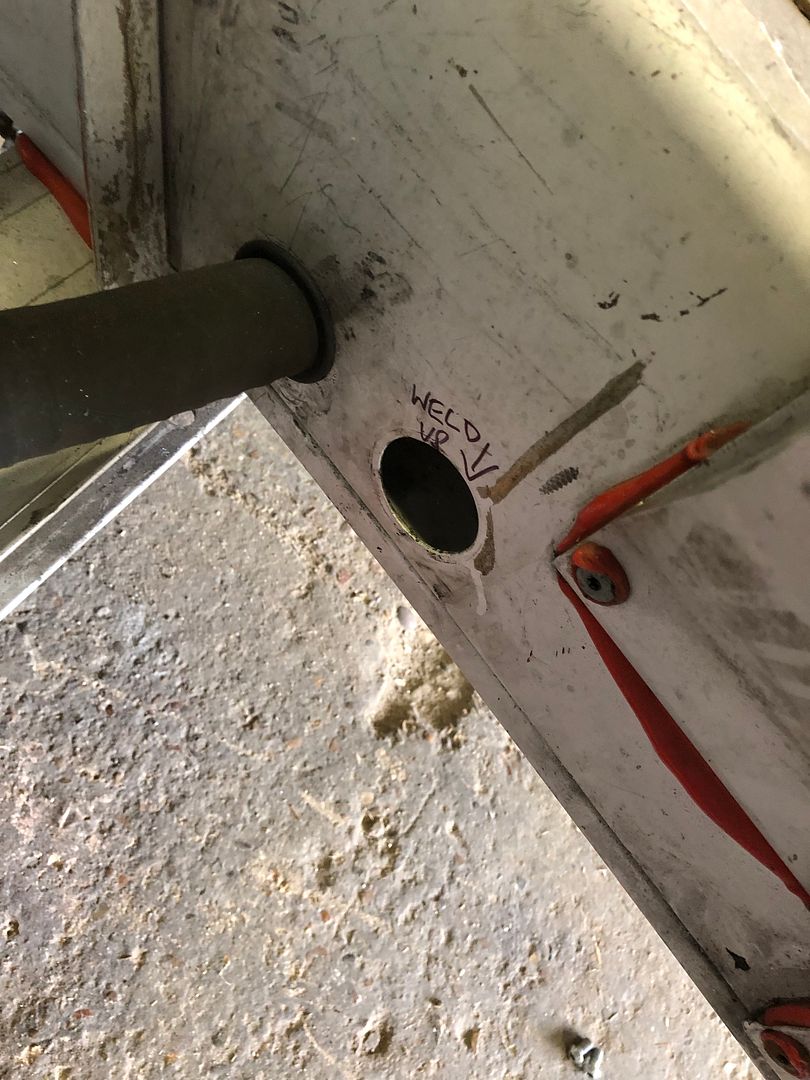
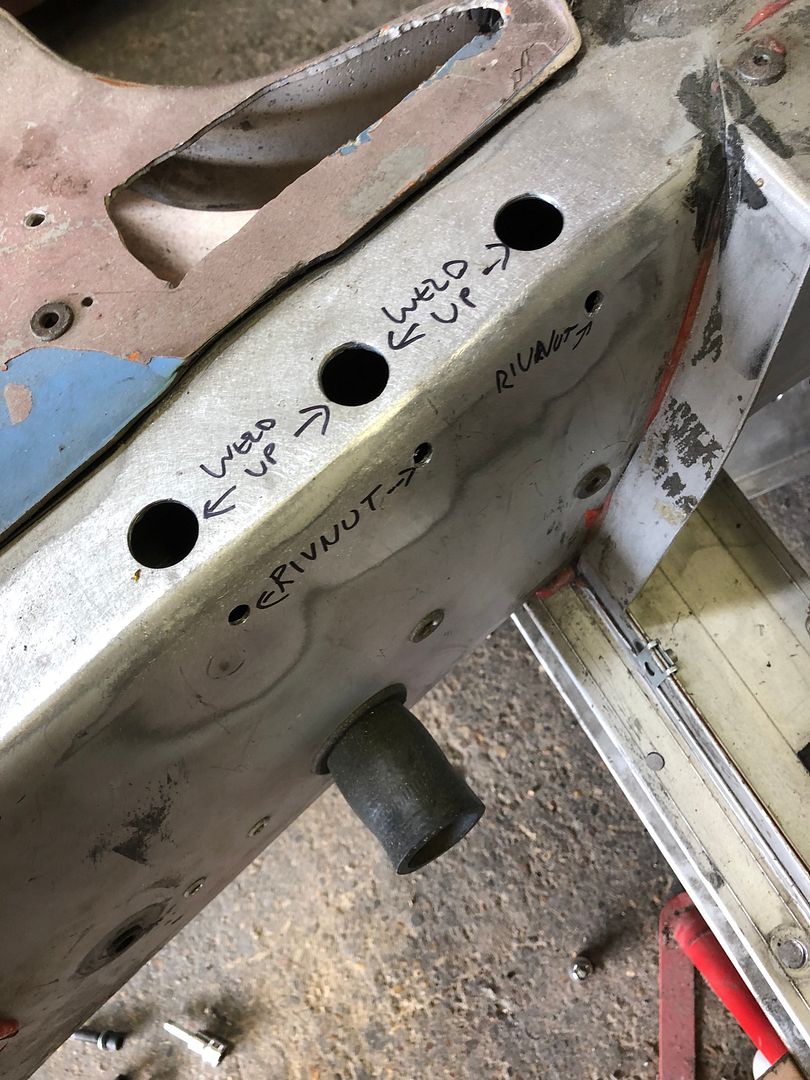
And actioned:
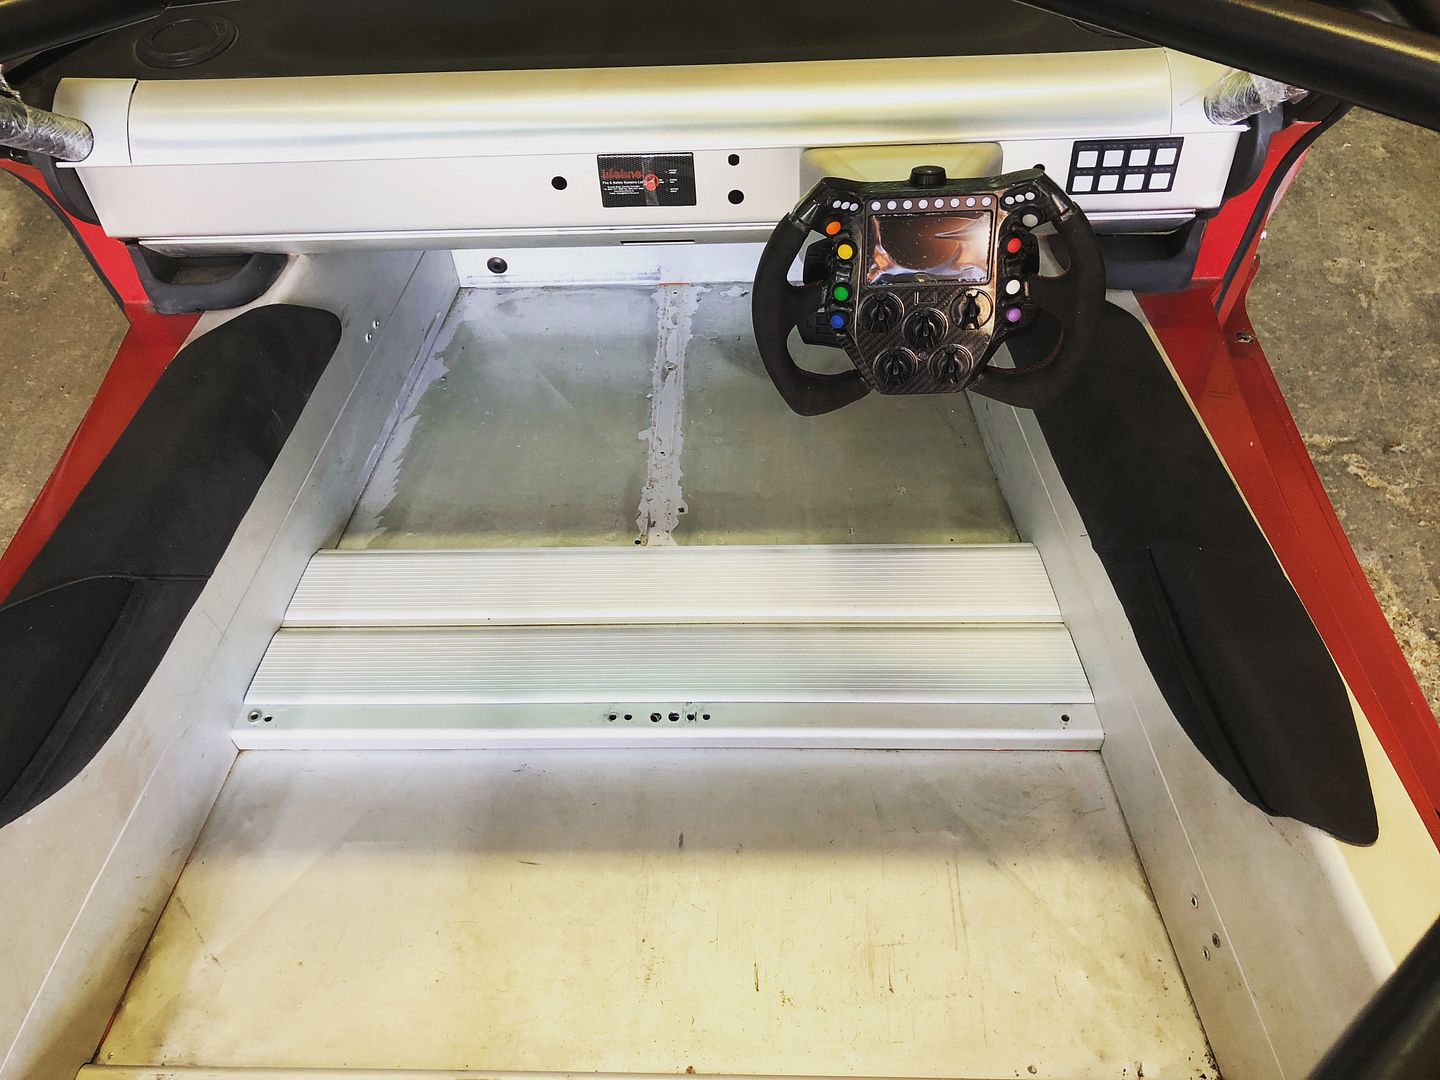
I'd also been explaining to Paul that I had a rather snazzy steering wheel with a built in dash, so was after a new dashboard without the cutout for the standard cluster.
Plus I wanted to mount my fire extinguisher control box, my CAN keypad, some switches etc. Oh, and being a well built 6ft 3 chap, it would be really nice if I could have some adjustment on the steering position...
A modified Vauxhall Zafira steering column complete with tilt and reach adjustment, collapsible safety section - modified to take a Lifeline wired quick release electrical connector:
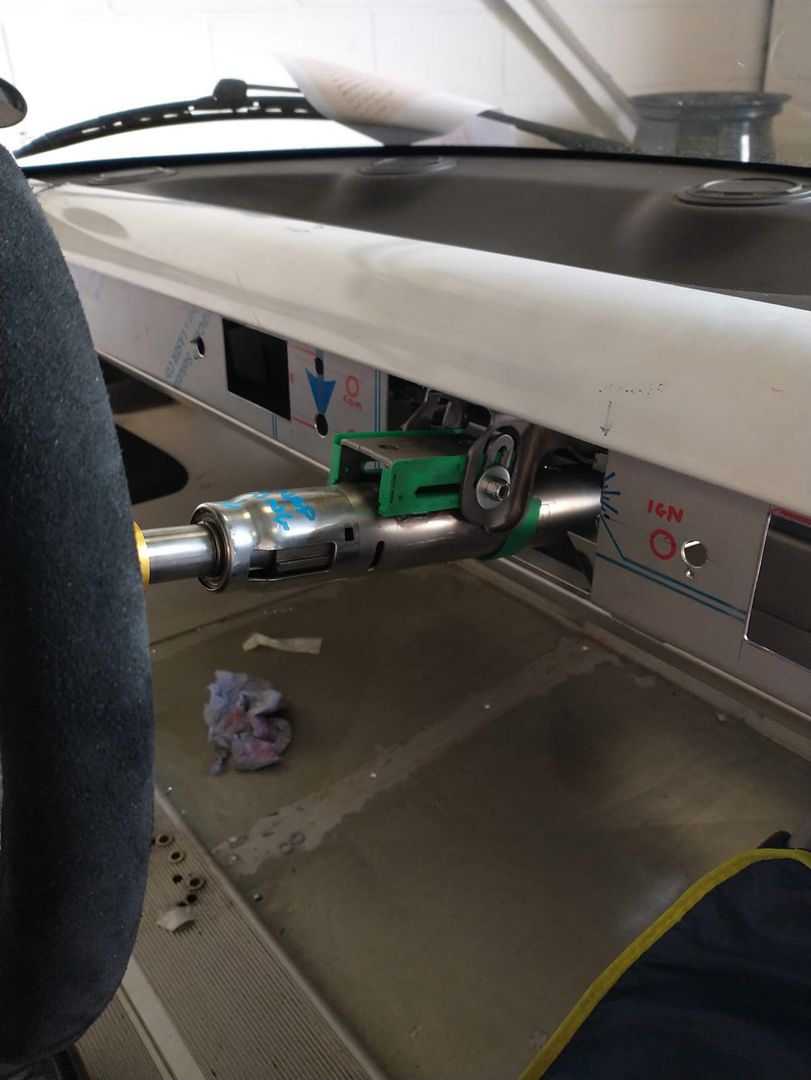
All the adjustment is covered by a custom shroud but can be easily accessed as required:

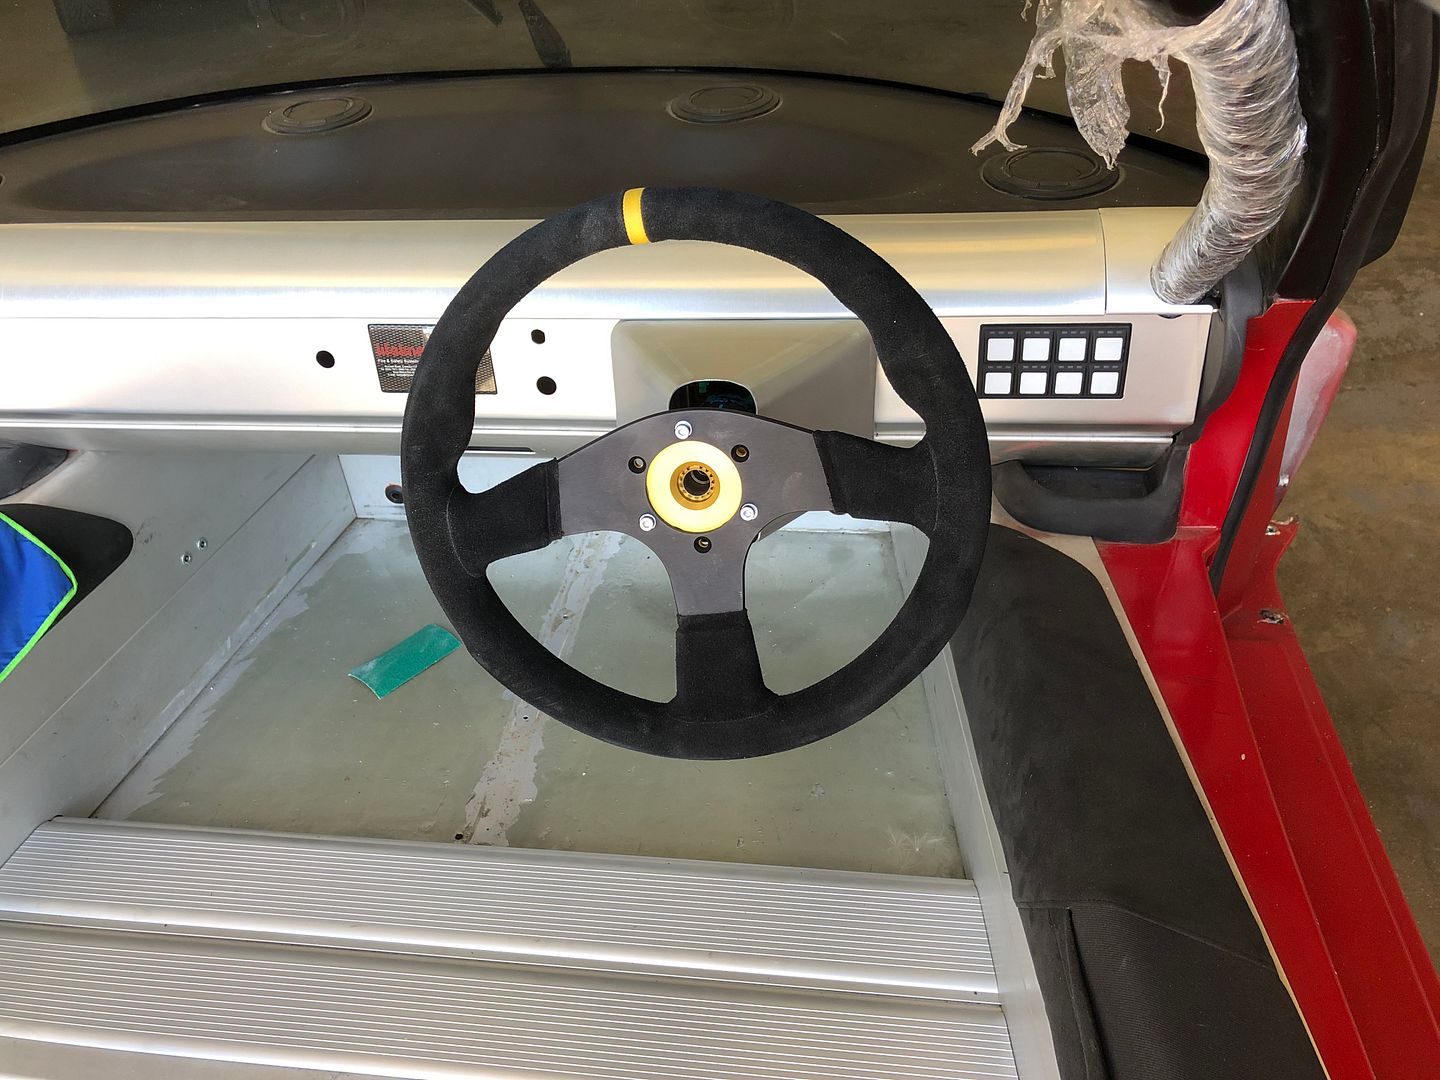

The pictures above show the transport steering wheel that I'm happy to use to wrestle it around on and off trailers etc.
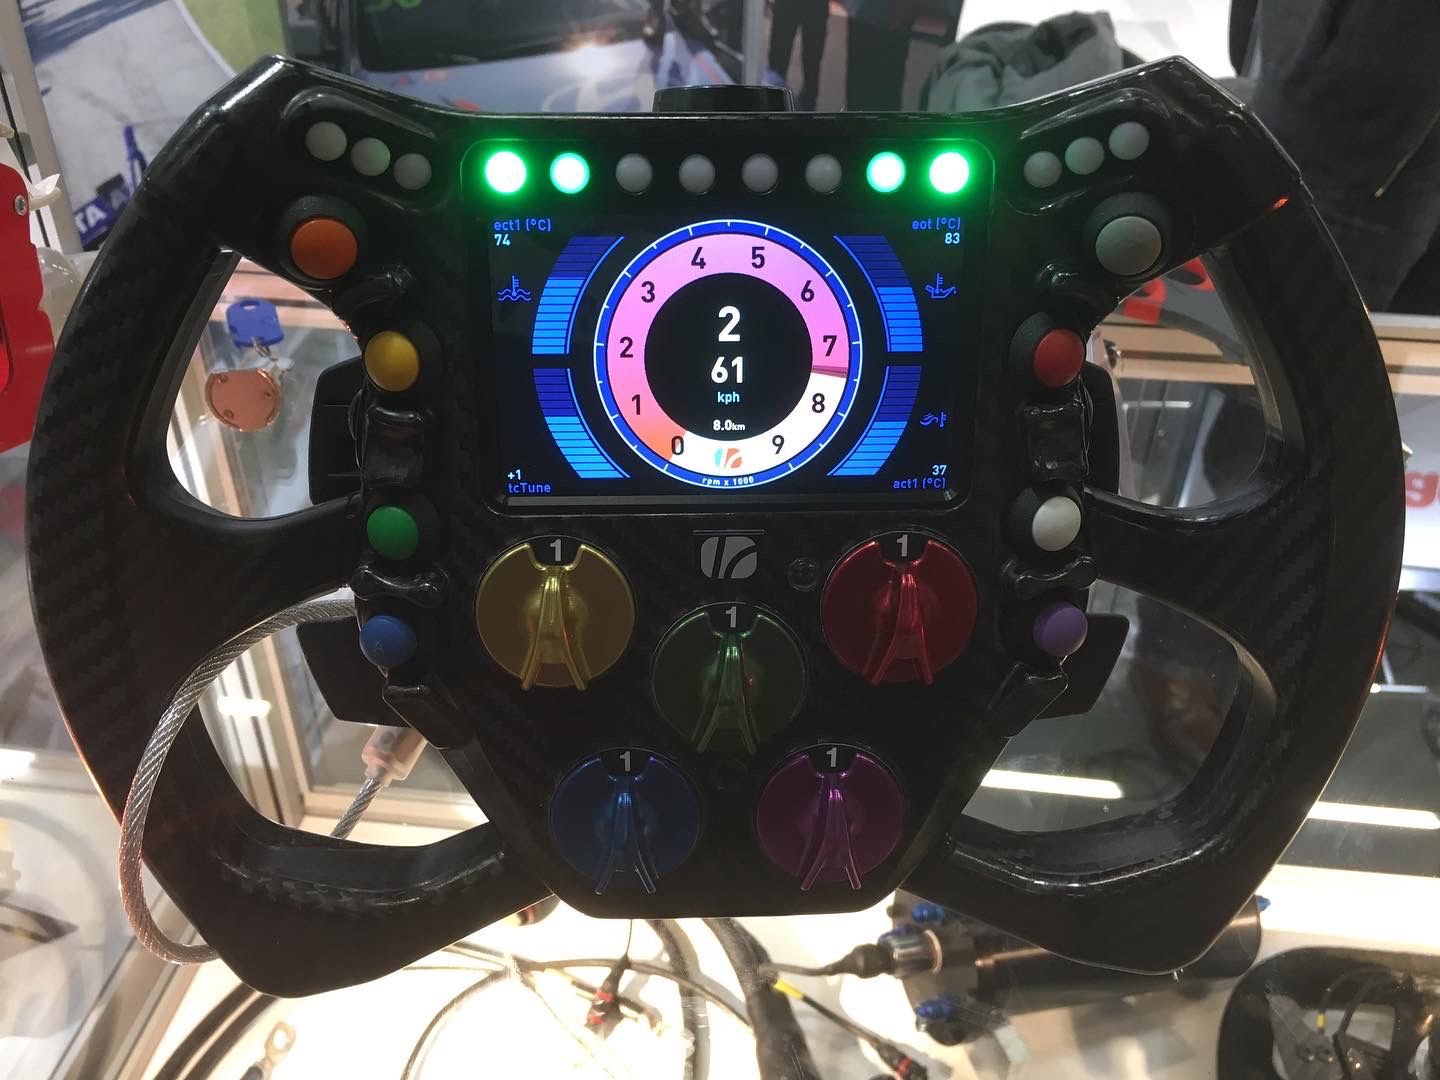
The actual snazzy steering wheel I mentioned earlier, a Life Racing SD4, looks like this:
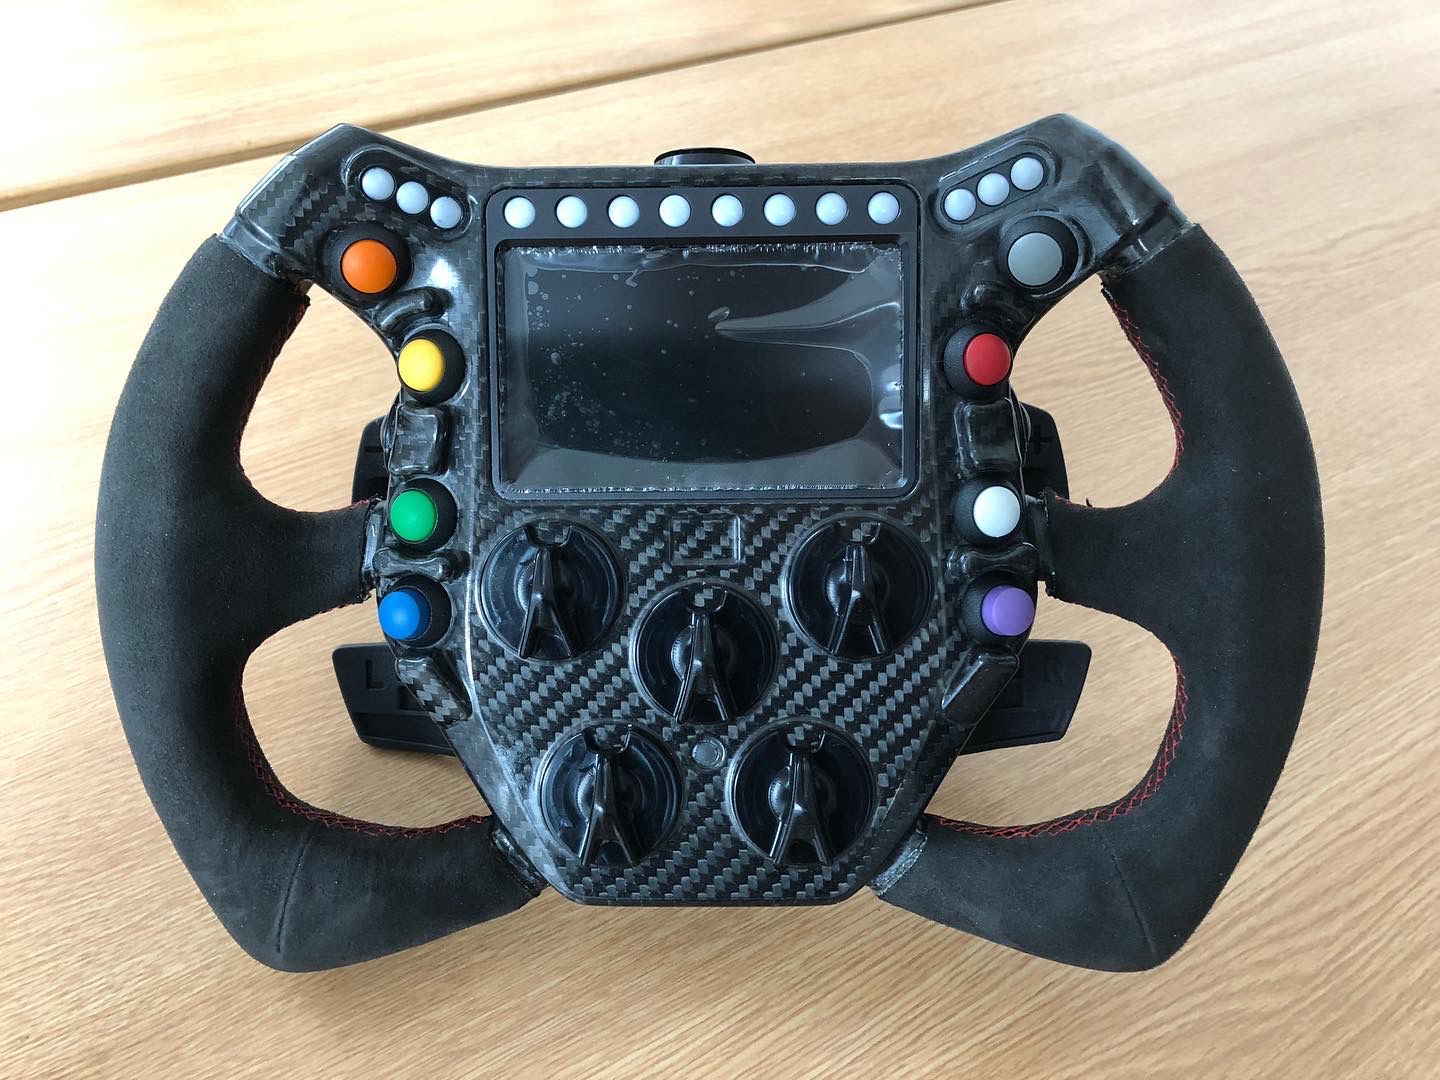
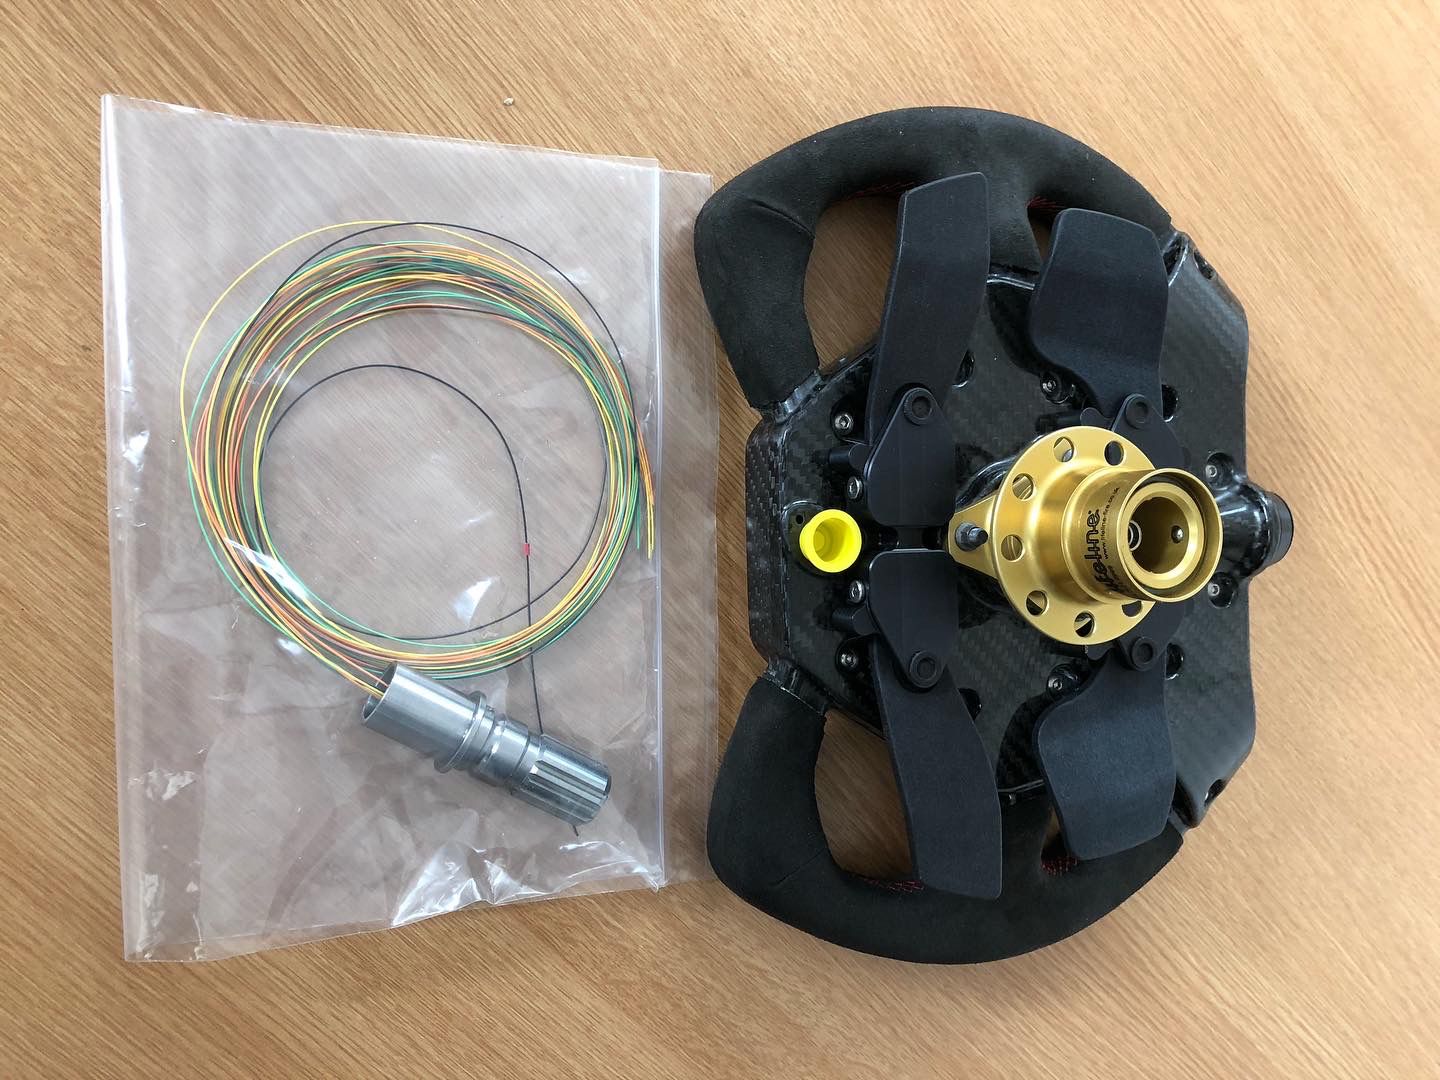
And if you want to see it powered...
The final job on this visit to Paul was for him to mount the new interior fan blower motor I'd bought and make up some pipework to get it to the dash:
While Paul had been working his magic on the interior, I'd done a bit of a stock take of everything I had that I wanted to use in rebuilding the car.
There was a large pile of bits that I thought could do with a freshen up:
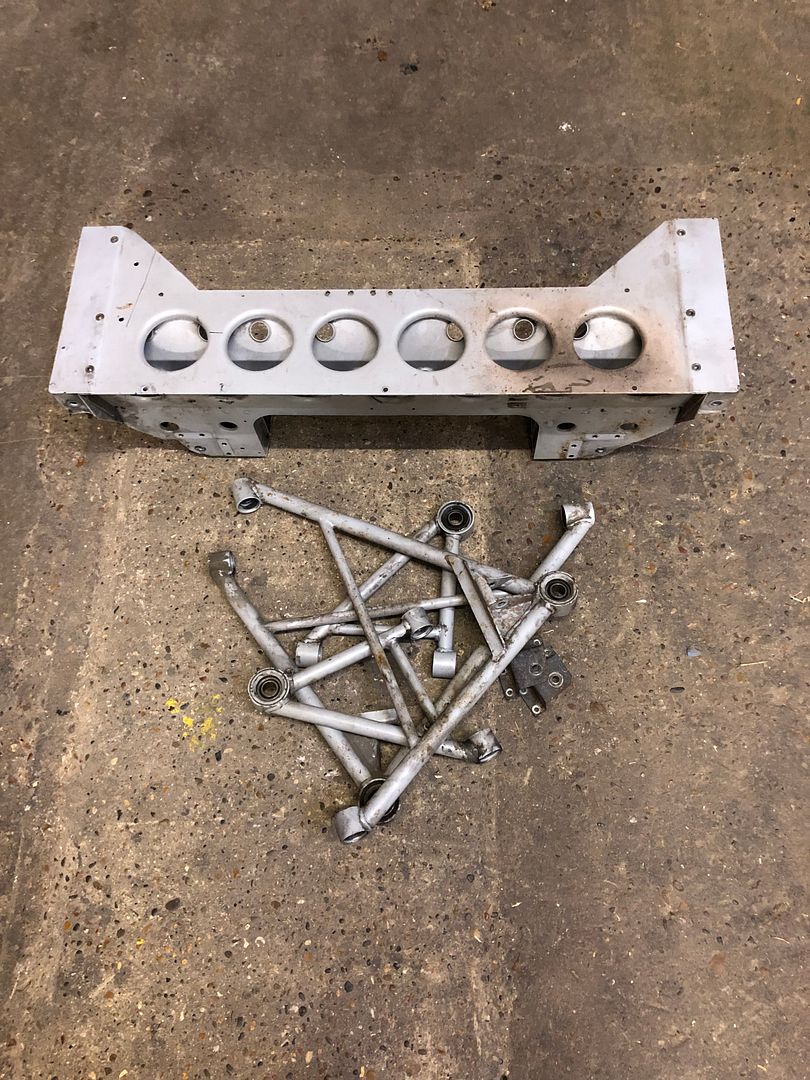
So had them cleaned and painted:
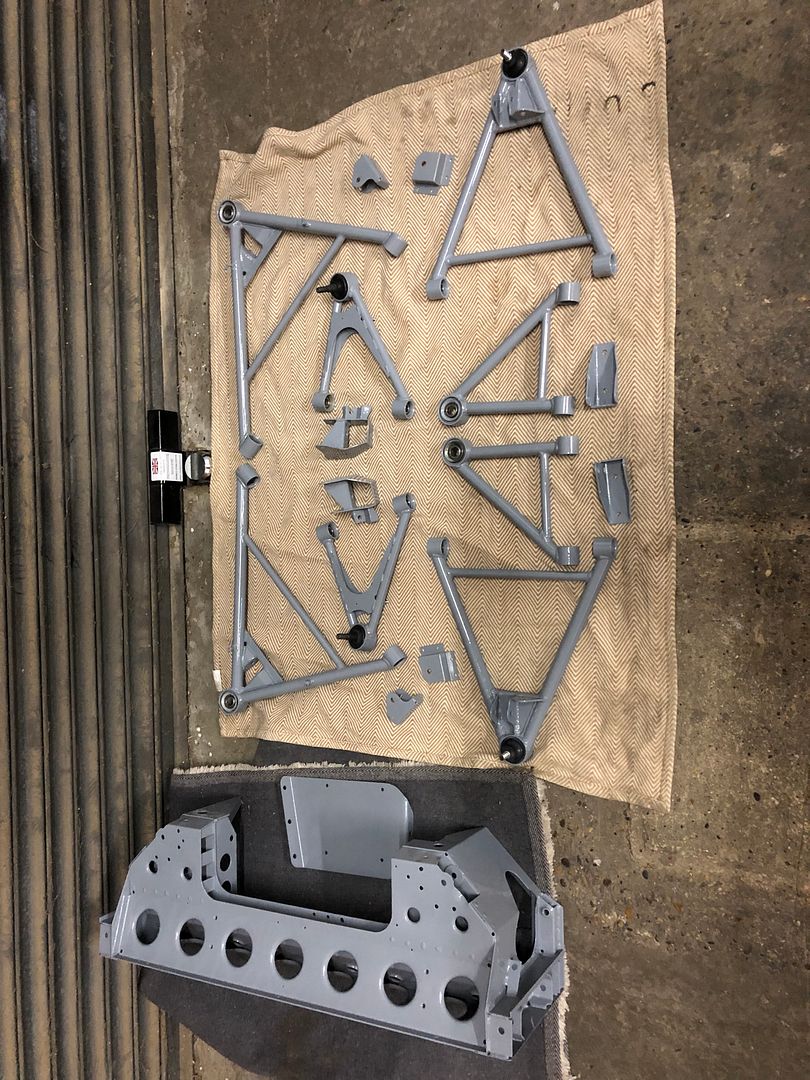
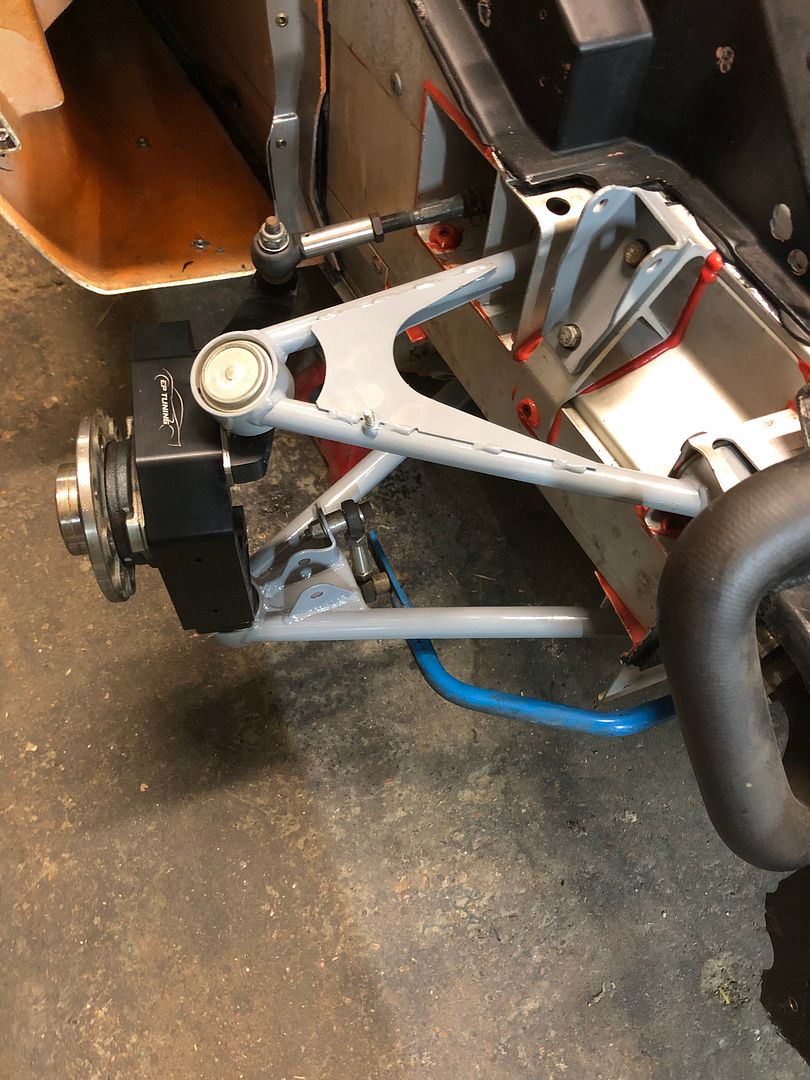
And finally, after many years, I actually started to put it back together
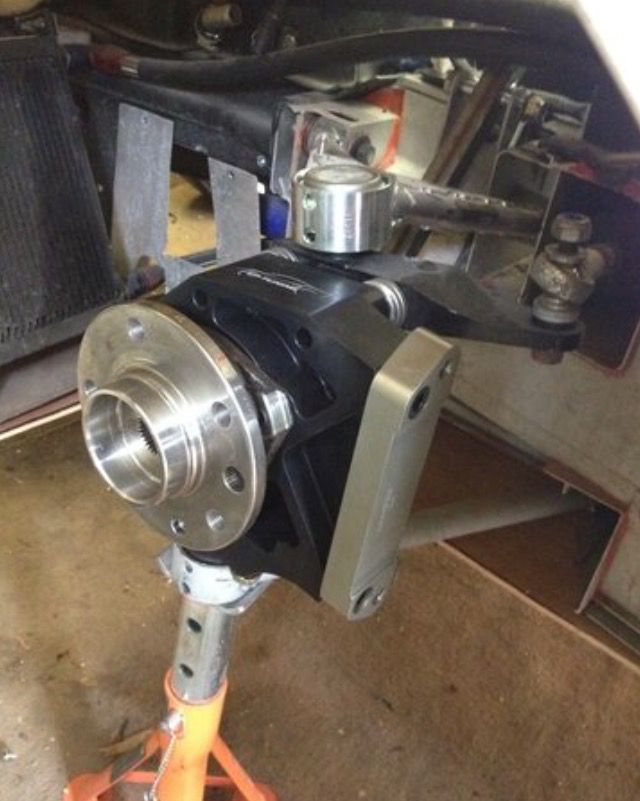
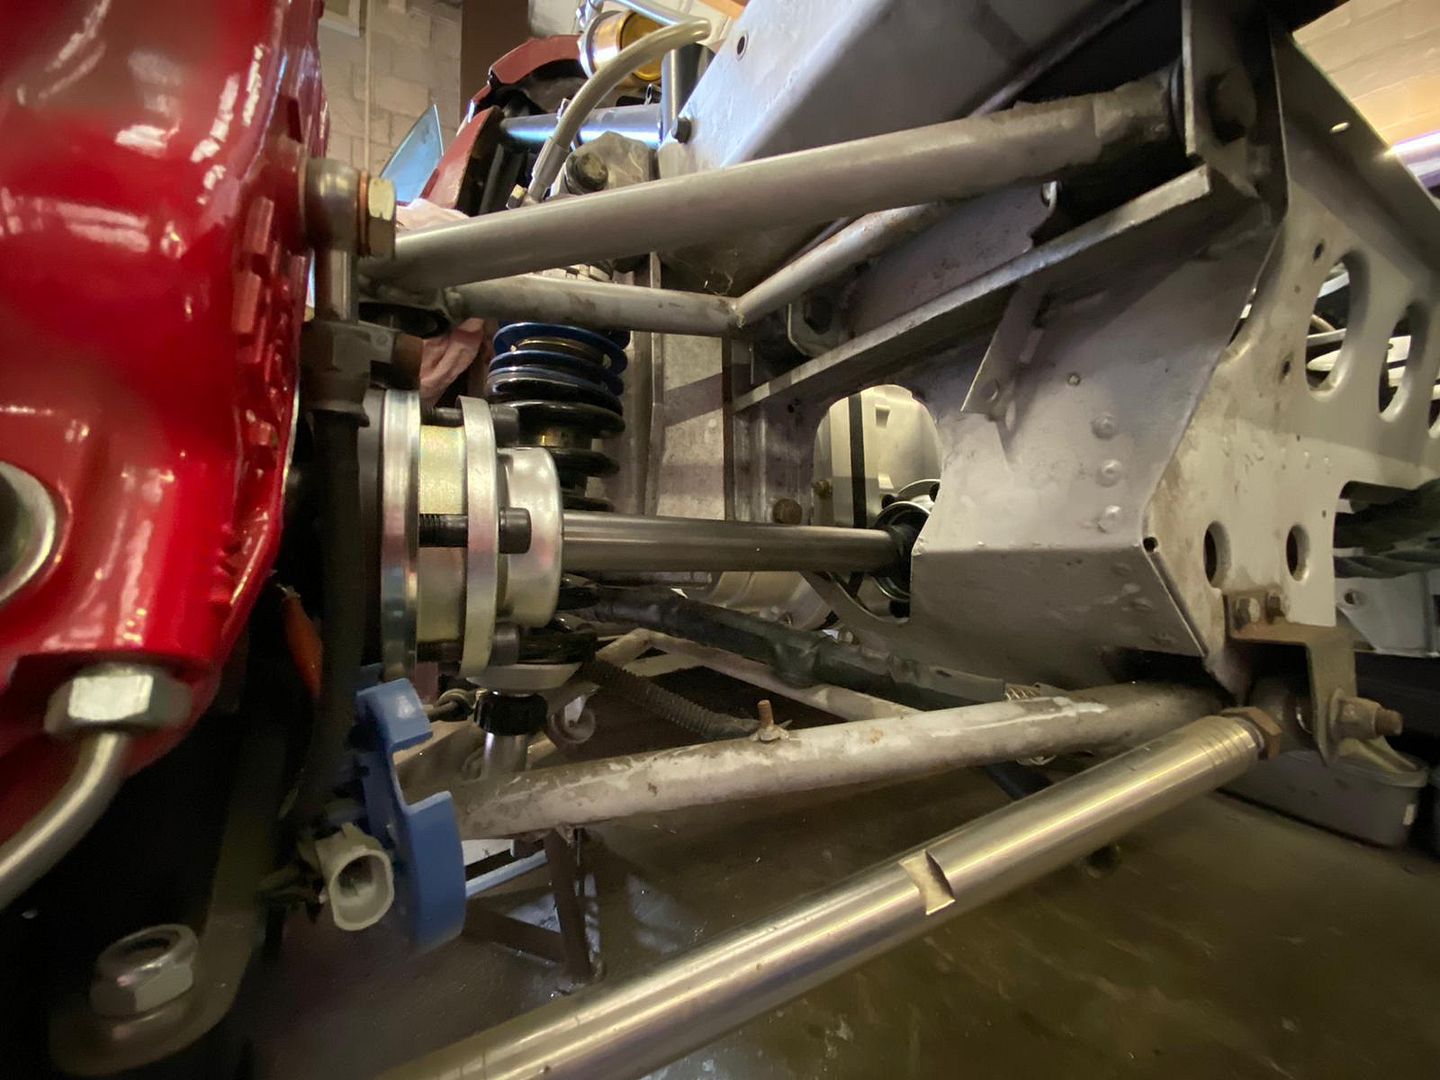
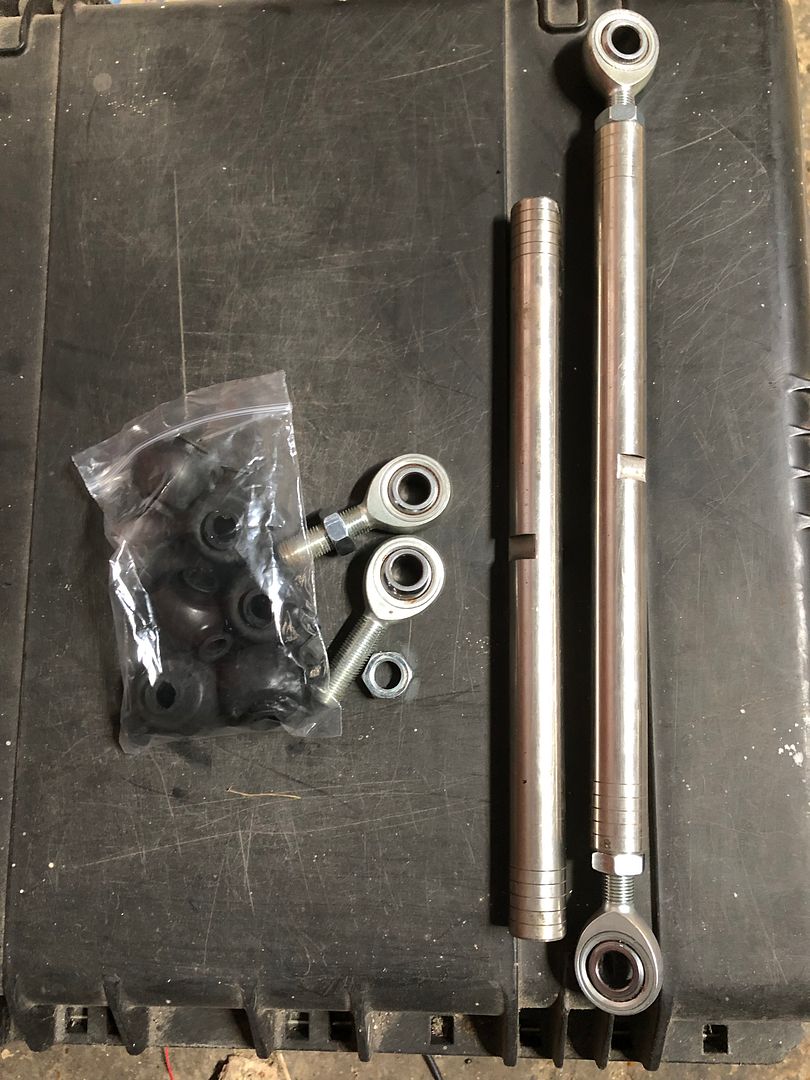
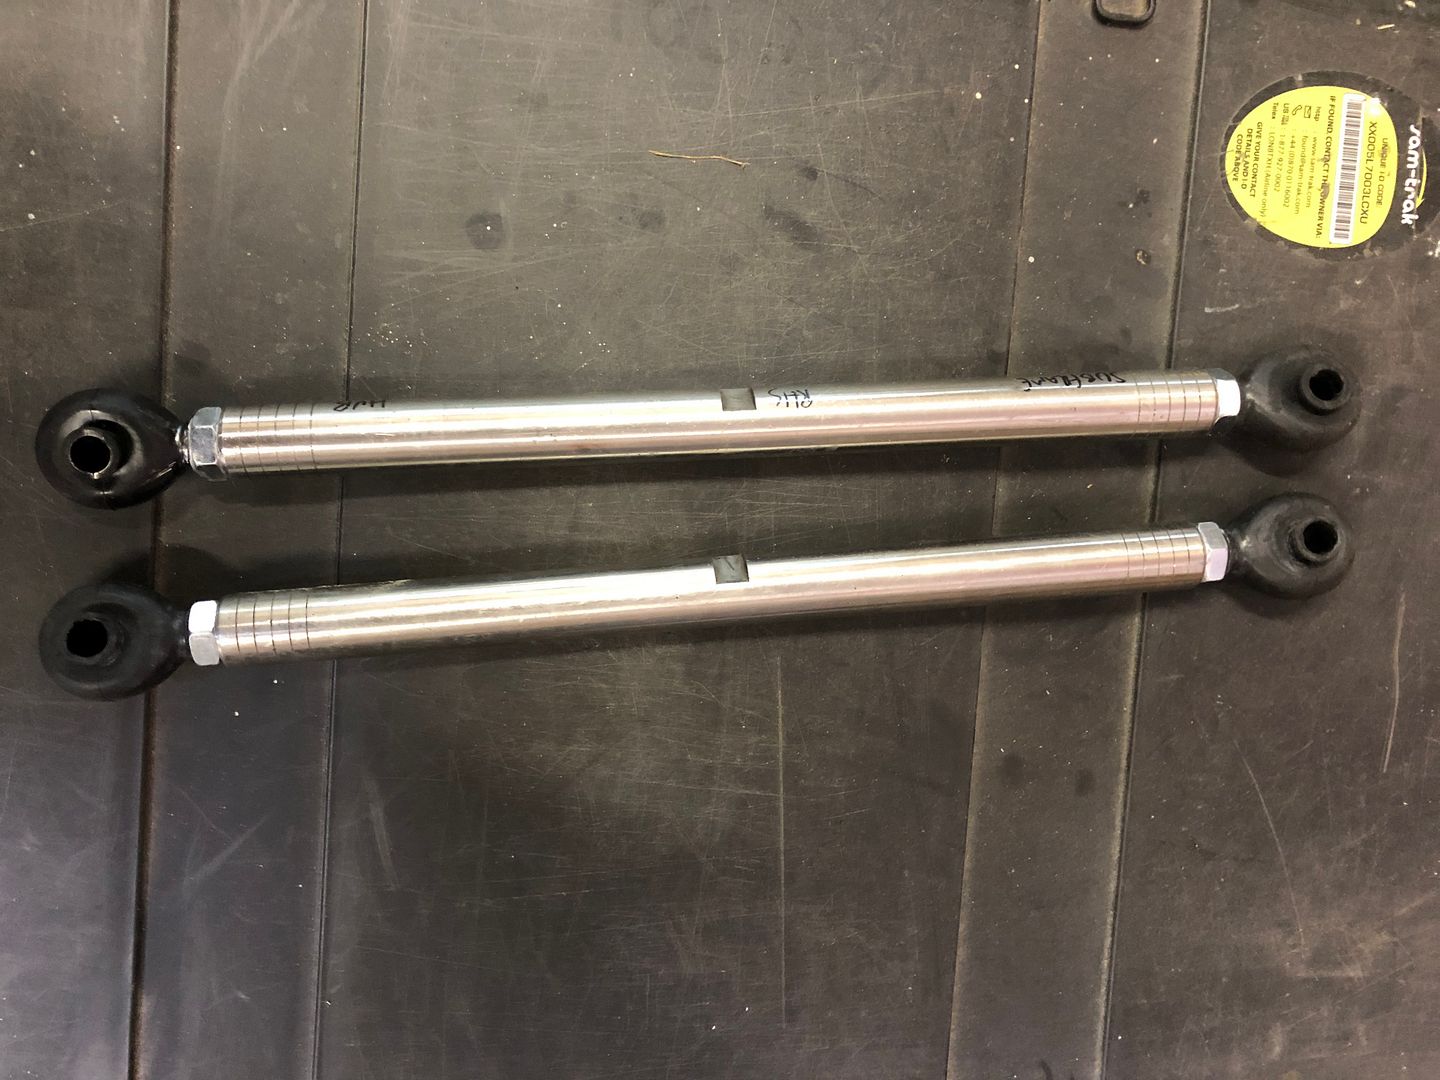
New Aurora bearings and boots:
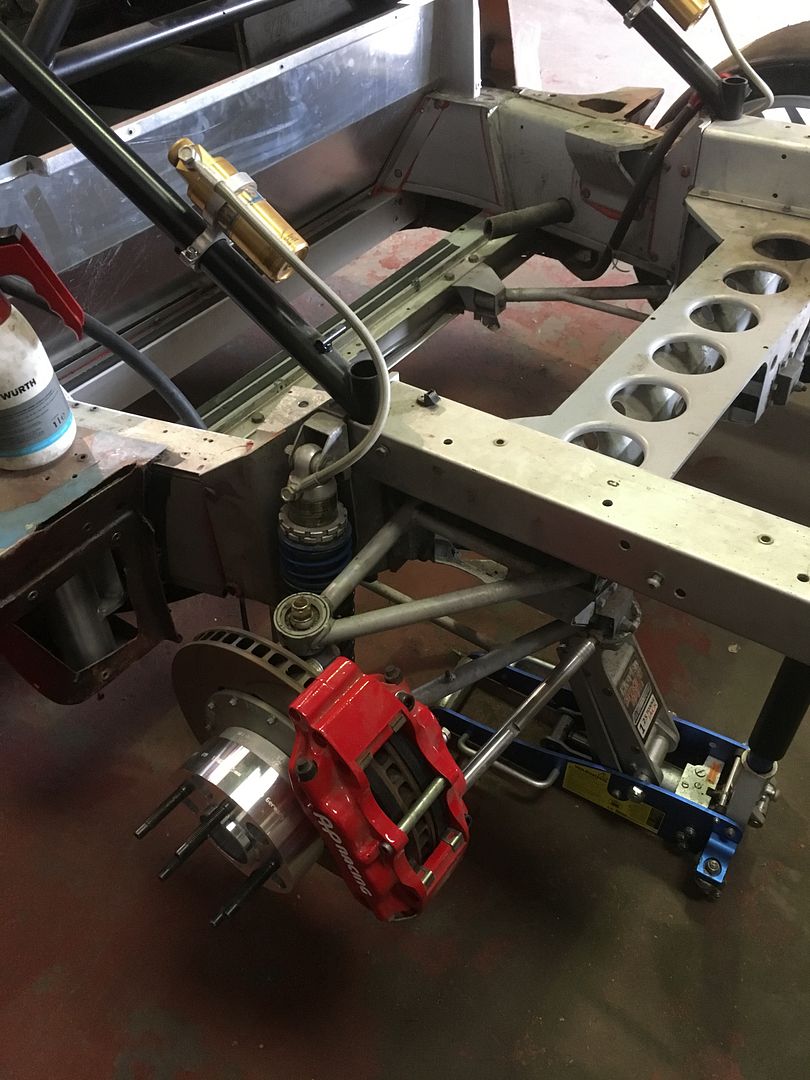
A rather large order with Elise Parts for new braking hardware, more appropriately sized for my needs:
290mm rears with front AP calipers
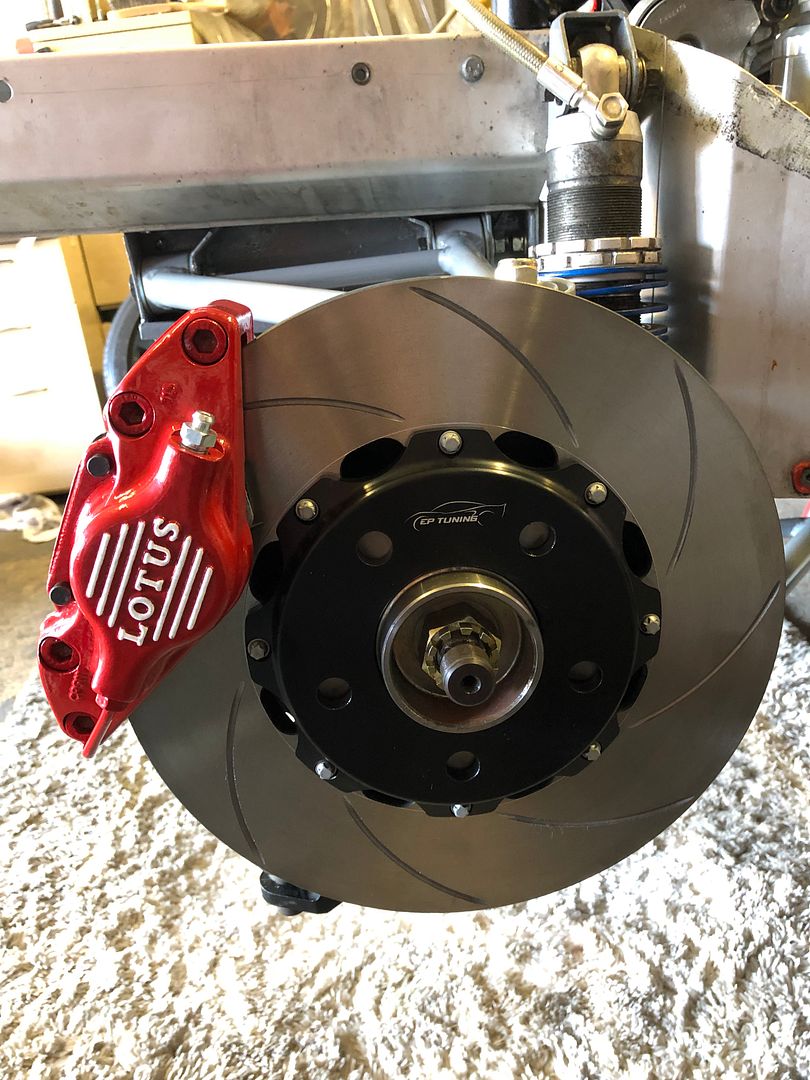
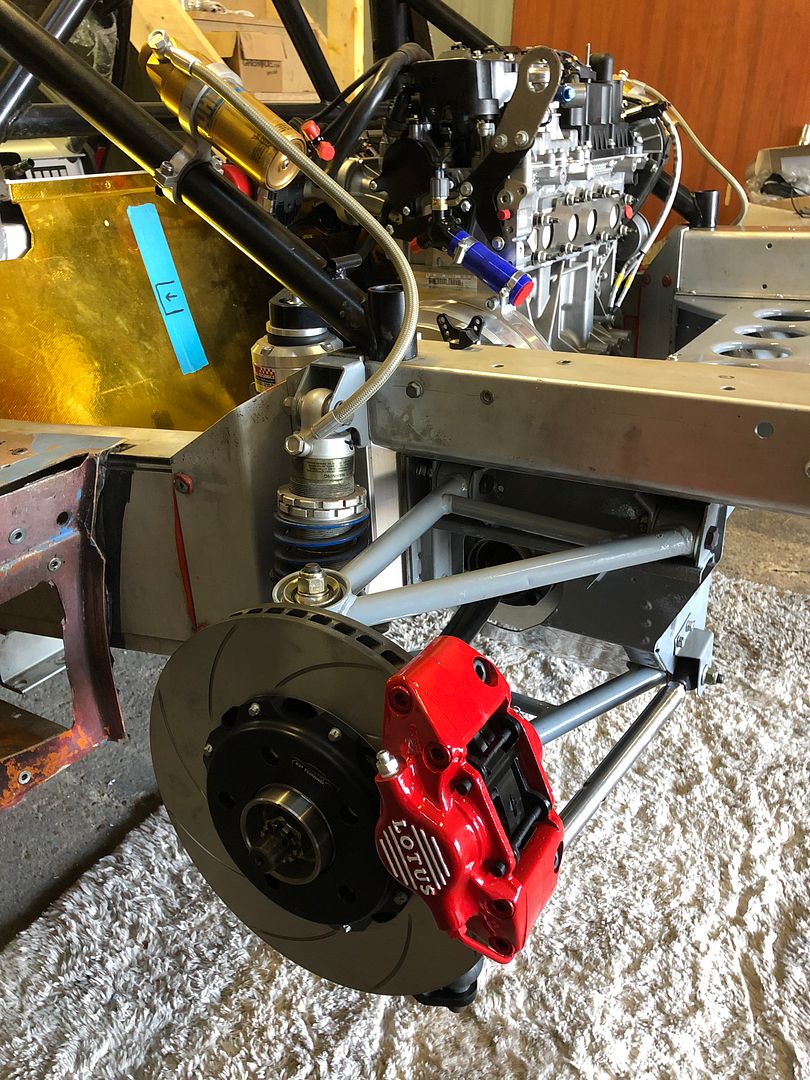
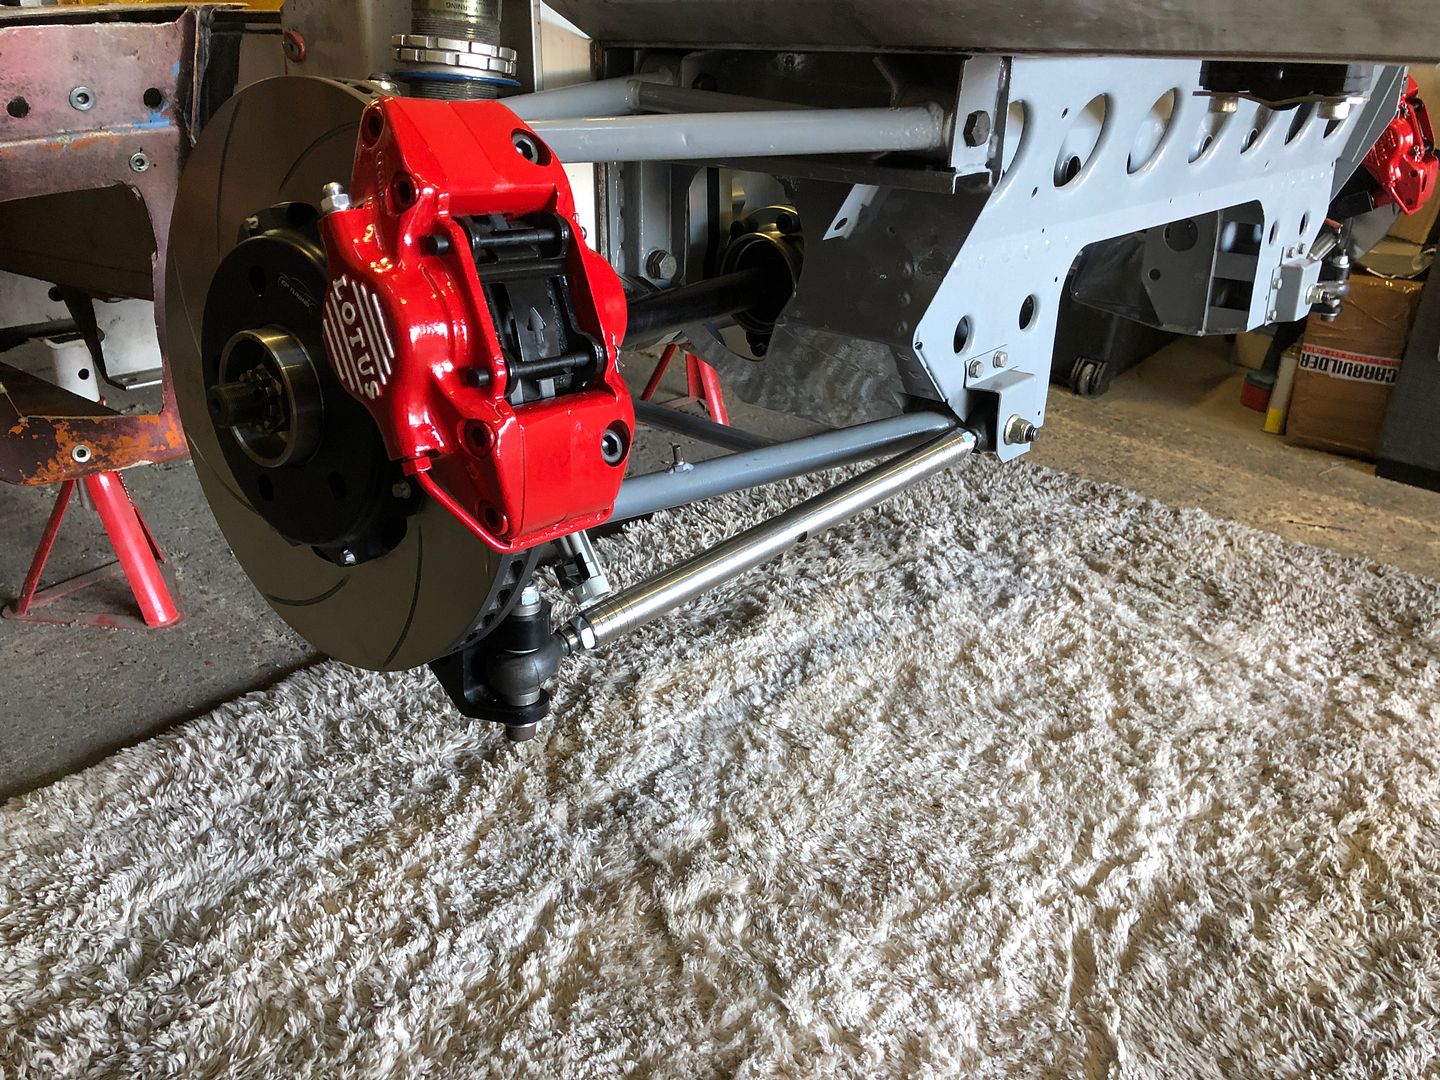
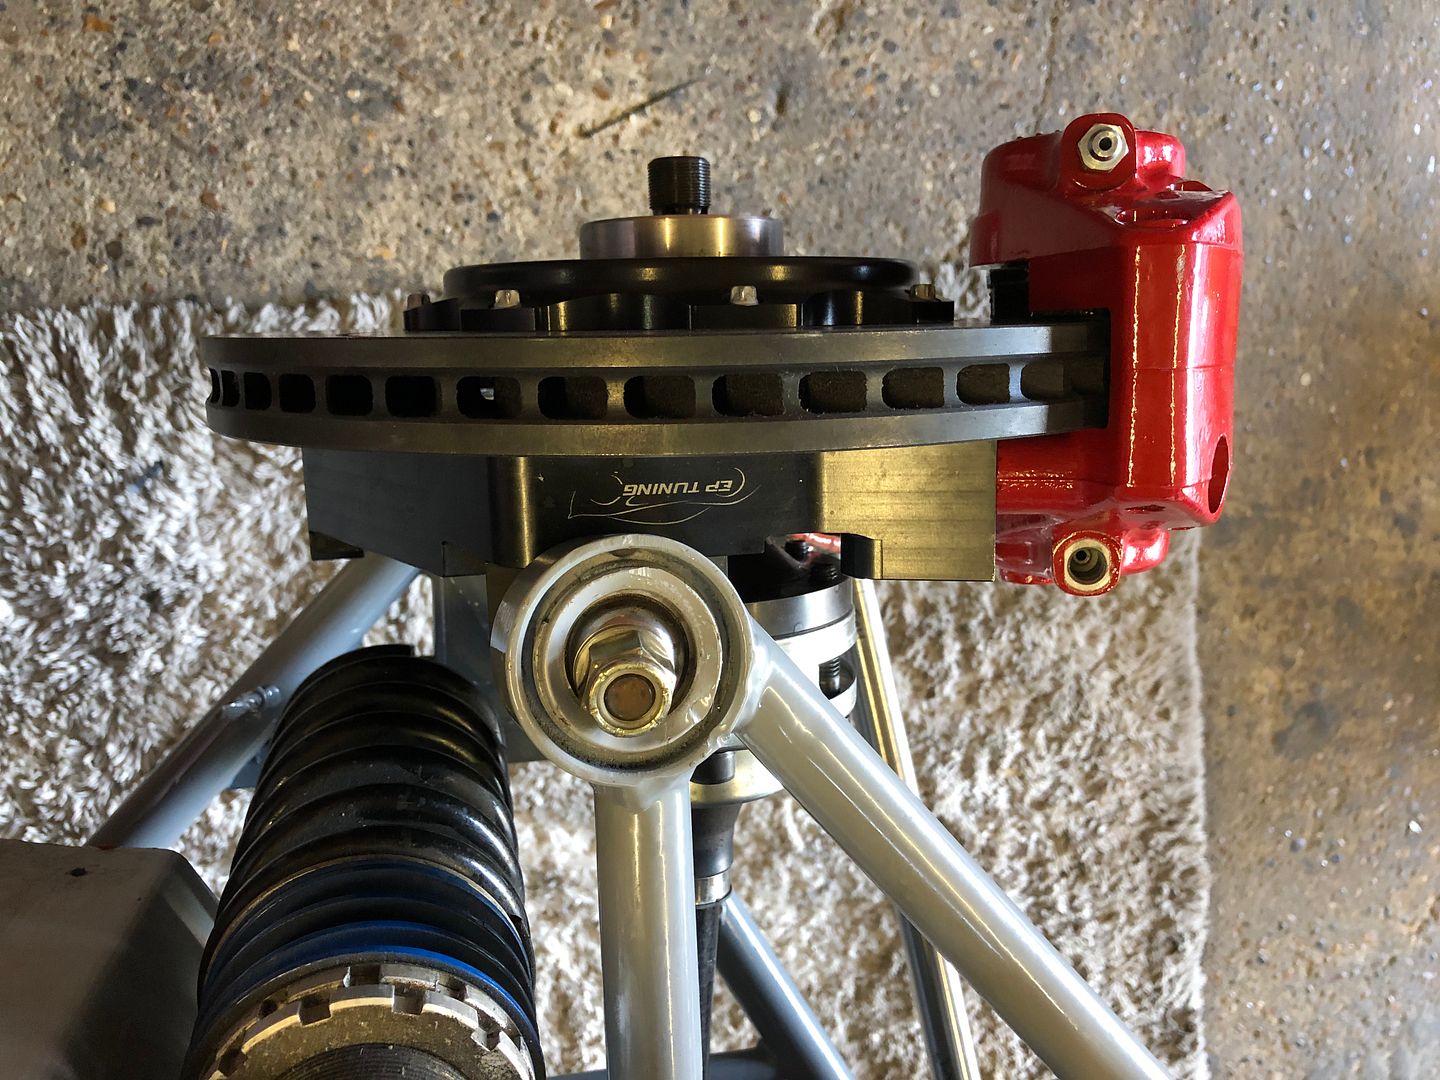
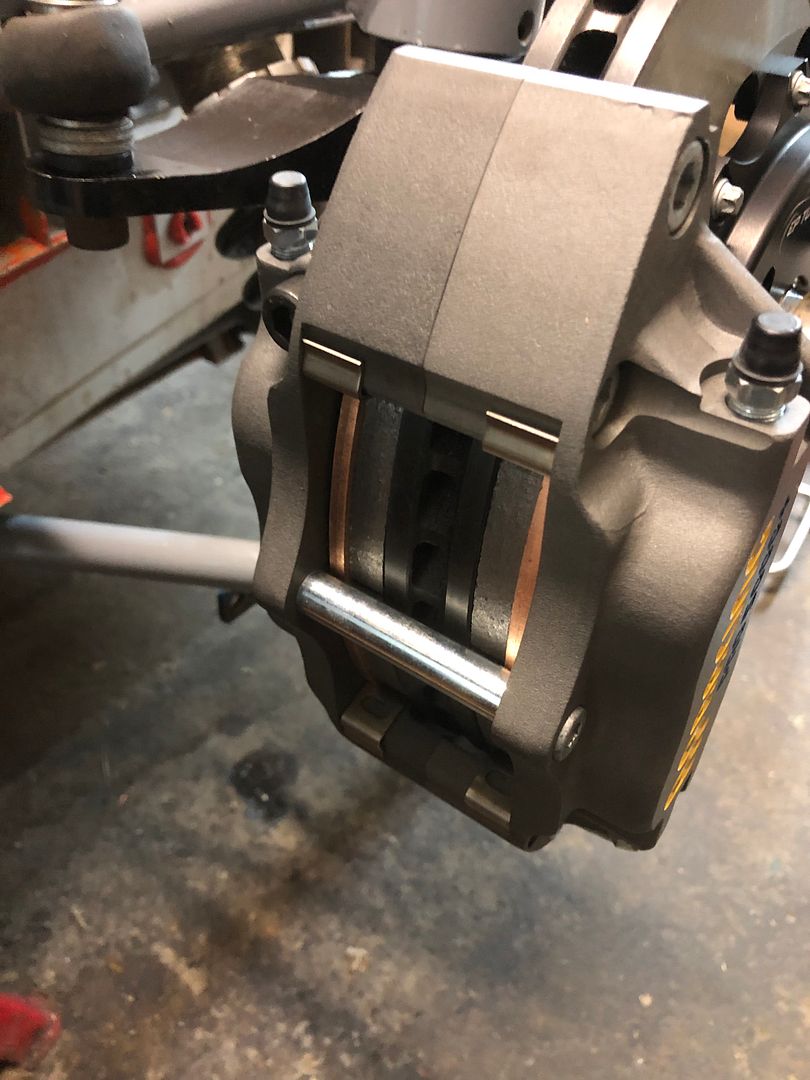
295mm fronts with AP Racing Pro5000 calipers and RC5+ pads
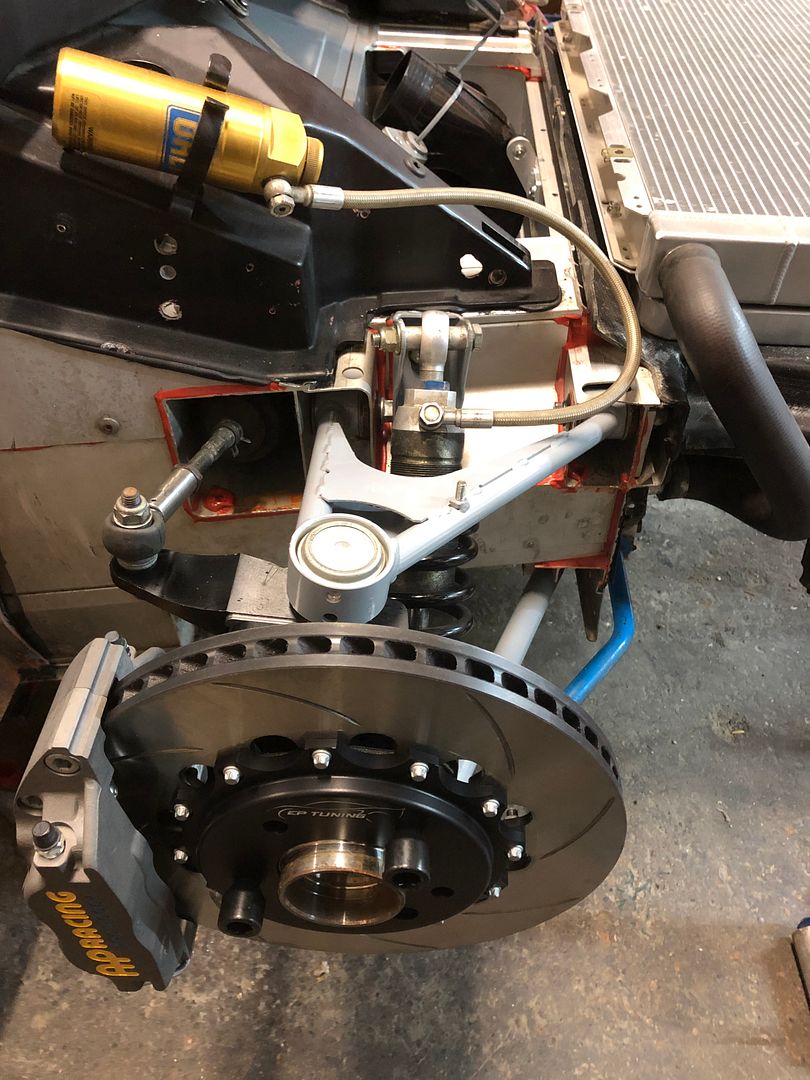
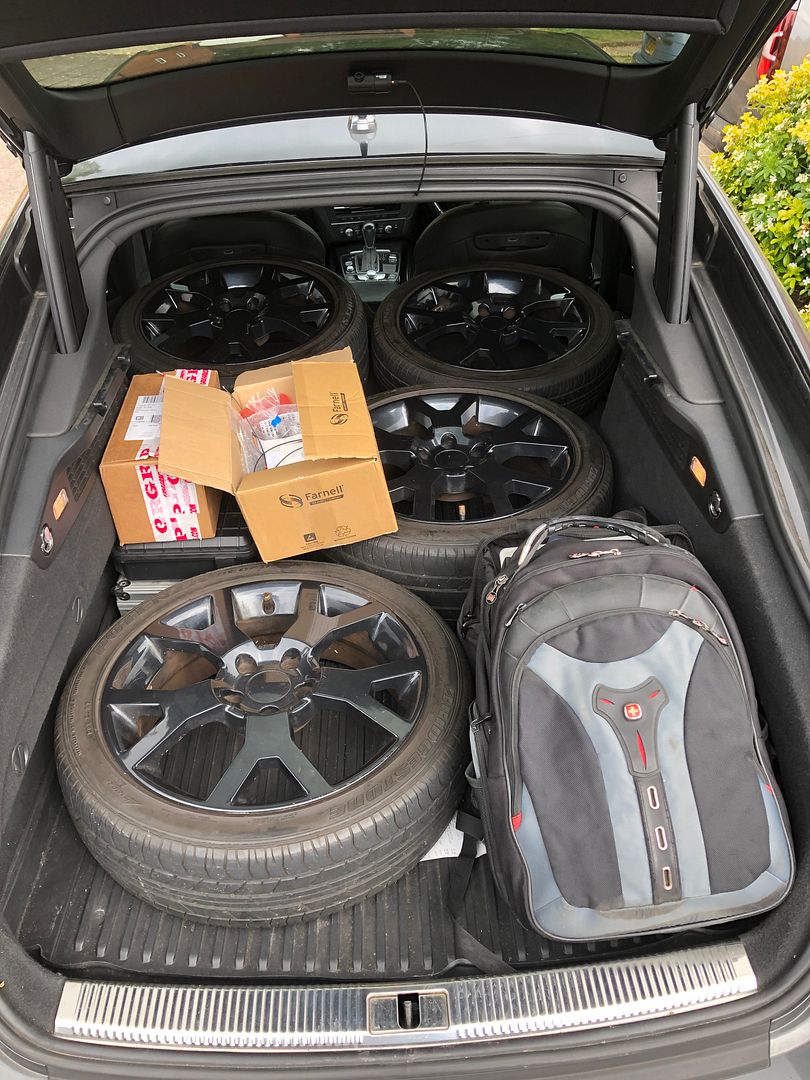
Now, the eagled eyed among you may have noticed that I'm on the Elise Parts 'GT' billet hubs and have a 5 stud flanged wheel bearing. They are indeed the VX220 format setup, but with good reason - the wheel bearing assembly bolts in and out very easily and there is an integral ABS sensor inside which means I can accurately measure all 4 wheelspeeds. But, since I sold the BMW CSL style big wheels and all the wheel spacers, I needed some transport wheels. Good old eBay to the rescue! Some slightly tired, DIY painted wheels with cracked tyres on were secured for £150 - ideal for the job. Just a few hours of a road trip to go and get them!
With some transport wheels (I will get some much nicer wheels closer to the end of the project, fear not!) it was time to get things rolling!

And back on the trailer (much easier to load and unload now!!) to go back to Paul Cooper for some more bits...
There was a large pile of bits that I thought could do with a freshen up:
So had them cleaned and painted:
And finally, after many years, I actually started to put it back together
New Aurora bearings and boots:
A rather large order with Elise Parts for new braking hardware, more appropriately sized for my needs:
290mm rears with front AP calipers
295mm fronts with AP Racing Pro5000 calipers and RC5+ pads
Now, the eagled eyed among you may have noticed that I'm on the Elise Parts 'GT' billet hubs and have a 5 stud flanged wheel bearing. They are indeed the VX220 format setup, but with good reason - the wheel bearing assembly bolts in and out very easily and there is an integral ABS sensor inside which means I can accurately measure all 4 wheelspeeds. But, since I sold the BMW CSL style big wheels and all the wheel spacers, I needed some transport wheels. Good old eBay to the rescue! Some slightly tired, DIY painted wheels with cracked tyres on were secured for £150 - ideal for the job. Just a few hours of a road trip to go and get them!
With some transport wheels (I will get some much nicer wheels closer to the end of the project, fear not!) it was time to get things rolling!
And back on the trailer (much easier to load and unload now!!) to go back to Paul Cooper for some more bits...
Love it, Elise ST !
I have a Fiesta with 300 ish bhp and it gets down the road pretty well, with a load less weight this will be rapid.
300 is the safe limit, you can push your luck up to 350 and even 400 but it gets less dependable the higher you go, unless you forge it all.
Amazing really, a 1.6 engine reliably making 300 bhp, they do break but that might be, in part down to the ownership demographic and their level of care, maintenance and mechanical sympathy, 19 year olds called Kyle or Jordan can be very enthusiastic about going fast, less so about oil changes and not hammering them from cold etc.
This is terrific. The quality looks fantastic and putting one of Vettel’s spare steering wheels is a feature.
300bhp will surely be plenty. What are the plans for the body work?
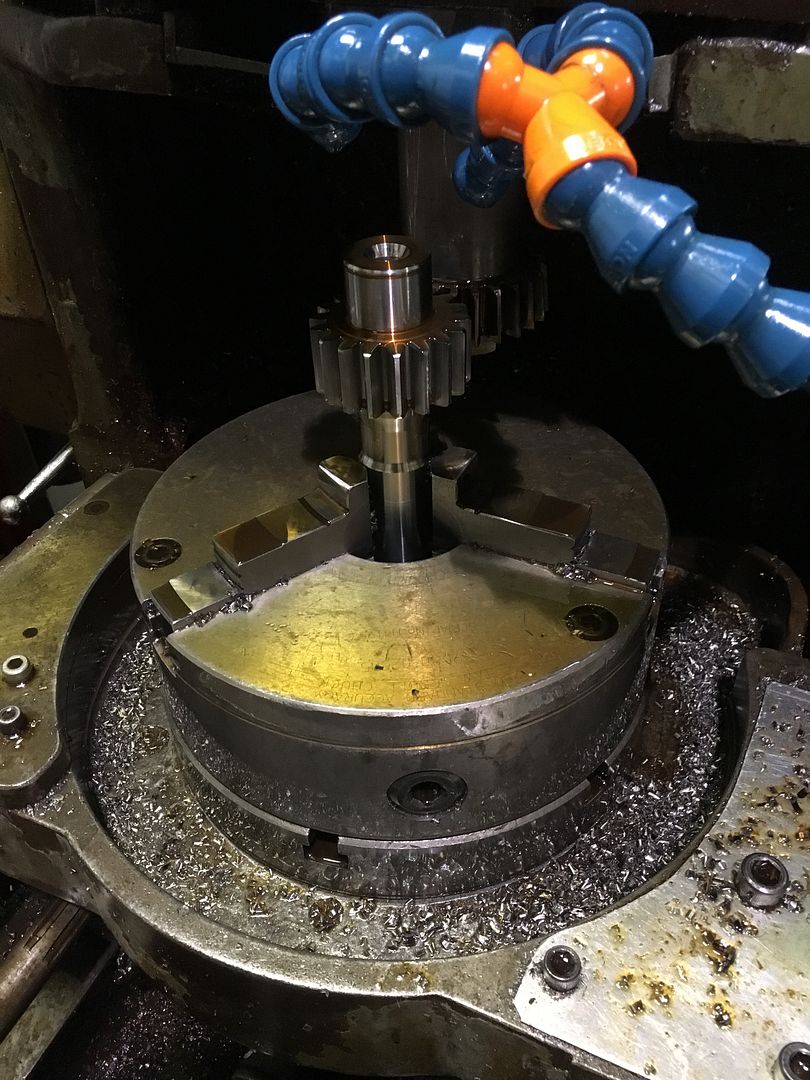
Also, forgive my ignorance, what’s the machine that looks a bit like a milling machine but appears to have a bed that works in multiple planes.
300bhp will surely be plenty. What are the plans for the body work?
Also, forgive my ignorance, what’s the machine that looks a bit like a milling machine but appears to have a bed that works in multiple planes.

Austin_Metro said:
This is terrific. The quality looks fantastic and putting one of Vettel’s spare steering wheels is a feature.
300bhp will surely be plenty. What are the plans for the body work?
Also, forgive my ignorance, what’s the machine that looks a bit like a milling machine but appears to have a bed that works in multiple planes.
Thank you - I'm still in the process of trawling through all the pictures on my phone and uploading them, but I will get to the bodywork soon 300bhp will surely be plenty. What are the plans for the body work?
Also, forgive my ignorance, what’s the machine that looks a bit like a milling machine but appears to have a bed that works in multiple planes.
The machine I think you're referring to is a 5 axis CNC machine, a favour called in from one of the machinists at my previous employer!
Thank you for all the kind words folks - I'll run out of update material soon, but until then - here's another one!
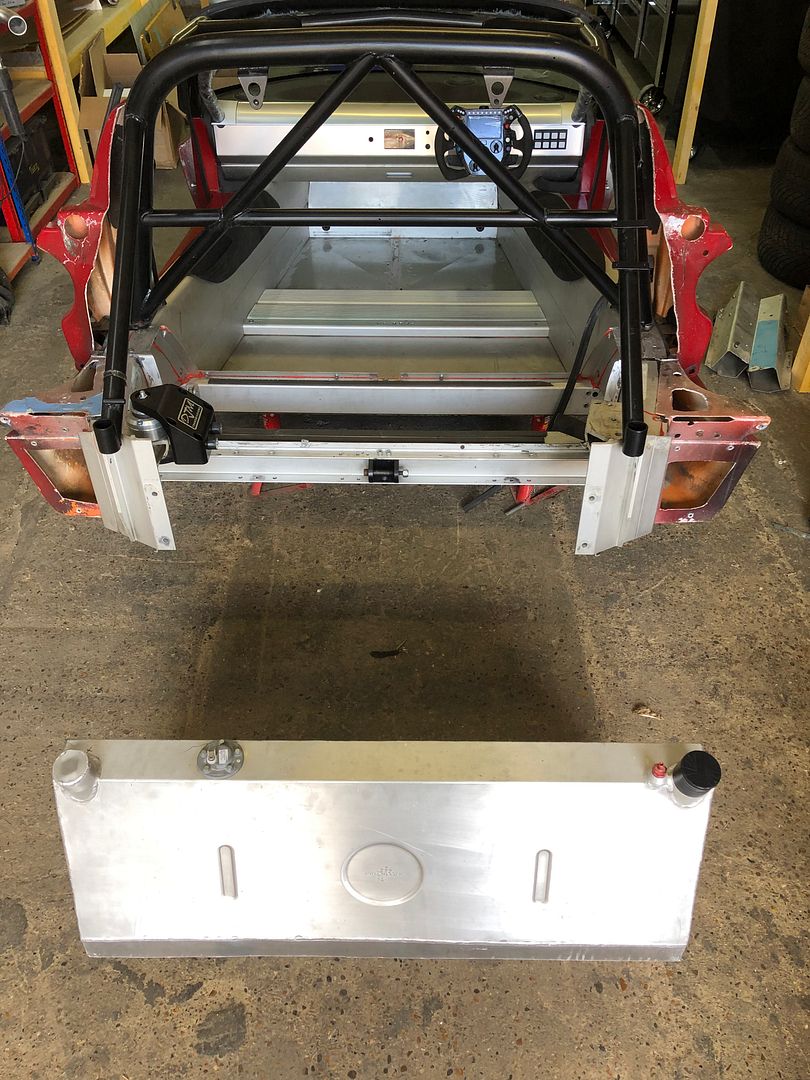
So with the car back with Paul Cooper, the next waves of brainstorming and idea bouncing commenced. I knew what I wanted and had calculated the volumes and dimensions of the tanks, but I was also realistic about packaging constraints and how the tanks would actually be constructed and mounted.
As seems to be the theme with this car, some CAD models came next:
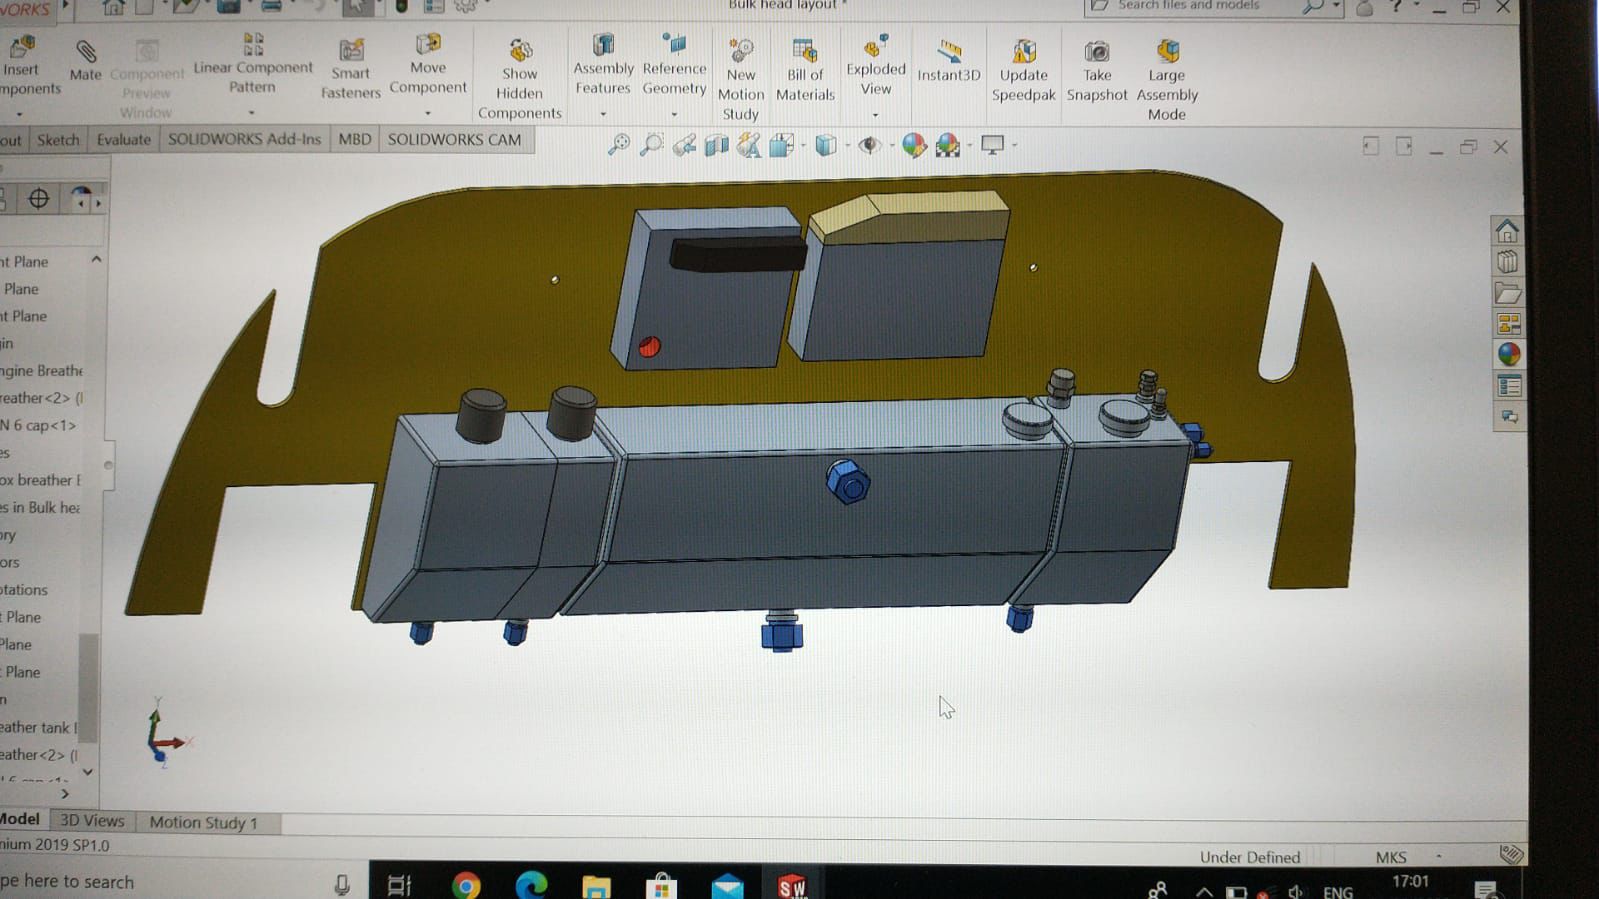
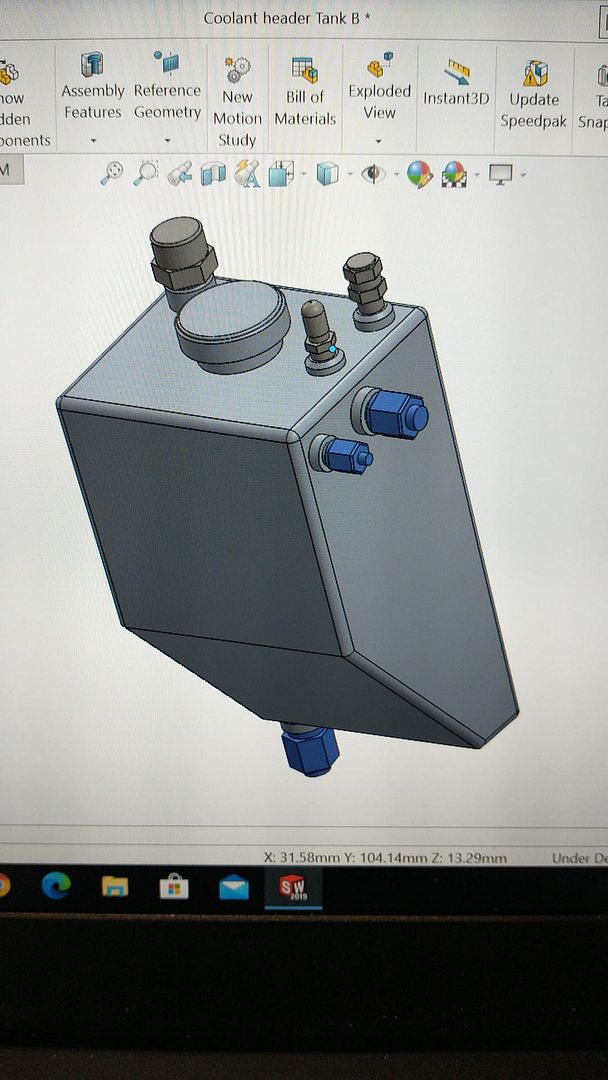
And not long after, those ideas started to become reality:
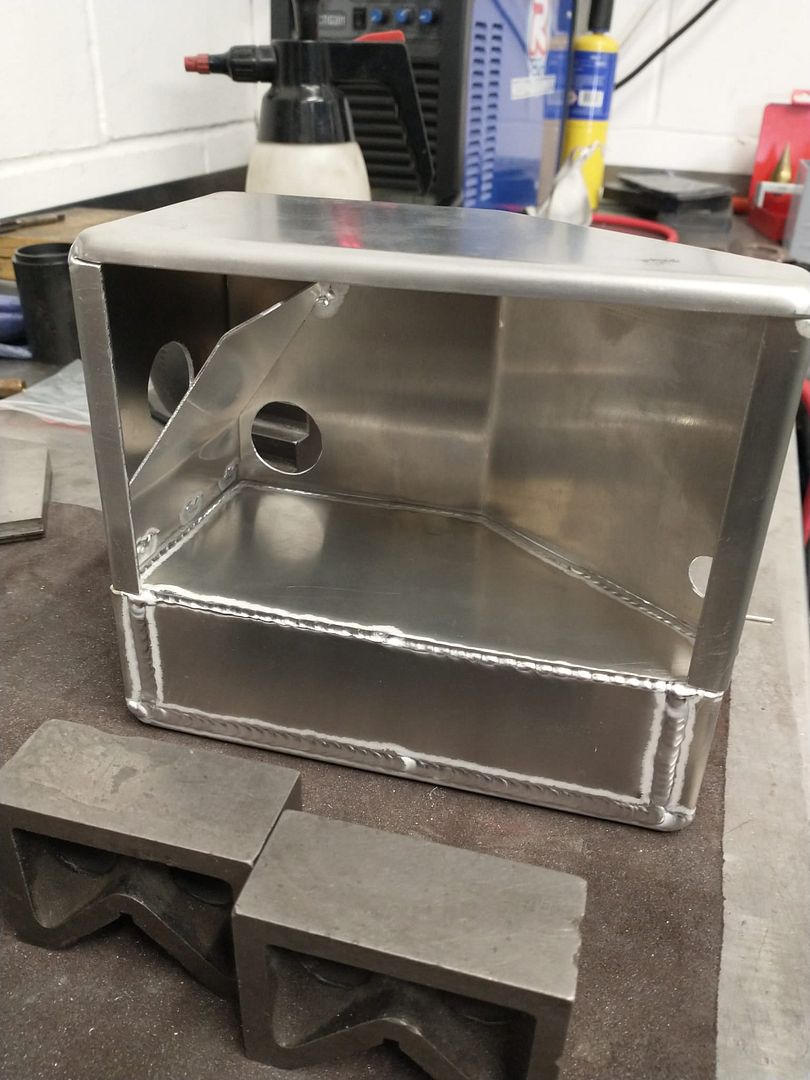
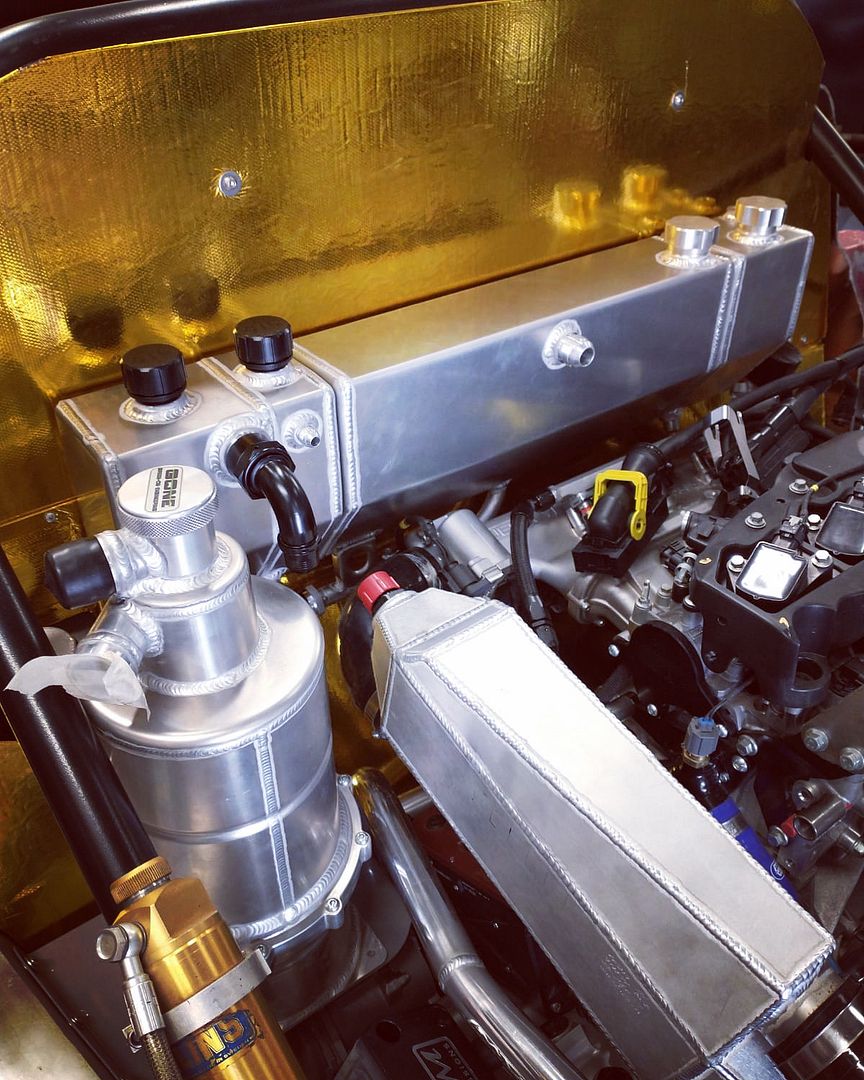
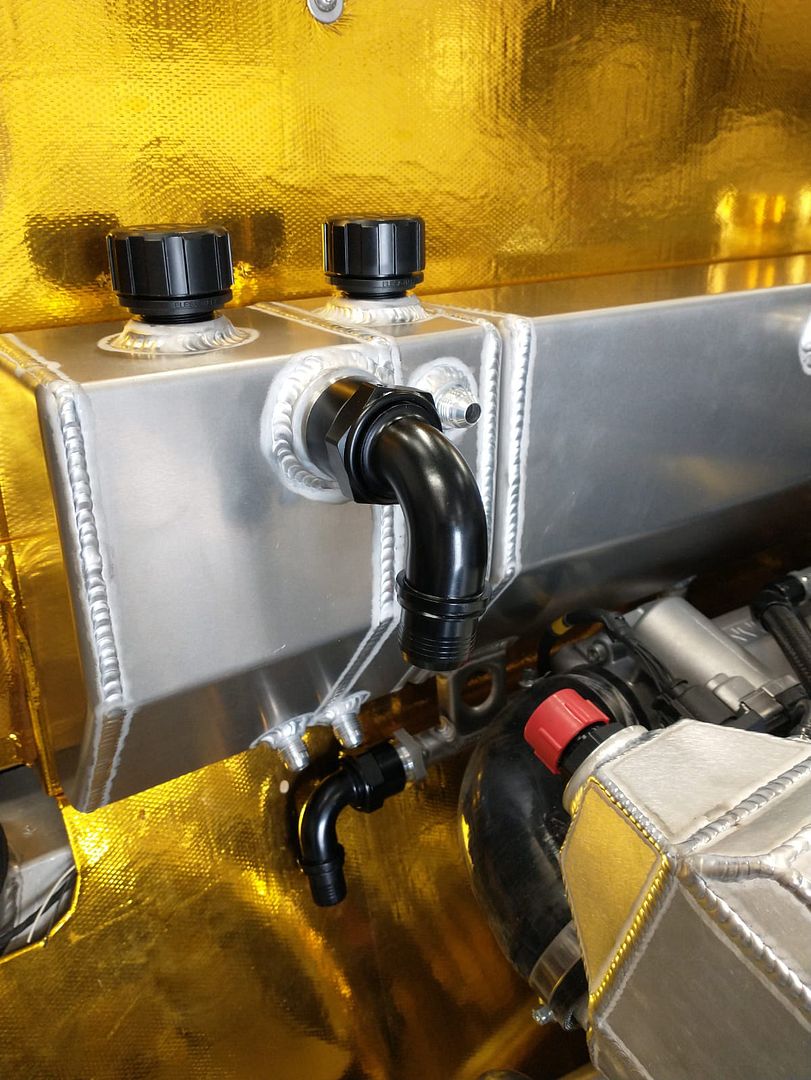
The end result was so good, Paul even felt the need to do a little photoshoot with his name on them
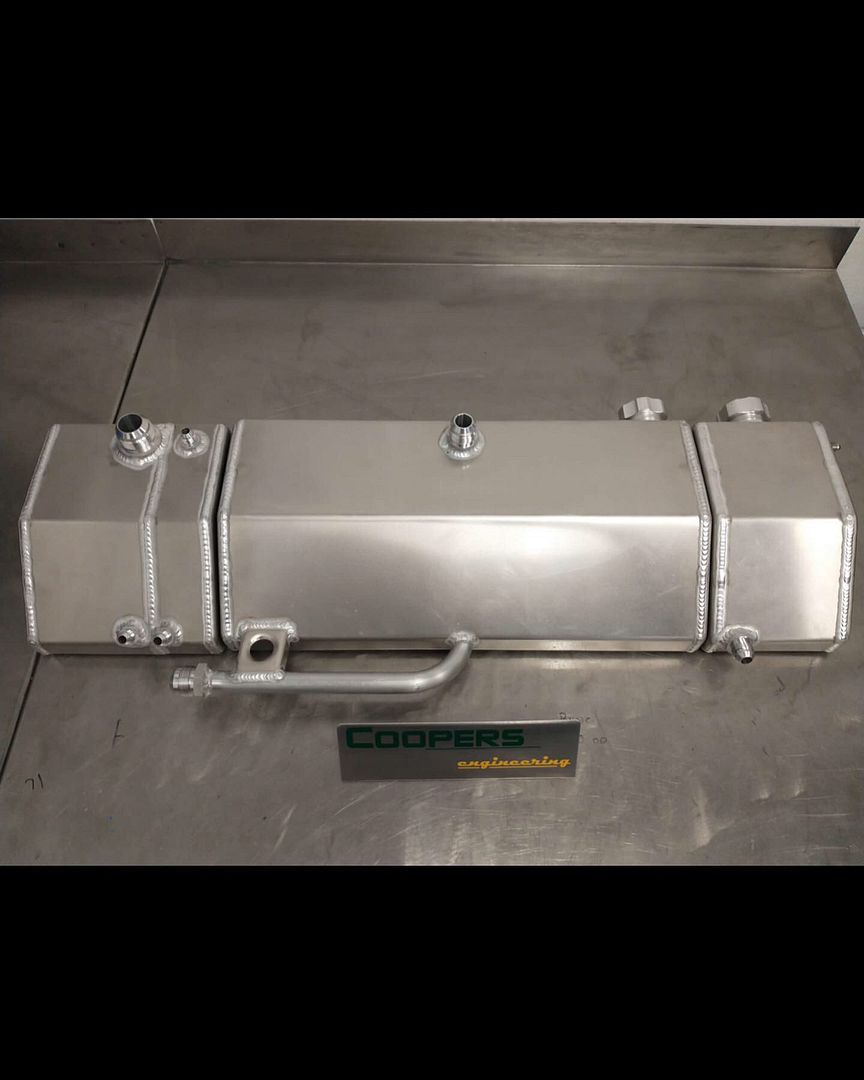


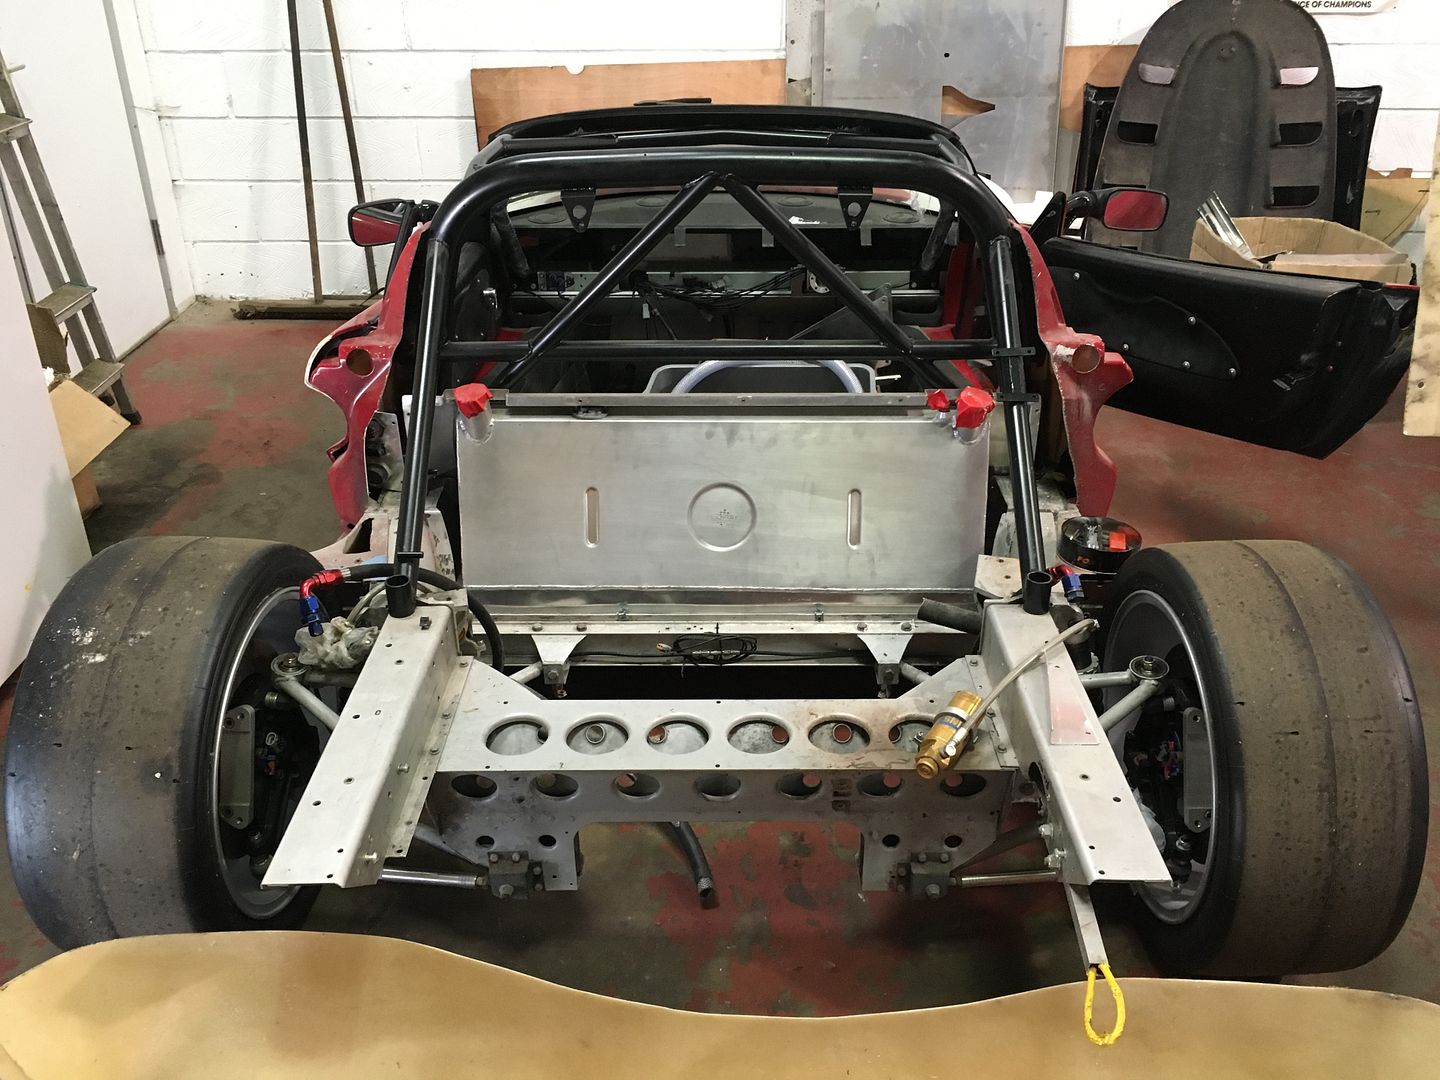
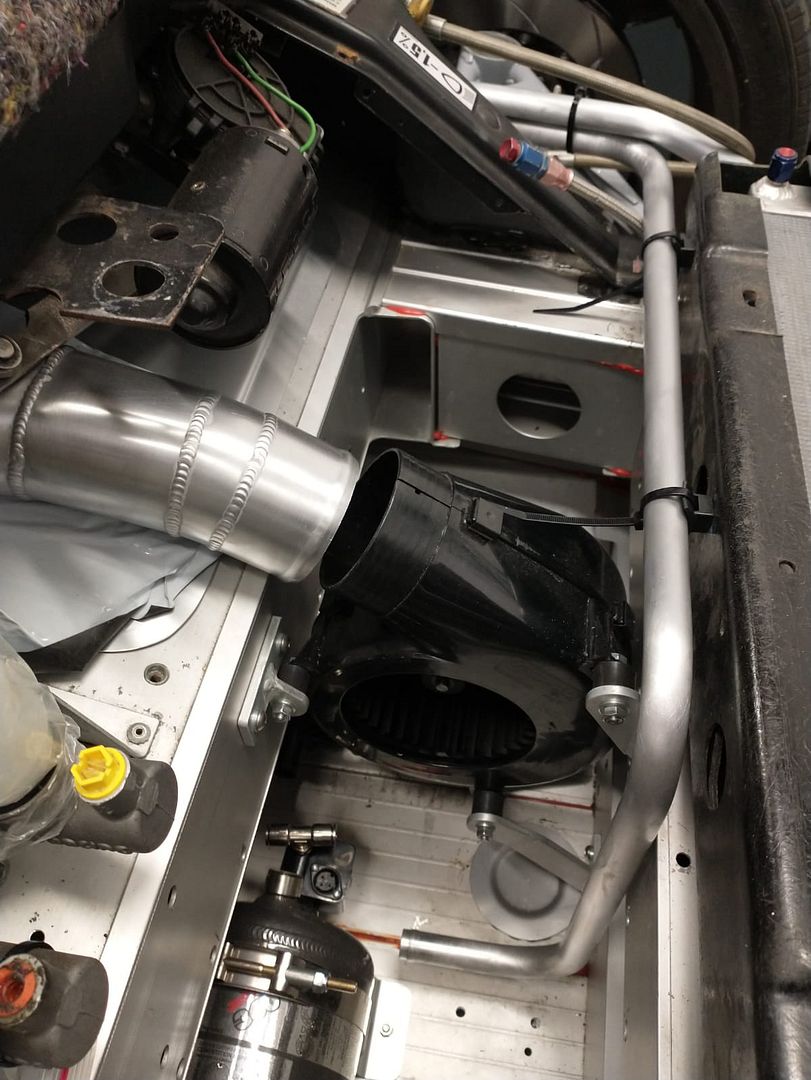
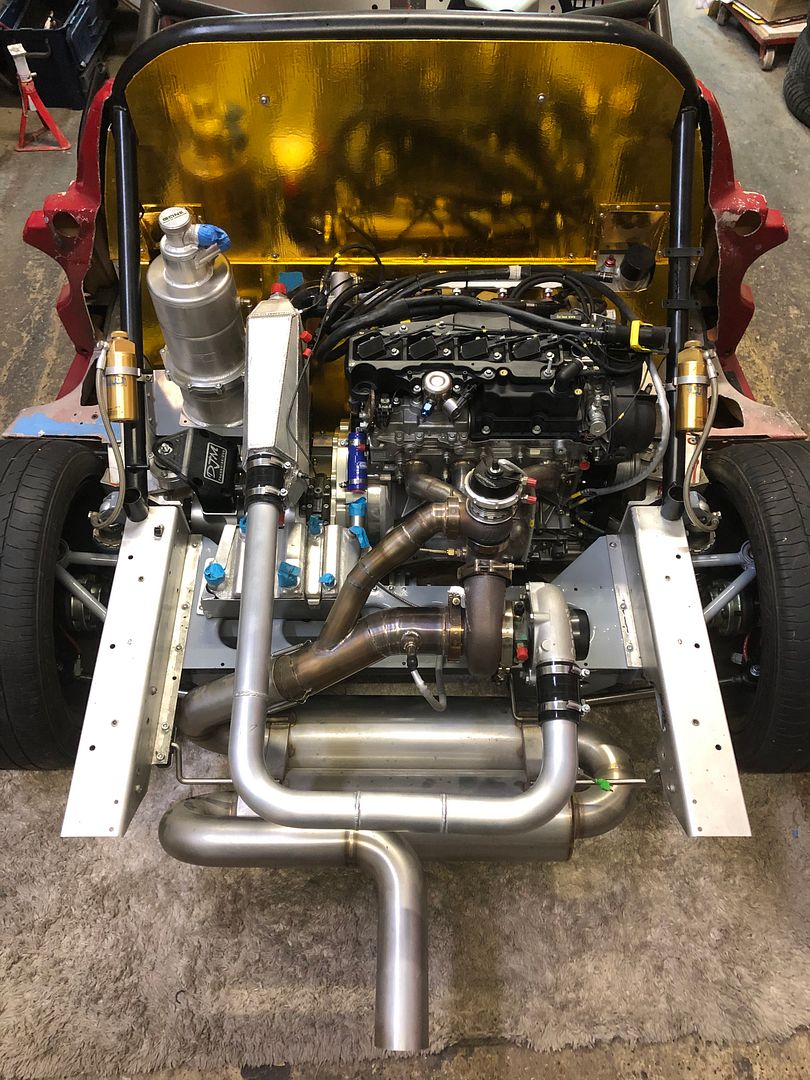
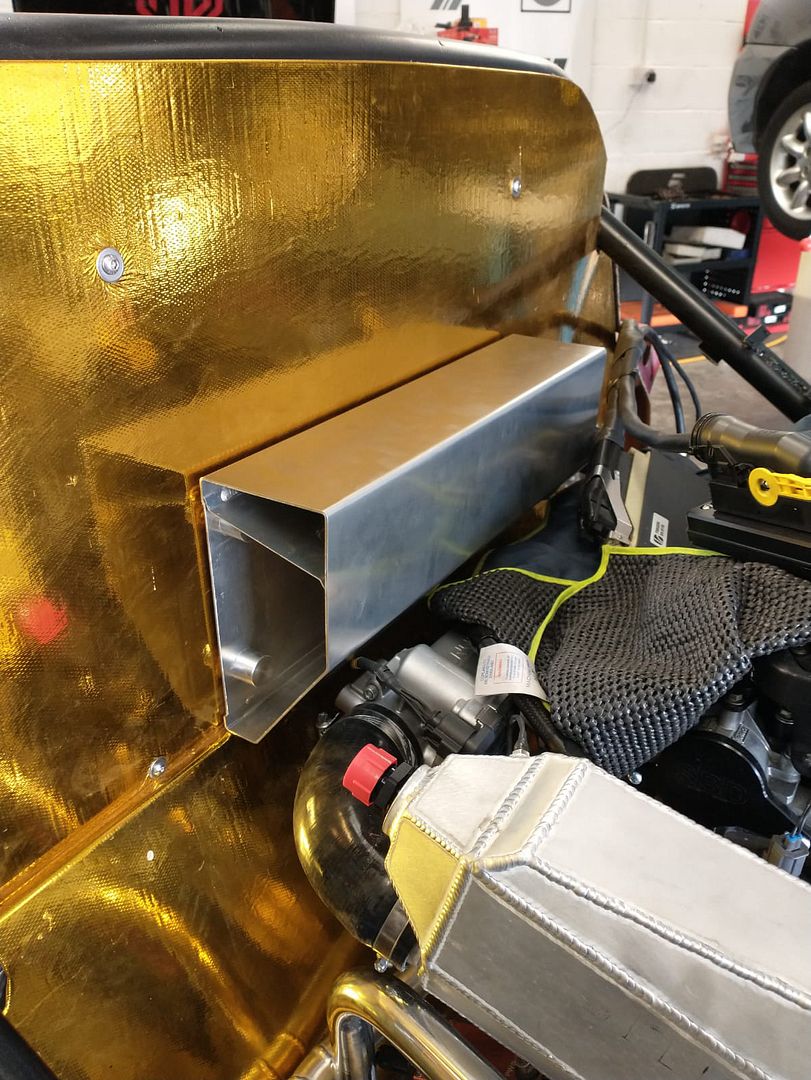
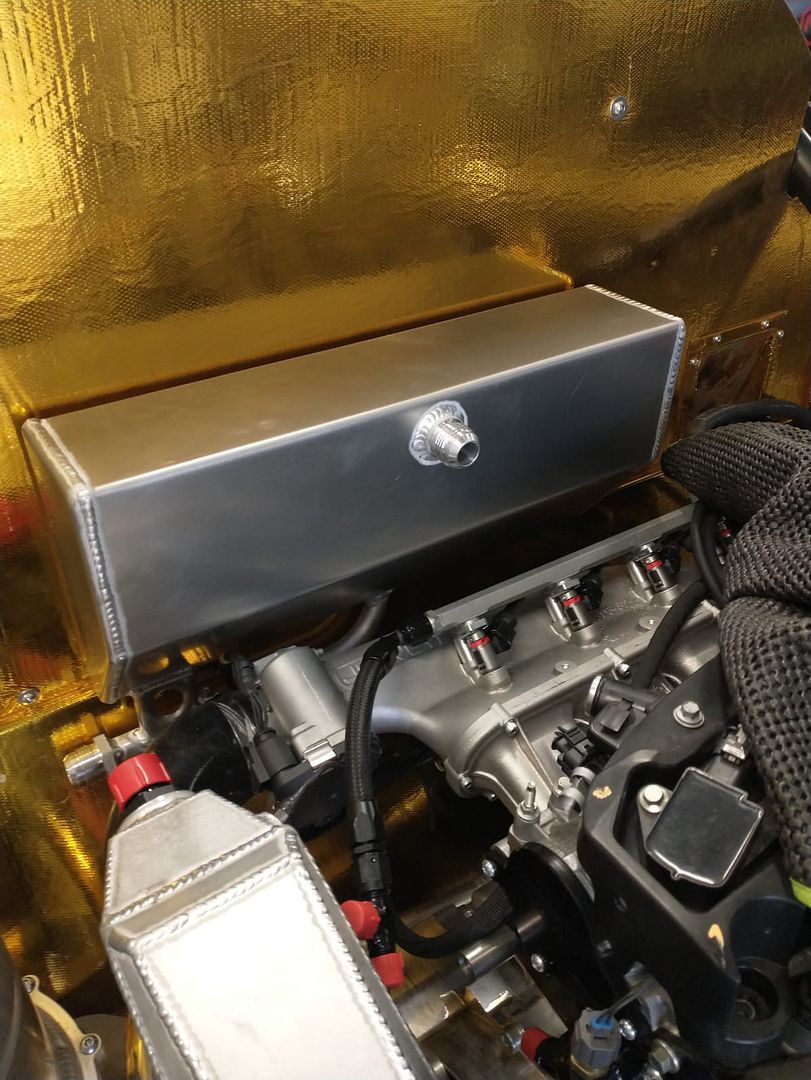
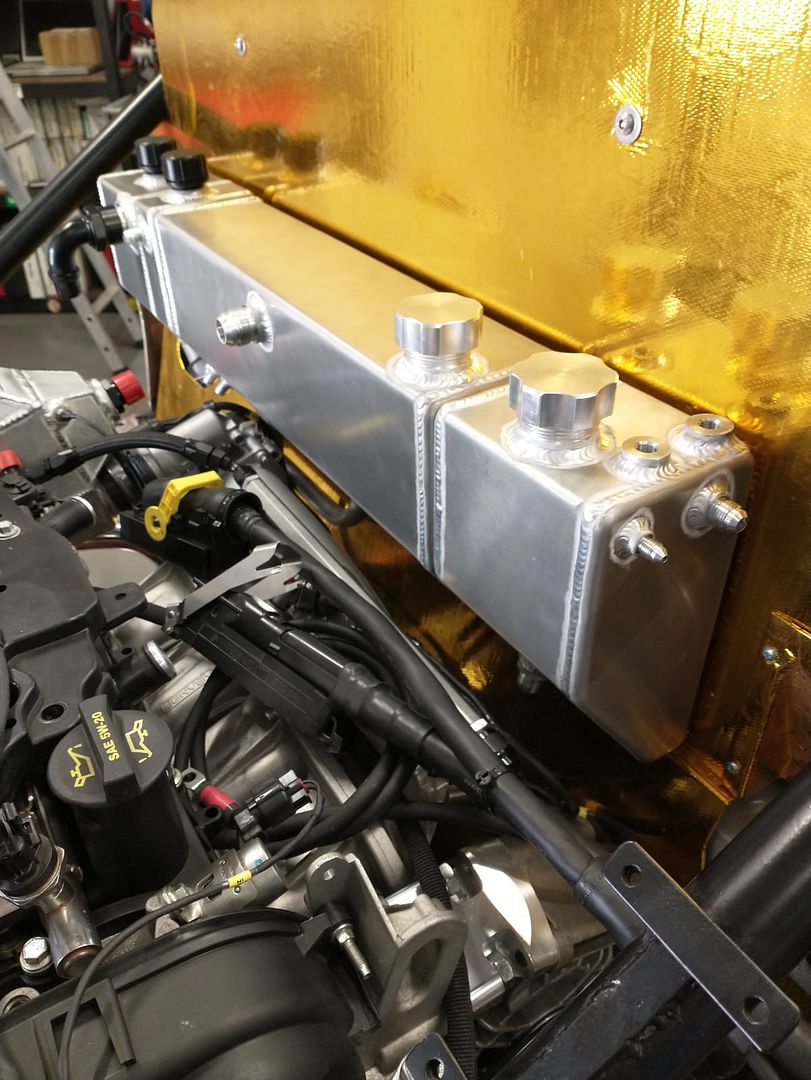
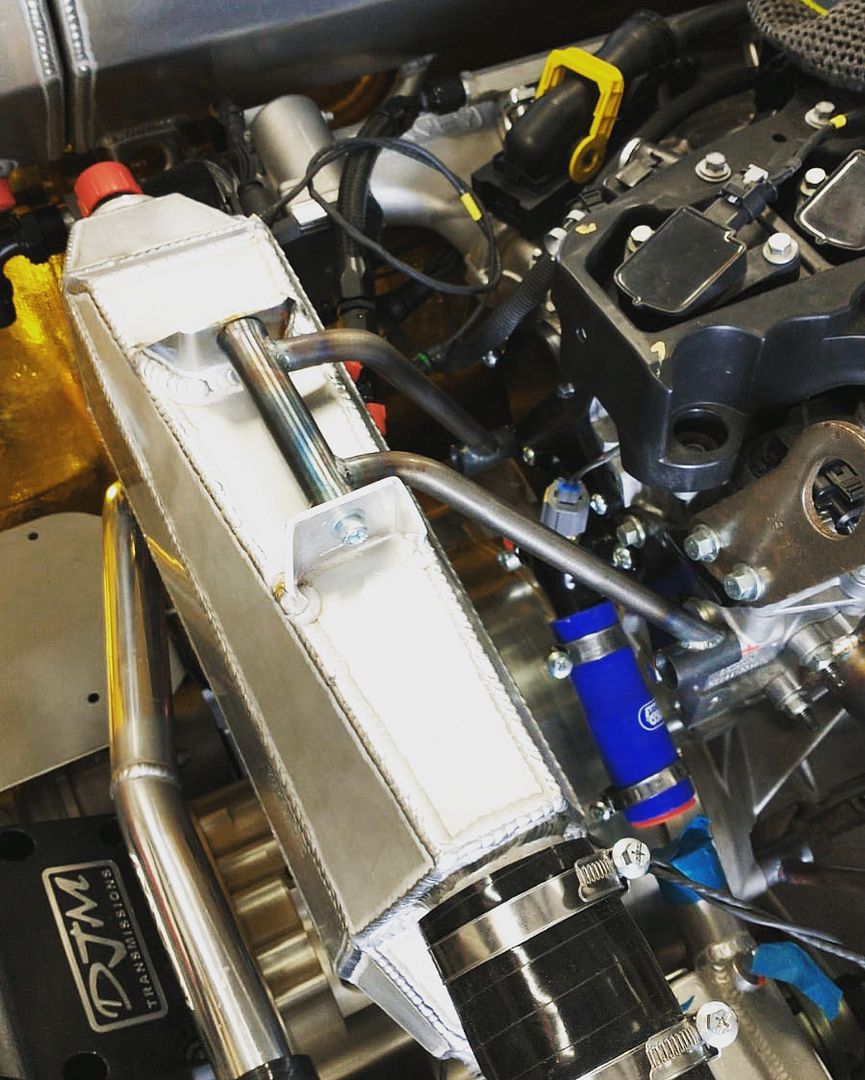
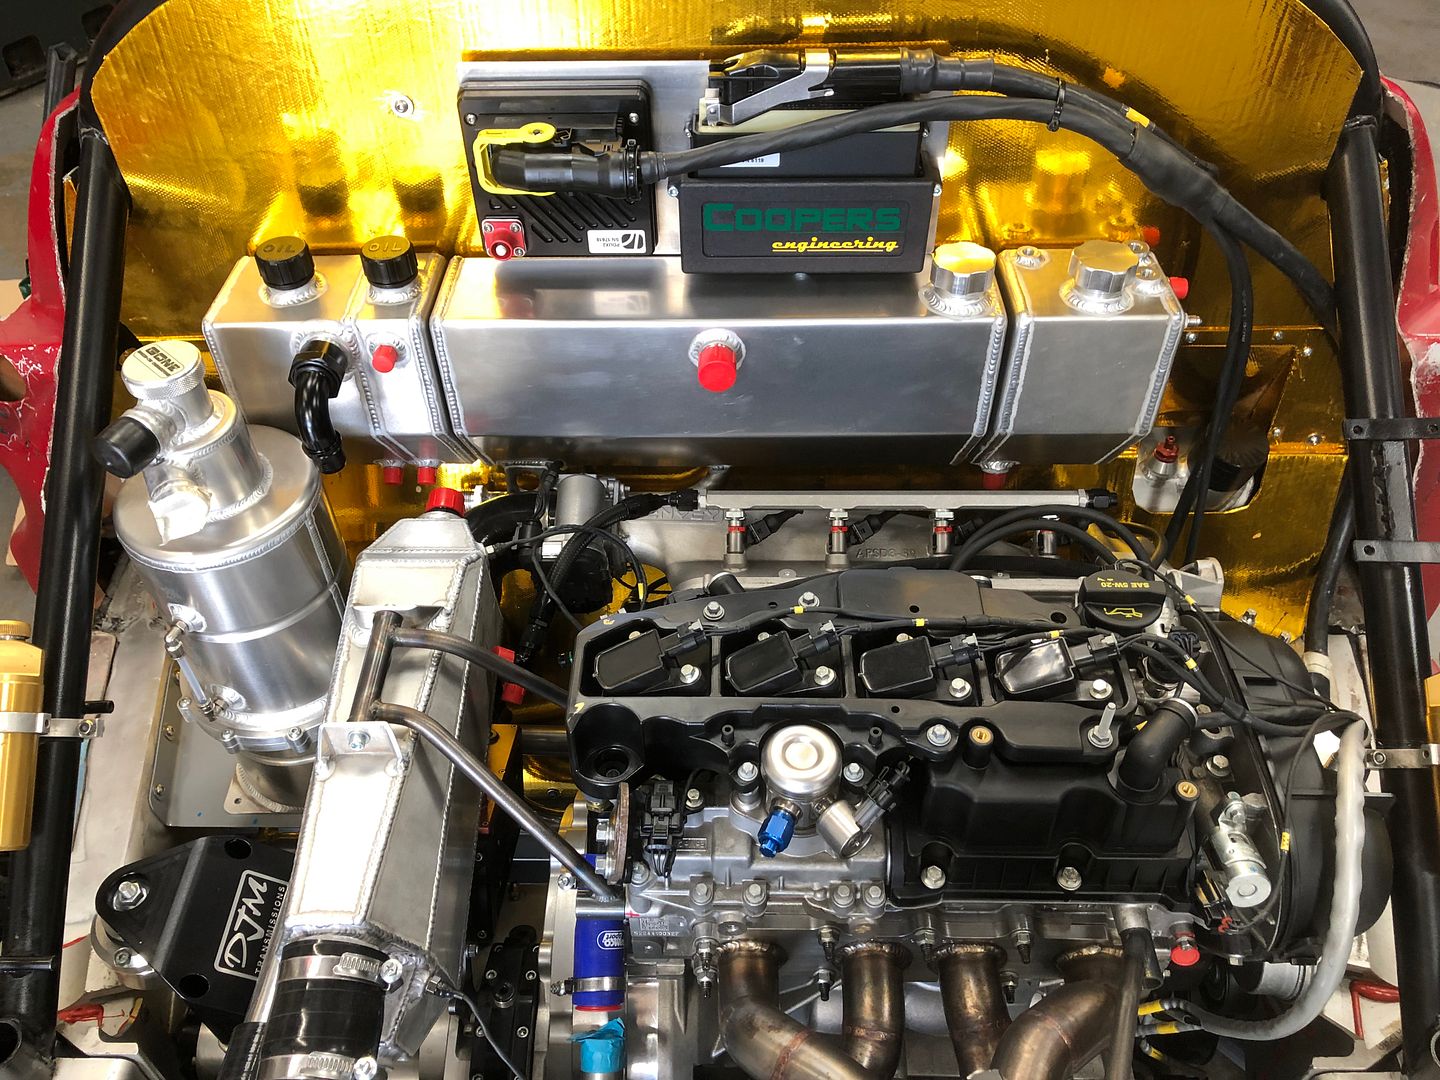
Fitted up in the car, they look even better. From left to right: Engine oil breather, gearbox oil breather, chargecooler reservoir, coolant header tank:
While Paul had the car I also had him make up a few hard pipes for the coolant:
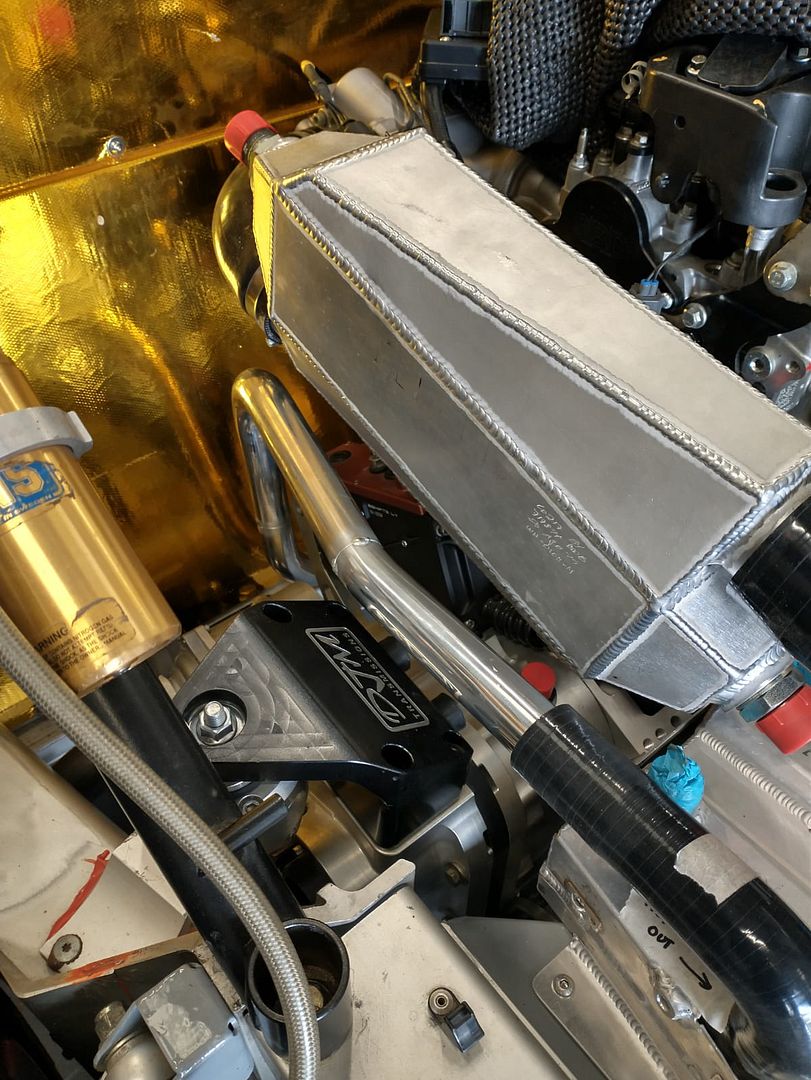
And the chargecooler pipework:
Support bracing for the turbo:
Support bracing for the chargecooler:
And last but not least, we came up with a cradle for the ECU which we had 3D printed:
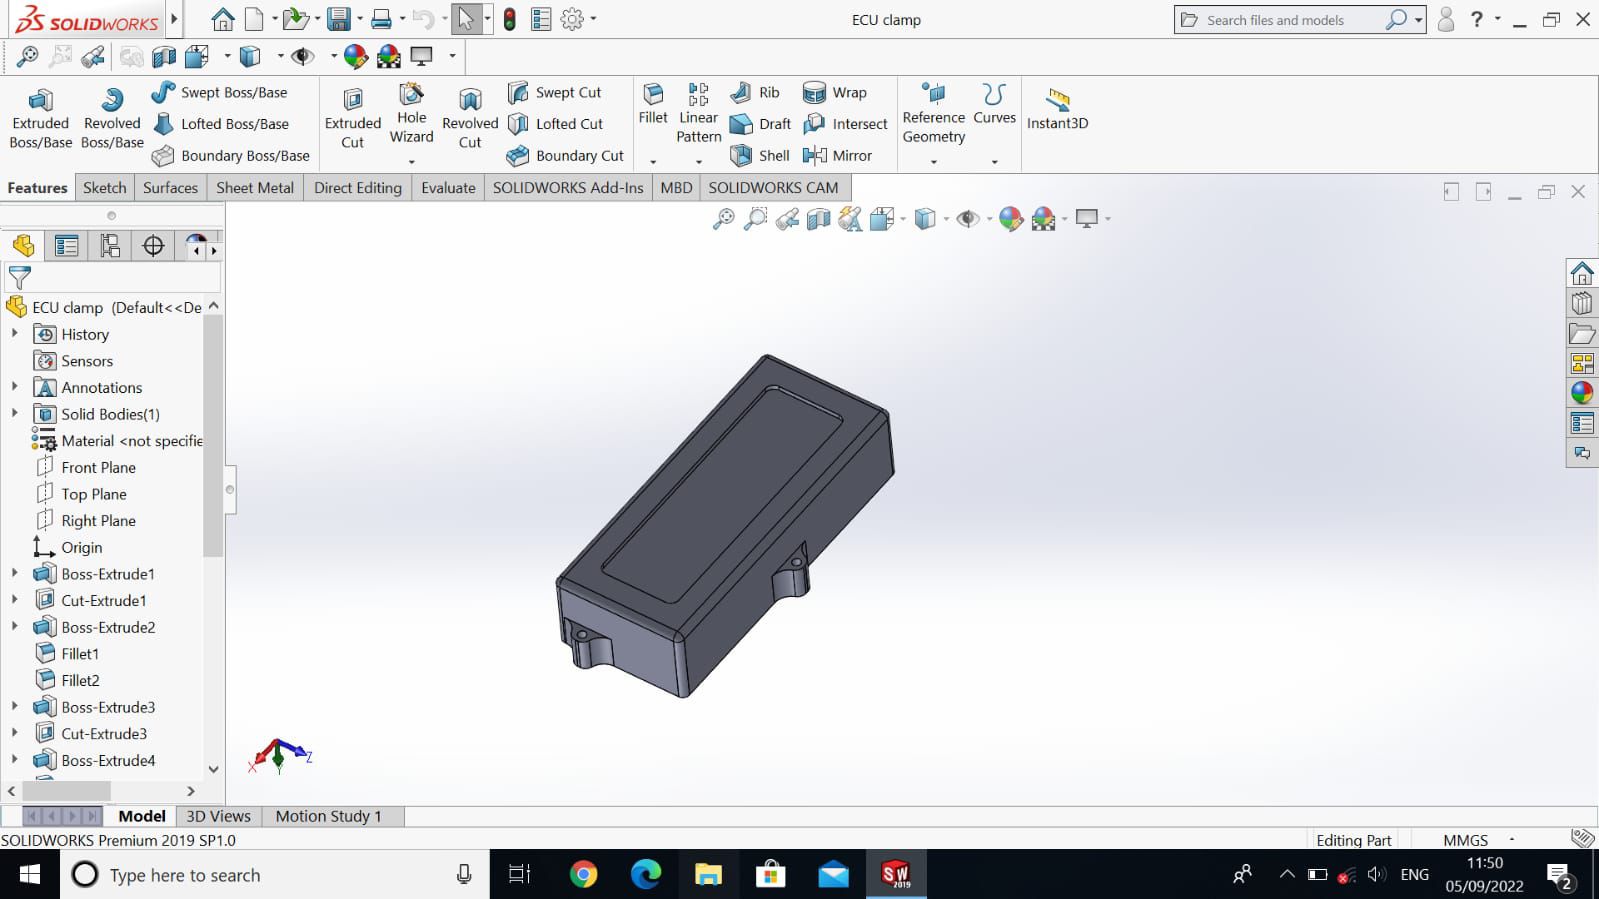
End result?
So with the car back with Paul Cooper, the next waves of brainstorming and idea bouncing commenced. I knew what I wanted and had calculated the volumes and dimensions of the tanks, but I was also realistic about packaging constraints and how the tanks would actually be constructed and mounted.
As seems to be the theme with this car, some CAD models came next:
And not long after, those ideas started to become reality:
The end result was so good, Paul even felt the need to do a little photoshoot with his name on them
Fitted up in the car, they look even better. From left to right: Engine oil breather, gearbox oil breather, chargecooler reservoir, coolant header tank:
While Paul had the car I also had him make up a few hard pipes for the coolant:
And the chargecooler pipework:
Support bracing for the turbo:
Support bracing for the chargecooler:
And last but not least, we came up with a cradle for the ECU which we had 3D printed:
End result?
Hitch said:
Almost seems a shame to put the body back on it!
Agreed! However I'm not sure quite how long I'd get away driving it in 'Max Max' form without any bodywork... Speaking of bodywork though... The final big update to bring this build thread up to date...
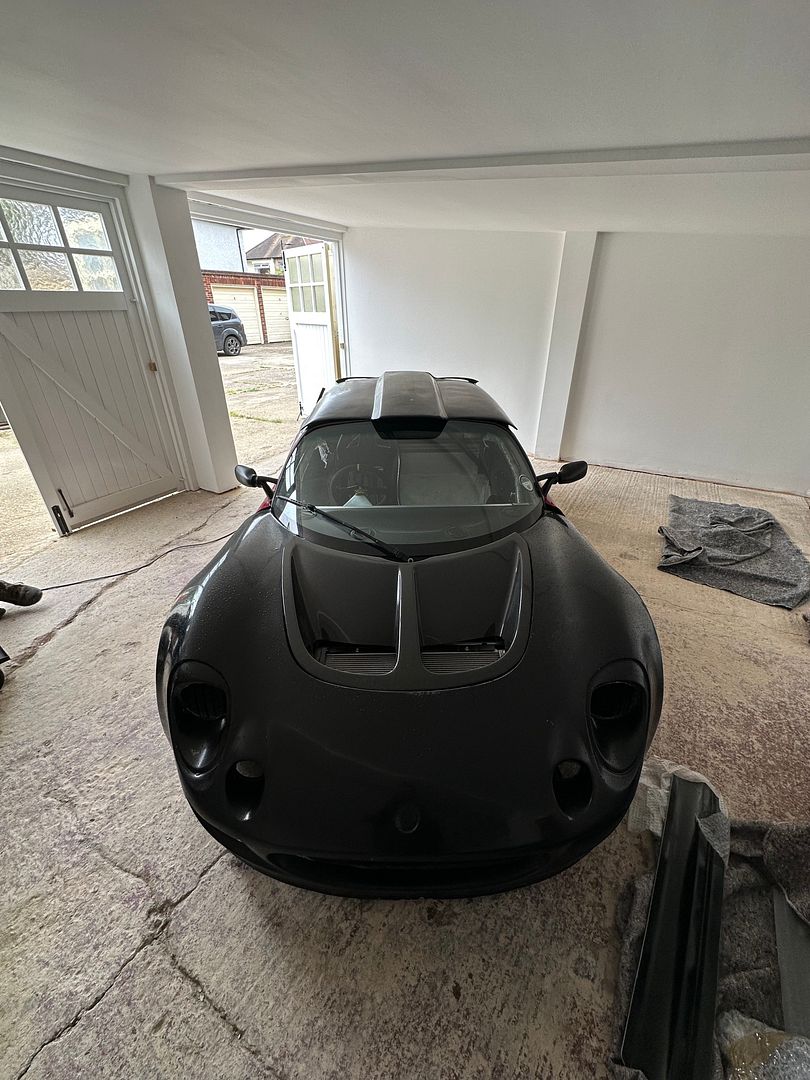
As I mentioned earlier, when I bought the car, everything was 'big'. Big brakes to haul down 600bhp+, big wheels to go over the big brakes, big slicks to try and put the power down and most obviously, very big bodywork to encompass all of that. With the power figure a much more moderate 300bhp, I now feel like the brakes are properly sized to get some energy into them and work. The smaller brakes mean I can run smaller and lighter wheels and as a result, the big bodywork was no longer required. I posted an advert online and a French chap made contact very quickly and we came to a deal.
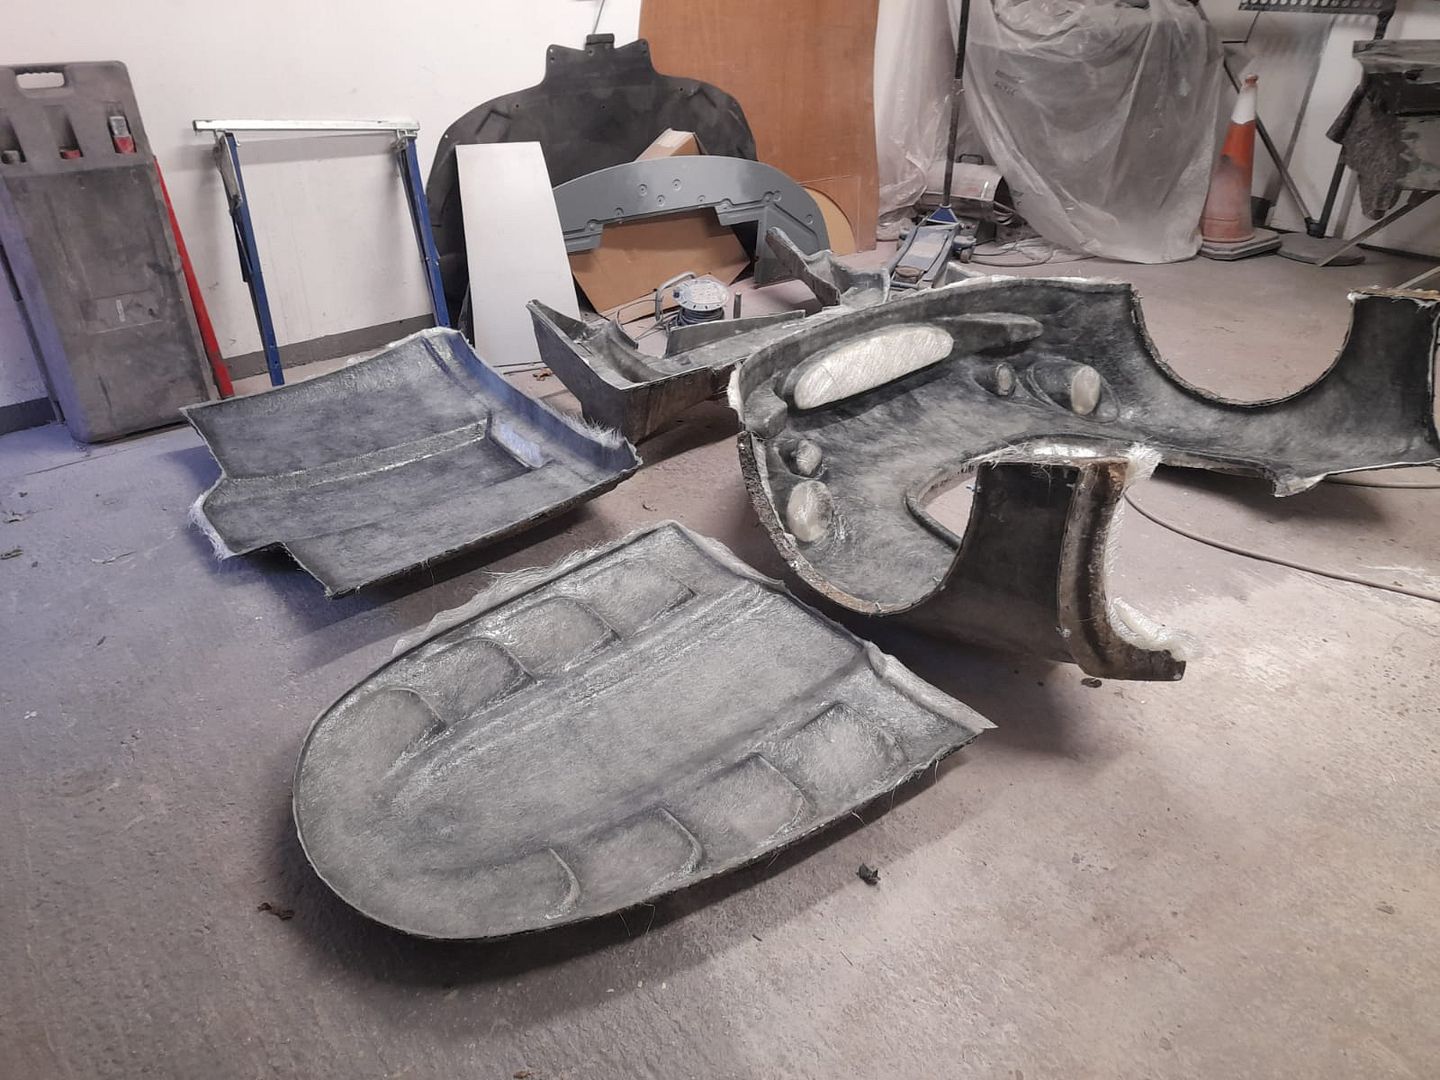
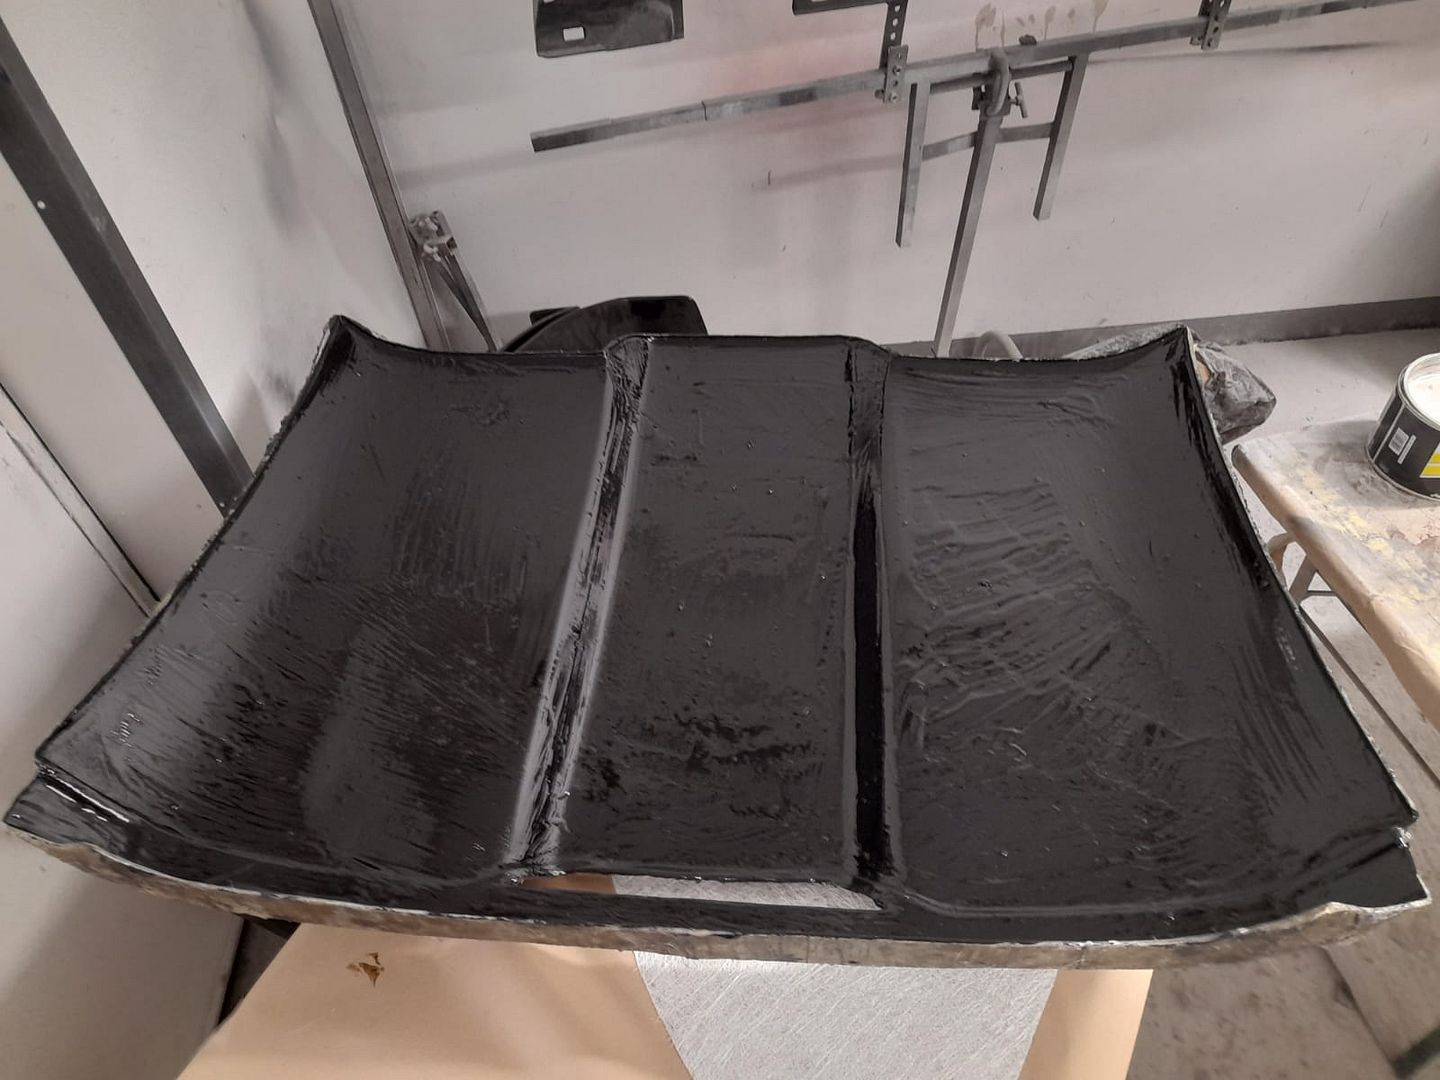
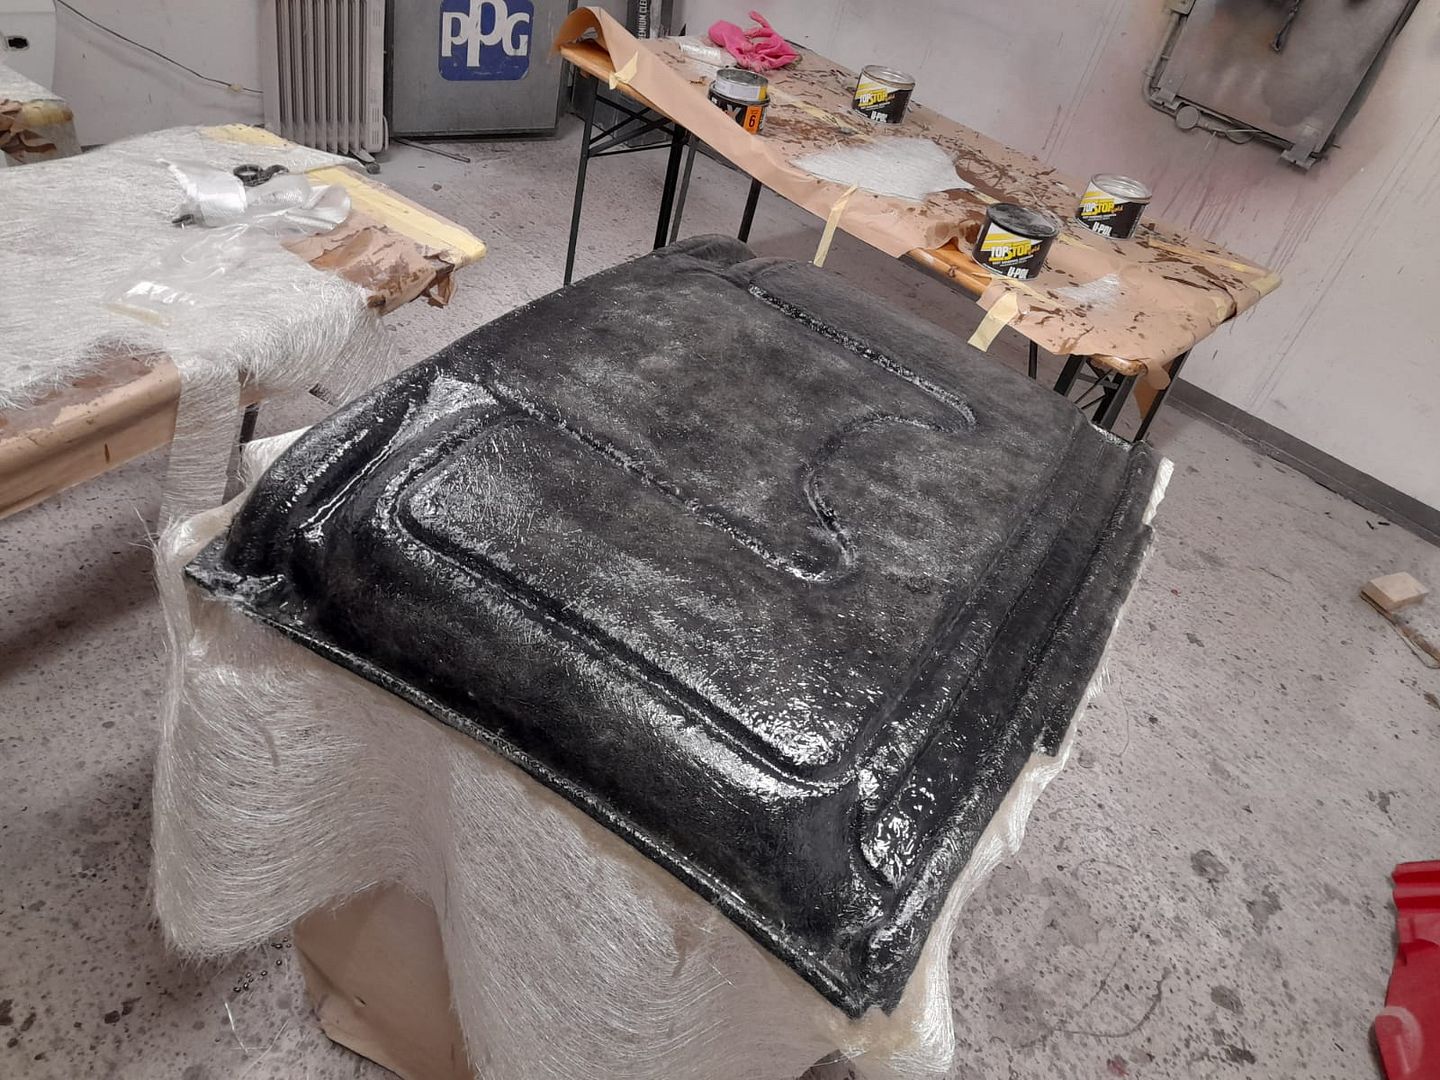
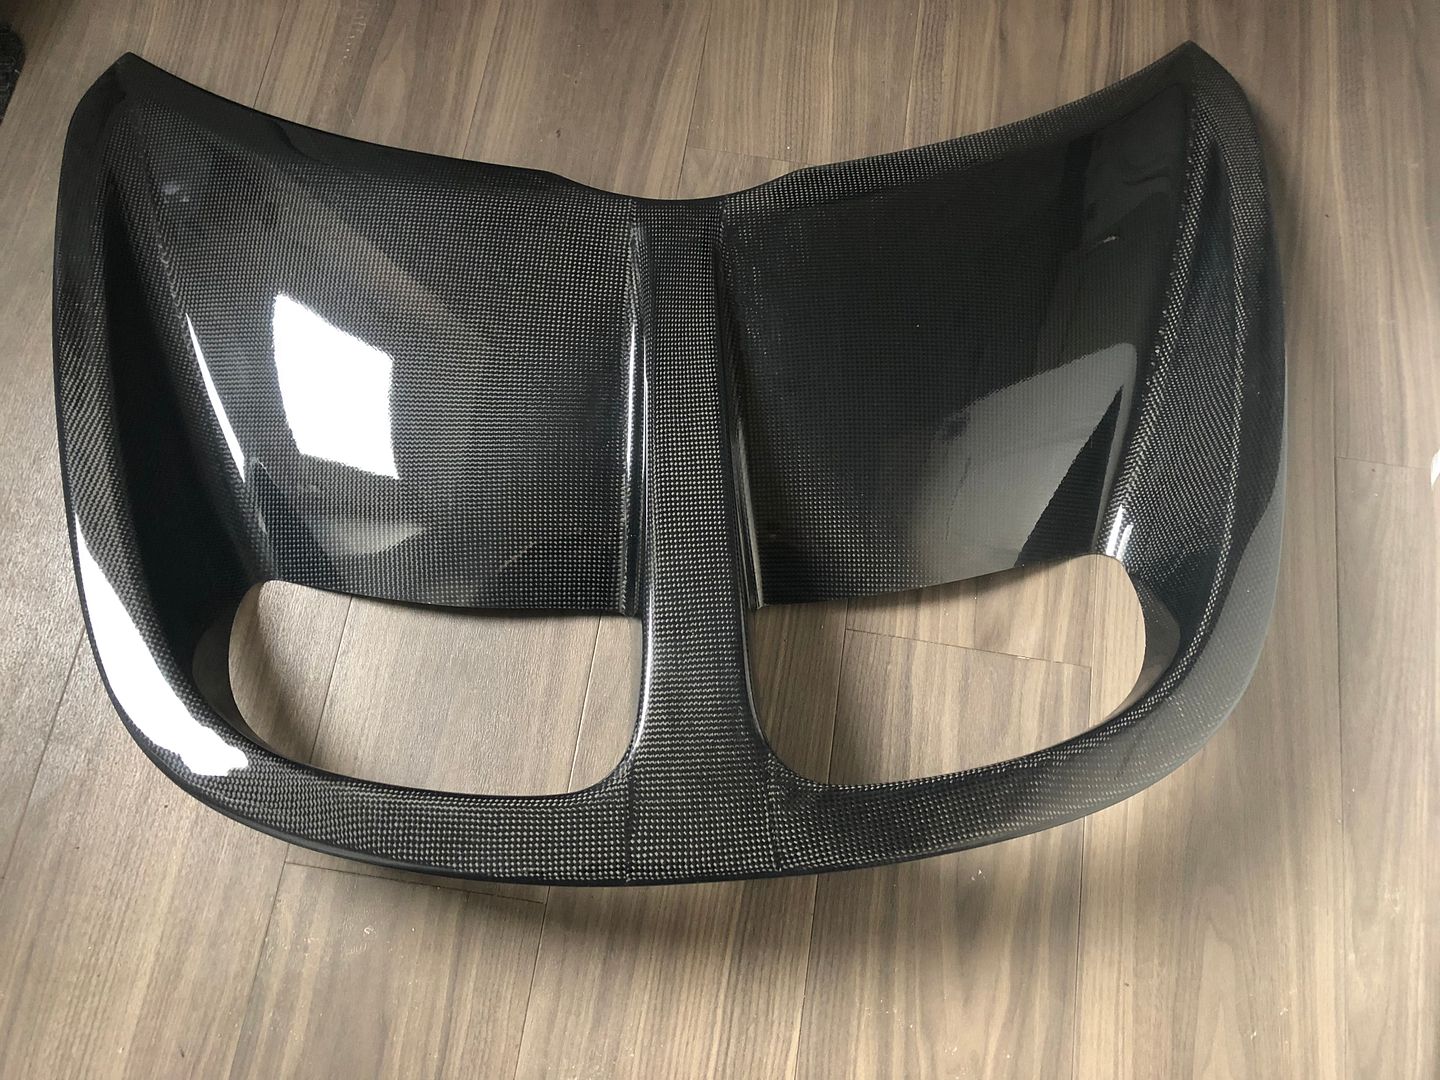
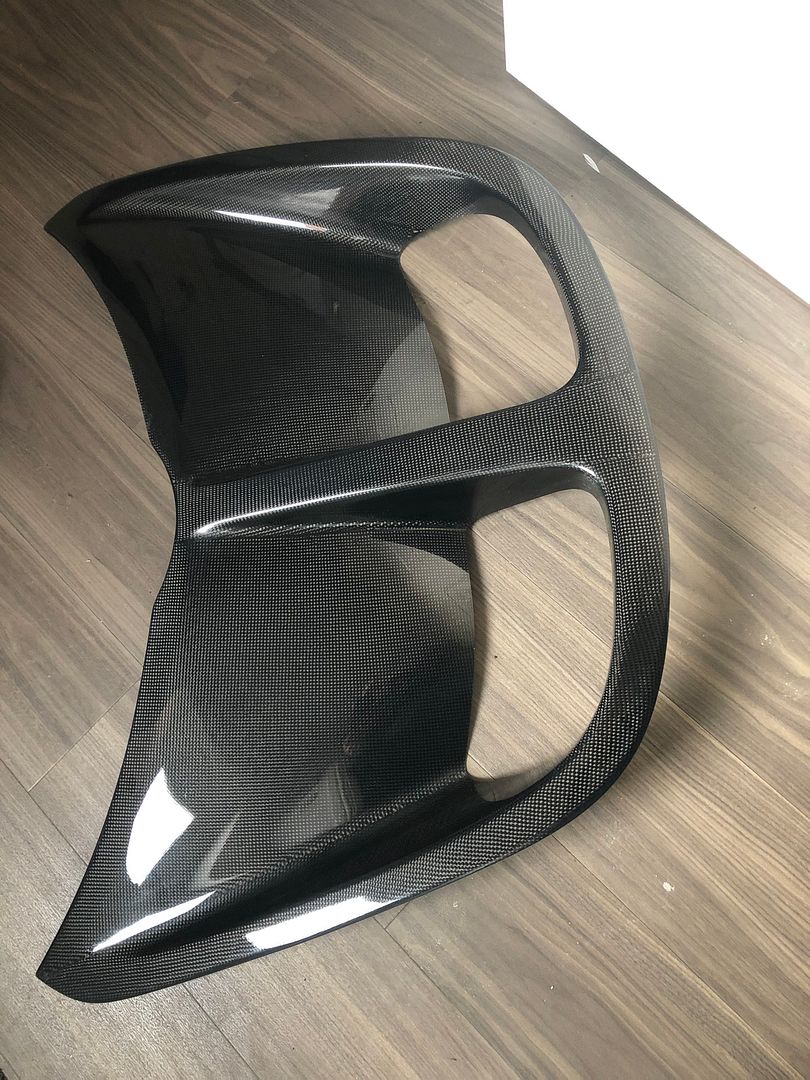
I then started looking for some new standard sized bodywork and looking at who did what. It didn't take long before I was talking to Phil Peek (Junks) and sending him some money!
After discussing exactly what I wanted, "as light as possible but without it cracking please", a short time later I got a few teaser pictures through:
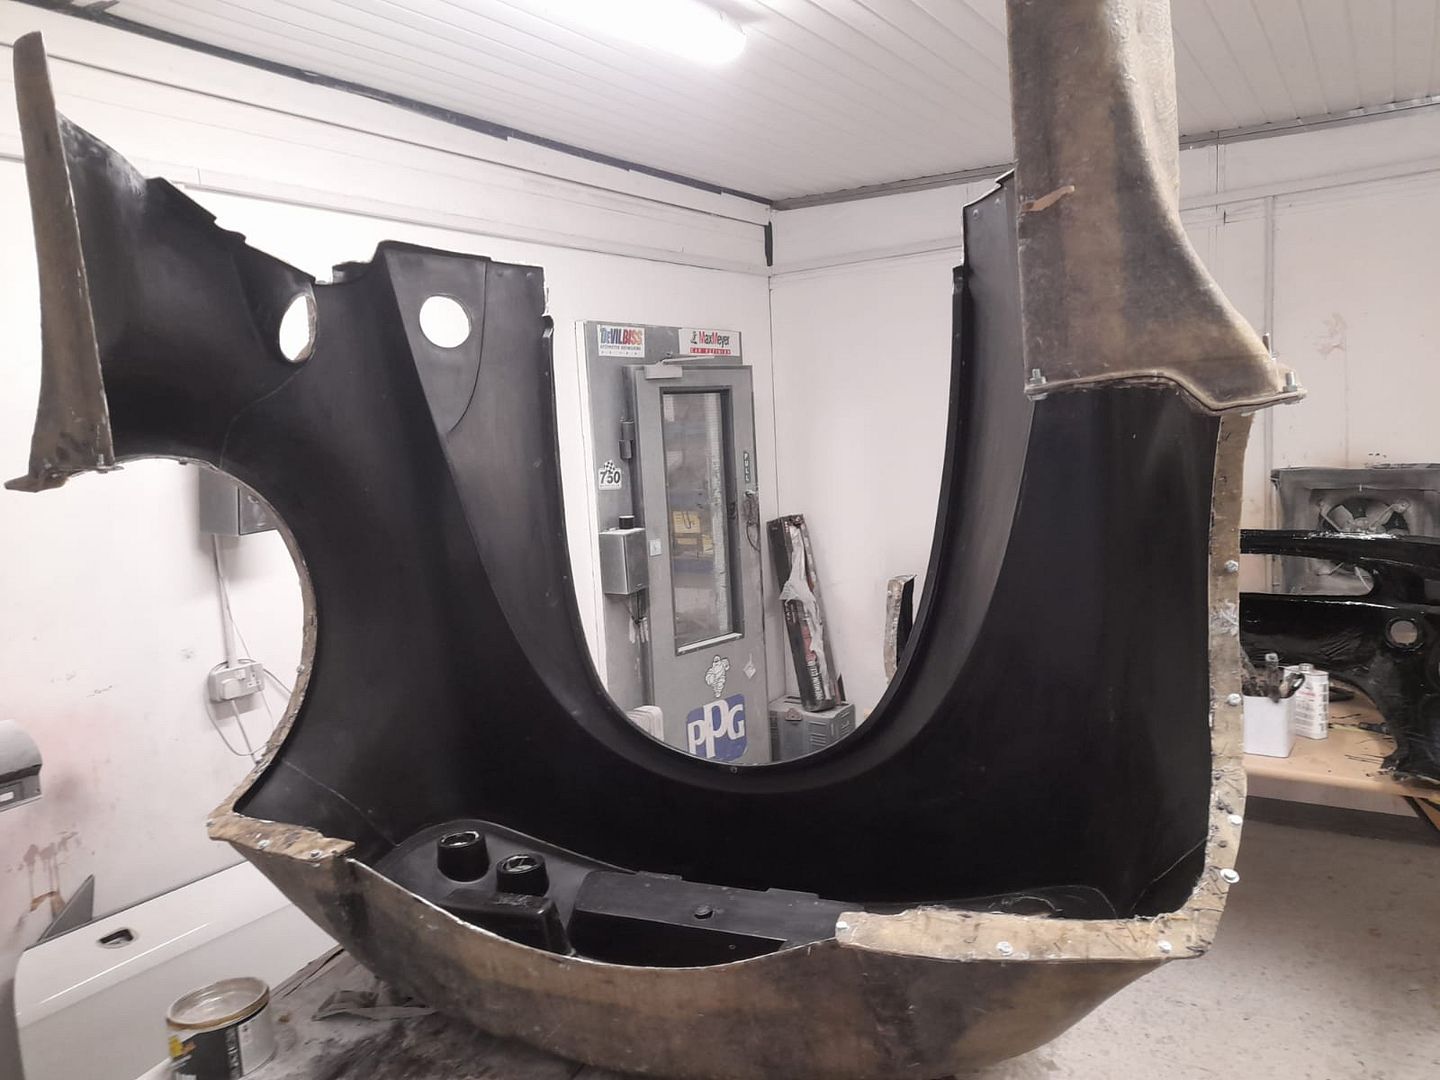
I asked a friend if I could borrow one of his vans to go and collect, a Transit Tipper wasn't quite what I had in mind but it did the job!
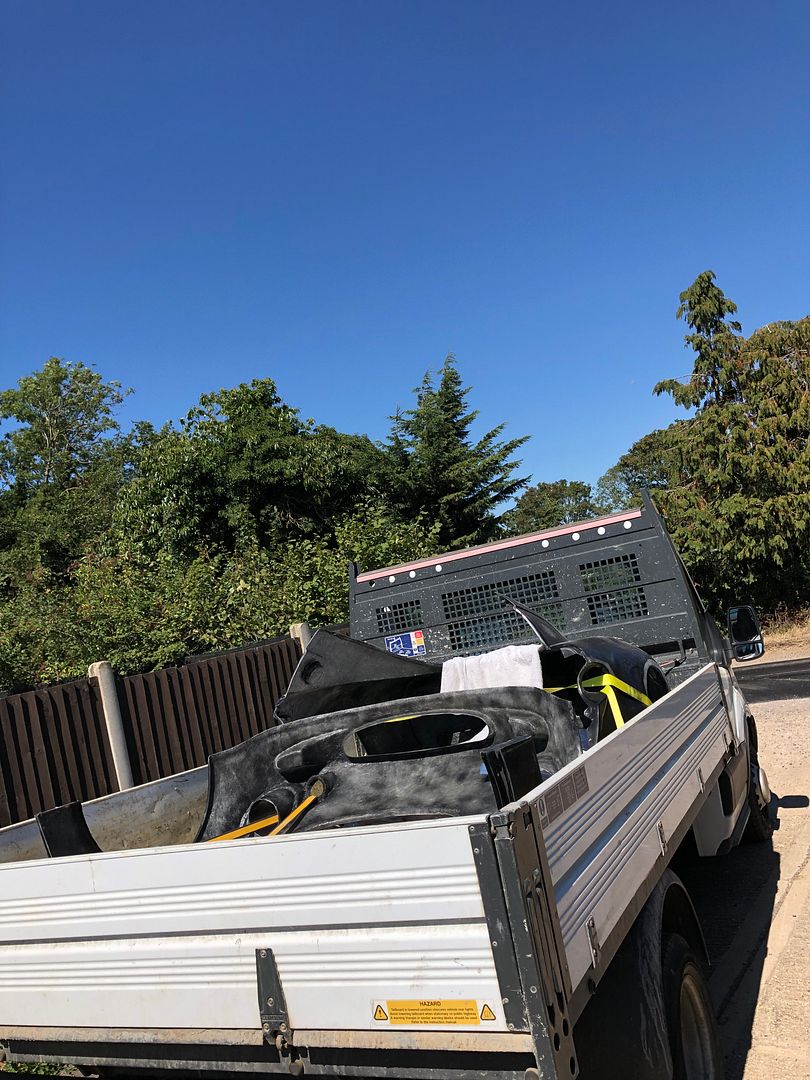

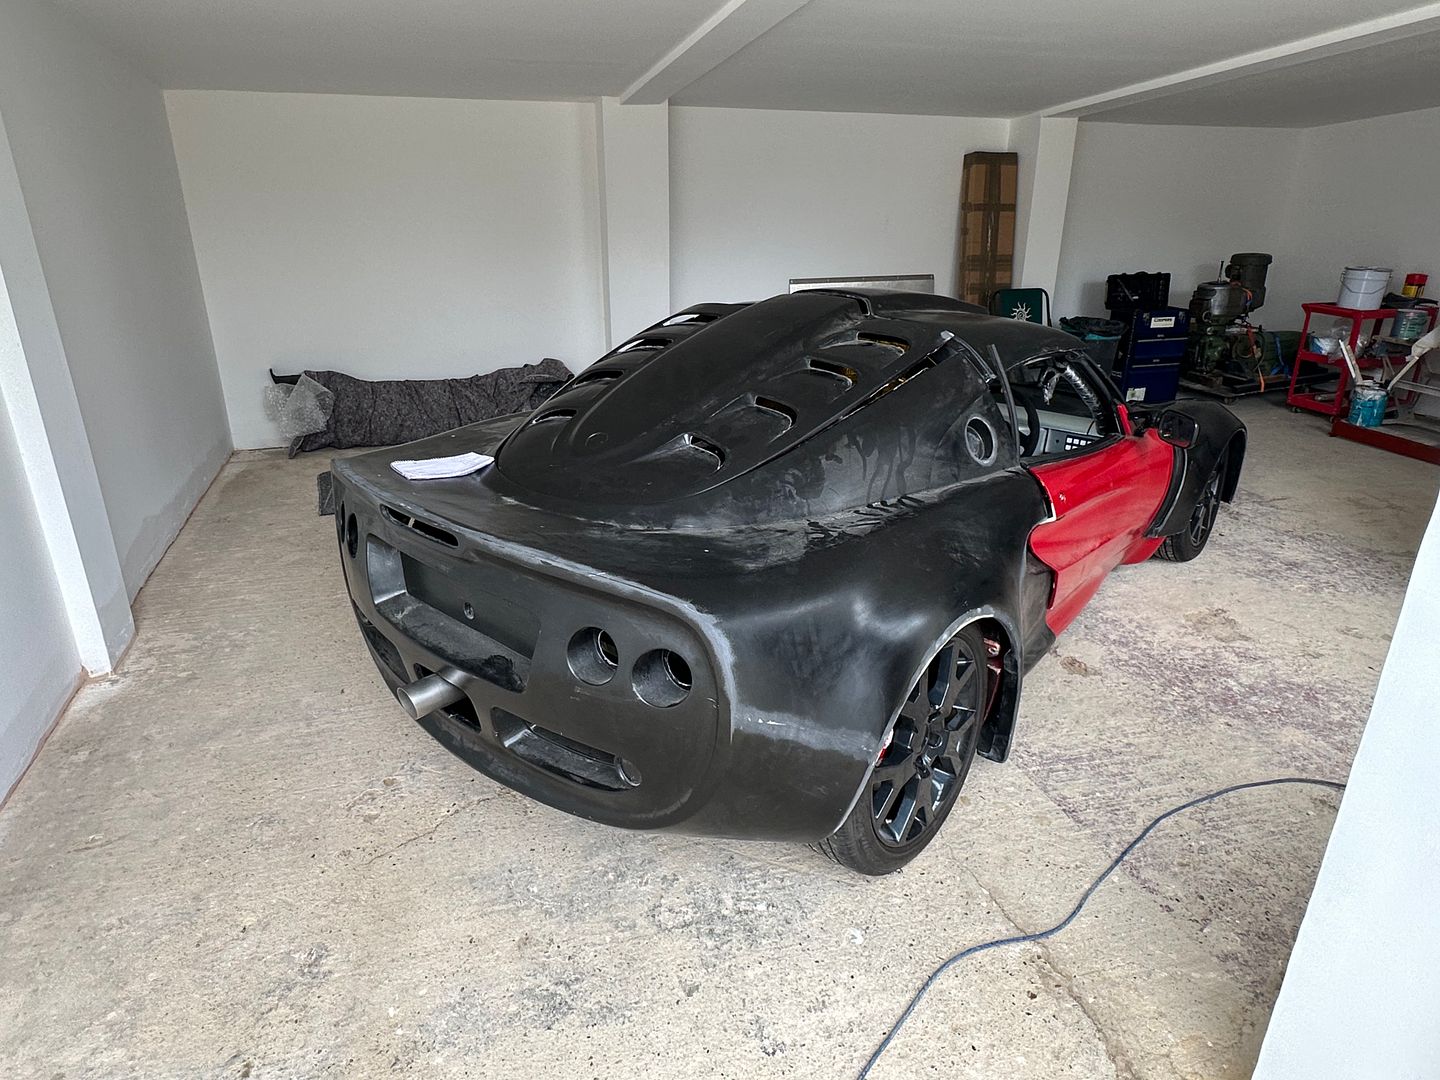
With everything but a bonnet collected, my online hunting quickly lead me to a carbon fibre one... which showed up not long after:
Next step was to mock fit everything on the car - ride height and transport wheel based hilarity ensued:

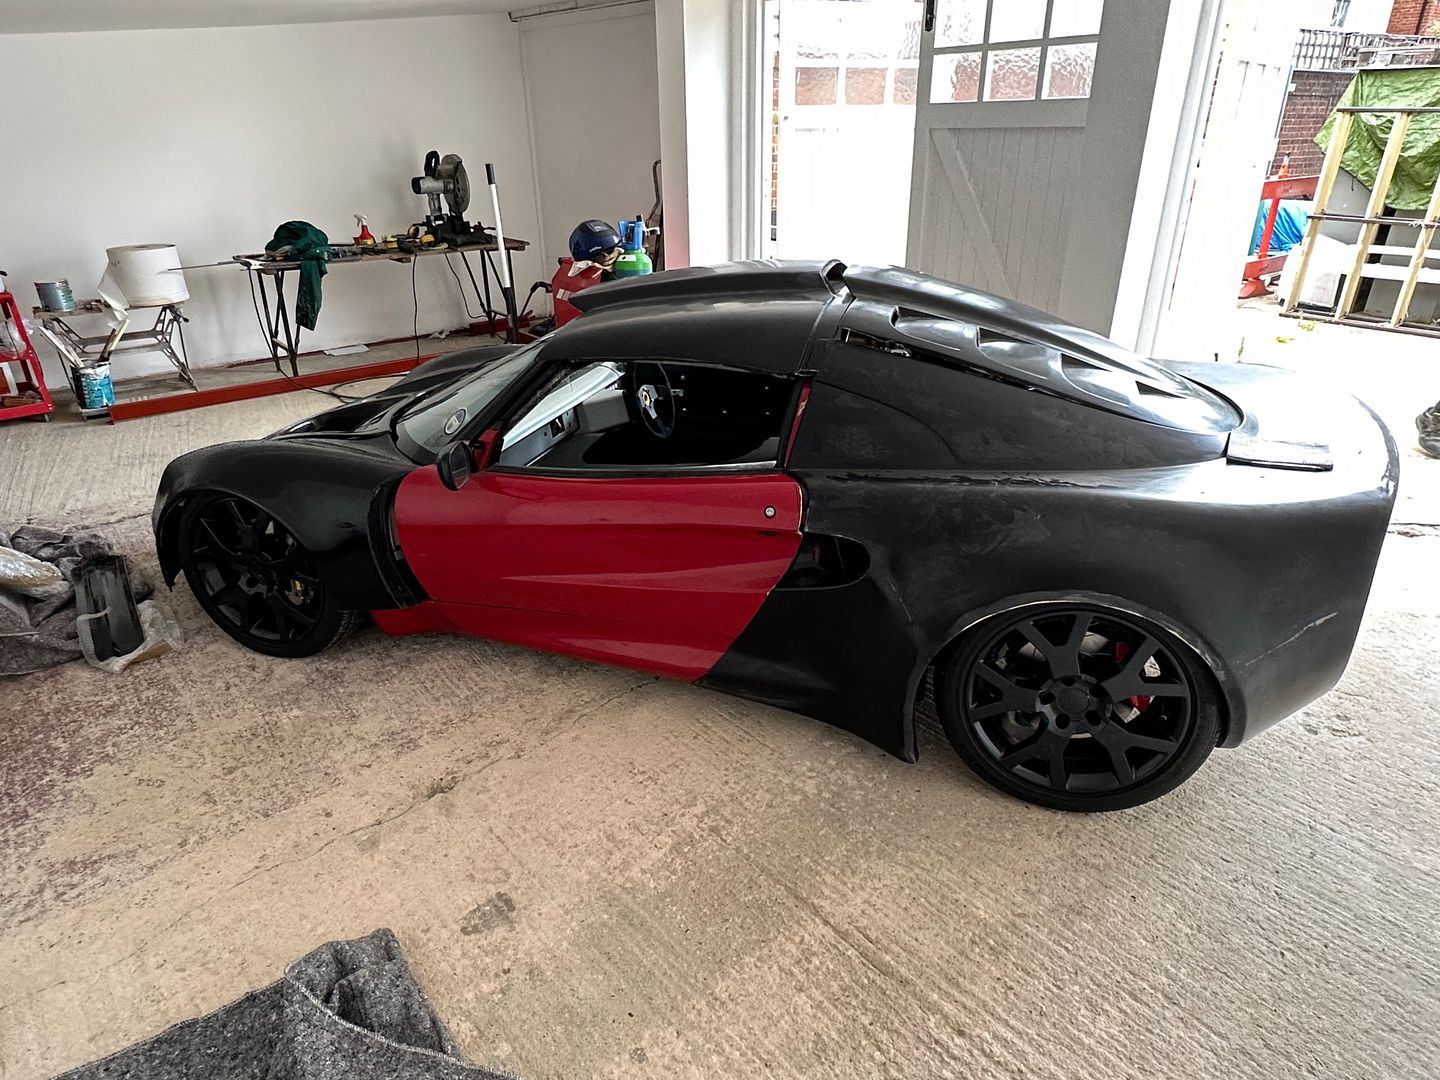
Hopefully the next update will be of all the bodywork actually fastened to the car and then I can get my teeth in to the plumbing and wiring...
Gassing Station | Readers' Cars | Top of Page | What's New | My Stuff