Talbot motorhome rolling restoration
Discussion


Took my old motorhome for its MOT today and happily it went straight through, so when I got back I thought id give it a clean and take some photos.
I bought mine a year ago as a cheap way into a motorhome, didn't want to spend loads as I wasn't sure id take to it.
Its an '89 2.0l petrol with 84k on the clock, half a dozen owners and pretty much everything was working inside it.
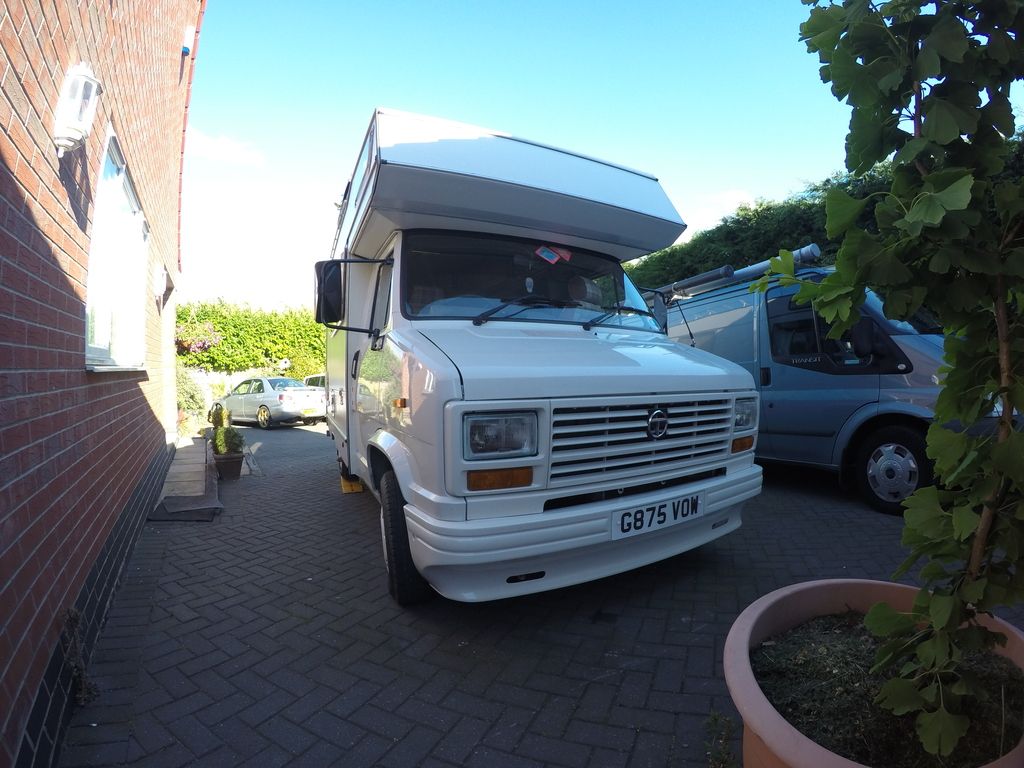
Never gave a Talbot a second thought before I got this one but turned out to be a reliable old van, probably because there's not much to go wrong, no fuel injection or ECU just a carb and manual choke.
Ive been slowly working on it while keeping it on the road, improving and changing things as I go, and its about how I want it now.
Here's a few jobs ive been doing lately
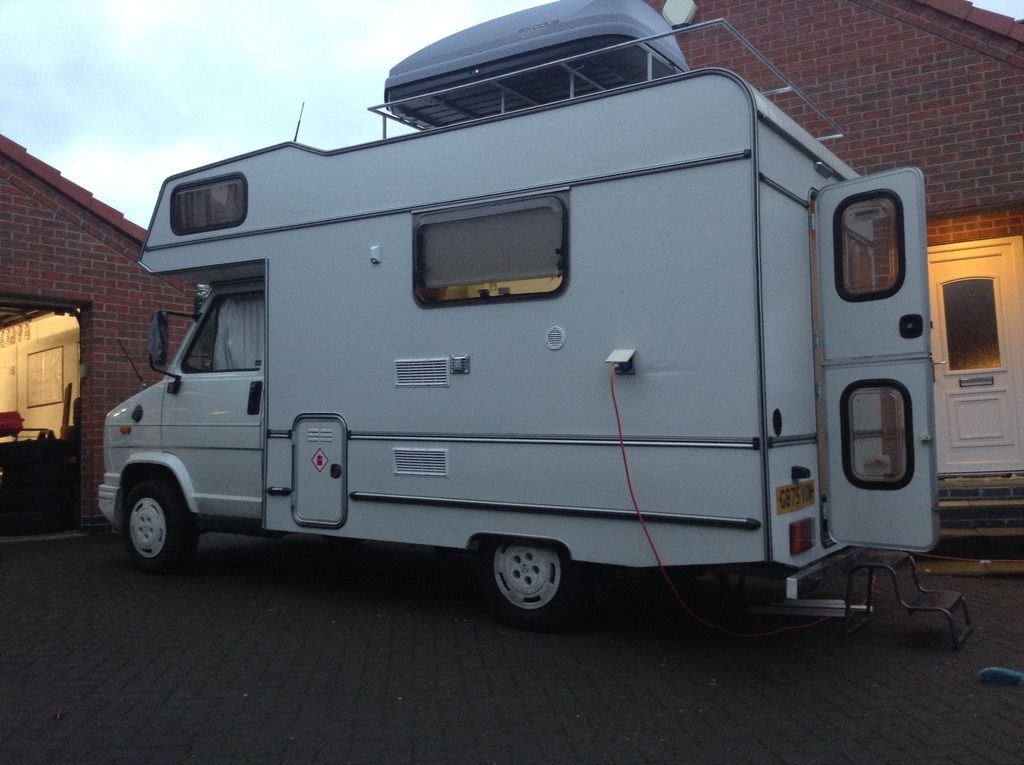
Home made roof rack with fold up TV aerial mast
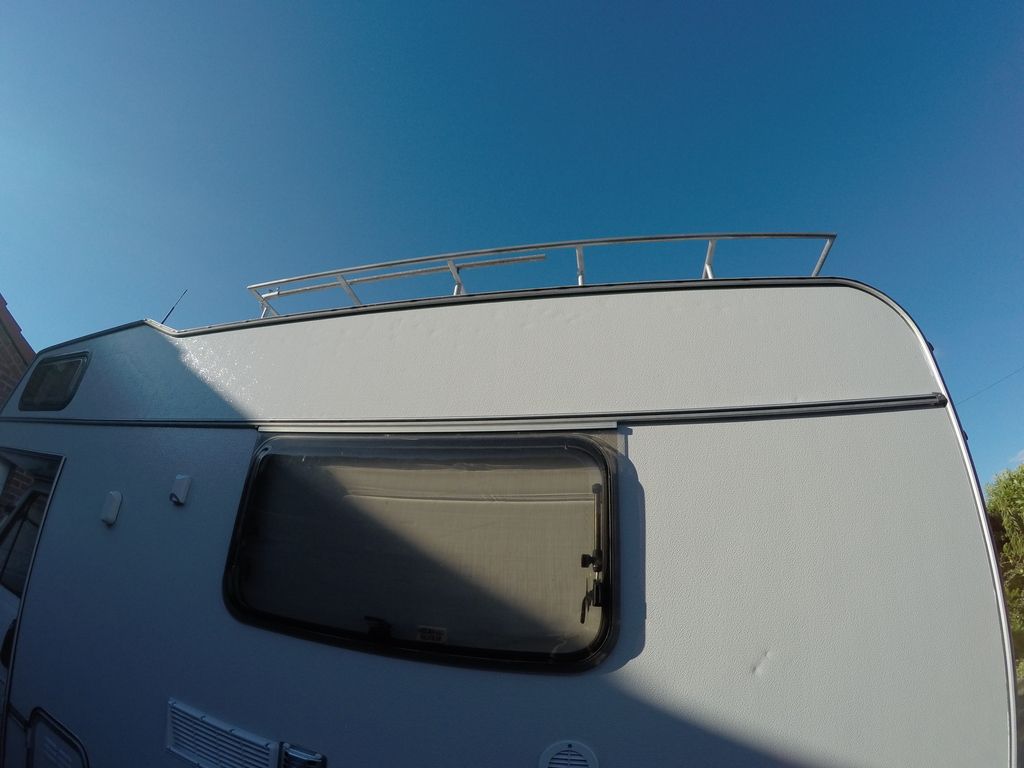
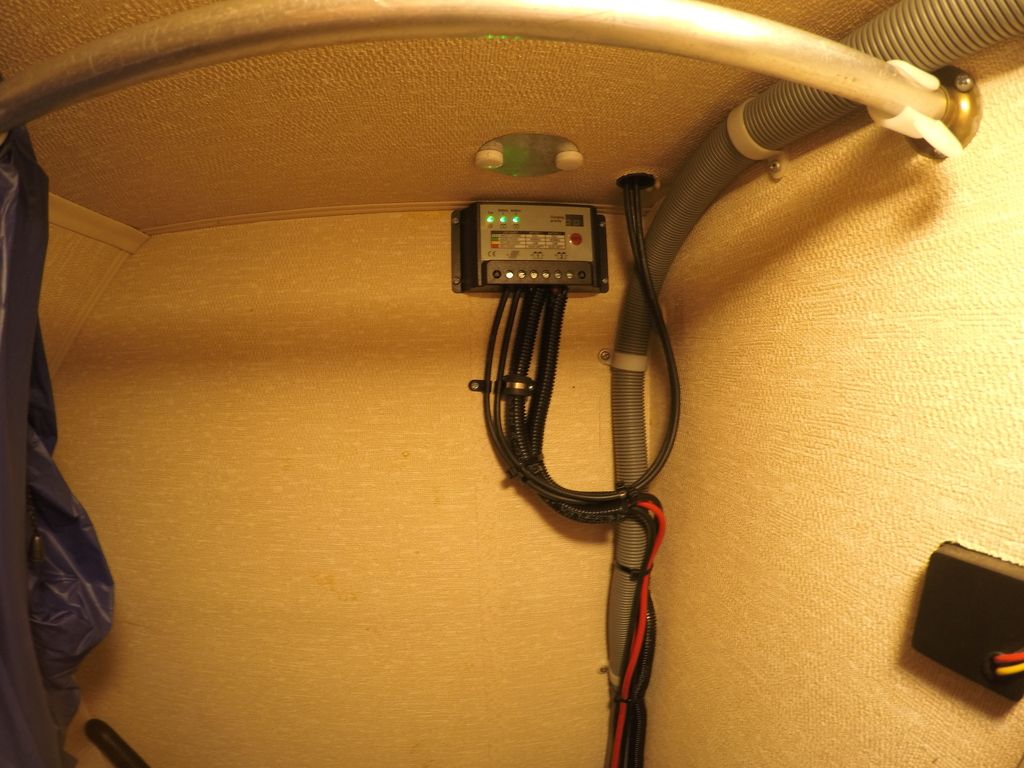
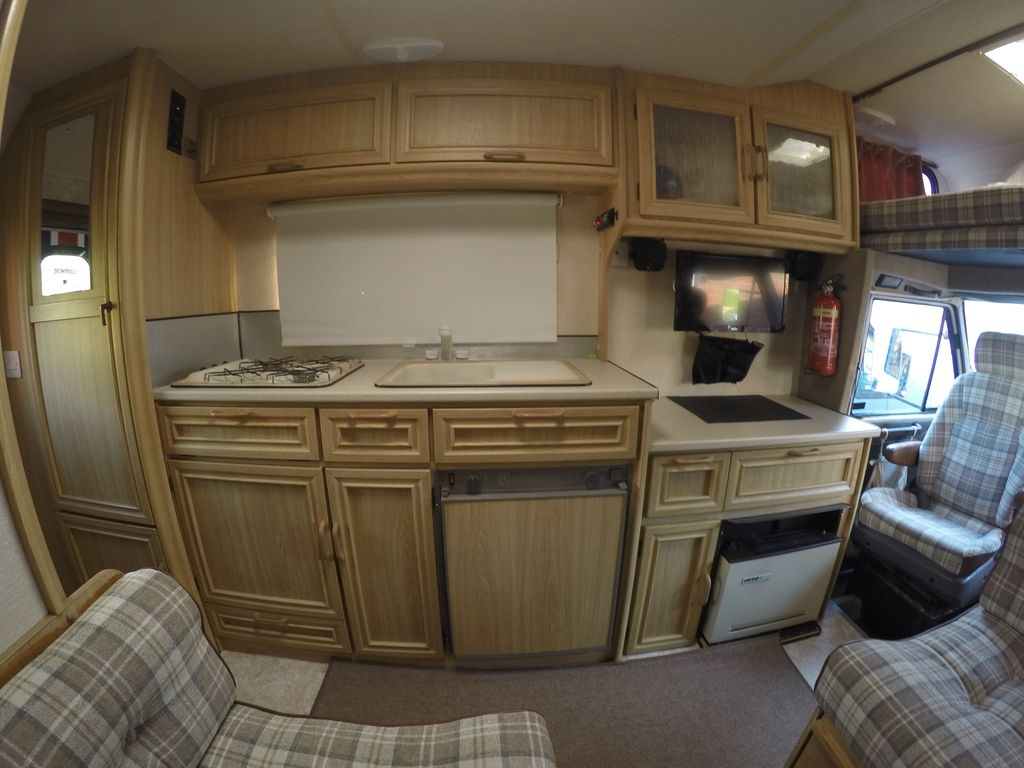
100w Solar panel and split charger means as long as I have a bottle of gas I don't need electric hook up, every thing inside is 12V
I bought mine a year ago as a cheap way into a motorhome, didn't want to spend loads as I wasn't sure id take to it.
Its an '89 2.0l petrol with 84k on the clock, half a dozen owners and pretty much everything was working inside it.


Never gave a Talbot a second thought before I got this one but turned out to be a reliable old van, probably because there's not much to go wrong, no fuel injection or ECU just a carb and manual choke.
Ive been slowly working on it while keeping it on the road, improving and changing things as I go, and its about how I want it now.
Here's a few jobs ive been doing lately
Home made roof rack with fold up TV aerial mast

100w Solar panel and split charger means as long as I have a bottle of gas I don't need electric hook up, every thing inside is 12V


Shower room lined with upvc cladding, new shower tray and sink
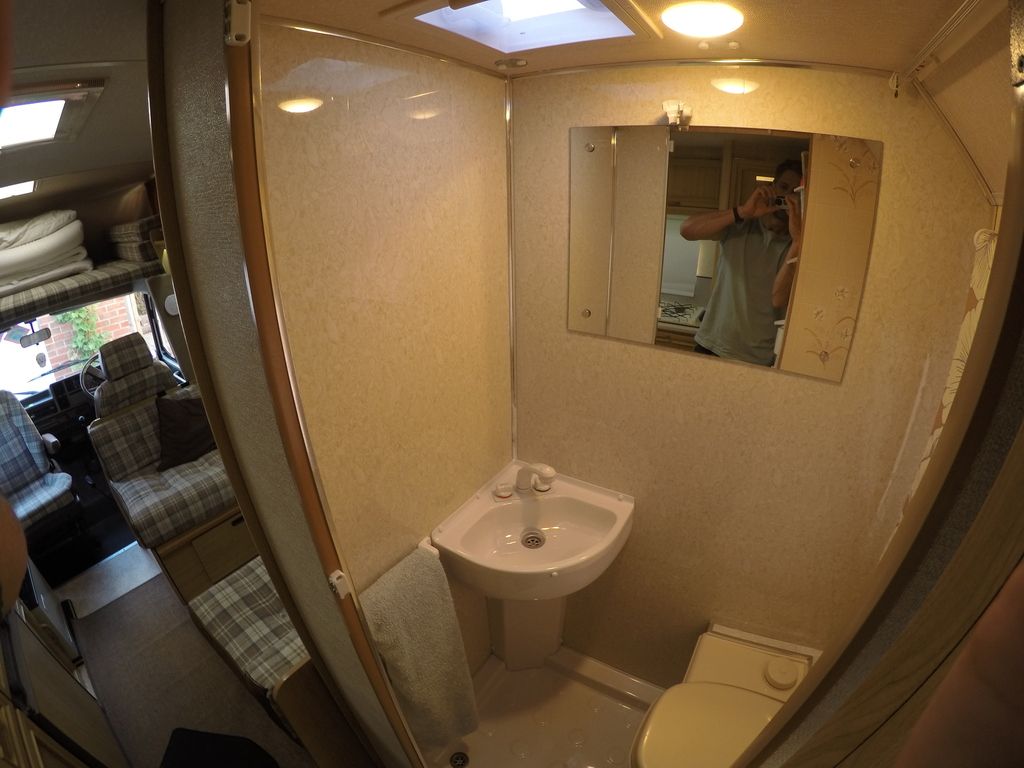
LED lighting all through saves on battery consumption.
12V TV also runs on mains.
Just need some new curtains making for the top bunk now.
I'm pleased with the results, big improvement on what it was and for not a lot of money.


LED lighting all through saves on battery consumption.
12V TV also runs on mains.
Just need some new curtains making for the top bunk now.
I'm pleased with the results, big improvement on what it was and for not a lot of money.


CDB1983 said:
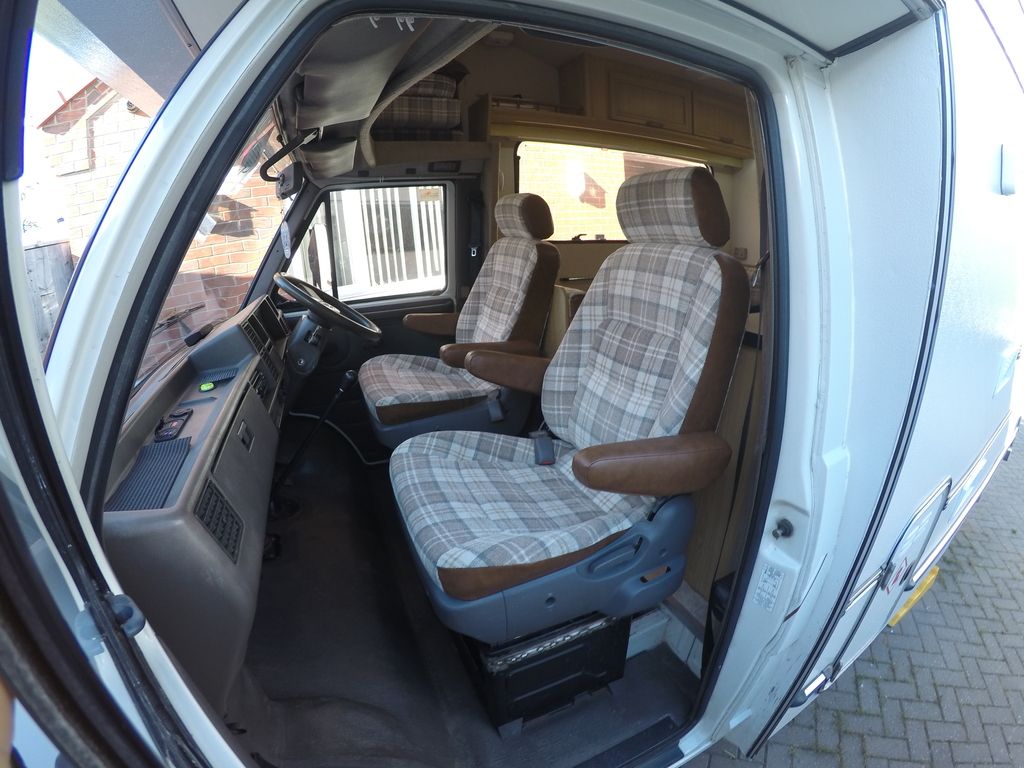
What a fabulous looking thing, Interior retrim looks amazing! How much of a pain was it to fit the Kia Sedona seats? I'm looking to change our seats in our Ducato based Hymer at the earliest possible opportunity along with a decent steering wheel.
It was a bit of a pain in truth and involved cutting and welding, but the price of the seats ( £40 pair from scappers ) more than offset the work.These seats are the revolving middle rear seats btw with cup holders and built in seatbelt points.
Basically I had to trim the KIA swivel base of all the bolt holes and surplus brackets to make the bottom flat.
I removed the original seat runners from the old seats and welded cross bars to accept the KIA seats

I found that the new seats sat to high once on the van seat boxes, so then I ended up cutting 2" off the height of the boxes, you can see the welding line above.
These new seats are really comfy with the arm rests and being swivel seats opens up the seating area on a relatively small motorhome.
eta, Your base van is the same, so it will be same procedure for yours.
Edited by martinnitram on Tuesday 27th June 09:20
martinnitram said:
It was a bit of a pain in truth and involved cutting and welding, but the price of the seats ( £40 pair from scappers ) more than offset the work.
These seats are the revolving middle rear seats btw with cup holders and built in seatbelt points.
Basically I had to trim the KIA swivel base of all the bolt holes and surplus brackets to make the bottom flat.
I removed the original seat runners from the old seats and welded cross bars to accept the KIA seats
I found that the new seats sat to high once on the van seat boxes, so then I ended up cutting 2" off the height of the boxes, you can see the welding line above.
These new seats are really comfy with the arm rests and being swivel seats opens up the seating area on a relatively small motorhome.
eta, Your base van is the same, so it will be same procedure for yours.
They really do look excellent! Well beyond my level of skills however! I will keep an eye out for seats and I think we we will certainly end up changing ours.These seats are the revolving middle rear seats btw with cup holders and built in seatbelt points.
Basically I had to trim the KIA swivel base of all the bolt holes and surplus brackets to make the bottom flat.
I removed the original seat runners from the old seats and welded cross bars to accept the KIA seats
I found that the new seats sat to high once on the van seat boxes, so then I ended up cutting 2" off the height of the boxes, you can see the welding line above.
These new seats are really comfy with the arm rests and being swivel seats opens up the seating area on a relatively small motorhome.
eta, Your base van is the same, so it will be same procedure for yours.
Edited by martinnitram on Tuesday 27th June 09:20
Just out of interest, How do you find the accelerator position? I've just driven our ducato for the first time (2000 mile trip) and found that the pedal is in such a bizzare position that it made driving it practically impossible, Have you had any issues or perhaps its just mine,
Had to stick a wheel chock to the floor with gaffa tape to be able to complete the journey
Had to stick a wheel chock to the floor with gaffa tape to be able to complete the journey
CDB1983 said:
Just out of interest, How do you find the accelerator position? I've just driven our ducato for the first time (2000 mile trip) and found that the pedal is in such a bizzare position that it made driving it practically impossible, Have you had any issues or perhaps its just mine,
Had to stick a wheel chock to the floor with gaffa tape to be able to complete the journey
Now you've mentioned it I suppose it does sit a bit high.Had to stick a wheel chock to the floor with gaffa tape to be able to complete the journey
Not caused me any problems though.
Gassing Station | Tents, Caravans & Motorhomes | Top of Page | What's New | My Stuff