2005 C180K plastic below 3rd brake light has "corroded"
Discussion


Got a 2005 C180K which hasn't been used for a while and unfortunately kept outside.
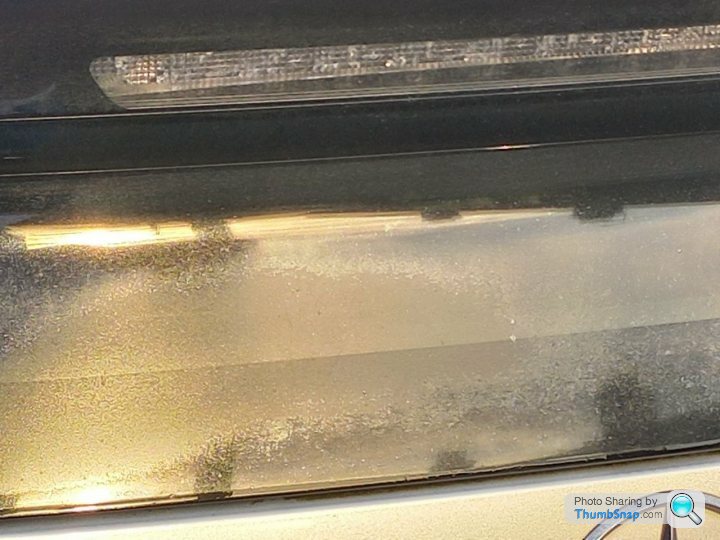
At the rear, above the number plate and Mercedes badge and just below the "third brake light" there is a plastic dark/see-through panel.
The surface of this appears to have "corroded". I've included a photo below and a photo from Google showing where on the car.
I went over it with water, initially it seemed to disappear but as the water dried, it returned.
Is this a permanent chemical reaction/physical damage/needs the part replaced? And if so, would the garage be able to detach this from the boot lid easily so I won't need an entire new boot lid?
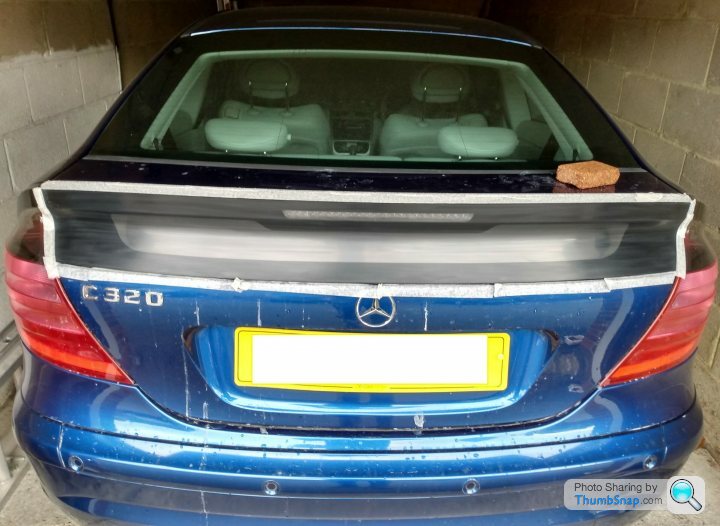
You can do a "headlight restoration" type technique on it, based on posts 12 and 13 on the following, which I did recently with some success:
https://mbworld.org/forums/c-class-w203/377934-c23...
1. Mask around the area - I masked the top black bit too, which seemed unaffected by the lacquer problem, though you then can have an issue at this joint;
2. Wet sand off the lacquer. I hand-sanded it as it would be easy for the edge of a sanding disk to cut the dip in the middle of the window when sanding the top and bottom bits. I used 800, then 1200, then 1500, then 2000 and finally 3000 grit, with each one at 90 degrees to the previous and having arranged it that the last one is horizonal, which is the easiest direction to sand. You have to remove all the lacquer, and I think most of the effort is removing the good lacquer from the underside of the S when viewed from the offside which won't have had direct sun. You want it all to look consistently hazy/grey at this point. On the subsequent grit papers you keep sanding until you can't see the scratches from the previous paper;
3. Remove the final sanding marks with a cutting compound. My old Autoglym paint renovator may not have been strong enough as close up there are still some surface scratches. You want a polishing head where the foam etc. extends around the sides, so again you don't cut the plastic in the dip, the underside of the S;
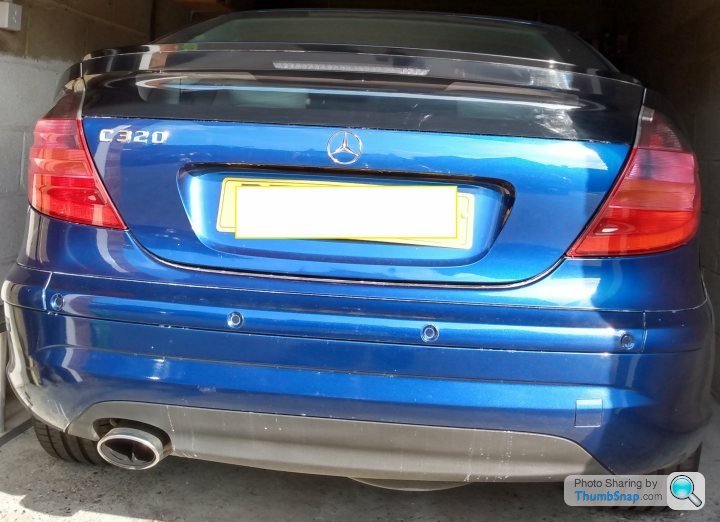
4. Protect it from UV with something ranging from polish or spray or get it re-lacquered.
On re-lacquering and the comment above about Hondas; in my research I came across the following and post 9 is interesting re. the difficulty of re-lacquering: https://www.civinfo.com/threads/rear-plexiglass-fr...
I'm a not-very-skilled amateur, so please regard the above accordingly.
https://mbworld.org/forums/c-class-w203/377934-c23...
1. Mask around the area - I masked the top black bit too, which seemed unaffected by the lacquer problem, though you then can have an issue at this joint;
2. Wet sand off the lacquer. I hand-sanded it as it would be easy for the edge of a sanding disk to cut the dip in the middle of the window when sanding the top and bottom bits. I used 800, then 1200, then 1500, then 2000 and finally 3000 grit, with each one at 90 degrees to the previous and having arranged it that the last one is horizonal, which is the easiest direction to sand. You have to remove all the lacquer, and I think most of the effort is removing the good lacquer from the underside of the S when viewed from the offside which won't have had direct sun. You want it all to look consistently hazy/grey at this point. On the subsequent grit papers you keep sanding until you can't see the scratches from the previous paper;
3. Remove the final sanding marks with a cutting compound. My old Autoglym paint renovator may not have been strong enough as close up there are still some surface scratches. You want a polishing head where the foam etc. extends around the sides, so again you don't cut the plastic in the dip, the underside of the S;
4. Protect it from UV with something ranging from polish or spray or get it re-lacquered.
On re-lacquering and the comment above about Hondas; in my research I came across the following and post 9 is interesting re. the difficulty of re-lacquering: https://www.civinfo.com/threads/rear-plexiglass-fr...
I'm a not-very-skilled amateur, so please regard the above accordingly.
Edited by trevalvole on Tuesday 11th July 11:06
Gassing Station | Mercedes | Top of Page | What's New | My Stuff