Rubber bumper mod' - a little bit of rust!
Discussion


I've decided to play around with modifying the rear bumper, like this in the link below. Think it will look better being a more snug fitment to the bodywork.
http://www.mgexperience.net/phorum/read.php?1%2c18...
So, not wanting to chop up the existing one, I picked up a pair of them off Ebay in what looked like reasonable condition. But, the under side of the armature on the rear bumper now that it is removed from the rubber looks like this:
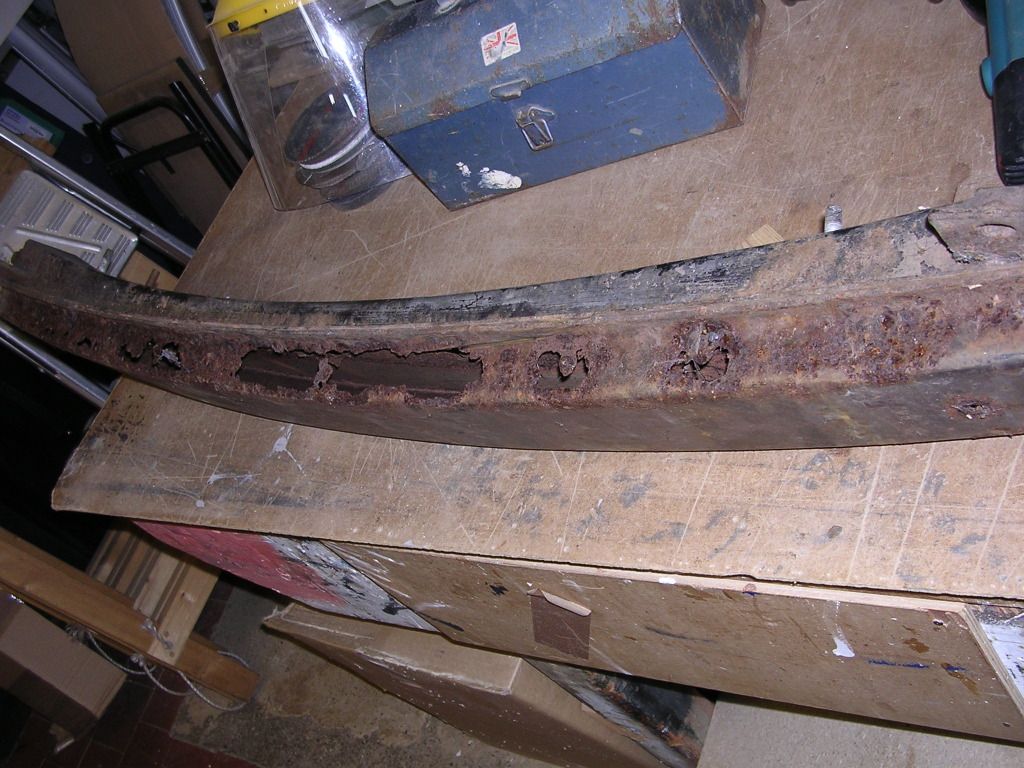
Anyone got a spare one better than that? If I buy another one complete I wont know if it's okay until I strip it. Or could I cut the rust out and weld in some bracing pieces?
The rubber part has polished up a treat.
http://www.mgexperience.net/phorum/read.php?1%2c18...
So, not wanting to chop up the existing one, I picked up a pair of them off Ebay in what looked like reasonable condition. But, the under side of the armature on the rear bumper now that it is removed from the rubber looks like this:
Anyone got a spare one better than that? If I buy another one complete I wont know if it's okay until I strip it. Or could I cut the rust out and weld in some bracing pieces?
The rubber part has polished up a treat.
hi tony, that looks pretty normal for the underside; unfortunately. i'm not sure i'd risk buying another unit with no certainty as to condition. moss quote £219.17 for the rear armature, so why not weld-in some good thick plate...it'd be much cheaper and you'll be guaranteed good structural support. once done it would be worth properly zinc etching with eastwood's fast etch prior to primer & paint.
see that this mod' is getting good interest on the mg forum guys in the u.s. & it's already being called the "sylvester mod". so you'll soon be the first englishman in the u.k. to be "sylvester'ed"...not sure i'd want to advertise this
see that this mod' is getting good interest on the mg forum guys in the u.s. & it's already being called the "sylvester mod". so you'll soon be the first englishman in the u.k. to be "sylvester'ed"...not sure i'd want to advertise this
Ptogress so far:
Took the tip of my thumb off with a sharp knife.
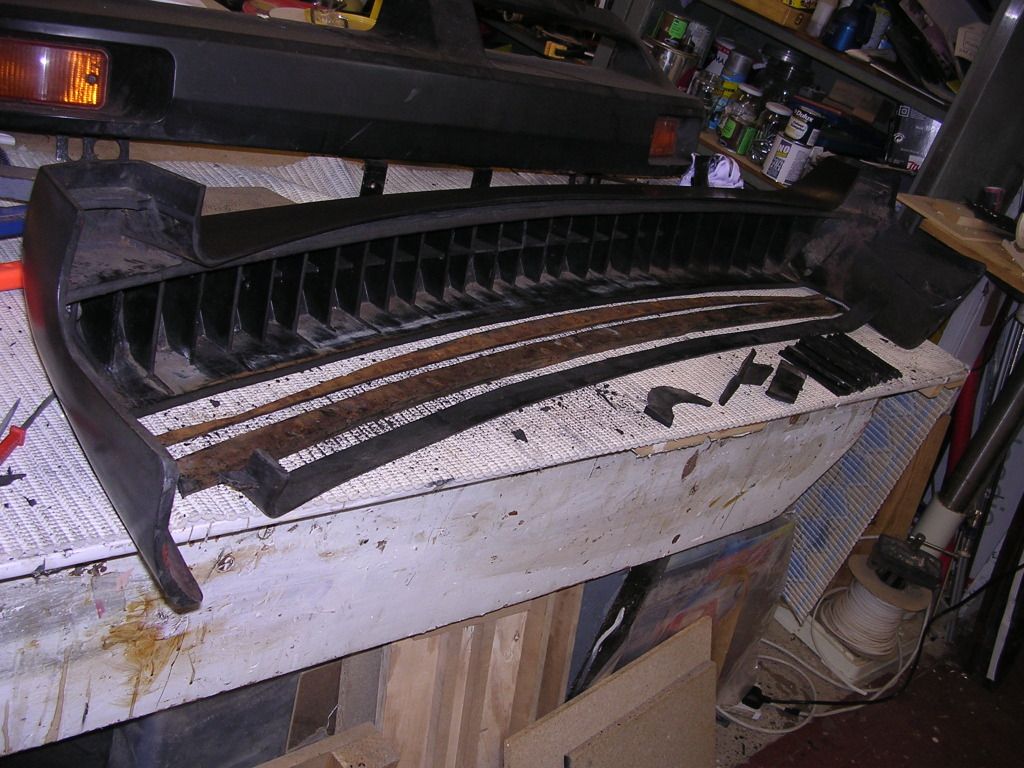
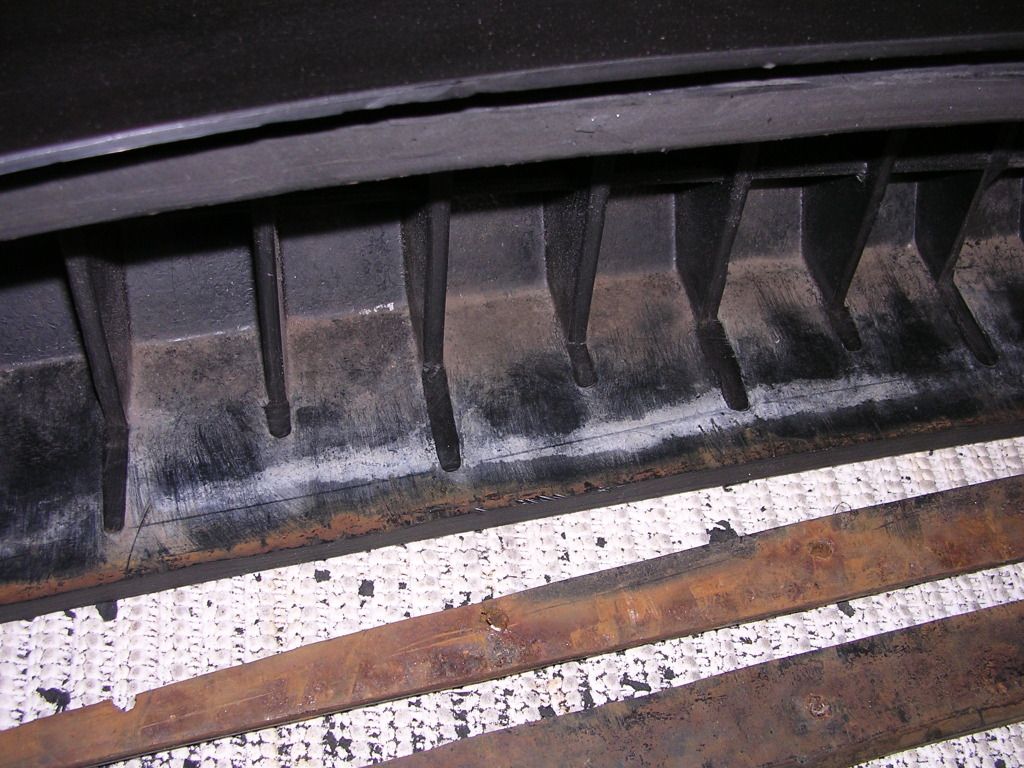
Some pictures. Cut an inch and a quarter of all the rear of the rubber. The larger inner supports also cut down by the same amount and the smaller ones trimmed back in-line with the ones either side of them.
Going to source another armature, but a test fit of the rusty one with a few adjustment to the corners, grinding them back, and all is looking good.
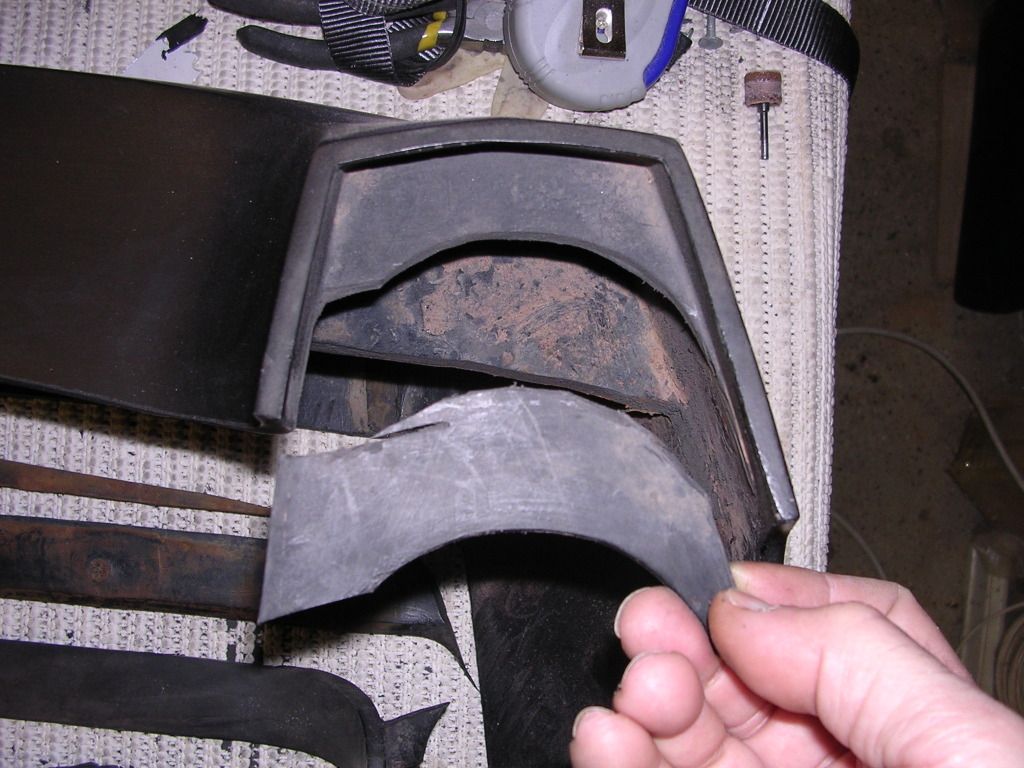
Now need to test fit and trim the side flaps.
Took the tip of my thumb off with a sharp knife.
Some pictures. Cut an inch and a quarter of all the rear of the rubber. The larger inner supports also cut down by the same amount and the smaller ones trimmed back in-line with the ones either side of them.
Going to source another armature, but a test fit of the rusty one with a few adjustment to the corners, grinding them back, and all is looking good.
Now need to test fit and trim the side flaps.
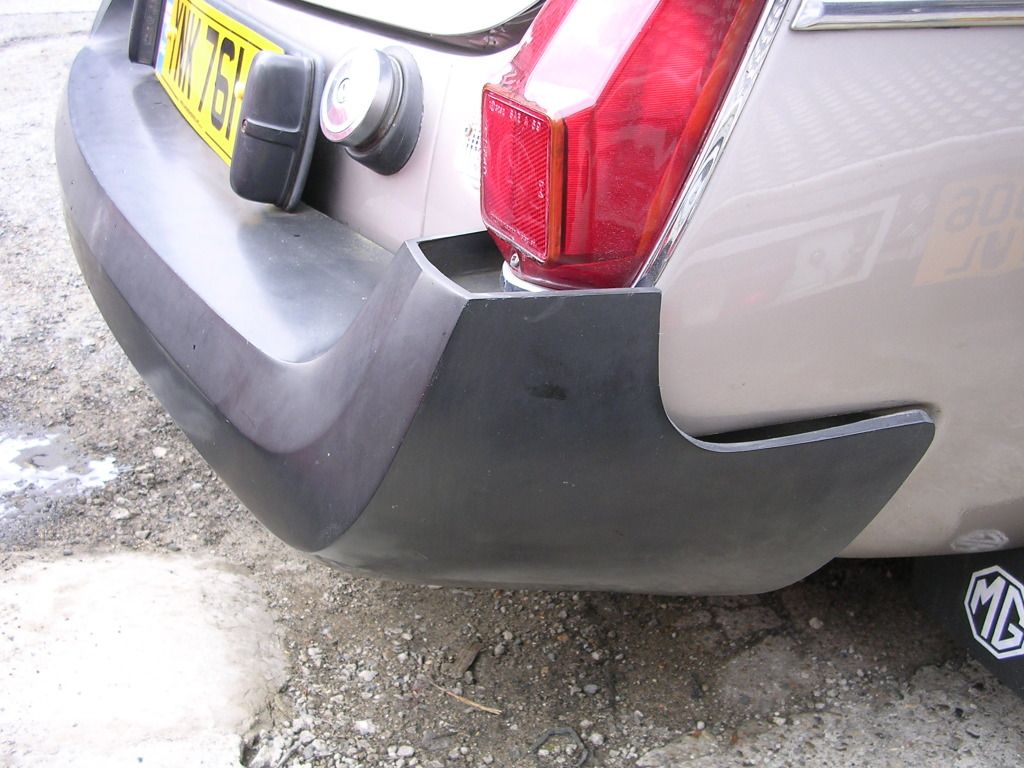
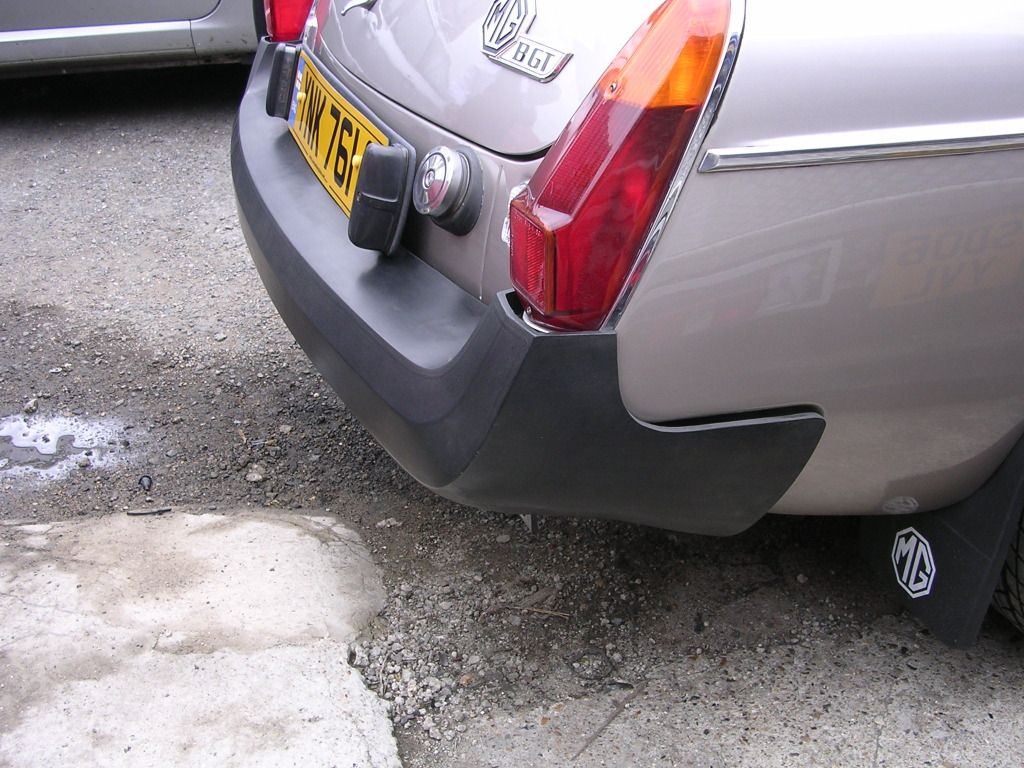
Finished, 
All now trimmed and fitted, took about an inch off the length of the side flaps,at both the curve by the light and the large piece. Had to do away with the clips but it doesn't need them.
Got the electric polisher out with some black trim wax and polished it up before fittng.
Pleased with the result, might have trimmed the height under the lights to expose the chrome trim but there is a thin pin-stripe in the black moulding which I hadn't noticed before, so left it to keep it even.
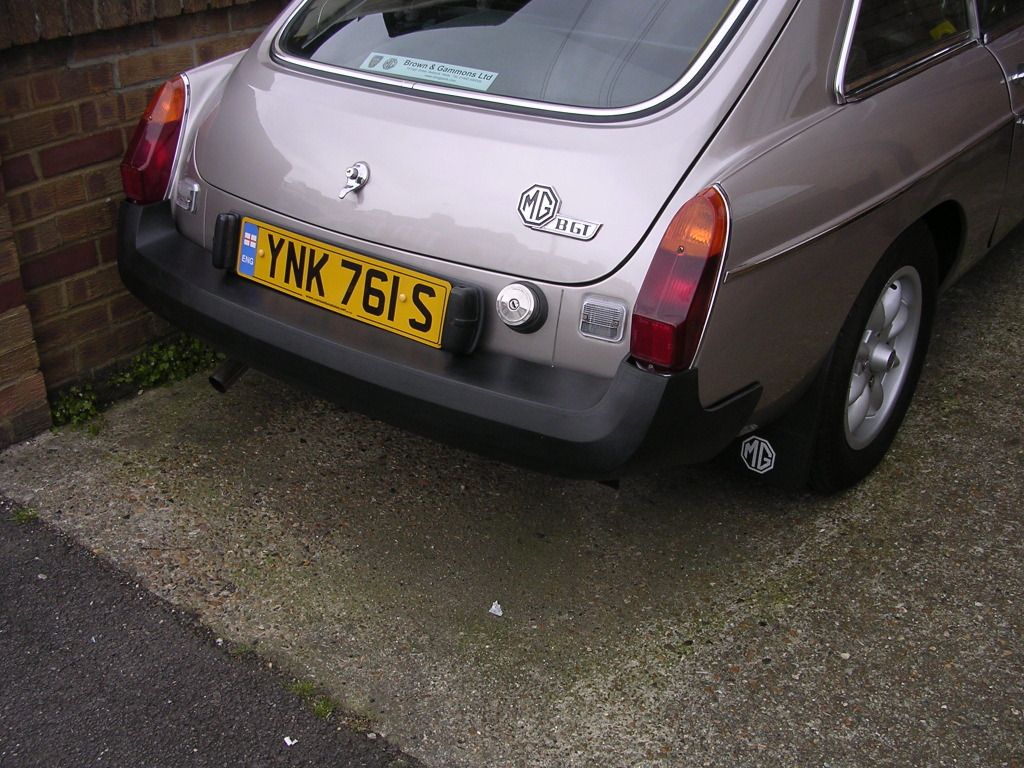
 Nigel. We're planning on being in your neck of the woods (oop north
 ) tomorrow. Going to the Old Warden car show in Bedford, can debut my new bumper!!
good job you put that Tony the local Bears are going including my mate who I was going to call round and see him at home tomorrow, have to make it today now
instead of sitting a polished car unused in a wet field carry on driving plenty of good roads in Beds then going into Cambs or Northants and into south Liecestershire and Rutland much more fun
Old Warden is just about level with the top of MK so it still south to us !
instead of sitting a polished car unused in a wet field carry on driving plenty of good roads in Beds then going into Cambs or Northants and into south Liecestershire and Rutland much more fun
Old Warden is just about level with the top of MK so it still south to us !
Gassing Station | MG | Top of Page | What's New | My Stuff