T350 Boot Badge/Button Replacement
Discussion
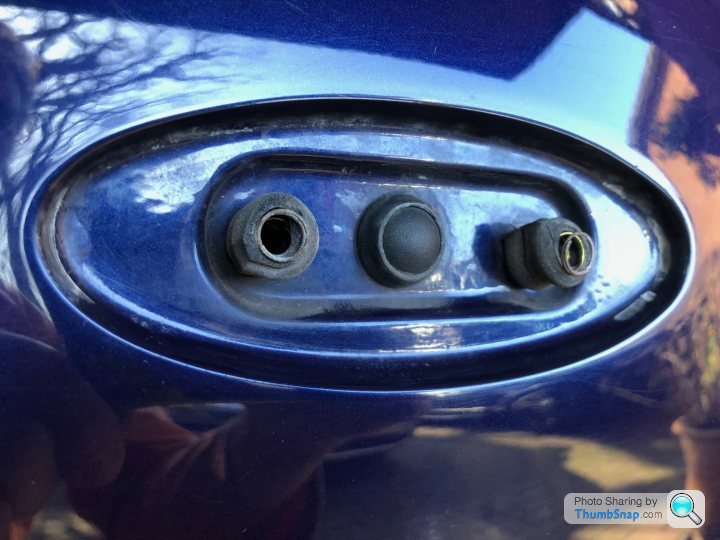
I need to replace the boot release press button on my T350 (the surround is really manky) and am struggling to visualise the mechanism. It appears to be a 'solid' plinth with two nuts holding it in place. A previous thread talks of a rubber pad but again, I'm struggling to see it in my mind.
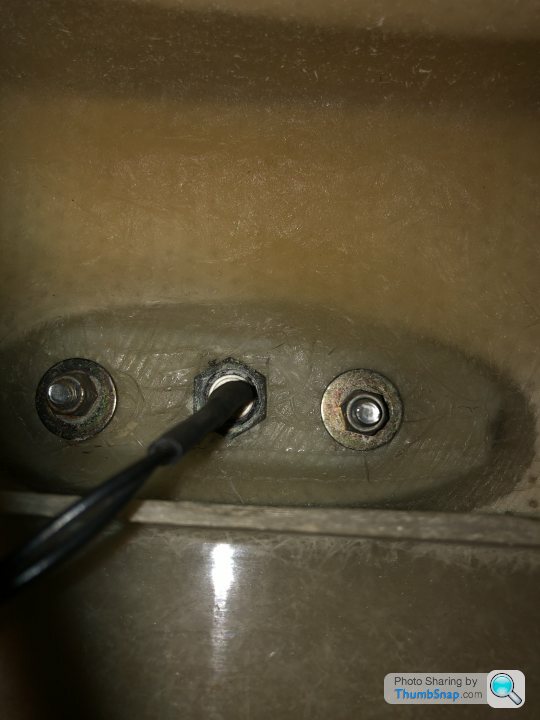
The pic below was taken by pushing the phone up the cubby hole. Again, it looks like a sold connection. Can anyone explain (or post pics of) how the push mechanism works please. Surely it's not just loose nuts pushing on a piece of rubber.... is it?? Being a TVR, I suppose it could be....
Some good responses to my query on FB but I still lack clarity. Thanks in advance


http://www.tvrpower.co.uk/store/slug/black-button/
All found here https://www.pistonheads.com/gassing/topic.asp?t=10...
Here is info about rubber https://www.pistonheads.com/gassing/topic.asp?h=0&...
So I've finally gotten around to replacing the badge/boot button. The first point of note is the right length of spanner to release the 2 nylock nuts on the reverse side and the unbelieveable degree of double-jointedness to access these nuts and undo them. Too long and you'll have nowhere to spin it. Also be aware that you should avoid damage to the wires running to the bullet button in the middle, which actuates the lock. To get them off took me close on an hour. I'm sure others could do it much quicker! 
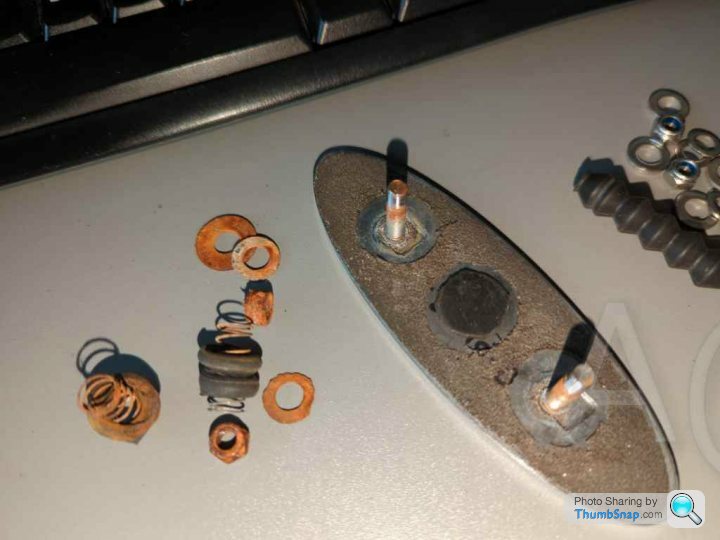
The second point to note is what lies behind the badge once removed. As shown in the picture below, there are two small rubber 'bellows' type bushes with small steel springs within, one either side of the bullet button. I didn't remove these items as they appeared to be in good order and quite happy where they sat, within the bodywork holes. Don't fiddle if they don't need fiddling with, is my motto.

The whole lot went back together with the constant fear of dropping the washers and/or nuts but luckily I managed to avoid this. They will never be seen again if you do drop them within the recess! Tightening the nylock nuts is crucial. Too tight and the button will actuate too easily and probably as the car passes over every bump. Too loose and the badge will rattle. With some trial and error everything was in place in around 35 minutes.
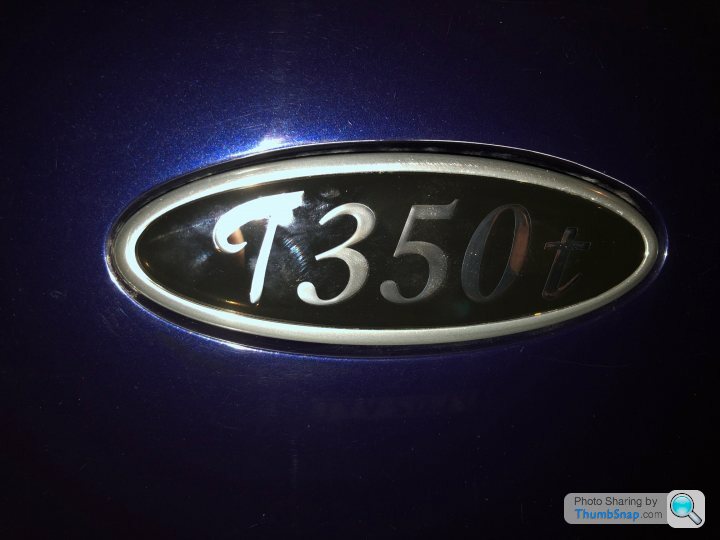
Oh yes, one last thing, I bought the plinth and the badge. Getting the badge accurately in exactly the right place is a challenge... The self-adhesive badge sticks instantly when it touches the plinth; the badge won't budge!!!. It's a very tight fit within the recessed area of the nice aluminium plinth and there is no room for error. In the end I gently arched the badge and fitted both ends to the plinth simulteneously. Ease the middle area into place and check constantly that it's in exactly the right place.
Job done!


The second point to note is what lies behind the badge once removed. As shown in the picture below, there are two small rubber 'bellows' type bushes with small steel springs within, one either side of the bullet button. I didn't remove these items as they appeared to be in good order and quite happy where they sat, within the bodywork holes. Don't fiddle if they don't need fiddling with, is my motto.

The whole lot went back together with the constant fear of dropping the washers and/or nuts but luckily I managed to avoid this. They will never be seen again if you do drop them within the recess! Tightening the nylock nuts is crucial. Too tight and the button will actuate too easily and probably as the car passes over every bump. Too loose and the badge will rattle. With some trial and error everything was in place in around 35 minutes.
Oh yes, one last thing, I bought the plinth and the badge. Getting the badge accurately in exactly the right place is a challenge... The self-adhesive badge sticks instantly when it touches the plinth; the badge won't budge!!!. It's a very tight fit within the recessed area of the nice aluminium plinth and there is no room for error. In the end I gently arched the badge and fitted both ends to the plinth simulteneously. Ease the middle area into place and check constantly that it's in exactly the right place.
Job done!


Question, does/did the boot switch come open, without a water proof cover, my door switches without covers caused all sorts of issues with the ECU the first time they got wet (they got wet, after not having the covers replaced after the car got painted) . I am just going through my car boot/back end and about to strip the lock/switch/hinges etc. to service everything. A@
Adrian@ said:
Question, does/did the boot switch come open, without a water proof cover, my door switches without covers caused all sorts of issues with the ECU the first time they got wet (they got wet, after not having the covers replaced after the car got painted) . I am just going through my car boot/back end and about to strip the lock/switch/hinges etc. to service everything. A@
I don't recall any waterproof cover. Not had any leaky problems in that area either.I only ask, as I have yet to take my Tamora boot switch apart. I read that there is a piece of rubber adhered to the back of the mount/badge to pack the gap between the back and the switch (hence my question). IF there is no cover ATM then I have a choice of adding a cover (better waterproofing) or purchasing the taller version of the ITW switch (still IP67) to negate the use of anything being stuck/falling off in the future. A@
I've taken a few of the rear badge/boot release mechanisms apart (Cerbera and Tuscan) and none had the waterproof cover of the door opening switches. Might not be a bad idea to fit though, as you do get some moisture in there as the springs on mine in the little bellows were rusty and had to be replaced. Not sure if there is enough clearance in there for a cover though. Will be interested to see what you find out Adrian@.
I am going to remove the rubber super glued on the back of the badge then replace the switch fitted with the rubber O ring to stack the button off the shell, ready to accept the cover as fitted to the door mirror (I found a new boot for the springs and some S/S washers)

Jobs a good one. I did buy in a taller switch but then O ring and boot will take up the gap that the bit of rubber had been added for. A@

Jobs a good one. I did buy in a taller switch but then O ring and boot will take up the gap that the bit of rubber had been added for. A@
very interested on how you did it on the Tamora Adrian. I've yet to tackle mine. is there a removable panel under the carpet on the boot rear wall? I got a response to my thread (https://www.pistonheads.com/gassing/topic.asp?h=0&f=&t=1986533) albeit about the T350; it it looks like you can get in the rear of the hatchback in order to "get your arm up" to reach the lock mounting bolts. I don't really fancy getting into my tamora boot!! (it looks somewhat claustrophobic!)
Gassing Station | Tamora, T350 & Sagaris | Top of Page | What's New | My Stuff


