My CV8 resto type build thread thing
Discussion


Hi all,
I've recently bought from my brother an '05 plate CV8, I've always wanted a big V8 but am a bit numb to all the new ones out there and the Ro seems like a good leftfield choice. I'm also hoping that they go the way of the Lotus Carltons etc in future. It needs a fair bit sorting out underneath so I thought I'd start a thread showing what I'm doing. It might help others in future or it might prompt a WHOOOAAAAH don't do that! So any input is greatly received.
I've managed to secure some garage space for a few months for the majority of the work.
I'm not planning on any major mods to the engine other than Exhaust/headers/OTRCAI and a remap.
The plan being to keep things simple and reliable, replacing anything with OE or better than OE.
Start point pictures to follow but my rough order of work is-
Car up on stands.
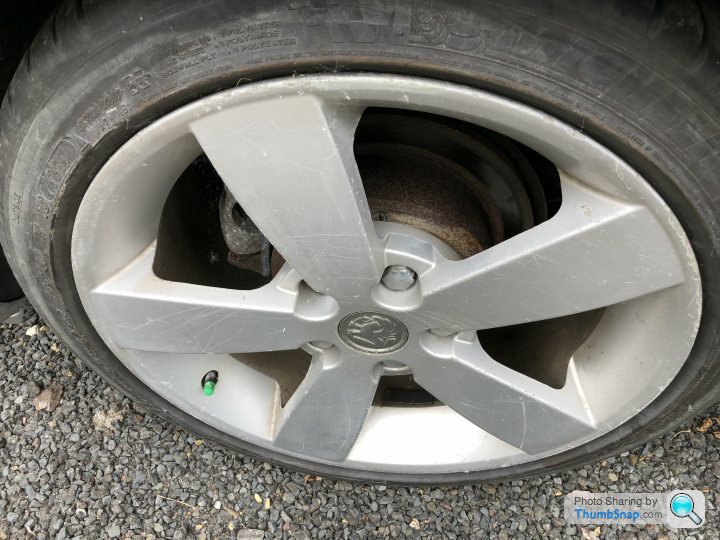
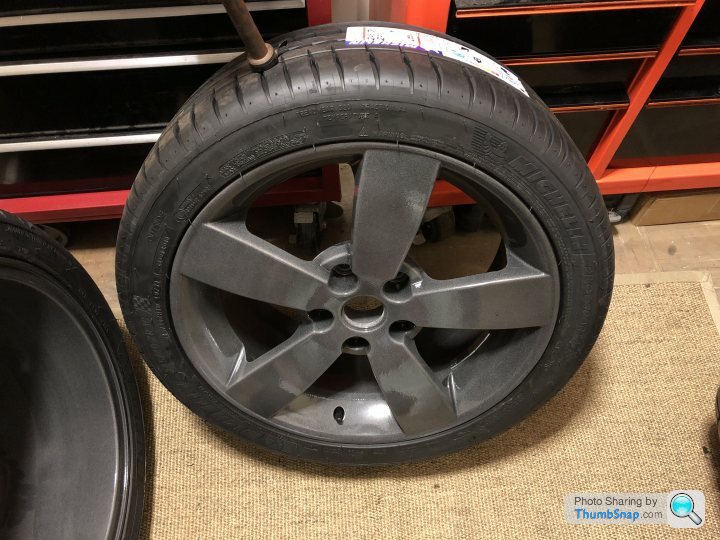
Remove all wheels and send off for powder coating (they're pretty badly scuffed).
Rear end first-
Drop fuel tank.
Drop rear x-member (paint or powder coat, undecided)
Remove all suspension components and clean,
Replace all hard brake and fuel lines. (can the fuel lines be replaced with soft lines?)
Replace Brake flexies with braided (on their way)
Drop Diff, drain, clean up.
Rebuild brake callipers.
Replace all discs and pads (got already).
Replace suspension, ARB and diff bushes with polyurethane (I've read somewhere about leaving one of the wishbone bushes std due to the asymmetric design)
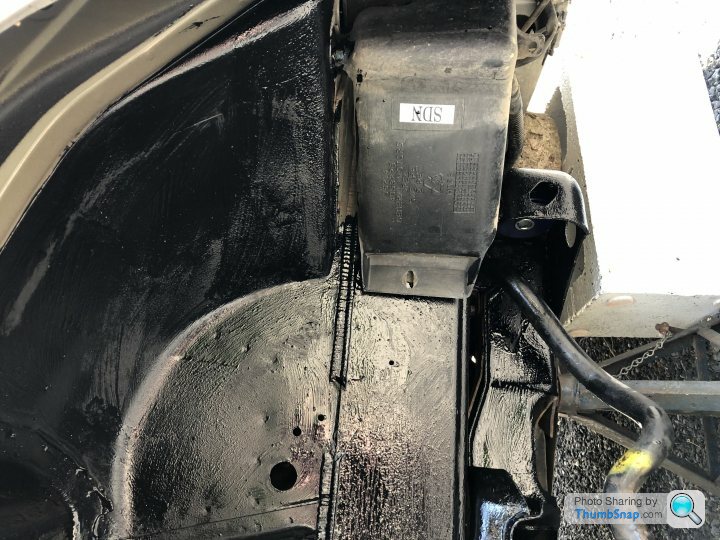
While all thats off neutralise any rust and underseal the whole thing with Dinitrol/BH or similar.
Similar story with the front end.
While all that's going on i'll get saving for the exhaust and headers!
I've recently bought from my brother an '05 plate CV8, I've always wanted a big V8 but am a bit numb to all the new ones out there and the Ro seems like a good leftfield choice. I'm also hoping that they go the way of the Lotus Carltons etc in future. It needs a fair bit sorting out underneath so I thought I'd start a thread showing what I'm doing. It might help others in future or it might prompt a WHOOOAAAAH don't do that! So any input is greatly received.
I've managed to secure some garage space for a few months for the majority of the work.
I'm not planning on any major mods to the engine other than Exhaust/headers/OTRCAI and a remap.
The plan being to keep things simple and reliable, replacing anything with OE or better than OE.
Start point pictures to follow but my rough order of work is-
Car up on stands.
Remove all wheels and send off for powder coating (they're pretty badly scuffed).
Rear end first-
Drop fuel tank.
Drop rear x-member (paint or powder coat, undecided)
Remove all suspension components and clean,
Replace all hard brake and fuel lines. (can the fuel lines be replaced with soft lines?)
Replace Brake flexies with braided (on their way)
Drop Diff, drain, clean up.
Rebuild brake callipers.
Replace all discs and pads (got already).
Replace suspension, ARB and diff bushes with polyurethane (I've read somewhere about leaving one of the wishbone bushes std due to the asymmetric design)
While all thats off neutralise any rust and underseal the whole thing with Dinitrol/BH or similar.
Similar story with the front end.
While all that's going on i'll get saving for the exhaust and headers!
 [/URL]
 [/URL]
 [/URL]
Good project to say the least, all your plans look like sensible things to do to a Monaro.
The fuel line will have to be replaced with a hard line, nothing soft that's for sure.
You will also have to borrow a rear end alignment tool for the rear sub frame. These are hard to get hold of, so maybe a trip to a specialist to get it done properly once it's all finished.
With those mods you will see a jump in power, probably from 330 HP to around 400HP which is quite nice.
John

solid fuel lines and brake lines are the safer route to go , flexible lines more prone to failure , change the diff gearing to a 3.9 and it has a big effect on the car and drive ability , it has a much bigger effect than doing a remap as gearing for performance is far too long , it has a minimal impact on mpg
Good luck with the work.
I'll watch this thread with interest as I have the same car and am ultimately looking to get much of the same work done to mine. So far I've had the LS7 clutch and flywheel upgrade. Dives better than before I had it done.
Next on the list is suspension bushes and possibly a quick steering rack as mine's started to weep a little.

Refitted all the front suspension and brakes, replacing all the bushes with polyurethane from superpro and a set of Russell brake hoses (which need the fronts swapping as they’re for an ‘05 not an ‘04). New ball joints and track rod ends. Oh and a caster adjustment set and steering rack bush.
I noticed the high pressure hose from the PAS pump is looking a bit crusty so ordered a new one from Oz. Fitting will wait ‘til I can get it on the ramps at work though.
I noticed the high pressure hose from the PAS pump is looking a bit crusty so ordered a new one from Oz. Fitting will wait ‘til I can get it on the ramps at work though.
Edited by andyluffs on Friday 5th July 19:00
I’m also going to include some very useful maintenance tips as I go. I’ll keep this post updated as there’s bound to be more.
1. Avoid contact between 2lb hammers and knuckles wherever possible.
2. When double checking everything for alignment and that bushes are fitted the right way round, do it BEFORE torquing everything up.
3. Don’t get epoxy mastic in your ear.
4. Tensile strength. This can be described as the breaking strain of whatever you left connected when removing the (insert assembly name here).
Edited by andyluffs on Monday 8th July 17:21
andyluffs said:
I’m also going to include some very useful maintenance tips as I go. I’ll keep this post updated as there’s bound to be more.
1. Avoid contact between 2lb hammers and knuckles wherever possible.
2. When double checking everything for alignment and that bushes are fitted the right way round, do it BEFORE torquing everything up.
3. Don’t get epoxy mastic in your ear.
Very useful maintenance tips, I’ve ‘learnt’ a lot of them myself.....not so much the ‘epoxy mastic in your ear’ tip though! 1. Avoid contact between 2lb hammers and knuckles wherever possible.
2. When double checking everything for alignment and that bushes are fitted the right way round, do it BEFORE torquing everything up.
3. Don’t get epoxy mastic in your ear.

Made up new brake pipes today and refitted the wheels. Need a ramp so I can straighten out the pipes a bit as I didn’t have space underneath to make it as tidy as I’d have liked. Brakes all bled and wheels refitted.
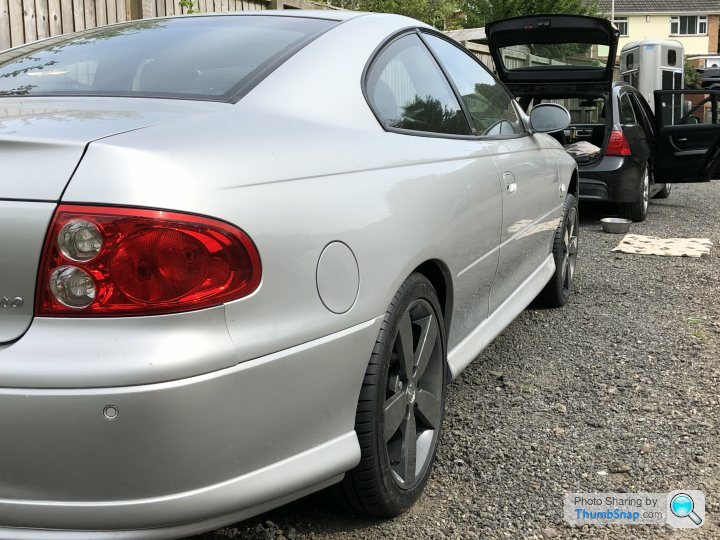
It still looks high at the front as it’s still on stands until the PAS pipes arrive.
It still looks high at the front as it’s still on stands until the PAS pipes arrive.
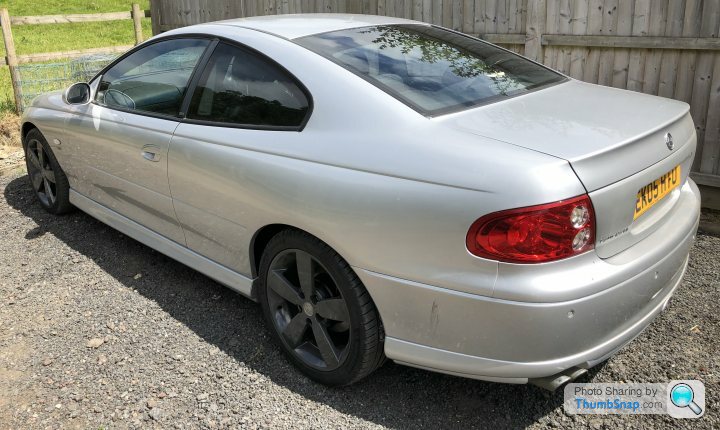

I do like the dark wheels in contrast to the silver of the car. Very nice 
I need to get my wheels refurbished at some point, another job on the list...
I've had super pro bushes and the quick steering rack done recently. The quick rack is not as different as I was expecting but it's an improvement over the original with a bit more weight to it as well.
Good luck with the rest of the work.

Gassing Station | HSV & Monaro | Top of Page | What's New | My Stuff