Trial fitting an LSA supercharger to an LS1
Discussion


Why would you want to do that? What with used LSA base units going for under $500 on ebay (remembering it's a TVS1900).
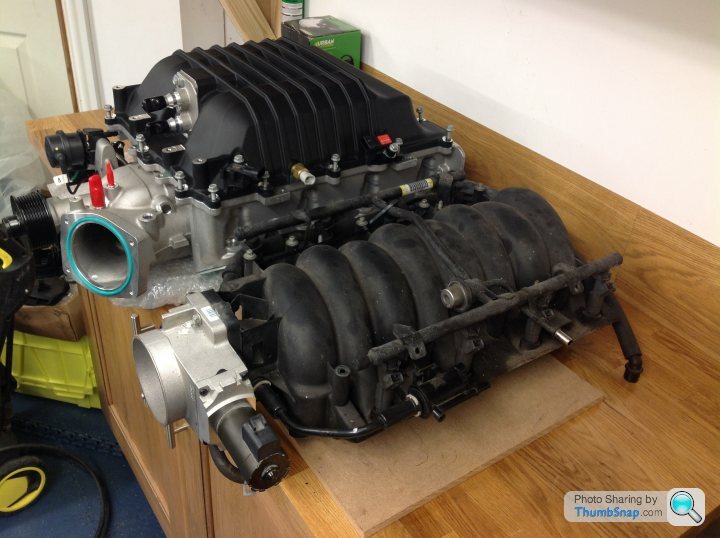
So, I finally got round to plonking the LSA charger on an LS1.
If fits. There, that's a short thread.
Well more or less.
Good points:
1. The angles and width appear to be correct
2. The bolts line up with the holes
3. The top 80% of the port lines up well enough
4. The injectors line up
Bad points:
1. There's a pipe (some sort of alignment boss) that sticks out in the left hand side. This would need to go. Assuming it serves no other purpose. I'll find out.
2. The bottom 20% of the head port is not covered by the supercharger. Either this (the head) would need filling or a very simple plate would need cutting to cover this. I think filling it would be best, though you'd be very brave if you tried it with the head on. A simple water-cut plate would do, though some thought would have to go into a gasket for it.
You'd still need to buy the lid, injectors, pump, front accessory drive, pulleys, etc. Again, with a little research, these parts can be had for less than you'd think.

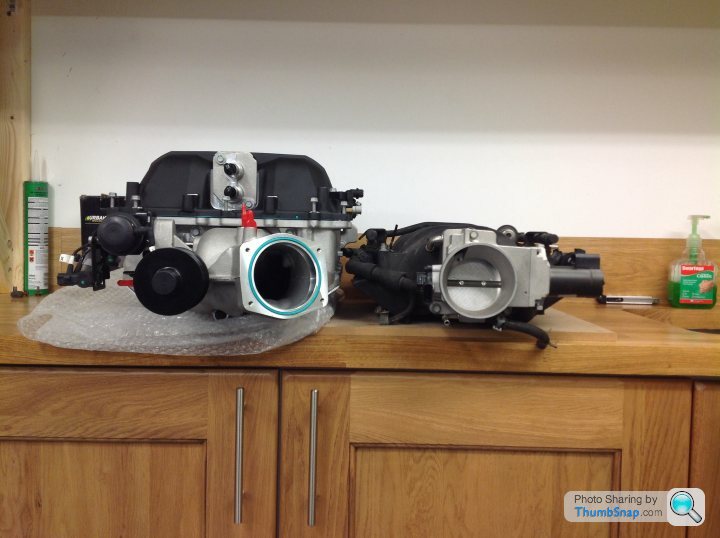
The LSA runs a three belt system: two for the ancillaries (as normal) and one for the charger. I think this is because the charge likes a tighter belt than is good for the ancillaries.
So, in addition to the idlers/tensioners for the extra belt, you need a new crank pulley, a new water pump, modified brackets for the other ancillaries and new belts. The pulley is expensive, as you'll want to buy an aftermarket, two parter. New water pump's are very cheap on ebay.com. The other bits are all available, including brackets to relocate ancillaries. The kits I've seen seem unnecessarily expensive, though these parts will end up costing more than the charger.
This charger will fit a VXR8 without much effort, as guys in the States already do this with their G8s. I can't see it fitting under a Monaro bonnet without a bit of effort/cutting. Given the orientation of the charger, it would be interesting to see if you could set up the pipework to run pressurised air to and from an air-to-air intercooler. This would circumvent the need for a water system, chargercooler lid, etc.
Maybe I'll buy some engine mounts and drop the block / heads into the VXR shell to see how far out it all runs.
PS I bought the charger for an LS3 style build (or maybe an LSX376). Is anyone genuinely interested in finding out how to get one of these onto an LS1?


wormus said:
Have you checked the pulley alignment and height of the unit to ensure it doesn't sit proud of the bonnet, a-la Mad Max road warrior
Would a be fine look on the black '04 VXR shell, LOL. 

I imagine it's the front of the intercooler housing and the pair of cooler pipes that foul the bonnet in practice, if yours is the ZL1 style 1900.
Edited by M11 MFP on Friday 9th January 18:35


stevieturbo said:
Presumably the base of the blower sits higher then ?
Could you just weld say a bit of flat bar along the bottom edge to seal up the base of the ports ?
Then for a gasket, revert back to a paper gasket for the entire setup. Not perfect, but should be a fairly cheap and easy fix.
I like the idea of simply welding a plate on the bottom of the blower. As you say the re-useable gasket would have to go. It would keep the height down. I just need to learn to weld now Could you just weld say a bit of flat bar along the bottom edge to seal up the base of the ports ?
Then for a gasket, revert back to a paper gasket for the entire setup. Not perfect, but should be a fairly cheap and easy fix.

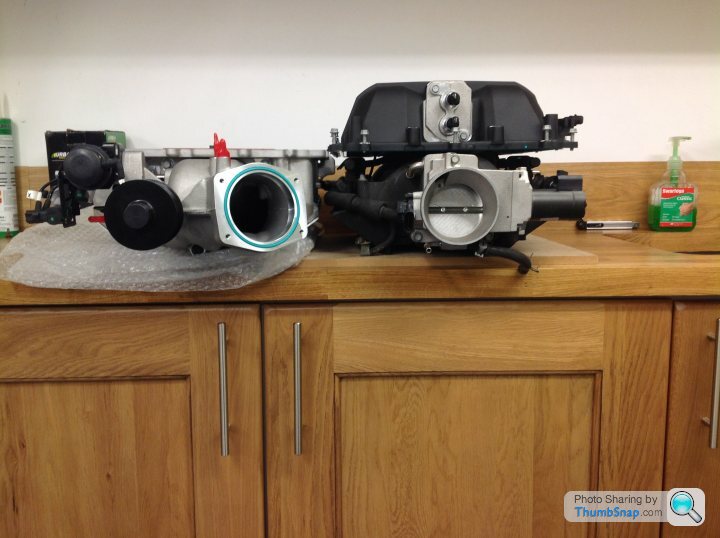
This illustrates the difference between the port set ups. I think two 4mm plates one with each port pattern, aligned on the fixing bolt holes and them 'glued' together would do it.
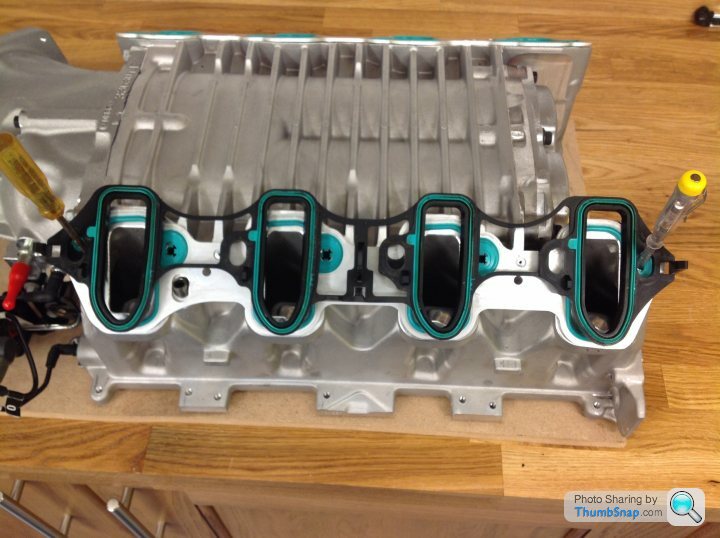
NB The cathedral port seal is reversed to save having to break off the connectors that attach it to the truck intake I borrowed it from.
NB The cathedral port seal is reversed to save having to break off the connectors that attach it to the truck intake I borrowed it from.
ArnieVXR said:
I like the idea of simply welding a plate on the bottom of the blower. As you say the re-useable gasket would have to go. It would keep the height down. I just need to learn to weld now
If you think a simple spacer will work, then normal gasket/o-ring at one side and paper on the other...baring in mind a spacer will lift the manifold upwards too, then draw out what you need and trial with cardboard first.Then Ralph at www.componentengineering.co.uk can waterjet what you need out from stainless or aluminium.
Stainless as a spacer might be better as it will be stronger and seal better more easily for a thin sheet.
Or welding...TIG is clearly best. But this stuff might work if you can get enough heat into the base metal. The guy was/is at autosport at the minute
https://www.youtube.com/watch?v=aiThO-UQIWE
he says it is welding, it looks like a form of bonding/brazing, but certainly how they apply in the show test piece is very easy and it seems bloody strong.
I'm sure getting the heat into larger pieces with a simple torch will be much more difficult though to make the process effective.
I think Frost or some places like that sell a similar product, Lumiweld ?
I'm sure I tried one a few years back on my Camaro sump when I modified it...I need oxy-acetylene to get enough heat to melt the stuff on the sump, then it warped like a banana lol
https://www.youtube.com/watch?v=CJ42scaWFnw
Edited by stevieturbo on Saturday 10th January 16:25
Gassing Station | HSV & Monaro | Top of Page | What's New | My Stuff