VAG 1.2TSI conrod bearing replacement
Discussion
Hello everyone,
I recently changed the conrod bearings on my 1.2TSI, and since I didn't find much previous information, I would like to share my experience with future DIY mechanics like me. It's going to be a long thread.
Engine model and relevant info about the car:
- Seat Toledo 1.2 TSI 90hp MY16, engine code CJZC
- Remapped to 135hp when it had 144000km (89477 miles)
- The car has now 317000km (197000 miles)
- I change the oil myself every 15000km (9320 miles) despite the recommended interval of 30000km. I always use 5w30 504/507, mostly Motul specific, Valvoline Synpower XL-III, and sometimes 5W40 502/505. I never have to top-up between changes, but the oil comes out dark and smells like petrol.
- The car is used gently most of the time, except for some "spirited" driving on mountain roads. It runs great and has great fuel mileage.
Motivation and background to perform the conrod bearing replacement:
- The car makes a knocking sound for 2s on start-up, and given the mileage I wanted to confirm if the noise was an early sign of rod bearing wear.
- Recently I changed the rod bearings on a different car (Corsa GSI) and was alarmed of the amount of wear on an engine with less miles.
- I plan to keep this car for a lot longer, so replacing the bearings wouldn't hurt, right?
Procedure and difficulties found:
The job was done by two decently skilled DIY enhusiast, on engine stands, with the engine on the car. The process is basically: drain the oil, remove the aux belt, unbolt the AC compressor, remove the oil pan, replace the rod bearings and bolt everything back together. In this car the oil pan is accesible without removing the subframe.
Complications:
1) The oil pan has 2 tricky bolts on the gearbox side that can only be removed at an angle from 2 dedicated holes or from the gearbox side (too much hassle), so the standard procedure is to use a 5mm long ball-end hex drive and pray for it to work. Not every ball-end 5mm works, only those that allow big angles. Please note that these bolts are rather tight, so the risk of stripping the head if the bolt if the tool does not fit is high. When bolting everything back, pay attention to use undamaged bolts in these two locations or use new bolts, since the ball-end driver at that angle marks the bolt 100%.
This video shows it https://www.youtube.com/watch?v=mxYQC8VW-3c
2) The oil pan has silicone sealant instead of a proper gasket. I know this is standard on most cars, but having previously worked on engines with rubber gaskets it is annoying to deal with removing the messy rests of silicone on both the engine and the oil pan. Allow 1-2 hours to get everything clean and be careful not to put dust particles into the engine. When working under the engine, use a face shield because the oil will be dripping for days.
3) DO NOT TRY TO REMOVE THE OIL LEVEL/TEMP SENSOR AT BOTTOM OF THE SUMP. We decided to remove the oil sensor to clean better the oil pan without damaging the sensor. The sensor is attached to the pan by 3 M6 bolts that according to the manual can be unbolted to replace both the sensor and/or the gasket. This is false, the 3 bolts have "trilobe" thread and they seize as yoy gently unbolt them by hand. Out of three one got out OK, another destroyed the first threads and the third one seized completely half way out. We had to drill the remains of the bolt and make a new thread. The results was poor due to tool availability, but we managed to thread it and put it back together after 2 hours and plenty of sweat. At this point, if you can get by without the car, look for a machine shop or order a new pan.
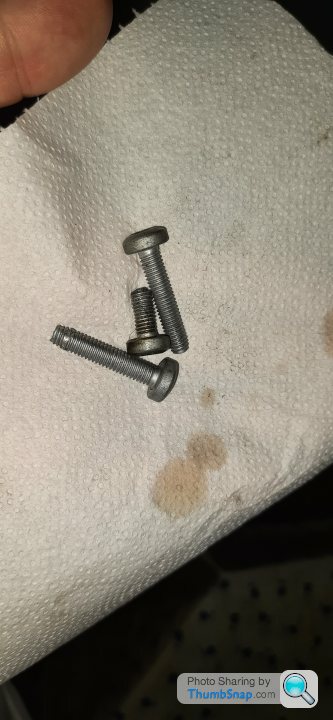
4) The "windage tray" that goes under the crank is a pain to install. It supposedly has a tab to hold it in place but the truth is that when you remove the oil pan, the only thing thats supports it is the silicone bead that protrudes into the engine. This is a problem when you want to put everything back together, since you need someone to hold the tray in place as you try to put the oil pan with fresh silicone applied. Crappy design.
5) The rod bearings (part 04C105701EGLB) do not have any "tang" or "lug" to correctly place each half axially. You are supposed to measure the gap on each side (2,5mm). This is OK for the rod cap, but the other side of the rod is inside the engine, and the space is limited, so measuring is not possible. You can prepare a "fixture" like a piece of plate to help you center the bearing, but at the end you have to put it as centered as possible by eye. Apparently, having no tangs or lugs is the current trend on engine mnufacturing.
Results
1) The wear on the old bearings was surprisingly low for roughly 200000 miles, certainly not due to change, but we changed them anyway once we were there. You can see some lines, but these are present in the new bearings and can barely be felt scratching with the nail. The crank journals are perfect. If you maintained and took care of your 1.2TSI, don't worry about your rod bearings, they will be probably fine.
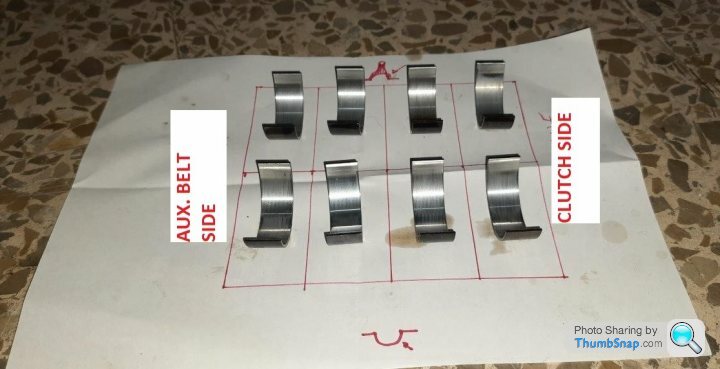
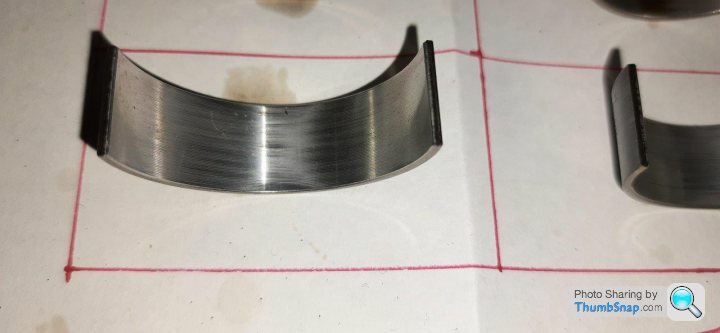
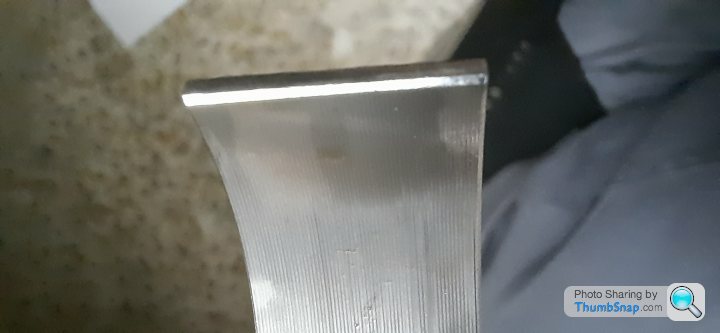
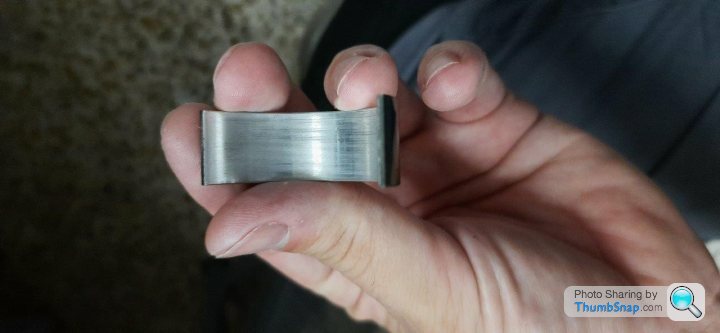
2) Aparently, we managed to install everything back with no leaks. The car runs fine, and the noise is not gone, so the source of the startup noise is not the bearings for sure.
Congrats if you have read this far, I hope it helps somebody out there.
I recently changed the conrod bearings on my 1.2TSI, and since I didn't find much previous information, I would like to share my experience with future DIY mechanics like me. It's going to be a long thread.
Engine model and relevant info about the car:
- Seat Toledo 1.2 TSI 90hp MY16, engine code CJZC
- Remapped to 135hp when it had 144000km (89477 miles)
- The car has now 317000km (197000 miles)
- I change the oil myself every 15000km (9320 miles) despite the recommended interval of 30000km. I always use 5w30 504/507, mostly Motul specific, Valvoline Synpower XL-III, and sometimes 5W40 502/505. I never have to top-up between changes, but the oil comes out dark and smells like petrol.
- The car is used gently most of the time, except for some "spirited" driving on mountain roads. It runs great and has great fuel mileage.
Motivation and background to perform the conrod bearing replacement:
- The car makes a knocking sound for 2s on start-up, and given the mileage I wanted to confirm if the noise was an early sign of rod bearing wear.
- Recently I changed the rod bearings on a different car (Corsa GSI) and was alarmed of the amount of wear on an engine with less miles.
- I plan to keep this car for a lot longer, so replacing the bearings wouldn't hurt, right?
Procedure and difficulties found:
The job was done by two decently skilled DIY enhusiast, on engine stands, with the engine on the car. The process is basically: drain the oil, remove the aux belt, unbolt the AC compressor, remove the oil pan, replace the rod bearings and bolt everything back together. In this car the oil pan is accesible without removing the subframe.
Complications:
1) The oil pan has 2 tricky bolts on the gearbox side that can only be removed at an angle from 2 dedicated holes or from the gearbox side (too much hassle), so the standard procedure is to use a 5mm long ball-end hex drive and pray for it to work. Not every ball-end 5mm works, only those that allow big angles. Please note that these bolts are rather tight, so the risk of stripping the head if the bolt if the tool does not fit is high. When bolting everything back, pay attention to use undamaged bolts in these two locations or use new bolts, since the ball-end driver at that angle marks the bolt 100%.
This video shows it https://www.youtube.com/watch?v=mxYQC8VW-3c
2) The oil pan has silicone sealant instead of a proper gasket. I know this is standard on most cars, but having previously worked on engines with rubber gaskets it is annoying to deal with removing the messy rests of silicone on both the engine and the oil pan. Allow 1-2 hours to get everything clean and be careful not to put dust particles into the engine. When working under the engine, use a face shield because the oil will be dripping for days.
3) DO NOT TRY TO REMOVE THE OIL LEVEL/TEMP SENSOR AT BOTTOM OF THE SUMP. We decided to remove the oil sensor to clean better the oil pan without damaging the sensor. The sensor is attached to the pan by 3 M6 bolts that according to the manual can be unbolted to replace both the sensor and/or the gasket. This is false, the 3 bolts have "trilobe" thread and they seize as yoy gently unbolt them by hand. Out of three one got out OK, another destroyed the first threads and the third one seized completely half way out. We had to drill the remains of the bolt and make a new thread. The results was poor due to tool availability, but we managed to thread it and put it back together after 2 hours and plenty of sweat. At this point, if you can get by without the car, look for a machine shop or order a new pan.

4) The "windage tray" that goes under the crank is a pain to install. It supposedly has a tab to hold it in place but the truth is that when you remove the oil pan, the only thing thats supports it is the silicone bead that protrudes into the engine. This is a problem when you want to put everything back together, since you need someone to hold the tray in place as you try to put the oil pan with fresh silicone applied. Crappy design.
5) The rod bearings (part 04C105701EGLB) do not have any "tang" or "lug" to correctly place each half axially. You are supposed to measure the gap on each side (2,5mm). This is OK for the rod cap, but the other side of the rod is inside the engine, and the space is limited, so measuring is not possible. You can prepare a "fixture" like a piece of plate to help you center the bearing, but at the end you have to put it as centered as possible by eye. Apparently, having no tangs or lugs is the current trend on engine mnufacturing.
Results
1) The wear on the old bearings was surprisingly low for roughly 200000 miles, certainly not due to change, but we changed them anyway once we were there. You can see some lines, but these are present in the new bearings and can barely be felt scratching with the nail. The crank journals are perfect. If you maintained and took care of your 1.2TSI, don't worry about your rod bearings, they will be probably fine.


2) Aparently, we managed to install everything back with no leaks. The car runs fine, and the noise is not gone, so the source of the startup noise is not the bearings for sure.
Congrats if you have read this far, I hope it helps somebody out there.
Gassing Station | Engines & Drivetrain | Top of Page | What's New | My Stuff


