DIY sticky rectification
Discussion
My 355 has been suffering from the horrible sticky interior for some time now, I’d considered DIYing it for some time but was always reluctant to take the leap of faith to make a start. It got to the point I’d be covered in yucky black goo after each drive, to the point it was just putting me off driving it!
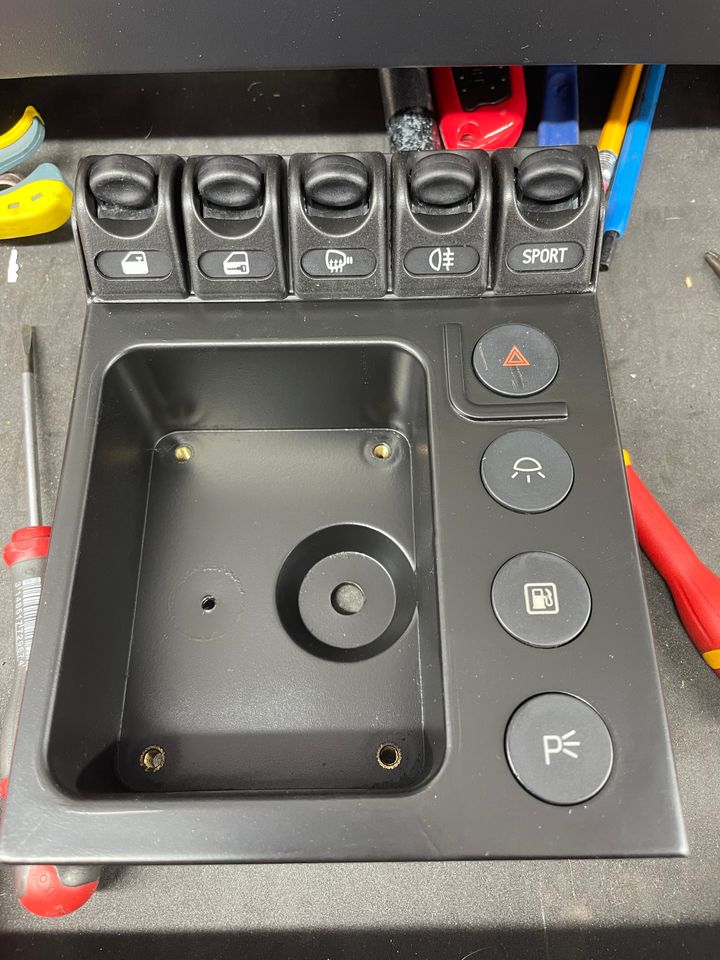
I used 99.9% rubbing alcohol to remove the goo, what surprised me was how easy it just wiped away using the alcohol and towelling rags, for example <15 minutes to clean the steering column upper and lower surround, this left them back to the bare plastic. All parts then sprayed with Plastidip primer then 3 coats of plastidip black. Very happy with the finish, colour good and same soft touch as the original, but no longer on my hands!
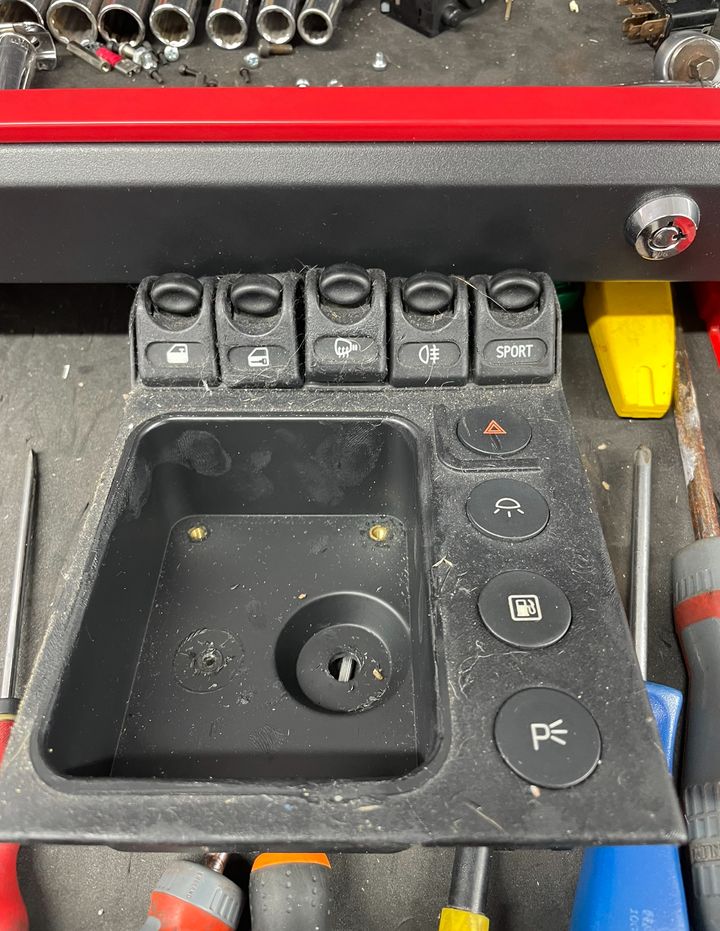
I’ve completed most now, the real surprise is just how satisfying it’s been. I’m not a great one for pictures but here’s a couple….
Before
After
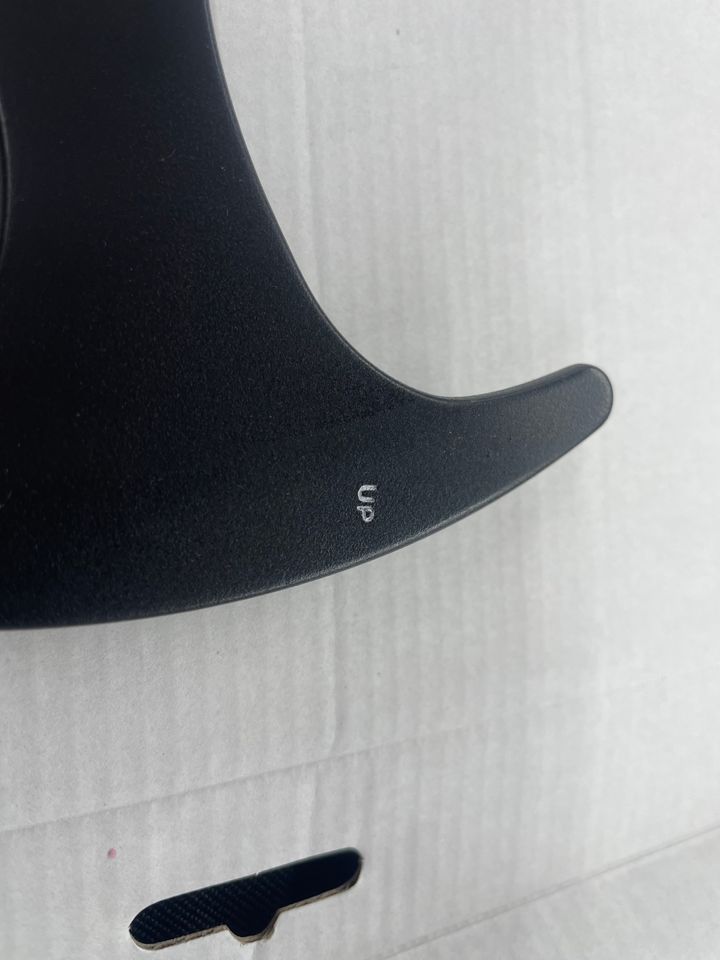
And my favourite is probably the F1 paddles, I read many people’s findings that the ‘up / down’ white text would be lost, couldn’t really understand as to why as the script is engraved, so I did the black Plastidip the followed up with white paint, applied with a cocktail stick, left for a few minutes then wiped away the surface excess with a jay cloth, left to dry, the remaining surface residue wiped away with a jay cloth and alcohol, this happily took away any white residue without affecting the black.
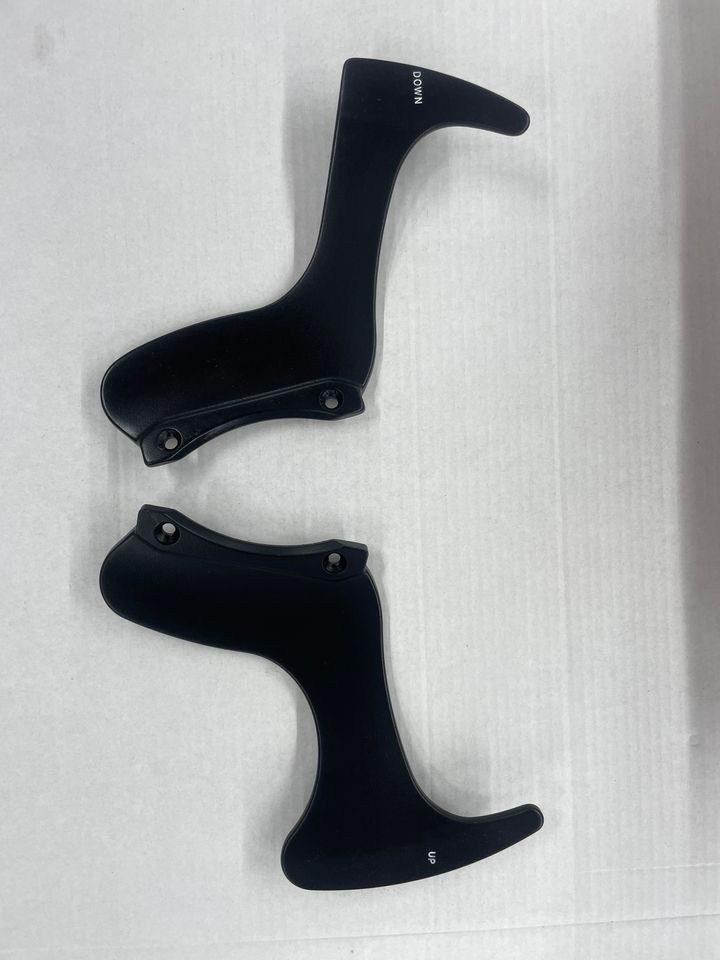
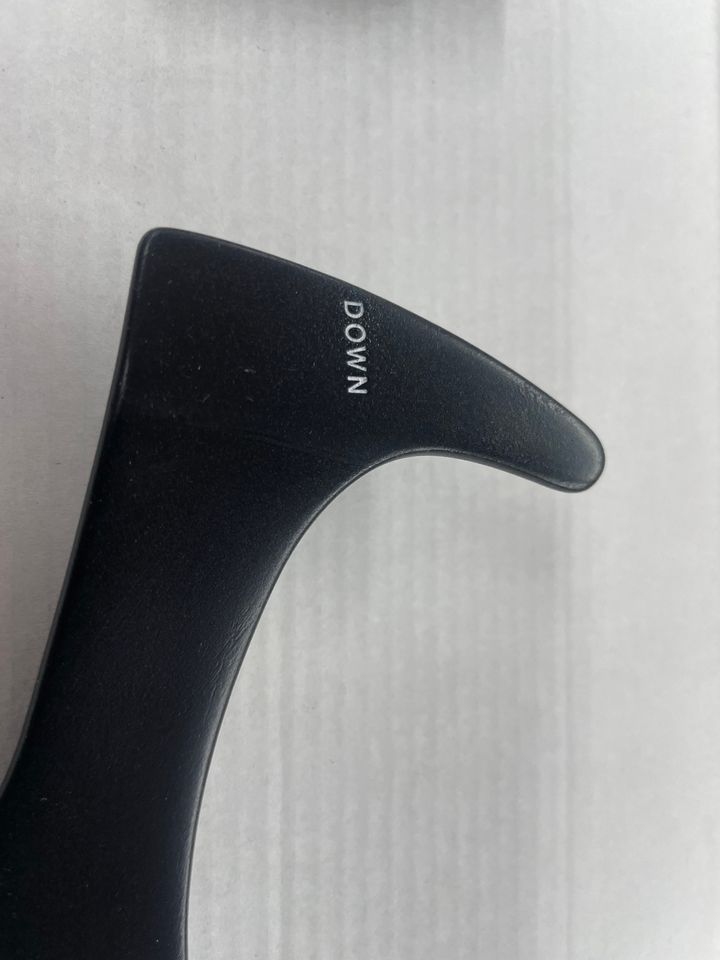
Next week I’ll cut out a stencil to replicate the dash vent arrows.
Window switches on the doors and the interior door releases and I’m done.
An enjoyable* experience that I wish I’d tackled years ago.
I used 99.9% rubbing alcohol to remove the goo, what surprised me was how easy it just wiped away using the alcohol and towelling rags, for example <15 minutes to clean the steering column upper and lower surround, this left them back to the bare plastic. All parts then sprayed with Plastidip primer then 3 coats of plastidip black. Very happy with the finish, colour good and same soft touch as the original, but no longer on my hands!
I’ve completed most now, the real surprise is just how satisfying it’s been. I’m not a great one for pictures but here’s a couple….
Before
After
And my favourite is probably the F1 paddles, I read many people’s findings that the ‘up / down’ white text would be lost, couldn’t really understand as to why as the script is engraved, so I did the black Plastidip the followed up with white paint, applied with a cocktail stick, left for a few minutes then wiped away the surface excess with a jay cloth, left to dry, the remaining surface residue wiped away with a jay cloth and alcohol, this happily took away any white residue without affecting the black.
Next week I’ll cut out a stencil to replicate the dash vent arrows.
Window switches on the doors and the interior door releases and I’m done.
An enjoyable* experience that I wish I’d tackled years ago.
- enjoyable, perhaps with the exception of reassembling the interior switches, little bit of a PITA, shim steel and patience to reassemble.
Great write-up. Thank you for the detail and photos. May I trouble you for more information? Why did you choose plastidip and not a matte varnish (which seems to be a common choice) - is this to preserve a 'soft touch' feel? Can you expect the plastidip to last longer than the OEM finish or will it need another refinish in 10 years' time? Did you spray using an airbrush or just rattle cans?
I have a couple of cars which need sticky button attention and the local refinisher has just retired and any overseas refinishers are asking exorbitant prices (£8k) to redo the buttons and plastics - and that's before factoring in the cost of dismantling and reinstalling the interior! So all help is very much appreciated.
I have a couple of cars which need sticky button attention and the local refinisher has just retired and any overseas refinishers are asking exorbitant prices (£8k) to redo the buttons and plastics - and that's before factoring in the cost of dismantling and reinstalling the interior! So all help is very much appreciated.
ANOpax said:
Great write-up. Thank you for the detail and photos. May I trouble you for more information? Why did you choose plastidip and not a matte varnish (which seems to be a common choice) - is this to preserve a 'soft touch' feel? Can you expect the plastidip to last longer than the OEM finish or will it need another refinish in 10 years' time? Did you spray using an airbrush or just rattle cans?
I have a couple of cars which need sticky button attention and the local refinisher has just retired and any overseas refinishers are asking exorbitant prices (£8k) to redo the buttons and plastics - and that's before factoring in the cost of dismantling and reinstalling the interior! So all help is very much appreciated.
Once the goo is removed many of the parts show evidence of original surface preparation, so effectively lots of small scratches, I’m unsure if a varnish type product would ‘hide’ these. I also wanted the soft touch something similar to the original, hence the Plastidip. As to its longevity I guess time will be the judge.I have a couple of cars which need sticky button attention and the local refinisher has just retired and any overseas refinishers are asking exorbitant prices (£8k) to redo the buttons and plastics - and that's before factoring in the cost of dismantling and reinstalling the interior! So all help is very much appreciated.
I used rattle cans, one can of the appropriate primer, this apparently increases the adhesion and then two cans of the black.
In all honesty, I wish I’d done it years ago!
Chris.
Been busy with other things but I’ve now tackled the arrow symbol on the air vents.
Interesting this one, I’ve read many report these are laser etched, however when cleaning the goo away what was clearly obvious was the arrow was white paint on top of the black goo. They’re not backlit so I don’t see why they’d do anything other than this.
I cut out some stencils and had a play first, a board many parts were painted on had a black coating so I tried that first….
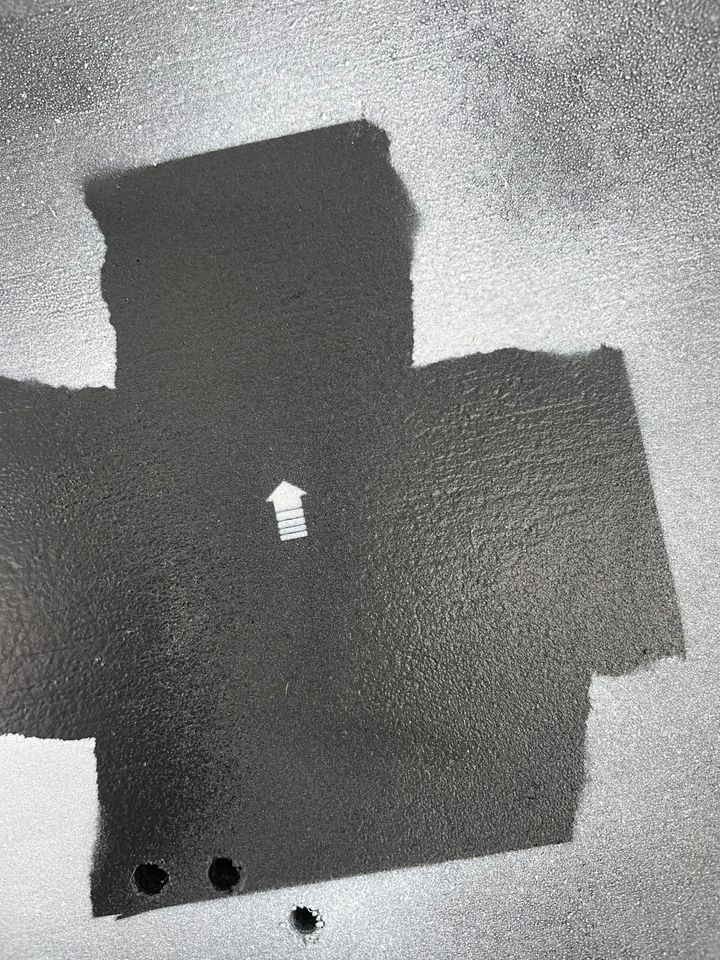
All went well, so I bit the bullet, positioned the stencils and held down with blueback, then masked off….
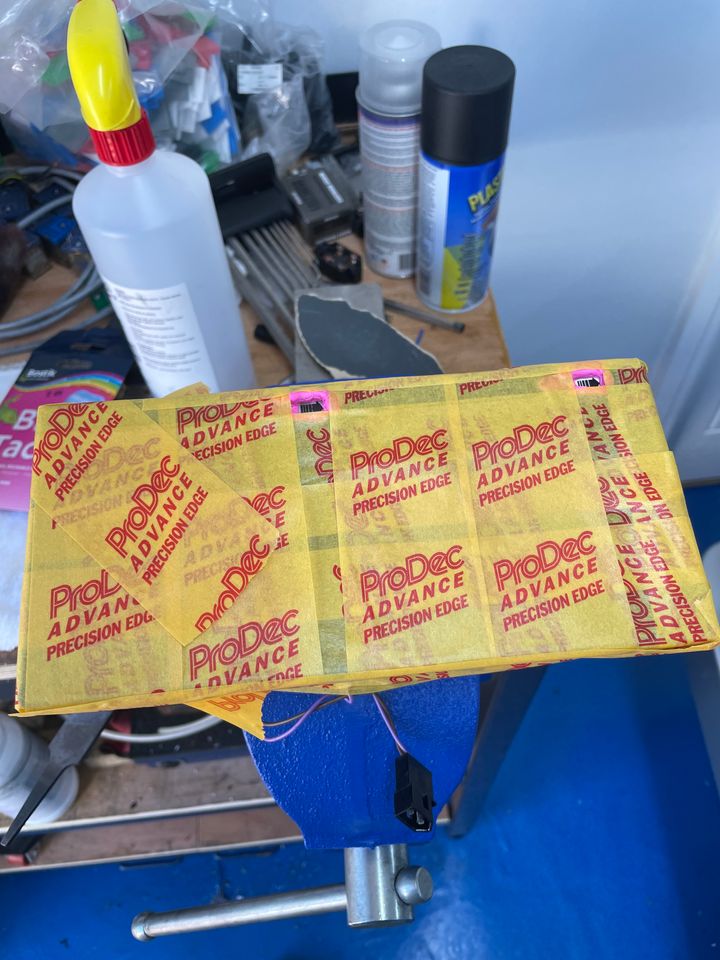
Three ‘dry’ coats of white and then remove the stencils….
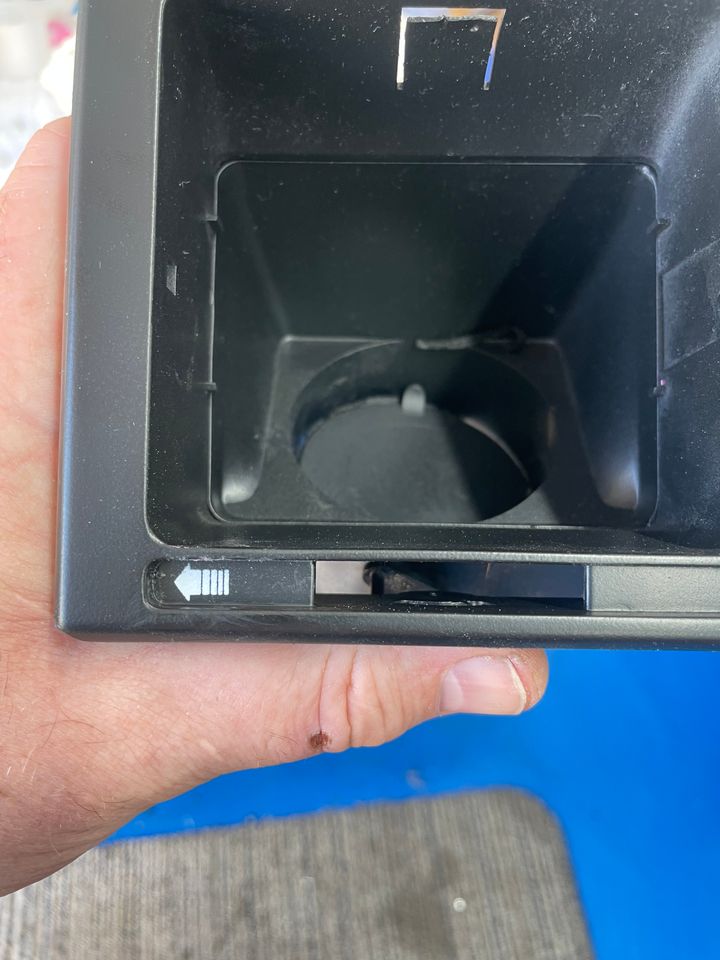
Just needs a little more cleaning off the bluetack which is pink! Next for the re-assembly.
Really very pleased how it’s all turning out 😊
Chris.
Interesting this one, I’ve read many report these are laser etched, however when cleaning the goo away what was clearly obvious was the arrow was white paint on top of the black goo. They’re not backlit so I don’t see why they’d do anything other than this.
I cut out some stencils and had a play first, a board many parts were painted on had a black coating so I tried that first….
All went well, so I bit the bullet, positioned the stencils and held down with blueback, then masked off….
Three ‘dry’ coats of white and then remove the stencils….
Just needs a little more cleaning off the bluetack which is pink! Next for the re-assembly.
Really very pleased how it’s all turning out 😊
Chris.
Doofus said:
I bought some Goo Gone following the advice of another thread on PH, and it's s t. How can a fluid for removing sticky residue be sticky?
I then bought rubbing alcohol based in this thread, and it's fantastic.
Thank you.
I found Elbow Grease degreaser very effective in my Maserati t. How can a fluid for removing sticky residue be sticky?
I then bought rubbing alcohol based in this thread, and it's fantastic.
Thank you.

Doofus said:
I bought some Goo Gone following the advice of another thread on PH, and it's s t. How can a fluid for removing sticky residue be sticky?
I then bought rubbing alcohol based in this thread, and it's fantastic.
Thank you.
My findings were that the F1 paddles and the interior door triangles behind the door mirrors were finished differently to all the plastic parts, I still used alcohol to scrub of the sticky, but it took much longer, the triangles I put in a bead blast cabinet and took then back to bare metal (there was a small amount of corrosion on the rear of one) t. How can a fluid for removing sticky residue be sticky?
I then bought rubbing alcohol based in this thread, and it's fantastic.
Thank you.

Alcohol doesn’t take off the plastidip but goo gone does.
Chris.
taz turbo said:
Been busy with other things but I’ve now tackled the arrow symbol on the air vents.
Interesting this one, I’ve read many report these are laser etched, however when cleaning the goo away what was clearly obvious was the arrow was white paint on top of the black goo. They’re not backlit so I don’t see why they’d do anything other than this.
I cut out some stencils and had a play first, a board many parts were painted on had a black coating so I tried that first….

All went well, so I bit the bullet, positioned the stencils and held down with blueback, then masked off….

Three ‘dry’ coats of white and then remove the stencils….

Just needs a little more cleaning off the bluetack which is pink! Next for the re-assembly.
Really very pleased how it’s all turning out ??
Chris.
What did you use to create the stencil Chris?Interesting this one, I’ve read many report these are laser etched, however when cleaning the goo away what was clearly obvious was the arrow was white paint on top of the black goo. They’re not backlit so I don’t see why they’d do anything other than this.
I cut out some stencils and had a play first, a board many parts were painted on had a black coating so I tried that first….
All went well, so I bit the bullet, positioned the stencils and held down with blueback, then masked off….
Three ‘dry’ coats of white and then remove the stencils….
Just needs a little more cleaning off the bluetack which is pink! Next for the re-assembly.
Really very pleased how it’s all turning out ??
Chris.
Gassing Station | Supercar General | Top of Page | What's New | My Stuff


