Cerbera does Dallas
Discussion
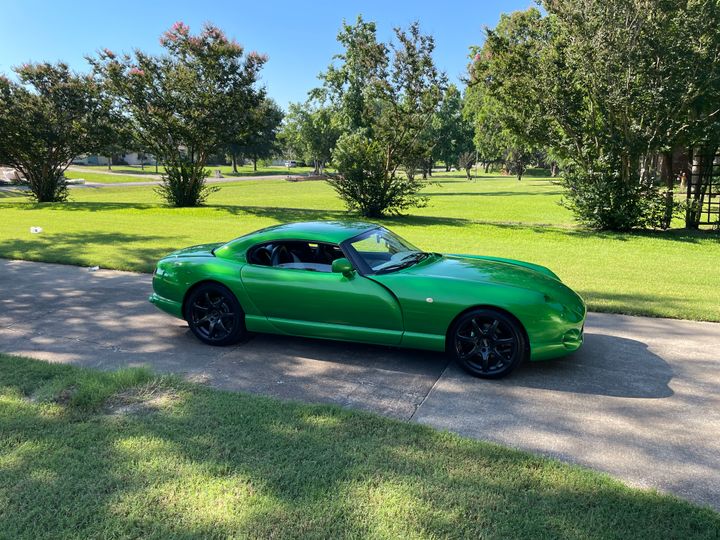
Starting a thread about my 1996 4.2, figured I would document the trials and tribulations of Stateside ownership of a Cerbera.


A Cerbera here causes quite a stir, in looks and noise...I'll have to get some decibel readings and post them. That will be interesting. Overall the car has been pretty well behaved. I had it up on my lift, sorry forgot to take picks, and noticed a small oil leak that I figured was a rear main seal.
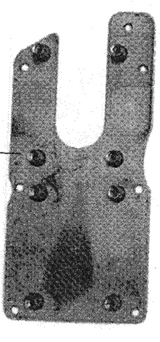
The leak got worse, so I had to do something so I shoved my borescope around and much to my surprise and relief, the rear main seal looked fine. Hmm, so started digging through the Pistonhead Search feature and found some info about a leaking oil pressure switch. More borescoping and couldn't see a thing, even the valve covers were leak free. So exploratory surgery was next. Pulled the fuel injector rail off and and 'attempted' to get the coils out only to find that the riv-nuts had broken off and just spun on the aluminum platform where the coil packs sit.
I deposited a few layers of skin and it all came out. Now I could finally see the oil pressure switch and it was bathing in oil. Success...kind of.
Now off to try and find the switch. I found 2, the normal STC4104 and a Beck/Arnley 201-1591 that looks like it shouldn't leak like the normal one https://www.amazon.com/dp/B000CB5I7W?ref=ppx_yo2ov...
My next project was to fix the plate that the coils sit on. Rather than welding, I was able to braze some nuts on the underside and then reinforce all the other existing riv-nuts by brazing them. That aluminum is so thin, that the heat did warp the plate, but I was able to get it back to flat.
I should be able to get it all back together this weekend, at least to the point I can move it under it's own power. It's parked over my lift and the Thing has sprung an oil leak that needs addressing; probably a valve cover.
Well....crap. I thought I got them seated ok, but apparently I pinched a couple injector O-rings trying to get the fuel rail on so back to the parts store, which had crap, so I order some viton 7.52mm X 3.53 mm x14.58mm.
Any advice other than brute force getting the fuel rail seated? The method I used was install the injectors into the manifold and then offer up the fuel rail. At that point I (tried but apparently failed) to slowly and evenly tighten the fuel rail down.
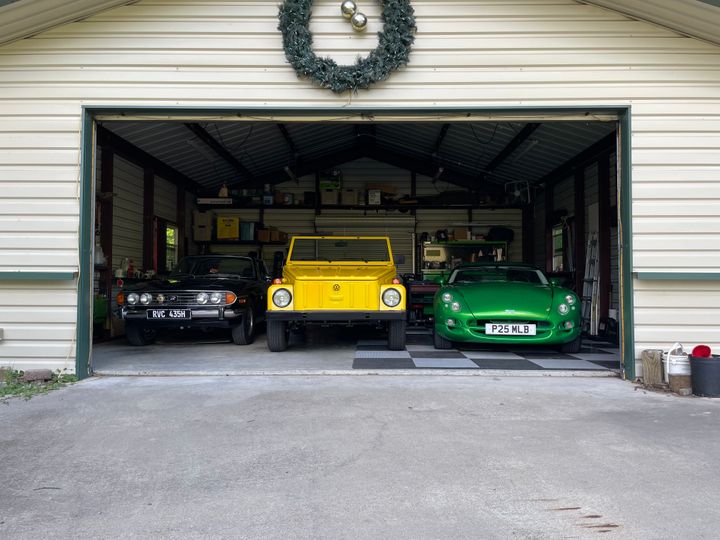
Of course I have a business trip this week so it'll have to wait. Like The Grand Tour, at present the Stag is the most reliable of my classics.

No, born and raised in the States.
My draw to both of these cars is their unique bespoke V8's. If you wanted a Triumph V8, you had to buy a Stag. If you wanted a AJP8 you had to buy a Cerbera. It wasn't sold in any other car(s). Sure the Tuscan Challenge Series used the AJP8, but the engines never saw duty in any other car sold to the public.
I loved the Stag since seeing it as a kid in Diamonds are Forever. I wanted a Cerbera since the late 90's after seeing Clarkson's Top Gear episode.
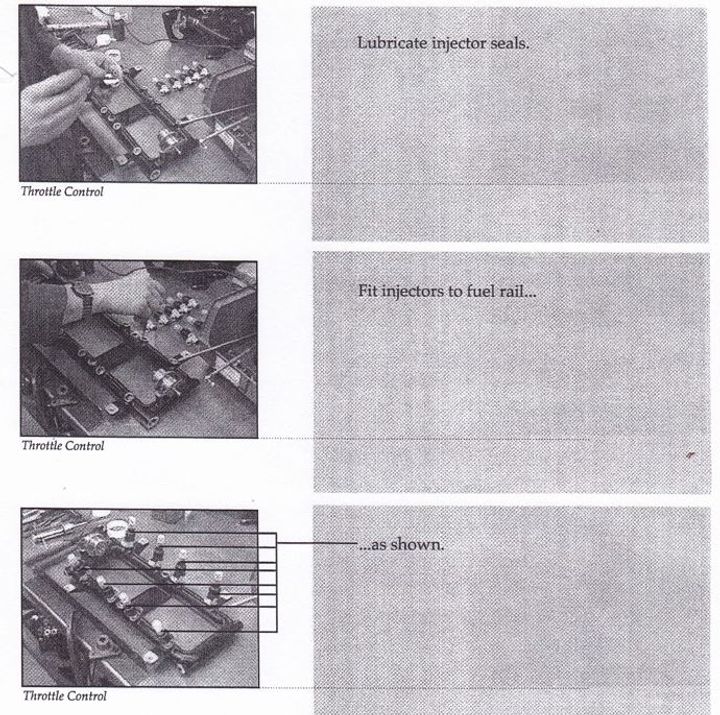
Hi jstx. Since the injectors are splayed out from the fuel rail, it makes it very difficult to locate all eight in their corresponding holes in the intake manifolds.
I found the easiest way was to take the intake manifolds off, then locate the injectors one at a time in the fuel rail, then you can tackle four at a time for each intake manifold. Once they're seated you bolt up the fuel rail and intake manifolds and install them as a single unit. Also, if you ever need to take them off again - take off the whole top as a single unit.
From the build manual:-
Edited by notaping on Monday 28th October 09:13
jstx said:
Starting a thread about my 1996 4.2, ...I'll have to get some decibel readings and post them. That will be interesting. Overall the car has been pretty well behaved. I had it up on my lift, sorry forgot to take picks, and noticed a small oil leak that I figured was a rear main seal.
The leak got worse, so I had to do something so I shoved my borescope around and much to my surprise and relief, the rear main seal looked fine. Hmm, so started digging through the Pistonhead Search feature and found some info about a leaking oil pressure switch. More borescoping and couldn't see a thing, even the valve covers were leak free. So exploratory surgery was next. Pulled the fuel injector rail off and and 'attempted' to get the coils out only to find that the riv-nuts had broken off and just spun on the aluminum platform where the coil packs sit.
I deposited a few layers of skin and it all came out. Now I could finally see the oil pressure switch and it was bathing in oil. Success...kind of.
Now off to try and find the switch. I found 2, the normal STC4104 and a Beck/Arnley 201-1591 that looks like it shouldn't leak like the normal one.
My next project was to fix the plate that the coils sit on. Rather than welding, I was able to braze some nuts on the underside and then reinforce all the other existing riv-nuts by brazing them. That aluminum is so thin, that the heat did warp the plate, but I was able to get it back to flat.
I should be able to get it all back together this weekend, at least to the point I can move it under it's own power. It's parked over my lift and the Thing has sprung an oil leak that needs addressing; probably a valve cover.
So glad to hear that a Cerb has gone to a good USA owner The leak got worse, so I had to do something so I shoved my borescope around and much to my surprise and relief, the rear main seal looked fine. Hmm, so started digging through the Pistonhead Search feature and found some info about a leaking oil pressure switch. More borescoping and couldn't see a thing, even the valve covers were leak free. So exploratory surgery was next. Pulled the fuel injector rail off and and 'attempted' to get the coils out only to find that the riv-nuts had broken off and just spun on the aluminum platform where the coil packs sit.
I deposited a few layers of skin and it all came out. Now I could finally see the oil pressure switch and it was bathing in oil. Success...kind of.
Now off to try and find the switch. I found 2, the normal STC4104 and a Beck/Arnley 201-1591 that looks like it shouldn't leak like the normal one.
My next project was to fix the plate that the coils sit on. Rather than welding, I was able to braze some nuts on the underside and then reinforce all the other existing riv-nuts by brazing them. That aluminum is so thin, that the heat did warp the plate, but I was able to get it back to flat.
I should be able to get it all back together this weekend, at least to the point I can move it under it's own power. It's parked over my lift and the Thing has sprung an oil leak that needs addressing; probably a valve cover.

I bought my first Car Craft magazine in 1968 and have loved how you Tanks take such wonderful care of your machines.
I am currently rebuilding mine (6 years) with the vision of the commitment that I witnessed in those CC photos.
Good Luck

PJ
Result!
I ordered new Viton o-rings 7.52mm X 3.53 mm x 14.58mm. I replaced all of them and lubed them up really well with a waterproof o-ring lube that I used on the pool equipment; good and slippery stuff. Then installed the odd side injectors in the manifold and the even side in the fuel rail, offered it up and it slide easily right on in. No leaks.
Now it's time to sand down the fiberglass intakes and paint them

Thanks for everyone's help.
John
I ordered new Viton o-rings 7.52mm X 3.53 mm x 14.58mm. I replaced all of them and lubed them up really well with a waterproof o-ring lube that I used on the pool equipment; good and slippery stuff. Then installed the odd side injectors in the manifold and the even side in the fuel rail, offered it up and it slide easily right on in. No leaks.
Now it's time to sand down the fiberglass intakes and paint them
Thanks for everyone's help.
John
Gassing Station | Cerbera | Top of Page | What's New | My Stuff


