Help please - black box locations and wiring routing
Discussion
I appreciate this is a quite obvious question for most, but bear with me.
In 2005 I bought a 1996 Cerbera shell plus some bits from Plasticman (Dave Hillis) and brought them back to New Zealand. The donor Cerb was fire damaged, the AJP and other parts had been removed already. This was a complete basket case Cerb that was never going to be back on the road otherwise. There's another thread here with more of that background.
In 2006/7 back in NZ I sorted the body and frame with Por15, poly bushes, etc so that it was a rolling chassis and labelled up what was left of the loom (which was most of it except what was lost engine bay inferno). With Plasticman Dave's help I located all the black boxes and other new and used parts needed and sourced a low mileage (300kms) LS6 from a 2003 Corvette locally to replace the absent AJP.
Then life, marriage, kids and several house moves happened. The Cerb followed me from garage to shed through all of it, but I had limited time or the money to progress it until now.
Now 19 years later I have outsourced the task of getting this project done because while I still have no time, I have a little more money and if i don't get this done I'll be too old to drive it. So... it's in Blenheim with a resto workshop that does Cobras and other one off type builds and is now to the point where the engine guy is looking at the box of wiring looms, switches, black boxes etc and wondering what goes where, how wiring gets routed through the body, where each of the black boxes go, etc.
So to the point of this post - I have given him wiring diagrams and workshop manuals but these don't help to see physically where everything goes and there's no reference vehicle nearby. Photo albums of a rebuild like Gordon's very impressive one here are really useful - https://www.flickr.com/photos/187253106@N08/albums... Are there others like this, or anything else that can help him?
Don
Omerta, Here are a couple of other photos that didn't make it onto Flickr. . .
There's a main battery cable that goes thru' the bulkhead at the wiper motor.
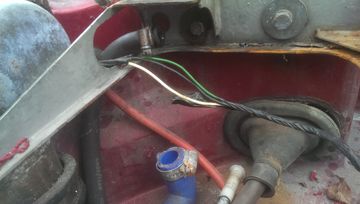 - That goes to a 100A fuse at the top of the passenger door pillar, then down thru' the passenger cill,
 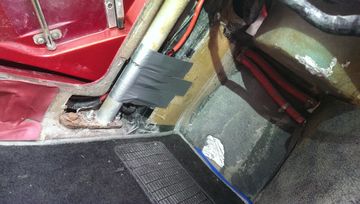 .
. 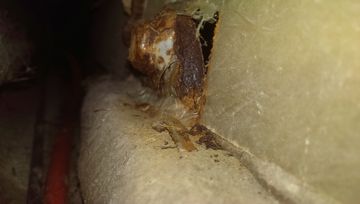 - across the top of the boot and finally to the +ve bus in the fuse box.
The output loom from the fuse box goes to the control boxes on top of the petrol tank (should be able to identify them from images in Flickr) and also forward over the drivers rear wheel arch in into the cab behind the rear seats. Then forward along the top of the tunnel and up to the main spar behind the dash. It climbs up from the tunnel inside the slope of the centre console.
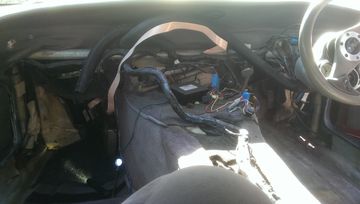 .
. 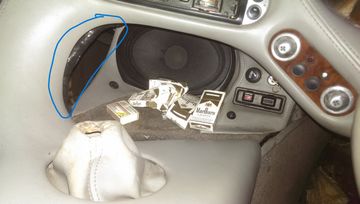 - The previous owner was obviously a smoker and just stuffed his empties into the opening under the slope. Dirty B..
The nose harness goes out the cab above the heater matrix and inside the passenger front wing. Comes out at the passenger headlight and then down to the bottom below the radiator. This feeds the headlights, indicators, horn and radiator fans.
Most of the control boxes are above the tank, but I seem to remember one in the drivers door for the mirrors, and there's another above the steering column for instrumentation and at least one in the passenger footwell for heating (also - maybe one for wipers?).
As Byker28i says - try to get a list of specific Q's from your electrician and post them here. Also, I doubt any 2 Cerbs are the same by now - so if in doubt just go with what feels like the best solution, and try to keep a record of what's been done - for future reference.
G.
There's a main battery cable that goes thru' the bulkhead at the wiper motor.
The output loom from the fuse box goes to the control boxes on top of the petrol tank (should be able to identify them from images in Flickr) and also forward over the drivers rear wheel arch in into the cab behind the rear seats. Then forward along the top of the tunnel and up to the main spar behind the dash. It climbs up from the tunnel inside the slope of the centre console.
The nose harness goes out the cab above the heater matrix and inside the passenger front wing. Comes out at the passenger headlight and then down to the bottom below the radiator. This feeds the headlights, indicators, horn and radiator fans.
Most of the control boxes are above the tank, but I seem to remember one in the drivers door for the mirrors, and there's another above the steering column for instrumentation and at least one in the passenger footwell for heating (also - maybe one for wipers?).
As Byker28i says - try to get a list of specific Q's from your electrician and post them here. Also, I doubt any 2 Cerbs are the same by now - so if in doubt just go with what feels like the best solution, and try to keep a record of what's been done - for future reference.

G.
Thank you both, and that's great extra info thanks Gordon.
I'll pass on this plus the link to your album Gordon and ask him to come back to me with any specific questions. Thankfully one thing I did do back in 2005 was label up the loom ends with everything I could glean from the wiring diagrams at the time. There were some colours used that didn't match the diagrams, of course
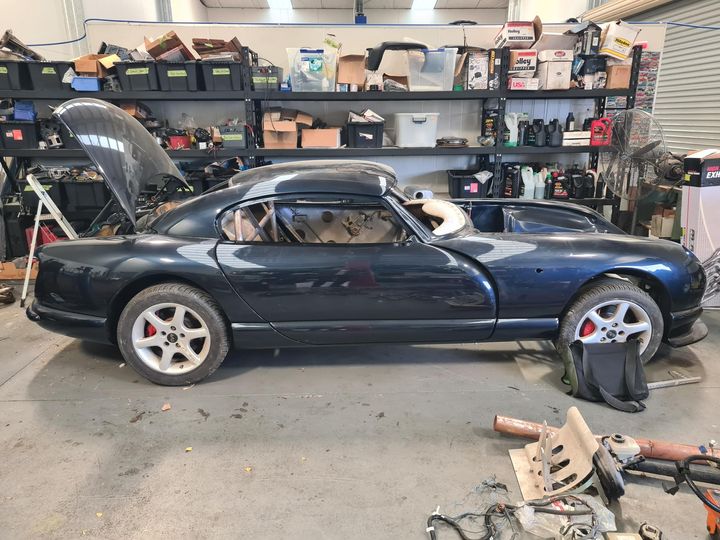
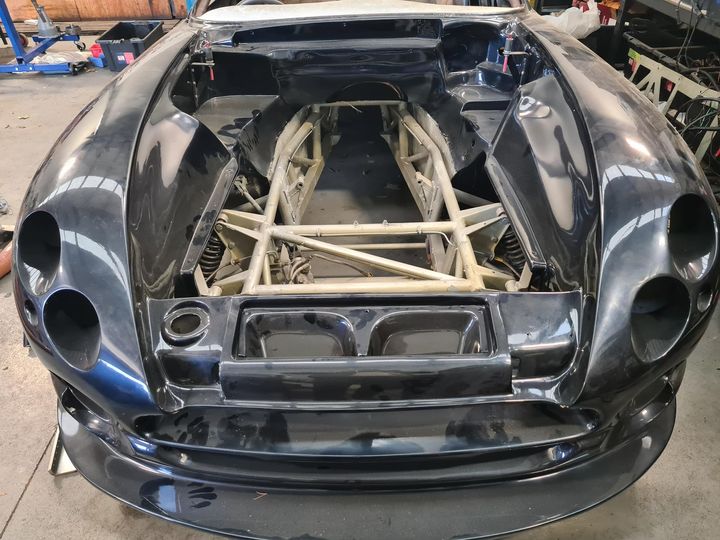
Here's a couple of quick pics I took this week on current state. The paint job is new, but dusty and not had a final buff up yet. Roll cage also new and compliant with current regs.
Tuscan pedal box in the foreground replacing the standard pedals, partly because that bit of the engine bay was burnt out.
I'll pass on this plus the link to your album Gordon and ask him to come back to me with any specific questions. Thankfully one thing I did do back in 2005 was label up the loom ends with everything I could glean from the wiring diagrams at the time. There were some colours used that didn't match the diagrams, of course

Here's a couple of quick pics I took this week on current state. The paint job is new, but dusty and not had a final buff up yet. Roll cage also new and compliant with current regs.
Tuscan pedal box in the foreground replacing the standard pedals, partly because that bit of the engine bay was burnt out.
Hi Don
This photo album should hopefully help and I can answer any specific wiring questions your electrician might have (*within reason) as my fuse box shorted and took out most of my black boxes so I've spent a fair amount of time fixing them, getting them fixed and documenting the process
https://photos.app.goo.gl/qi2az8JJvVnfcPDE7
Also my car is close so if you need any specific photos or test, I should be able to help
 Alex
Alex
This photo album should hopefully help and I can answer any specific wiring questions your electrician might have (*within reason) as my fuse box shorted and took out most of my black boxes so I've spent a fair amount of time fixing them, getting them fixed and documenting the process
https://photos.app.goo.gl/qi2az8JJvVnfcPDE7
Also my car is close so if you need any specific photos or test, I should be able to help
 Alex
AlexJuddder said:
Hi Don
This photo album should hopefully help and I can answer any specific wiring questions your electrician might have (*within reason) as my fuse box shorted and took out most of my black boxes so I've spent a fair amount of time fixing them, getting them fixed and documenting the process
https://photos.app.goo.gl/qi2az8JJvVnfcPDE7
Also my car is close so if you need any specific photos or test, I should be able to help
 Alex
Alex
Thanks Alex, there's some very useful detail in those pics I haven't had from anywhere else. I will pass on your kind offer of Q&A help if needed.This photo album should hopefully help and I can answer any specific wiring questions your electrician might have (*within reason) as my fuse box shorted and took out most of my black boxes so I've spent a fair amount of time fixing them, getting them fixed and documenting the process
https://photos.app.goo.gl/qi2az8JJvVnfcPDE7
Also my car is close so if you need any specific photos or test, I should be able to help
 Alex
AlexCheers
Gassing Station | Cerbera | Top of Page | What's New | My Stuff


