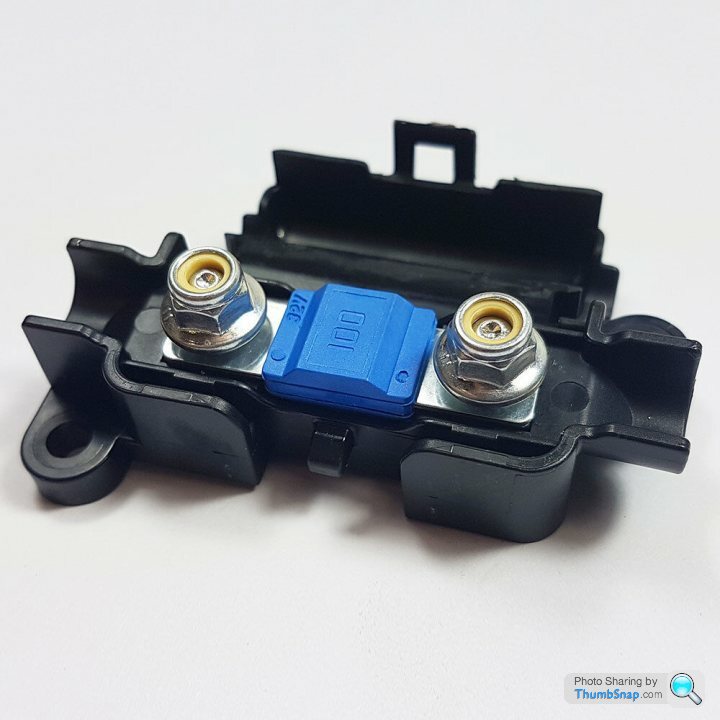
Big Fuse Replacement 4.2
Discussion
While testing my car with the MBE diagnostic software I noticed that the running battery voltage was low so the clever bods on PH (Thanks FP) said to check the big fuse as that is inline with the charging circuit and designed to protect the alternator
First job was to find the big fuse and try and continuity test the fuse - it's located at the back of the engine in pretty much the most inaccessible place possible
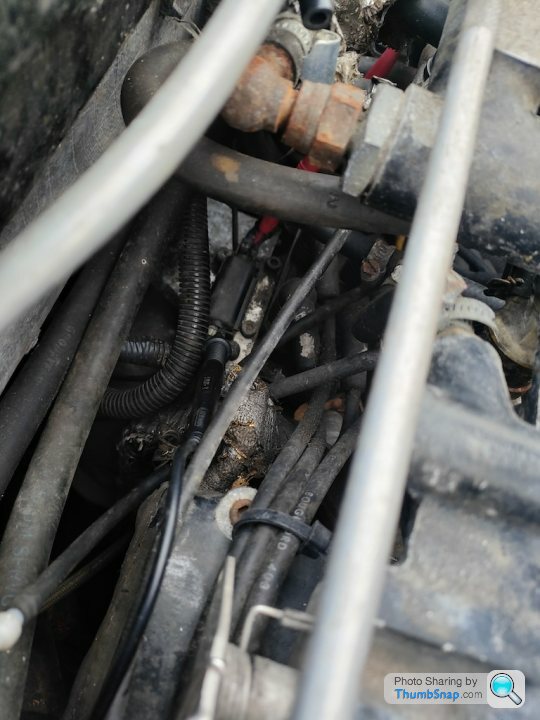
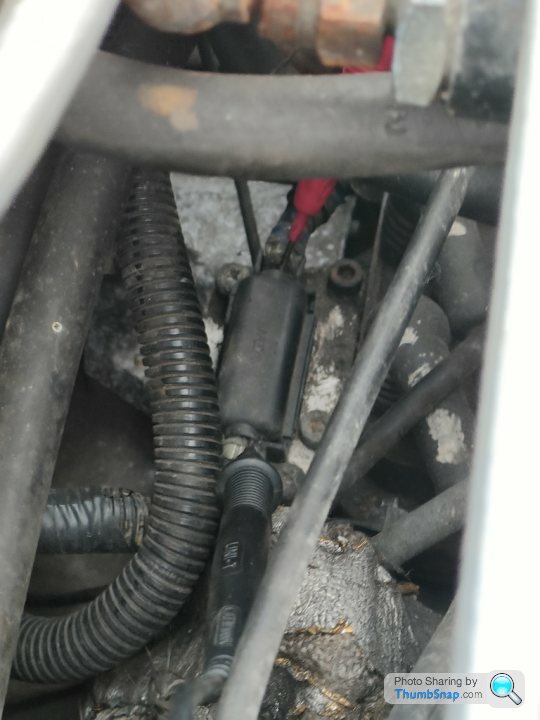
Metering the fuse was showing no connectivity but I wanted to visual inspect it so you have to get the case open to do that. The problem is that the clasp for the case faces towards the dashboard, so there isn't easy room to flip open the catch to get to the fuse
Instead I unscrewed the fuse case itself from it's mount (two philips head screws) and very carefully using a magnetic tool extracted them from the engine to allow me to rotate the fuse box and carefully flip open the catch using a small headed flat screwdriver
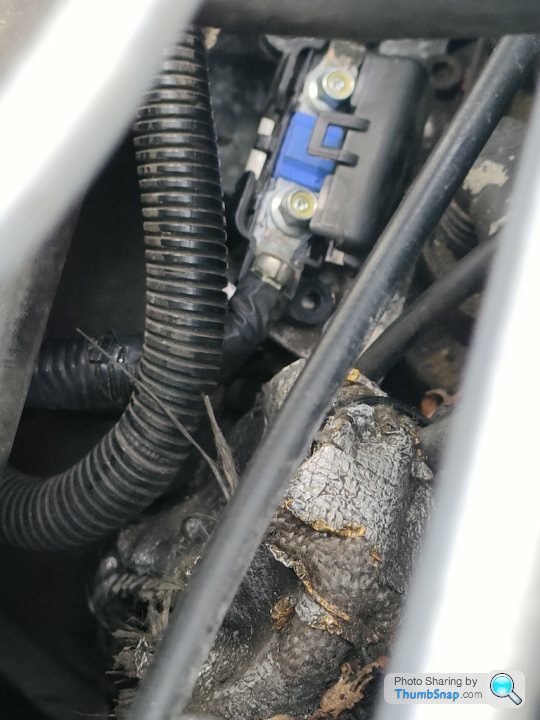
Visually the fuse looks fine but again continuity testing it resulted in no connection so next step is to actually take it out and test.
There are 2 x 8mm nuts holding the wires on to the fuse housing, so carefully unbolt those (I had to hold the fuse box with one hand and ratchet + extension bar'd the nuts off with the other) and again use the magnetic extension tool to grab them or hold them in the socket and carefully extract them from the engine
Once out I could see that the fuse was actually blown so now it's time to get a new one and do this process in reverse...


First job was to find the big fuse and try and continuity test the fuse - it's located at the back of the engine in pretty much the most inaccessible place possible


Metering the fuse was showing no connectivity but I wanted to visual inspect it so you have to get the case open to do that. The problem is that the clasp for the case faces towards the dashboard, so there isn't easy room to flip open the catch to get to the fuse
Instead I unscrewed the fuse case itself from it's mount (two philips head screws) and very carefully using a magnetic tool extracted them from the engine to allow me to rotate the fuse box and carefully flip open the catch using a small headed flat screwdriver

Visually the fuse looks fine but again continuity testing it resulted in no connection so next step is to actually take it out and test.
There are 2 x 8mm nuts holding the wires on to the fuse housing, so carefully unbolt those (I had to hold the fuse box with one hand and ratchet + extension bar'd the nuts off with the other) and again use the magnetic extension tool to grab them or hold them in the socket and carefully extract them from the engine
Once out I could see that the fuse was actually blown so now it's time to get a new one and do this process in reverse...


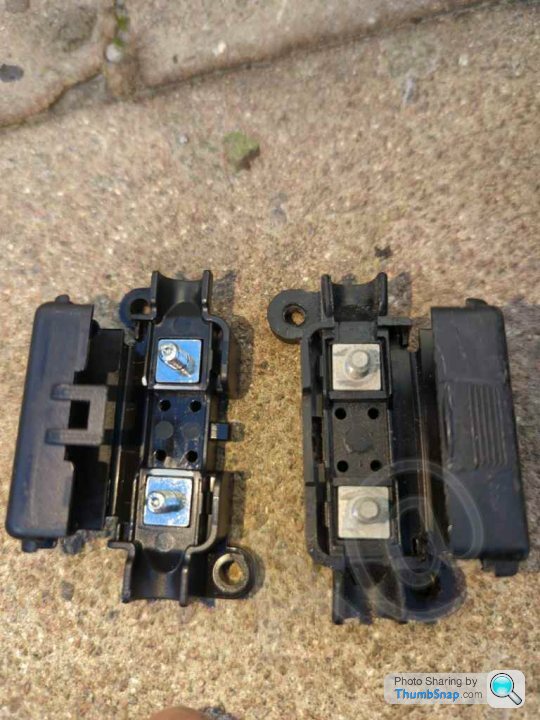
There are two different versions of the fuse holder ...the later version captures the lid with a central hook. The original item clasp onto the lid edge and needed TVR to put electrical tape around it to keep the lid closed.
Alex...perhaps you need to go back to the wiper motor to see why it fused
A@

Alex...perhaps you need to go back to the wiper motor to see why it fused
A@
ukkid35 said:
I've always carried a spare fuse, but I hadn't considered carrying a spare fuse holder
I think I should - small, light, and cheap, so it would be mad not to
Yep - I agree Paul - I ordered two spare fuses yesterday and am adding a spare case to the order today as I agree with you - cheap and light and would be stupid not to!I think I should - small, light, and cheap, so it would be mad not to
Edited by ukkid35 on Monday 18th March 04:30
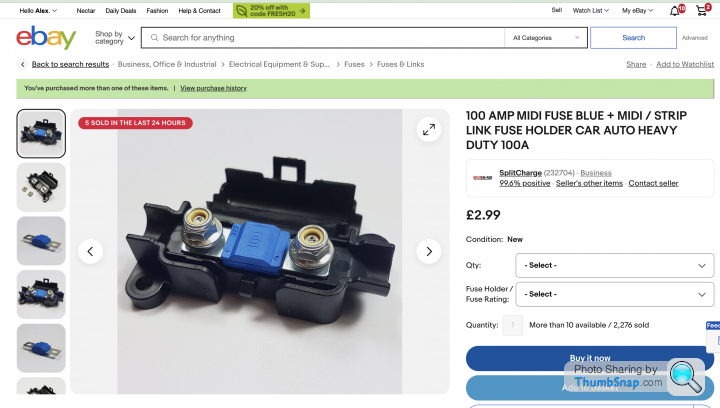
Link to the one I bought - just in case anyone else needs one (*probably totally dead if you are reading this 4 years from now or similar  )
)
https://www.ebay.co.uk/itm/191994605661
 )
)https://www.ebay.co.uk/itm/191994605661

New parts arrived today so it's time to fit the new shiny parts to the car
The easiest way I found to do this was
1. Insert fuse in to fuse box and put fusebox in place in car
2. Have the lid of the fusebox opening towards the dashboard, so that you can open the lid if you need to in the future without unbolting the whole fusebox
3. Loop the far alternator wire over the far terminal in the fusebox, and using the magnetic extension tool slowly lower down the nut for that part of the fusebox and position it over the top of the terminal and the wire
4. Using your fingers gently spin the nut while holding it in place with the magnetic extension tool until it is safely threaded on the terminal
5. Remove magnetic extension tool while holding fusebox and then tighten nut hand tight
6. Repeat on the other side
As the fusebox is still lose you can move it around to attach the terminals and angle it towards the magnetic extension tool to make this part nice and easy
Once done position the fusebox in place so that you can see the holes on the fusebox are lined up with the holes on the engine body, and again slowly lower in the bolts to hold it in place using the magnetic extension tool
Once you have each one gently positioned in place in it's hole in the fusebox, then you can use your fingers to firmly push it in to place, tighten a few turns so that the bolt is secure, and then remove magnetic extension tool and tighten in place with a long extension, Phillips screw head adapter and a screw handle adapter
Once both sides are done, then tighten the two nuts that hold the fuse in place using the same long extension but with an 8mm socket
Finally test with a multimeter just to double check that you have continuity from one side of the wire to the other through the fuse
Job done
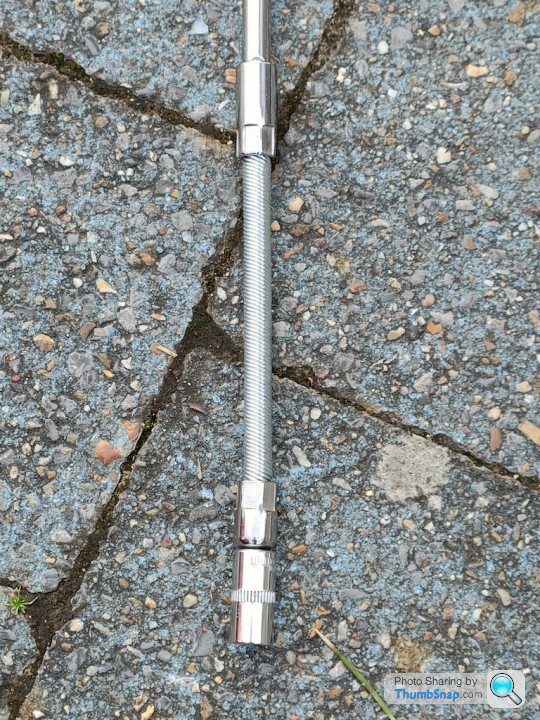
Here's some photos of mine and tools to help and I used a flexi extension to give me some more wiggle room
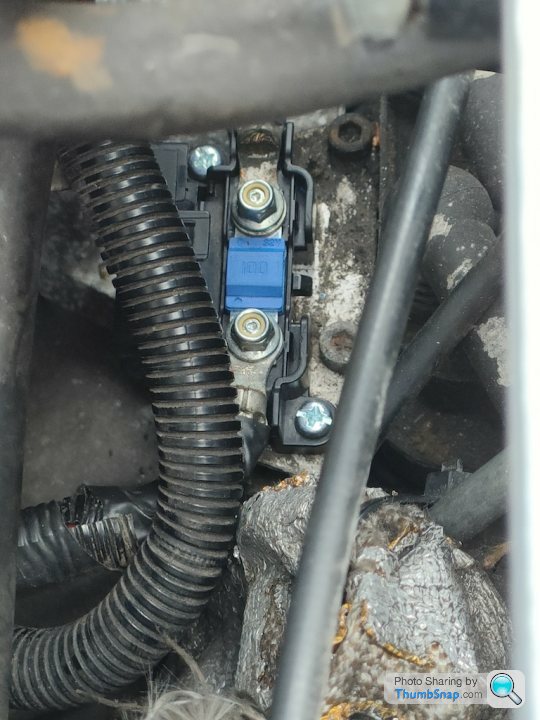
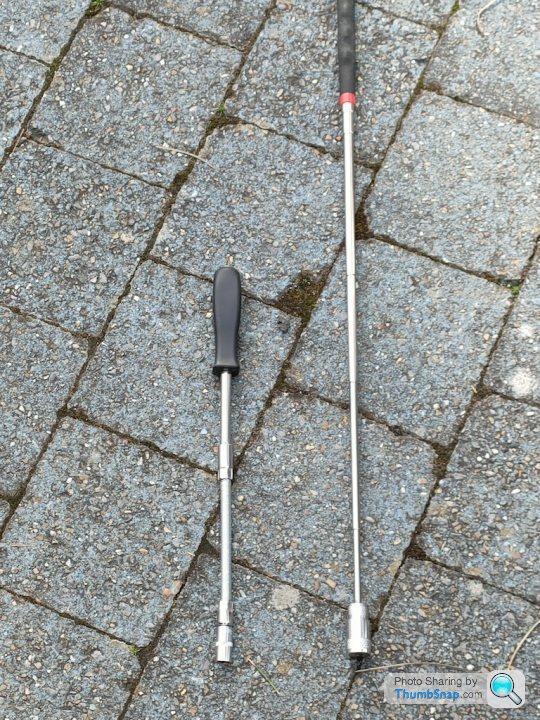
The easiest way I found to do this was
1. Insert fuse in to fuse box and put fusebox in place in car
2. Have the lid of the fusebox opening towards the dashboard, so that you can open the lid if you need to in the future without unbolting the whole fusebox
3. Loop the far alternator wire over the far terminal in the fusebox, and using the magnetic extension tool slowly lower down the nut for that part of the fusebox and position it over the top of the terminal and the wire
4. Using your fingers gently spin the nut while holding it in place with the magnetic extension tool until it is safely threaded on the terminal
5. Remove magnetic extension tool while holding fusebox and then tighten nut hand tight
6. Repeat on the other side
As the fusebox is still lose you can move it around to attach the terminals and angle it towards the magnetic extension tool to make this part nice and easy
Once done position the fusebox in place so that you can see the holes on the fusebox are lined up with the holes on the engine body, and again slowly lower in the bolts to hold it in place using the magnetic extension tool
Once you have each one gently positioned in place in it's hole in the fusebox, then you can use your fingers to firmly push it in to place, tighten a few turns so that the bolt is secure, and then remove magnetic extension tool and tighten in place with a long extension, Phillips screw head adapter and a screw handle adapter
Once both sides are done, then tighten the two nuts that hold the fuse in place using the same long extension but with an 8mm socket
Finally test with a multimeter just to double check that you have continuity from one side of the wire to the other through the fuse
Job done

Here's some photos of mine and tools to help and I used a flexi extension to give me some more wiggle room


Edited by Juddder on Wednesday 20th March 17:20
Juddder said:
....
First job was to find the big fuse....
We've all been there, Mate First job was to find the big fuse....

BUT
This raises a question in my mind:-
I hate keeping things in a bad state so I wanted to move my Big Fuse further around the engine bay to allow easier access.
My question is - Does the fuse, or more importantly its mounting plate, have to be earthed on the engine ? (as it's currently bolted to the block at the back).
Thanks for any and all of your comments


Mr Cerbera said:
We've all been there, Mate 
Now that's one way of doing it 

Mr Cerbera said:
My question is - Does the fuse, or more importantly its mounting plate, have to be earthed on the engine ? (as it's currently bolted to the block at the back).
I can't think so but didn't take any photos of the bottom of the fuse holder case to verify 100%.As the fuse is on the positive of the alternator, if the case was connected to the terminals and grounded that would short it, so I think the plastic top and bottom mounts are just to secure it
Edited by Juddder on Friday 21st February 15:37
Can't believe it's been 4 years since I changed the big fuse location. No ill effects from the move.
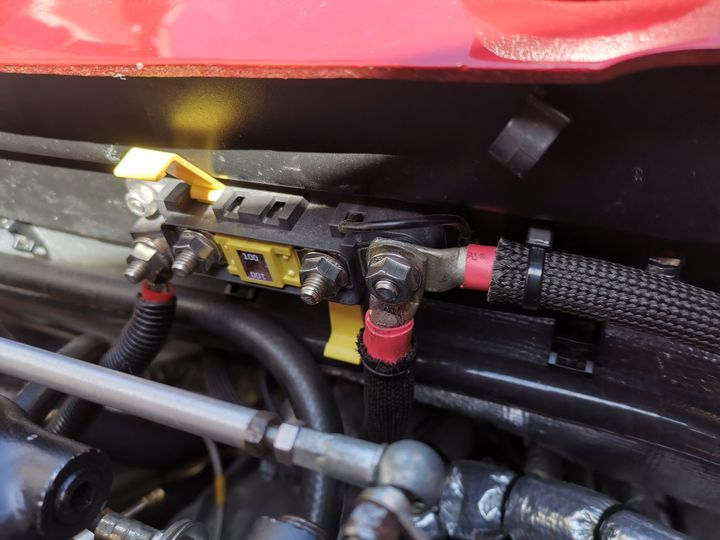
https://www.pistonheads.com/gassing/topic.asp?h=0&...
Paul - no it doesn't need to be earthed.
https://www.pistonheads.com/gassing/topic.asp?h=0&...
Paul - no it doesn't need to be earthed.
Always a job so nicely done Gordon 
Using the powers of Google Lens I found the fuse holder Gordon used which is, I believe, a Littelfuse MEGA® SN Series 70V Bolt-Down Sealed Water-Resistant Fuse Holder
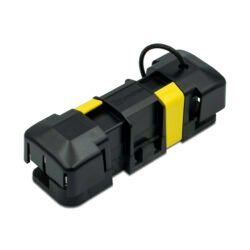
£33 odd on eBay so definitely the way to go next time mine blows or I have nicer enough weather to find the will to live to want to tackle this part of the engine again

Using the powers of Google Lens I found the fuse holder Gordon used which is, I believe, a Littelfuse MEGA® SN Series 70V Bolt-Down Sealed Water-Resistant Fuse Holder
£33 odd on eBay so definitely the way to go next time mine blows or I have nicer enough weather to find the will to live to want to tackle this part of the engine again

Thanks Alex and Gordon

"or I have nicer enough weather to find the will to live to want to tackle this part of the engine again"

I try to do infuriating jobs like this when the weather'a crap so that I can enjoy my success when the conditions improve

Juddder said:
Always a job so nicely done Gordon 
Using the powers of Google Lens I found the fuse holder Gordon used which is, I believe, a Littelfuse MEGA® SN Series 70V Bolt-Down Sealed Water-Resistant Fuse Holder

£33 odd on eBay so definitely the way to go next time mine blows or I have nicer enough weather to find the will to live to want to tackle this part of the engine again
Perfect ! Thanks for the recommendation 
Using the powers of Google Lens I found the fuse holder Gordon used which is, I believe, a Littelfuse MEGA® SN Series 70V Bolt-Down Sealed Water-Resistant Fuse Holder
£33 odd on eBay so definitely the way to go next time mine blows or I have nicer enough weather to find the will to live to want to tackle this part of the engine again


"or I have nicer enough weather to find the will to live to want to tackle this part of the engine again"


I try to do infuriating jobs like this when the weather'a crap so that I can enjoy my success when the conditions improve

Edited by Mr Cerbera on Friday 21st February 17:14
Juddder said:
Always a job so nicely done Gordon 
Cheers Alex. 
Manged to dig out the parts list for the mod - which included cables, terminals etc. All from PCS Cables - https://www.pcscables.com
There's more cable than required, but I needed some extra for another mod involving an isolator switch. I'll post pictures of this when I unwrap the beast from it's hibernation

Gassing Station | Cerbera | Top of Page | What's New | My Stuff


