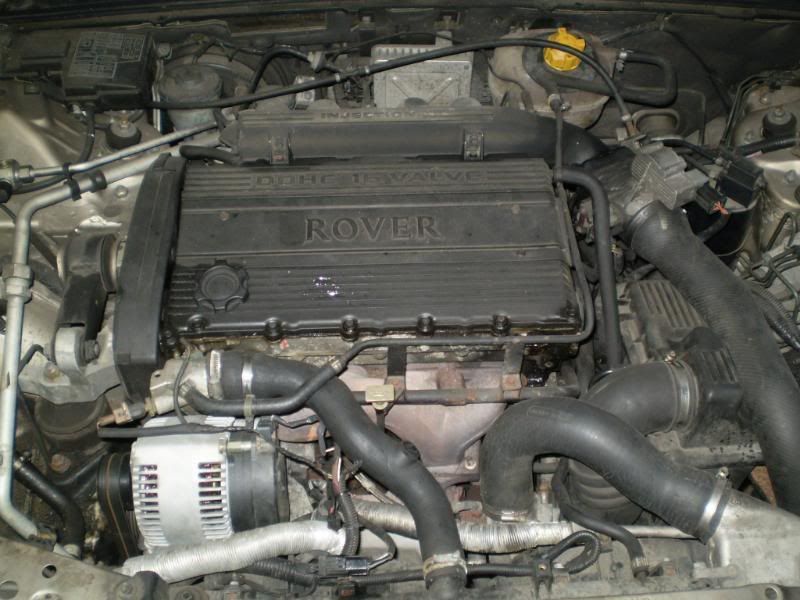
Bought a Rover 620ti with problems ~ numerous problems..
Discussion


I like a challenge and having sold both my project Turbo cars recently, I had withdrawal pangs and needed another 'fix'. One of those cars I'd had for over seven years and the other a year. So trawled the web for another "fixer upper" challenge. After considering quite a few including a half decent MG Montego Turbo non-runner ~ another multi car owner who had little idea how to repair a car, I then found a very tidy S-Reg Gold Rover 620ti which the owner had decided to dispose of having tried various ways to get the car running nicely again. He had replaced it with a SAAB turbo half the age of the Rover but, said he preferred the Rover although the SAAB turbo was quite a nice car. I can understand his preference. A mutually acceptable price was agreed and so the Gold Turbo Rover became mine.... had about ten of them over the years ~ Some say ~ I'm a glutton for punishment >>>> but, I think they're all wrong ... 
First thing was to check the obviously brand new and shiney Alternator which I suspect was the cause of some of the problems the previous owner described. Much flickering of headlights and battery troubles.
So it proved, this new one was charging up to 16 volts:~
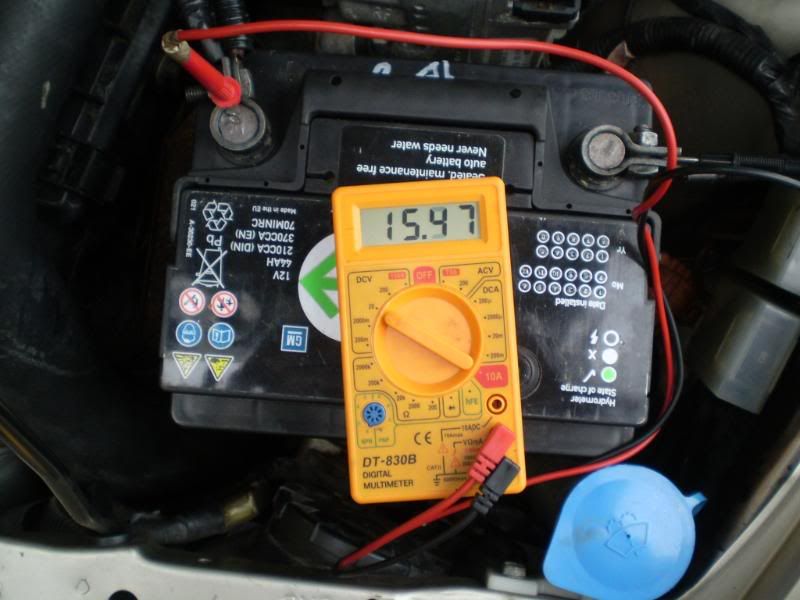
Not the usual ca. 14 volts as shown here on my Oxford Blue car used as a comparison control. Those 15-16 volts would surely cook any battery ~ thoughts please.

Next was to investigate the overheating problems. Before I saw the car, on the phone I suggested to the owner that it may be a worn water pump causing the coolant loss and boiling over he described. I suggested looking under the front driver's side of the car for signs of any coolant loss there. Not that although when I did see the car, there were lots of tell tale stains on the drive directly underneath the water pump.
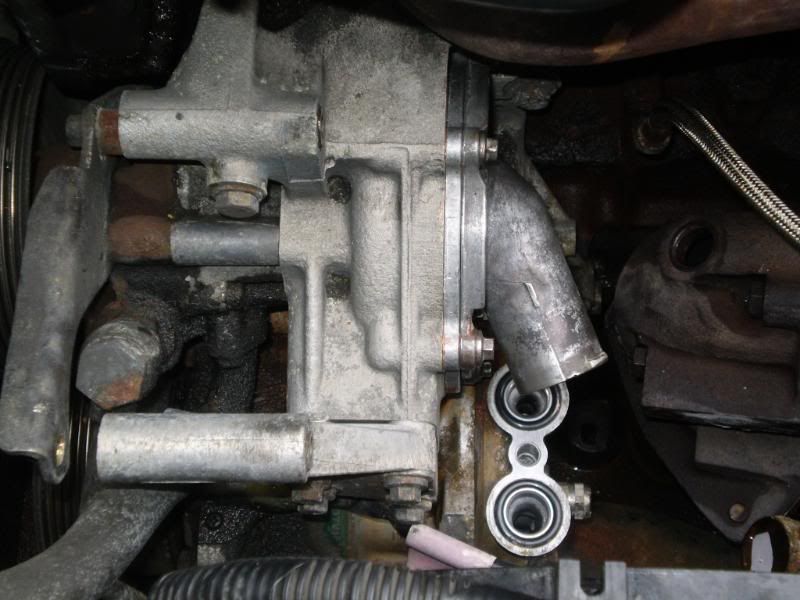
So, off with the alternator and out with the old pump. Before starting, I had to release the AirCon pipes which restrict access to the five 8mm Water Pump Cover Bolts and two of the nearside Alternator 10mm bolts. The AirCon was not working efficiently so I suspected loss of refridgerant. So it proved and with that larger AirCon pipe assembly out of the way, essential better access to the bolts is possible. I also removed the heat shield from the Turbocharger and the Lambda sensor from the turbo elbow outlet and the short stubby hose from the water pump cover. All these things restrict access to those Alternator and Water Pump Cover bolts. Using my best quality 8mm Hex Socket set, I was relieved to undo all five pump cover bolts although Sod's Law, it looked like for one heart sinking moment the hardest two bolts to access were far too tight and I feared rounded flats. My sockets did the trick with carefully controlled pressure ~ essential that there's no slippage which will round those flats.
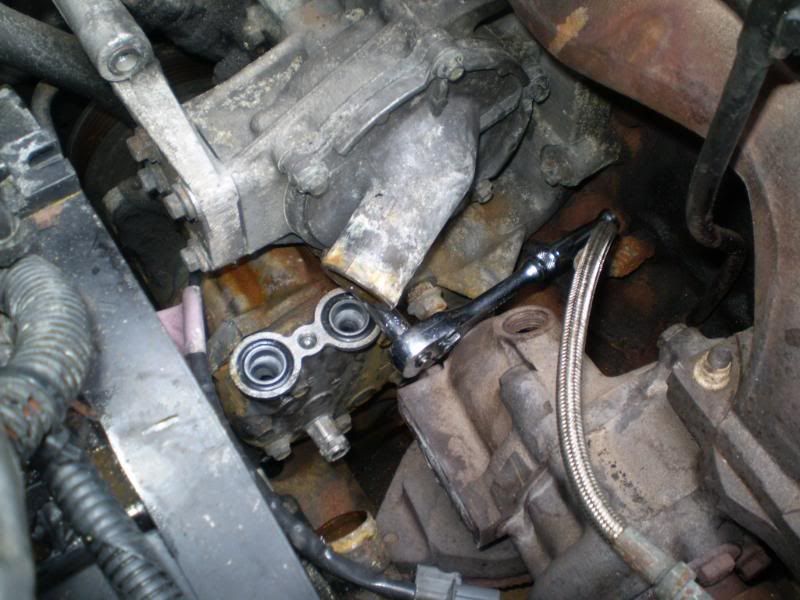
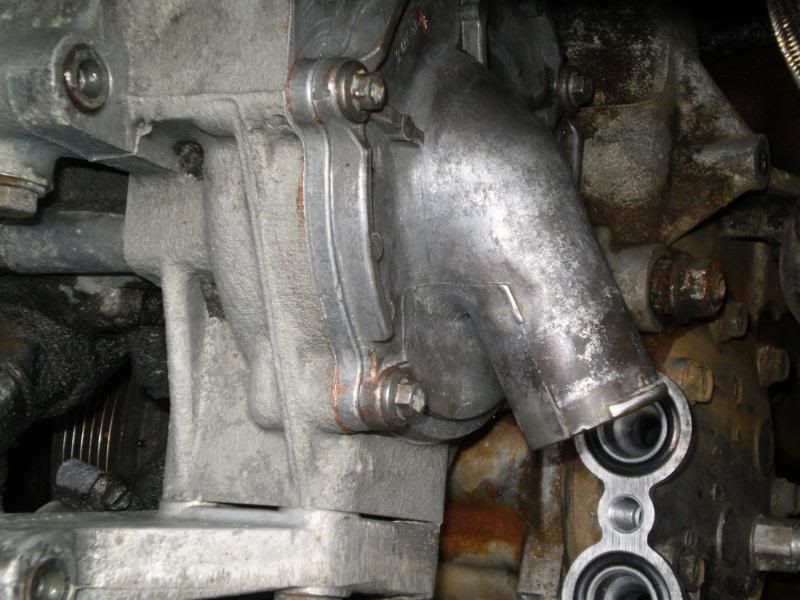
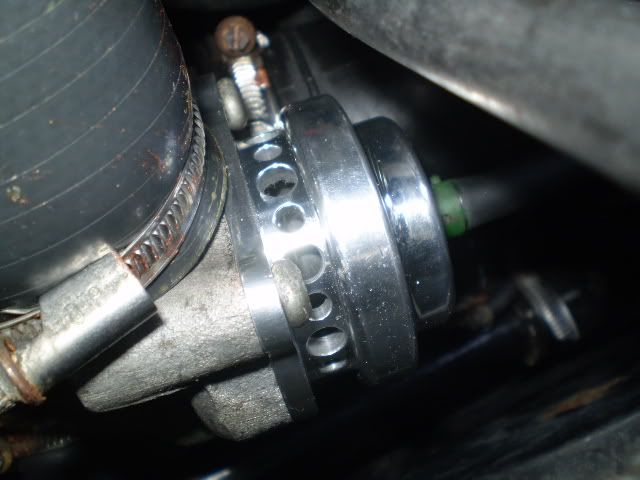
Once the Water Pump cover was removed, I used a sharp chisel to carefully separate the actual pump from the housing. It was far tighter than any other T16 water pump I have removed. So much so that part of its flange actually broke off! :~
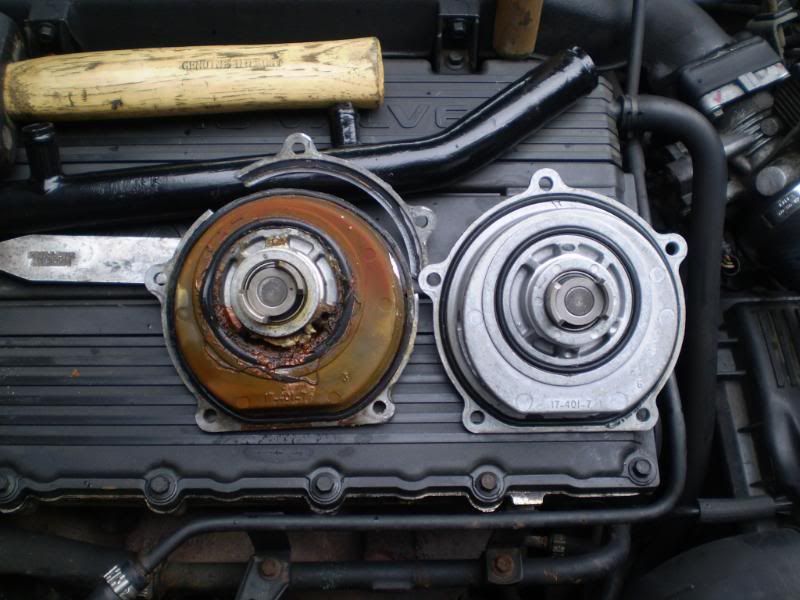
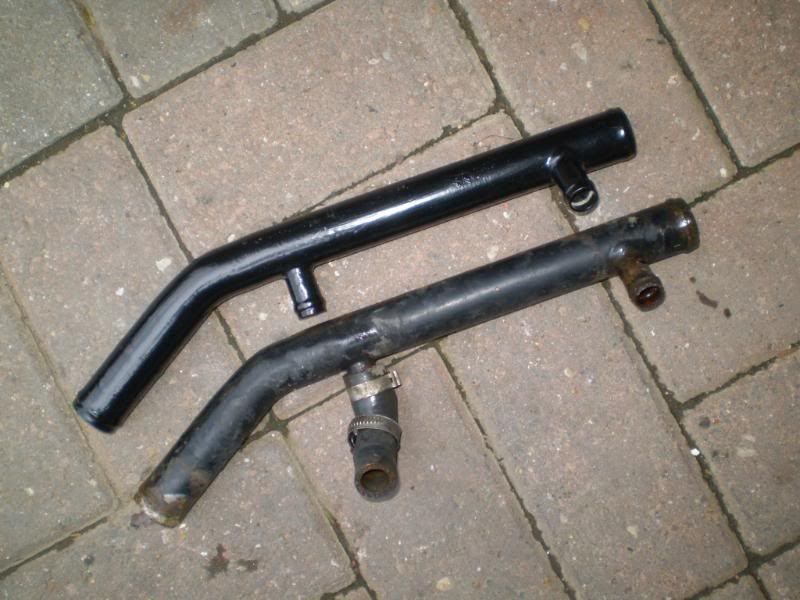
You can clearly see the excessive staining on the old pump where the coolant has been escaping past the worn seals on the shaft. Compare it to the new pump. I also repalced the much corroded lower coolant pipe as that I suspect had a slight leak too. I used a refurbished pipe I'd prepared and painted a year ago ~ knew it would come in handy one day... Here's the old and refurbished one:~
Fitted:~
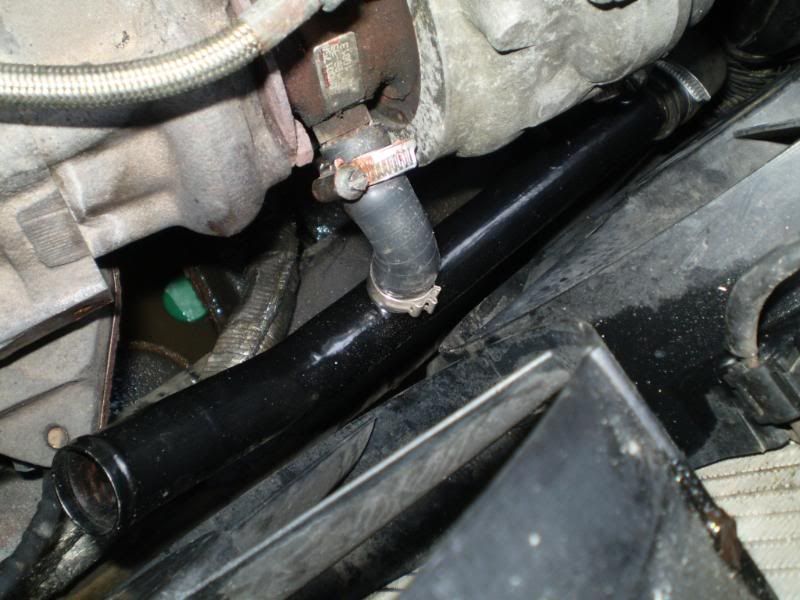
I cleaned up all the water pump housing seal interfaces using some wet and dry 180 grade finishing off with some 1000 grade ~ then fitted the new pump:~
Refitted all the items removed and filled the cooling system and also fitted a new Thermostat. There was not one in the top hose of this car...Hmmmm ... wonder why?...
Note: I used some copper based grease on ALL the threads of the bolts on reassembly, cleaning up some threads before using them where needed. No chance of seized bolts on this lot should I ever need to work on this car again which I intend to keep for a while.
Started car and pleased to get a steady 13.99~14.00 volts with the used but known good alternator:~
Bled the system ~ so easy on the T-Series ~ after full warm up, checked all systems and delighted to report all systems go engine and cooling system wise.
Now to investigate and rectify SRS light on all the time and reversing lights not working...
Getting there... Think this is going to be a nice car and the 83,330 miles I now supsect is genuine.
More follows when further investigations are complete in a few days time.
First thing was to check the obviously brand new and shiney Alternator which I suspect was the cause of some of the problems the previous owner described. Much flickering of headlights and battery troubles.
So it proved, this new one was charging up to 16 volts:~
Not the usual ca. 14 volts as shown here on my Oxford Blue car used as a comparison control. Those 15-16 volts would surely cook any battery ~ thoughts please.
Next was to investigate the overheating problems. Before I saw the car, on the phone I suggested to the owner that it may be a worn water pump causing the coolant loss and boiling over he described. I suggested looking under the front driver's side of the car for signs of any coolant loss there. Not that although when I did see the car, there were lots of tell tale stains on the drive directly underneath the water pump.
So, off with the alternator and out with the old pump. Before starting, I had to release the AirCon pipes which restrict access to the five 8mm Water Pump Cover Bolts and two of the nearside Alternator 10mm bolts. The AirCon was not working efficiently so I suspected loss of refridgerant. So it proved and with that larger AirCon pipe assembly out of the way, essential better access to the bolts is possible. I also removed the heat shield from the Turbocharger and the Lambda sensor from the turbo elbow outlet and the short stubby hose from the water pump cover. All these things restrict access to those Alternator and Water Pump Cover bolts. Using my best quality 8mm Hex Socket set, I was relieved to undo all five pump cover bolts although Sod's Law, it looked like for one heart sinking moment the hardest two bolts to access were far too tight and I feared rounded flats. My sockets did the trick with carefully controlled pressure ~ essential that there's no slippage which will round those flats.
Once the Water Pump cover was removed, I used a sharp chisel to carefully separate the actual pump from the housing. It was far tighter than any other T16 water pump I have removed. So much so that part of its flange actually broke off! :~
You can clearly see the excessive staining on the old pump where the coolant has been escaping past the worn seals on the shaft. Compare it to the new pump. I also repalced the much corroded lower coolant pipe as that I suspect had a slight leak too. I used a refurbished pipe I'd prepared and painted a year ago ~ knew it would come in handy one day...
Here's the old and refurbished one:~Fitted:~
I cleaned up all the water pump housing seal interfaces using some wet and dry 180 grade finishing off with some 1000 grade ~ then fitted the new pump:~
Refitted all the items removed and filled the cooling system and also fitted a new Thermostat. There was not one in the top hose of this car...Hmmmm ... wonder why?...
Note: I used some copper based grease on ALL the threads of the bolts on reassembly, cleaning up some threads before using them where needed. No chance of seized bolts on this lot should I ever need to work on this car again which I intend to keep for a while.
Started car and pleased to get a steady 13.99~14.00 volts with the used but known good alternator:~
Bled the system ~ so easy on the T-Series ~ after full warm up, checked all systems and delighted to report all systems go engine and cooling system wise.
Now to investigate and rectify SRS light on all the time and reversing lights not working...
Getting there... Think this is going to be a nice car and the 83,330 miles I now supsect is genuine.
More follows when further investigations are complete in a few days time.
SRS Red warning light on permanently ~
exactly the same thing happened to my son's 620ti ( now with over 163,000 on the clock and still running fine and strong ) when his car's alternator expired.
As then this time I deployed the specialist tool ~ well a bent paper clip ........~ in the small yellow SRS connector located behind the drop down coin drawer to the right of the steering wheel.
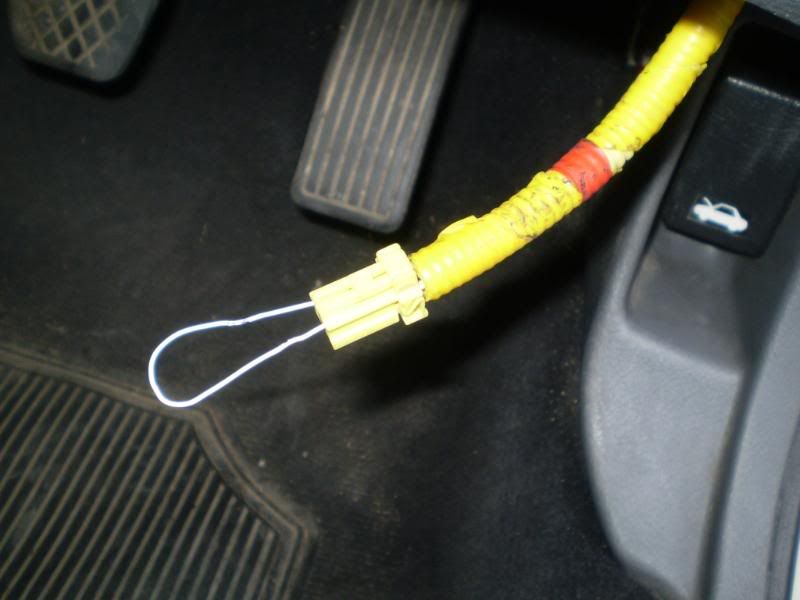
Nice to see that SRS Red Light go out now on this Gold ti after completing the sequence using the paper clip. For future reference, this is the procedure I followed using the paper clip bent into a U shape and inserted the two ends into the little yellow connector.
1) IGNITION SWITCHED OFF
2) INSERT CLIP INTO YELLOW PLUG
3) SWITCH IGNITION ON
4) SRS RED LIGHT WILL LIGHT FOR 6 SECONDS THEN GO OUT
5) REMOVE CLIP WITHIN 4 SECONDS OF LIGHT GOING OUT
6) SRS WILL LIGHT UP
7) INSERT WIRE AGAIN WITHIN 4 SECONDS
8.) SRS SHOULD GO OUT
9) REMOVE CLIP WITHIN FOUR SECONDS OF LIGHT GOING OUT
10) SRS LIGHT SHOULD THEN FLASH TWICE AND STAY OUT PROVIDED THE SYSTEM IS IN GOOD CONDITION...... 8)
NOTE: YOU HAVE TO BE ON THE BALL WITH THE ABOVE METHOD ~ TIMING IS ESSENTIAL ~ A SECOND LATE INSERTING OR REMOVING THE CLIP FROM THE YELLOW PLUG MEANS YOU WILL HAVE TO SWITCH OFF AND START ALL OVER AGAIN.
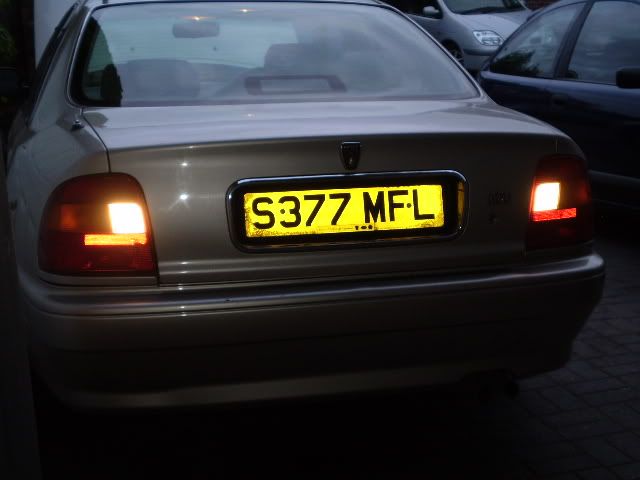
The driver's side rear stop light was not working ~ needed a new twin filament bulb..
All that remains to be done now on this car is to find out why the reverse lights do not illuminate when selecting reverse. Should be an easy fix but, unable to tackle this evening after work as it was getting too dark. Someone told me that non functional reversing lights are NOT a fail on the MoT ~ can anyone confirm either way?
Almost there now.......

exactly the same thing happened to my son's 620ti ( now with over 163,000 on the clock and still running fine and strong ) when his car's alternator expired.
As then this time I deployed the specialist tool ~ well a bent paper clip ....
....~ in the small yellow SRS connector located behind the drop down coin drawer to the right of the steering wheel.Nice to see that SRS Red Light go out now on this Gold ti after completing the sequence using the paper clip. For future reference, this is the procedure I followed using the paper clip bent into a U shape and inserted the two ends into the little yellow connector.
1) IGNITION SWITCHED OFF
2) INSERT CLIP INTO YELLOW PLUG
3) SWITCH IGNITION ON
4) SRS RED LIGHT WILL LIGHT FOR 6 SECONDS THEN GO OUT
5) REMOVE CLIP WITHIN 4 SECONDS OF LIGHT GOING OUT
6) SRS WILL LIGHT UP
7) INSERT WIRE AGAIN WITHIN 4 SECONDS
8.) SRS SHOULD GO OUT
9) REMOVE CLIP WITHIN FOUR SECONDS OF LIGHT GOING OUT
10) SRS LIGHT SHOULD THEN FLASH TWICE AND STAY OUT PROVIDED THE SYSTEM IS IN GOOD CONDITION....
.. 8) NOTE: YOU HAVE TO BE ON THE BALL WITH THE ABOVE METHOD ~ TIMING IS ESSENTIAL ~ A SECOND LATE INSERTING OR REMOVING THE CLIP FROM THE YELLOW PLUG MEANS YOU WILL HAVE TO SWITCH OFF AND START ALL OVER AGAIN.
The driver's side rear stop light was not working ~ needed a new twin filament bulb..
All that remains to be done now on this car is to find out why the reverse lights do not illuminate when selecting reverse. Should be an easy fix but, unable to tackle this evening after work as it was getting too dark. Someone told me that non functional reversing lights are NOT a fail on the MoT ~ can anyone confirm either way?
Almost there now...
.... This little picture may help anyone doing this SRS Red Light Reset locate the Yellow SRS Connector. This imagine was taken by placing the camera down in the footwell and pointing the lens towards the rear of the car ~ a blind shot but, serves the purpose. It is on the metal subframe immediately behind the bottom of the small drop down drawer to the right of the steering wheel.
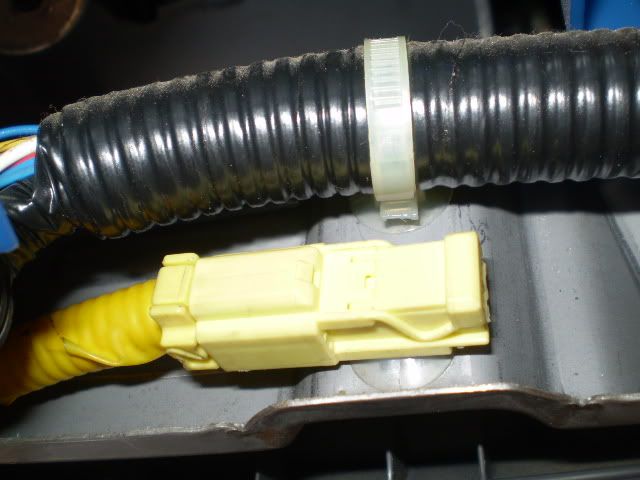
Press the little square clip and that will relase it from the mount. Click it back in place when job done. I have heard that some dealerships have charged up to £100 labour to complete this 1/4 hour job for the average DIYer. Follow these simple guidelines and it will cost you nowt.
..
Press the little square clip and that will relase it from the mount. Click it back in place when job done. I have heard that some dealerships have charged up to £100 labour to complete this 1/4 hour job for the average DIYer. Follow these simple guidelines and it will cost you nowt.
..
FM said:
keep it up fella...get right in there...
I shall indeed ... there's more ... I'm really enjoying sorting these various problems on this car. Despite the problems, I suspected that under it all, there lurks a half decent Rover 620ti. It's becoming obvious that it is a better example than I had allowed for or anticipated...
The previous owner told me about the non functioning Reversing Lights ...this is what I found ...

Suspecting one of the two bullet connectors had separated, I removed the Air Filter assembly to find this untidy bodge ~
~ yes, the plastic covering on both those wires has melted at some stage ~ possibly a dead short rather than engine heat damage :~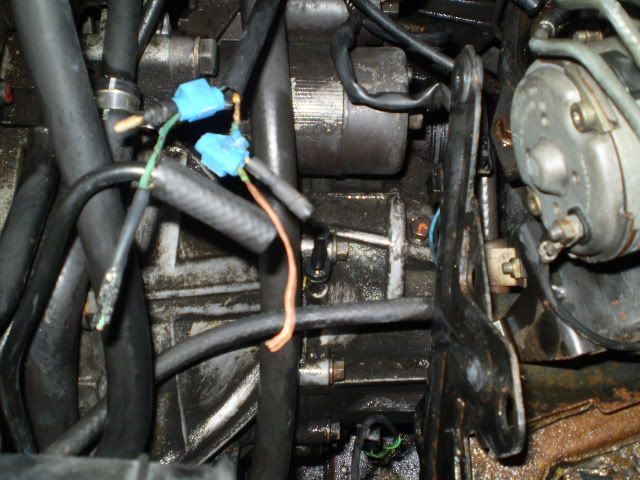
I had a spare PG1 reverse light switch and replaced the original. Cleaned up the connections and fastened them:~

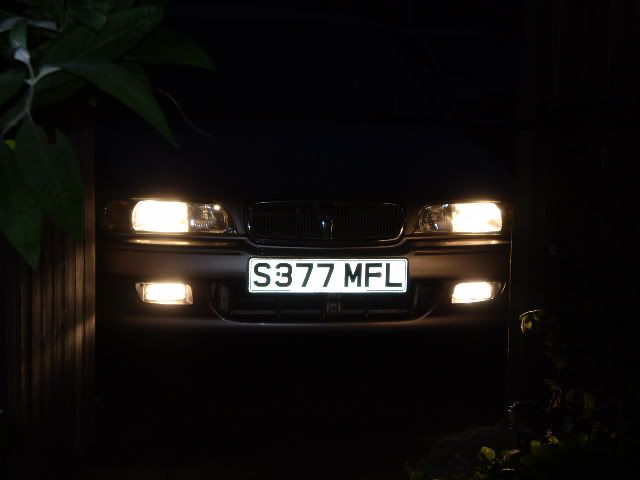
Connected the battery and tested the lights ~ sorted :~
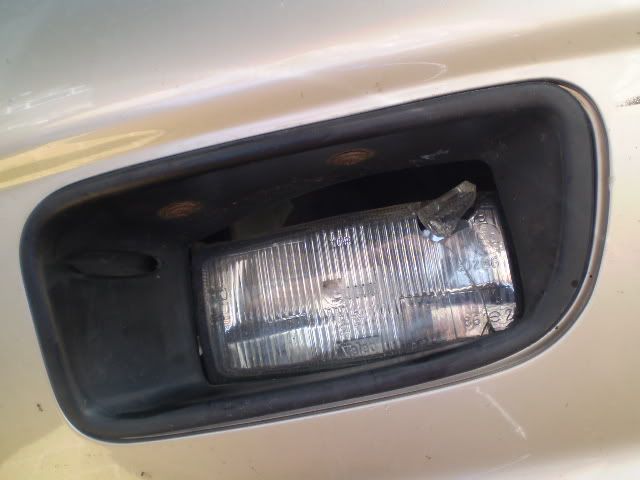
Almost there, just one more job to do. The front nearside driving light works but, has a small stone hole in the broken glass ~ I just happen to have a spare...
More follows...

Mike V said:
Great work all round. DO you know if the yellow connector is present on the 820?
It's several years since I had a 820 Vitesse Turbo but, cannot remember where or, if there was a yellow connector as I never had any need to access it. I believe all Rovers and possibly all cars, use bright yellow colour coded cables and connectors for the SRS systems. Look for those in your car and you may find it. Better still, pose the same question over on Rovertech.net or MG-Rover.org. Plenty of clued up folks there who've probably been there and done that on the 820...
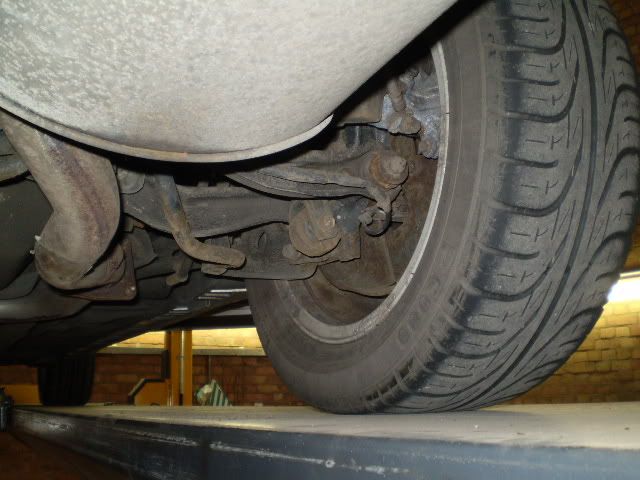
MOT Time ... :~
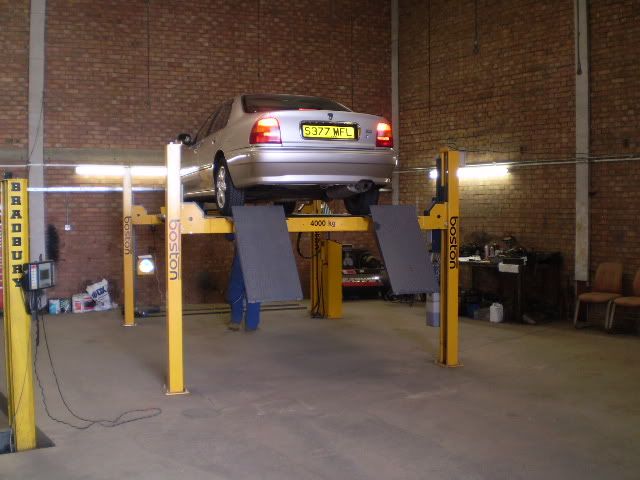
It failed ... ... On the following two items:~
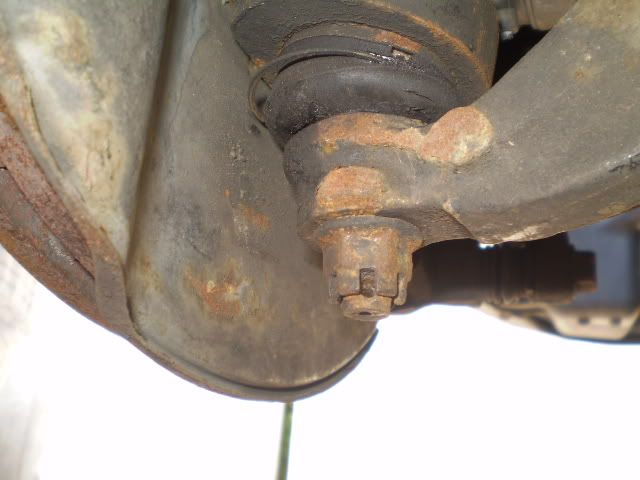
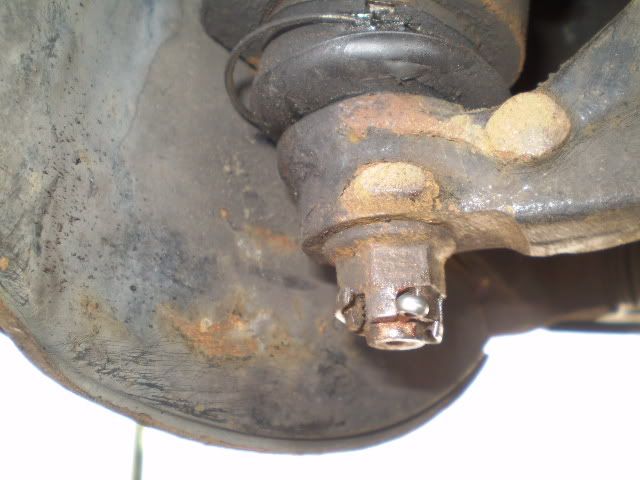
Missing Split Pin in Lower N/S swivel..
This tyre was a tad illegal ~ looked OK to me ...:~
Changed the illegal tyre and inserted a shiney new split pin in the Castlelated Nut. I also repositioned the seal retaining spring clip which had been displaced at some stage... :~
Back two hours later for a free retest ~ It took my friendly MoT tester all of twenty seconds to retest ...
... and a nice new MoT Certificate for the car.
When replacing that split pin, with the wheel removed I was able to observe the condition of the front brake assembly. Look at this:~
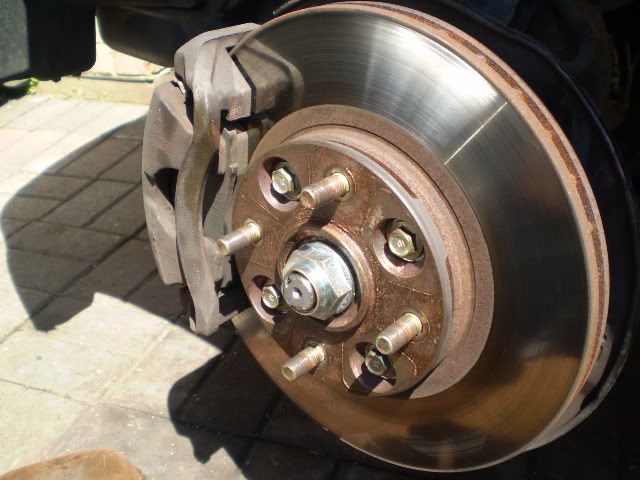
It was virtually new, even the driveshaft nut which suggests a new outer CV-joint had been recently fitted. All four brakes were new discs and new pads. The tester remarked that the rear brakes on this car were very good ~ perfect in fact ~ which underminds the widely held myth that Rover's rear brakes are crap ~ altogether now... Oh no they're not ...
With one or two exceptions such as that reverse light connection bodge and the missing split pin ~ a professional oversight I'd bet a nice few quid on that ~ whilst working on this car on several occasions I saw evidence of regular and good maintenance. Even the oil looks in good shape although I'll put some of my favourite 10-40 semi-synthetic soon.
Pity that brand new alternator was faulty ~ most owners would renew one of those and never guess the new one was the cause of battery, SRS and other problems.
Finally, on the way back back from the Retest, I popped into Ebley Tyres locally and had the AirCon regassed ~ £45 and took 45 minutes ~ did it whilst I waited ~ money well spent ~ I like efficient AirCon in a car particularly in the winter as it's so effective in clearing misted screens quickly.
I'm delighted with the car... It goes really well now.
..
It failed ...
... On the following two items:~Missing Split Pin in Lower N/S swivel..
This tyre was a tad illegal ~ looked OK to me ...:~
Changed the illegal tyre and inserted a shiney new split pin in the Castlelated Nut. I also repositioned the seal retaining spring clip which had been displaced at some stage... :~
Back two hours later for a free retest ~ It took my friendly MoT tester all of twenty seconds to retest ...
... and a nice new MoT Certificate for the car.
When replacing that split pin, with the wheel removed I was able to observe the condition of the front brake assembly. Look at this:~
It was virtually new, even the driveshaft nut which suggests a new outer CV-joint had been recently fitted. All four brakes were new discs and new pads. The tester remarked that the rear brakes on this car were very good ~ perfect in fact ~ which underminds the widely held myth that Rover's rear brakes are crap ~ altogether now... Oh no they're not ...
With one or two exceptions such as that reverse light connection bodge and the missing split pin ~ a professional oversight I'd bet a nice few quid on that ~ whilst working on this car on several occasions I saw evidence of regular and good maintenance. Even the oil looks in good shape although I'll put some of my favourite 10-40 semi-synthetic soon.
Pity that brand new alternator was faulty ~ most owners would renew one of those and never guess the new one was the cause of battery, SRS and other problems.
Finally, on the way back back from the Retest, I popped into Ebley Tyres locally and had the AirCon regassed ~ £45 and took 45 minutes ~ did it whilst I waited ~ money well spent ~ I like efficient AirCon in a car particularly in the winter as it's so effective in clearing misted screens quickly.
I'm delighted with the car... It goes really well now.
..
Couple of final touches :~
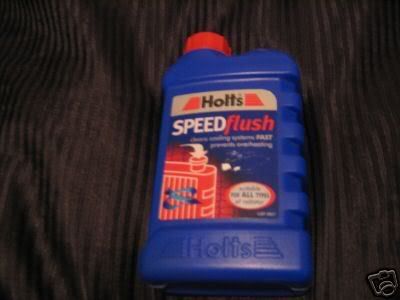
Put half a bottle of Speedflush in the cooling system yesterday ~ not the full dose as the system is fairly clean but, be nice to have it cleaner. This is the stuff I used Holts SPEEDflush :~
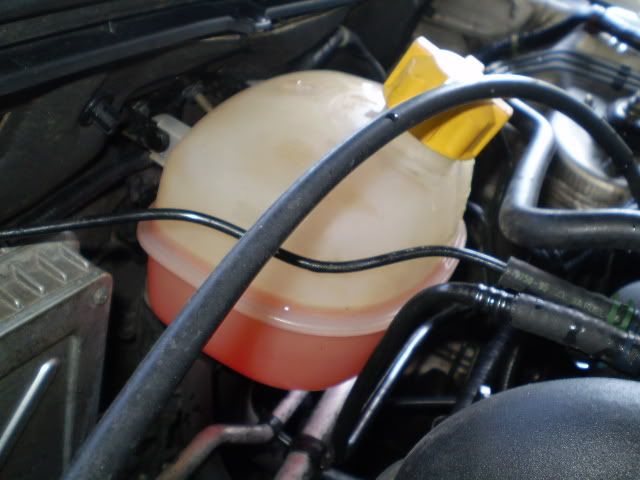
Got engine nice and warm and then drained all the coolant ~ it was slightly discloured which shows the SPEEDflush did its work well. Then flushed all the system with pressure from the garden hose. Finally, topped up with 50-50 OAT Coolant. That should keep the system healthy for a couple of years or so. The cleaned Coolant Expansion Bottle is now easy to check the level ~ a quick glance all that's necessary to check :~

Finally .... well why not :~
One more thing I must do ~ drain the gearbox lubricant and refill with the correct MTF 94. Do that tomorrow.
That's it ~ then for some of this stuff .... .... 
Put half a bottle of Speedflush in the cooling system yesterday ~ not the full dose as the system is fairly clean but, be nice to have it cleaner. This is the stuff I used Holts SPEEDflush :~
Got engine nice and warm and then drained all the coolant ~ it was slightly discloured which shows the SPEEDflush did its work well. Then flushed all the system with pressure from the garden hose. Finally, topped up with 50-50 OAT Coolant. That should keep the system healthy for a couple of years or so. The cleaned Coolant Expansion Bottle is now easy to check the level ~ a quick glance all that's necessary to check :~
Finally .... well why not :~
One more thing I must do ~ drain the gearbox lubricant and refill with the correct MTF 94. Do that tomorrow.
That's it ~ then for some of this stuff ....
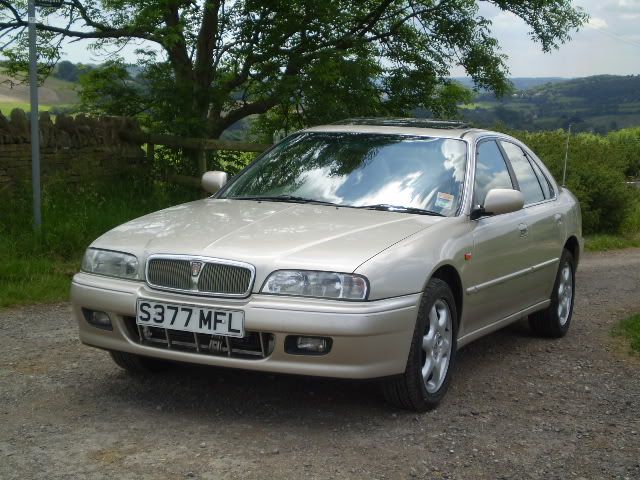
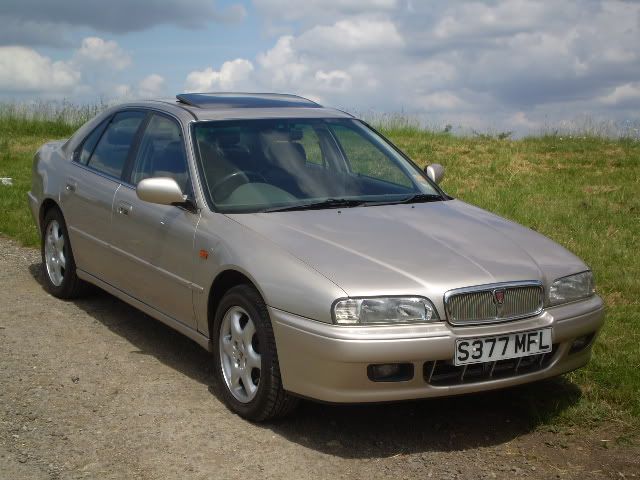
.... After working on the car I drove it up to a local beauty spot and took a couple of pictures:~
Then drove back home and checked the coolant level in the Expansion bottle. As anticipated, there had been further settling ~ close to the MIN mark, and the system needed a large cup full to bring it up to the MAX mark again.
.... Almost there...
Then drove back home and checked the coolant level in the Expansion bottle. As anticipated, there had been further settling ~ close to the MIN mark, and the system needed a large cup full to bring it up to the MAX mark again.
.... Almost there...
Ever mindful of the PG1 gearbox's differential bearings, which are the first to suffer if as sometimes happens, progressive seal wear allows the slow loss of lubricant leading to premature wear. So today, I drained the gearbox and it had lost some lubricant. I refilled with MTF 94.
I shall use this car now as my daily driver ~ keep the mileage down on my other 620ti ~ that car still with only 80,000 miles showing ~ and see how it shapes up with regular use. Best way to get to know a car.
I've posted this account here and a few other car web sites to illustrate what a few hours careful and methodical work can do to a car which a previous frustrated owner has given up on, having been quoted silly money to have professionally rectified. Apart from MoT, VED and AirCon regass, which is needed on most cars three years old or older, little real financial cost is involved ~ just a tyre, some OAT AntiFreeze and a new water pump. There is of course my time ~ having completed a couple of hundred miles in the car now, that time has been well invested.
Thats a nice post John and Affirms what I have always thought about Rovers.
They are slagged off by many.
I have an Audi A4
an Isuzu trooper for Towing
A dodge day van for Sleeping in
and a race car.
I still however get my most perverse form of pleasure driving my 200 turbo Diesel Bubble which is now clocking 172K miles. in all that time it has broken down once with a snapped throttle cable, (Even then I cobbled a shoe lace together and it got me home) and a second time with a filled intercooler but only because I drove it too quickly through Stanhope ford.
The little Rover is loved more by my wife than her £20k Audi. because it commuted us the 300 miles every day to Bradford and back to Northumberland, It keeps going in snowy conditions when the other UBER FWD car just slides. its still on its original clutch.
Its had a very hard life with me but has a heart of a Lion and for that reason alone it will always be with us.
b ks to Scrappage!!
Running bangers is much more fun.
Especially when you can buy them from Numptys who no longer know how to fix cars anymore.
N.
They are slagged off by many.
I have an Audi A4
an Isuzu trooper for Towing
A dodge day van for Sleeping in
and a race car.
I still however get my most perverse form of pleasure driving my 200 turbo Diesel Bubble which is now clocking 172K miles. in all that time it has broken down once with a snapped throttle cable, (Even then I cobbled a shoe lace together and it got me home) and a second time with a filled intercooler but only because I drove it too quickly through Stanhope ford.
The little Rover is loved more by my wife than her £20k Audi. because it commuted us the 300 miles every day to Bradford and back to Northumberland, It keeps going in snowy conditions when the other UBER FWD car just slides. its still on its original clutch.
Its had a very hard life with me but has a heart of a Lion and for that reason alone it will always be with us.
b
ks to Scrappage!!Running bangers is much more fun.
Especially when you can buy them from Numptys who no longer know how to fix cars anymore.
N.
heightswitch said:
Thats a nice post John and Affirms what I have always thought about Rovers.
They are slagged off by many.
I have an Audi A4
an Isuzu trooper for Towing
A dodge day van for Sleeping in
and a race car.
I still however get my most perverse form of pleasure driving my 200 turbo Diesel Bubble which is now clocking 172K miles. in all that time it has broken down once with a snapped throttle cable, (Even then I cobbled a shoe lace together and it got me home) and a second time with a filled intercooler but only because I drove it too quickly through Stanhope ford.
The little Rover is loved more by my wife than her £20k Audi. because it commuted us the 300 miles every day to Bradford and back to Northumberland, It keeps going in snowy conditions when the other UBER FWD car just slides. its still on its original clutch.
Its had a very hard life with me but has a heart of a Lion and for that reason alone it will always be with us.
bks to Scrappage!!
Running bangers is much more fun.
Especially when you can buy them from Numptys who no longer know how to fix cars anymore.
N.
Glad it's appreciated. They are slagged off by many.
I have an Audi A4
an Isuzu trooper for Towing
A dodge day van for Sleeping in
and a race car.
I still however get my most perverse form of pleasure driving my 200 turbo Diesel Bubble which is now clocking 172K miles. in all that time it has broken down once with a snapped throttle cable, (Even then I cobbled a shoe lace together and it got me home) and a second time with a filled intercooler but only because I drove it too quickly through Stanhope ford.
The little Rover is loved more by my wife than her £20k Audi. because it commuted us the 300 miles every day to Bradford and back to Northumberland, It keeps going in snowy conditions when the other UBER FWD car just slides. its still on its original clutch.
Its had a very hard life with me but has a heart of a Lion and for that reason alone it will always be with us.
b
ks to Scrappage!!Running bangers is much more fun.
Especially when you can buy them from Numptys who no longer know how to fix cars anymore.
N.
heightswitch said:
.
bks to Scrappage!!
Running bangers is much more fun.
"Running bangers is much more fun."b
ks to Scrappage!!Running bangers is much more fun.
Hey a kindred spirit !....
I could go out and buy a newly rearranged pile of teutonic tin tomorrow if I so desired but, no way .... toooo boring. In fact the last new car I bought was six years ago. An MG ZS120+ ~ nice car to both own and drive but ... it's driven almost exclusively by my wife who loves the way it drives and handles which is understandable ~ economical too although she does not drive for economy.
No, like you, provided the motors are basically sound, I get my motoring kicks by resurrecting someone else's frustrations and breathing new life into them. Very satisfying and appeals to both my creative and artistic 'bents'...
This latest project is one such and I'm delighted with the result. Much better outcome than I expected and a nice car to drive. Even my friendly MoT tester who I've used for years remarked on the ten year old car's fine condition and the fact that against common widespread ignorance, Rover's can have efficient rear/hand brakes.
I cannot get too much enthusiasm for modern 'newer' cars. Just do not do it for me anymore and I cannot remember the last time I picked up a new car with eager anticipation and excitement. Many moons ago I guess when I was much younger.
Scrappage. This car was first registered on 30th December 1998 so qualifies for the £2000 scrappage deal. Cannot think of any new car scrappage deal I'd rather have than this now very tidy and competent Rover 620ti.
You mention an Audi A4 ~ quite like those...
So, by coincidence ... coming home from the office this evening, I shaped up to pass a quickly driven newish Audi A4 2.0 Diesel on the local bypass. The driver spotted me and decided to move over whilst at the same time he floored the throttle pedal ~ Rascal ! I had anticipated this ~ VAG Diesel drivers really think that lots of Diesel gearchanges equals good acceleration ~ and I observed the usual plumes of VAG Diesel out of the rear. In my experience, that's as most VAG Diesel drivers are prone to do ~
~ whilst I had already selected second gear in anticipation and got the turbocharger interested and also floored it. No contest ~ the 620ti quickly indicated 70 mph in second gear as I snicked it into third gear. The A4 quickly dropped away. I like to spread the word this way. I'm a bit funny like that..... A slightly wiser VAG Diesel driver when it comes to old Rovers ... well, maybe... because some folks never learn ......
The previous owner was totally honest about this Rover 620ti and mentioned he'd disconnected both front electric windows as the winder mechanism was faulty. I removed the door cards expecting to find one or more of the little plastic wheels damaged or broken off in the lifter mechanism channel they run in bolted to the bottom of the window glass. I would say the cause of this failure 99% of the time is solely due to lack of cleaning and maintenance. All these cars are ten years old or more and I wonder how many owners have bothered to keep the side glass channels clean, clear and lubricated. Build up of road dirt, tree pollen ( my wife parked her car daily underneath several mature trees at her firm's car park for years ~ pine needles, dead leaves, sap and pollen build up caused all sorts of problems ) etc eventually stops the glass from running smoothly up and down. Then the glass can partially seize in one of the side channels, then locks solid and the powerful electric motors continue to raise one side of the glass which then twists out of the side guide channels completely. Impatient drivers try to use that powerful electric motor ( never known one of those to fail ) to rectify things but, once the glass is out of its channels, that only makes things worse so things bend and break, including the glass if drivers are too heavy handed with the switch!
I have repaired several of these window mechanisms over the years and when I dismantled both from the front doors, I found exactly what I had anticipated. The little plastic wheels had broken away from both 'scissors' lifting mechanisms on this car :~

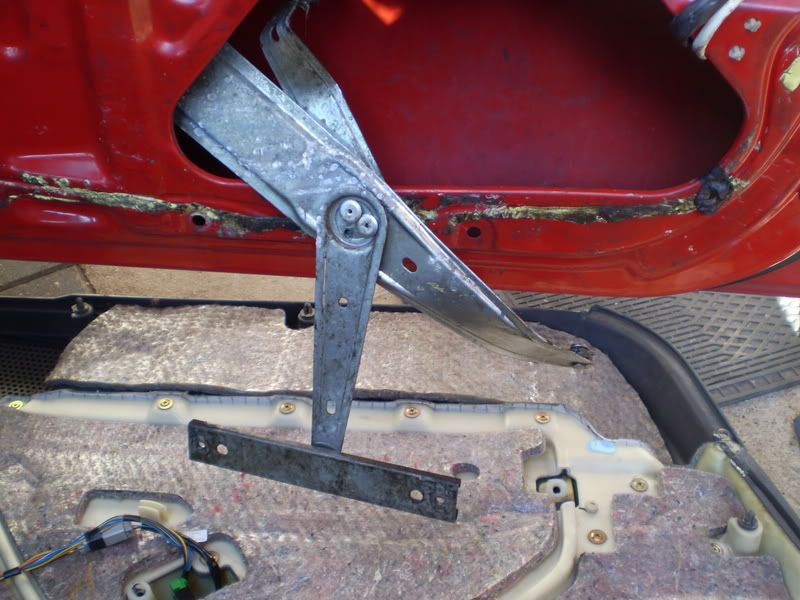
Here is a particularly bad example which I rectified on another car some eyars ago. Look how twisted it is. The result of a very impatient and uncaring owner ~ note the rivets ~ signs of a bodge repair which maybe made things worse...:~
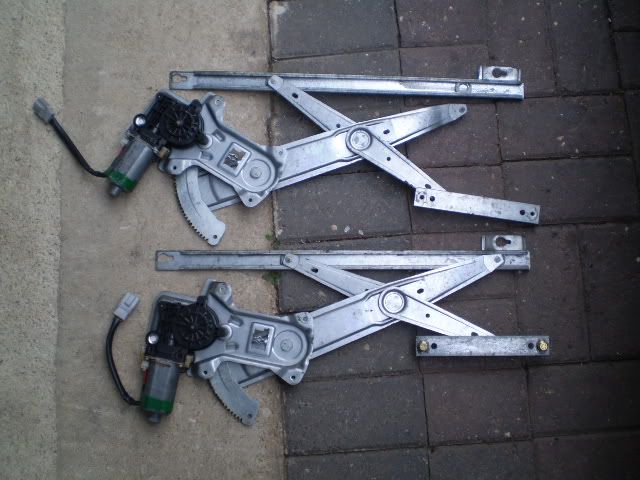
It is possible to repair these broken wheels and lifters but, less time consuming to source a good used one from the breakers yards. I had secured two of these good used replacements quite inexpensively sometime ago because I knew they would be needed one day.... Here is a broken one with a good replacement :~
It is a fiddly rather than difficult job to do on these cars, or any others which suffer in the same way. For example, some BMWs suffer and they have similar window winder mechanisms. By coincidence, there's an article in the July 2009 issue of Car Mechanics out now:
BMW 3-Series Electric Window Sort Out.
The motor and lifter assembly is held by four 10mm bolts in the door and two other 10mm bolts in the adjuster which is located in slots.
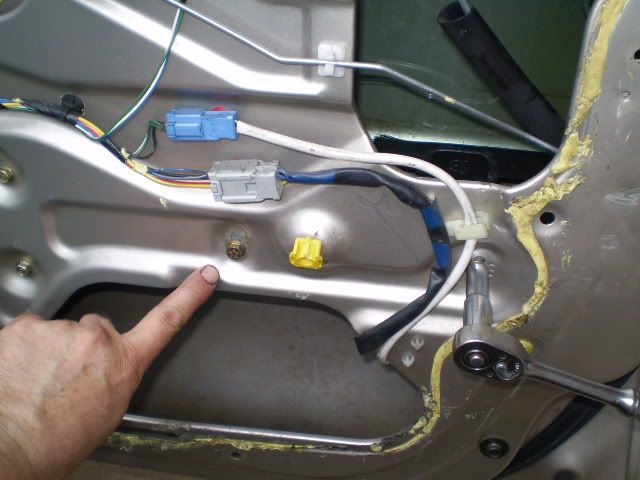
Once the assembly is back in the door, the only tricky bit is getting the window glass aligned in it's side channels. Here's how I do it. With the glass half way opened up in the window, I hold the top of the glass and push it back towards the rear of the car firmly so it's located properly in the longer rear channel. Then, I tighten up the two adjustable 10mm bolts which are located in slots to allow for this adjustment. After one or two trials, you should find the 'sweet' location and your glass then should raise and lower as smooth as slik because you have cleaned both side channels thoroughly and lubricated then with silicon spray.... These are the two 10mm bolts involved:~
Be careful replacing the door cards to connect the electric connections without stressing their wires or plugs. Easily done if you drop the heavy door card so support the cards to be on the safe side until they are back on the door. I use an old cushion.
I have now checked everything on this car and everything works as it should, even the AirCon which was nice to use as it's quite warm today. Car drives even better than I had anticipated. I shall use it for some time to get the benefits of all my work until I feel the urge for another "Fix".....
Meantime ....
..
I have repaired several of these window mechanisms over the years and when I dismantled both from the front doors, I found exactly what I had anticipated. The little plastic wheels had broken away from both 'scissors' lifting mechanisms on this car :~
Here is a particularly bad example which I rectified on another car some eyars ago. Look how twisted it is. The result of a very impatient and uncaring owner ~ note the rivets ~ signs of a bodge repair which maybe made things worse...:~
It is possible to repair these broken wheels and lifters but, less time consuming to source a good used one from the breakers yards. I had secured two of these good used replacements quite inexpensively sometime ago because I knew they would be needed one day...
. Here is a broken one with a good replacement :~It is a fiddly rather than difficult job to do on these cars, or any others which suffer in the same way. For example, some BMWs suffer and they have similar window winder mechanisms. By coincidence, there's an article in the July 2009 issue of Car Mechanics out now:
BMW 3-Series Electric Window Sort Out.
The motor and lifter assembly is held by four 10mm bolts in the door and two other 10mm bolts in the adjuster which is located in slots.
Once the assembly is back in the door, the only tricky bit is getting the window glass aligned in it's side channels. Here's how I do it. With the glass half way opened up in the window, I hold the top of the glass and push it back towards the rear of the car firmly so it's located properly in the longer rear channel. Then, I tighten up the two adjustable 10mm bolts which are located in slots to allow for this adjustment. After one or two trials, you should find the 'sweet' location and your glass then should raise and lower as smooth as slik because you have cleaned both side channels thoroughly and lubricated then with silicon spray....
These are the two 10mm bolts involved:~Be careful replacing the door cards to connect the electric connections without stressing their wires or plugs. Easily done if you drop the heavy door card so support the cards to be on the safe side until they are back on the door. I use an old cushion.
I have now checked everything on this car and everything works as it should, even the AirCon which was nice to use as it's quite warm today. Car drives even better than I had anticipated. I shall use it for some time to get the benefits of all my work until I feel the urge for another "Fix".....
Meantime ....
..
Gassing Station | Rover | Top of Page | What's New | My Stuff