Thermostat Renewal on AirCon Rover 620ti.
Discussion


Until a few days ago I have not been using my favourite Rover 620ti much at all. In fact the discs were a bit more rusty than is ideal. They will soon clean up with use.
So, I used it to tow my Cousin's stricken Saxo to the repair shop as the clutch had completely expired on her car. It was then that I noticed the temperature gauge would sometimes drop rapidly to the 'cold' lower range and be slow to recover on my 620ti. A sure sign that the Thermostat has seen better days. Maybe a bit sticky due to lack of use or simply past its useful life.
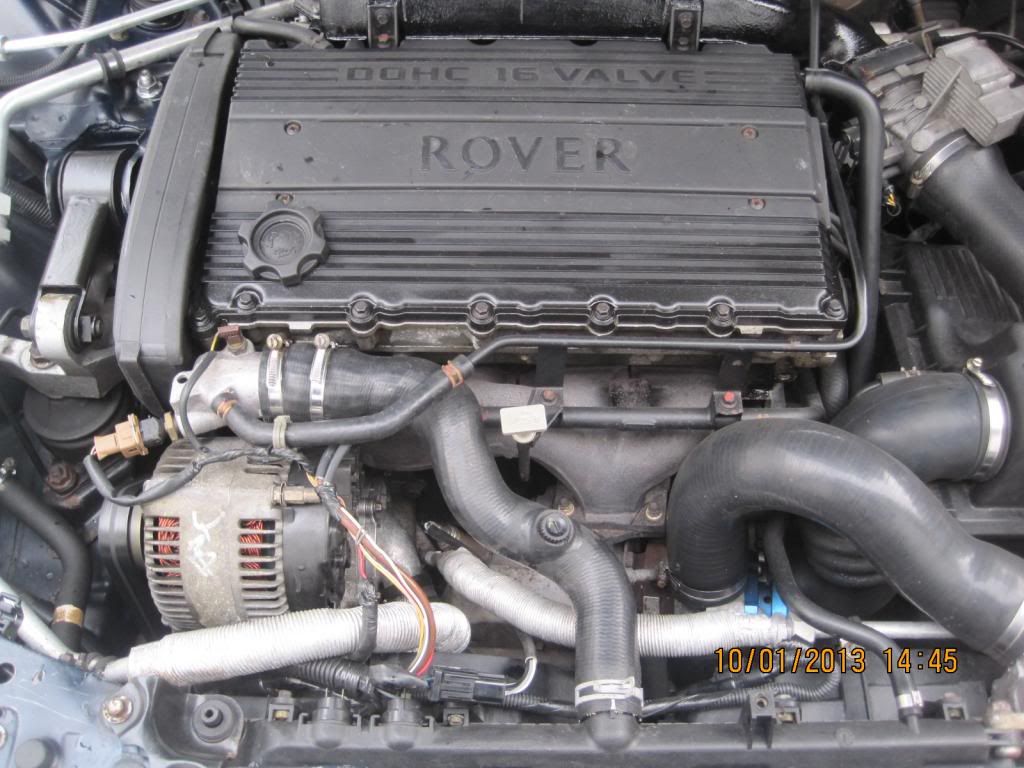
The Thermostat on the AirCon 620ti is located in the Top Radiator hose and it is more involved to change than on non-AirCon cars. It is not a difficult job but, unless one is aware it is easy to damage the hose or its little bleed valve and a new replacement is over £80!
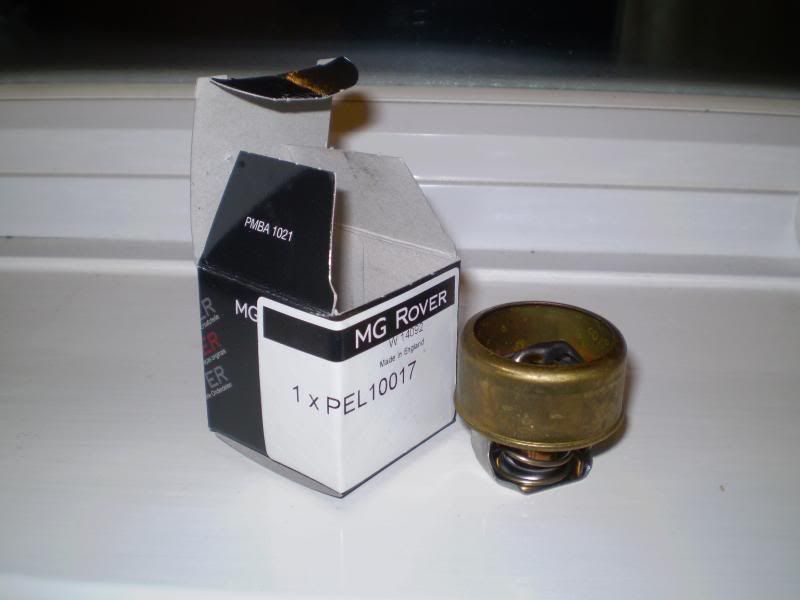
So had one spare new Thermostat still in its box :~
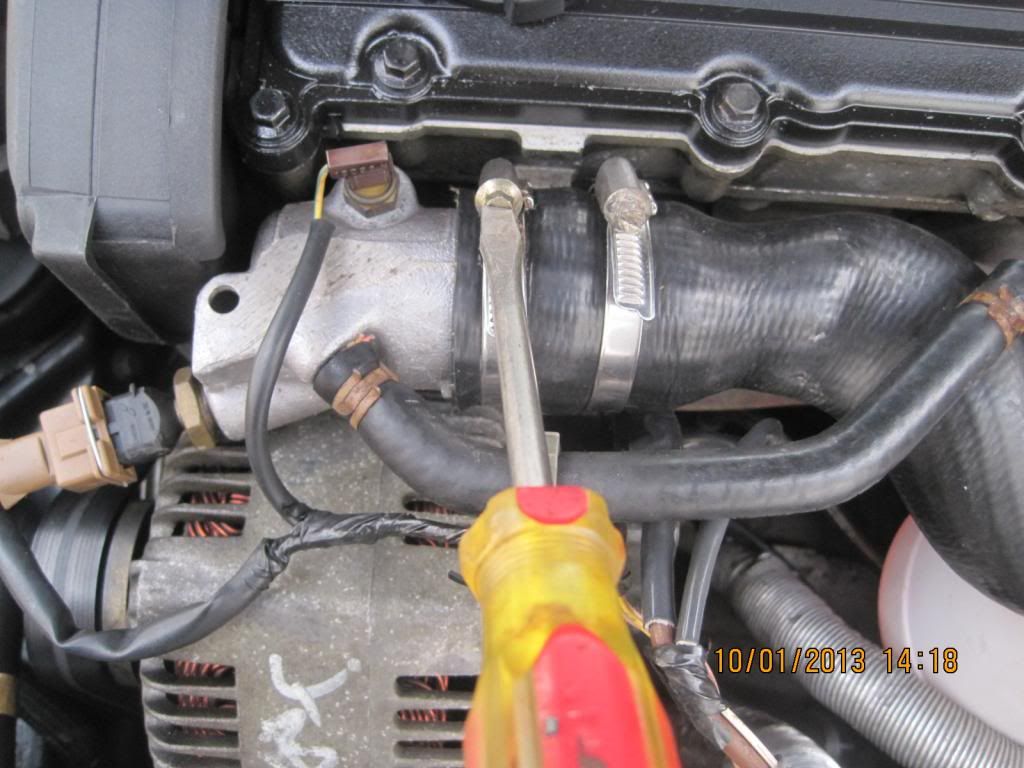
I made a start by loosening both the worm drive fasteners using a screwdriver. A 6mm socket would be better but that was not to hand:~
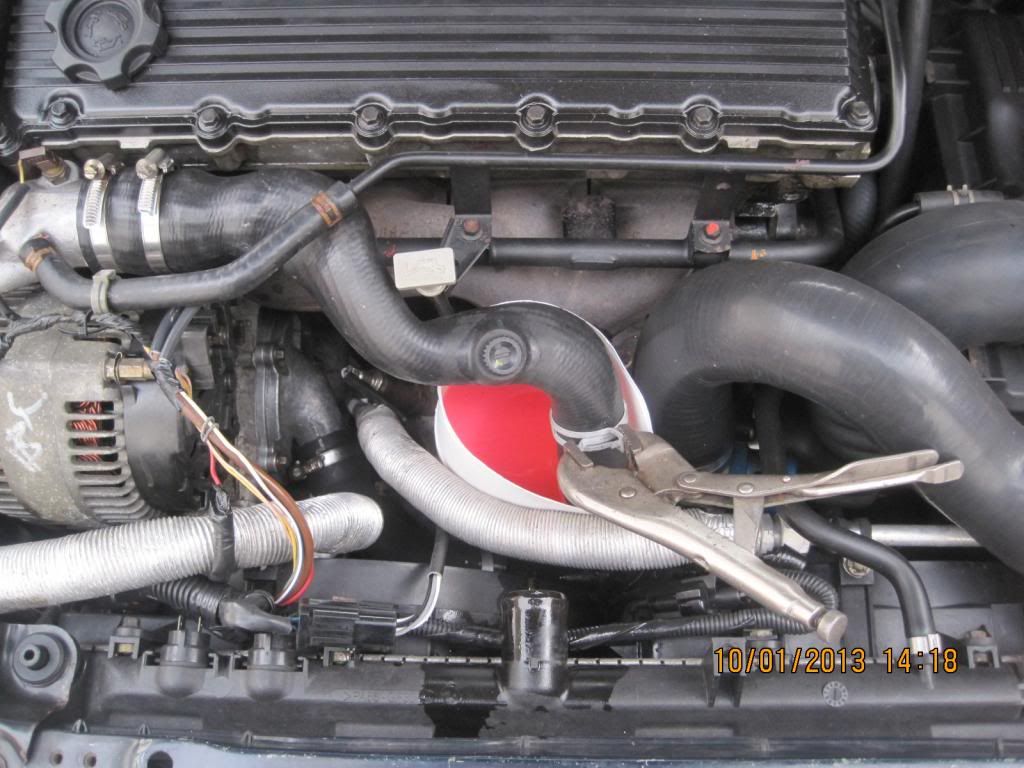
Next to disconnect the hose from the radiator. My car has the original spring hose clamp fastener and I use Mole Grips to hold open the powerful spring. As soon as I eased the hose off the Radiator I put the end into a plastic jar to collect the coolant. Yes, it's expensive stuff and anyway I do not want it going all over the place :~
The original Thermostat has been clamped firmly in the hose for about thirteen years now. With the years clamped that way and many hot-cold heat cycles during that time, the hose rubber will be permanently shaped to and firmly held around the contours of the Thermostat. Thus its removal must be done with some care to avoid cutting or splitting the expensive hose. I use a smooth screwdriver to make a start separating the hose's very tight grip on the Thermostat sides. Then use another screwdriver alongside the first and by rotating it carefully, you can work it around the whole of the old Thermostat loosening the hose's firm grip on it :~
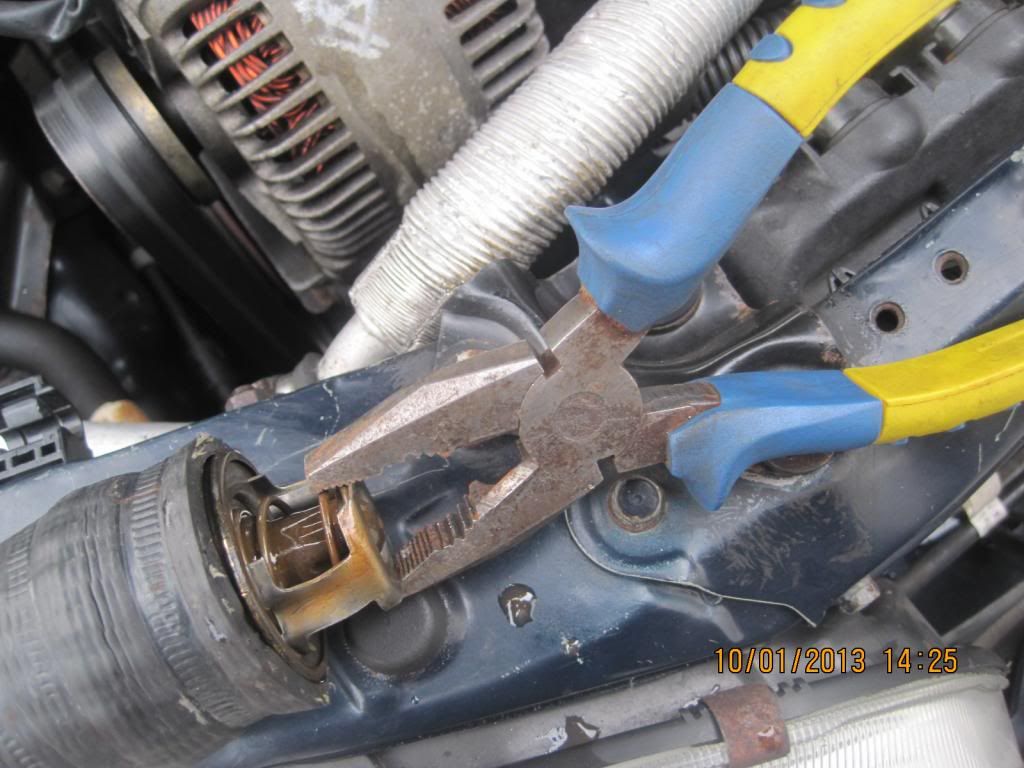
Then a strong pair of pliers the old Thermostat is pulled out :~
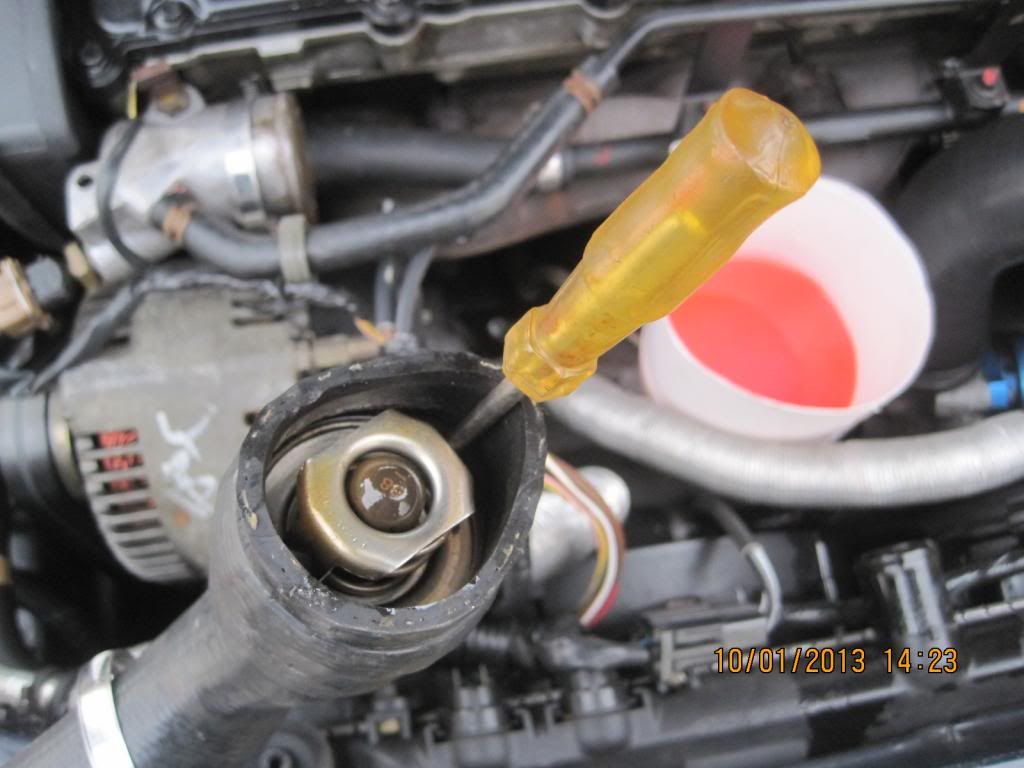
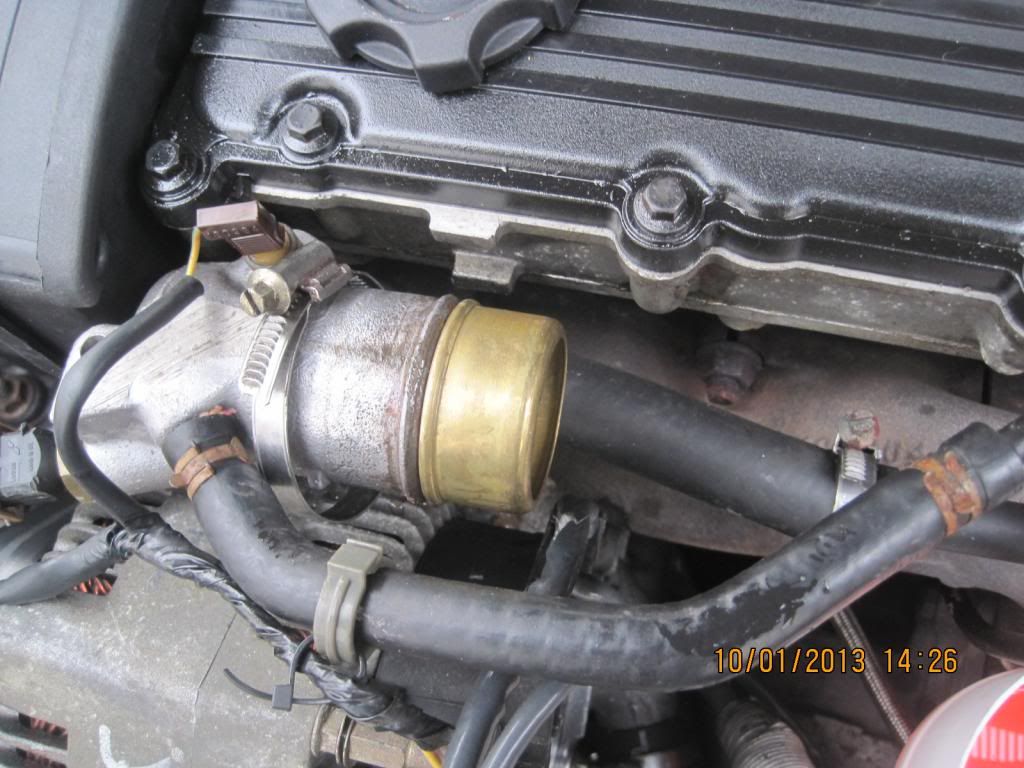
I like to place the new Thermostat in the alloy housing on the cylinder head as that way you can ensure that it is fully seated :~
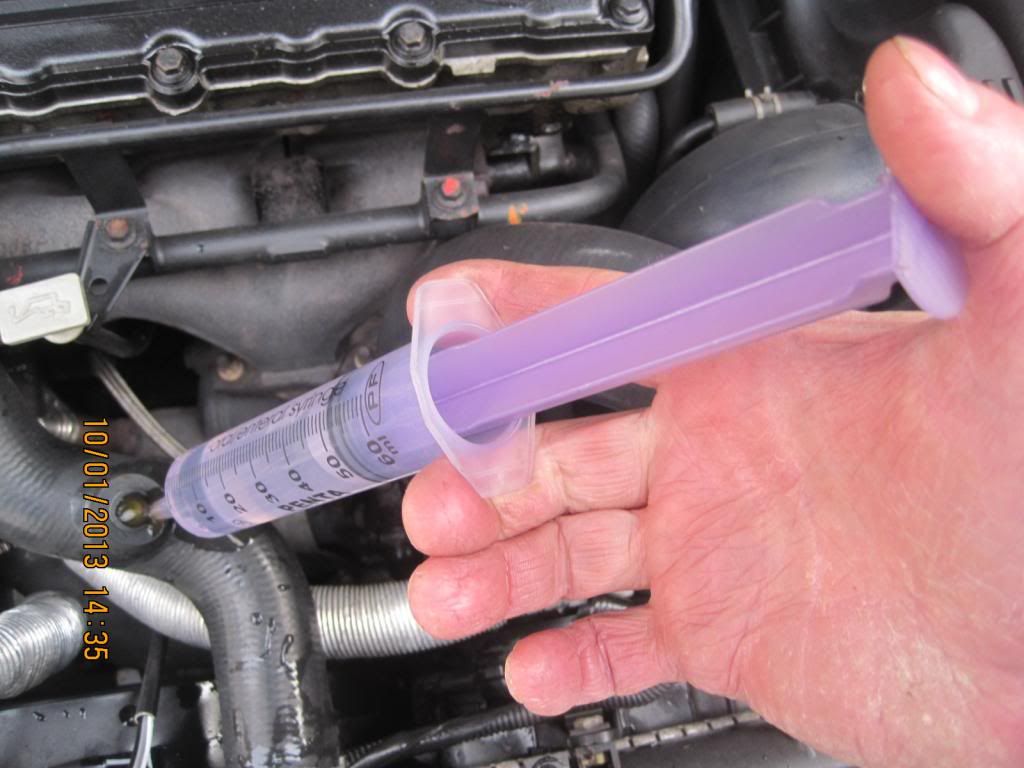
Then slide the Hose over that assembly and the other end of the radiator refitting the three fasteners. I use a large syringe to fill the top hose via the bleed valve rather than wait for the heat of the engine to open up the Thermostat. Unlike the K-Series's cooling system, the T-Series is very easy to fill and bleed. In fact you could say it almost self-bleeds :~
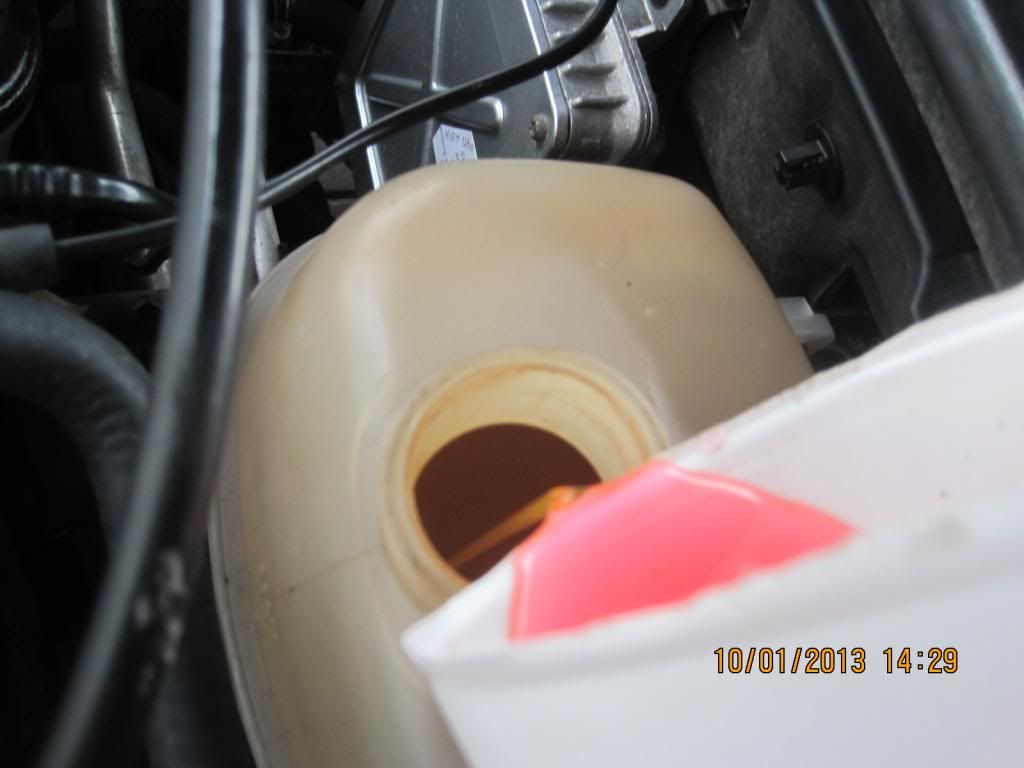
Then return the coolant I'd collected earlier to the system :~
Then a final check to see everything in place :~
I then took the car for a twelve mile round shopping trip. The heater blew nice and hot and the needle on the temperature gauge remained steady in the normal position, a shade below mid-way.
Yes, a simple job which only takes a few minutes but it is worth stressing that these hoses are now at least thirteen years old and so it's easy to get damaged. Those top hoses are not cheap to buy new and good used ones are not easy to obtain. So, wise to go easy.
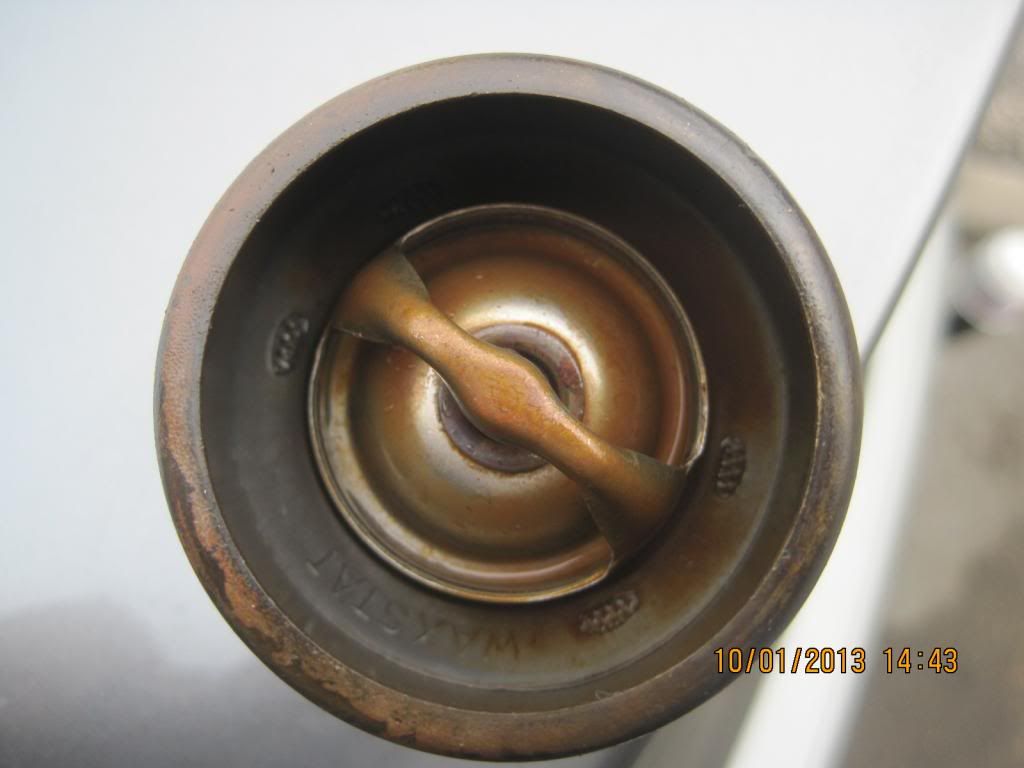
Here's the old thermostat clearly showing it fully closed. I suspect that it does open normally with the heat allowing cooler coolant to enter the engine but is slow to close so overcools the engine. That's when the needle on the temperature gauge takes a dive :~
So, I used it to tow my Cousin's stricken Saxo to the repair shop as the clutch had completely expired on her car. It was then that I noticed the temperature gauge would sometimes drop rapidly to the 'cold' lower range and be slow to recover on my 620ti. A sure sign that the Thermostat has seen better days. Maybe a bit sticky due to lack of use or simply past its useful life.
The Thermostat on the AirCon 620ti is located in the Top Radiator hose and it is more involved to change than on non-AirCon cars. It is not a difficult job but, unless one is aware it is easy to damage the hose or its little bleed valve and a new replacement is over £80!
So had one spare new Thermostat still in its box :~
I made a start by loosening both the worm drive fasteners using a screwdriver. A 6mm socket would be better but that was not to hand:~
Next to disconnect the hose from the radiator. My car has the original spring hose clamp fastener and I use Mole Grips to hold open the powerful spring. As soon as I eased the hose off the Radiator I put the end into a plastic jar to collect the coolant. Yes, it's expensive stuff and anyway I do not want it going all over the place :~
The original Thermostat has been clamped firmly in the hose for about thirteen years now. With the years clamped that way and many hot-cold heat cycles during that time, the hose rubber will be permanently shaped to and firmly held around the contours of the Thermostat. Thus its removal must be done with some care to avoid cutting or splitting the expensive hose. I use a smooth screwdriver to make a start separating the hose's very tight grip on the Thermostat sides. Then use another screwdriver alongside the first and by rotating it carefully, you can work it around the whole of the old Thermostat loosening the hose's firm grip on it :~
Then a strong pair of pliers the old Thermostat is pulled out :~
I like to place the new Thermostat in the alloy housing on the cylinder head as that way you can ensure that it is fully seated :~
Then slide the Hose over that assembly and the other end of the radiator refitting the three fasteners. I use a large syringe to fill the top hose via the bleed valve rather than wait for the heat of the engine to open up the Thermostat. Unlike the K-Series's cooling system, the T-Series is very easy to fill and bleed. In fact you could say it almost self-bleeds :~
Then return the coolant I'd collected earlier to the system :~
Then a final check to see everything in place :~
I then took the car for a twelve mile round shopping trip. The heater blew nice and hot and the needle on the temperature gauge remained steady in the normal position, a shade below mid-way.
Yes, a simple job which only takes a few minutes but it is worth stressing that these hoses are now at least thirteen years old and so it's easy to get damaged. Those top hoses are not cheap to buy new and good used ones are not easy to obtain. So, wise to go easy.
Here's the old thermostat clearly showing it fully closed. I suspect that it does open normally with the heat allowing cooler coolant to enter the engine but is slow to close so overcools the engine. That's when the needle on the temperature gauge takes a dive :~
Gassing Station | Rover | Top of Page | What's New | My Stuff