Jessop's Saxo VTS -
Discussion


Right, thought i'd do a quick thread with some pics of my little toy to get my through the summer so i have something to enjoy car shows with rather than being envious at everybody elses car, while my AX* is in bits in the garage back home... :wall: anic:
anic:
[I]
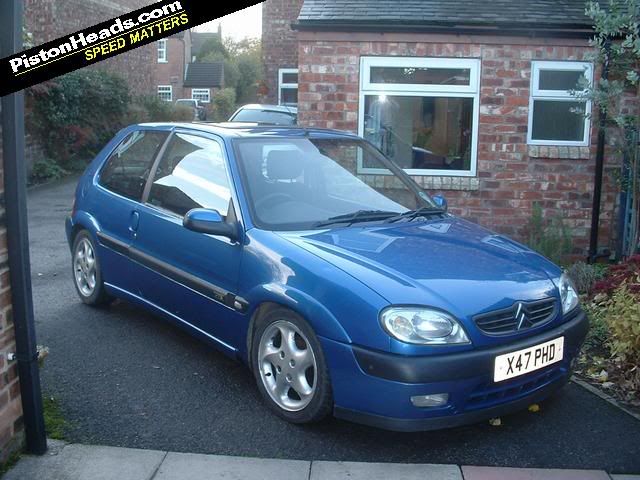
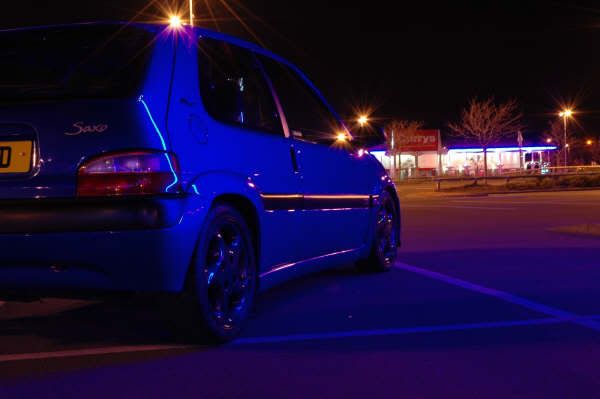
Seen a Phase 2 Posi blue Saxo VTS for sale on Pistonheads, after a breif discussion with a friend and deciding not to purchase a 205 Mi16 due to the potential for it to go wrong, and ive already got loads of spares for the saxo if that did go wrong at some point.
It was standard, has been lowered 50mm or so i would guess, standard dampers and unknown lowering springs. One of the exhaust hangers wants replacing as its snapped off the underside of the car and probably wants new top mounts/dampers/bushes for my own piece of mind however i shall investigate these further when i start cleaning the underside of the car properly ready for summer showtime!
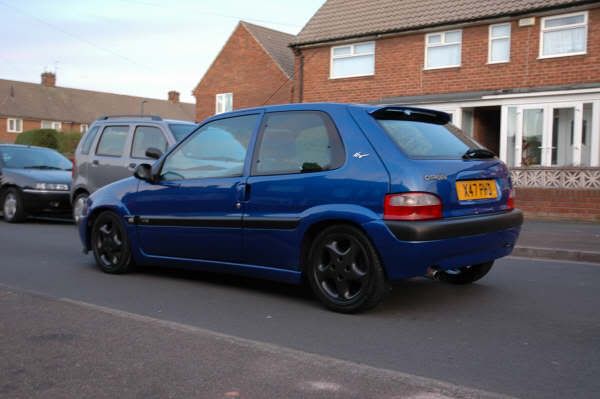
Here's how it looked in the advert.
Collected it on Friday night 2 weeks ago (13th!!). It was an hour and 20 minutes back from the guys house near York to mine, after leaving his place the low fuel warning light came on, and i know there really is not many places to stop for fuel at 11pm at night en route!! The 1 place i did know of on the A19 was on the other side, and i missed the bloody U turn.. :wall:anic: d'oh!!
Managed to get home though plodding away.. absolutley amazed how it got there. Must have been a sign that its new owner was going to treat it good over the coming months! :homme::afro:
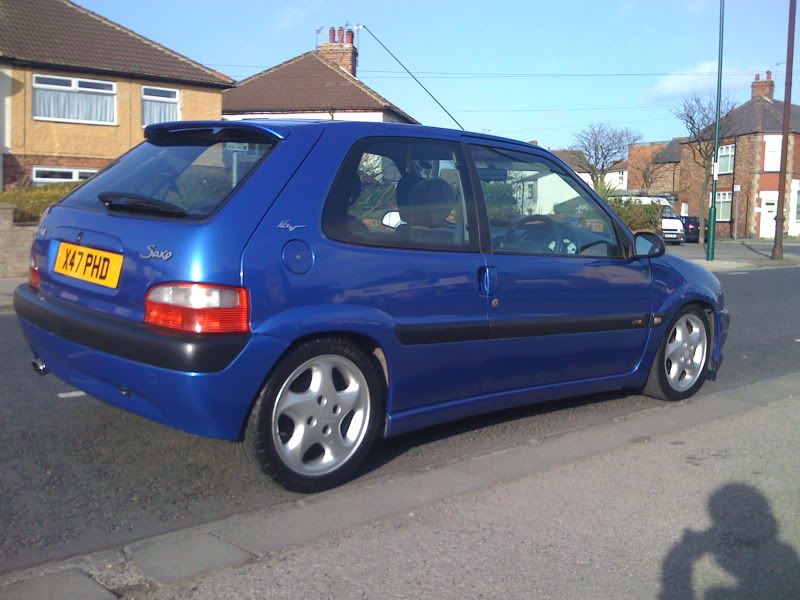
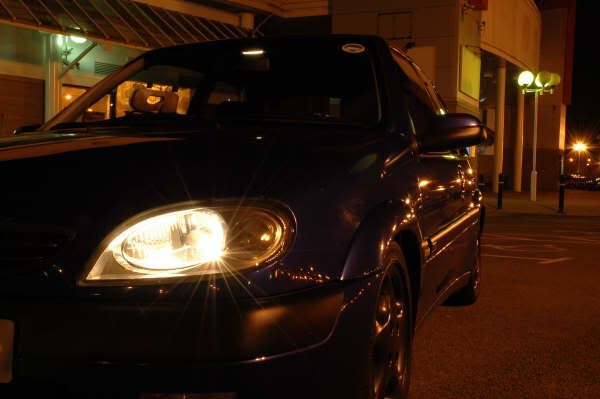
Spent the weekend cleaning & polishing it.. Came out really well to be honest.
Some pics:

Havent done anything to it yet, still sitting tucked away in the garage keeping out of the cold & rain (although weather has been awesome this week!!).
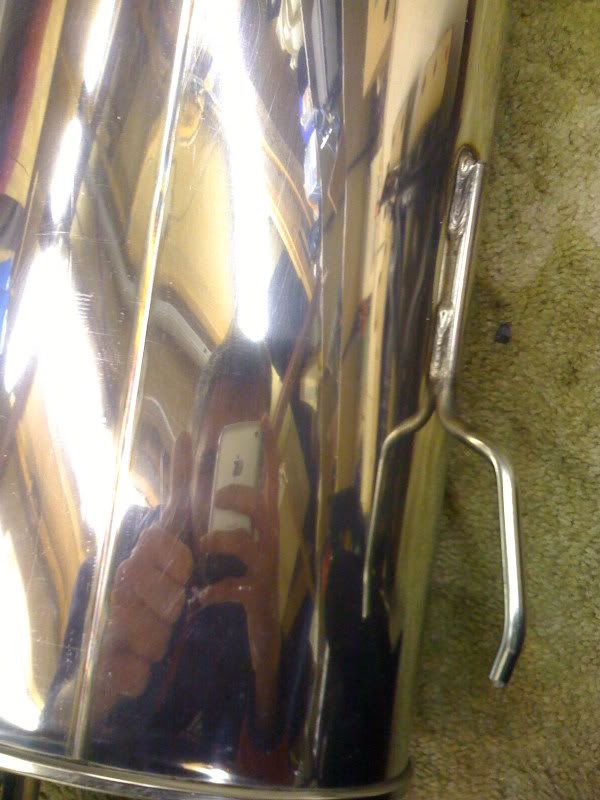
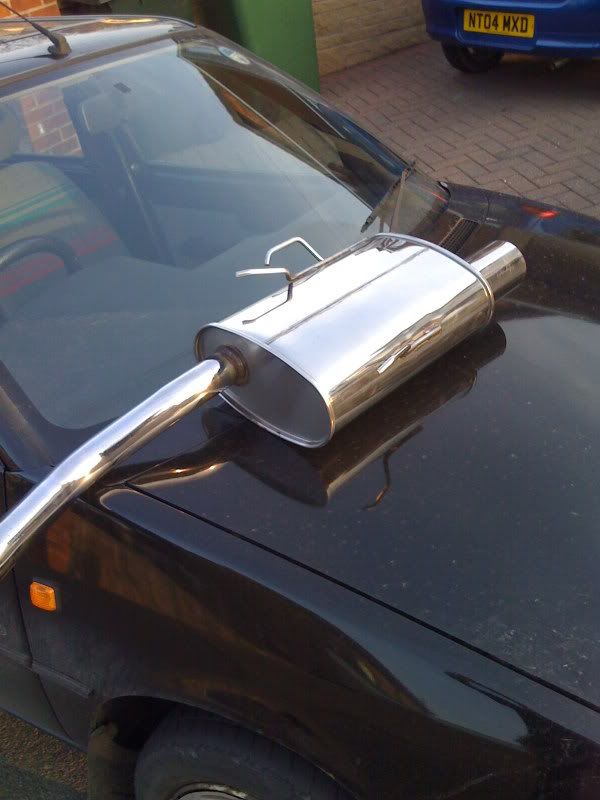
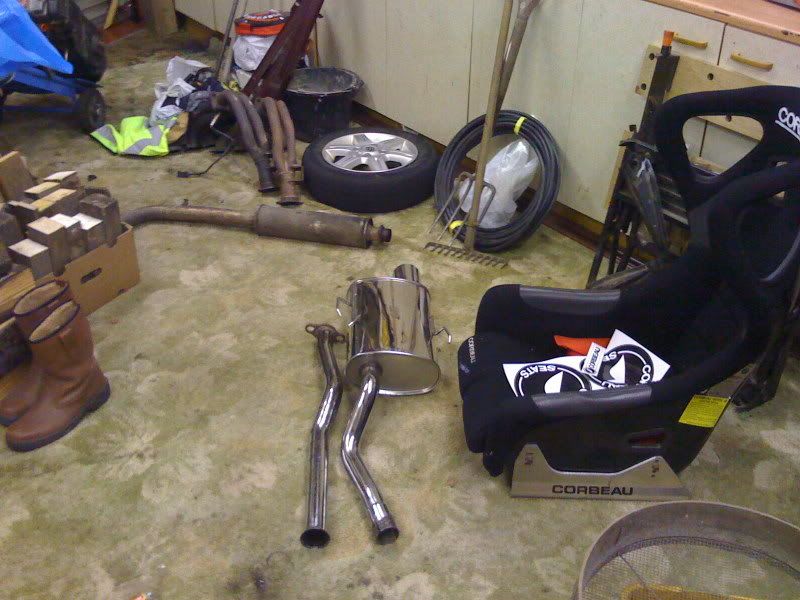
Picked up a full stainless Magnex exhaust & de-cat this morning though.
Decided to spend the day polishing it. Only finished about 5 minutes before i started writing this too, so i guess a full day lol.. :homme:
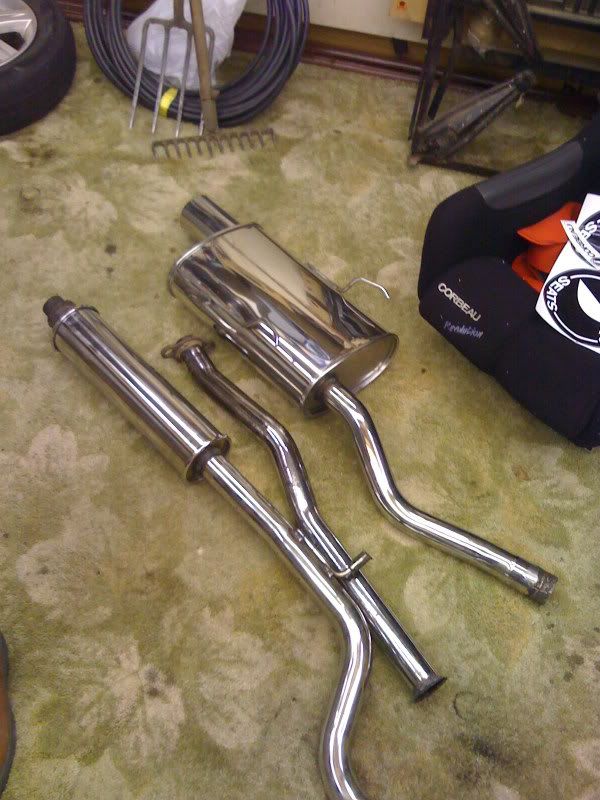
Here's some pics of the finished product... although i still may go over the pipes with some 1200 wet & dry just to get any slightly corrosion off that i couldnt buff out no matter how hard i tried!
Pics:
Backbox reflection ASW..
Time to crack on with the middle section!!..
Finished article...
More to come though.
Plans are to maybe invest in a decent suspension kit if i can find one cheap enough, Some 266 or 283mm brakes and hopefully Bilsteins & faulkners if possible although it does look good at the current height it sits!
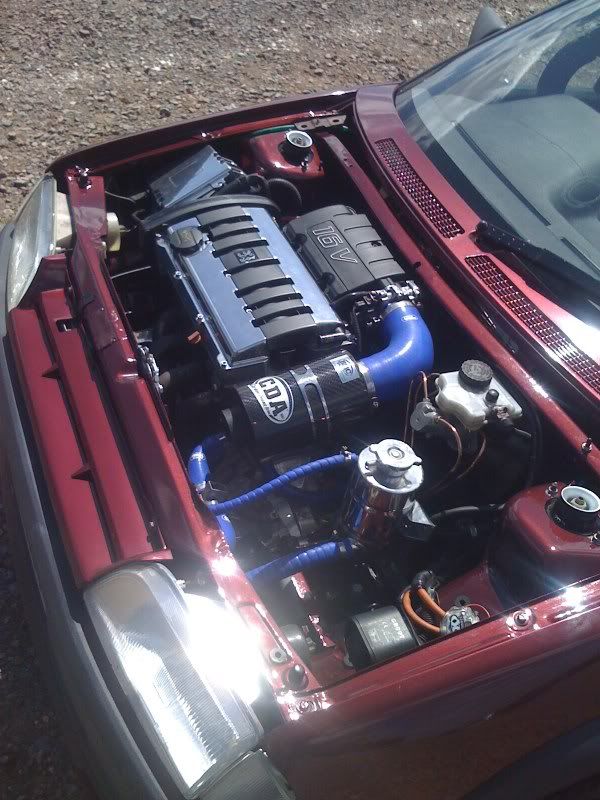
Take the engine bay to bits and tidy that up, maybe like i did with my old burgendy AX VTS. Time is free to me, and for a couple of weeks to take it apart polish bits up, get things powder coated (free for me) it will definatley be worthwhile. Considering overall it would contribute selling the car for more than what i bought it for in a years time (through elbow grease!!) and definatley put a smile on my face when i open the bonnet / pull up to various car shows through 2009.
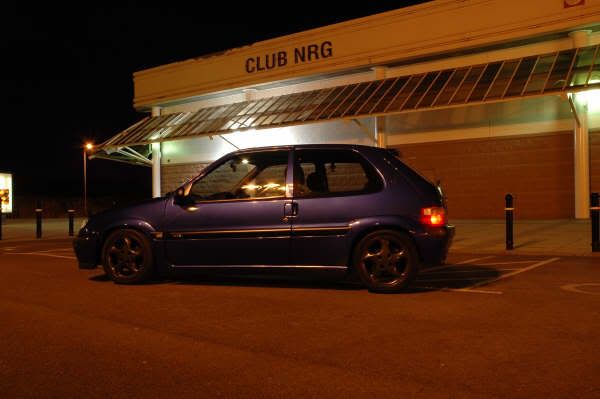
See pic of my old car:
Thats it for now, pretty basic stuff really. Will be sorting the underside of the car, painting struts wishbones rear axle trailing arms calipers etc over the next few weeks so watch this space.
GOAL...
Mint posi blue phase 2 Saxo VTS, Subtle looking. Slightly lowered. Good suspension/brakes and anthracite vts wheels, while enjoying what i hope will be an excellent summer!
Hope you enjoy the read so far =]
anic:[I]
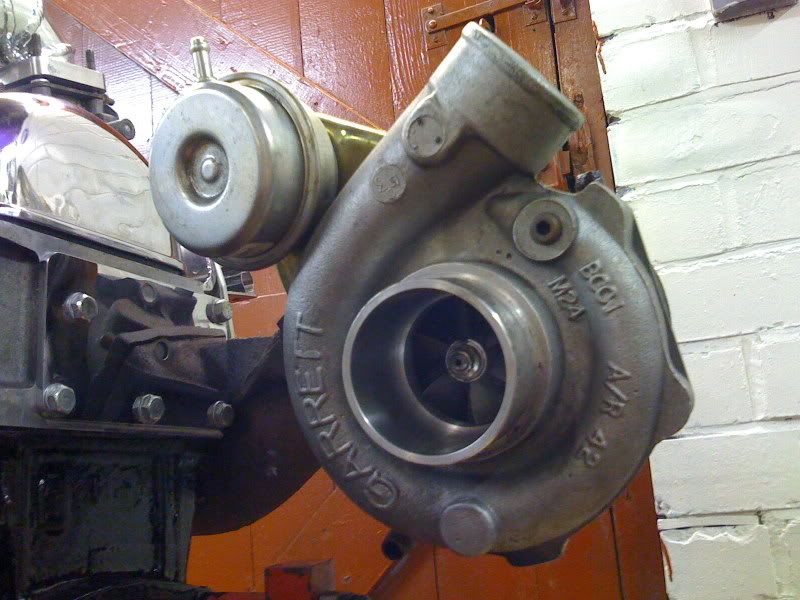
- If youve not already seen my other thread, Im currently building a 16v AX Sport Turbo, aiming for 300bhp or so but that wont be ready untill next summer due to amount of parts & work left to do on it. Will be takin gmy time and doing it right instead of cutting corners and having a half arsed car for this summer![/I]
Seen a Phase 2 Posi blue Saxo VTS for sale on Pistonheads, after a breif discussion with a friend and deciding not to purchase a 205 Mi16 due to the potential for it to go wrong, and ive already got loads of spares for the saxo if that did go wrong at some point.
It was standard, has been lowered 50mm or so i would guess, standard dampers and unknown lowering springs. One of the exhaust hangers wants replacing as its snapped off the underside of the car and probably wants new top mounts/dampers/bushes for my own piece of mind however i shall investigate these further when i start cleaning the underside of the car properly ready for summer showtime!
Here's how it looked in the advert.
Collected it on Friday night 2 weeks ago (13th!!). It was an hour and 20 minutes back from the guys house near York to mine, after leaving his place the low fuel warning light came on, and i know there really is not many places to stop for fuel at 11pm at night en route!! The 1 place i did know of on the A19 was on the other side, and i missed the bloody U turn.. :wall:
anic: d'oh!!Managed to get home though plodding away.. absolutley amazed how it got there. Must have been a sign that its new owner was going to treat it good over the coming months! :homme::afro:
Spent the weekend cleaning & polishing it.. Came out really well to be honest.
Some pics:
Havent done anything to it yet, still sitting tucked away in the garage keeping out of the cold & rain (although weather has been awesome this week!!).
Picked up a full stainless Magnex exhaust & de-cat this morning though.
Decided to spend the day polishing it. Only finished about 5 minutes before i started writing this too, so i guess a full day lol.. :homme:
Here's some pics of the finished product... although i still may go over the pipes with some 1200 wet & dry just to get any slightly corrosion off that i couldnt buff out no matter how hard i tried!
Pics:
Backbox reflection ASW..
Time to crack on with the middle section!!..
Finished article...
More to come though.
Plans are to maybe invest in a decent suspension kit if i can find one cheap enough, Some 266 or 283mm brakes and hopefully Bilsteins & faulkners if possible although it does look good at the current height it sits!
Take the engine bay to bits and tidy that up, maybe like i did with my old burgendy AX VTS. Time is free to me, and for a couple of weeks to take it apart polish bits up, get things powder coated (free for me) it will definatley be worthwhile. Considering overall it would contribute selling the car for more than what i bought it for in a years time (through elbow grease!!) and definatley put a smile on my face when i open the bonnet / pull up to various car shows through 2009.
See pic of my old car:
Thats it for now, pretty basic stuff really. Will be sorting the underside of the car, painting struts wishbones rear axle trailing arms calipers etc over the next few weeks so watch this space.
GOAL...
Mint posi blue phase 2 Saxo VTS, Subtle looking. Slightly lowered. Good suspension/brakes and anthracite vts wheels, while enjoying what i hope will be an excellent summer!
Hope you enjoy the read so far =]
deviant said:
Polished exhaust 48mm = BHP
Im not sure whether to take that as a sarcastic comment? but i will anyway.The magnex is as far as i know the subtlest & quietest of aftermarket exhaust systems for the saxo, and the restrictive standard system wants replacing anyway.
Thanks for your criticism though, what would you have done had this been your car ?
Edited by Jessop on Monday 23 March 07:26
Jessop said:
deviant said:
Polished exhaust 48mm = BHP
Im not sure whether to take that as a sarcastic comment? but i will anyway.Let me guess, because its got a saxo badge on the back its a BAD car, and any saxo owner must not polish, or fit any peformance parts to it?
Barryboys member etc?
The magnex is as far as i know the subtlest & quietest of aftermarket exhaust systems for the saxo, and the restrictive standard system wants replacing anyway.
Thanks for your constructive criticism though, what would you have done had this been your car ?
Nice car you've got, you don't seem intent on ruining it with silly wings and halfords bodykits etc which can only be a good thing. Enjoy it, they're cracking fun.
Cheers Stu,
Probably something ive not picked up on yet.
Regarding halfords bits and pieces, most definatley not. I intend on leaving the exterior standard, the interior renewed as the gear knob & gaiter are worn for example, they are being replaced with standard parts. Subtle shiny bits under the engine bay, bigger more efficient brakes (the standard stuff isnt very effective compared to what im used to) and a different exhaust system to give it a bit of subtle rumble and put a smile on ones face on track. Possibly a suitable quickshift and bilstein suspension kit too, along with some poly bushes and renew the strut bearings & strut tops to give it a refreshed handling feeling, thats all i plan on doing with it. And oh, enjoy driving it!
Randomman > Yeah they definatley are a fun chuckable little car
Edited by Jessop on Monday 23 March 07:53
UPDATE.. 27/03/2009
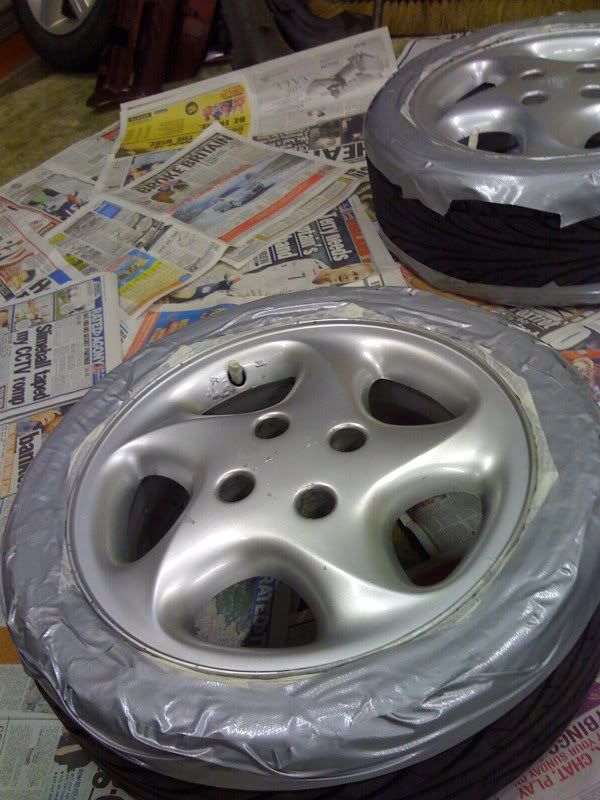
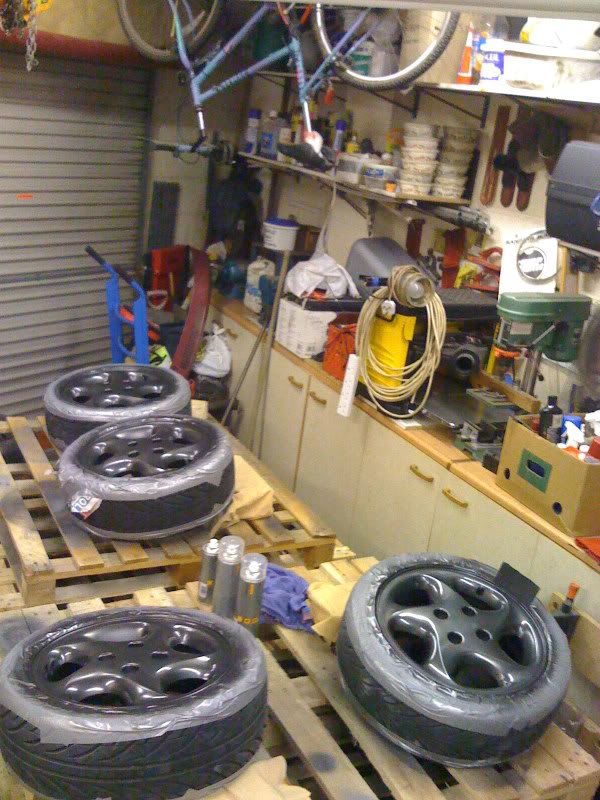
Spent this week doing my wheels as i said i was planning to do originally. They did need doing, even if the pictures in my initial post in this thread didnt look like it.
Spent the day degreasing them and masking up ready to do the relevent prep. Stocked up on bits at halfords.
Decided on Ford grapphite grey metallic paint.
Spent half the week prepping them after work.. Ill let the pictures do most of the talking.
Masked up..
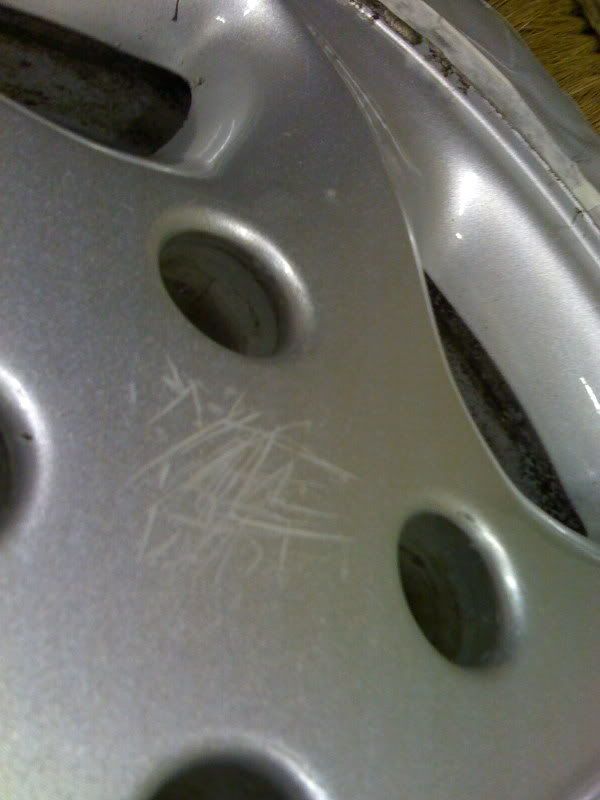
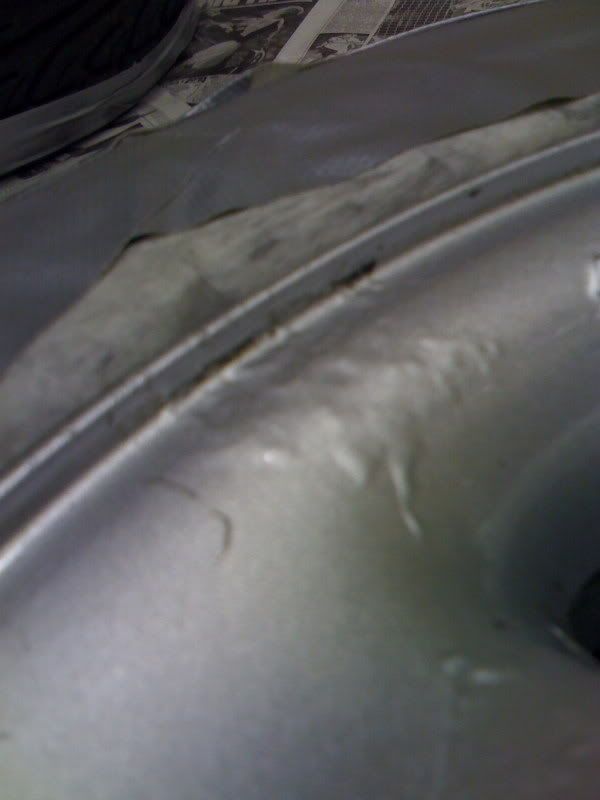
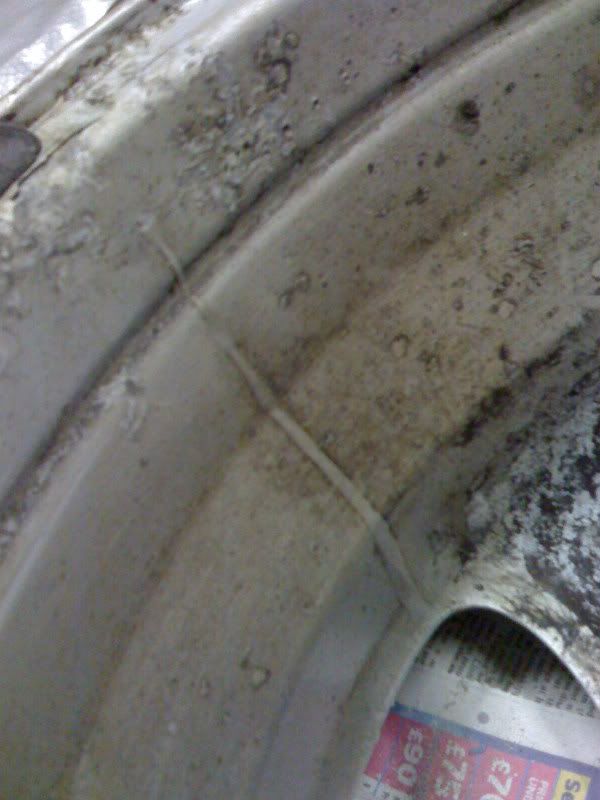
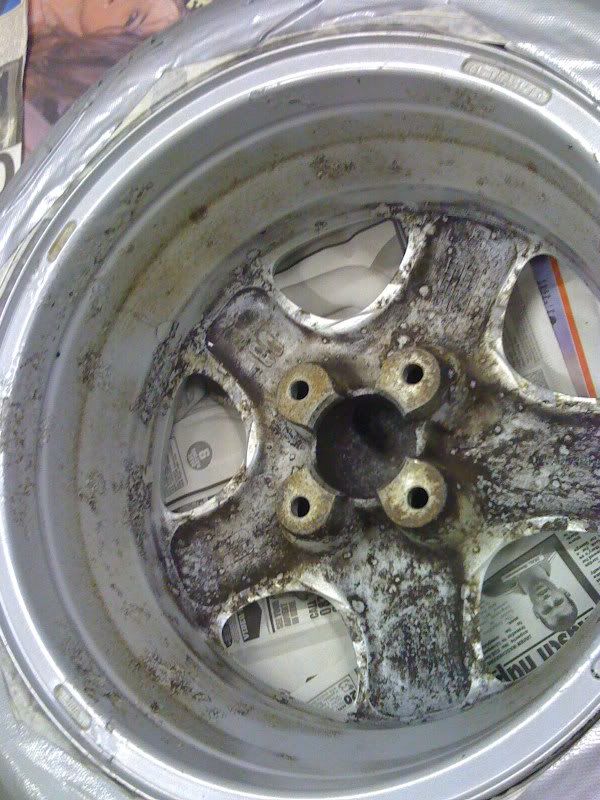
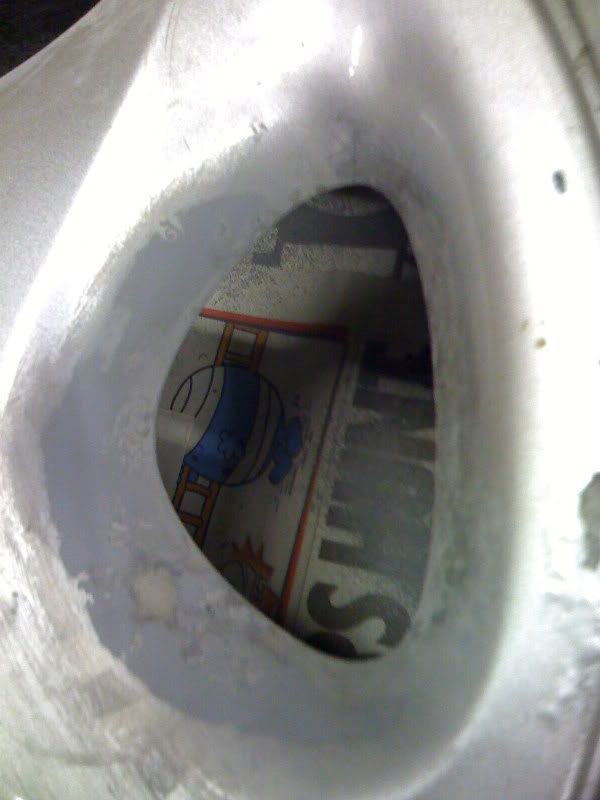
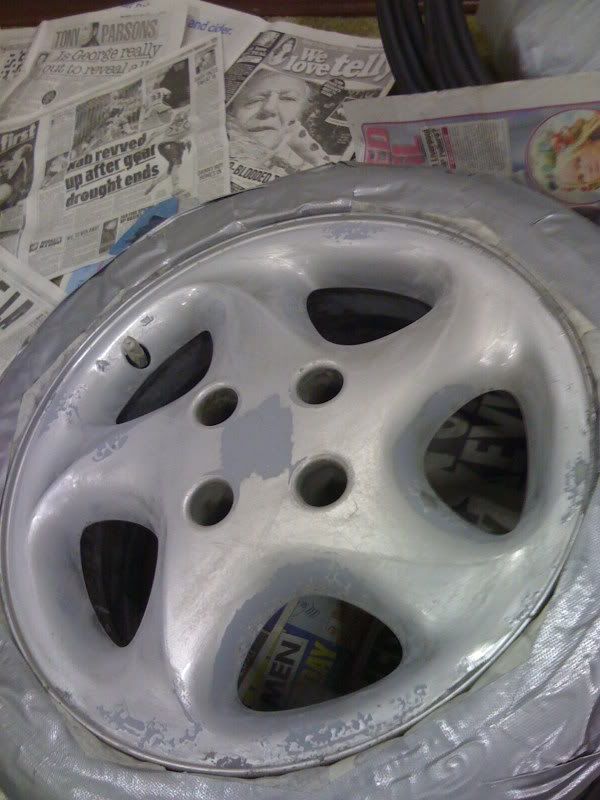
Here's how the were. Seems as though they have had a hard life by a previous owner just kerbing them and laying them face down!! Shocking really!
Prep begins..
Through the grades.
100 / 240 / 400 / 800.. had some 1200 but didnt feel the need to go that far. Im not an expert painter so i believe it wouldnt make much if any difference to the finished product.
My home for the last few days..
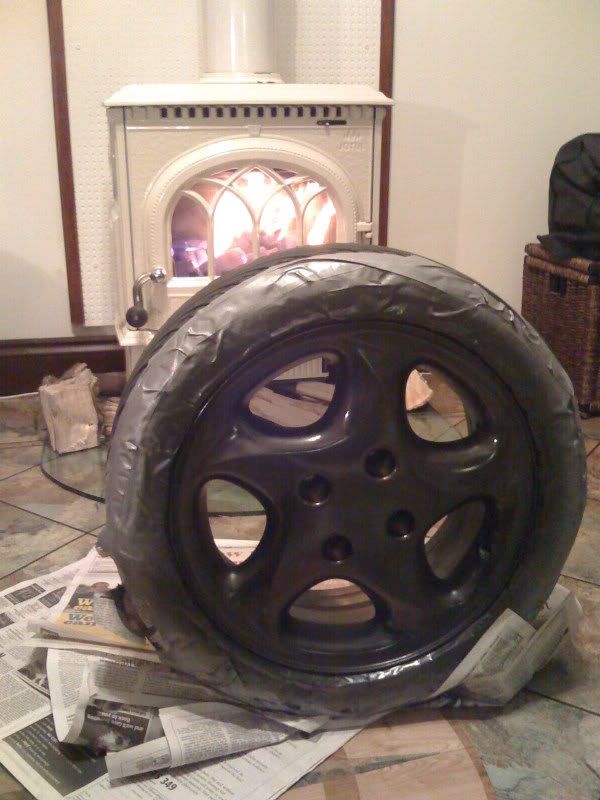
Painting..
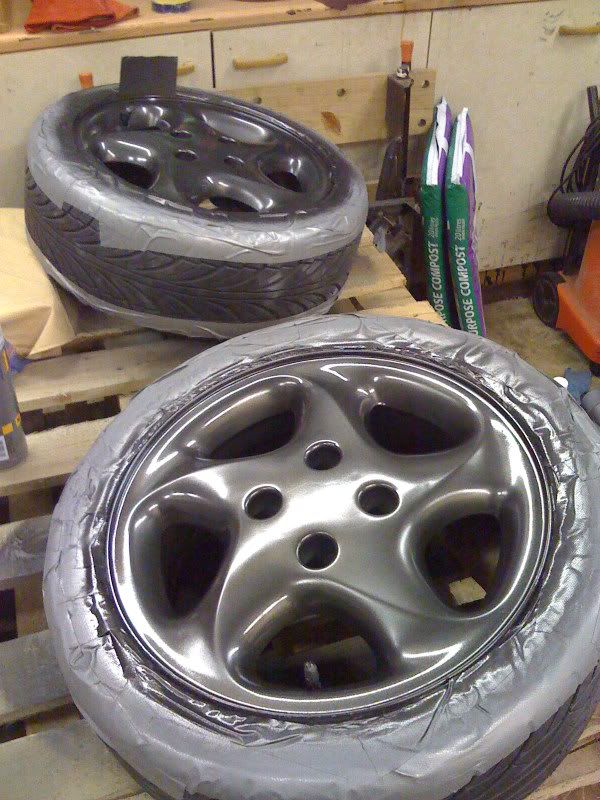
Unfortunatley i didnt take any 'in primer' pictures, although heres how they looked after a 3rd coat of the ford grapphite metallic grey..
Lacquer is a complete nightmare.. I did unfortunatley get a run on two of the wheels where i was a bit too over-enthusiastic, however im leaving one of the wheels to harden over the next few days so i can redo that with some wet 1200 grit paper (it will come in handy after all!!).
Left to bake infront of the fire at the moment..
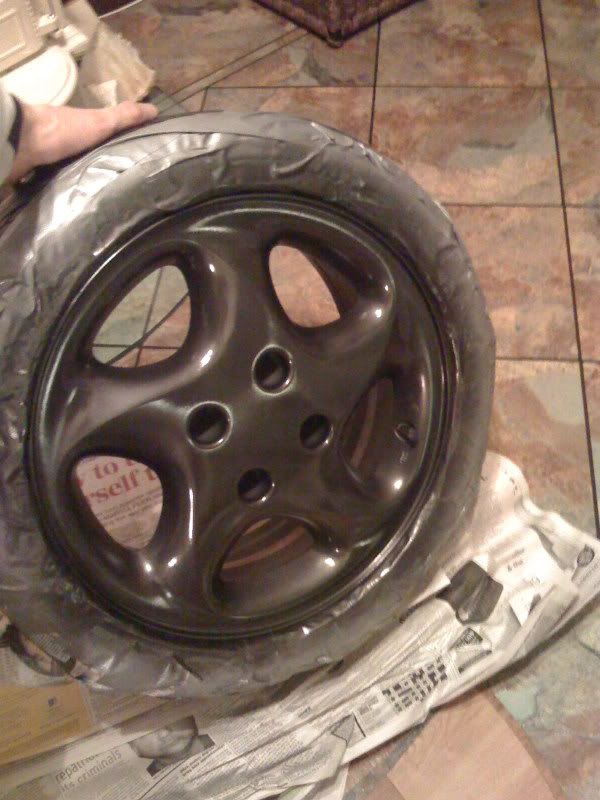
I hope you will agree they look great. Remember i am far from a professional, however my dad now wants me to do the wheels on his 406 haha. Practice makes perfect though! I did enjoy doing them, The more i used the grit paper the better i got with it. Doing a friends alternator this weekend as a favour before i crack on the engine bay on my car. Good practice before hand!
Have to love new paint though. Looks great, im looking forward to seeing the engine bay looking sparkly with a fresh coat of Posi Blue !
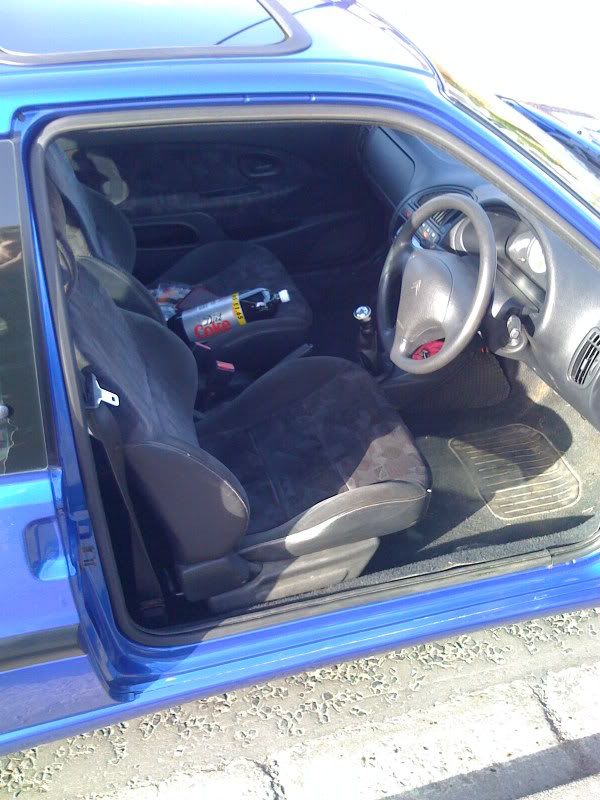
Putting paint aside breifly though, ive also purchased a new leather gear gaiter too as the one on the car at the moment is a bit too worn for my liking. New gear knob to come too as thats also worn. Standard items, no halfords chavvy glowing neon things here, Just planning on tidying it up so it puts a smile on my face every time i get in, otherwise i'll only end up picking faults with it otherwise, haha.
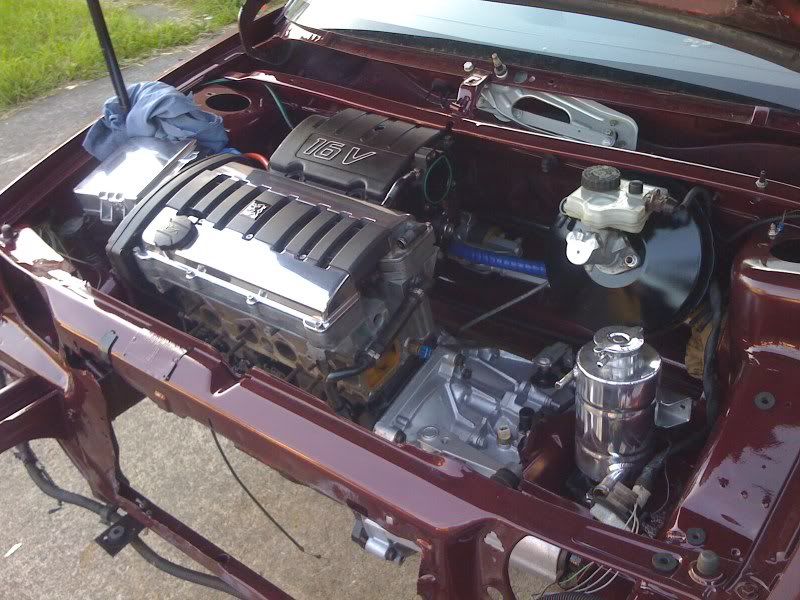
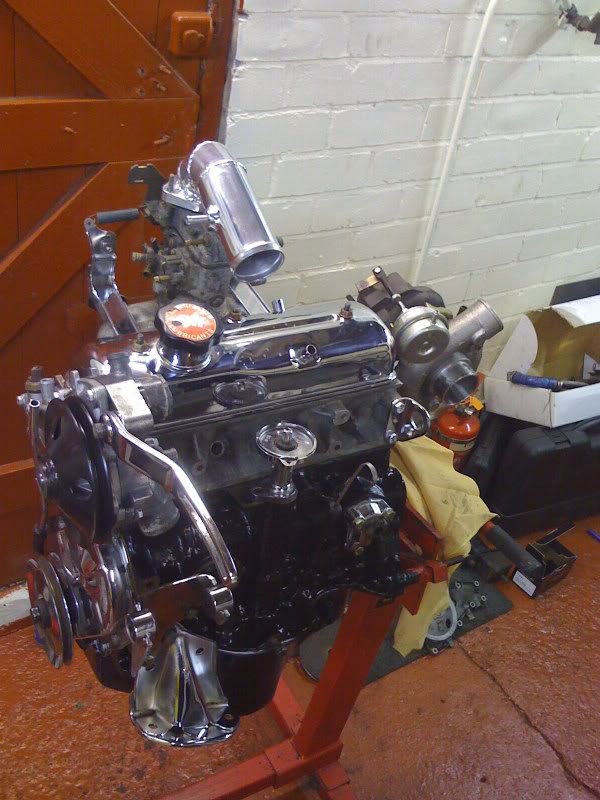
Watch this space for more. I'll get some pics up of the car with the wheels on next week, im in no rush as ive got a renault 5 turbo engine on a stand with a car in bits at the moment though so untill thats done i cant do anything.
Here's a pic of engine weve been working on over the last fortnight too.
Anyway.. more to come , watch this space.
Spent this week doing my wheels as i said i was planning to do originally. They did need doing, even if the pictures in my initial post in this thread didnt look like it.
Spent the day degreasing them and masking up ready to do the relevent prep. Stocked up on bits at halfords.
Decided on Ford grapphite grey metallic paint.
Spent half the week prepping them after work.. Ill let the pictures do most of the talking.
Masked up..
Here's how the were. Seems as though they have had a hard life by a previous owner just kerbing them and laying them face down!! Shocking really!
Prep begins..
Through the grades.
100 / 240 / 400 / 800.. had some 1200 but didnt feel the need to go that far. Im not an expert painter so i believe it wouldnt make much if any difference to the finished product.
My home for the last few days..
Painting..
Unfortunatley i didnt take any 'in primer' pictures, although heres how they looked after a 3rd coat of the ford grapphite metallic grey..
Lacquer is a complete nightmare.. I did unfortunatley get a run on two of the wheels where i was a bit too over-enthusiastic, however im leaving one of the wheels to harden over the next few days so i can redo that with some wet 1200 grit paper (it will come in handy after all!!).
Left to bake infront of the fire at the moment..
I hope you will agree they look great. Remember i am far from a professional, however my dad now wants me to do the wheels on his 406 haha. Practice makes perfect though! I did enjoy doing them, The more i used the grit paper the better i got with it. Doing a friends alternator this weekend as a favour before i crack on the engine bay on my car. Good practice before hand!
Have to love new paint though. Looks great, im looking forward to seeing the engine bay looking sparkly with a fresh coat of Posi Blue !
Putting paint aside breifly though, ive also purchased a new leather gear gaiter too as the one on the car at the moment is a bit too worn for my liking. New gear knob to come too as thats also worn. Standard items, no halfords chavvy glowing neon things here, Just planning on tidying it up so it puts a smile on my face every time i get in, otherwise i'll only end up picking faults with it otherwise, haha.
Watch this space for more. I'll get some pics up of the car with the wheels on next week, im in no rush as ive got a renault 5 turbo engine on a stand with a car in bits at the moment though so untill thats done i cant do anything.
Here's a pic of engine weve been working on over the last fortnight too.
Anyway.. more to come , watch this space.
Jessop said:
deviant said:
Polished exhaust 48mm = BHP
Im not sure whether to take that as a sarcastic comment? but i will anyway.The magnex is as far as i know the subtlest & quietest of aftermarket exhaust systems for the saxo, and the restrictive standard system wants replacing anyway.
Thanks for your criticism though, what would you have done had this been your car ?
Edited by Jessop on Monday 23 March 07:26
I actually quite like these little cars...could they even be considered a more modern 205 GTI?!?!
Jessop said:
Yeah sounds like whoever was doing the astra clearly didnt know what he was talking about lol.
He most definitely didn't know what he was doing, and the ironic thing was his name was TopTune.Very nice looking saxo there, a nice set of coilovers whilst keeping at its current height would be good I reckon.
Very good job of the wheels aswell. I've got some old wheels i fancy refurbing, Any tips on getting dents/scuffing/kerbing out??
Thom
I'd love to fit some coilovers, only id be looking at something like AST coilovers or something similar which will set me back more than i'd like, + rear dampers, top mounts etc..
Planning on doing this on a budget as ive got a turbo AX to build, this is just a fun car to enjoy driving for the rest of the year. Will be up for sale so all this hard work may hopefully pay off come for sale time. =]
Anyway in terms of advice for doing wheels,
Just work your way through the grades! If they have corrosion bubbles etc like in the above pictures, i'd reccomend starting at 100 or so grade grit paper, dry... and just working up through the grades to 800.
Regarding curb marks, You could try some quicksteel type chemical metal compound and lay that into any bad curb scuss on the outer lip and sand it down, although im not sure how effective this would be long term. Obviously welding them would be the most ideal solution but your talking about a professional job there which if your on a budget, and you just want it looking nice then thats not really an option.
You could use some 60 grit paper and try to level the lip off like what i did as best you can to get it flat. It wont be noticeable unless people are specifically looking to pick faults. But you wouldnt be doing a DIY wheel job if you were building a car for a concourse competition would you?
Just get stuck in mate. Takes a lot of patience and i had to keep stopping now and again as my fingers were hurting. Ive got two blisters from doing these wheels, and ive got an alternator and a set of rocker covers to do yet!
Good luck though, there are some good posts on various forums explaining exactly how to go about it. If they are bad you have nothing to loose i guess.
Oh and another think, be VERY careful with lacquer! It is exceptionally easy to get runs. Just build up very light layers every 20 minutes or so as i found this to be the most effective way.
Good luck!
I used to sell Citroens around when your VTS was new. I had a ton of VTRs but never a VTS as my demo, but I wanted one for ages at the time! Always hankered after one in Citron yellow (the pale yellow, NOT Mango) and I think there were a couple built in that colour as it was non-standard, or like the darker met blue. One guy bought one same colour as yours and body-colour painted all the black bits, looked pretty good. They handle great. Fond memories
very nice motor there, mate, i had a phase 1 vtr for about 3 years but had to get rid as a) it just wasn't practical for what i needed but b) for some reason i went through two rear axles due to the lowering wearing the bearings out!
on another note the wheels look like a top job (loving the colour). i'm a powder coater and have done a few sets for mates over the years but i've never been 100% happy with the outcome. my method howevwer is to chuck them in the tumbling shotblaster, a quick rubdown then a couple of coats of powder and bobs your auntie. if theres a next time i think i'll take me time and try and find some patience from somewhere!
just one last thing, i've been reading the ax thread and well impressed. thats pure dedication!
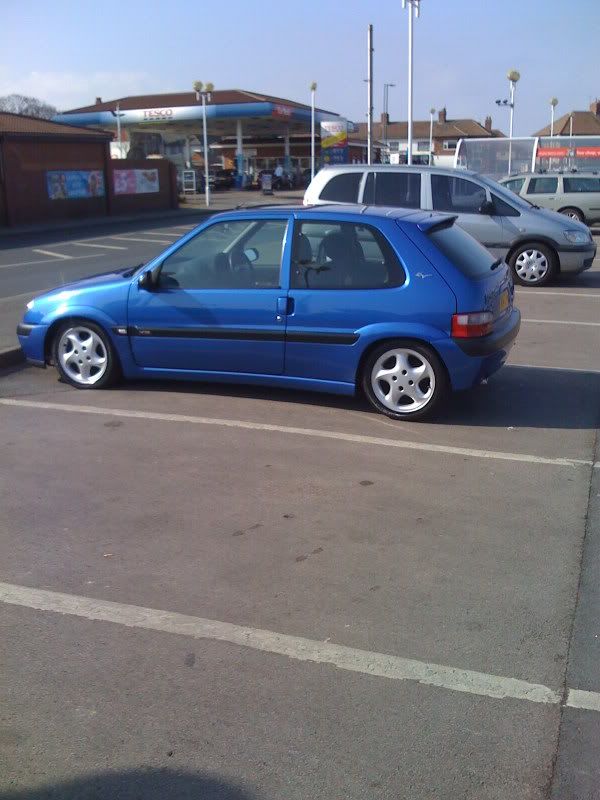
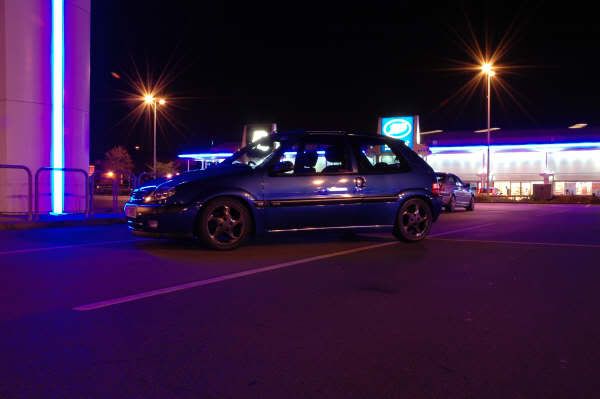
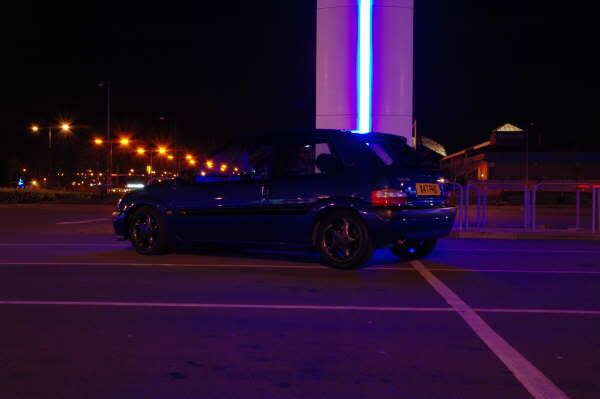
ok got some pics finally with the wheels on, not very big though, waiting for my mate to send me the larger versions.
Still to master taking some really good shots at good angles, will go for a run out over the moors in the summer when the weather is nice and take some good shots in daylight!
Here goes anyay..
Still to master taking some really good shots at good angles, will go for a run out over the moors in the summer when the weather is nice and take some good shots in daylight!
Here goes anyay..
Gassing Station | Readers' Cars | Top of Page | What's New | My Stuff