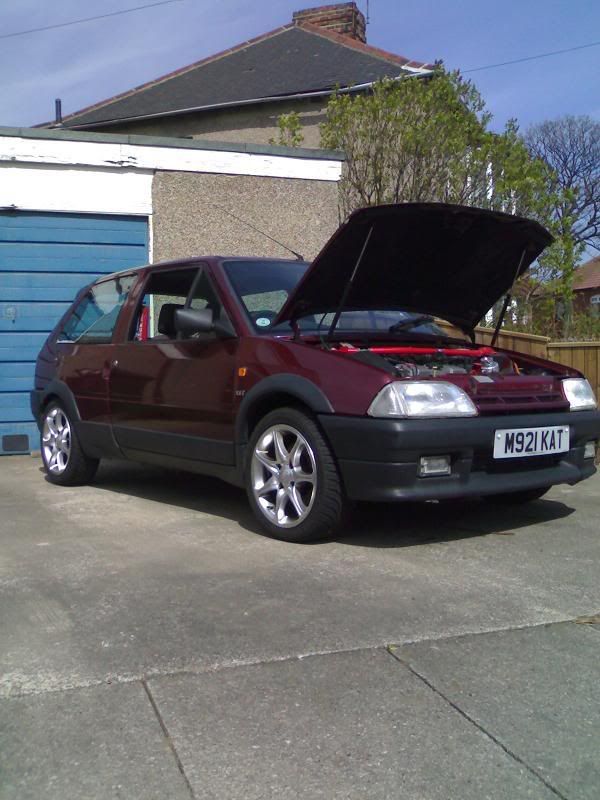
Jessop's 16v Citroen AX forte
Discussion


Alrite chaps.. =]
I 'did' have a rather huge thread about my original reshell & vts conversion which went on for about 40 odd' pages IIRC, so thought i'd be best to make a new one which explains the story a bit better :lol:
So here goes, I'll let the pictures do the majority of the talking;
In the beginning..
I bought an AX VTi after getting my first years NCB and could insure it..
However, within a week of owning it, the head gasket went pop and since i knew absolutley nothing about cars at this point it sat in the garage for about 6 weeks untill i eventually bought a haynes manual and a few tools, decided to crack on and change the head myself. All went well and my knowledge of cars kind of went from there.
Oops..
Within a few weeks of fixing the car i took a trip to Skegness with a few mates and ended up in a ditch. Moral of the story.. Dont, EVER take your eyes off the road, not even if you drop a drink!
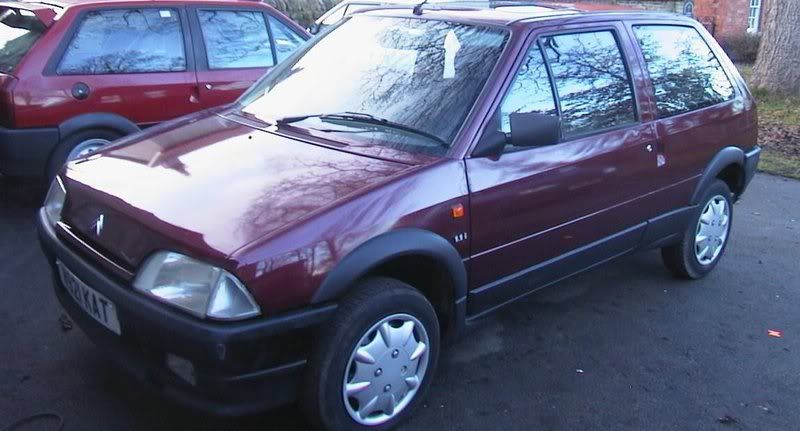
Here's what the car looked like when i bought it:
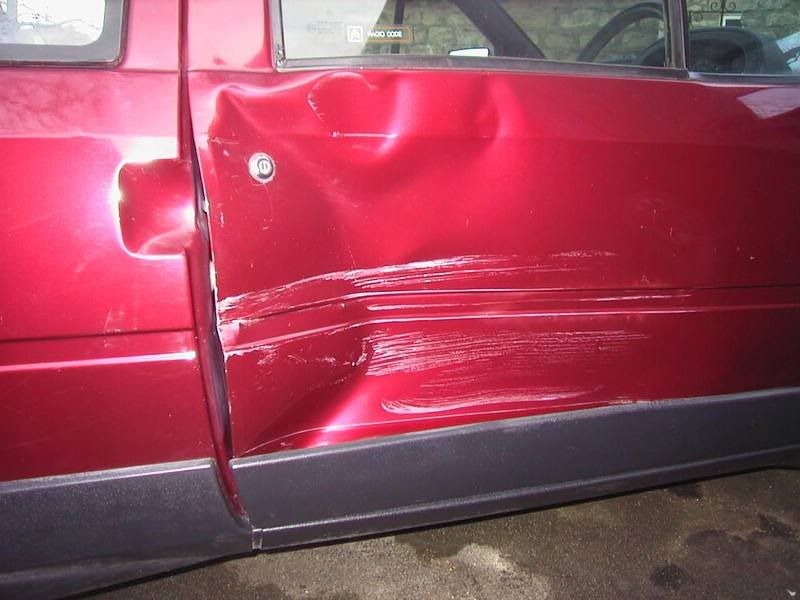
And after the ditch:
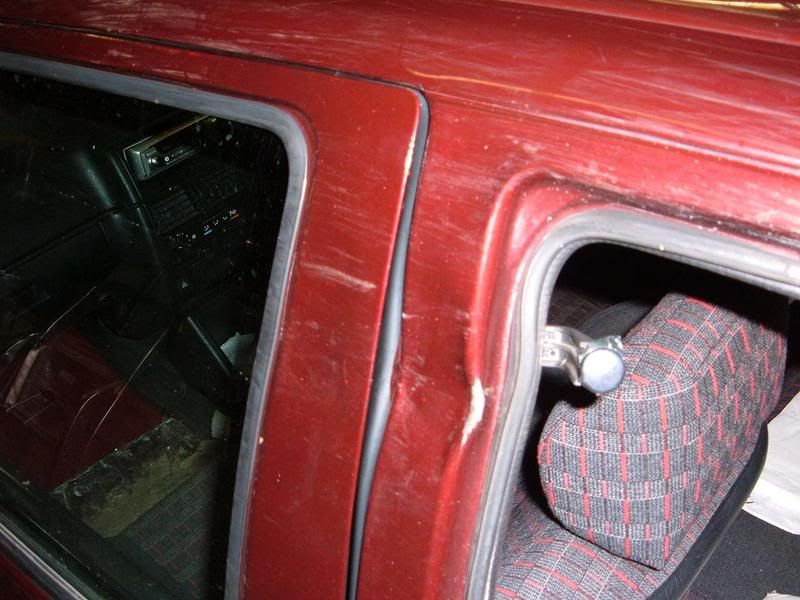
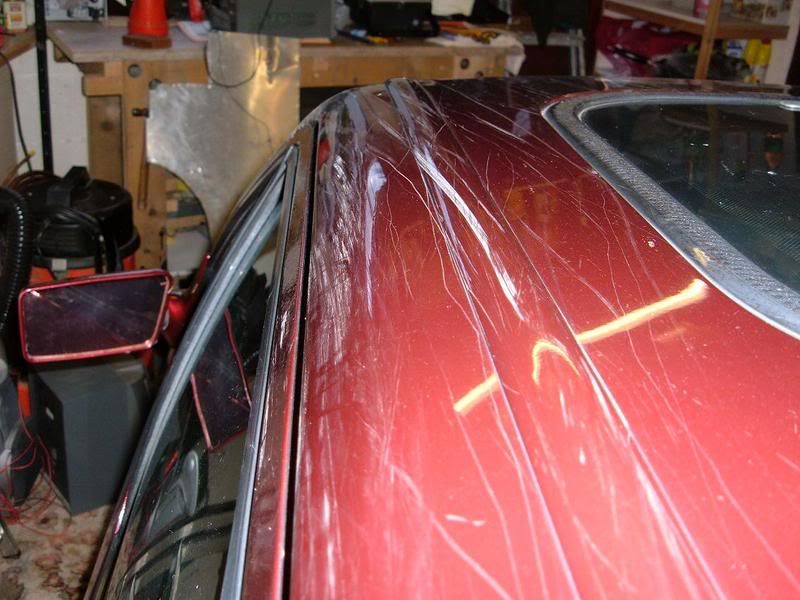

The damage done from hitting the ditch was not much, a few dents. However the damage done by the guy dragging the car out of the ditch was rather extensive. by dragging it out by the towing eye (weak point when dragging out side on?) it had bent the inner wing, which meant it would need to be put onto a jig, get a full respray etc etc and a new door.
Then it sat there for a few weeks...
The 'project' began..
As i couldnt afford to pay the cost of getting the work done to the forte' and a few other problems with it (rotten sills etc), i spoke to a friend of mine Charlie who had a 1.1i AX Forte on his drive with a broken door. So a few hundred sheets later (£250 IIRC?) and a 12 months MOT ticket i begun to crack on with a reshell project.
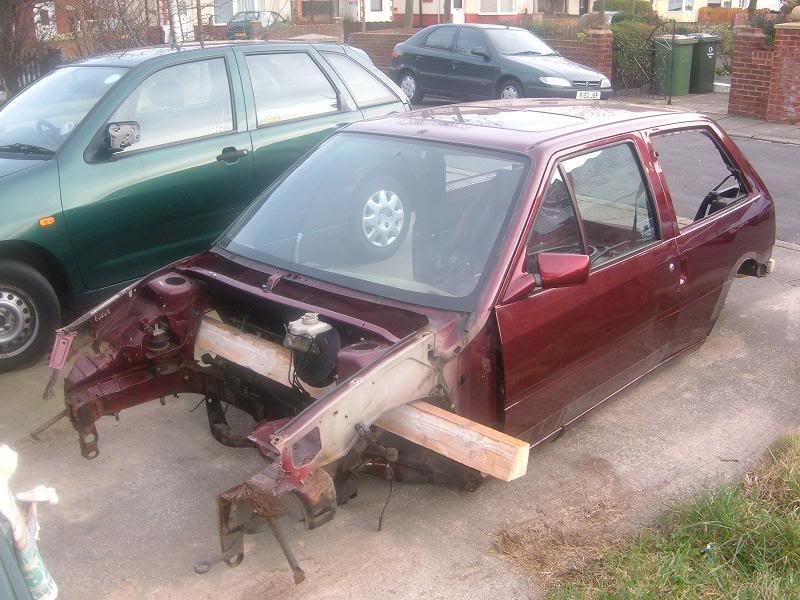
The new shell
Citroen AX 1.1i Forte.. with a broken door which i just swapped for one from the GTi shell. albeit a slightly different shade & came with metal flake paint effect.
Out with the old...
Time to crack on with the new!...
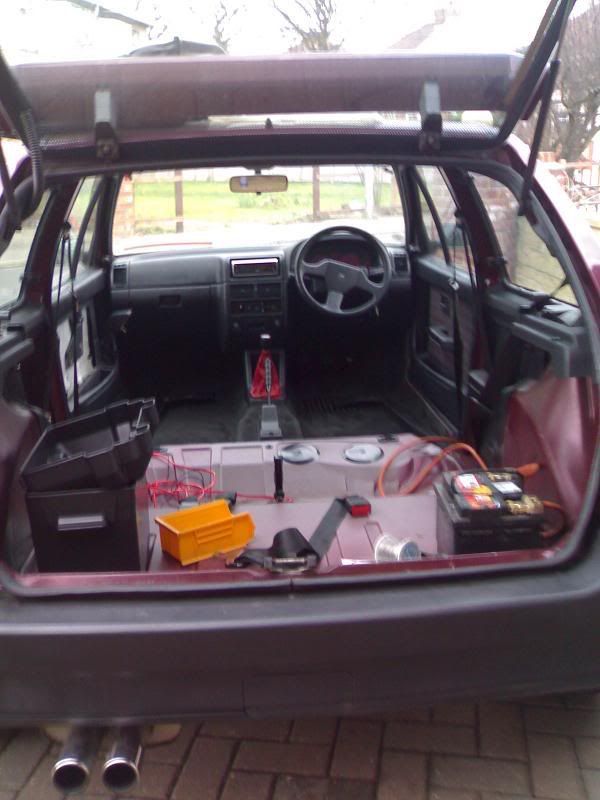
Wiring..
Swapped the entire car wiring loom over to a GTi loom with a CAT 1 alarm already plumbed in.


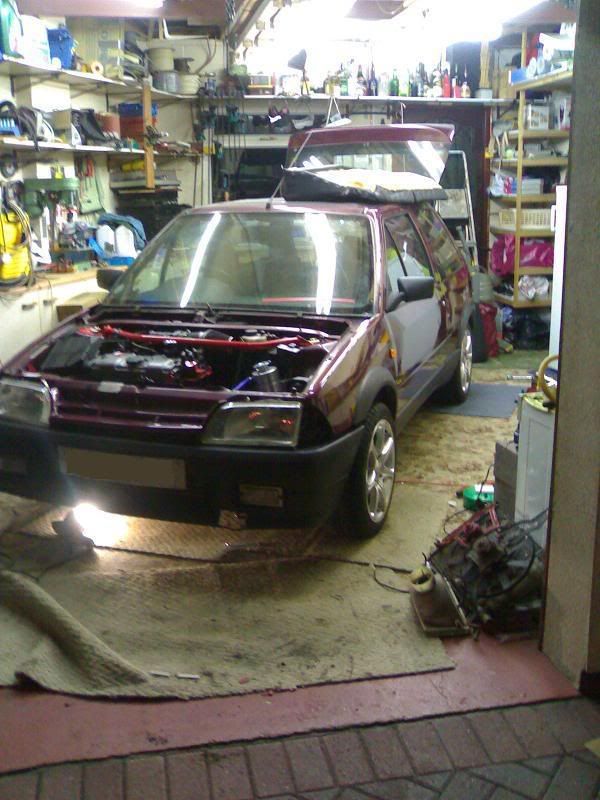
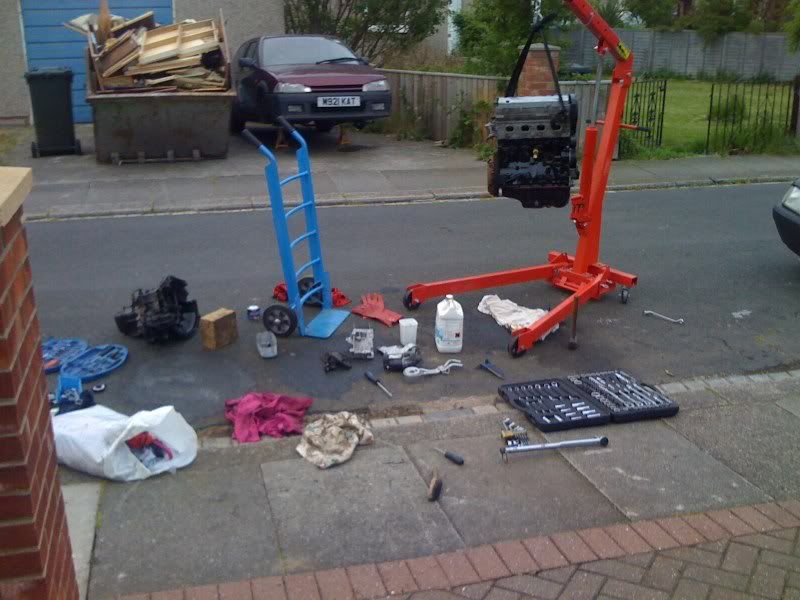
Engine..
Out of the old shell..
In with the new..
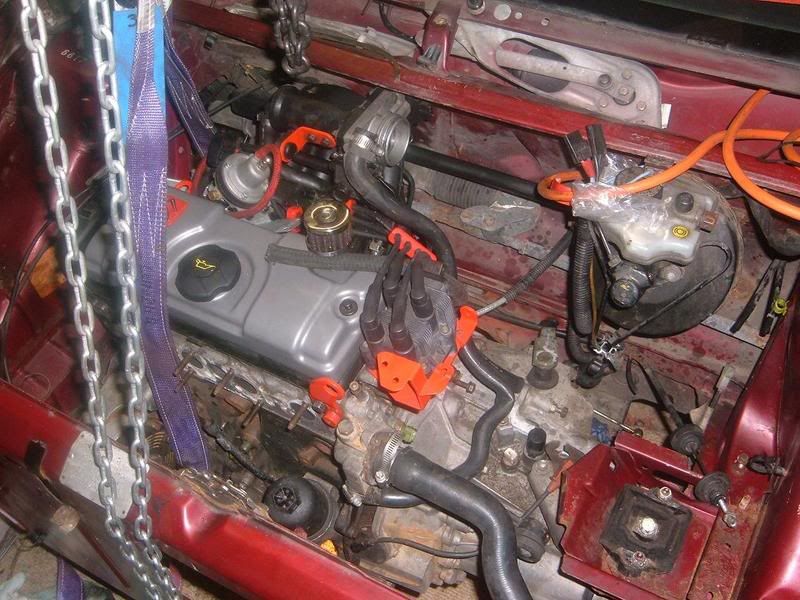
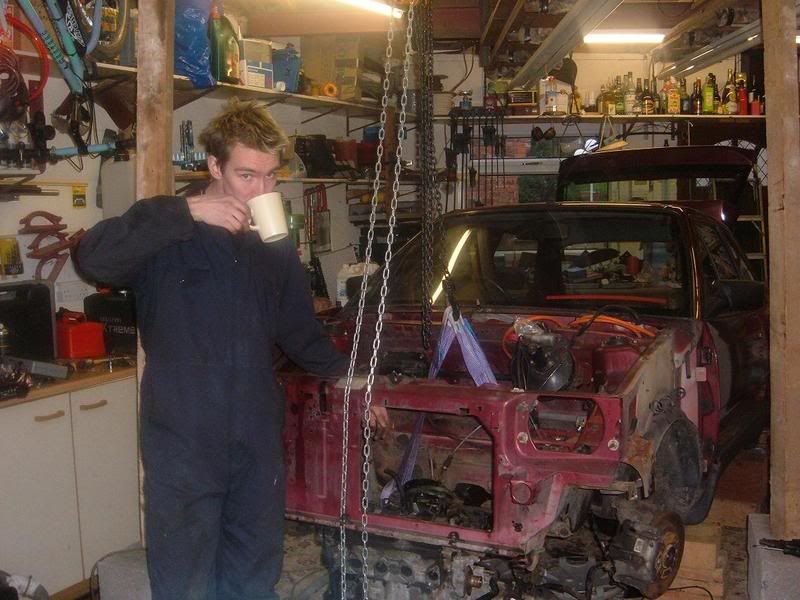
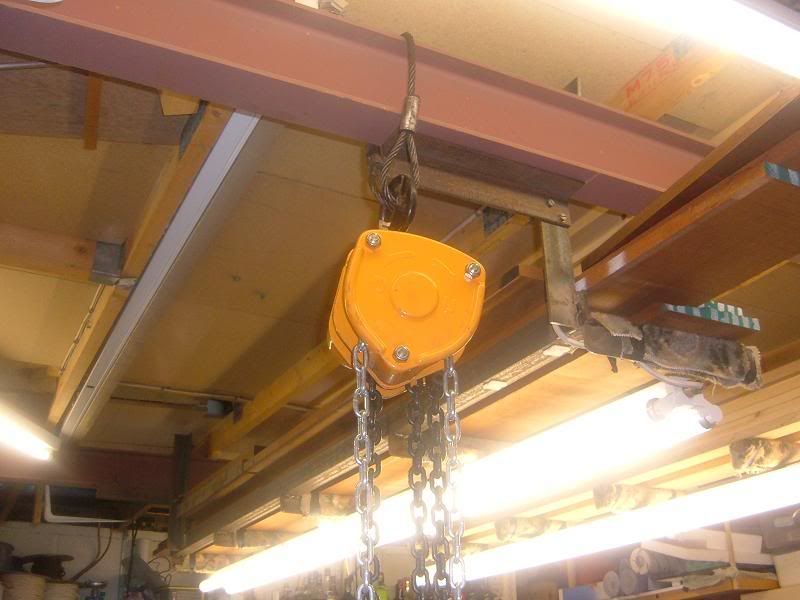
The important tool..
did have an issue with the engine mounts though, as the old GTi shell had the later type cradle mount , and the forte had the poverty spec mounting. not to worry though.
Some pictures so you can see what i meant:
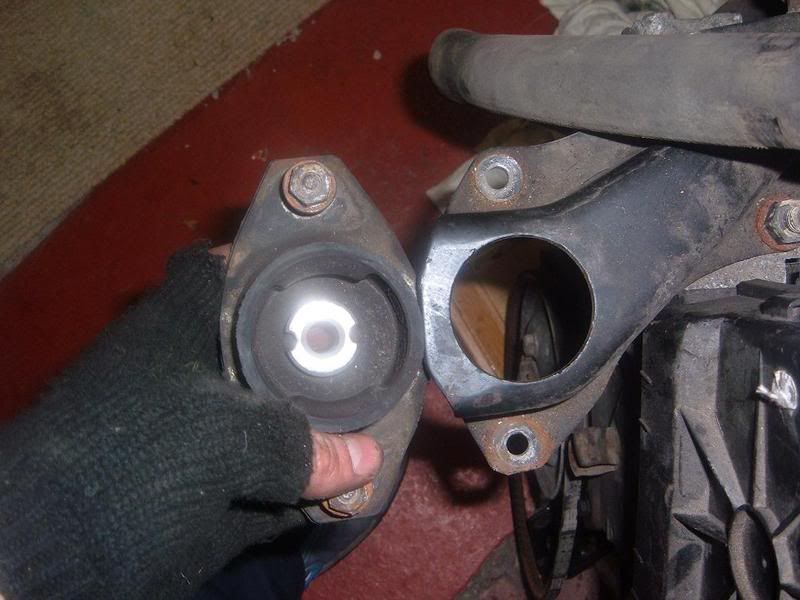
Poverty forte mount
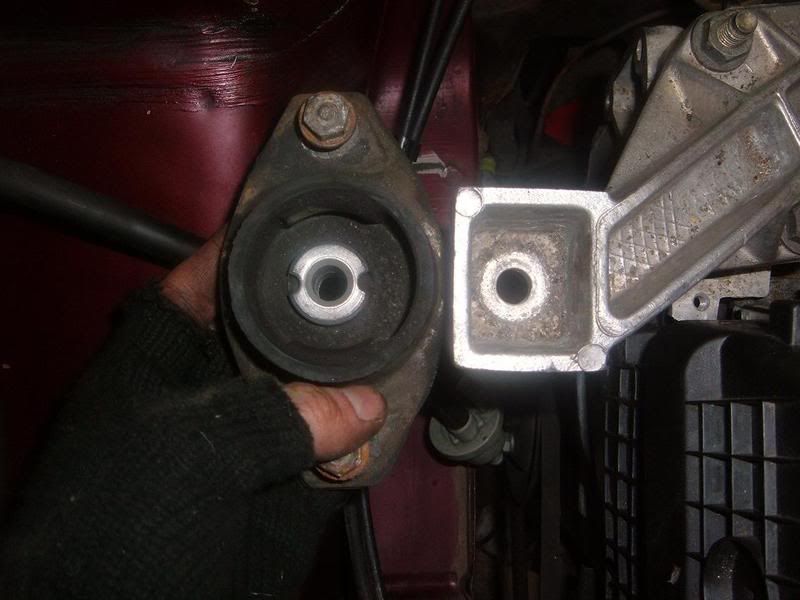
GTi alloy mount
Bought a S1 Rallye inlet Manifold..
However i decided to ditch the idea & sell it after reading many neagtive things about running problems once its been fitted, without having a remap.
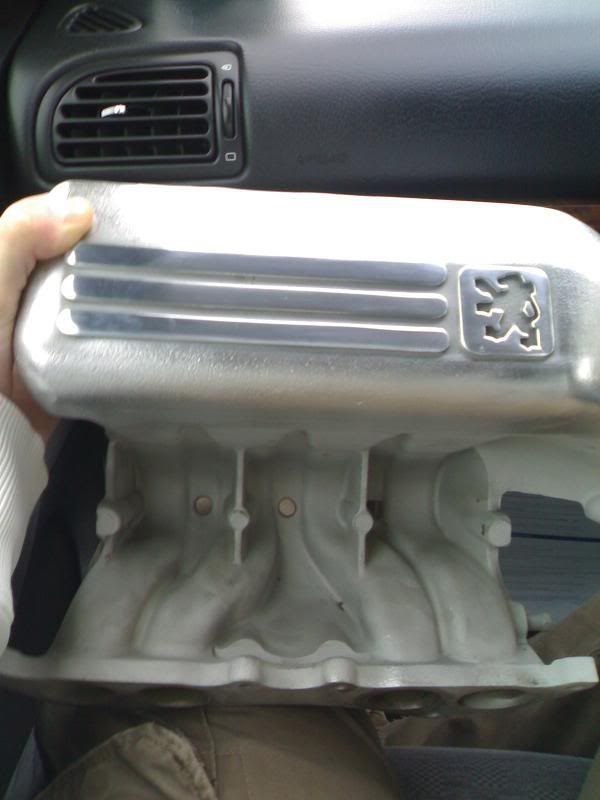
It looked nice anyway!
Coming along..
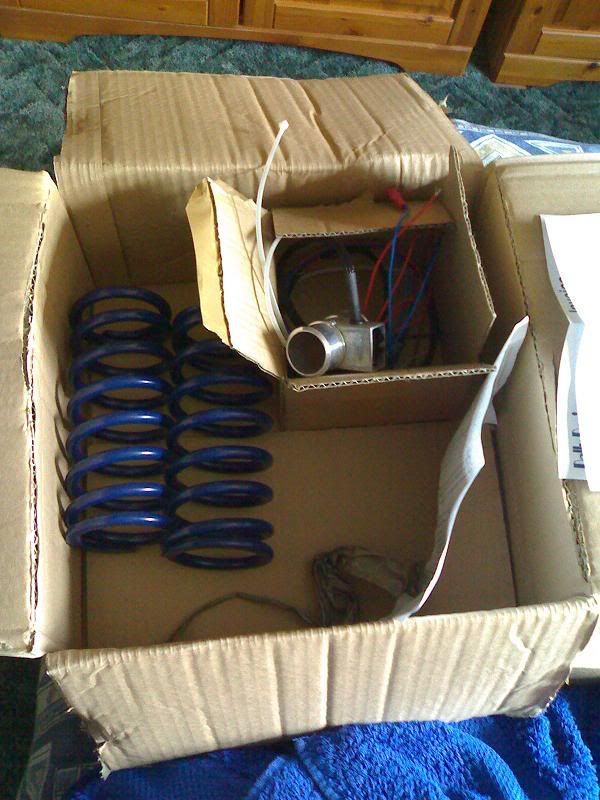
Got some new bits through the post...
Pacet cooling fan, poly bushes, some samco, flexible cable for battery relocation.
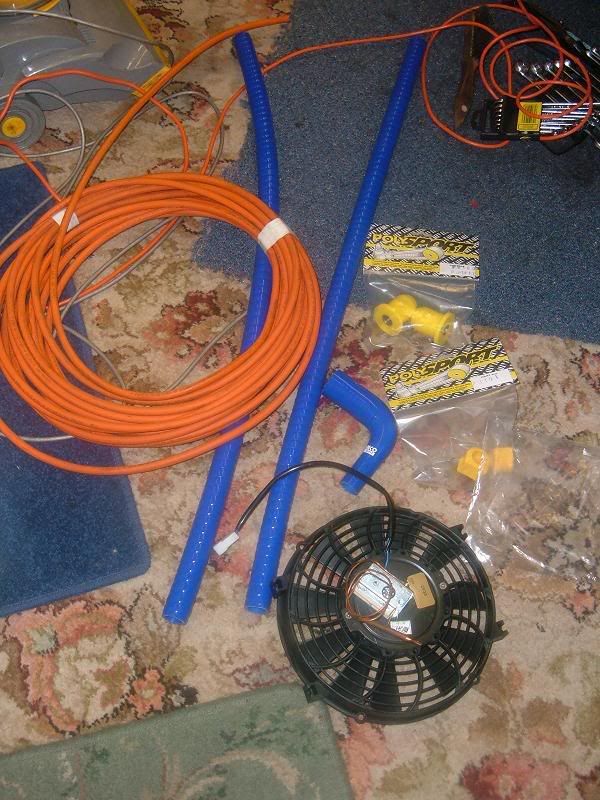
Bilstein group N dampers.
200lb springs, 40lb 4" Helpers + Platforms and an in-line thermostat/fan controller.
Purchased a 4-1 GMC 8v manifold and fitted that. Was rude not to
How she sat for a few days..
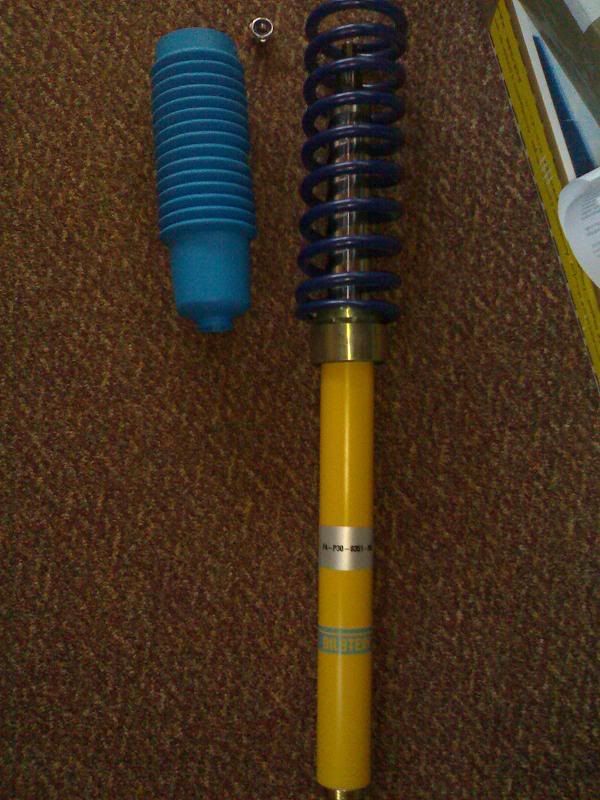
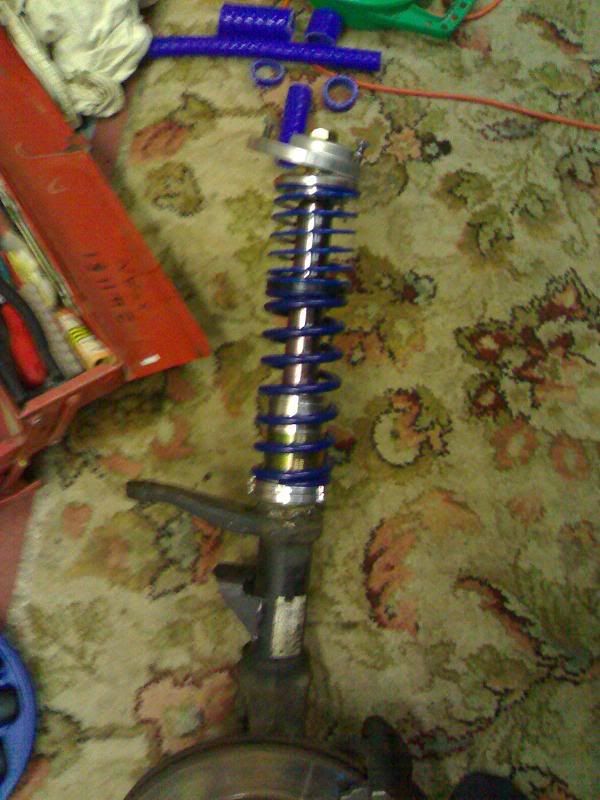
Made up some coilovers..
Invested in a coilovers conversion kit, which needed a bit of modification, mainly in the top spring cup and damper cap, as the bilstein rod was much thicker than the standard AX GTi damper, as well as the top thread was thicker also.. See pics below >>
partly together.. but you get the idea =]
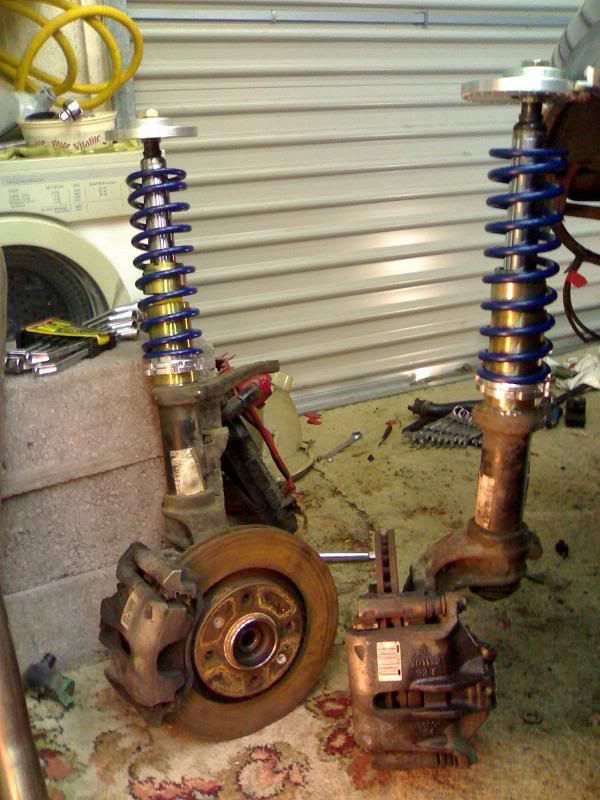
NOTE: 206 GTi 266mm Brakes
finished article:
On the car..
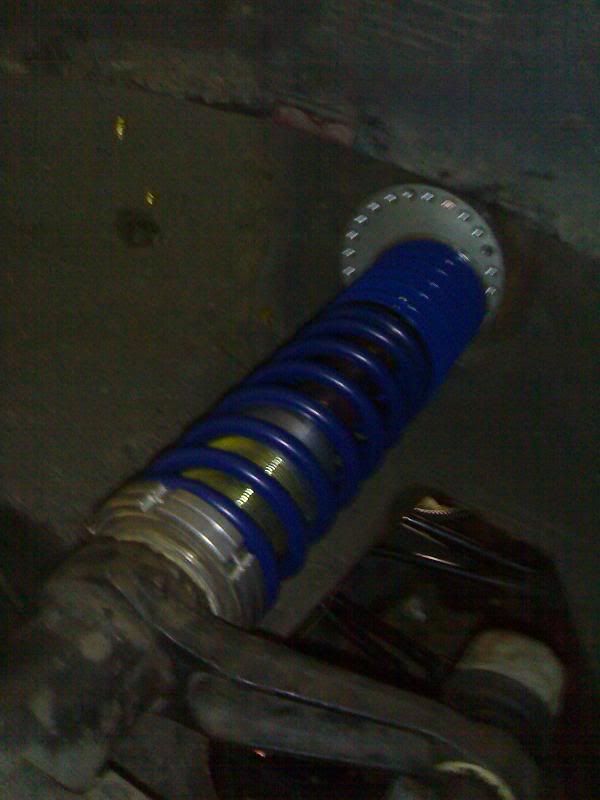
NOTE: Eccentric top mounts
More new toys.
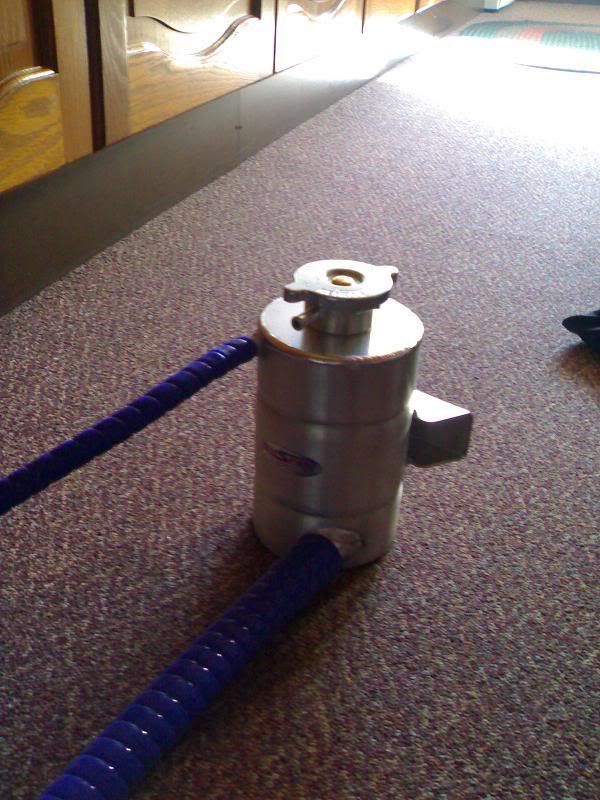
Invested in some more samco and an alloy header tank from AlliSport. IIRC it was about £55 and they put the hose fitments to my spec, which was ideal =]
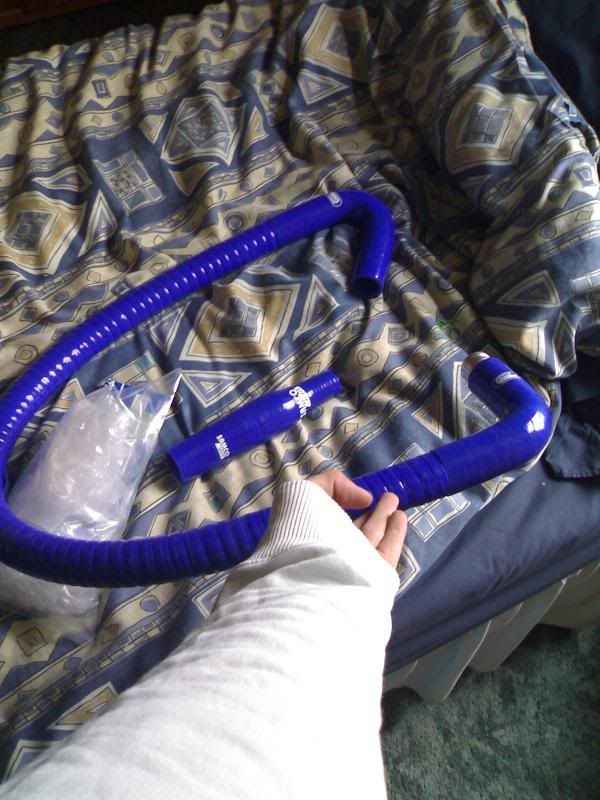
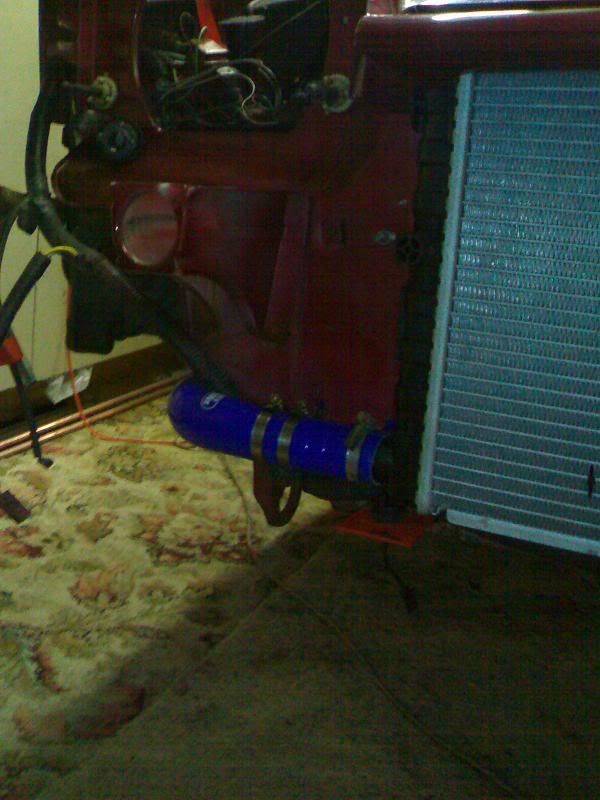
The plumbing:

Fairly chuffed with how it was coming together..
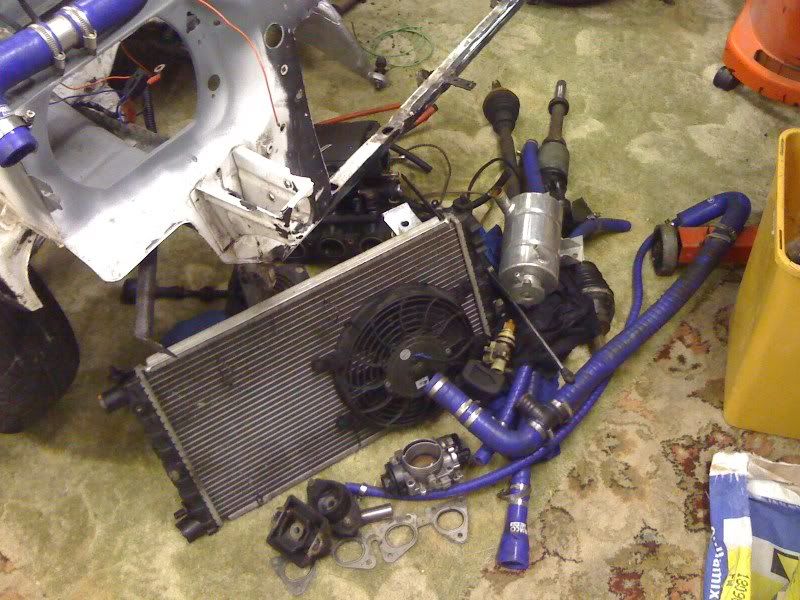
If you didnt already notice , I had fitted a 106 Diesel radiator also, as it was much larger than the standard 1.1i radiator.
Almost there
So i decided that now she was on 4 wheels i'd push her outside while it wasnt pissing it down lol.
The next few days was a case of tidying things up etc..
Ignore the pikey tie wrap job on the header tank lol
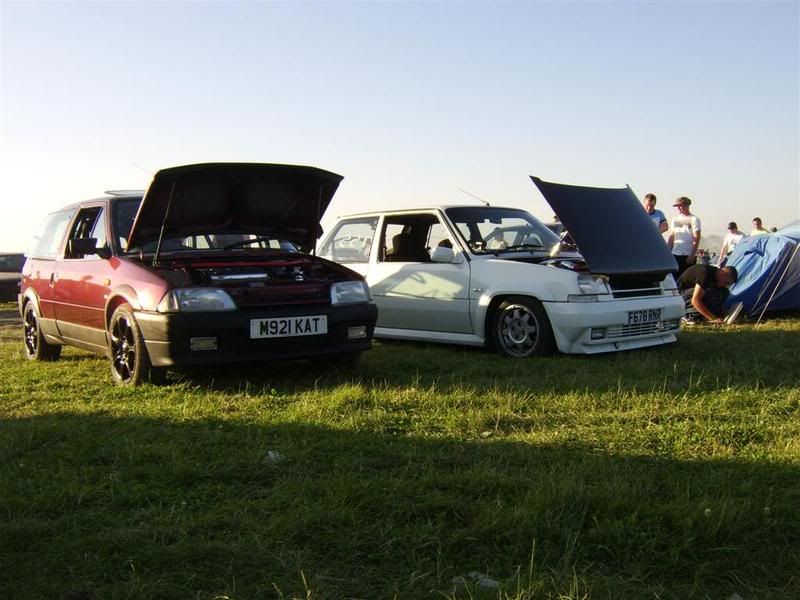
And thats that... not quite!
After attending FCS 2006' as it was in the above pictures.. i decided that over the winter of 06' to take the car off the road and undergo the next 'phase' if you will! giving me some more power and another 8 valves
Thus, Project VTS Forte began...
New bits..
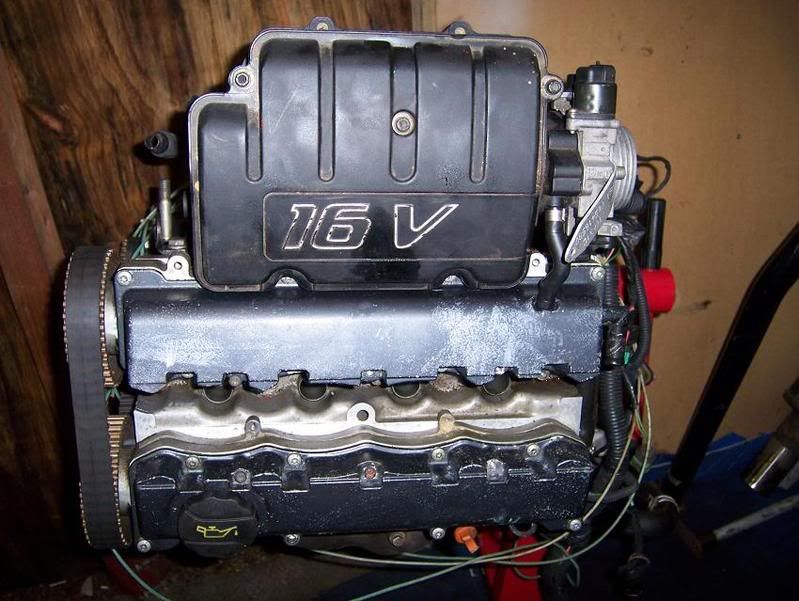
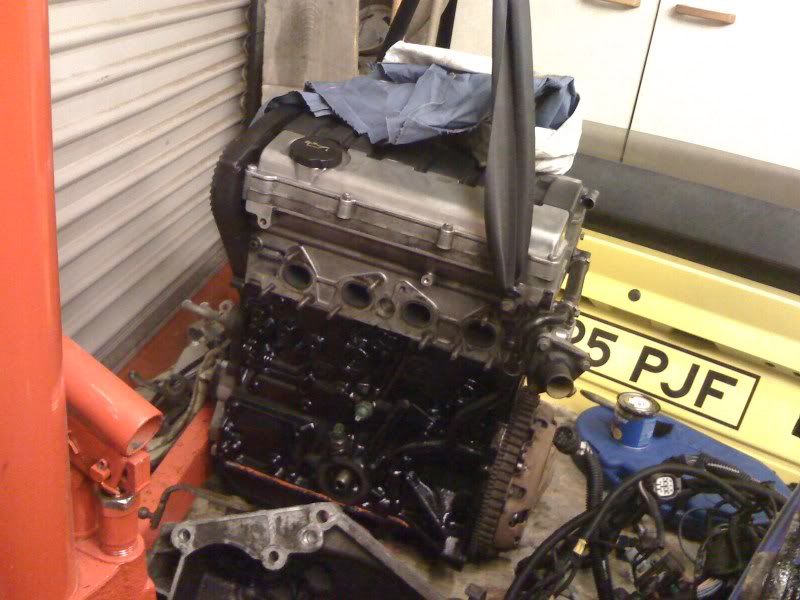
VTS engine..
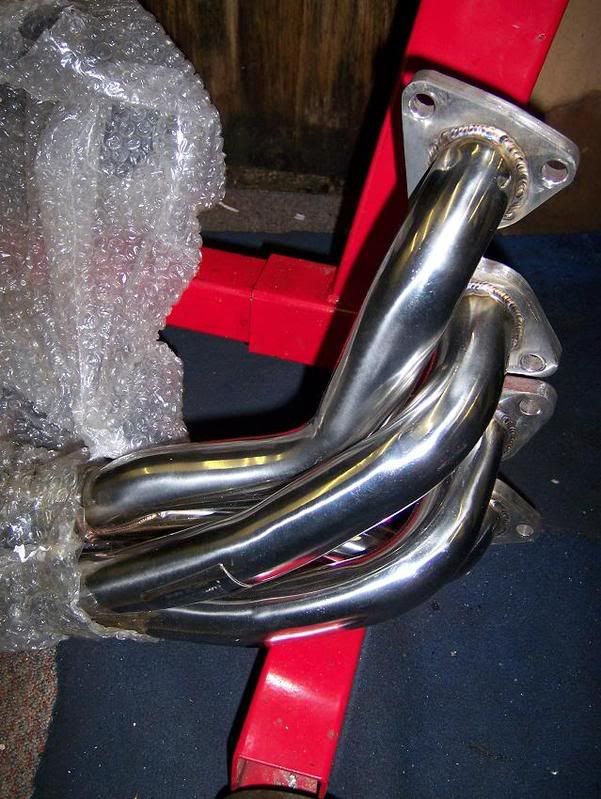
4-2-1 Racelant stainless manifold:
24mm rear Anti-roll Bar
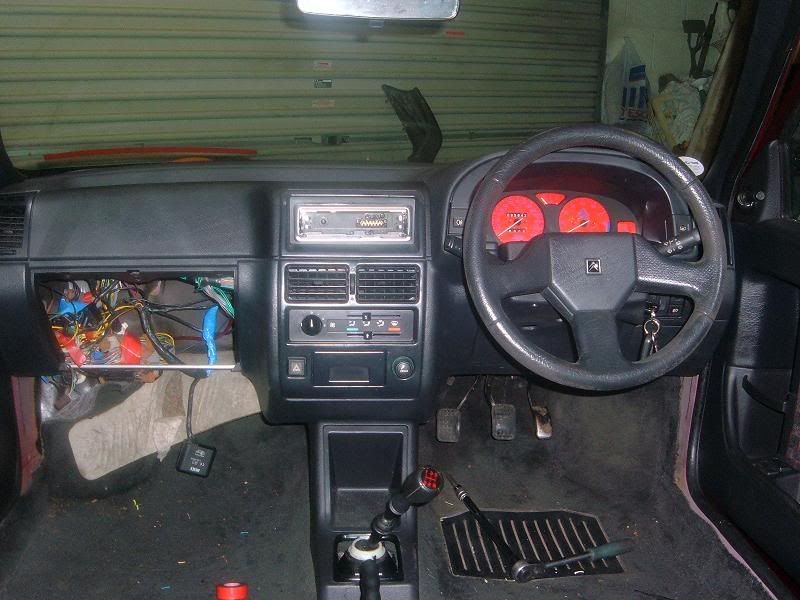
Off came the dash, again
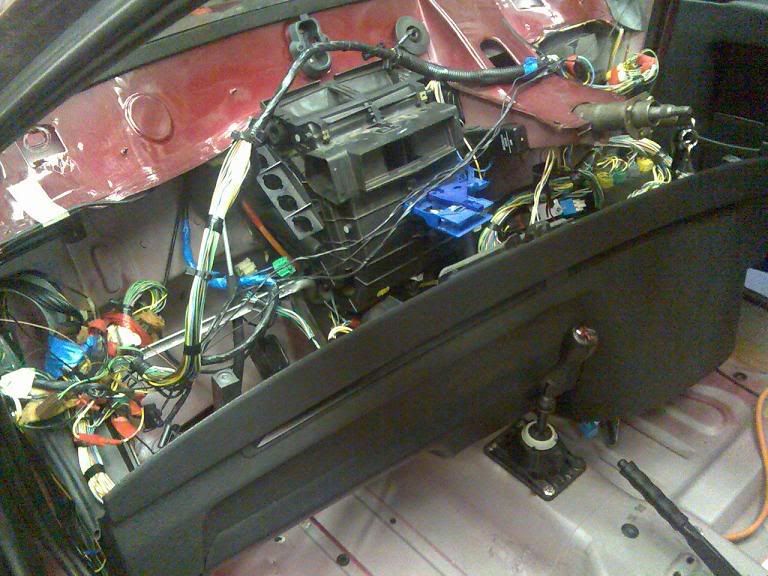
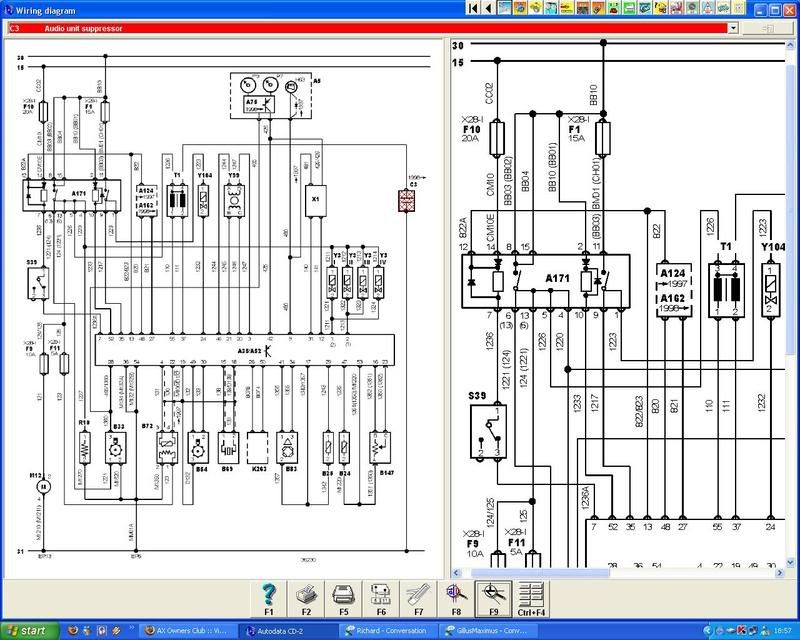
armed with an obscene amount of notes and wiring diagrams i cracked on...

most helpfull diagrams!

After many hours of working out the saxo 16v wiring loom buzzing all the various connectors etc, i made them suit my AX GTi dash loom which i didnt need to modify (just needed to add a few new wires for fuel pump, digital speedo, oil temp etc).
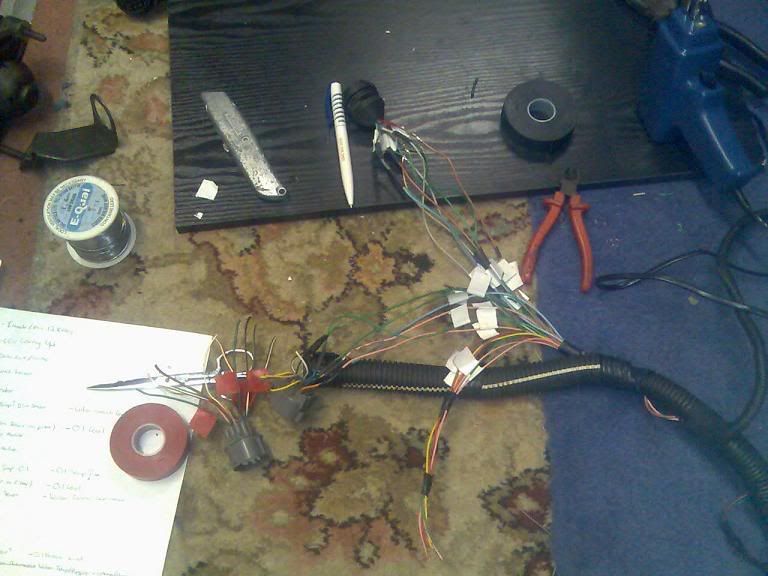
decided that having another multiplug for the extra wires would be beneficial if i ever needed to remove the engine, rather than a straight through wire.
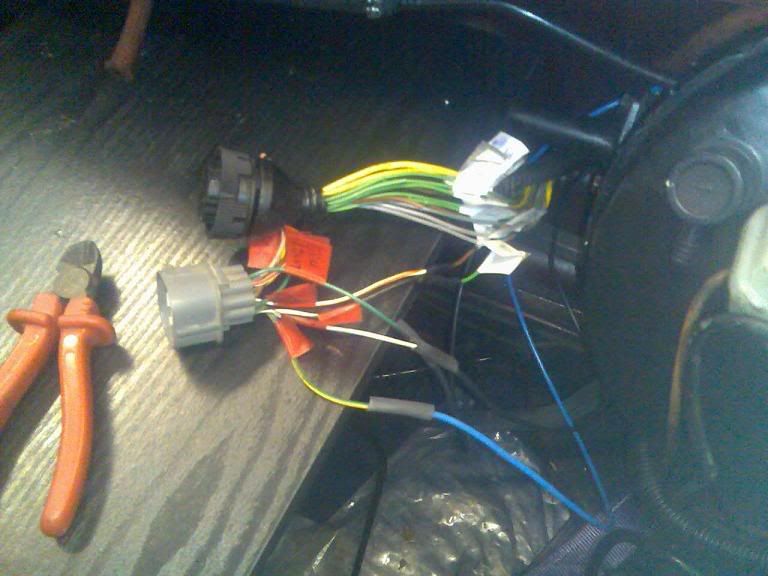
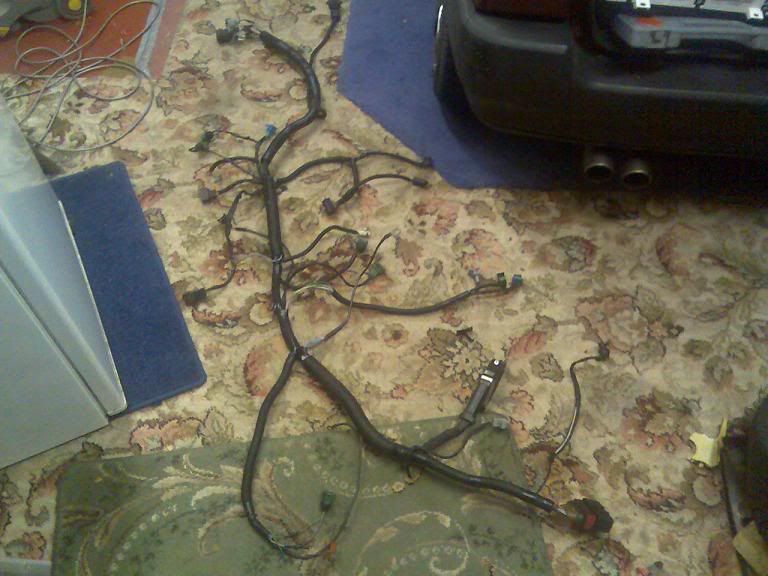
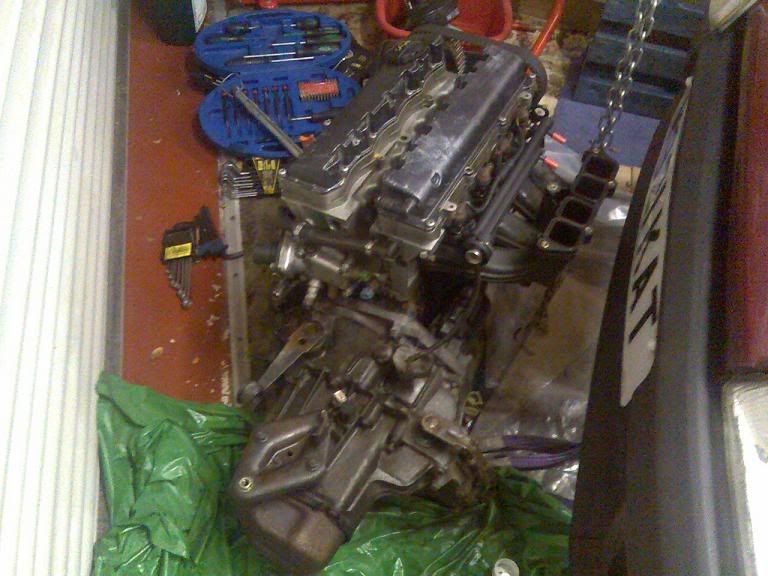
So end result i went from this AX GTi engine loom:

To this, AX VTS engine loom:
Cracking on..
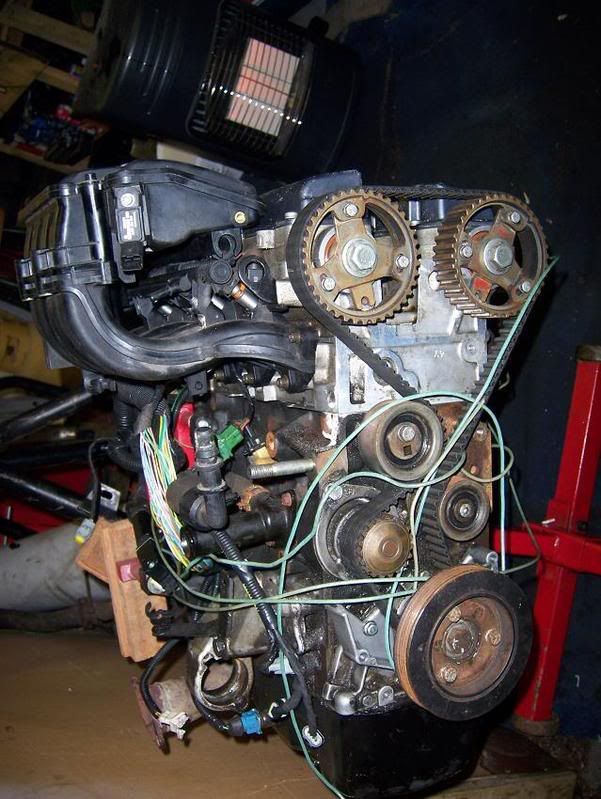
Fitted new timing belt kit, idler, pump etc..
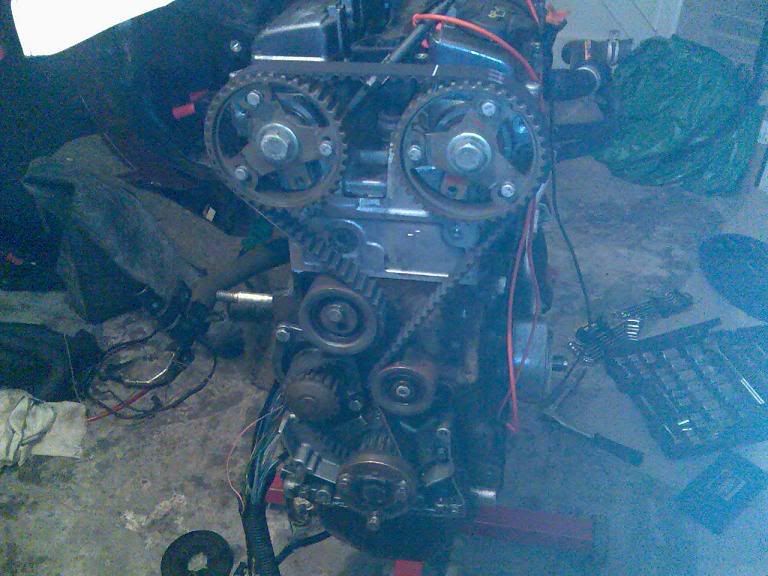
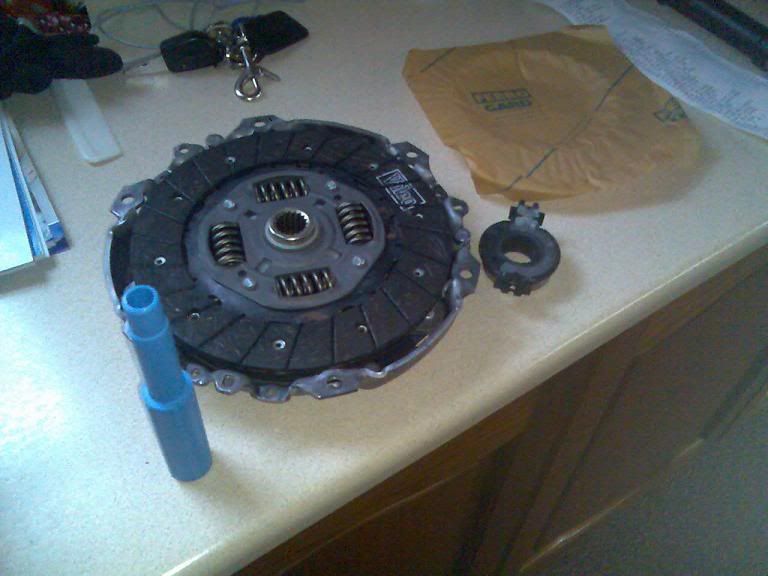
New clutch came through the post so fitted that while engine was out.
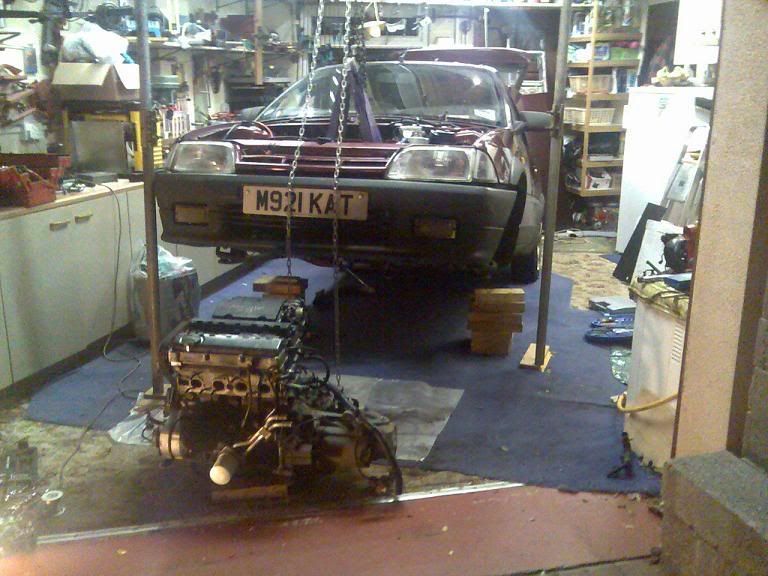
Out with the old..
Monster ride height huh?
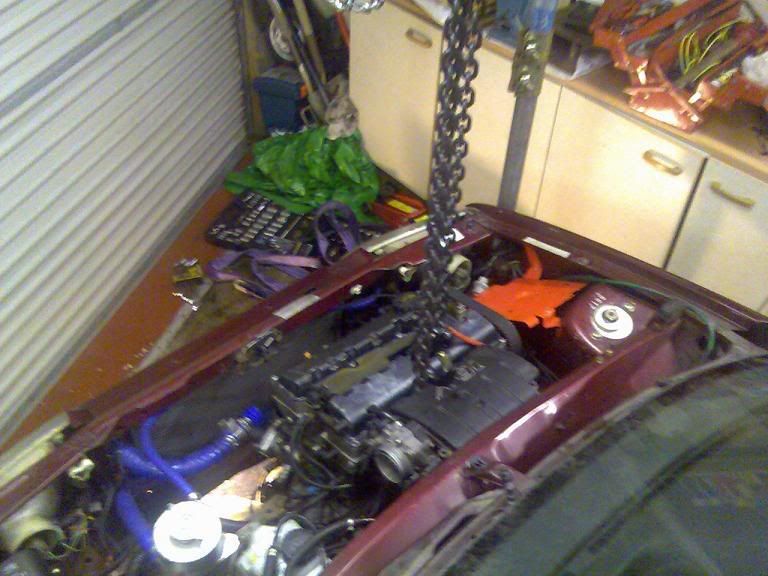
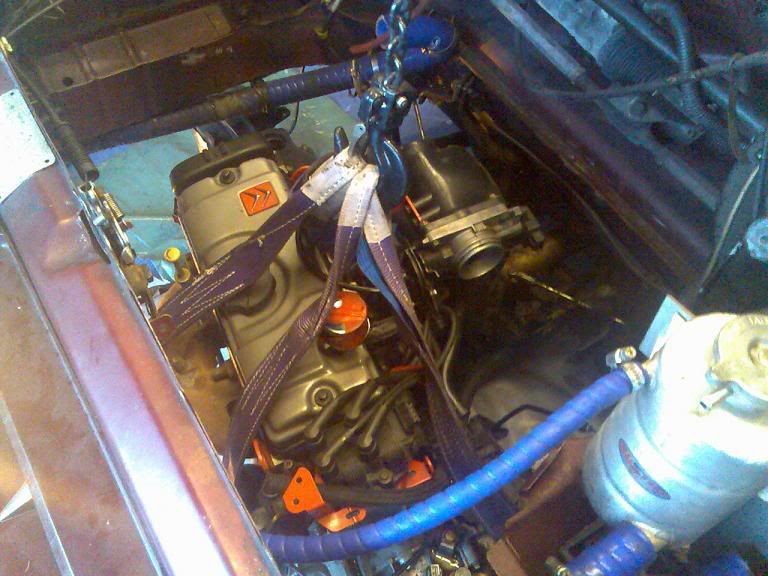
Its in!!
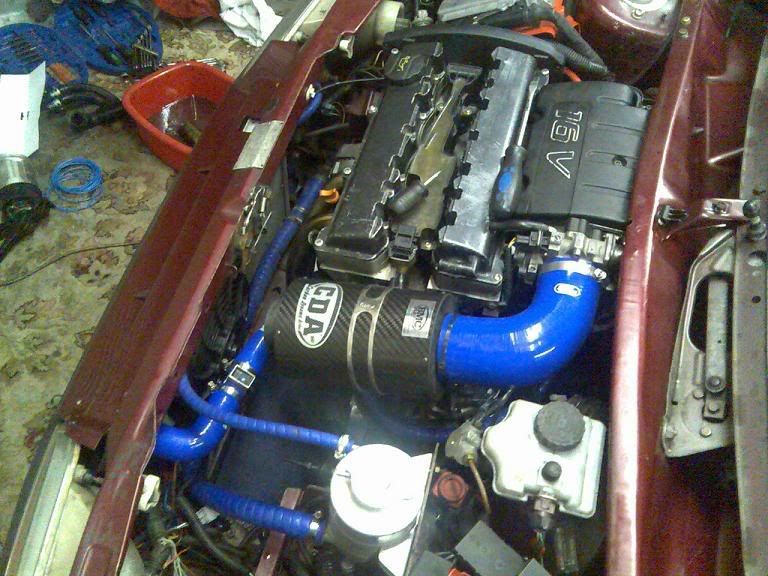
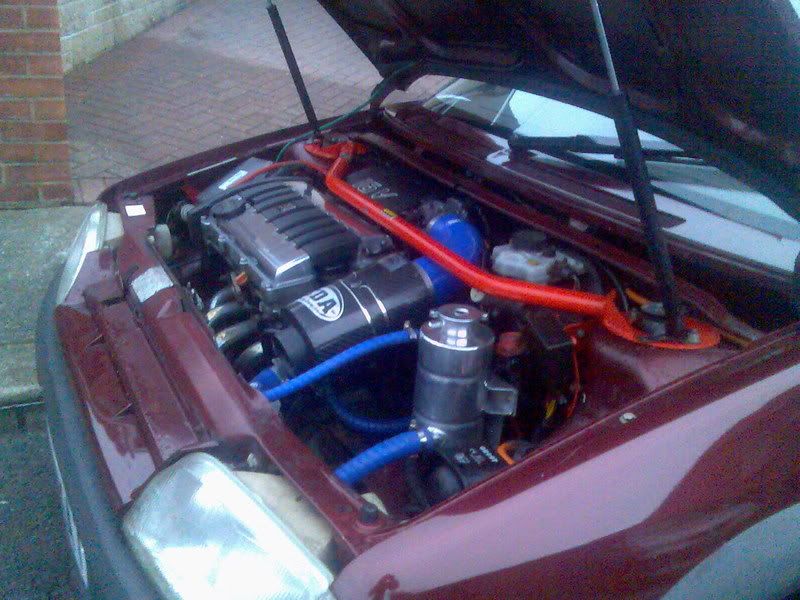
A BMC CDA air filter came on the market cheap nearby so i picked that up sharply and fitted that too!
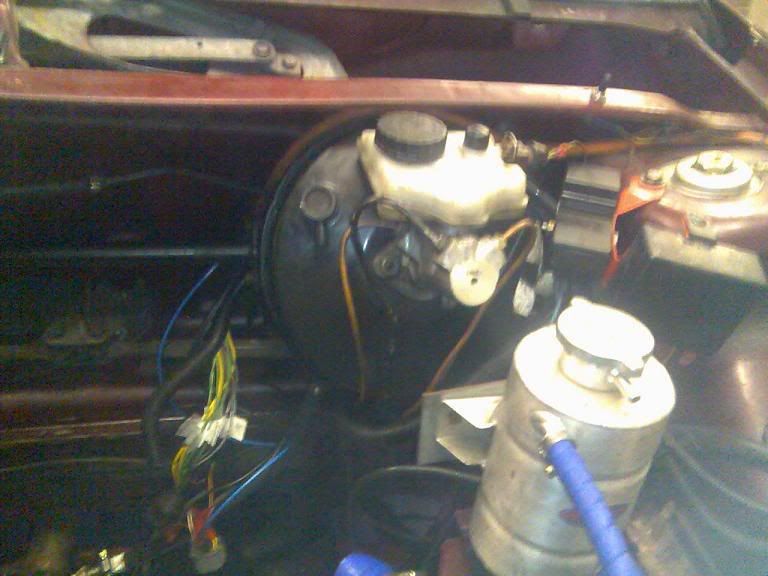
I also fitted a Saxo VTS brake servo & master cylinder as i decided using the 1.1i forte ones and 206 gti brakes wasnt such a good combination after a while!
Problems?
After lots of teething running problems, the vts was most definatley not idling properly at all, kept cutting out, spluttering etc etc all the time. spent a while trying to work out what the hell was wrong. tested all the various sensors, turns out that the Lambda sensor was to blame. Was replaced sharply and all is good =]
Here's how the manifold looked after driving round the block (not hard) while the lambda wasnt doing its job properly! :|
eek!
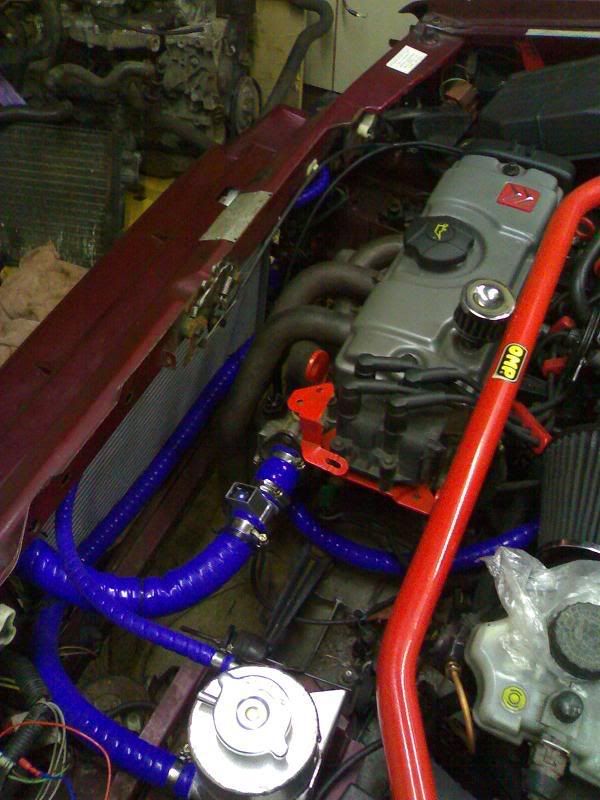
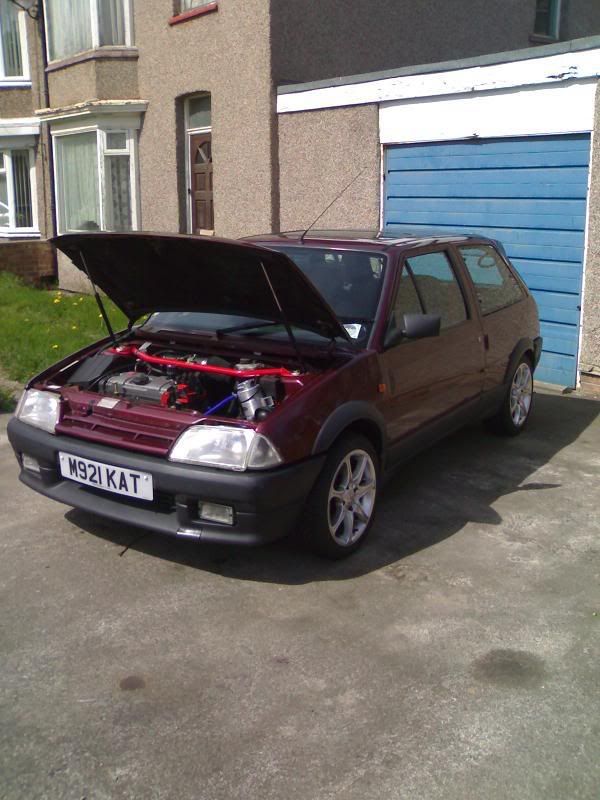
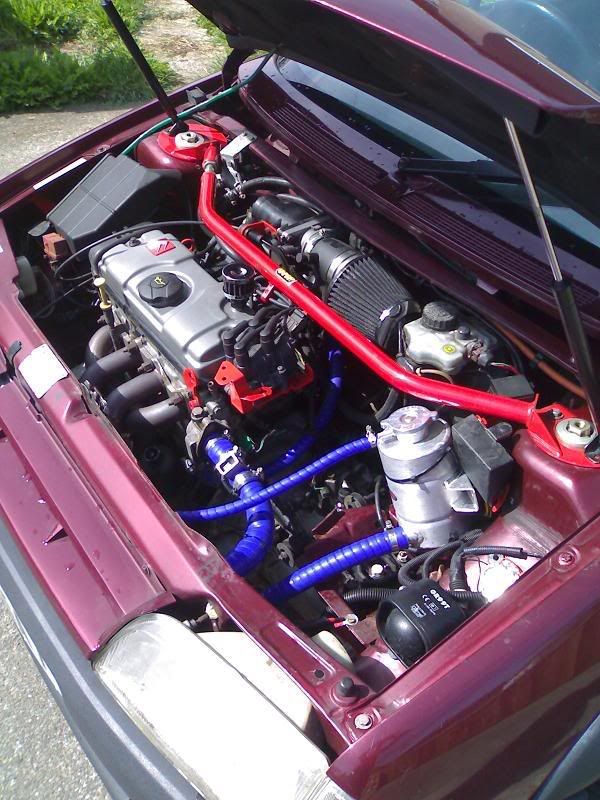
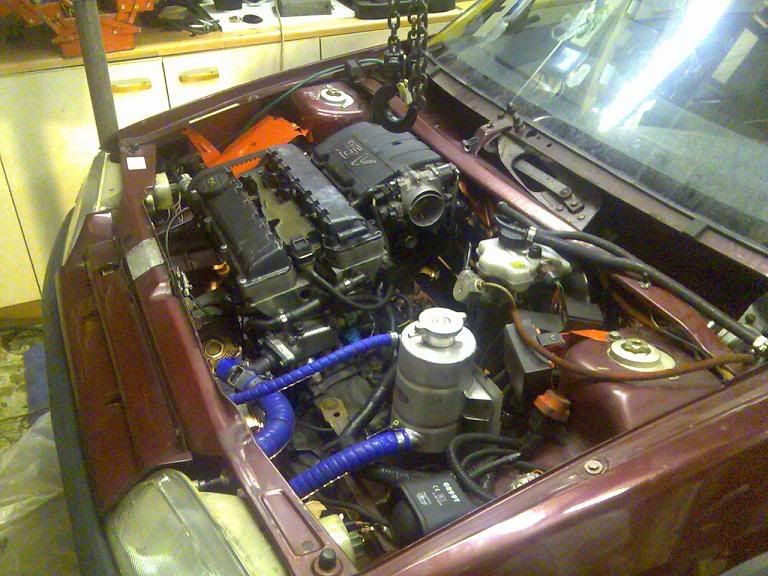
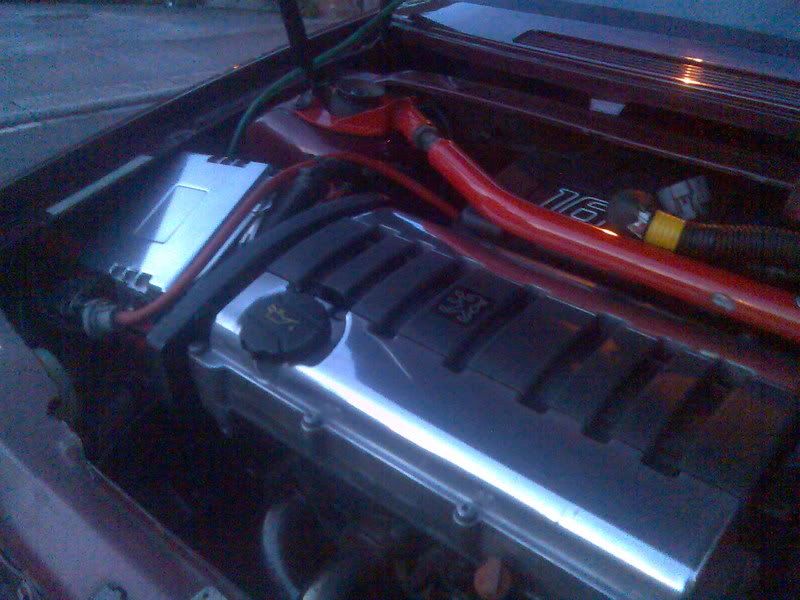
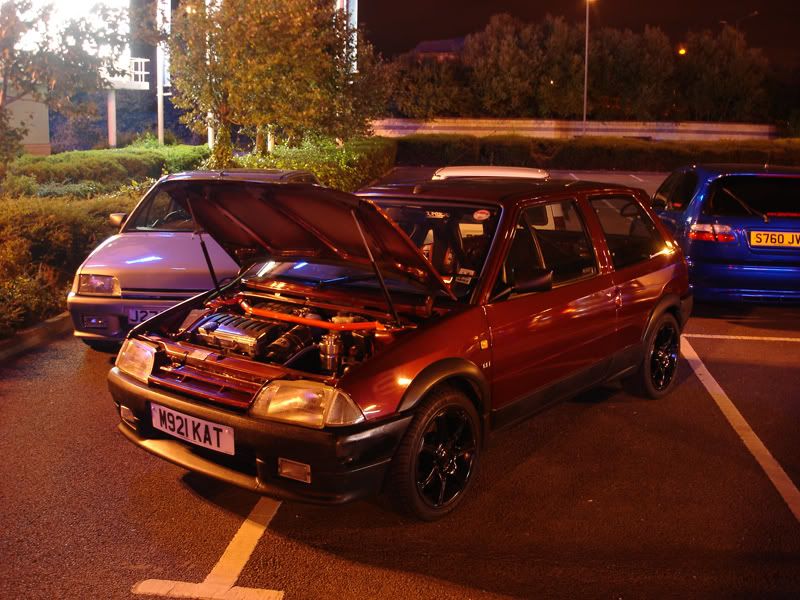
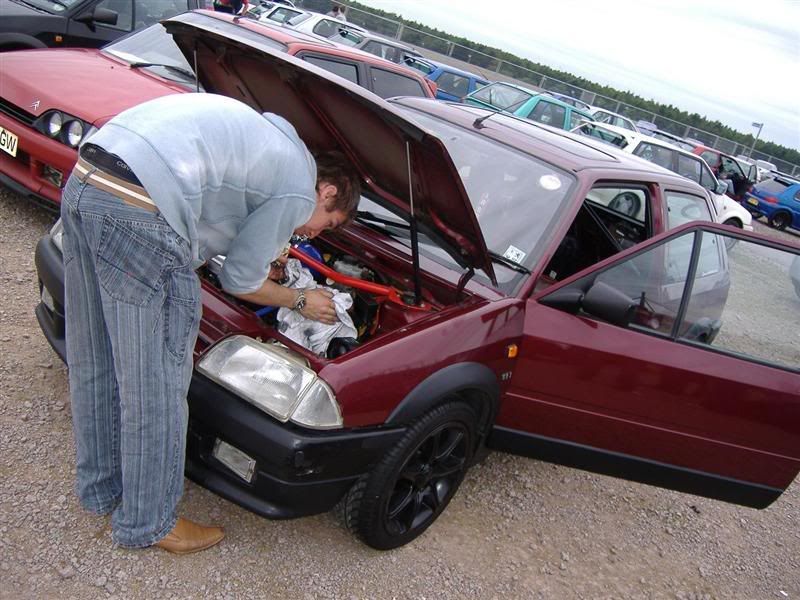
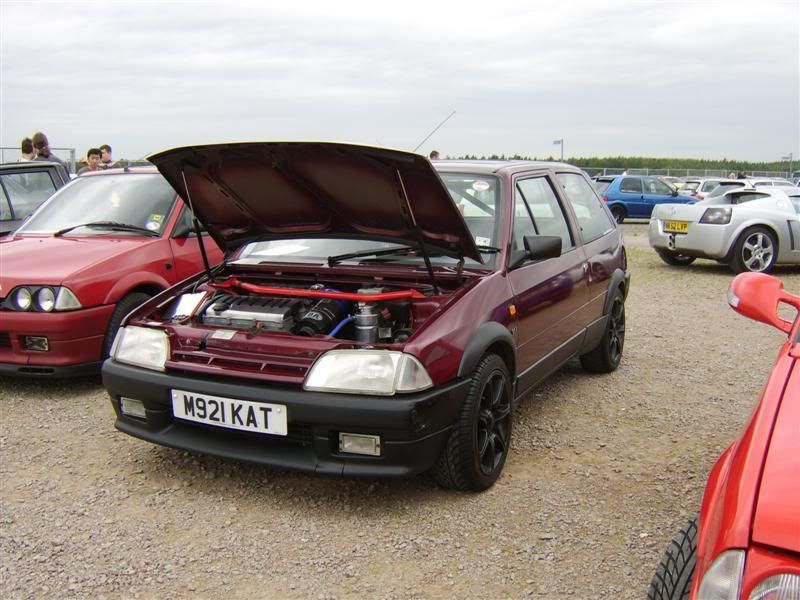
How it looked by now..
Engine bay looks SO much better than the old 8v in my opinion. The 16v option is definatley the way forward for anybody thinking about doing an engine conversion with an AX.
[img]http://i131.photobucket.com/albums/p307/Jessop_bucket/Project%20Forte/VTS/Engine/Image084.jpg[/img[
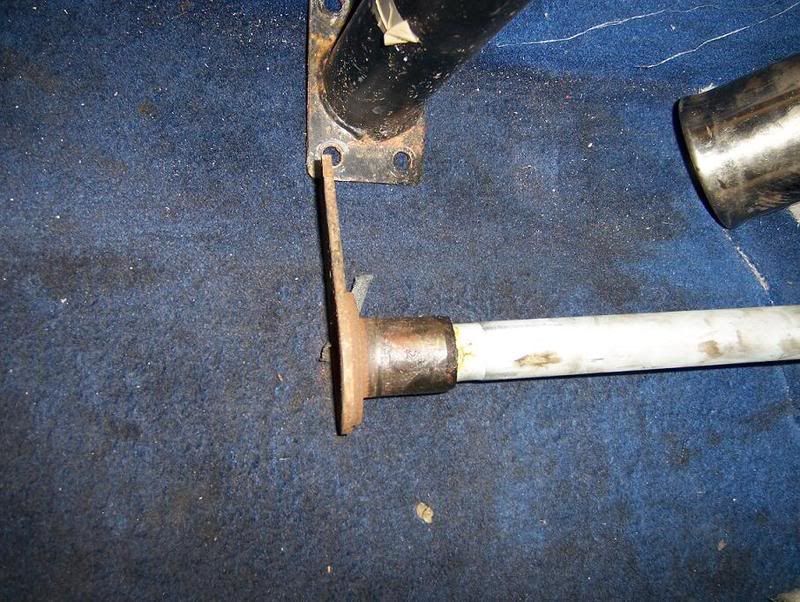
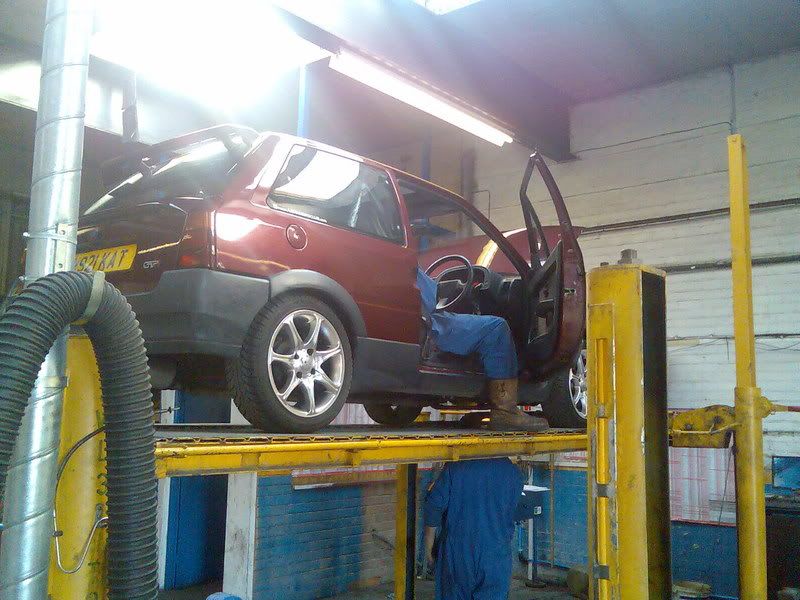
I took it to get MOT'd.. failed on emissions first time round but took it elsewhere and it passed not a problem. dodgy old standard exhausts eh
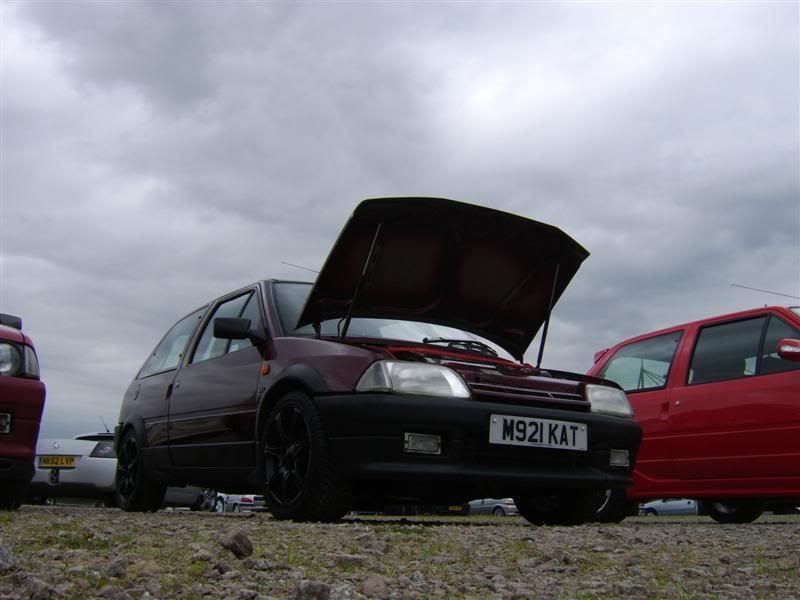
how she looked on the stand
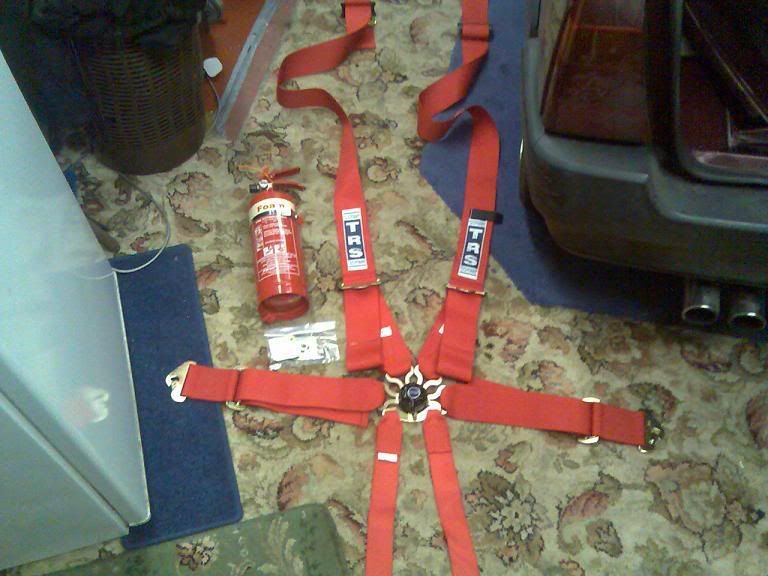
I decided that i wanted to do a bit more with the car also, had a bti of spare cash laying about so bought some funky new toys:
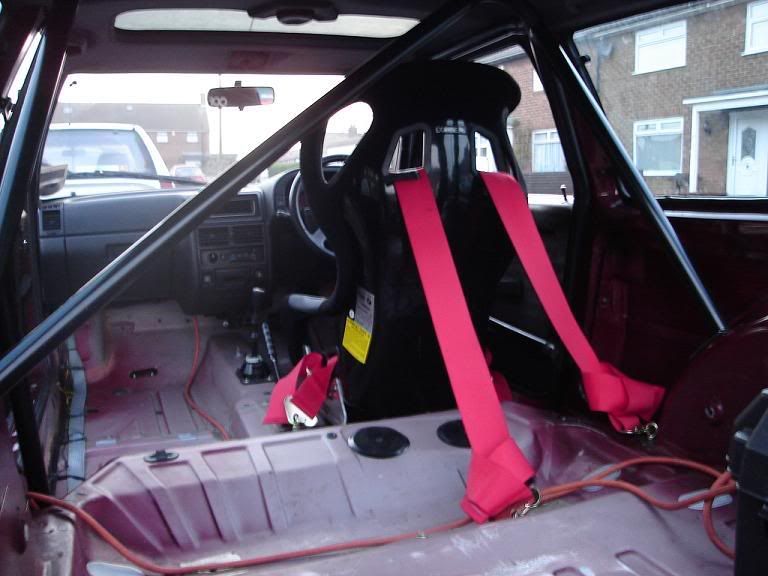
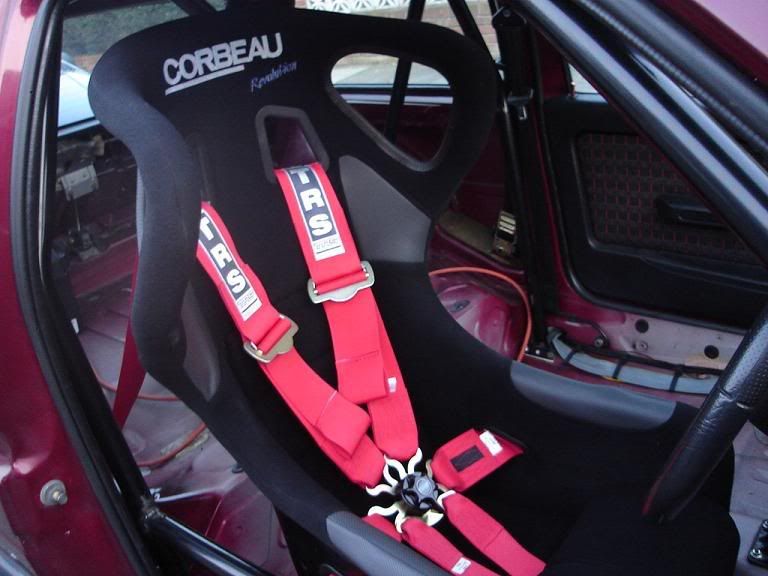
6point TRS Magnum 3" harness + fire extinguisher from rally design.
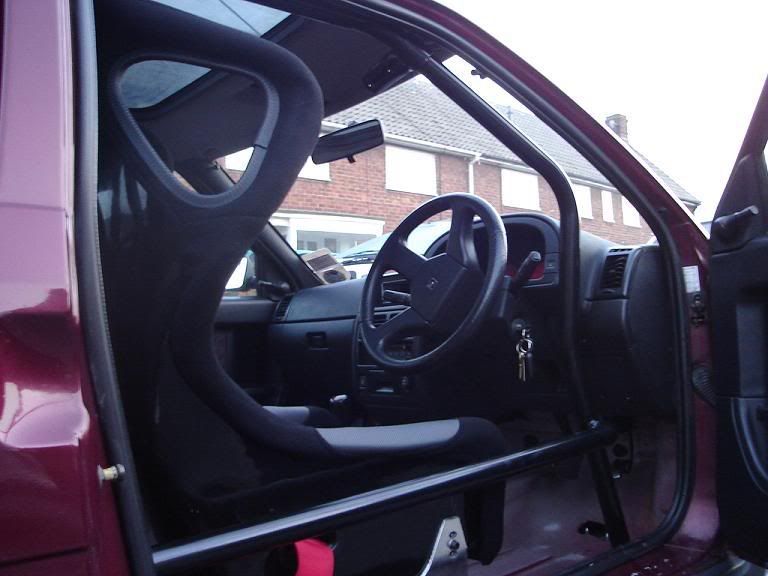
Corbeau Revolution bucket seat.
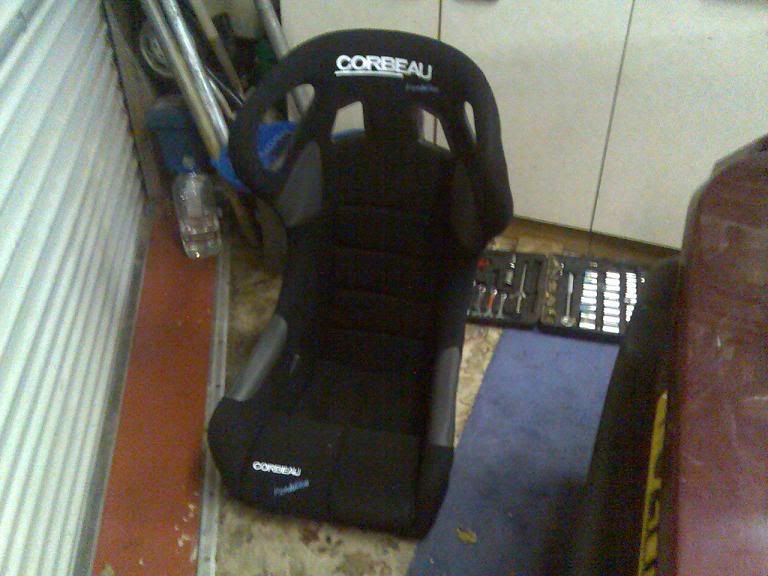
also decided to fit some of these for the 'bling' factor, :lol: 8)
Employed the help of a friend to help weld in the SD cage i also purchased, also to weld in the brackets/subframe to mount the revolution seat onto:
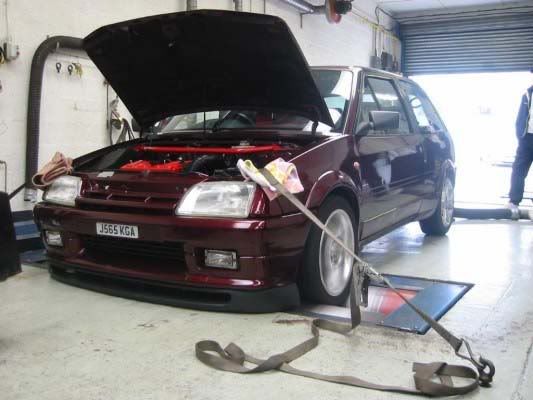
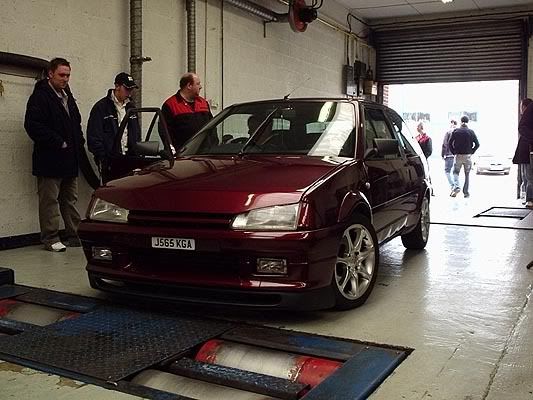
Once i had this sorted i took the car down to Motoscope to the rolling road session i organized with a handfull of people from NEMM. (North east modified motors)
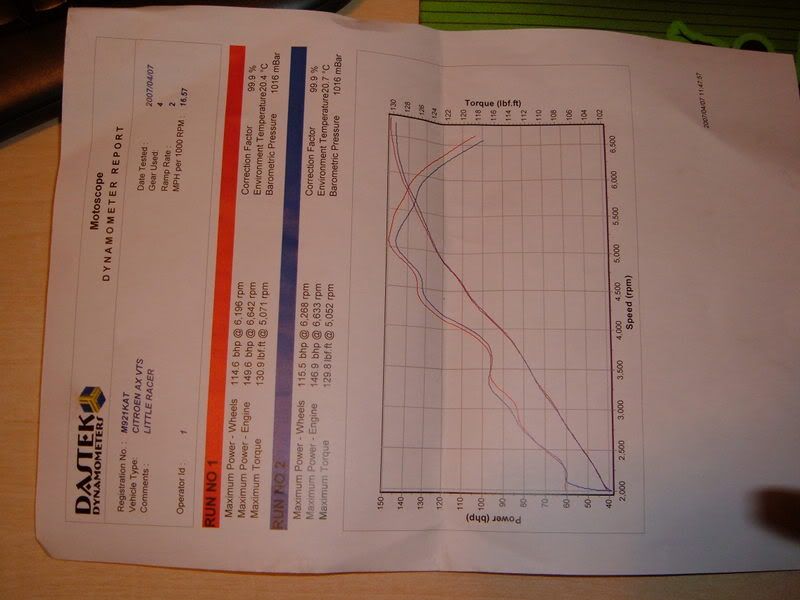
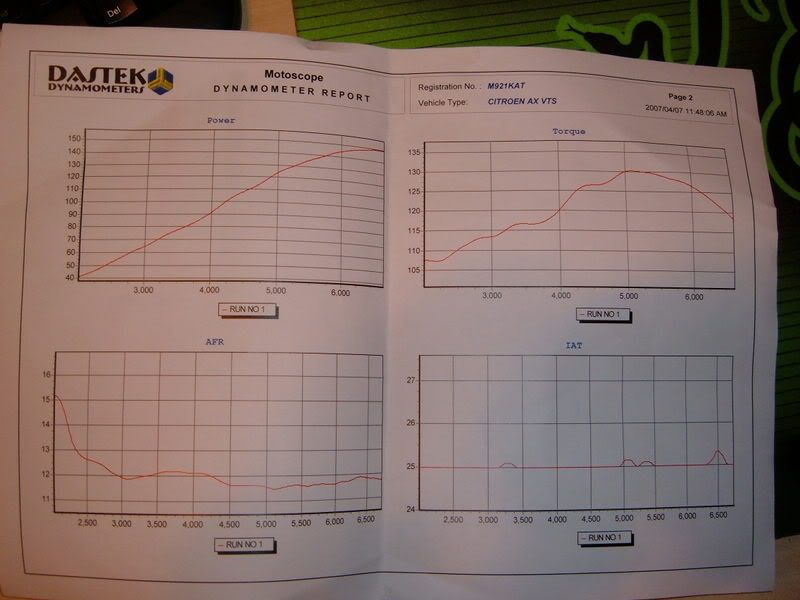
Not too bad.. 8) :twisted:
In the run up to FCS 07' i decided to do some more bits to make the car nicer, in my opinion anyway
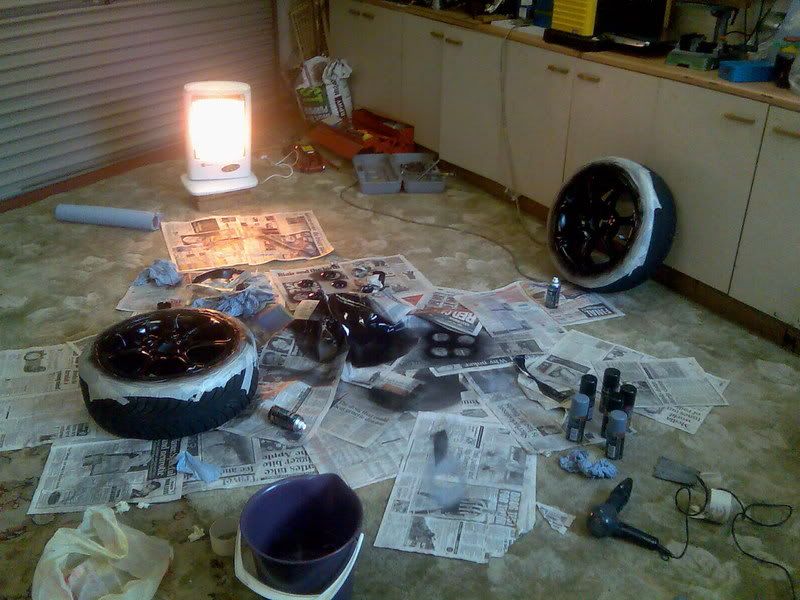
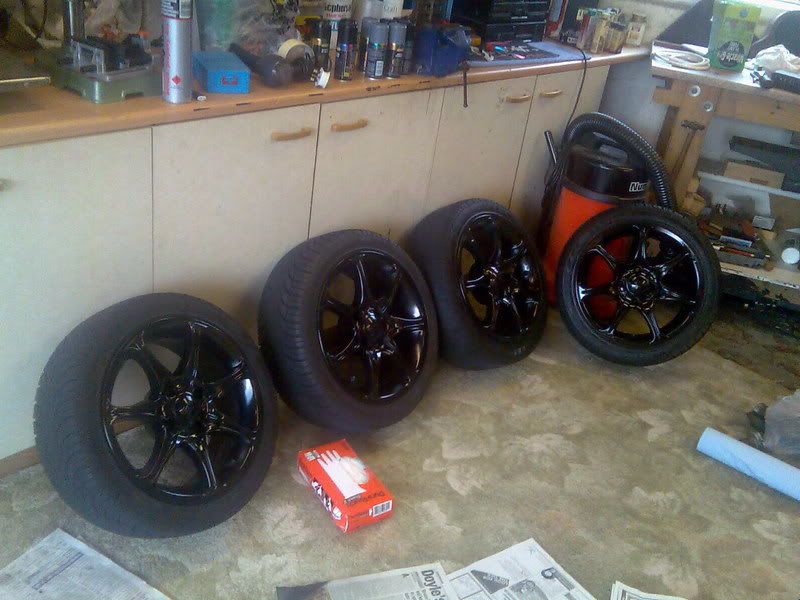
Painted my wheels black, came out superb. one of the best things ive done to the car yet tbh.
Also spent an eternity polishing my rocker covers. Me & a friend IIRC spent about 5 hours on each one lol. came out really well though, well worth it!
ECU, throttlebody & the alternator, along with the various brackets were polished also..
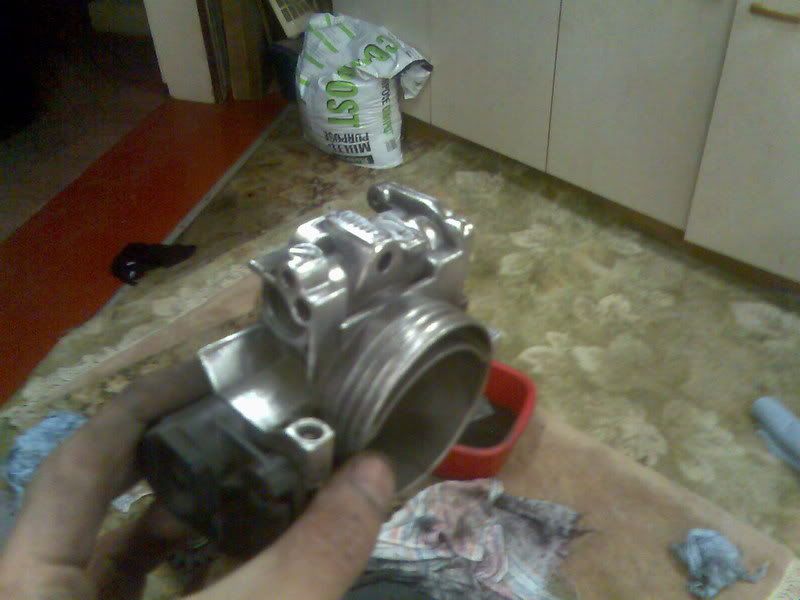
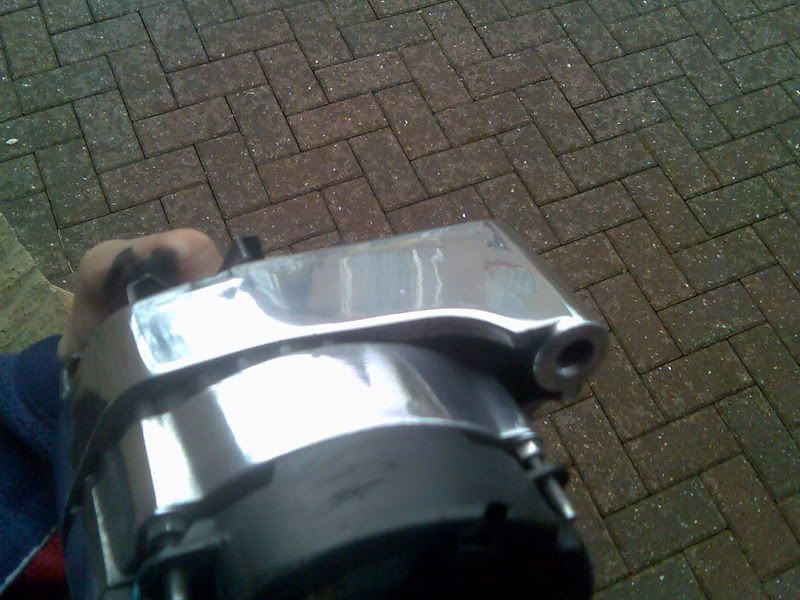
... and yes, all by hand :wink: :twisted:
En route..
... back from FCS 07' car cut out on the A1 randomly at about 11pm at night, in the PISSING down rain. no idea what was wrong so called the AA out to take me home.. an hour and a half later the guy turns up hauls the car onto the back of the truck and takes us home..
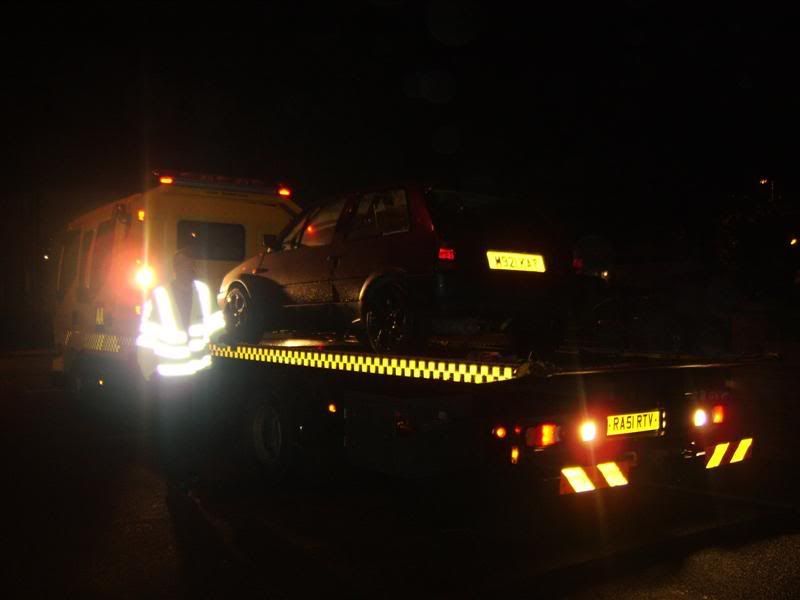
Turns out that a gear linkage had eaten through one of the injector wires, d'oh! easily fixed and back on the road again =]
At this point i'll add that ive had no other issues with the car since i didn the reshell/conversion
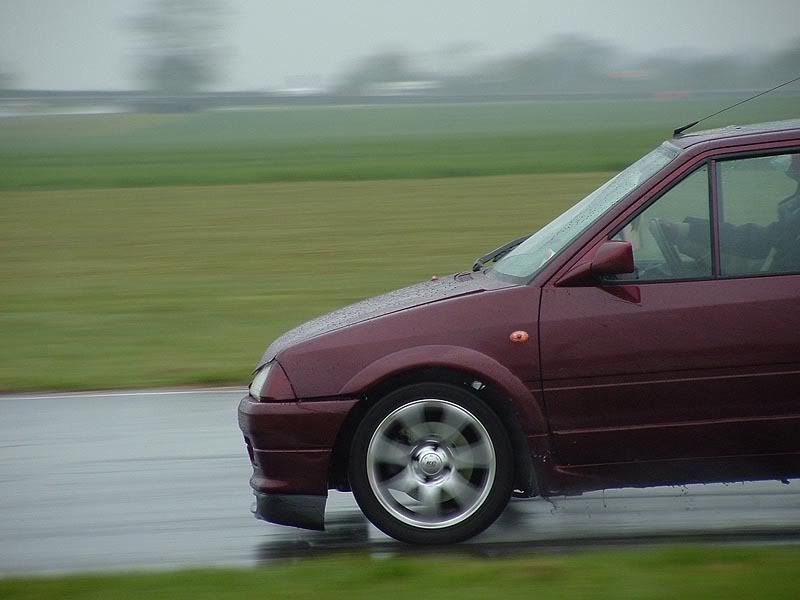
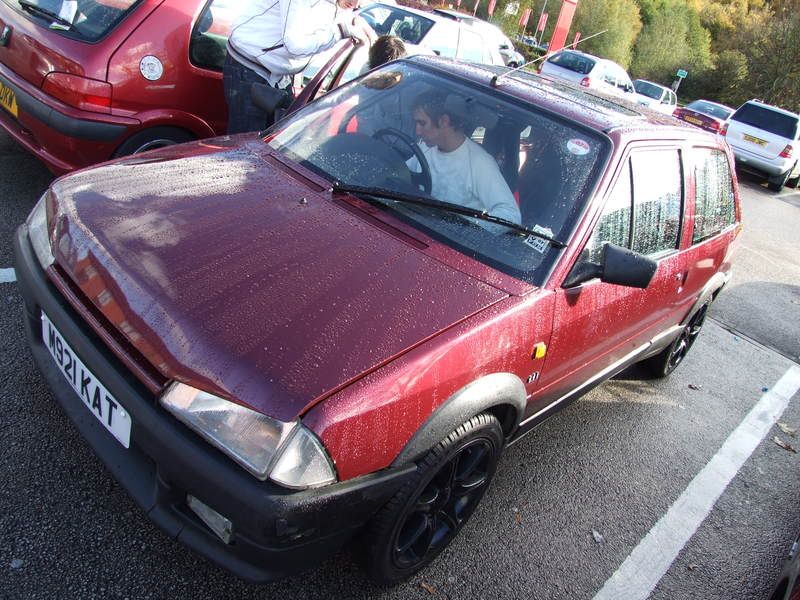
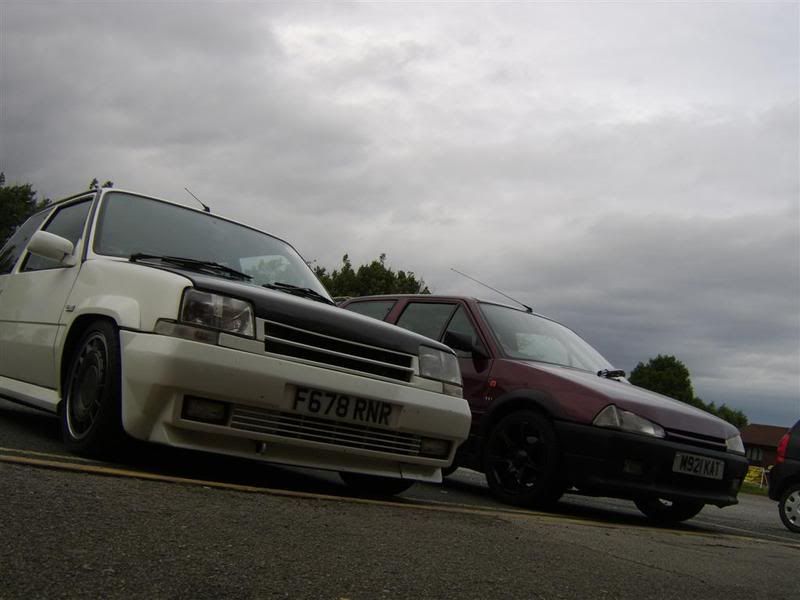
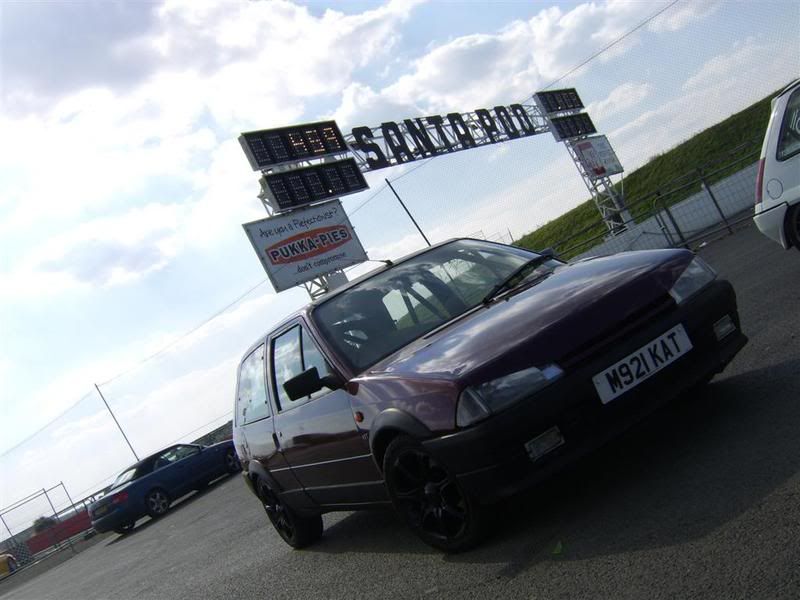
Enjoyed the summer, went to a handfull of car shows.. a local 'cruise' of which somebody took this picture:
safe to say i DID polish the car before i went, :lol: :lol:
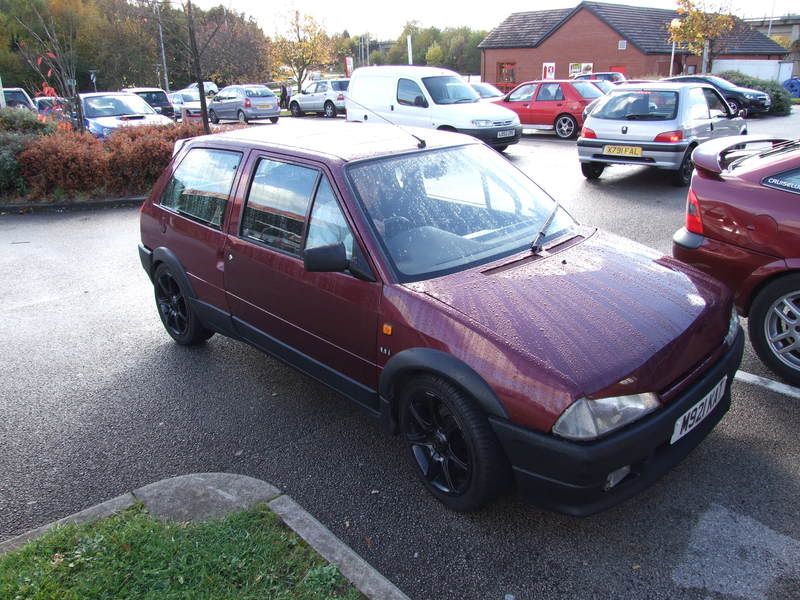
Attended a local AX Owners Club meet near Demon Tweeks in october.
I decided to make a video or two, (Sort of..) the story so far!
Feel free to comment =]
@ Story so far
[color=darkred][size=18]http://www.youtube.com/watch?v=xOp_jWc9hl4 [/size][/color]
@ Ultimate Street Car 07' [awesome weekend]
[color=darkred][size=18]http://www.youtube.com/watch?v=RblDdHUoqOo [/size][/color]
Some more pics:
THE NEXT EPISODE
Now we're all up to date with things, almost
MOT ran out on the car in March 08' so its been off the for a few months feeling sorry for itself, wishbones have gone slightly rusty etc from where i painted them all before.. and with the arrival of my other car, the AX Sport [see my other project thread!] which definatley wotn be ready this year ive decided to keep this car untill August and sell it then, but enjoy the summer this year in it. get some cool pictures and attend various shows etc.
So over the last week i've stripped the engine bay down, de-greased the engine and various bits and pieces ready for chroming/painting/powder coating [whichever applicable], and the engine bay is being resprayed next weekend. The aim is to put it all back together better than it was the first time [as im not really im a huge rush now, as i have a daily runabout therefore dont need this car on the road ASAP for work!!] :wink: :twisted:
Here's where were at so far as of today:
Engine bay
the drive.. lol
the street - > see my SPORT project thread as to why i no longer have a garage
Painted block..
Still lots more cleaning to do to the head though!
More to come =]
will update this every few days =]
The aim is to be ready for FCS, but we shall see !!
I 'did' have a rather huge thread about my original reshell & vts conversion which went on for about 40 odd' pages IIRC, so thought i'd be best to make a new one which explains the story a bit better :lol:
So here goes, I'll let the pictures do the majority of the talking;
In the beginning..
I bought an AX VTi after getting my first years NCB and could insure it..
However, within a week of owning it, the head gasket went pop and since i knew absolutley nothing about cars at this point it sat in the garage for about 6 weeks untill i eventually bought a haynes manual and a few tools, decided to crack on and change the head myself. All went well and my knowledge of cars kind of went from there.
Oops..
Within a few weeks of fixing the car i took a trip to Skegness with a few mates and ended up in a ditch. Moral of the story.. Dont, EVER take your eyes off the road, not even if you drop a drink!
Here's what the car looked like when i bought it:
And after the ditch:
The damage done from hitting the ditch was not much, a few dents. However the damage done by the guy dragging the car out of the ditch was rather extensive. by dragging it out by the towing eye (weak point when dragging out side on?) it had bent the inner wing, which meant it would need to be put onto a jig, get a full respray etc etc and a new door.
Then it sat there for a few weeks...
The 'project' began..
As i couldnt afford to pay the cost of getting the work done to the forte' and a few other problems with it (rotten sills etc), i spoke to a friend of mine Charlie who had a 1.1i AX Forte on his drive with a broken door. So a few hundred sheets later (£250 IIRC?) and a 12 months MOT ticket i begun to crack on with a reshell project.
The new shell
Citroen AX 1.1i Forte.. with a broken door which i just swapped for one from the GTi shell. albeit a slightly different shade & came with metal flake paint effect.
Out with the old...
Time to crack on with the new!...
Wiring..
Swapped the entire car wiring loom over to a GTi loom with a CAT 1 alarm already plumbed in.
Engine..
Out of the old shell..
In with the new..
The important tool..
did have an issue with the engine mounts though, as the old GTi shell had the later type cradle mount , and the forte had the poverty spec mounting. not to worry though.
Some pictures so you can see what i meant:
Poverty forte mount
GTi alloy mount
Bought a S1 Rallye inlet Manifold..
However i decided to ditch the idea & sell it after reading many neagtive things about running problems once its been fitted, without having a remap.
It looked nice anyway!
Coming along..
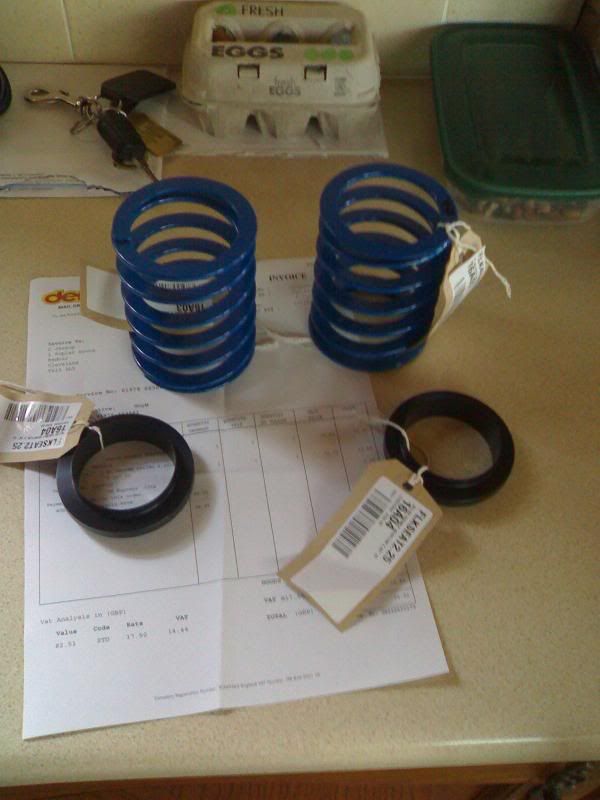
Got some new bits through the post...
Pacet cooling fan, poly bushes, some samco, flexible cable for battery relocation.
Bilstein group N dampers.
200lb springs, 40lb 4" Helpers + Platforms and an in-line thermostat/fan controller.
Purchased a 4-1 GMC 8v manifold and fitted that. Was rude not to
How she sat for a few days..
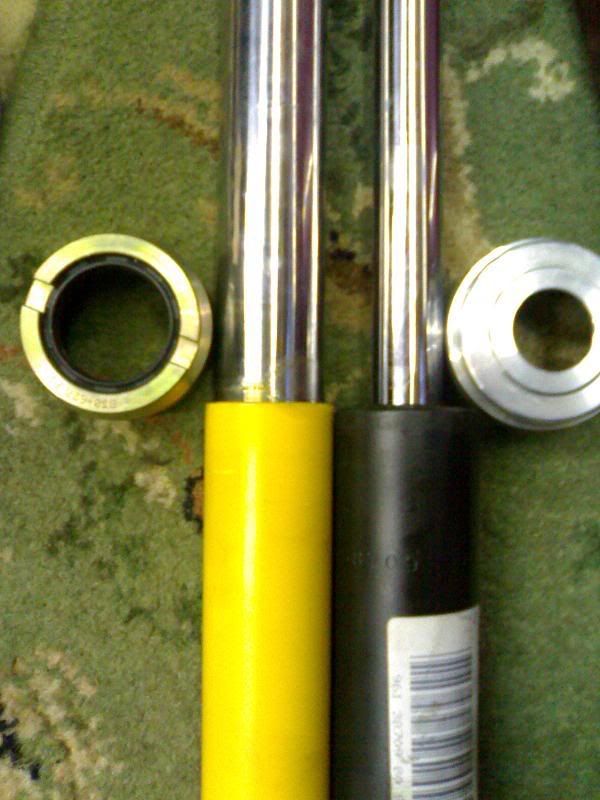
Made up some coilovers..
Invested in a coilovers conversion kit, which needed a bit of modification, mainly in the top spring cup and damper cap, as the bilstein rod was much thicker than the standard AX GTi damper, as well as the top thread was thicker also.. See pics below >>
partly together.. but you get the idea =]
NOTE: 206 GTi 266mm Brakes
finished article:
On the car..
NOTE: Eccentric top mounts
More new toys.
Invested in some more samco and an alloy header tank from AlliSport. IIRC it was about £55 and they put the hose fitments to my spec, which was ideal =]
The plumbing:
Fairly chuffed with how it was coming together..
If you didnt already notice , I had fitted a 106 Diesel radiator also, as it was much larger than the standard 1.1i radiator.
Almost there
So i decided that now she was on 4 wheels i'd push her outside while it wasnt pissing it down lol.
The next few days was a case of tidying things up etc..
Ignore the pikey tie wrap job on the header tank lol
And thats that... not quite!
After attending FCS 2006' as it was in the above pictures.. i decided that over the winter of 06' to take the car off the road and undergo the next 'phase' if you will! giving me some more power and another 8 valves
Thus, Project VTS Forte began...
New bits..
VTS engine..
4-2-1 Racelant stainless manifold:
24mm rear Anti-roll Bar
Off came the dash, again
armed with an obscene amount of notes and wiring diagrams i cracked on...
most helpfull diagrams!
After many hours of working out the saxo 16v wiring loom buzzing all the various connectors etc, i made them suit my AX GTi dash loom which i didnt need to modify (just needed to add a few new wires for fuel pump, digital speedo, oil temp etc).
decided that having another multiplug for the extra wires would be beneficial if i ever needed to remove the engine, rather than a straight through wire.
So end result i went from this AX GTi engine loom:
To this, AX VTS engine loom:
Cracking on..
Fitted new timing belt kit, idler, pump etc..
New clutch came through the post so fitted that while engine was out.
Out with the old..
Monster ride height huh?
Its in!!
A BMC CDA air filter came on the market cheap nearby so i picked that up sharply and fitted that too!
I also fitted a Saxo VTS brake servo & master cylinder as i decided using the 1.1i forte ones and 206 gti brakes wasnt such a good combination after a while!
Problems?
After lots of teething running problems, the vts was most definatley not idling properly at all, kept cutting out, spluttering etc etc all the time. spent a while trying to work out what the hell was wrong. tested all the various sensors, turns out that the Lambda sensor was to blame. Was replaced sharply and all is good =]
Here's how the manifold looked after driving round the block (not hard) while the lambda wasnt doing its job properly! :|
eek!
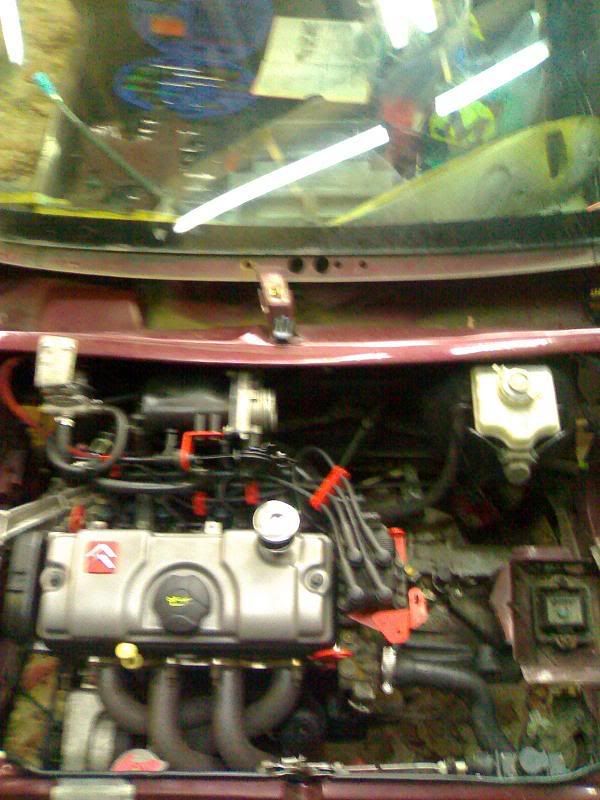
How it looked by now..
Engine bay looks SO much better than the old 8v in my opinion. The 16v option is definatley the way forward for anybody thinking about doing an engine conversion with an AX.
[img]http://i131.photobucket.com/albums/p307/Jessop_bucket/Project%20Forte/VTS/Engine/Image084.jpg[/img[
I took it to get MOT'd.. failed on emissions first time round but took it elsewhere and it passed not a problem. dodgy old standard exhausts eh
how she looked on the stand
I decided that i wanted to do a bit more with the car also, had a bti of spare cash laying about so bought some funky new toys:
6point TRS Magnum 3" harness + fire extinguisher from rally design.
Corbeau Revolution bucket seat.
also decided to fit some of these for the 'bling' factor, :lol: 8)
Employed the help of a friend to help weld in the SD cage i also purchased, also to weld in the brackets/subframe to mount the revolution seat onto:
Once i had this sorted i took the car down to Motoscope to the rolling road session i organized with a handfull of people from NEMM. (North east modified motors)
Not too bad.. 8) :twisted:
In the run up to FCS 07' i decided to do some more bits to make the car nicer, in my opinion anyway
Painted my wheels black, came out superb. one of the best things ive done to the car yet tbh.
Also spent an eternity polishing my rocker covers. Me & a friend IIRC spent about 5 hours on each one lol. came out really well though, well worth it!
ECU, throttlebody & the alternator, along with the various brackets were polished also..
... and yes, all by hand :wink: :twisted:
En route..
... back from FCS 07' car cut out on the A1 randomly at about 11pm at night, in the PISSING down rain. no idea what was wrong so called the AA out to take me home.. an hour and a half later the guy turns up hauls the car onto the back of the truck and takes us home..
Turns out that a gear linkage had eaten through one of the injector wires, d'oh! easily fixed and back on the road again =]
At this point i'll add that ive had no other issues with the car since i didn the reshell/conversion
Enjoyed the summer, went to a handfull of car shows.. a local 'cruise' of which somebody took this picture:
safe to say i DID polish the car before i went, :lol: :lol:
Attended a local AX Owners Club meet near Demon Tweeks in october.
I decided to make a video or two, (Sort of..) the story so far!
Feel free to comment =]
@ Story so far
[color=darkred][size=18]http://www.youtube.com/watch?v=xOp_jWc9hl4 [/size][/color]
@ Ultimate Street Car 07' [awesome weekend]
[color=darkred][size=18]http://www.youtube.com/watch?v=RblDdHUoqOo [/size][/color]
Some more pics:
THE NEXT EPISODE
Now we're all up to date with things, almost
MOT ran out on the car in March 08' so its been off the for a few months feeling sorry for itself, wishbones have gone slightly rusty etc from where i painted them all before.. and with the arrival of my other car, the AX Sport [see my other project thread!] which definatley wotn be ready this year ive decided to keep this car untill August and sell it then, but enjoy the summer this year in it. get some cool pictures and attend various shows etc.
So over the last week i've stripped the engine bay down, de-greased the engine and various bits and pieces ready for chroming/painting/powder coating [whichever applicable], and the engine bay is being resprayed next weekend. The aim is to put it all back together better than it was the first time [as im not really im a huge rush now, as i have a daily runabout therefore dont need this car on the road ASAP for work!!] :wink: :twisted:
Here's where were at so far as of today:
Engine bay
the drive.. lol
the street - > see my SPORT project thread as to why i no longer have a garage
Painted block..
Still lots more cleaning to do to the head though!
More to come =]
will update this every few days =]
The aim is to be ready for FCS, but we shall see !!


Finished degreasing a handfull of bits from the engine bay after work today. Just come in from the garage tbh. :lol:
Handfull of bits & pieces coated in Kurust then paint ahoy.
Theres a handfull of bits i really would like to get chromed but its extra expense which i could put towards the sport, or a trackday or something in the summer, so i think i'll just paint them. /sob
Pics to come in a few days...
Handfull of bits & pieces coated in Kurust then paint ahoy.
Theres a handfull of bits i really would like to get chromed but its extra expense which i could put towards the sport, or a trackday or something in the summer, so i think i'll just paint them. /sob
Pics to come in a few days...

1275GT - Just give them a ruff up with some 1000 grit paper (i cant remember what i used? sorry!) and make sure they are properly degreased.
I used this:
http://www.capitalonline.biz/shop/product.php?productid=16601
Great stuff. [especially when its free!]
However make sure you wear rubber gloves or something !!!
Two coats of metal primer and then 2 coats of gloss black car paint.
jobs a goodun.
Also get a bucket of water and put some hot water into it and put the cans into that for a few minutes before using them and give them a proper shake for a few minutes [not just 10 seconds or so!] and it should come out alrite.
I used a small heater next to each while to help with the 'curing' i think they call it? :lol:
Best of luck my friend =]
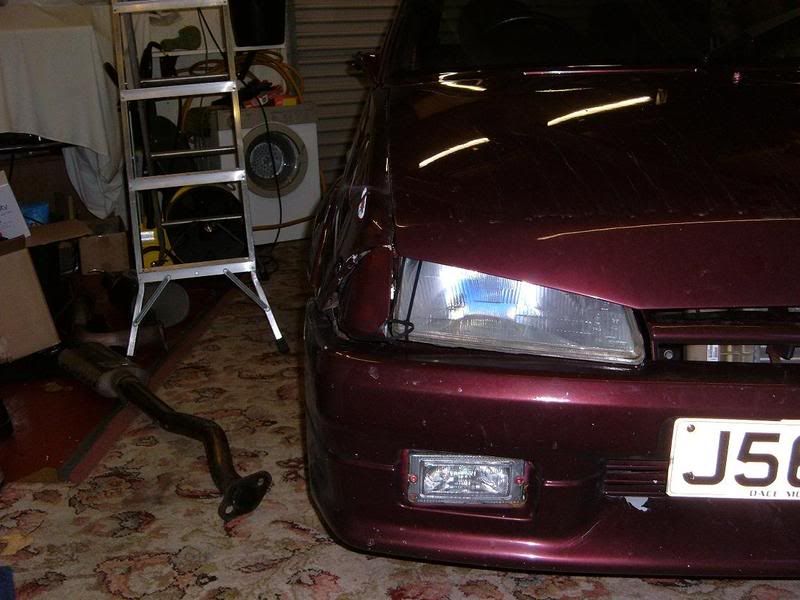
And the bonnet is being changed.
Engine bay is being painted this weekend, wont be long after when i spray the/a door to get rid of the metal flake and slightly different shade of colour.
Painted a few odds & sodds this evening also.
How do you all feel about gold gear linkages?
Didnt quite look right in silver.
Anybody have a good idea or can comment from past experience on the amount i should expect (approximatley) to pay for chroming 3 small rods, a bracket, a bonnet catch, and 2 engine mounts? [relative sizes of bits can be seen form some of pics above].
Advice would be most appreciated.
More to come guys .. =]
I used this:
http://www.capitalonline.biz/shop/product.php?productid=16601
Great stuff. [especially when its free!]
However make sure you wear rubber gloves or something !!!
Two coats of metal primer and then 2 coats of gloss black car paint.
jobs a goodun.
Also get a bucket of water and put some hot water into it and put the cans into that for a few minutes before using them and give them a proper shake for a few minutes [not just 10 seconds or so!] and it should come out alrite.
I used a small heater next to each while to help with the 'curing' i think they call it? :lol:
Best of luck my friend =]
And the bonnet is being changed.
Engine bay is being painted this weekend, wont be long after when i spray the/a door to get rid of the metal flake and slightly different shade of colour.
Painted a few odds & sodds this evening also.
How do you all feel about gold gear linkages?
Didnt quite look right in silver.
Anybody have a good idea or can comment from past experience on the amount i should expect (approximatley) to pay for chroming 3 small rods, a bracket, a bonnet catch, and 2 engine mounts? [relative sizes of bits can be seen form some of pics above].
Advice would be most appreciated.
More to come guys .. =]
UPDATE
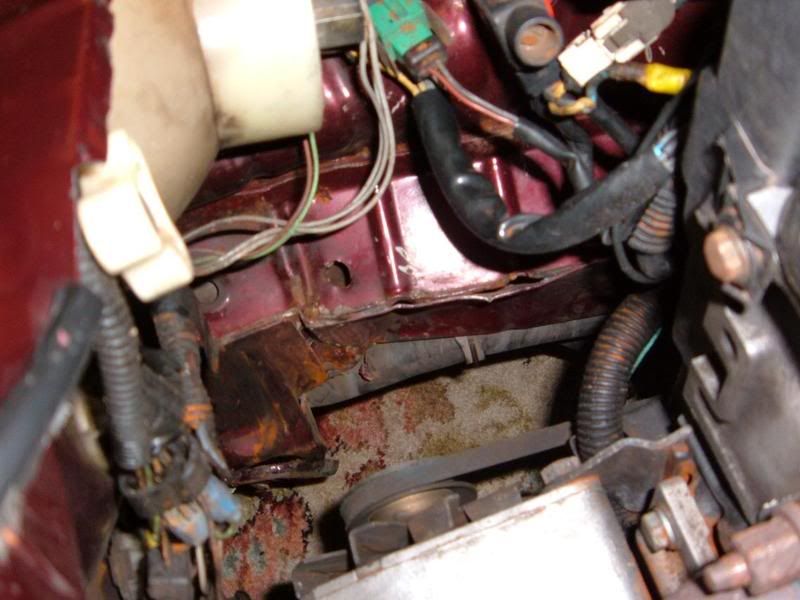
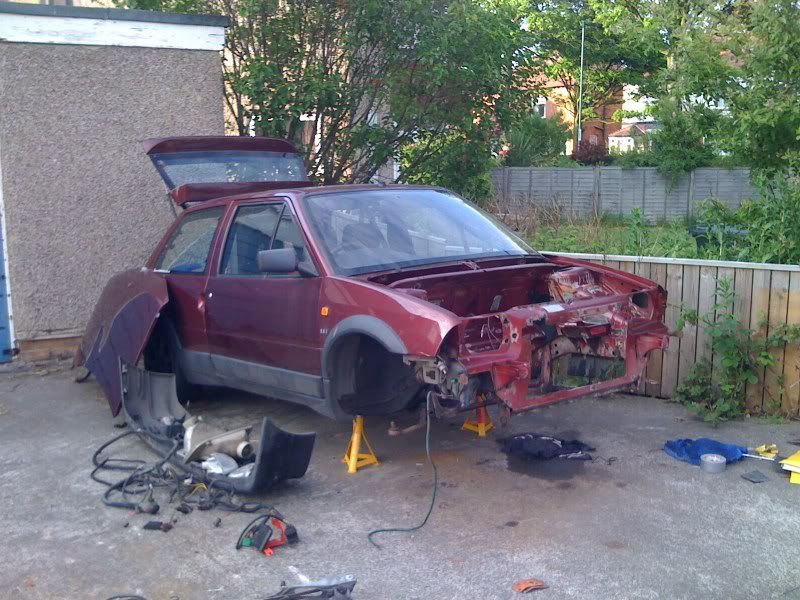
Over the last week ive basically stripped everything from the front side of the car, including loom, all clips, fasteners brackets etc ready to clean them, polish them or whatever.. as long as when they go back they look nice & new im happy. 8)
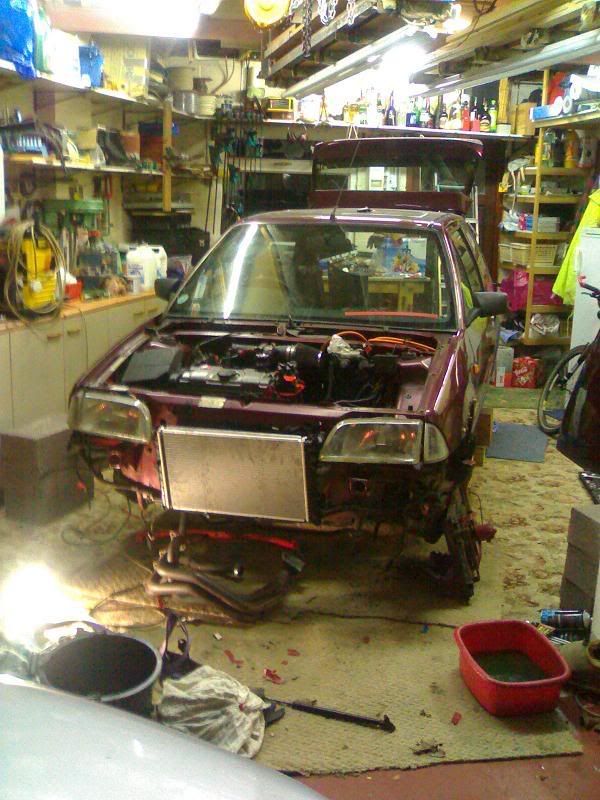
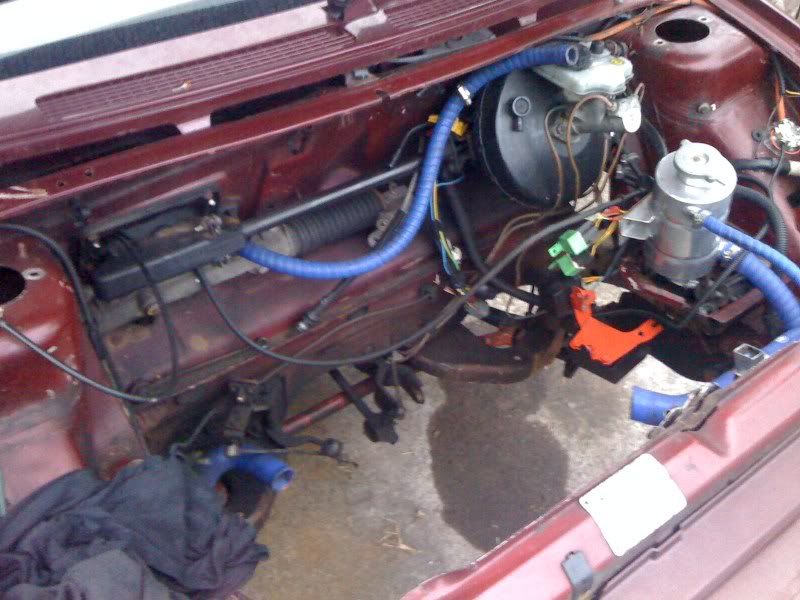
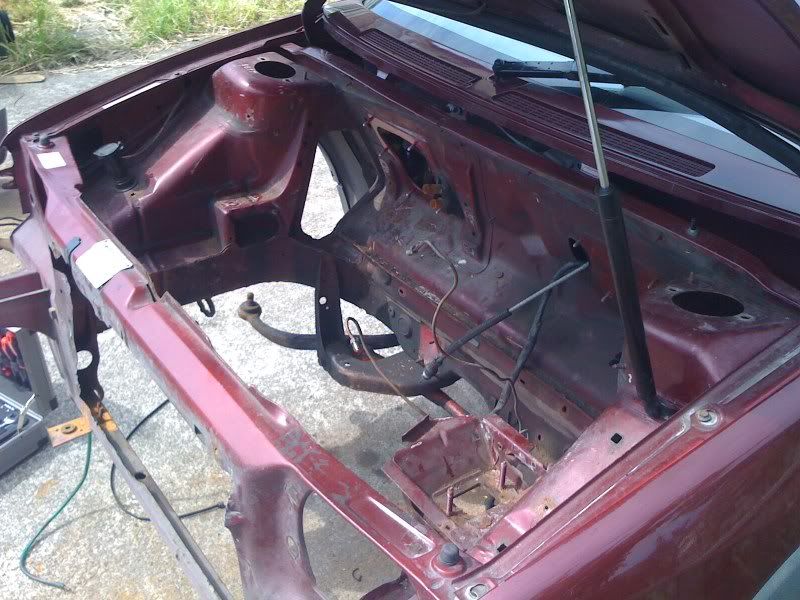
Today i cracked on with prepping the engine bay for painting tomorrow.
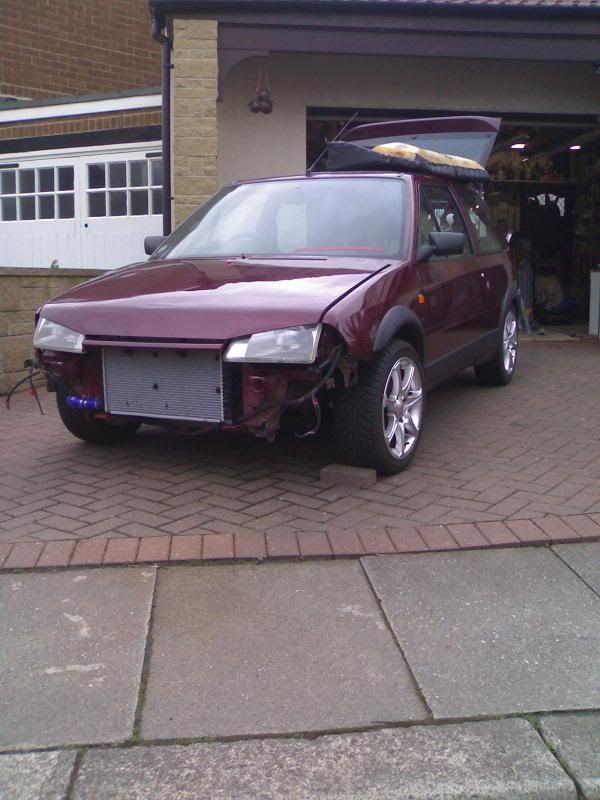
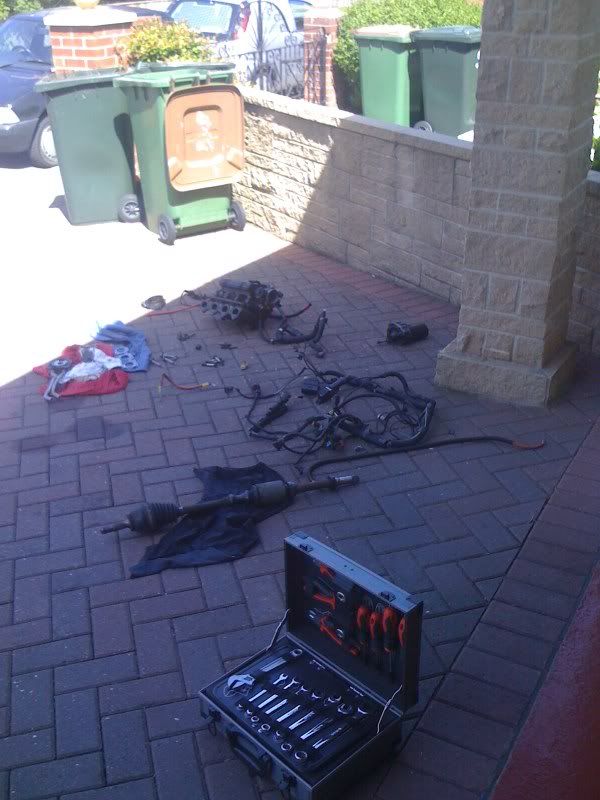
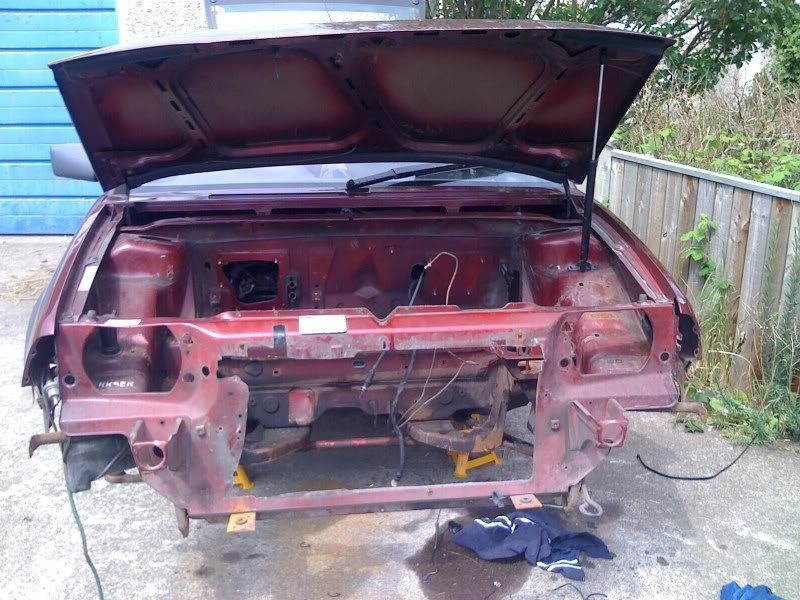
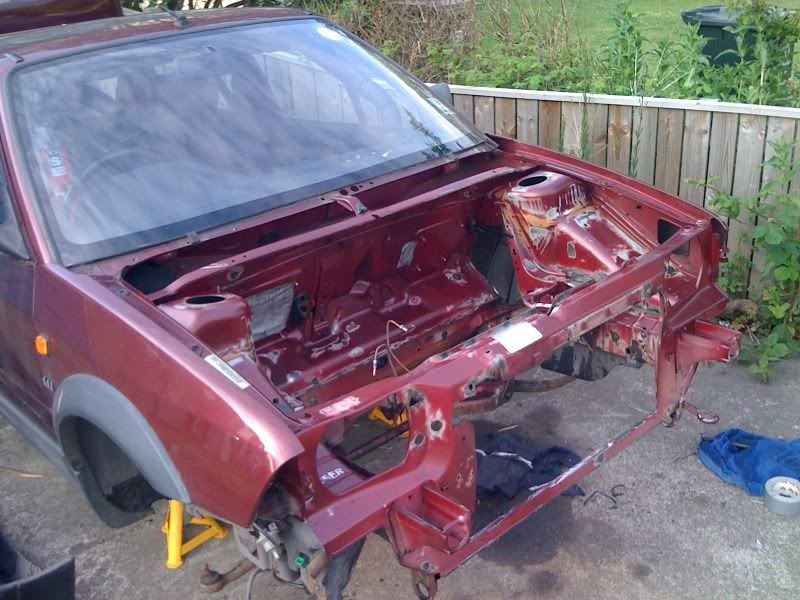
Removed front end of the car...
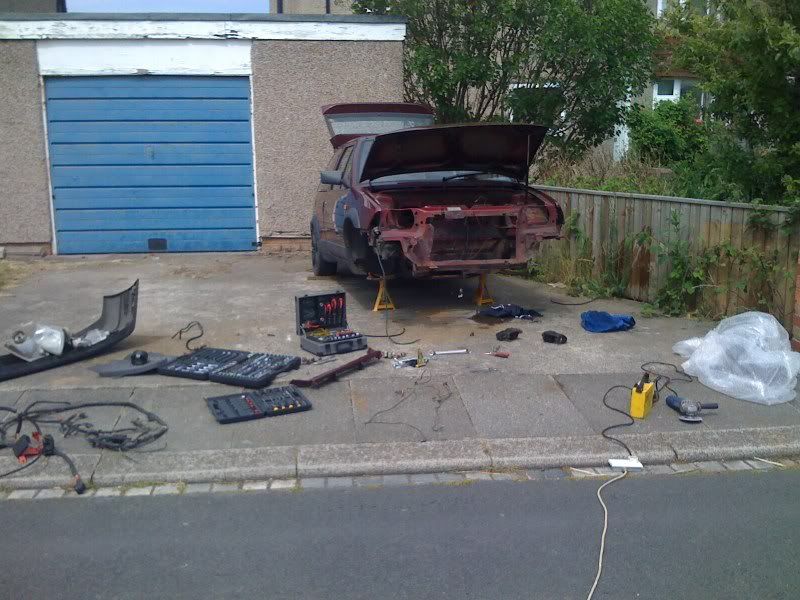
Note: the trusty halfords toolkit!!
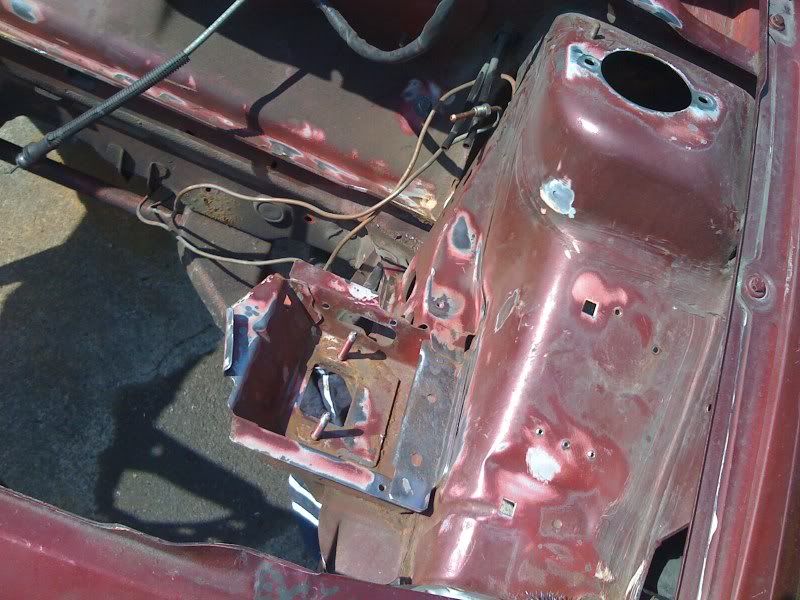
It was relativley mint with nothing but surface rust in small places, biggest bit being on the battery tray but again, surface rust and it soon came away.
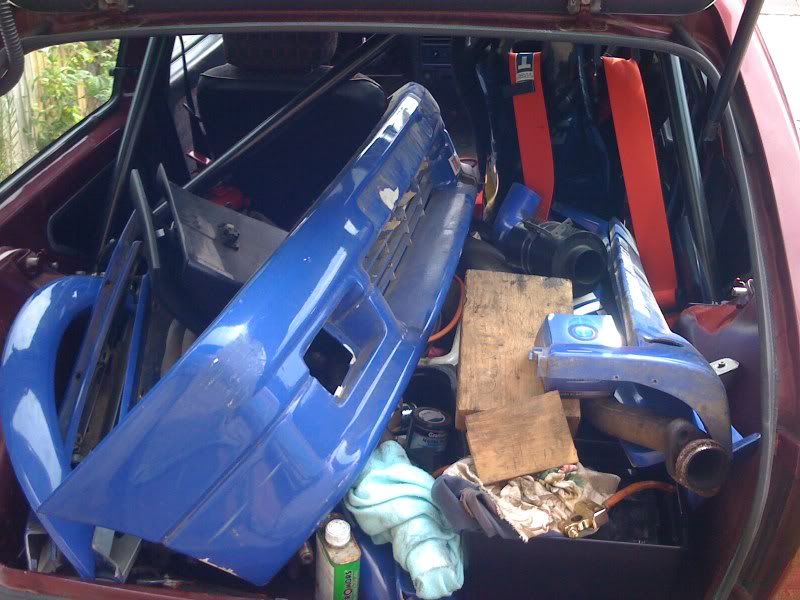
I also have various bits & pieces of the sport bodykit, 3 exhaust manifolds, an exhaust, front struts, ecu, brackets, alternator etc etc stashed inside the car.. while making sure nothing touched the corbeau seat.
....god i cant wait to get back into that thing since driving the diesel runabout 1.4 AX its bodyroll city and just no shoulder hugging fun!
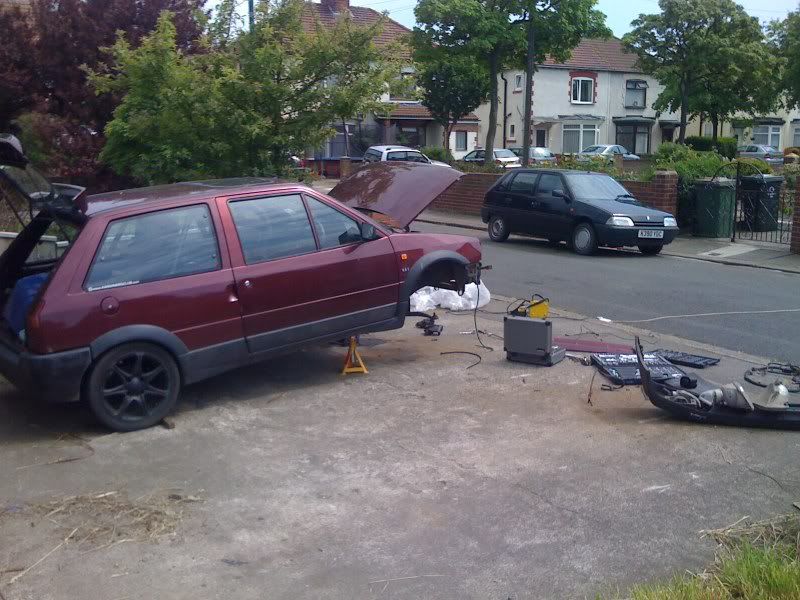
Side view:
Playtime
After removing everything that i wouldnt want painted, i god the grinder out with a wire wheel and went at anything brown/rusty in the bay.
any rough metal (such as battery tray parallel inner wing i went at with 60 grit paper, 240 grit then 600, got bored and continued with the grinder, ill leave that to the painter to do sufficient prep.
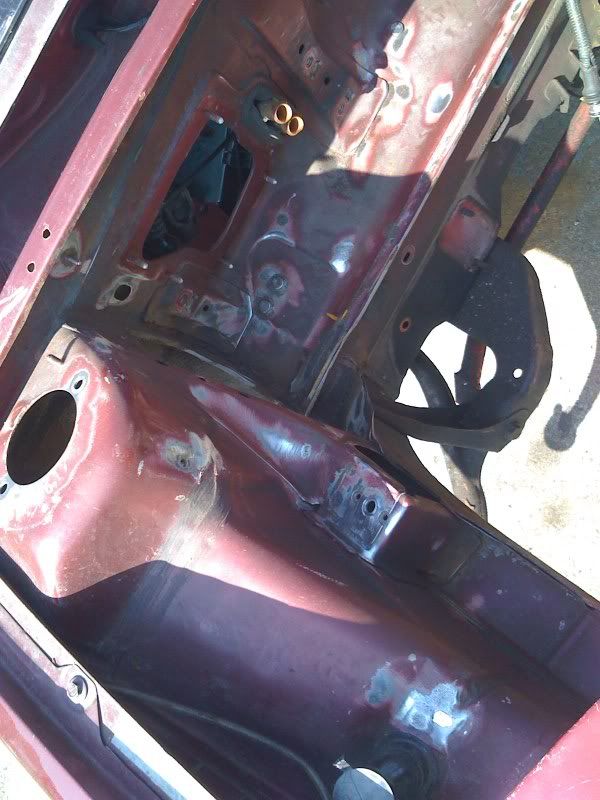
Once i was happy with rust removal i continued on and degreased the engine bay with some decent stuff [or at least to my knowledge its decent!]
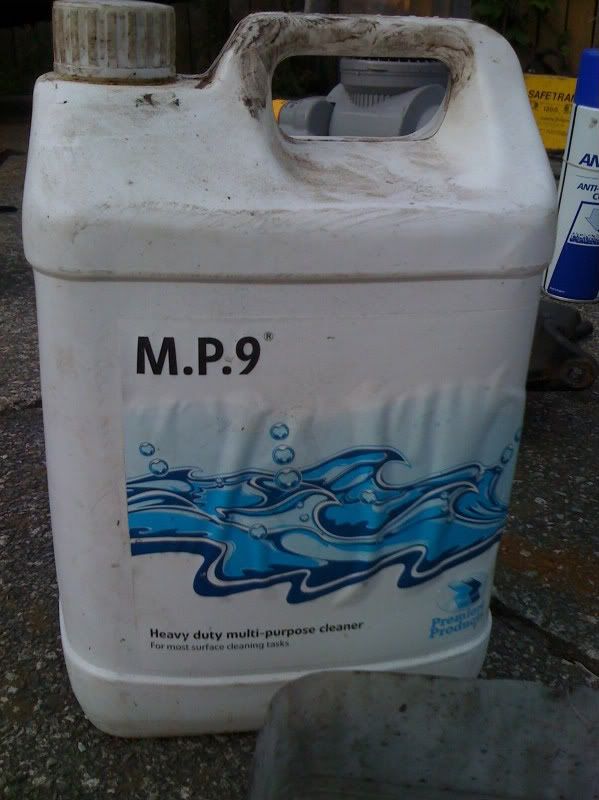
Its about £9 online, or free if you work at the right place
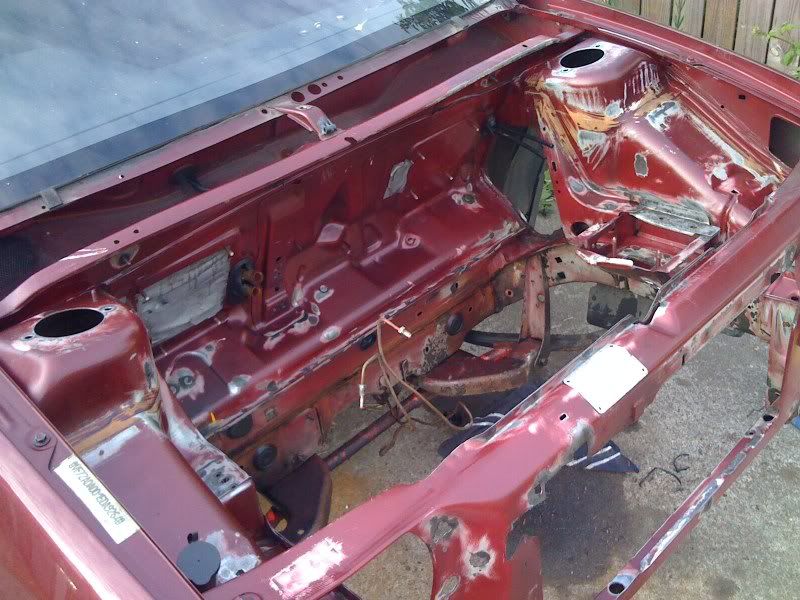
bit further out..
Then i went in to get some scran, ended up watching britains got talent for a bit then it started to get dark :roll: :lol:
Anything i wasnt totally happy with, in little nooks and crannies that i couldnt get all the brown away because the metal was pitted or whatever, i gave it a lick of Kurust as i dont have access to a big enough compressor at home to use all my sandblasting stuff. so it should last a while nevertheless once its painted, im confident enough to say itll last a long time even for a NEW owner once i sell it in August time once ive enjoyed the summer in it :wink:
More to come over the next few days.
At Croft tomorrow for the BTCC, been looking forward to it for a while last year was great =]
feels like forever since i was last at a track :lol:
hope everybody has a productive weekend in preparation for the show season
My target for THIS project is 3 weeks, in time for the French Car Show on June 22nd.. possibly [and hopefully?? who knows] a Mag feature once its done too ? will have to get the polishing rags out ! :twisted: :twisted: :twisted:
Over the last week ive basically stripped everything from the front side of the car, including loom, all clips, fasteners brackets etc ready to clean them, polish them or whatever.. as long as when they go back they look nice & new im happy. 8)
Today i cracked on with prepping the engine bay for painting tomorrow.
Removed front end of the car...
Note: the trusty halfords toolkit!!
It was relativley mint with nothing but surface rust in small places, biggest bit being on the battery tray but again, surface rust and it soon came away.
I also have various bits & pieces of the sport bodykit, 3 exhaust manifolds, an exhaust, front struts, ecu, brackets, alternator etc etc stashed inside the car.. while making sure nothing touched the corbeau seat.
....god i cant wait to get back into that thing since driving the diesel runabout 1.4 AX its bodyroll city and just no shoulder hugging fun!
Side view:
Playtime
After removing everything that i wouldnt want painted, i god the grinder out with a wire wheel and went at anything brown/rusty in the bay.
any rough metal (such as battery tray parallel inner wing i went at with 60 grit paper, 240 grit then 600, got bored and continued with the grinder, ill leave that to the painter to do sufficient prep.
Once i was happy with rust removal i continued on and degreased the engine bay with some decent stuff [or at least to my knowledge its decent!]
Its about £9 online, or free if you work at the right place
bit further out..
Then i went in to get some scran, ended up watching britains got talent for a bit then it started to get dark :roll: :lol:
Anything i wasnt totally happy with, in little nooks and crannies that i couldnt get all the brown away because the metal was pitted or whatever, i gave it a lick of Kurust as i dont have access to a big enough compressor at home to use all my sandblasting stuff. so it should last a while nevertheless once its painted, im confident enough to say itll last a long time even for a NEW owner once i sell it in August time once ive enjoyed the summer in it :wink:
More to come over the next few days.
At Croft tomorrow for the BTCC, been looking forward to it for a while last year was great =]
feels like forever since i was last at a track :lol:
hope everybody has a productive weekend in preparation for the show season
My target for THIS project is 3 weeks, in time for the French Car Show on June 22nd.. possibly [and hopefully?? who knows] a Mag feature once its done too ? will have to get the polishing rags out ! :twisted: :twisted: :twisted:
ok car has been dropped off for painting.
had a proper nightmare towing it there as the big bolt and washers i was using to hold the bearing together instead of shafts knocking about failes and the bearing fell to pieces.. result:: wheel at 45* angle.
Luckily enough it did no damage though (although i did drop the wheel and its chipped the black paint off it.. D'OH! so that'll have to be re-done soon!).
So round the corner from my house i ran back and forth with tools and removed one of the leda struts off my Sport and fitted that instead, along with proper driveshafts and lots of trusty tiewraps!!
got there in the end though after this.. so should get it back in a few days looking well =]
downside is though it pissed down today while i was f king about with the strut etc so some bits of the bay have gone rusty, but its just surface and itll probably rub off with just ones thumb lol, nevertheless it'll look good when it comes back..
Looking forward to crackong on putting it back together.
Roll on FCS eh?
had a proper nightmare towing it there as the big bolt and washers i was using to hold the bearing together instead of shafts knocking about failes and the bearing fell to pieces.. result:: wheel at 45* angle.
Luckily enough it did no damage though (although i did drop the wheel and its chipped the black paint off it.. D'OH! so that'll have to be re-done soon!).
So round the corner from my house i ran back and forth with tools and removed one of the leda struts off my Sport and fitted that instead, along with proper driveshafts and lots of trusty tiewraps!!
got there in the end though after this.. so should get it back in a few days looking well =]
downside is though it pissed down today while i was f
king about with the strut etc so some bits of the bay have gone rusty, but its just surface and itll probably rub off with just ones thumb lol, nevertheless it'll look good when it comes back.. Looking forward to crackong on putting it back together.
Roll on FCS eh?
Small update..
While im waiting for paint to dry and the weather to stop being so st...
I decided to take some pics and update this thread. =]
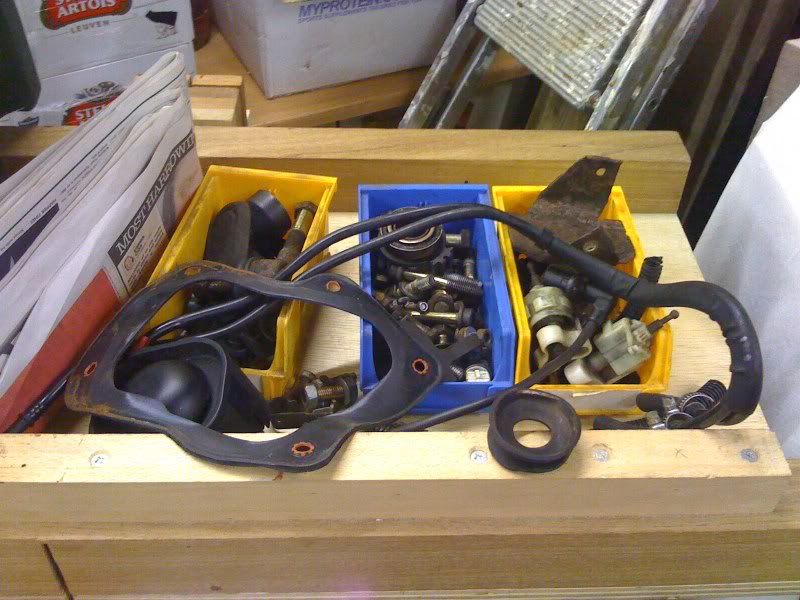
Not enough space in the garage to do very much otherwise i'd have a handfull of other bits & pieces bathing in Kurust at the moment.. nevertheless, heres some pics of some bits and pieces im in the progress of 'tidying up'
Should look pretty sweet once its in the car.. [i hope!]
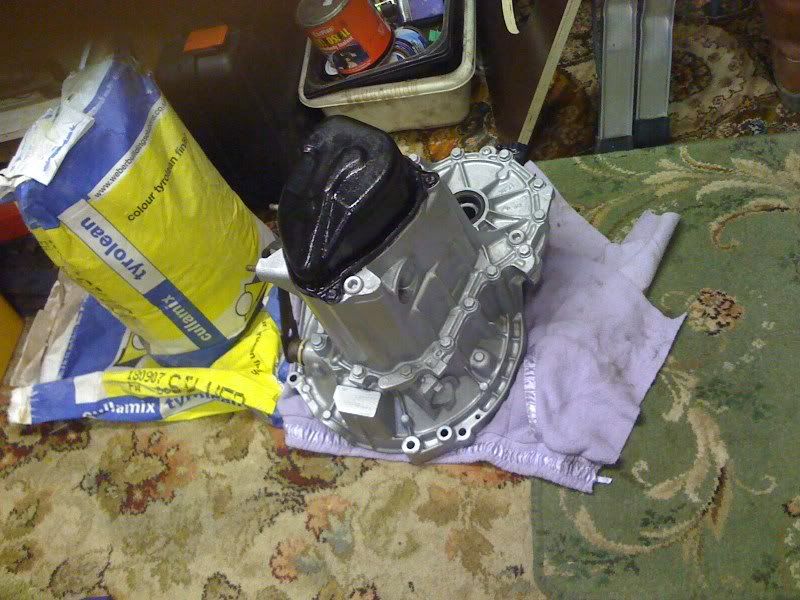
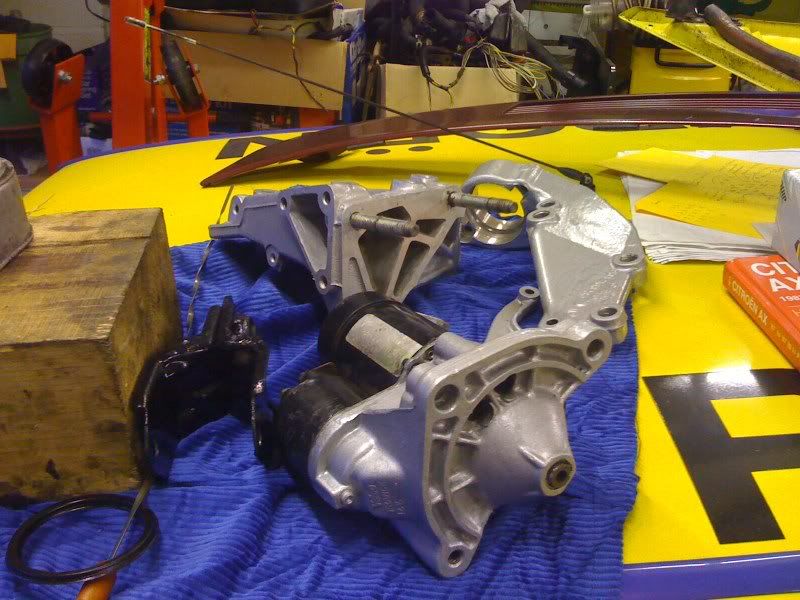
VTS Gearbox
engine mounts & gear linkages
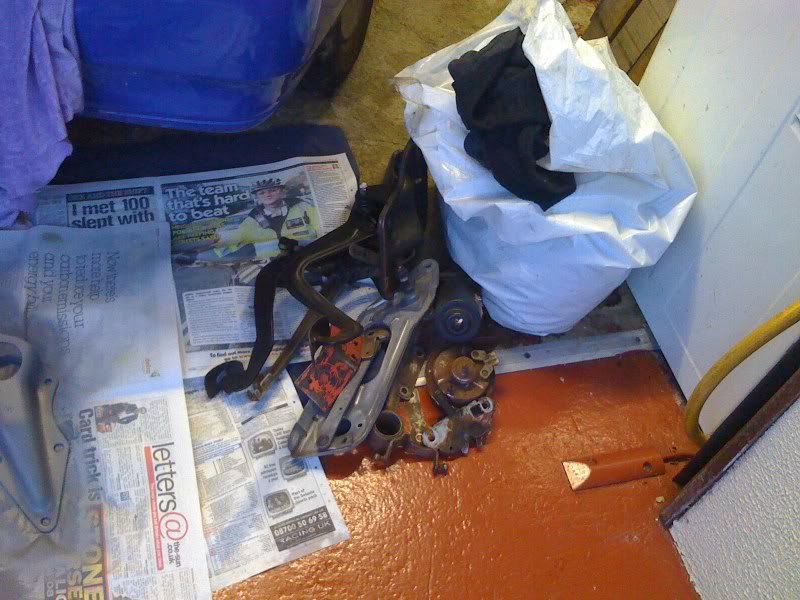
Lots of other bits and pieces waiting to be degreased etc
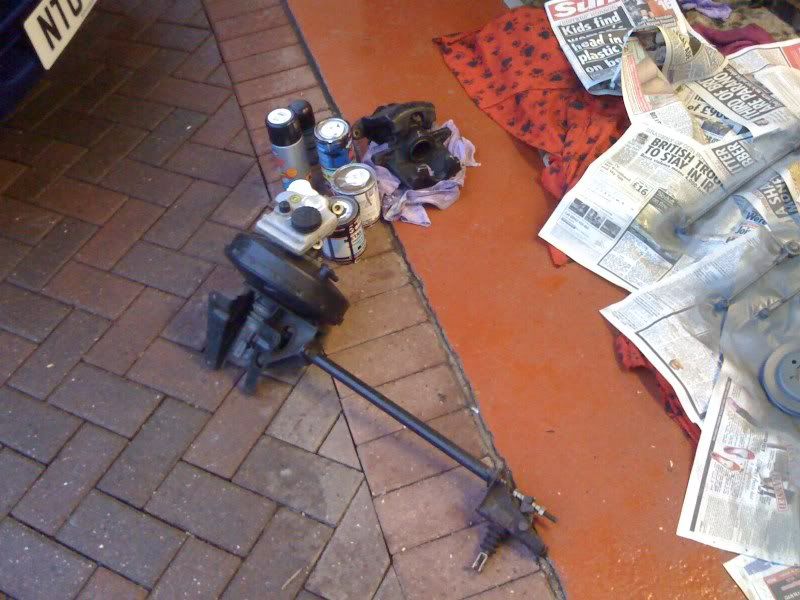
Think i'll keep the servo & brackets black. however i think im going to polish the M/C, or at least the flat front bit of it
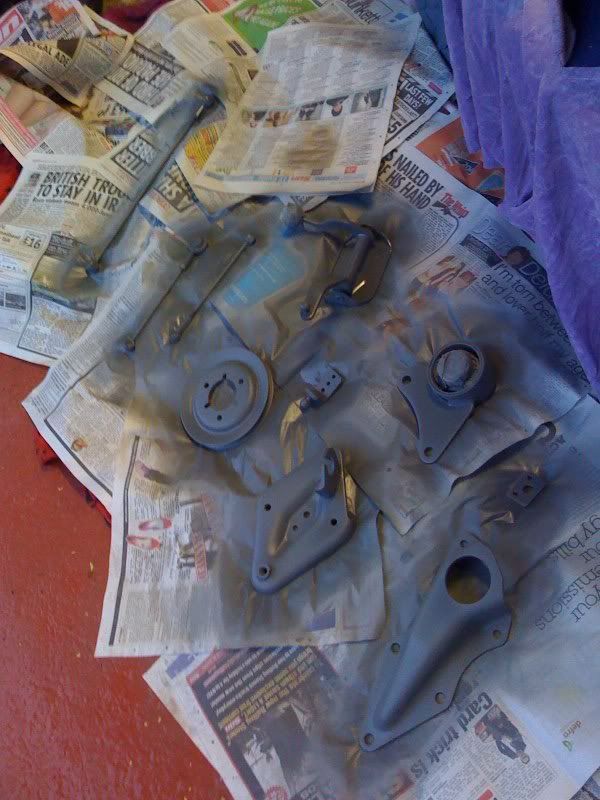
Some bits already done, not totally happy with them so will probably do them again
Lots of other bits & pieces to clean up.
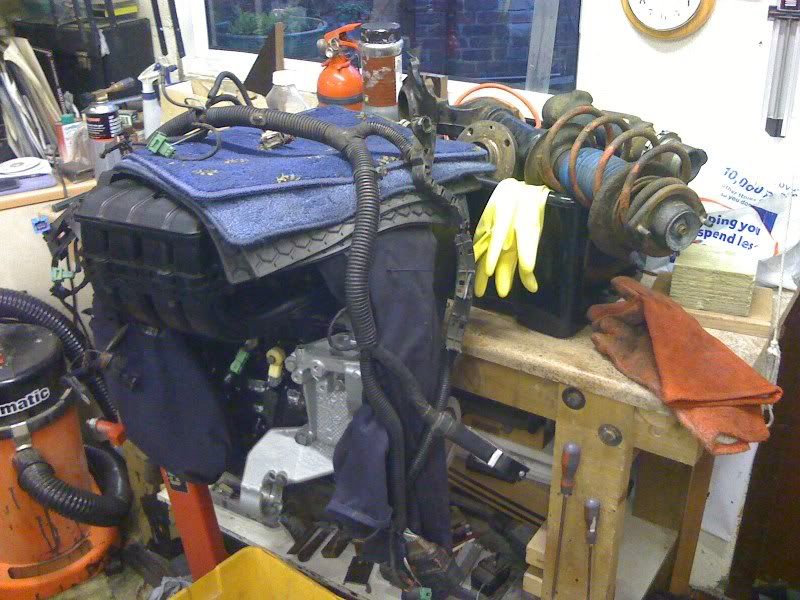
The spare VTS engine, loom, some coilovers and another set of struts
Lots of nuts and bolts i need to replace with shiny ones
I think you'll agree lots of work yet to do before FCS !!!
Not to mention get it through an MOT also !!! =[
Went to see the engine bay yesterday also. Looks pretty sweet tbh even with just the first coat going on! Looking forward to seeing what it looks like with the final coat and lacquer on! shiny shiny!
.. more to come =]
While im waiting for paint to dry and the weather to stop being so s
t... I decided to take some pics and update this thread. =]
Not enough space in the garage to do very much otherwise i'd have a handfull of other bits & pieces bathing in Kurust at the moment.. nevertheless, heres some pics of some bits and pieces im in the progress of 'tidying up'
Should look pretty sweet once its in the car.. [i hope!]
VTS Gearbox
engine mounts & gear linkages
Lots of other bits and pieces waiting to be degreased etc
Think i'll keep the servo & brackets black. however i think im going to polish the M/C, or at least the flat front bit of it
Some bits already done, not totally happy with them so will probably do them again
Lots of other bits & pieces to clean up.
The spare VTS engine, loom, some coilovers and another set of struts
Lots of nuts and bolts i need to replace with shiny ones
I think you'll agree lots of work yet to do before FCS !!!
Not to mention get it through an MOT also !!! =[
Went to see the engine bay yesterday also. Looks pretty sweet tbh even with just the first coat going on! Looking forward to seeing what it looks like with the final coat and lacquer on! shiny shiny!
.. more to come =]
Gassing Station | Readers' Cars | Top of Page | What's New | My Stuff