Chris' MX5 NBFL
Discussion


It's certainly been awhile since I've been in the driver's seat of an MX5.
Some may remember my supercharged NA, named The Purple Monster. I stripped this for parts in 2018 to fund my R34 GTT (which I still own).

I did own an NC1 Sport back in 2022/2023 but sold it to buy a 'sensible diesel car'.

The current daily driver project is a 1996 Mazda 323F V6 which I purchased in January 2024. I've been doing Youtube for about 3 years and unfortunately there just isn't enough content left in it. So I've made the decision to sell it and buy another car.

A platform that I'm familiar with, a chassis I've not yet done before (well, kinda...to a degree) and something that will help my Youtube channel.
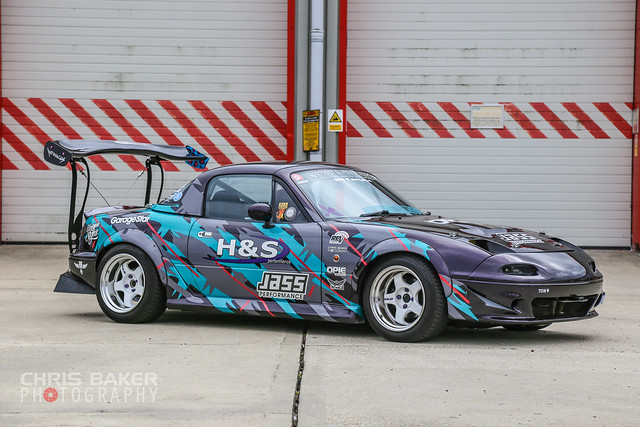
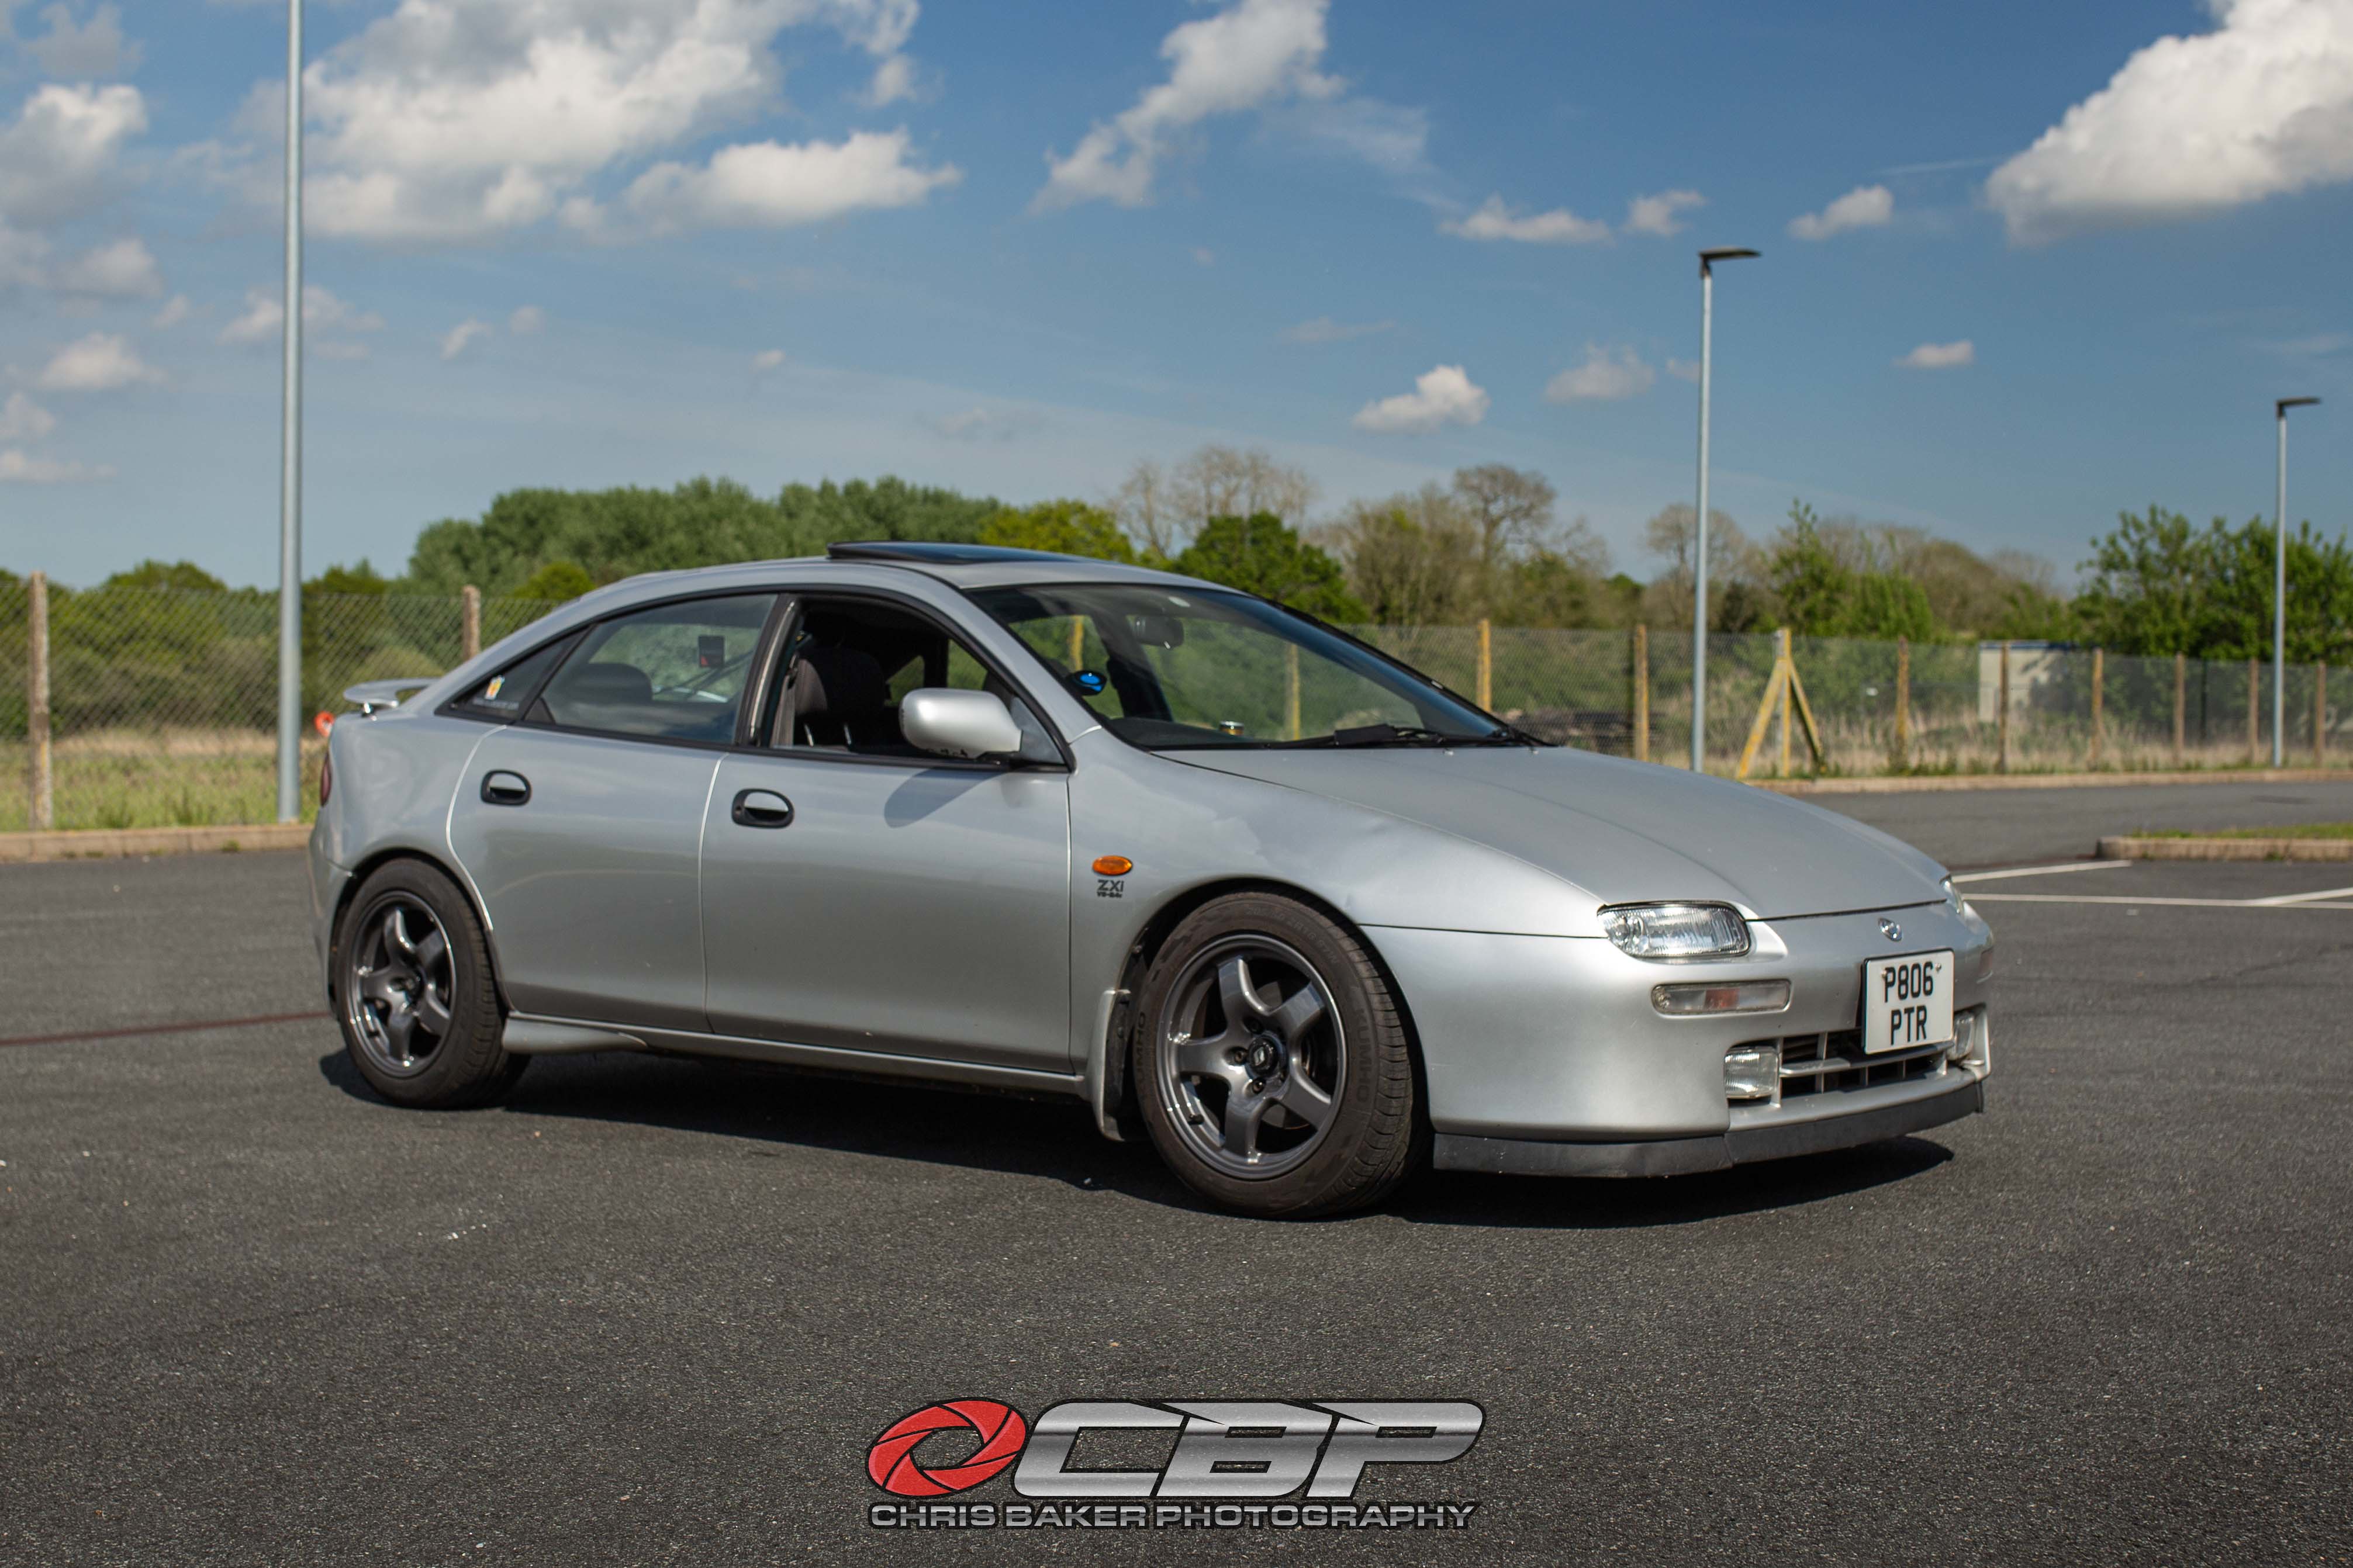
Welcome to my MX5 NBFL project

The car is a 2004 NBFL Arctic Edition with a 1.8 VVT, 5 speed manual with an open diff. Currently on 119k miles.


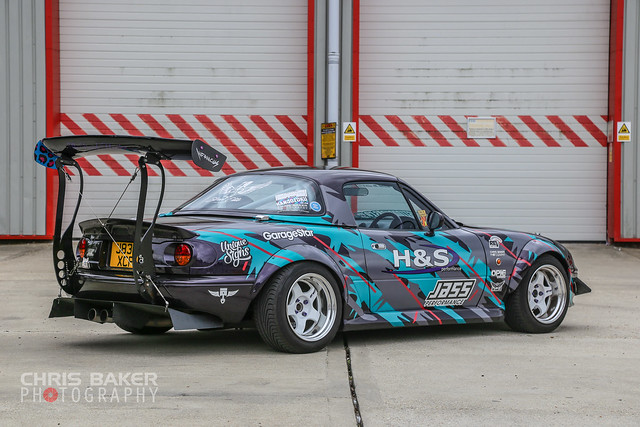
The chrome fuel filler cap has been badly painted along with the chrome door mirror covers. These will be replaced in the future.


The softtop is in really good condition, the glass window is an added bonus


The car is on stock shock absorbers and lowering springs. These will be the first to get changed, the ride is too bouncy and it could really do with an alignment.


The first thing I checked when viewing the car was checking the condition of the sills. They're solid and look to have been replaced at some point. The rear arches feel solid but I've noticed some minor bubbling. There's also evidence of sanding marks so unsure if they've been replaced/repaired, the inner arch doesn't look new.

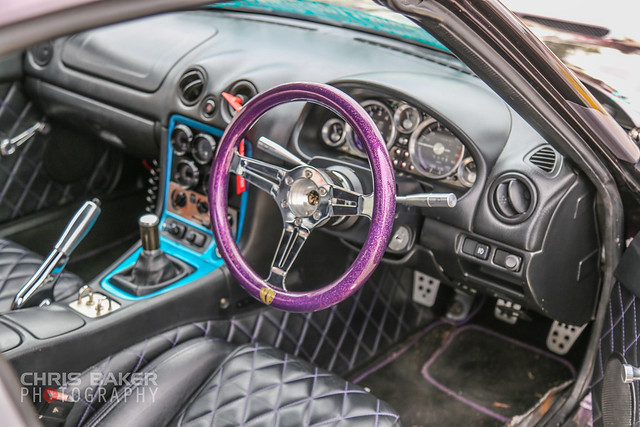
The interior is stock with the exception of the gear shifter and stereo. The heated leather seats will come in handy during the winter months. I wasn't sure about the blue leather but it's slowly growing on me.


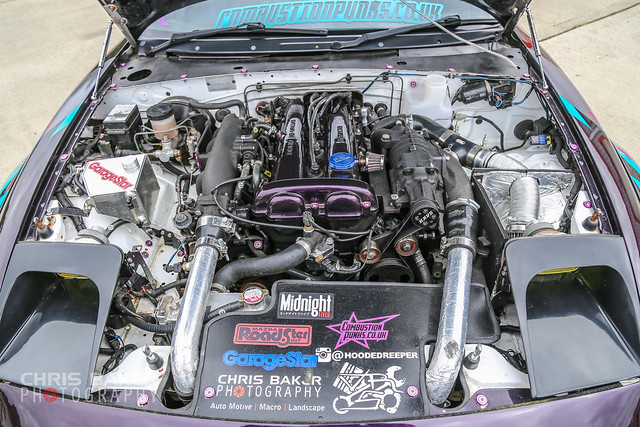
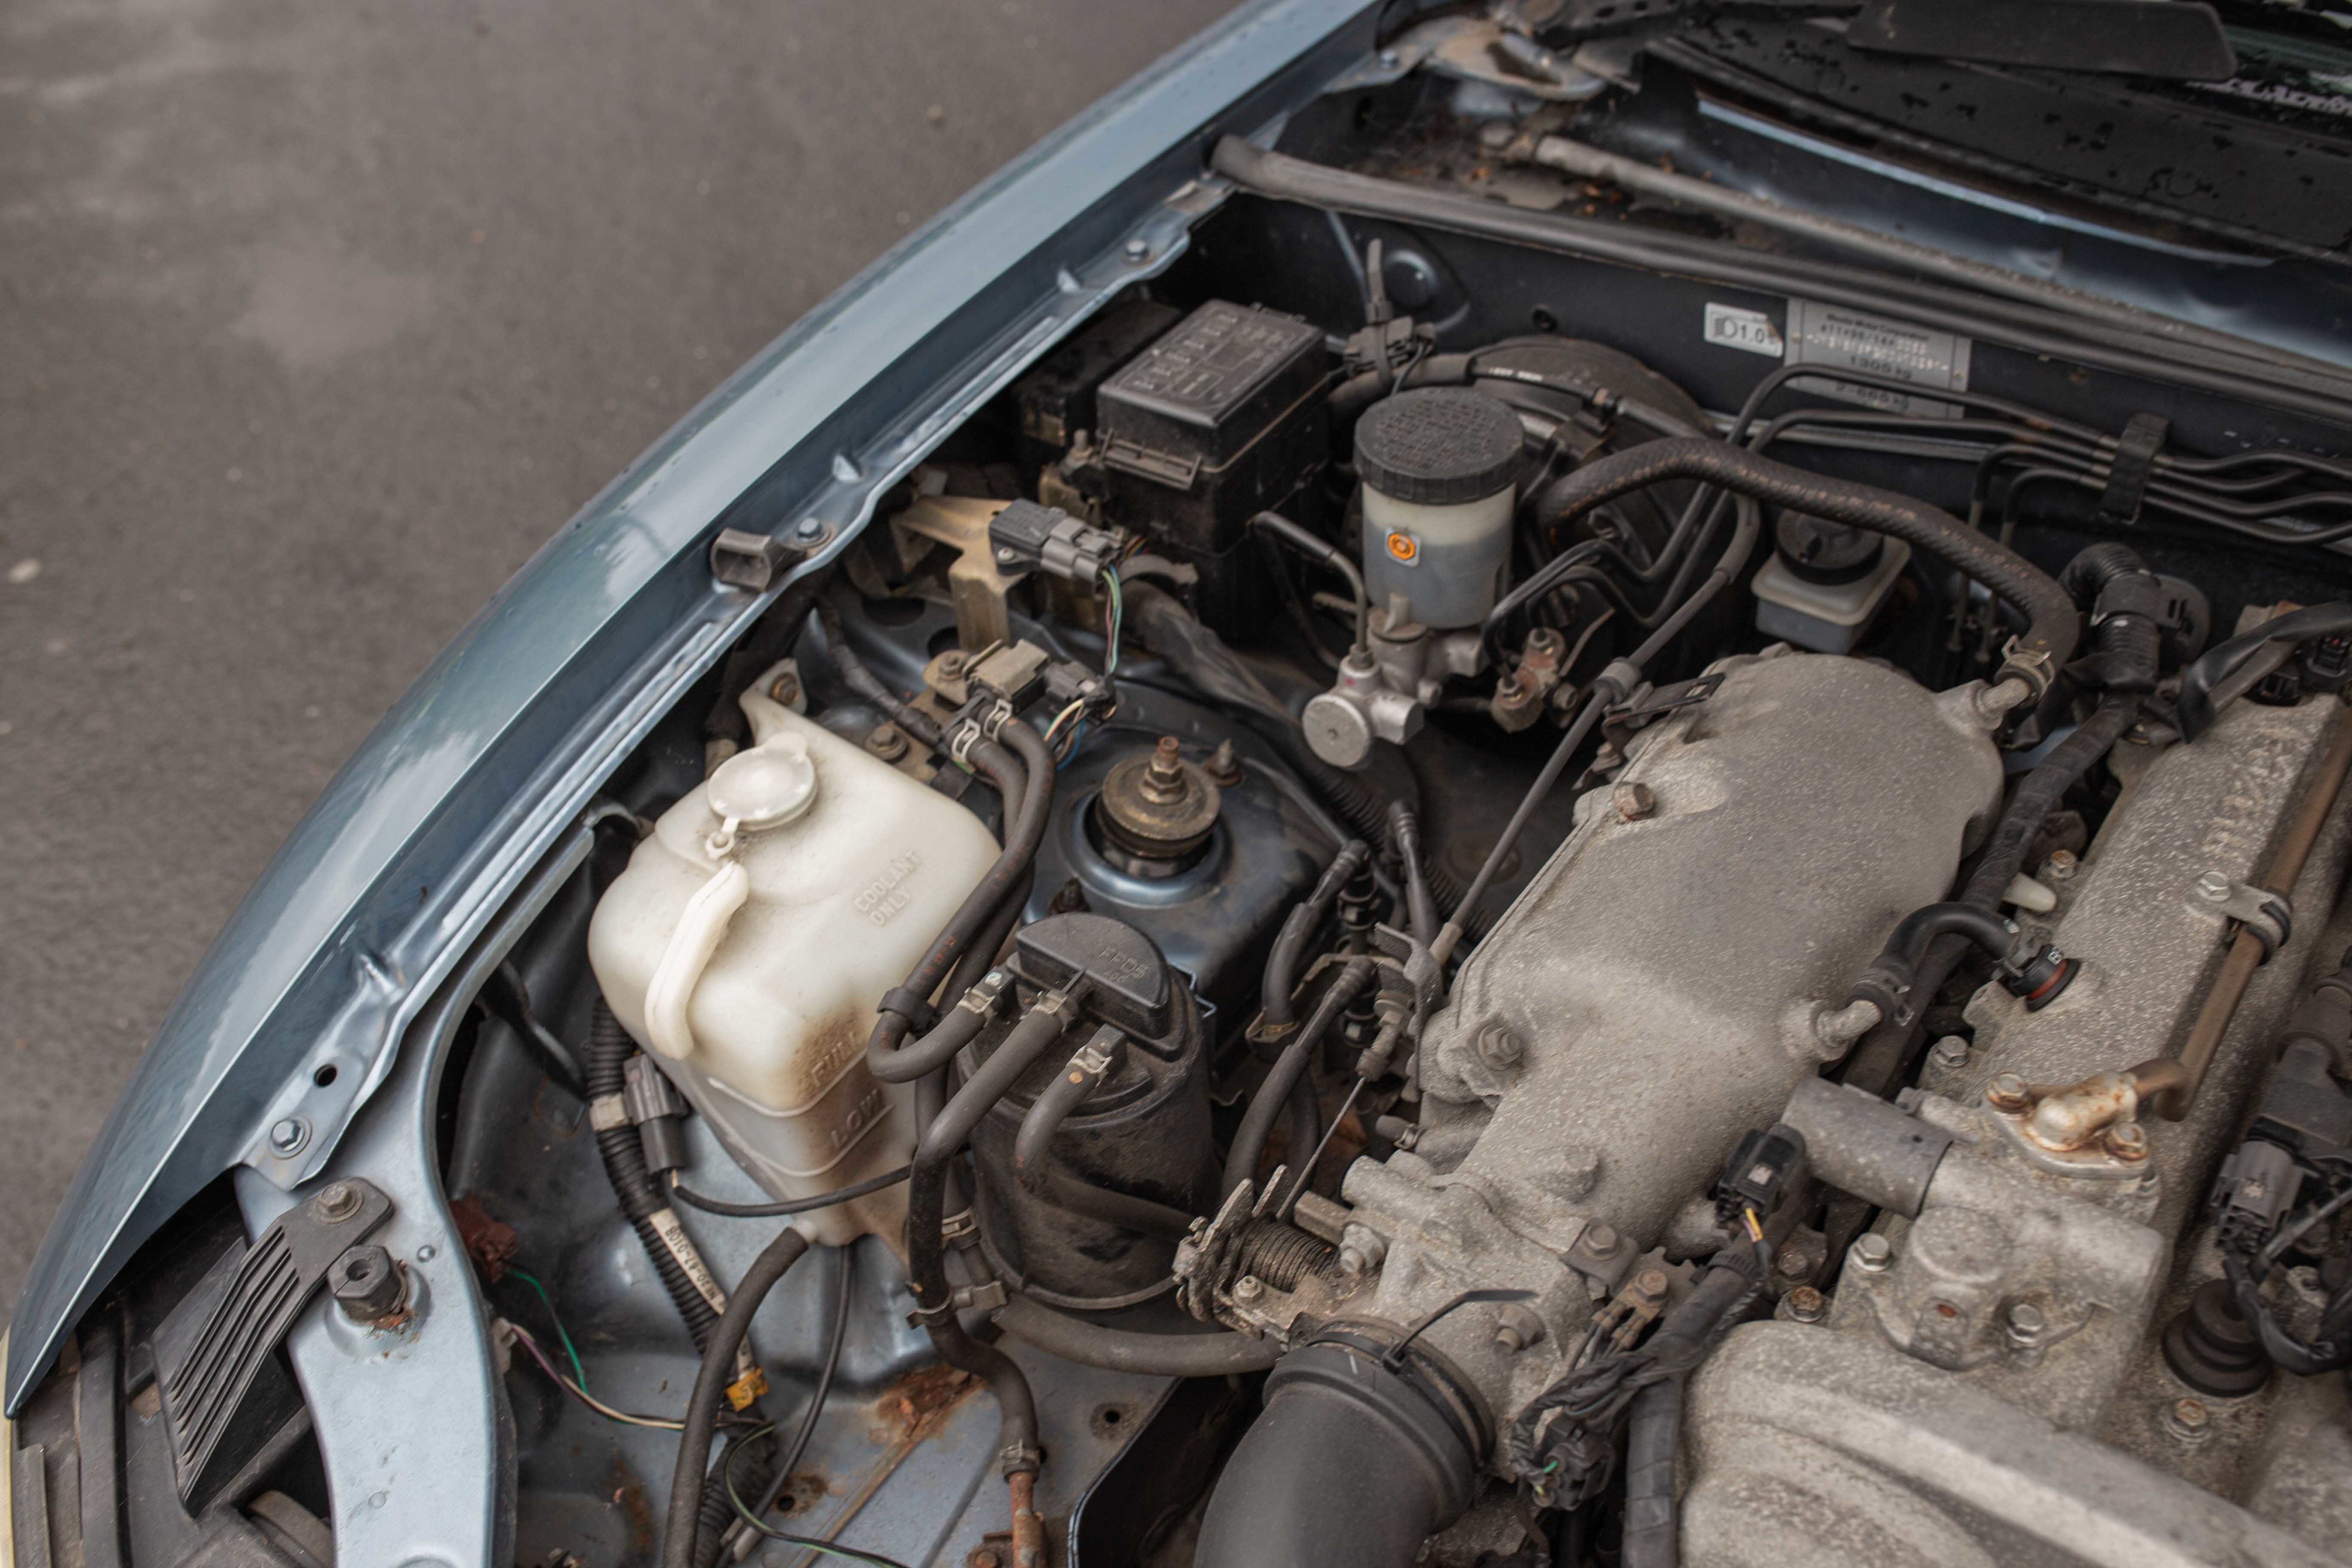
Under the bonnet (or hood) is a very dirty engine bay. A little bit of corrosion below the coolant bottle and around the PAS reservoir (I think thats common?)


I'm looking forward to getting stuck in with this project. I'll also be documenting the build on Youtube. I'd really appreciate any subscribers, likes,comments and shares
https://www.youtube.com/hoodedreeper
https://youtu.be/PkHV8Vd49Oc?si=sx6vpSNi9Op5r1Q1
Some may remember my supercharged NA, named The Purple Monster. I stripped this for parts in 2018 to fund my R34 GTT (which I still own).
I did own an NC1 Sport back in 2022/2023 but sold it to buy a 'sensible diesel car'.
The current daily driver project is a 1996 Mazda 323F V6 which I purchased in January 2024. I've been doing Youtube for about 3 years and unfortunately there just isn't enough content left in it. So I've made the decision to sell it and buy another car.
A platform that I'm familiar with, a chassis I've not yet done before (well, kinda...to a degree) and something that will help my Youtube channel.
Welcome to my MX5 NBFL project
The car is a 2004 NBFL Arctic Edition with a 1.8 VVT, 5 speed manual with an open diff. Currently on 119k miles.
The chrome fuel filler cap has been badly painted along with the chrome door mirror covers. These will be replaced in the future.
The softtop is in really good condition, the glass window is an added bonus
The car is on stock shock absorbers and lowering springs. These will be the first to get changed, the ride is too bouncy and it could really do with an alignment.
The first thing I checked when viewing the car was checking the condition of the sills. They're solid and look to have been replaced at some point. The rear arches feel solid but I've noticed some minor bubbling. There's also evidence of sanding marks so unsure if they've been replaced/repaired, the inner arch doesn't look new.
The interior is stock with the exception of the gear shifter and stereo. The heated leather seats will come in handy during the winter months. I wasn't sure about the blue leather but it's slowly growing on me.
Under the bonnet (or hood) is a very dirty engine bay. A little bit of corrosion below the coolant bottle and around the PAS reservoir (I think thats common?)
I'm looking forward to getting stuck in with this project. I'll also be documenting the build on Youtube. I'd really appreciate any subscribers, likes,comments and shares
https://www.youtube.com/hoodedreeper
https://youtu.be/PkHV8Vd49Oc?si=sx6vpSNi9Op5r1Q1
Firstly I apologise for the lack of updates, which is very unlike me. I've managed to achieve alot 'behind the scenes', so I'm now playing catch up with photo/video editing and updating here.
Although I had a reasonably good test drive, the drive home was going to be the eye opener especially when it comes to any potential problems.
The main thing I noticed was the car would pull to the side under braking. Getting the car jacked up and on axle stands was a job in itself.

So it seems the caliper slider pins had next to no grease *rolls eyes*
I also noticed the driver side calipers have been painted red, but not the passenger side? Someone must have ran out of time I guess.
With the slider pins receiving a smothering of red rubber grease, I went for a test drive and it's much better. The pulling to the side is still there under heavy braking but the discs and pads do need replacing, so it could be from un-even wear.
While the front was off the ground I had a poke around the bottom of the front wings...


The double skinned jacking lip along the sill have certainly seen better days. Luckily they're still solid despite looking quite the opposite.
I'll get the front wings replaced and painted and I'll straighten that lip and repaint the black stone chip along the bottom of the car.
The Youtube Video can be found here:
https://www.youtube.com/watch?v=Lw9A8baoJBI
The driver side headlamp had started to oxidize. In the past I had some good results with the ArmourAll restoration wipes, so I gave them another go. If it comes back I'll attempt a 'proper' resto.


Much better Time will tell though
On the subject of lighting, I wanted to see what was hiding beneath the duct tape on the bootlid

Ah yes, it wouldn't be an NB without rust lol
It seems these suffered badly with bootlid corrosion and finding a good used item seems to be difficult. I remember doing a repair on the NC1 (luckily that was aluminium and quite light corrison). It looks like the light units have been glued in too, lovely job! I'll leave these be for now and will revisit later on.

The Youtube video can be found here:
https://www.youtube.com/watch?v=jtvUa5Q9o7c
Although I had a reasonably good test drive, the drive home was going to be the eye opener especially when it comes to any potential problems.
The main thing I noticed was the car would pull to the side under braking. Getting the car jacked up and on axle stands was a job in itself.
So it seems the caliper slider pins had next to no grease *rolls eyes*
I also noticed the driver side calipers have been painted red, but not the passenger side? Someone must have ran out of time I guess.
With the slider pins receiving a smothering of red rubber grease, I went for a test drive and it's much better. The pulling to the side is still there under heavy braking but the discs and pads do need replacing, so it could be from un-even wear.
While the front was off the ground I had a poke around the bottom of the front wings...
The double skinned jacking lip along the sill have certainly seen better days. Luckily they're still solid despite looking quite the opposite.
I'll get the front wings replaced and painted and I'll straighten that lip and repaint the black stone chip along the bottom of the car.
The Youtube Video can be found here:
https://www.youtube.com/watch?v=Lw9A8baoJBI
The driver side headlamp had started to oxidize. In the past I had some good results with the ArmourAll restoration wipes, so I gave them another go. If it comes back I'll attempt a 'proper' resto.
Much better
Time will tell thoughOn the subject of lighting, I wanted to see what was hiding beneath the duct tape on the bootlid
Ah yes, it wouldn't be an NB without rust lol
It seems these suffered badly with bootlid corrosion and finding a good used item seems to be difficult. I remember doing a repair on the NC1 (luckily that was aluminium and quite light corrison). It looks like the light units have been glued in too, lovely job! I'll leave these be for now and will revisit later on.
The Youtube video can be found here:
https://www.youtube.com/watch?v=jtvUa5Q9o7c
I've been messing around with cars for a number of years and I've never changed a cambelt!?
There's no better time than the present, so here goes my attempt. Knowing these engines are non-interference gives me a little more confidence, but I'll be checking and re-checking everything.

Gates Cambelt & Tensioners
Gates Water Pump
Gates Drive Belts
Tensioner Spring
OEM Crankshaft Pulley Bolt
OEM Woodruff Key
OEM Thermostat & Gasket
Jass Performance Camshaft Locking Tool
I apologise if I miss any info/steps, this job did take longer than expected and my brain was frazzled by the end of it all.
Starting off by removing the air intake pipe, unplugging the MAF and temperature sensor on the air box along with the crankcase breather pipe. I also unclipped the cable tidies to make as much space as possible.
Moving onto the drive belts, starting with the PAS and AC belts. ** Before doing this, slacken off the x3 10mm bolts on the waterpump pulley **
Moving the PAS pulley so the slot lines up with the bolt on the PAS pump. With that cracked off (making sure you use spanner or socket on the nut the other end of the bolt) you can crack off the tensioner bolts (I unwound the long bolt nearly all the way) . These are mainly 12mm and 14mm from memory. The bracket that holds the tensioner bolt, the bolt on the left nearest the waterpump will need undoing too.
The PAS pump should now push down, allowing the belt to slip off.
The Alternator is a similar job. There's a 14mm bolt top and bottom that will need to be slackened. The bottom one in particular was an a** to do. I had to borrow a long spanner to do it, even then it didn't want to move despite alot of Plus Gas penetrant. Once that was done the top tensioner bolt could be undone like the PAS. Once those were loose the Alternator will pivot to the left allowing the belt to be removed. The water pump pulley can now be removed too.
Next up was the rocker cover, from memory there's x11 10mm bolts and x6 10mm bolts for the coilpacks/brackets. For the VVT I undone the 19mm banjo bolt and the feed pipe lifts off with the rocker cover. There's a couple of plugs that'll need unplugging and the PCV hose before lifting it up.
The radiator has to be drained and removed to allow better access to the crank pulley/harmonic dampener. You can either drain the coolant from the drain plug on the bottom of the radiator. Or you can remove the lower hose like I did. Make sure you have a container to catch the coolant.
Remove the x4 10mm bolts that hold the harmonic balancer to the face plate (you may need to use a spanner/socket on the crank bolt to stop it from moving). The pulley can be wiggled back and forth to release it. These can corrode and seize on so be careful. The face plate stayed attached to my pulley, some will split apart (hence removing the x4 bolts).
The next step is to move the wiring away from the front of the engine. Theres a few brackets and cable tidies but nothing too complicated.I moved mine away to the side and on top of the throttle body/inlet manifold.
The timing covers should now be accessable, the top has x1 10mm bolt in each corner. Once removed the cover can be pulled forward and upwards. The lower cover is split diagonally, some times called the middle/centre and lower covers. The middle cover is only held on by x1 bolt to the left. The lower cover has x3 bolts, one at the top near the waterpump and one either side towards the bottom. These are prone to cracking over time so be careful removing them. I do need to replace mine but I was unable to source replacements over the weekend.
With the car in 5th gear it's time to undo the crank bolt. I used a deep 21mm socket on a breaker bar and it cracked off reasonably easy. It's also advisable to remove the anti roll bar incase you wish to use an impact gun. My anti roll bar was left off from the coilover fitting so that was something I didn't need to worry about. With the bolt undone, I rethreaded it into the crank so I can check the engine was in TDC.
For some reason this was one step of the job I wasn't too sure on, but infact it was very simple. With the spark plugs removed I could turn the engine over without any compression. The backing plate behind has two diagonal markings which need to line up with the notches on the camshaft pulleys. For the crankshaft pulley there's also a notch which needs to line up with a V. Turn the crank bolt with the socket until all 3 markings line up. The engine is now in TDC (Top Dead Centre).
To stop the engine from moving/turning when removing/fitting the new belt you need to lock the camshafts. There's a few different methods, the 'old school' way is to use a pair of spanners locked together with some locking grips. Another way is to use a tool that goes inbetween the two camshafts, which isn't any use if the cam pulleys need to be removed. Luckily Jass Performance have developed a tool which goes over the hex sections of the camshafts, locking them together. This tool has two different sized ends depending on the engine. The VVT uses the larger size. With the tool slipped over the camshafts, tighten the two bolts and you're good to go.
At this point of the job I wanted to replace the camshaft seals. Starting off with the exhaust side, the bolt was removed and the pulley wiggled off. I used a pick and carefully removed the old seal. Make sure you don't score/damage the camshaft or block. Any damage will lead to a leak which you don't want!
I purchased a couple of tools from Autolink UK which help fit the new seals. Unfortunately I don't have a photo, but I've included it in the Youtube video.
For the VVT pulley there's x3 torx bolts that hold a cover on. Behind this is the 17mm? bolt, with this removed the pulley slides off like the exhaust side. This seal is exactly the same procedure except it's a slightly larger seal.

There's no better time than the present, so here goes my attempt. Knowing these engines are non-interference gives me a little more confidence, but I'll be checking and re-checking everything.
Gates Cambelt & Tensioners
Gates Water Pump
Gates Drive Belts
Tensioner Spring
OEM Crankshaft Pulley Bolt
OEM Woodruff Key
OEM Thermostat & Gasket
Jass Performance Camshaft Locking Tool
I apologise if I miss any info/steps, this job did take longer than expected and my brain was frazzled by the end of it all.
Starting off by removing the air intake pipe, unplugging the MAF and temperature sensor on the air box along with the crankcase breather pipe. I also unclipped the cable tidies to make as much space as possible.
Moving onto the drive belts, starting with the PAS and AC belts. ** Before doing this, slacken off the x3 10mm bolts on the waterpump pulley **
Moving the PAS pulley so the slot lines up with the bolt on the PAS pump. With that cracked off (making sure you use spanner or socket on the nut the other end of the bolt) you can crack off the tensioner bolts (I unwound the long bolt nearly all the way) . These are mainly 12mm and 14mm from memory. The bracket that holds the tensioner bolt, the bolt on the left nearest the waterpump will need undoing too.
The PAS pump should now push down, allowing the belt to slip off.
The Alternator is a similar job. There's a 14mm bolt top and bottom that will need to be slackened. The bottom one in particular was an a** to do. I had to borrow a long spanner to do it, even then it didn't want to move despite alot of Plus Gas penetrant. Once that was done the top tensioner bolt could be undone like the PAS. Once those were loose the Alternator will pivot to the left allowing the belt to be removed. The water pump pulley can now be removed too.
Next up was the rocker cover, from memory there's x11 10mm bolts and x6 10mm bolts for the coilpacks/brackets. For the VVT I undone the 19mm banjo bolt and the feed pipe lifts off with the rocker cover. There's a couple of plugs that'll need unplugging and the PCV hose before lifting it up.
The radiator has to be drained and removed to allow better access to the crank pulley/harmonic dampener. You can either drain the coolant from the drain plug on the bottom of the radiator. Or you can remove the lower hose like I did. Make sure you have a container to catch the coolant.
Remove the x4 10mm bolts that hold the harmonic balancer to the face plate (you may need to use a spanner/socket on the crank bolt to stop it from moving). The pulley can be wiggled back and forth to release it. These can corrode and seize on so be careful. The face plate stayed attached to my pulley, some will split apart (hence removing the x4 bolts).
The next step is to move the wiring away from the front of the engine. Theres a few brackets and cable tidies but nothing too complicated.I moved mine away to the side and on top of the throttle body/inlet manifold.
The timing covers should now be accessable, the top has x1 10mm bolt in each corner. Once removed the cover can be pulled forward and upwards. The lower cover is split diagonally, some times called the middle/centre and lower covers. The middle cover is only held on by x1 bolt to the left. The lower cover has x3 bolts, one at the top near the waterpump and one either side towards the bottom. These are prone to cracking over time so be careful removing them. I do need to replace mine but I was unable to source replacements over the weekend.
With the car in 5th gear it's time to undo the crank bolt. I used a deep 21mm socket on a breaker bar and it cracked off reasonably easy. It's also advisable to remove the anti roll bar incase you wish to use an impact gun. My anti roll bar was left off from the coilover fitting so that was something I didn't need to worry about. With the bolt undone, I rethreaded it into the crank so I can check the engine was in TDC.
For some reason this was one step of the job I wasn't too sure on, but infact it was very simple. With the spark plugs removed I could turn the engine over without any compression. The backing plate behind has two diagonal markings which need to line up with the notches on the camshaft pulleys. For the crankshaft pulley there's also a notch which needs to line up with a V. Turn the crank bolt with the socket until all 3 markings line up. The engine is now in TDC (Top Dead Centre).
To stop the engine from moving/turning when removing/fitting the new belt you need to lock the camshafts. There's a few different methods, the 'old school' way is to use a pair of spanners locked together with some locking grips. Another way is to use a tool that goes inbetween the two camshafts, which isn't any use if the cam pulleys need to be removed. Luckily Jass Performance have developed a tool which goes over the hex sections of the camshafts, locking them together. This tool has two different sized ends depending on the engine. The VVT uses the larger size. With the tool slipped over the camshafts, tighten the two bolts and you're good to go.
At this point of the job I wanted to replace the camshaft seals. Starting off with the exhaust side, the bolt was removed and the pulley wiggled off. I used a pick and carefully removed the old seal. Make sure you don't score/damage the camshaft or block. Any damage will lead to a leak which you don't want!
I purchased a couple of tools from Autolink UK which help fit the new seals. Unfortunately I don't have a photo, but I've included it in the Youtube video.
For the VVT pulley there's x3 torx bolts that hold a cover on. Behind this is the 17mm? bolt, with this removed the pulley slides off like the exhaust side. This seal is exactly the same procedure except it's a slightly larger seal.
The crank bolt can now be removed along with the faceplate. At this point I decided to replace the crankshaft seal. There's evidence of an oil leak on the sump and around the crank pulley so it made sense to do it now.
Jass Performance have also developed a tool for installing the new seal. Unfortunately I don't have a photo of this either, but I do cover it in the Youtube video.

Moving up to the tensioners, slacken the tensioner bolt but do not fully remove. With a pair of pliers you can remove the spring. Now you can remove the tensioner and idler pulley, the belt can now be removed.
To remove the water pump, the top right bolt of the alternator needs to be removed. From here there's a further x4 bolts that hold the water pump on. The bottom right corner of the water pump is an water neck elbow held on with x2 bolts. With the water neck pushed to one side the water pump will release with a little wiggling.
Install the new water pump and gasket, I used some sealant on either side of the water pump and water neck gaskets to help. Torque the x4 bolts down to 22nm. Next refit the water neck ** THIS was an absolute nightmare to refit! I recommend unbolting the PAS pump and tying it up and away to give you more room. The bolts go in at an angle and can be tricky start threading in **
Install the idler and tensioner pulleys. The tensioner has a little lug bracket, this sits over a small dowel on the water pump to help align it. Keep the tensioner pulley bolt loose and not fully tightened. Next install the spring using some long nose pliers. Push the tensioner pulley all the way to the left and tighten up the bolt.
Slide the cambelt over the crank pulley and reinstall the face plate and bolt, this keeps it all together for the time being. Wrap the belt around the idler pulley and around the outer edge of the camshaft pulley (exhaust), making sure you keep the belt tight. I borrowed a tip from a friend and used some cable ties on the belt and camshaft pulley. That was you don't loose the tensioner when doing the other side.
With the belt now on both pulleys you can pull/twist the belt over the tensioner pulley. Once you're happy the belt is sitting nicely the cable ties can be cut off (be careful not to cut the new belt!) the tensioner bolt can now be loosened off, which will take up the slack. Once the tensioner has settled, the bolt can be nipped up.
Before you torque the tensioner bolt, I removed the Jass locking tool and did two full rotations of the engine, making sure all 3 timing marks aligned. You can count the teeth on the cambelt from the 12 o'clock position on the cams, there should be 19 teeth. Once you're happy it's all aligned the idler and tensioner bolts can be torqued to 50nm. From here I did another two full rotations just to double check everything was lined up.

The crankshaft bolt can now be torqued to 160nm
The refitting is the reversal, starting off with the timing covers, wiring, harmonic dampener, drive belts etc.
Jass Performance have also developed a tool for installing the new seal. Unfortunately I don't have a photo of this either, but I do cover it in the Youtube video.
Moving up to the tensioners, slacken the tensioner bolt but do not fully remove. With a pair of pliers you can remove the spring. Now you can remove the tensioner and idler pulley, the belt can now be removed.
To remove the water pump, the top right bolt of the alternator needs to be removed. From here there's a further x4 bolts that hold the water pump on. The bottom right corner of the water pump is an water neck elbow held on with x2 bolts. With the water neck pushed to one side the water pump will release with a little wiggling.
Install the new water pump and gasket, I used some sealant on either side of the water pump and water neck gaskets to help. Torque the x4 bolts down to 22nm. Next refit the water neck ** THIS was an absolute nightmare to refit! I recommend unbolting the PAS pump and tying it up and away to give you more room. The bolts go in at an angle and can be tricky start threading in **
Install the idler and tensioner pulleys. The tensioner has a little lug bracket, this sits over a small dowel on the water pump to help align it. Keep the tensioner pulley bolt loose and not fully tightened. Next install the spring using some long nose pliers. Push the tensioner pulley all the way to the left and tighten up the bolt.
Slide the cambelt over the crank pulley and reinstall the face plate and bolt, this keeps it all together for the time being. Wrap the belt around the idler pulley and around the outer edge of the camshaft pulley (exhaust), making sure you keep the belt tight. I borrowed a tip from a friend and used some cable ties on the belt and camshaft pulley. That was you don't loose the tensioner when doing the other side.
With the belt now on both pulleys you can pull/twist the belt over the tensioner pulley. Once you're happy the belt is sitting nicely the cable ties can be cut off (be careful not to cut the new belt!) the tensioner bolt can now be loosened off, which will take up the slack. Once the tensioner has settled, the bolt can be nipped up.
Before you torque the tensioner bolt, I removed the Jass locking tool and did two full rotations of the engine, making sure all 3 timing marks aligned. You can count the teeth on the cambelt from the 12 o'clock position on the cams, there should be 19 teeth. Once you're happy it's all aligned the idler and tensioner bolts can be torqued to 50nm. From here I did another two full rotations just to double check everything was lined up.
The crankshaft bolt can now be torqued to 160nm
The refitting is the reversal, starting off with the timing covers, wiring, harmonic dampener, drive belts etc.
Before I reinstalled the rocker cover, it was the perfect chance to repaint it. I started by removing the VVT feed and solenoid, masking up all areas and then rubbing the surface with a scotch pad, followed by a wipe down with some white spirit.

Two coats of grey etch primer came next followed by two coats of a high metallic base coat. This was a formula I mixed at work based on BMW Titanium Silver but with the medium metallic pigment swapped for a course one.
Next was a type of paint I've never sprayed before, candy. I went with a candy apple red. Not knowing how this would spray, I accidently treated it like normal paint. By that I mean I sprayed more to get a good coverage. Little did I know, the more I sprayed, the darker the colour got, doh! So the 2nd or 3rd coat would have been a really bright red, but instead it dulled down. Which in turn kinda works, because it's a decent match to the Meister R strut mount plates.

So another 'while I'm here I may aswell change....' job was to refresh all of the VVT seals and gaskets.

I go through the installation of these in my Youtube video
With the seals and gaskets installed, it was time for reassembly which is straight forward.


With everything back on and torqued down the last step was to refill with coolant before starting the car. I set the cabin climate control to hot and inside the cab. This allows coolant to circulate through the heater matrix, hopefully minimising the risk of any air trapped in the system.
While the car was running I noticed a coolant leak. This was coming from that water neck that bolts to the water pump. So everything had to removed to gain access again. When I removed the water neck I noticed the gasket got damaged when refitting. Which is the reason I added the ** note earlier.

Although not ideal, I removed the gasket, dried the surface and used some instant gasket. For some reason I really struggled getting the bolts to line up, but I did it in the end.
I restarted the car and let the car get upto temperature allowing the coolant fan to switch on. While the car was up in air I did an oil change too.
Two coats of grey etch primer came next followed by two coats of a high metallic base coat. This was a formula I mixed at work based on BMW Titanium Silver but with the medium metallic pigment swapped for a course one.
Next was a type of paint I've never sprayed before, candy. I went with a candy apple red. Not knowing how this would spray, I accidently treated it like normal paint. By that I mean I sprayed more to get a good coverage. Little did I know, the more I sprayed, the darker the colour got, doh! So the 2nd or 3rd coat would have been a really bright red, but instead it dulled down. Which in turn kinda works, because it's a decent match to the Meister R strut mount plates.
So another 'while I'm here I may aswell change....' job was to refresh all of the VVT seals and gaskets.
I go through the installation of these in my Youtube video
With the seals and gaskets installed, it was time for reassembly which is straight forward.
With everything back on and torqued down the last step was to refill with coolant before starting the car. I set the cabin climate control to hot and inside the cab. This allows coolant to circulate through the heater matrix, hopefully minimising the risk of any air trapped in the system.
While the car was running I noticed a coolant leak. This was coming from that water neck that bolts to the water pump. So everything had to removed to gain access again. When I removed the water neck I noticed the gasket got damaged when refitting. Which is the reason I added the ** note earlier.
Although not ideal, I removed the gasket, dried the surface and used some instant gasket. For some reason I really struggled getting the bolts to line up, but I did it in the end.
I restarted the car and let the car get upto temperature allowing the coolant fan to switch on. While the car was up in air I did an oil change too.
The videos can be found on my Youtube channel
Part 1
https://www.youtube.com/watch?v=TXCVH8D3v4c&t=...
Part 2
https://www.youtube.com/watch?v=JGIEa3CXkE0
Camshaft/Crankshaft Seal Replacement
https://www.youtube.com/watch?v=qcRC25StMHc
VVT Seals & Painting Rocker Cover
https://www.youtube.com/watch?v=BVhGDPz5pUg
Part 3 round up
https://www.youtube.com/watch?v=w5v4WCMUR5k&t=...
The next part of the service was to replace the transmission oil in both the gearbox and differential.
I don't have a front undertray, only the gearbox one. This is held on by a handful of 10mm bolts. Mine has certainly seen better days so I'm glad I removed it.

The gearbox drain is found on the bottom of the gearbox and is a 24mm socket. The fill plug is found on the side of the gearbox, it's a square drive and is a 14mm open end spanner. Make sure you can loosen the fill plug before draining any oil.

With the oil drained into a container, I refitted the plug with a new washer and torqued it to 25-39nm. The fill plug is the same, only if you have the correct square socket.
The drain plug is magnetic (same with the diff plugs). It's a good way to check the health of the transmission, make sure its cleaned before refitting.

To refill with oil I used a Laser Tools oil suction gun. This takes 500ml of fluid. You simply pull back the handle, unscrew the top and fill with EP80W90 GL4. Refit the cap and attach the hose supplied. Push the hose through the fill hole and push the handle.
Gearbox Oil Capacity is 1.8L. Once filled it will slowly seep out, that's when you know there's enough. Refit the fill plug and wipe any excess oil off.
The differential is the same procedure, both the drain and fill plugs are 24mm and both are torqued to the same 25-39nm. It also uses the same oil grade.
Differential Oil Capacity is 1.0L
The Youtube video can be found here:
https://www.youtube.com/watch?v=dlypx4Xyvis
I noticed with the car being 'low' that the frame rails were taking a beating. I ordered a set of Jass Performance reinforced frame rail protectors and they were swiftly delivered, always fast delivery!

Having owned a pair of these for a previous NA build, I knew the quality was going to be top notch as always. The rails come with a bag of stainless hardware including some stainless fuel line brackets to replace the rusty steel ones.
To begin the sill kick panels need to be removed, these simply pull off. Next is to remove the dead pedal/foot rest, this had x2 10mm nuts. Both front seats need to come out, each seat uses x4 14mm bolts. The carpet needs lifting up and fixing together with some cable ties, just enough to keep the carpet off the floor.

I test fitted the passenger rail first and it went straight on. The key here is to make sure the rail is as far forward as possible. There's a curved cut out at the front to follow the hump on the floor for the subframe. Once you're happy with the position, drill a single pilot hole in a front and rear mounting hole, have a look inside the car to make sure there's clearance and it's not too far forward or back. Drill the holes out to 8mm and fit a nut and bolt to secure it in place.
I used a trolley jack to help keep the rail protector pushed up while I drilled the other holes. I then used a deburring tool to remove any unwanted swarf and gave each hole a spray of some paint to protect the bare metal.

Back underneath the car I cleaned up the surface and undersealed the frame rail. The protector could then be remounted and secured down with the stainless hardware.


It's worth noting, if you want the fully polished finish, remove the protective film in the channel where the mounting holes are BEFORE you bolt it to the car. I found out the hard way, doh!


The driver side is the same except there's two brackets that hold the fuel lines on. Mine are completely seized, a 10mm socket is too big and a 9mm is too small. I ended up snapping the brackets off just so I could get the protectors on. With the driver side protector there's a lip that needs to be tucked under the fuel lines before the rail can slide over the frame rail.
Once both protectors are bolted on, the cable ties holding the carpet together can be cut off and the carpet refitted. Followed by the seats, dead pedal and sill kick panels.
A very worth while item to fit if you have a lowered MX5, anything to help save the chassis!
The Youtube video can be found here:
https://www.youtube.com/watch?v=Ugu8WlqKitg
I don't have a front undertray, only the gearbox one. This is held on by a handful of 10mm bolts. Mine has certainly seen better days so I'm glad I removed it.
The gearbox drain is found on the bottom of the gearbox and is a 24mm socket. The fill plug is found on the side of the gearbox, it's a square drive and is a 14mm open end spanner. Make sure you can loosen the fill plug before draining any oil.
With the oil drained into a container, I refitted the plug with a new washer and torqued it to 25-39nm. The fill plug is the same, only if you have the correct square socket.
The drain plug is magnetic (same with the diff plugs). It's a good way to check the health of the transmission, make sure its cleaned before refitting.
To refill with oil I used a Laser Tools oil suction gun. This takes 500ml of fluid. You simply pull back the handle, unscrew the top and fill with EP80W90 GL4. Refit the cap and attach the hose supplied. Push the hose through the fill hole and push the handle.
Gearbox Oil Capacity is 1.8L. Once filled it will slowly seep out, that's when you know there's enough. Refit the fill plug and wipe any excess oil off.
The differential is the same procedure, both the drain and fill plugs are 24mm and both are torqued to the same 25-39nm. It also uses the same oil grade.
Differential Oil Capacity is 1.0L
The Youtube video can be found here:
https://www.youtube.com/watch?v=dlypx4Xyvis
I noticed with the car being 'low' that the frame rails were taking a beating. I ordered a set of Jass Performance reinforced frame rail protectors and they were swiftly delivered, always fast delivery!
Having owned a pair of these for a previous NA build, I knew the quality was going to be top notch as always. The rails come with a bag of stainless hardware including some stainless fuel line brackets to replace the rusty steel ones.
To begin the sill kick panels need to be removed, these simply pull off. Next is to remove the dead pedal/foot rest, this had x2 10mm nuts. Both front seats need to come out, each seat uses x4 14mm bolts. The carpet needs lifting up and fixing together with some cable ties, just enough to keep the carpet off the floor.
I test fitted the passenger rail first and it went straight on. The key here is to make sure the rail is as far forward as possible. There's a curved cut out at the front to follow the hump on the floor for the subframe. Once you're happy with the position, drill a single pilot hole in a front and rear mounting hole, have a look inside the car to make sure there's clearance and it's not too far forward or back. Drill the holes out to 8mm and fit a nut and bolt to secure it in place.
I used a trolley jack to help keep the rail protector pushed up while I drilled the other holes. I then used a deburring tool to remove any unwanted swarf and gave each hole a spray of some paint to protect the bare metal.
Back underneath the car I cleaned up the surface and undersealed the frame rail. The protector could then be remounted and secured down with the stainless hardware.
It's worth noting, if you want the fully polished finish, remove the protective film in the channel where the mounting holes are BEFORE you bolt it to the car. I found out the hard way, doh!
The driver side is the same except there's two brackets that hold the fuel lines on. Mine are completely seized, a 10mm socket is too big and a 9mm is too small. I ended up snapping the brackets off just so I could get the protectors on. With the driver side protector there's a lip that needs to be tucked under the fuel lines before the rail can slide over the frame rail.
Once both protectors are bolted on, the cable ties holding the carpet together can be cut off and the carpet refitted. Followed by the seats, dead pedal and sill kick panels.
A very worth while item to fit if you have a lowered MX5, anything to help save the chassis!
The Youtube video can be found here:
https://www.youtube.com/watch?v=Ugu8WlqKitg
We all know choosing a set of alloys for a car can 'make or break' a build. There's many factors to think about, for example spoke design, width, colour, cost etc. Being a 4x100 stud pattern the options are plentiful, but how many tick all of the boxes?
I normally have a vision for what ever car I have, but with this NB2 I don't? It's more of a 'go with the flow' type of project. I didn't have a huge budget for wheels so that ruled out fancy wheels like Work Wheels, Wedssport, Volk etc So I went with one of the cheaper options.

The Enkei RPF01 is a timeless design and suits pretty much any car. There are several brands that do a replica of this design, are some better than others? Who knows.
I had these Ultralite F1 alloys in my eBay watch list for a number of weeks, one day I received a notification from the seller offering me a discount bringing the price down to £460 ($577) shipped. I couldn't say no to that price so I proceeded to place the order.
A couple of days later I received a message to say the Gloss Silver I had ordered were out of stock, but they have the Gunmetal finish available. Not my first choice of colour but it's certainly not a terrible one.

I needed a couple of replacement tyres so I left them with the garage but hadn't inspected the wheels. When I collected them I noticed the colour seemed abit...off?
Despite them being 'gunmetal' there were certainly more of an anthracite.

I played it safe with the fitment and went with a 15x7.5j ET30. There's still some space available in the arch to add a spacer later on if need be. I didn't want an aggressive fitment and have to roll the arches. I know the front wings will need replacing in the future so perhaps I may do that then before they get painted.


They may be cliché, but they're much better than the heavily corroded, skinny factory wheels.
The Youtube video can be found here:
https://www.youtube.com/watch?v=SDxakQb3-m4
I normally have a vision for what ever car I have, but with this NB2 I don't? It's more of a 'go with the flow' type of project. I didn't have a huge budget for wheels so that ruled out fancy wheels like Work Wheels, Wedssport, Volk etc So I went with one of the cheaper options.
The Enkei RPF01 is a timeless design and suits pretty much any car. There are several brands that do a replica of this design, are some better than others? Who knows.
I had these Ultralite F1 alloys in my eBay watch list for a number of weeks, one day I received a notification from the seller offering me a discount bringing the price down to £460 ($577) shipped. I couldn't say no to that price so I proceeded to place the order.
A couple of days later I received a message to say the Gloss Silver I had ordered were out of stock, but they have the Gunmetal finish available. Not my first choice of colour but it's certainly not a terrible one.
I needed a couple of replacement tyres so I left them with the garage but hadn't inspected the wheels. When I collected them I noticed the colour seemed abit...off?
Despite them being 'gunmetal' there were certainly more of an anthracite.
I played it safe with the fitment and went with a 15x7.5j ET30. There's still some space available in the arch to add a spacer later on if need be. I didn't want an aggressive fitment and have to roll the arches. I know the front wings will need replacing in the future so perhaps I may do that then before they get painted.
They may be cliché, but they're much better than the heavily corroded, skinny factory wheels.
The Youtube video can be found here:
https://www.youtube.com/watch?v=SDxakQb3-m4
I wanted to turn my attention to the engine bay. Since painting the rocker cover it's made the rest of it look horrible and wasn't upto the same standard.
I began by removing what I could to help make degreasing and cleaning easier. Starting with the driver side, the coolant expansion tank and harcoal canister were removed along with the fuse box and fuel lines unbolted to be moved out of the way.

I started off with some Gunk Ultra degreaser and various brush sizes. Unlike the 'normal' Gunk, this doesn't require hosing it off. Instead you only need a damp cloth, making it safer for this type of job.
After a couple of passes it's starting to clean up really well

While the expansion tank was off I gave it a good clean along with tidying up the wiring in that area, tucking it up further under the wing/fender.

The bracket holding the fuel lines together was prepped and painted to help neaten it up. The hardware was replaced with stainless equivalents

With the charcoal canister now removed I was left with the solenoid and sensor. The big ugly bracket was obviously removed, the solenoid hose looped and the sensor relocated with a new bracket.
Luckily no EML has appeared!

Moving onto the passenger side, the airbox and windscreen washer bottle were removed where I found a little surprise behind the airbox and ducting


It seems the ABS models have the washer bottle just behind the airbox, right next to the exhaust manifold. It's quite a tall bottle and just looks out of place, so I decided to relocate it to the boot.
To the left is a plastic storage pocket which seemed like a good place to put it, but the bottle would need to be changed. We happen to sell a universal bottle kit at work, but these can be found online too.
Looks like a perfect fit!

The original plug is tucked infront of the suspension strut next to the ABS pump bracket. I used some insulated crimp terminals to extend the wiring, but only the positive wire. The negative wire for the washer pump would be earthed to the chassis in the boot.
Along with the single live wire I also fed the washer tubing through the fire wall. The original washer tubing had a straight join connector that went to the OEM bottle, I disconnected it here and connected the new tubing to the washer jets.
Underneath the carpet was some round black plastic tubing, but with nothing in it. This was perfect to feed the wire and tubing through along the car, it would then come out by the seat belt trim. With the lower seat belt bolt removed (14mm) and the rubber door seal peeled off a few inches, the trim piece can be pulled away enough to feed these through the gap.

The gap is between the inner panel and fuel tank, you'll need to remove the metal cover to gain better access.

I drilled two holes into the plastic pocket. The left hole (front of the pocket) is for the washer tubing, the other (left side of the pocket) is for the wiring.

I cleaned up the other side with the degreaser, painted a few brackets and reassembled. Here's a side by side comparison from the day of purchase to now


A productive day with some great results. The washer bottle relocation was a good choice, obviously there's a slight lack of 'power' with the washer jets but it works and that's all that matters.
The corrosion in the engine bay will get sorted at a later date. Matching the engine bay colour is proving to be more difficult than I first thought. It's a blow over of the body colour, but I can't replicate it with an aerosol the colour is too dark even straight out of the aerosol can. I had a local paint shop scan it, a close match was a Daihatsu colour, but it wasn't blue enough. Again, this will get sorted later on when the weather hopefully improves/warms up
The Youtube video can be found here:
https://www.youtube.com/watch?v=D0gJHzYCK7w
I began by removing what I could to help make degreasing and cleaning easier. Starting with the driver side, the coolant expansion tank and harcoal canister were removed along with the fuse box and fuel lines unbolted to be moved out of the way.
I started off with some Gunk Ultra degreaser and various brush sizes. Unlike the 'normal' Gunk, this doesn't require hosing it off. Instead you only need a damp cloth, making it safer for this type of job.
After a couple of passes it's starting to clean up really well
While the expansion tank was off I gave it a good clean along with tidying up the wiring in that area, tucking it up further under the wing/fender.
The bracket holding the fuel lines together was prepped and painted to help neaten it up. The hardware was replaced with stainless equivalents
With the charcoal canister now removed I was left with the solenoid and sensor. The big ugly bracket was obviously removed, the solenoid hose looped and the sensor relocated with a new bracket.
Luckily no EML has appeared!
Moving onto the passenger side, the airbox and windscreen washer bottle were removed where I found a little surprise behind the airbox and ducting
It seems the ABS models have the washer bottle just behind the airbox, right next to the exhaust manifold. It's quite a tall bottle and just looks out of place, so I decided to relocate it to the boot.
To the left is a plastic storage pocket which seemed like a good place to put it, but the bottle would need to be changed. We happen to sell a universal bottle kit at work, but these can be found online too.
Looks like a perfect fit!
The original plug is tucked infront of the suspension strut next to the ABS pump bracket. I used some insulated crimp terminals to extend the wiring, but only the positive wire. The negative wire for the washer pump would be earthed to the chassis in the boot.
Along with the single live wire I also fed the washer tubing through the fire wall. The original washer tubing had a straight join connector that went to the OEM bottle, I disconnected it here and connected the new tubing to the washer jets.
Underneath the carpet was some round black plastic tubing, but with nothing in it. This was perfect to feed the wire and tubing through along the car, it would then come out by the seat belt trim. With the lower seat belt bolt removed (14mm) and the rubber door seal peeled off a few inches, the trim piece can be pulled away enough to feed these through the gap.
The gap is between the inner panel and fuel tank, you'll need to remove the metal cover to gain better access.
I drilled two holes into the plastic pocket. The left hole (front of the pocket) is for the washer tubing, the other (left side of the pocket) is for the wiring.
I cleaned up the other side with the degreaser, painted a few brackets and reassembled. Here's a side by side comparison from the day of purchase to now
A productive day with some great results. The washer bottle relocation was a good choice, obviously there's a slight lack of 'power' with the washer jets but it works and that's all that matters.
The corrosion in the engine bay will get sorted at a later date. Matching the engine bay colour is proving to be more difficult than I first thought. It's a blow over of the body colour, but I can't replicate it with an aerosol the colour is too dark even straight out of the aerosol can. I had a local paint shop scan it, a close match was a Daihatsu colour, but it wasn't blue enough. Again, this will get sorted later on when the weather hopefully improves/warms up
The Youtube video can be found here:
https://www.youtube.com/watch?v=D0gJHzYCK7w
I apologise for the lack of photos for this update, luckily I managed to capture it all for Youtube.
The car stereo looked to have been ill fitted and just thrown into the cabin. I had also noticed the passenger speaker wasn't working and the only audio was coming through the tweeter.
With a tonne of options available whether it be single or double din, mechless or with a CD drive not forgetting other options like Bluetooth, USB, DAB and even android auto/apple car play.
Working at a Motor Factors we stock a small range of audio components, but the MX5 uses a 5x7" speaker and it was the only size we didn't have. With a selection of Pioneer units to choose from I went with their SPH-DA160DAB double din unit along with some Vibe Slick 5x7 speakers.
The stereo installation was quite easy, but I'll leave the explaining to the Youtube video. The speakers required the factory units to be removed from the plastic housing.

With Spotify and Google Maps working seamlessly along side each other, it makes the daily commute and road trips much more enjoyable and convenient.
The Youtube video can be found here:
https://www.youtube.com/watch?v=_3N5yfVvTDM
This isn't a very exciting update, but sometimes it's the little changes which can and do make a difference (that's subjective of course)
Starting off by getting rid of the ugly orange on the headlights. I replaced the bulbs with chrome versions and it's made the front much cleaner


It was time to finally remove the awful black reflectors. At first glance I thought they were painted, turns out they were badly vinyl wrapped.

I.L Motorsport offer clear reflectors and side repeaters. I've had these fitted on preWhilvious MX5s so I knew the quality was going to be good.

The reflectors came with bulb holders to wire up side markers but I decided against this for the time being.

And a random sunset photo with the wife's Mazda 6

The Youtube video can be found here:
https://www.youtube.com/watch?v=vhiQ6k13w4Q
The car stereo looked to have been ill fitted and just thrown into the cabin. I had also noticed the passenger speaker wasn't working and the only audio was coming through the tweeter.
With a tonne of options available whether it be single or double din, mechless or with a CD drive not forgetting other options like Bluetooth, USB, DAB and even android auto/apple car play.
Working at a Motor Factors we stock a small range of audio components, but the MX5 uses a 5x7" speaker and it was the only size we didn't have. With a selection of Pioneer units to choose from I went with their SPH-DA160DAB double din unit along with some Vibe Slick 5x7 speakers.
The stereo installation was quite easy, but I'll leave the explaining to the Youtube video. The speakers required the factory units to be removed from the plastic housing.
With Spotify and Google Maps working seamlessly along side each other, it makes the daily commute and road trips much more enjoyable and convenient.
The Youtube video can be found here:
https://www.youtube.com/watch?v=_3N5yfVvTDM
This isn't a very exciting update, but sometimes it's the little changes which can and do make a difference (that's subjective of course)
Starting off by getting rid of the ugly orange on the headlights. I replaced the bulbs with chrome versions and it's made the front much cleaner
It was time to finally remove the awful black reflectors. At first glance I thought they were painted, turns out they were badly vinyl wrapped.
I.L Motorsport offer clear reflectors and side repeaters. I've had these fitted on preWhilvious MX5s so I knew the quality was going to be good.
The reflectors came with bulb holders to wire up side markers but I decided against this for the time being.
And a random sunset photo with the wife's Mazda 6
The Youtube video can be found here:
https://www.youtube.com/watch?v=vhiQ6k13w4Q
Are you surprised as much as I am, with how long it's took me to do this next modification? It's time to change the exhaust!
Like most things for this platform, there are a number of choices depending on the aesthetics, sound and price. Here in the UK it seems the brand Malian is favoured amongst the newer/younger owners for the low cost and fart cannon looks. Unfortunately these sound absolutely AWFUL and if I had a choice between that and stock, I'd choose stock!
Luckily for me, age has brought me some sort of sense when it comes to exhaust decibel levels and I was looking for a much more subtle sound. Something that added some noise, without compromising the ride (I don't want to be shouting at my passengers while trying to make conversation).
Racing Beat are up there with one of the best sounds in my opinion, but they also cost almost as much as the car. I've had the single and dual exit MX5Parts items in the past but a Cobalt backbox at a discounted price was waaaay too tempting.
Moss Europe had this discounted on eBay for £199 ($254), from their retail price of £330 ($425).
The goods swiftly arrived and I wasted no time in fitting it
Removing the exhaust backbox (or muffler to those across the pond) is straight forward. Spraying the three rubber mounts with WD40 made removal easy. Before removing the last one, I sprayed the 2 bolts on the flange to ease removal aswell. An impact gun may be easier here if the bolts are corroded and/or stubborn.

Who doesn't love shiney new things! Nice manufacture including the welds, seems to be a decent replacement. The box is slightly smaller so it'll be interesting to see how it sounds.


Installation was the reversal, starting off with the two bolt flange and the right hand rubber mount to hold the weight.


After the first start up, it sounded veeery quiet certainly not what I was expecting. I drove it another week or so to see if there were any improvements but there wasn't. So I found myself looking through facebook marketplace and eBay looking for a stainless mid pipe.

I managed to source a stainless one only 15 mins away and used the ramp at work to swap it over

Again, a straight forward swap over. The passenger seat had to be removed and the carpet lifted up to gain access to the lambda sensor plug and grommet

It did improve the sound a little bit but it still wasn't the loudness I was looking for (the resonator on the mid pipe doesn't help). It's a slightly louder than stock and now won't rust so I guess it is a small win.
While fitting the mid pipe I did notice the flange on the cat pipe was heavily corroded and covered in soot. Luckily the seller of the stainless mid pipe also had a stainless 200 cell sports cat. I purchased that a week later and spent about an hour battling with heavily corroded hardward on the stock 3 bolt flange. Eventually the original cat was removed and the sports cat fitted. No more exhaust blow, and it's increased the noise a tiny bit. Unfortunately this isn't included in the video.
The Youtube Video can be found here:
https://www.youtube.com/watch?v=srz8alePj5A
Like most things for this platform, there are a number of choices depending on the aesthetics, sound and price. Here in the UK it seems the brand Malian is favoured amongst the newer/younger owners for the low cost and fart cannon looks. Unfortunately these sound absolutely AWFUL and if I had a choice between that and stock, I'd choose stock!
Luckily for me, age has brought me some sort of sense when it comes to exhaust decibel levels and I was looking for a much more subtle sound. Something that added some noise, without compromising the ride (I don't want to be shouting at my passengers while trying to make conversation).
Racing Beat are up there with one of the best sounds in my opinion, but they also cost almost as much as the car. I've had the single and dual exit MX5Parts items in the past but a Cobalt backbox at a discounted price was waaaay too tempting.
Moss Europe had this discounted on eBay for £199 ($254), from their retail price of £330 ($425).
The goods swiftly arrived and I wasted no time in fitting it
Removing the exhaust backbox (or muffler to those across the pond) is straight forward. Spraying the three rubber mounts with WD40 made removal easy. Before removing the last one, I sprayed the 2 bolts on the flange to ease removal aswell. An impact gun may be easier here if the bolts are corroded and/or stubborn.
Who doesn't love shiney new things! Nice manufacture including the welds, seems to be a decent replacement. The box is slightly smaller so it'll be interesting to see how it sounds.
Installation was the reversal, starting off with the two bolt flange and the right hand rubber mount to hold the weight.
After the first start up, it sounded veeery quiet certainly not what I was expecting. I drove it another week or so to see if there were any improvements but there wasn't. So I found myself looking through facebook marketplace and eBay looking for a stainless mid pipe.
I managed to source a stainless one only 15 mins away and used the ramp at work to swap it over
Again, a straight forward swap over. The passenger seat had to be removed and the carpet lifted up to gain access to the lambda sensor plug and grommet
It did improve the sound a little bit but it still wasn't the loudness I was looking for (the resonator on the mid pipe doesn't help). It's a slightly louder than stock and now won't rust so I guess it is a small win.
While fitting the mid pipe I did notice the flange on the cat pipe was heavily corroded and covered in soot. Luckily the seller of the stainless mid pipe also had a stainless 200 cell sports cat. I purchased that a week later and spent about an hour battling with heavily corroded hardward on the stock 3 bolt flange. Eventually the original cat was removed and the sports cat fitted. No more exhaust blow, and it's increased the noise a tiny bit. Unfortunately this isn't included in the video.
The Youtube Video can be found here:
https://www.youtube.com/watch?v=srz8alePj5A
One job I wanted to carry out alongside the gearbox and differential oil change was to replace the gear shifter turret oil and bushing.
Starting off by removing the gear shifter and centre console trim (5 screws from memory). You'll then see the upper shift boot, this has 4x 10mm bolts in each corner, once removed it can be lifted off and up. Make sure you check the condition of this, more often than not this will be split letting in excess heat and fumes into the cabin. Mine was in a few pieces so I ordered a replacement, more info further down.

Underneath the upper boot is the shifter assembly with the lower shift boot. Check the lower shift boot too, this was also split

There's a further 4x 10mm bolts that holder the shifter and upper housing to the gearbox. The shifter will then lift up and out of the way

The shifter is held onto the upper housing with 3x 10mm bolts. With the housing now separated it was a good opportunity to give it a good clean.


To remove the upper washer one of the pins needs to be pushed back. This turned out to be a little tricky. In the end I bolted it back onto the car and used a 1/4" extension bar and a rubber mallet to push it back. With this done the washer can be removed and a new one fitted. Push the pin back in so the outer edge is flush with the aluminium body.
To remove the shifter bush I used a pair of long nose pliers. Next was to remove the wavy washer and nylon? washer below the shift boot. The shifter body has a wide taper and the shift boot has a small opening, so stretching it over to remove is impossible. I ended up cutting it off.

The new shift bush simply pushed onto the end of the shifter shaft, I placed it on the work top and pushed down. Next slide the nylon and wavy washer over the tapered shaft.
This is the how it should look

Heading back to the car we now need to remove the old turret oil. I used the oil suction gun I had previously used to fill the gearbox/diff. I used some brake cleaner and blue tissue to mop up any remaining oil and to make sure it was clean. It's also a good time to clean any old silicone sealant that's on the flange surface.
I applied a bead of silicone sealant to the upper aluminium housing and refitted the unit to the gearbox.
The oil needed is the same EP80W90 GL4 used for the gearbox and differential, the required amount is 90ml.
Once filled the shifter can be fitted, you'll see a slot either side which line up with the pins on the upper housing. Once pushed down, the lower shift boot can be bolted to the upper housing via the 3x 10mm bolts.
The replacement upper shift boot had arrived from Jass Performance. These are a huge improvement over the OEM one and include some counter sunk bolts to refit with.

With the upper boot installed all that's left to refit the centre console and gear shifter.
The Youtube video can be found here:
https://www.youtube.com/watch?v=TXoOxuAriFk
Starting off by removing the gear shifter and centre console trim (5 screws from memory). You'll then see the upper shift boot, this has 4x 10mm bolts in each corner, once removed it can be lifted off and up. Make sure you check the condition of this, more often than not this will be split letting in excess heat and fumes into the cabin. Mine was in a few pieces so I ordered a replacement, more info further down.
Underneath the upper boot is the shifter assembly with the lower shift boot. Check the lower shift boot too, this was also split
There's a further 4x 10mm bolts that holder the shifter and upper housing to the gearbox. The shifter will then lift up and out of the way
The shifter is held onto the upper housing with 3x 10mm bolts. With the housing now separated it was a good opportunity to give it a good clean.
To remove the upper washer one of the pins needs to be pushed back. This turned out to be a little tricky. In the end I bolted it back onto the car and used a 1/4" extension bar and a rubber mallet to push it back. With this done the washer can be removed and a new one fitted. Push the pin back in so the outer edge is flush with the aluminium body.
To remove the shifter bush I used a pair of long nose pliers. Next was to remove the wavy washer and nylon? washer below the shift boot. The shifter body has a wide taper and the shift boot has a small opening, so stretching it over to remove is impossible. I ended up cutting it off.
The new shift bush simply pushed onto the end of the shifter shaft, I placed it on the work top and pushed down. Next slide the nylon and wavy washer over the tapered shaft.
- PAY ATTENTION TO WHICH WAY IT NEEDS TO BE. I ONLY NOTICED WHILE RE-ASSEMBLING AND IT COST ME A REPLACEMENT LOWER BOOT. THE WAVY WASHER FACES UPWARDS **
This is the how it should look
Heading back to the car we now need to remove the old turret oil. I used the oil suction gun I had previously used to fill the gearbox/diff. I used some brake cleaner and blue tissue to mop up any remaining oil and to make sure it was clean. It's also a good time to clean any old silicone sealant that's on the flange surface.
I applied a bead of silicone sealant to the upper aluminium housing and refitted the unit to the gearbox.
The oil needed is the same EP80W90 GL4 used for the gearbox and differential, the required amount is 90ml.
Once filled the shifter can be fitted, you'll see a slot either side which line up with the pins on the upper housing. Once pushed down, the lower shift boot can be bolted to the upper housing via the 3x 10mm bolts.
The replacement upper shift boot had arrived from Jass Performance. These are a huge improvement over the OEM one and include some counter sunk bolts to refit with.
With the upper boot installed all that's left to refit the centre console and gear shifter.
The Youtube video can be found here:
https://www.youtube.com/watch?v=TXoOxuAriFk
With the quest to tidy up the engine bay, I noticed a couple of parts on the Jass Performance website which I thought would help do the job.
Starting with their polished exhaust manifold cover. Taking the airbox out will give you much more room. Removing the original one was a task in itself. The two upper bolts were fine, it was the two left ones specifically the lower one. With those removed and the threads cleaned up it was time for the fitting.
Included with the cover is a bag of stainless hardware. The upper bolts have some round spacers which sit underneath the cover to raise it up, followed by some long allen cap bolts. The right hand side bolt is a little tricky with the heater hose being in the way, but it's certainly doable.

Next was a scuttle cover to hide the gap behind the fire wall.
I opted for their textured black finish, I think polished would have been abit too blingy. This comes in 3 sections, probably to make shipping a lot easier. Again, a bag of stainless hardware is included. The centre piece uses 4x allen cap bolts,washers and nuts. There are slots laser cut out of the new panel to slide over the factory scuttle panel.

You'll need to remove a single bolt from the upper part of the wing (fender) to help secure the panel. Also don't forget to disconnect the washer tubing to feed through the supplied holes on the panel.
The last part is the weather strip. The new panel has holes which line up with the original weather strip, but I found the OEM white clips didn't seem long enough to be secure. I decided to remove the OEM strip and use the replacement provided. This just pushes over the lip of the firewall/bulkhead and the new scuttle panel.

Very happy with how these have turned out, some subtle changes but as I said in a previous post, its the small changes which make a difference IMO.

The Youtube video can be found here:
https://www.youtube.com/watch?v=VM5DsbGiuPM
Starting with their polished exhaust manifold cover. Taking the airbox out will give you much more room. Removing the original one was a task in itself. The two upper bolts were fine, it was the two left ones specifically the lower one. With those removed and the threads cleaned up it was time for the fitting.
Included with the cover is a bag of stainless hardware. The upper bolts have some round spacers which sit underneath the cover to raise it up, followed by some long allen cap bolts. The right hand side bolt is a little tricky with the heater hose being in the way, but it's certainly doable.
Next was a scuttle cover to hide the gap behind the fire wall.
I opted for their textured black finish, I think polished would have been abit too blingy. This comes in 3 sections, probably to make shipping a lot easier. Again, a bag of stainless hardware is included. The centre piece uses 4x allen cap bolts,washers and nuts. There are slots laser cut out of the new panel to slide over the factory scuttle panel.
You'll need to remove a single bolt from the upper part of the wing (fender) to help secure the panel. Also don't forget to disconnect the washer tubing to feed through the supplied holes on the panel.
The last part is the weather strip. The new panel has holes which line up with the original weather strip, but I found the OEM white clips didn't seem long enough to be secure. I decided to remove the OEM strip and use the replacement provided. This just pushes over the lip of the firewall/bulkhead and the new scuttle panel.
Very happy with how these have turned out, some subtle changes but as I said in a previous post, its the small changes which make a difference IMO.
The Youtube video can be found here:
https://www.youtube.com/watch?v=VM5DsbGiuPM
Jass Performance offer a range of tow hooks for all model MX5s and in a couple of colour options. Normally I'd choose black to make them subtle, but this time I chose their powdercoated red finish. With the rocker cover red I thought it'd break up the blue on the exterior and tie in with the engine bay.
To make things easier installing the front hook I removed the bumper. The front 'baby teeth' tow hook is held on by 3x bolts attached to the front cross member. The bumper/radiator air dam had to be removed to gain a little more access, be careful of any corroded bolts.

Jass includes new hardware, you wouldn't want to use rusty 20+ year old bolts anyway.
With the bumper refitted it was time to step back and see how it looks


Moving onto the rear tow hook, this doesn't require removal of anything. The only thing I did was use a wire brush to clean up the OEM tow hook. What I should have done was paint it with some black hammerite first, but I could always do that later on.
The rear tow hook sits horizontally rather than vertical like the factory one. A long bolt passes through both the new and old tow hook and a large washer and nut compresses the body of the new tow hook and almost wraps itself around the old one. It's as simple as that!


Was the red a good choice? I think so, and I really like it. Lets hope I never have to use them, but at least I know they're functioning and purposeful.
The Youtube video can be found here:
https://www.youtube.com/watch?v=uARzBQqXdco
To make things easier installing the front hook I removed the bumper. The front 'baby teeth' tow hook is held on by 3x bolts attached to the front cross member. The bumper/radiator air dam had to be removed to gain a little more access, be careful of any corroded bolts.
Jass includes new hardware, you wouldn't want to use rusty 20+ year old bolts anyway.
With the bumper refitted it was time to step back and see how it looks
Moving onto the rear tow hook, this doesn't require removal of anything. The only thing I did was use a wire brush to clean up the OEM tow hook. What I should have done was paint it with some black hammerite first, but I could always do that later on.
The rear tow hook sits horizontally rather than vertical like the factory one. A long bolt passes through both the new and old tow hook and a large washer and nut compresses the body of the new tow hook and almost wraps itself around the old one. It's as simple as that!
Was the red a good choice? I think so, and I really like it. Lets hope I never have to use them, but at least I know they're functioning and purposeful.
The Youtube video can be found here:
https://www.youtube.com/watch?v=uARzBQqXdco
Gassing Station | Readers' Cars | Top of Page | What's New | My Stuff