Discussion


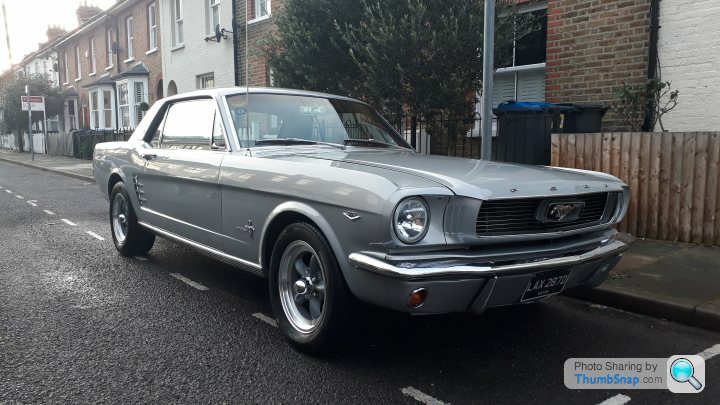
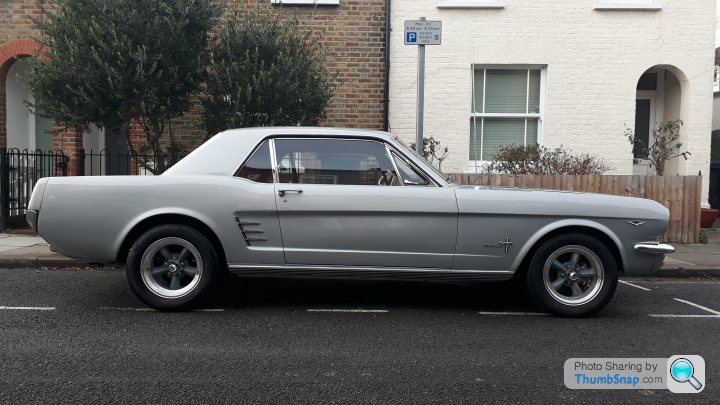
I bought this at the beginning of the year. Not managed to do too much with it due to moving and other projects.. Cheapest "running/driving" V8 Mustang in the country at the time. A since a small lad dream car (albeit in Fastback form), after photo's of my old man's 1971 351C Fastback he had to sell when I was on my way..
Image found from a later owner..RYX294R.. I believe it is still about somewhere! It still shows on the DVLA and has had a new V5 issued a few years ago.

I dabbled with a '67 C10 for a couple of years and loved it! It now lives in Swindon and regular at shows/events with the young new owner!

Anyway.. The '66...
Starting here..

Currently here..

Need to fill in some bits inbetween, and continue the story! It was originally planned to be a quick build, but other projects and the financial s t show we are currently in have bitten, so it will be somewhat steadier for a while at least.
Image found from a later owner..RYX294R.. I believe it is still about somewhere! It still shows on the DVLA and has had a new V5 issued a few years ago.
I dabbled with a '67 C10 for a couple of years and loved it! It now lives in Swindon and regular at shows/events with the young new owner!
Anyway.. The '66...
Starting here..
Currently here..
Need to fill in some bits inbetween, and continue the story! It was originally planned to be a quick build, but other projects and the financial s
t show we are currently in have bitten, so it will be somewhat steadier for a while at least.Edited by Jhonno on Wednesday 31st August 17:02


Yeah love that vision. I have a 68 notchback and a folder on my PC with images including that one with ideas for the best look. There are too many garage queens with shiny chrome and expensive paint jobs but I find the track worn patina look is perfect.
21 is our NSS race number for Santa Pod, maybe it needs it's own thread on here.

21 is our NSS race number for Santa Pod, maybe it needs it's own thread on here.

Dan_The_Man said:
Yeah love that vision. I have a 68 notchback and a folder on my PC with images including that one with ideas for the best look. There are too many garage queens with shiny chrome and expensive paint jobs but I find the track worn patina look is perfect.
21 is our NSS race number for Santa Pod, maybe it needs it's own thread on here.
I saw your Mustang recently! It looks ace! Love it.21 is our NSS race number for Santa Pod, maybe it needs it's own thread on here.
Definitely needs it's own thread!
Export56 said:
The visions look a POS, would be a shame to mess up a nice 66, still if the mods are reversible.
Just in case you have taken the image too literally, I'm not going to make mine "worse", or putting stickers on etc. It is more the general stance/side exit and to have patina. Also, this is just a boggo C code Coupe with no spec. It isn't anything interesting. Grown up watching these race in Historic Touring Cars over the past 20-odd years so can appreciate the appeal and see the potential, look forward to future updates!
First job after unloading, was to get the seal of approval..

Approved.
It had died coming off the transporter, and had to be pushed in to position on the drive..
Basically nothing worked on the car.. So first up was to start going through the wiring..

Clocks out for access..

Here we go..
Tbh, what initially seemed a bit daunting, wasn't.. The wiring is quite simple on these, and diagrams available.

Soon we had some lights working. Simple things, like bad connections cleaned up and simply plugging the loom in properly.

Iconic lights..

After some wire following, and some raised eyebrows at wiring "fixes" it was determined the coil had died.. New one fitted and we had spark and life again.

To celebrate, I drove it across the drive and parked it on flatter ground. It did not like throttle openings however, and would bog down a lot, as well as tbh, being awkward to start/hold idle when cold. (Headlight surround removed).
Approved.
It had died coming off the transporter, and had to be pushed in to position on the drive..
Basically nothing worked on the car.. So first up was to start going through the wiring..
Clocks out for access..
Here we go..
Tbh, what initially seemed a bit daunting, wasn't.. The wiring is quite simple on these, and diagrams available.
Soon we had some lights working. Simple things, like bad connections cleaned up and simply plugging the loom in properly.
Iconic lights..
After some wire following, and some raised eyebrows at wiring "fixes" it was determined the coil had died.. New one fitted and we had spark and life again.
To celebrate, I drove it across the drive and parked it on flatter ground. It did not like throttle openings however, and would bog down a lot, as well as tbh, being awkward to start/hold idle when cold. (Headlight surround removed).
Edited by Jhonno on Tuesday 13th September 15:48
I had to get the Mustang driving enough to be loaded on to a trailer for a house move! To investigate the reluctance to run when cold and stumbling with throttle I looked at the fuel system.. It had had a new fuel hard line installed, but they had quite badly kinked it as it ran round the chassis rail, so I ordered some fuel line to make my own up! Not the easiest of jobs tbh.. The pipe wasn't overly keen to bend and not kink.. However, once finally run, and loosely for the time being held in place, it would now run from cold and was more willing to rev! Should be good enough to get it on a trailer..

I drove it round the corner to my neighbour's to store until I could move it to my new place.. Parked next to another wallet/time drain.

Trailer hired (thanks to the government and their new towing regs!), Navara borrowed from work and it successfully drove onto the trailer.

New home.

Trying to get the bottom of the lack of reverse lights working, after quite a lot of time spent tracing wires, it dawned on me there was actually a section of loom missing! So, bridging the loom to check and we have a singular reverse light!

Loom checked from NS to OS and was all good, turned out the OS light was corroded, so the bulb was a) not working b) stuck.. After some WD-40/wiggling/pushing and then blood when the bulb shattered, it came out. Both cleaned up, and reinstalled with new seals/lenses and LED bulbs. You could purchase a new section of loom for £60 odd, however, it's not a concours build, so I made my own, better solution, using Ampseals for £6.

At the same time, the front turn signals were installed.. A nice 2nd hand find and mint condition! As I was connecting the loom up however, it fell apart on a few connectors, so I didn't get to test them. Rather than work with a crap old loom, a new complete headlight loom one was purchased from the US for not much money!
I drove it round the corner to my neighbour's to store until I could move it to my new place.. Parked next to another wallet/time drain.
Trailer hired (thanks to the government and their new towing regs!), Navara borrowed from work and it successfully drove onto the trailer.
New home.
Trying to get the bottom of the lack of reverse lights working, after quite a lot of time spent tracing wires, it dawned on me there was actually a section of loom missing! So, bridging the loom to check and we have a singular reverse light!
Loom checked from NS to OS and was all good, turned out the OS light was corroded, so the bulb was a) not working b) stuck.. After some WD-40/wiggling/pushing and then blood when the bulb shattered, it came out. Both cleaned up, and reinstalled with new seals/lenses and LED bulbs. You could purchase a new section of loom for £60 odd, however, it's not a concours build, so I made my own, better solution, using Ampseals for £6.
At the same time, the front turn signals were installed.. A nice 2nd hand find and mint condition! As I was connecting the loom up however, it fell apart on a few connectors, so I didn't get to test them. Rather than work with a crap old loom, a new complete headlight loom one was purchased from the US for not much money!
Edited by Jhonno on Wednesday 14th September 13:41

Badass '67 (I think) Coupe racecar.

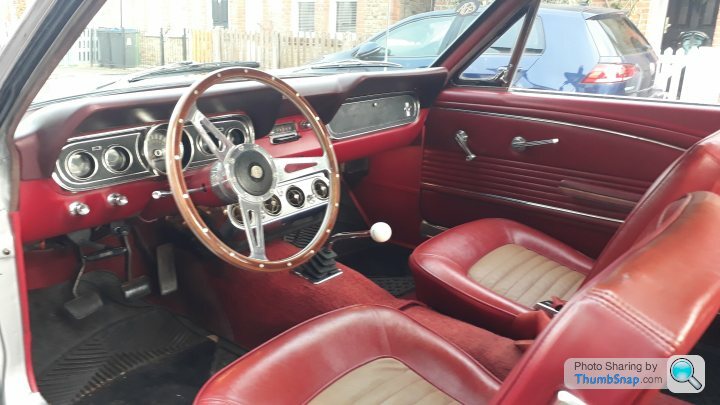
eBay bargain Motolita.. Will help with getting in, the stock wheel is huge and I am not small.

Not sure how far I will go with the engine on this yet, but you can't have a Mustang without a 4 barrel Holley.. (600CFM in this case - probably a bit big for a stockish lump, but headroom and will still work). Edlebrock Performer RPM inlet is probably the best all round inlet available for these, mild to wild.

Another eBay bargain..
I've been busy with various projects, but I did manage to clear the garage to get this in for the winter.. I've stripped all the front panels for ease of access and to sort some alignment issues. Plus a few tickles with the welder might be required! Timeline is spread over months..

The rear brakes weren't connected when I got it, so I purchases some new flexi lines and ran some new hard lines. Plugged it into the master and began a small journey of learning..
First issue.. I wasn't getting fluid out the rear chamber on the master.. I couldn't work this one out for a while, mainly as I never spent all that much time mulling it over. However, it was during an episode of my new weakness - Vice Grip Garage - I realised my issue. I wasn't trying to bleed it right! (I've never previously had an issue bleeding a master with more modern cars). I don't have a vacuum bleeder, so I was using the pedal pump method. However, what you need to do on these is either on a bench or in the car, depress the master with your fingers ready over the outlets and then cover the outlets and release the master. So instead of sucking air back in the outlets (path of least resistance) it forces it to draw fluid from the chamber!
I removed the master and pulled it apart to make sure there was no corrosion etc from sitting open for god knows how long, before bleeding it out the car and putting it back in. Success! fluid from both ports!

Unfortunately this wasn't the end of the issues..
Being originally a drums all round car, the front disc (4 pots! Posh!) kit fitted, came with an all in one proportioning valve/bias valve. I cracked the rear slaves open and pumped the pedal expecting big things.. Nope. Nothing, still no rear brakes. Bugger. I went under the bonnet and twisted the bias knob, full open is best for bleeding. Obviously. Still nothing. After some head scratching I pulled the block to try the old blow through on the rear circuit. Nope. It was now that I realised the plastic knob was cracked internally and not actually doing anything, despite having enough resistance to feel like it was! I got some pliers out, removed the knob and wound it out. Bingo! Open circuit! Valve returned to the car, pedal pumped a few times and the wonderful sound of fluid and air escaping the rear bleed valves was heard!
To solve my broken knob issue, I fired up CAD and the 3d printer and quickly knocked up a new betterer one. A bit bigger and a bit chunkier. My quick attempts to glue the original knob failed as you can see by the epoxy residue in the image.

So now the go forward and backwards, left and right, and Wooooah! systems are working. The front brake hard lines are an utter mess (PO installation job), so I haven't bothered doing a full bleed, as I will be pulling lines again to remake.
The rear brakes weren't connected when I got it, so I purchases some new flexi lines and ran some new hard lines. Plugged it into the master and began a small journey of learning..
First issue.. I wasn't getting fluid out the rear chamber on the master.. I couldn't work this one out for a while, mainly as I never spent all that much time mulling it over. However, it was during an episode of my new weakness - Vice Grip Garage - I realised my issue. I wasn't trying to bleed it right! (I've never previously had an issue bleeding a master with more modern cars). I don't have a vacuum bleeder, so I was using the pedal pump method. However, what you need to do on these is either on a bench or in the car, depress the master with your fingers ready over the outlets and then cover the outlets and release the master. So instead of sucking air back in the outlets (path of least resistance) it forces it to draw fluid from the chamber!
I removed the master and pulled it apart to make sure there was no corrosion etc from sitting open for god knows how long, before bleeding it out the car and putting it back in. Success! fluid from both ports!
Unfortunately this wasn't the end of the issues..
Being originally a drums all round car, the front disc (4 pots! Posh!) kit fitted, came with an all in one proportioning valve/bias valve. I cracked the rear slaves open and pumped the pedal expecting big things.. Nope. Nothing, still no rear brakes. Bugger. I went under the bonnet and twisted the bias knob, full open is best for bleeding. Obviously. Still nothing. After some head scratching I pulled the block to try the old blow through on the rear circuit. Nope. It was now that I realised the plastic knob was cracked internally and not actually doing anything, despite having enough resistance to feel like it was! I got some pliers out, removed the knob and wound it out. Bingo! Open circuit! Valve returned to the car, pedal pumped a few times and the wonderful sound of fluid and air escaping the rear bleed valves was heard!
To solve my broken knob issue, I fired up CAD and the 3d printer and quickly knocked up a new betterer one. A bit bigger and a bit chunkier. My quick attempts to glue the original knob failed as you can see by the epoxy residue in the image.
So now the go forward and backwards, left and right, and Wooooah! systems are working. The front brake hard lines are an utter mess (PO installation job), so I haven't bothered doing a full bleed, as I will be pulling lines again to remake.
Edited by Jhonno on Wednesday 4th January 11:09
Edited by Jhonno on Wednesday 4th January 11:44
A bit of a tarty update..
I gave the seats/instrument binnacle a bit of a clean..
50:50

After. I think I need to check the fuel gauge, the needle seems to be hanging about in the middle of nowhere, which seems potentially wrong. Depends if it is supposed to self zero when you remove the voltage and resistance/ground. I will be getting a solid state voltage regulator for the dash, the OE ones are st and regularly fail. "Interestingly" the dials work on 5V, hence the regulator.

I decided to tidy up the metal dash whilst everything was apart. I did a quick straight on top test paint to check finish..

I then rubbed back and primered the dash with a high build, to remove some of the pits and surface irregularities from the PO's attempt at painting the dash black..

2 coats in, I think it looks much better! Not perfect, but will look loads better once the dash is reassembled.

I also started looking at the heater system. The fan was seized, but before buying a new one, I pulled it out and tried to free it off. Luckily it just required some WD-40 and a bit more force! 12v applied and it spins strongly and quietly!
Also a stroke of luck, the heater box is a 3 speed one, so I can plug the really nice 2nd hand heater control unit in and will work on 3 speed!

I checked out out the heater core that came laying in the car, and the unit seems really good, I did a quick leak/pressure test and annoyingly I have a small crack round the base of one of the ports.. However, as it is a copper/brass unit in otherwise very good condition I have ordered some solder to have a go at brazing it to repair it..

I gave the seats/instrument binnacle a bit of a clean..
50:50
After. I think I need to check the fuel gauge, the needle seems to be hanging about in the middle of nowhere, which seems potentially wrong. Depends if it is supposed to self zero when you remove the voltage and resistance/ground. I will be getting a solid state voltage regulator for the dash, the OE ones are s
t and regularly fail. "Interestingly" the dials work on 5V, hence the regulator.I decided to tidy up the metal dash whilst everything was apart. I did a quick straight on top test paint to check finish..
I then rubbed back and primered the dash with a high build, to remove some of the pits and surface irregularities from the PO's attempt at painting the dash black..
2 coats in, I think it looks much better! Not perfect, but will look loads better once the dash is reassembled.
I also started looking at the heater system. The fan was seized, but before buying a new one, I pulled it out and tried to free it off. Luckily it just required some WD-40 and a bit more force! 12v applied and it spins strongly and quietly!
Also a stroke of luck, the heater box is a 3 speed one, so I can plug the really nice 2nd hand heater control unit in and will work on 3 speed!
I checked out out the heater core that came laying in the car, and the unit seems really good, I did a quick leak/pressure test and annoyingly I have a small crack round the base of one of the ports.. However, as it is a copper/brass unit in otherwise very good condition I have ordered some solder to have a go at brazing it to repair it..
Edited by Jhonno on Wednesday 4th January 12:05
Darren390 said:
Brilliant, will look forward to future updates. My first Mustang was a 68 coupe and have owned my 67 fastback for nearly 20 years. You will love it when its on the road.
Thanks!Pics of your Fastback?!
The '67/'68 Fastback is the one I've always wanted, the "Bullitt" car - 390 S Code, when you could still pick them up for sub 5k, sadly I was at school and despite enthusiasm from my Dad, we were never in the position to get one. Now, they are way out of my budget.. Well, short of selling up all my cars! I have grown really fond of the '69/'70 shape though, so maybe one day!
I had a '67 C10 previously which I sold and miss, looking forward to a go in this one, and improving it along the way!
The look I like appears to be called the Trans Am look.. Minus stickers.

 I'll be following with interest, and probably comparing notes.

Gassing Station | Readers' Cars | Top of Page | What's New | My Stuff