Vegantune Elan S4 Restoration
Discussion


08-Dec-21 Update: Pictures now fixed for all browsers as far as I can see…
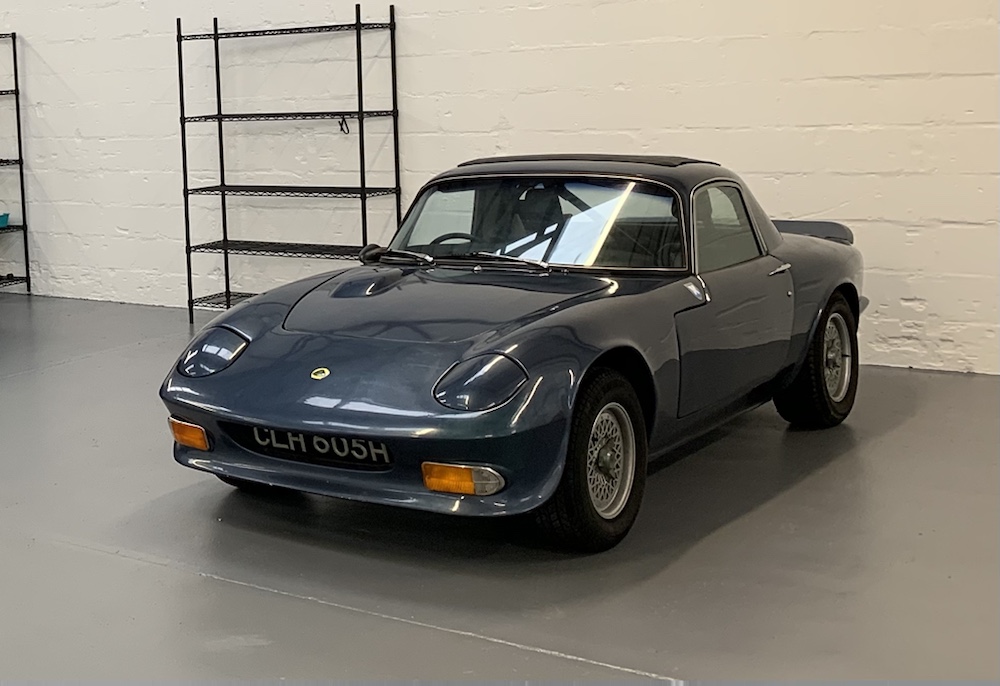
With not a lot of time at the track through 2020 and 2021, I've finally got my head down a bit with working on restoring my father's 1970 Lotus Elan S4.
He bought the car in May 1990, with the previous owner having spent considerable money with Vegantune, modifying almost every aspect of the car.
Some parts of the car are extremely reminiscent of the Vegantune Evante, indeed my father believes certain parts were prototyped on this car. I've only found one other wearing the same body modifications, that one living in Canada.
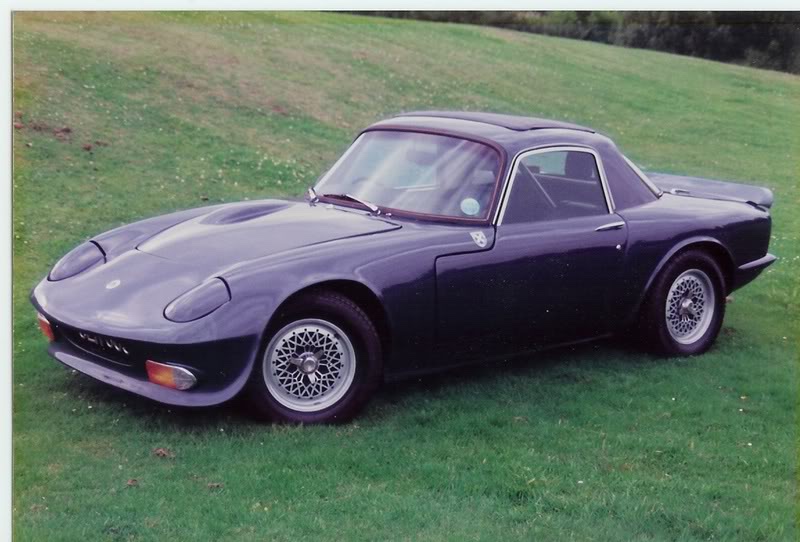
Here's the only image I've seen of the car, when the owner found me on Pistonheads, prior to that point he also thought he had the only one in the world with this body configuration!
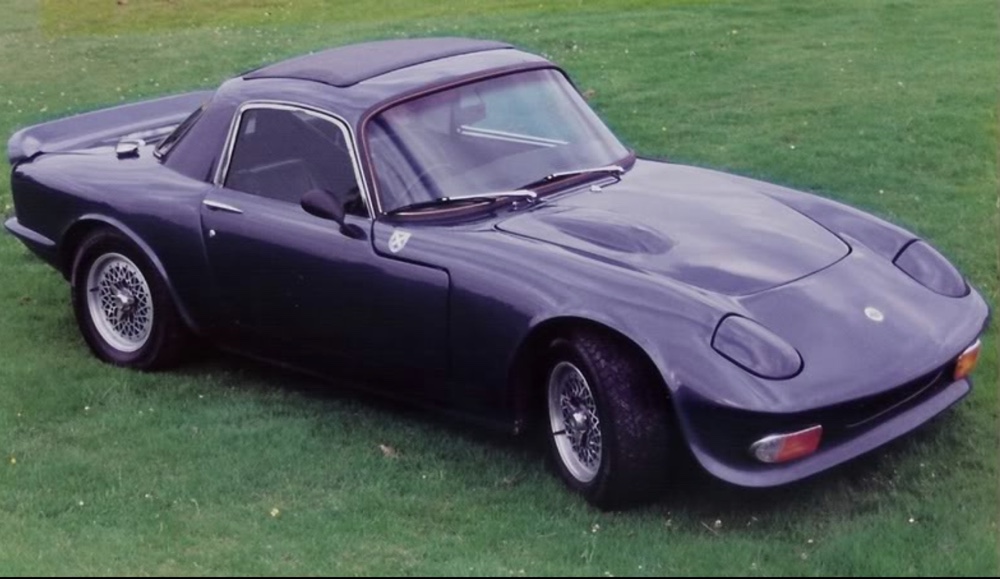
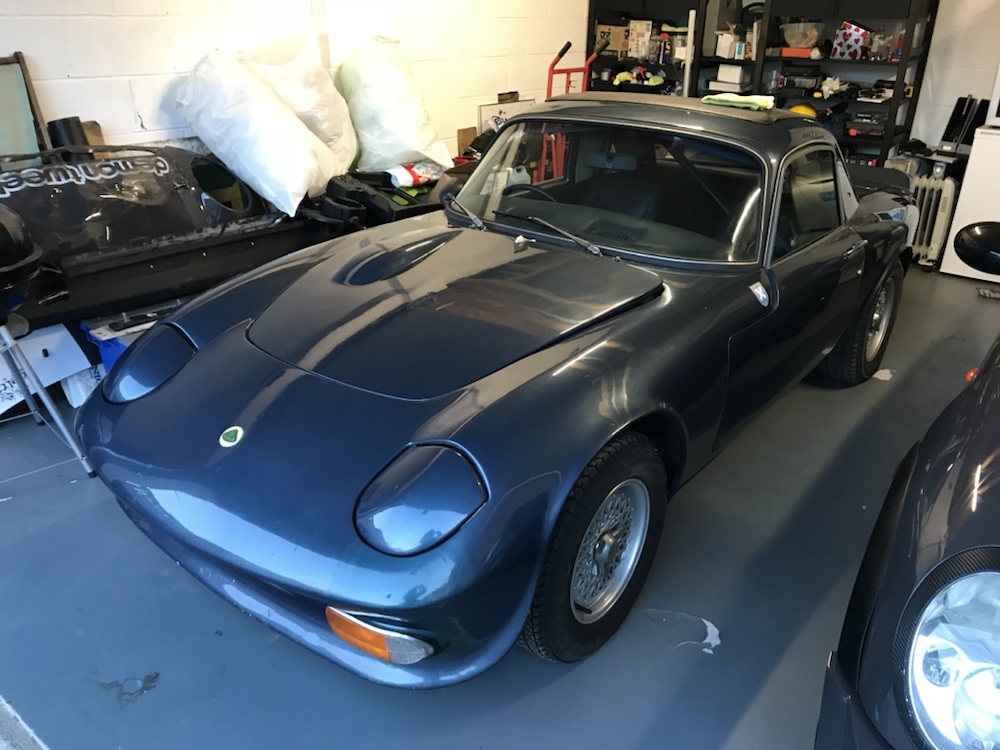
As a top level overview, the car runs wider arches all round with a deeper front valance and a lip added to the boot. Wider wheels, 3 piece Compomotive split rims, have been fitted with pretty massive (proportionately) 205 width Pirelli tyres. The engine is still the Lotus twin cam, but the transmission is a 5 speed ZF unit.
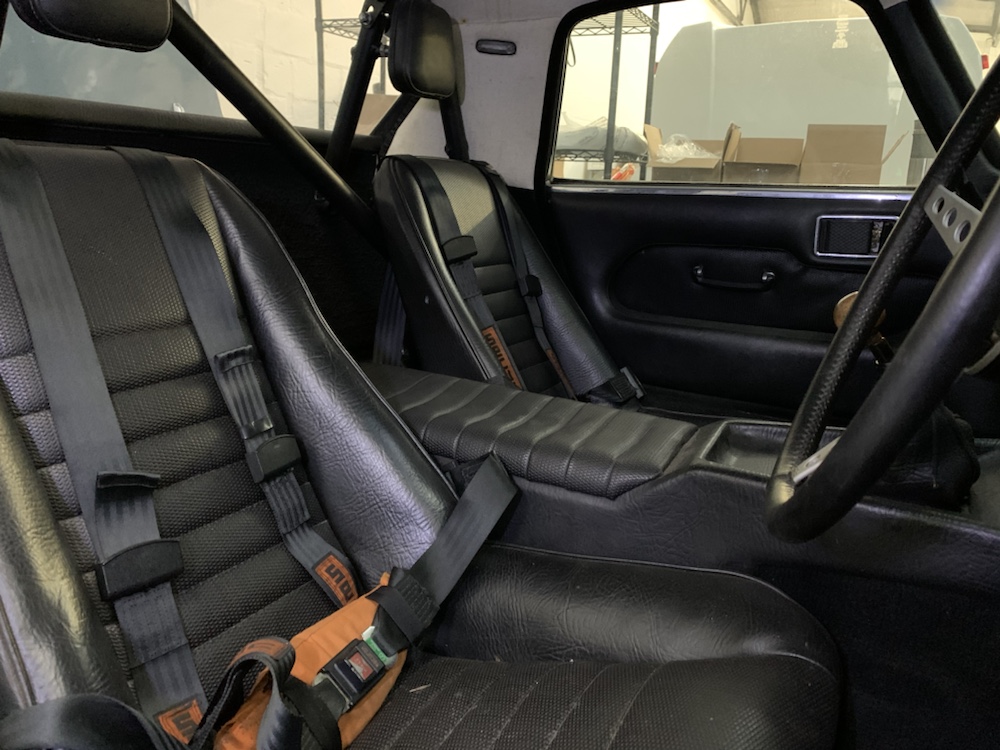
Chassis wise, the car has been fitted with a Spyder spaceframe incorporating a roll age with main hoop and side intrusion bars.
Probably thick and fast updates for the next while, as I try and catch up on where we’re currently at. The proper work started this year to be fair, I really struggle with working in a garage rather than a workshop. Making progress now though!
When trying to figure out just when the car moved back to mine I found this somewhat cringeworthy video I made doing a walk around. We'll just ignore the bit where I state the wrong model and wrong year, this was just the start of the learning curve!?
https://youtu.be/474wLMxTjXg?
With not a lot of time at the track through 2020 and 2021, I've finally got my head down a bit with working on restoring my father's 1970 Lotus Elan S4.
He bought the car in May 1990, with the previous owner having spent considerable money with Vegantune, modifying almost every aspect of the car.
Some parts of the car are extremely reminiscent of the Vegantune Evante, indeed my father believes certain parts were prototyped on this car. I've only found one other wearing the same body modifications, that one living in Canada.
Here's the only image I've seen of the car, when the owner found me on Pistonheads, prior to that point he also thought he had the only one in the world with this body configuration!
As a top level overview, the car runs wider arches all round with a deeper front valance and a lip added to the boot. Wider wheels, 3 piece Compomotive split rims, have been fitted with pretty massive (proportionately) 205 width Pirelli tyres. The engine is still the Lotus twin cam, but the transmission is a 5 speed ZF unit.
Chassis wise, the car has been fitted with a Spyder spaceframe incorporating a roll age with main hoop and side intrusion bars.
Probably thick and fast updates for the next while, as I try and catch up on where we’re currently at. The proper work started this year to be fair, I really struggle with working in a garage rather than a workshop. Making progress now though!
When trying to figure out just when the car moved back to mine I found this somewhat cringeworthy video I made doing a walk around. We'll just ignore the bit where I state the wrong model and wrong year, this was just the start of the learning curve!?
https://youtu.be/474wLMxTjXg?
Edited by emicen on Wednesday 8th December 18:31
Going back some way, like all the way back to the end of 2018(!), the Elan came to live in my garage with the aim being to get it back on the road.
Initially the plan had been to get it back on the road earlier in 2018 to be used as my wedding car, but it quickly became apparent the car was in need of more than a quick going over and some air in the tyres.
It was parked up in 2001, but all that time in a nice dry garage. Still the brake and clutch systems were goosed, it had overheated prior to being parked up so the engine would need checked and there was a bit of a leak present around the diff.
Anyways, more detail on the car and pictures of the modifications and it's general condition.
First up was giving it a waterless wash (window seals utterly perished, boot seal never really worked in the first place), things looked a fair bit better!
Vacuumed with the soft brush attachment on good old Henry, then quick detailer and multiple micro fibre cloths were used.
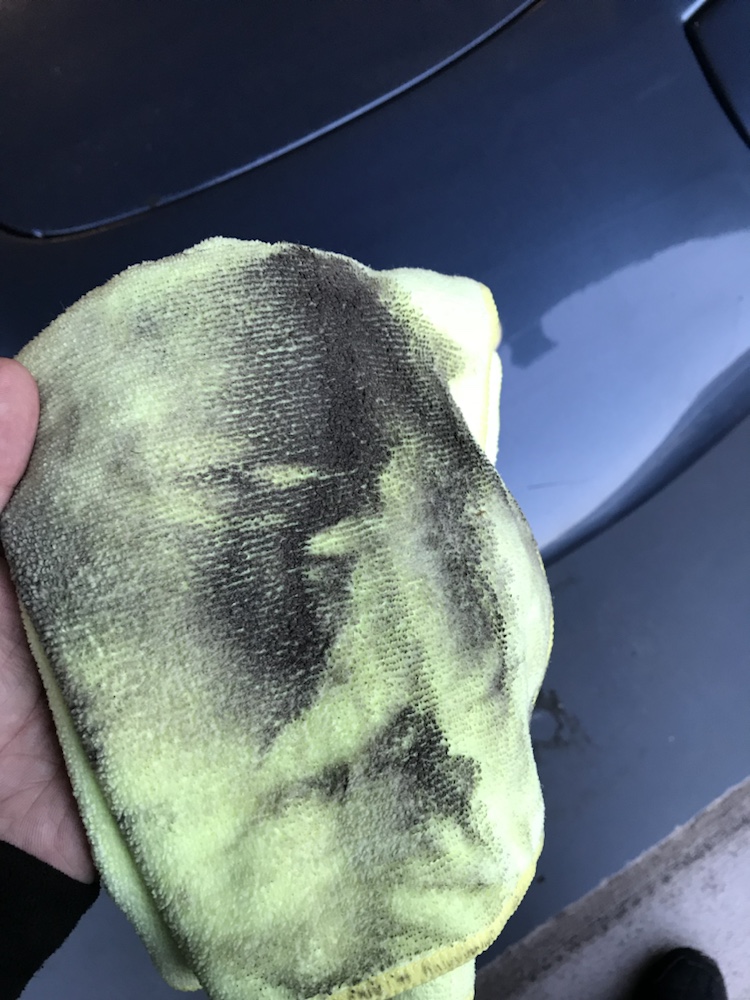
Just a light coating of dust!
Massive improvement!
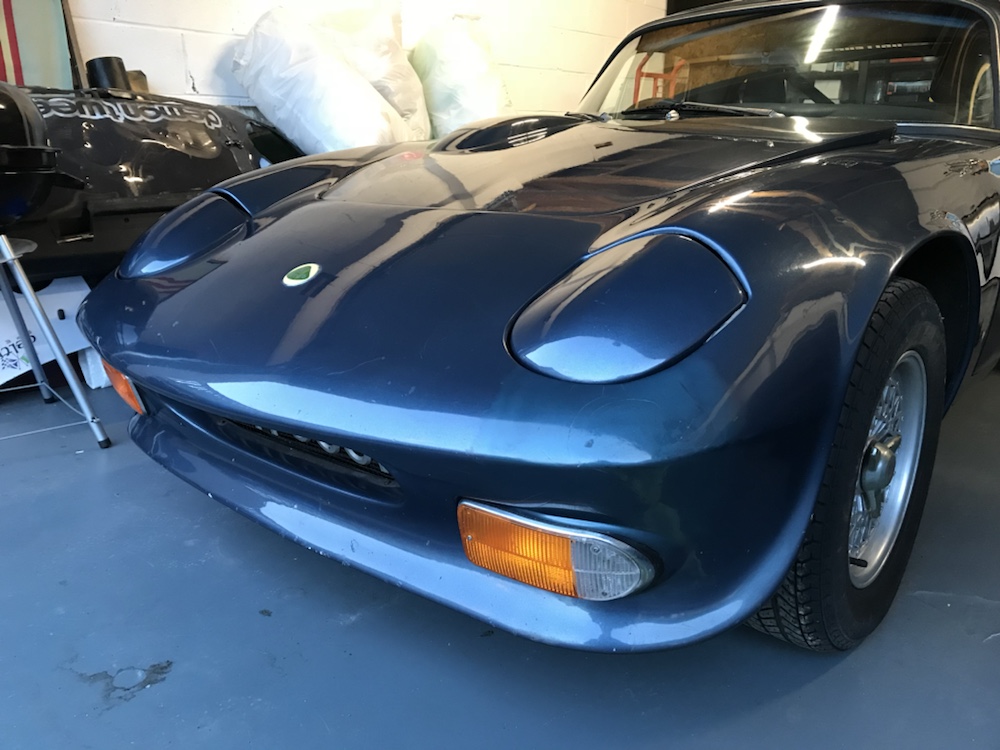
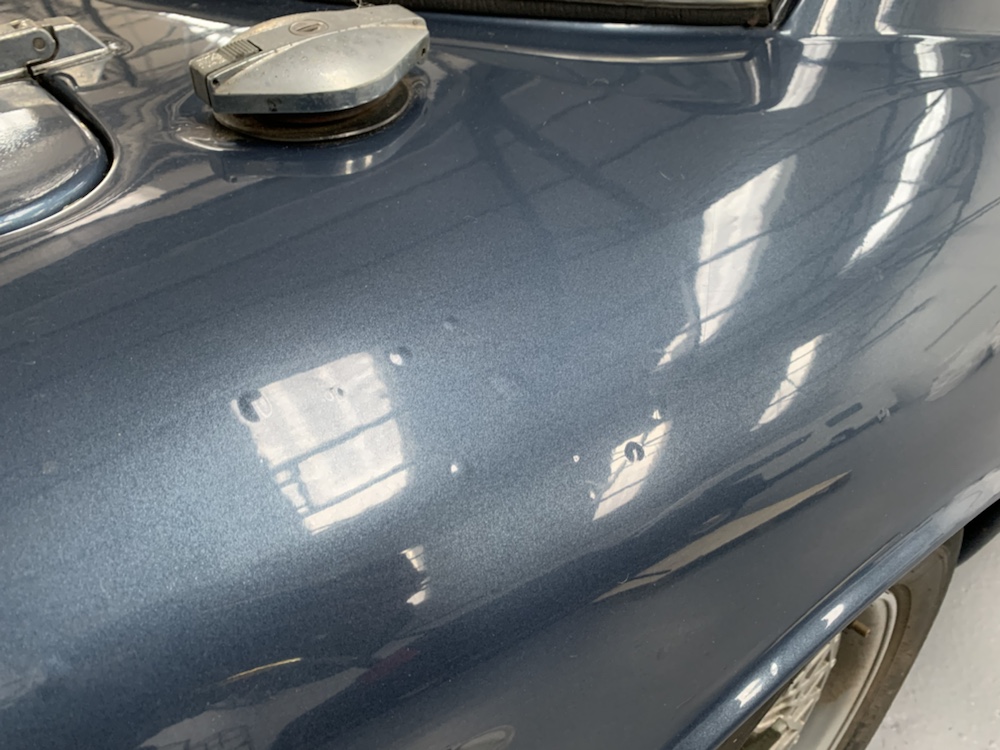
Evidence of a really poor repair on the passenger front corner of the car. This must have happened some time after the car was painted by Vegantune as the colour match is miles off and the cracking and crazing suggests there's a power of catty underneath.
This gives a good indication of just how much wider the arches are compared to standard. The 3 piece Compomotive split rims in 13x7 do a good job of filled them, 205 section tyres are huge when you consider the size and weight of the vehicle.
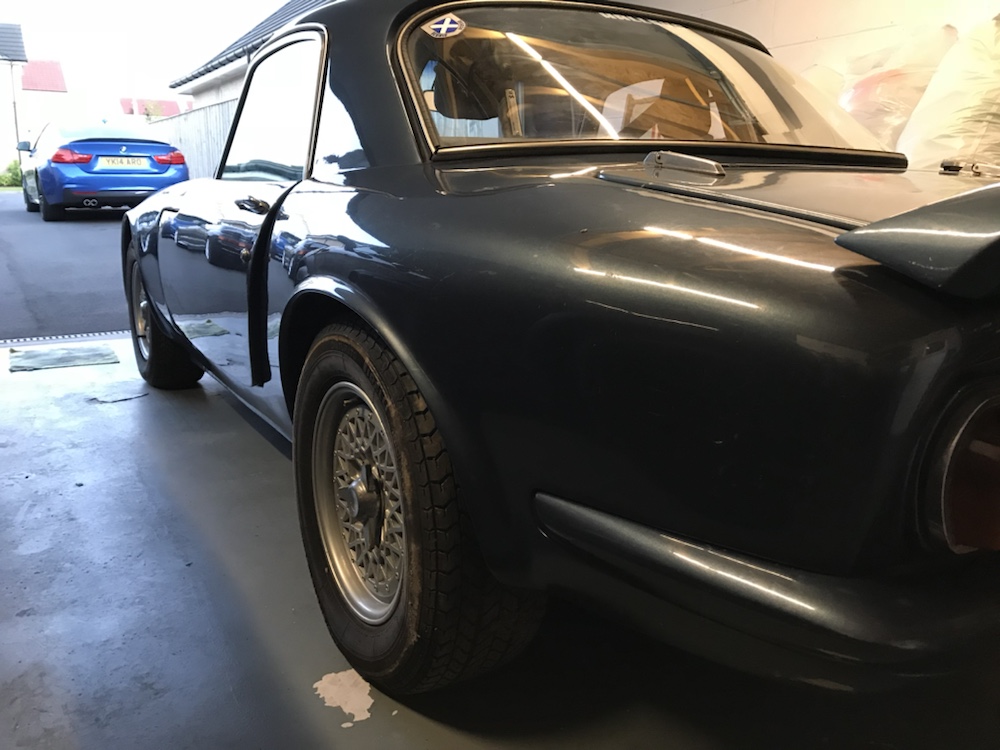
Also shows just how bad the door fitment is. Not unique to this car, bit of an Elan special feature.
Pretty sizeable ducktail / spoiler grafted in to the boot lid. Not sure what it's made up of, but the boot lid is seriously weighty for a fibreglass panel!
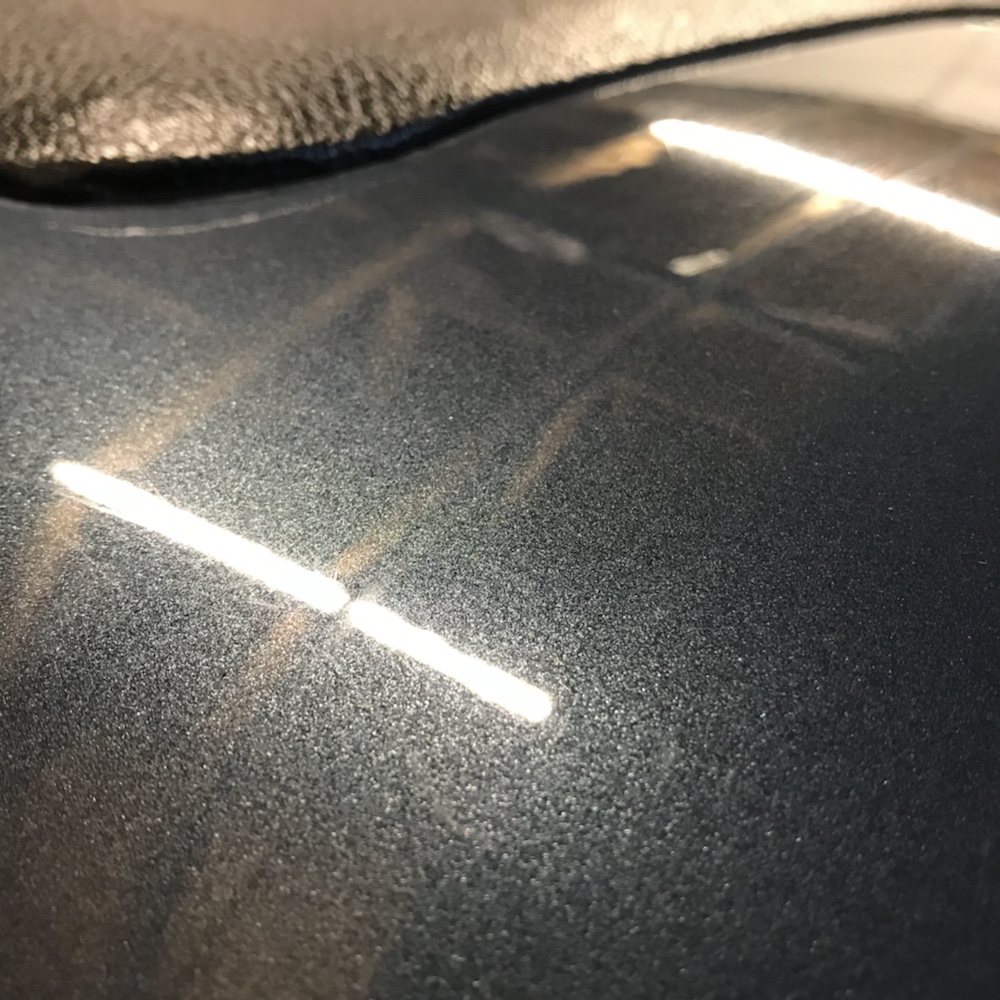
The somewhat unique paint looks to be an attempt at Ecurie Ecosse blue. This shot really shows just how fantastically metallic the finish is.
Sadly the paint is in pretty bad condition, aside from the front end repair. The bootlid is actually a different shade of blue to the rest of the car, there's parts where you can see brush strokes and paint runs on it also. There's also sections on the front and rear arches where there are bubbles under the paint which suggests moisture has compromised the gel coat.
Also in that picture is the edge of the Webasto sunroof. Very rare to see one fitted to the "baby Elan" rather than the more common fitting to the larger, and much flatter roofed, Plus2.
Initially the plan had been to get it back on the road earlier in 2018 to be used as my wedding car, but it quickly became apparent the car was in need of more than a quick going over and some air in the tyres.
It was parked up in 2001, but all that time in a nice dry garage. Still the brake and clutch systems were goosed, it had overheated prior to being parked up so the engine would need checked and there was a bit of a leak present around the diff.
Anyways, more detail on the car and pictures of the modifications and it's general condition.
First up was giving it a waterless wash (window seals utterly perished, boot seal never really worked in the first place), things looked a fair bit better!
Vacuumed with the soft brush attachment on good old Henry, then quick detailer and multiple micro fibre cloths were used.
Just a light coating of dust!
Massive improvement!
Evidence of a really poor repair on the passenger front corner of the car. This must have happened some time after the car was painted by Vegantune as the colour match is miles off and the cracking and crazing suggests there's a power of catty underneath.
This gives a good indication of just how much wider the arches are compared to standard. The 3 piece Compomotive split rims in 13x7 do a good job of filled them, 205 section tyres are huge when you consider the size and weight of the vehicle.
Also shows just how bad the door fitment is. Not unique to this car, bit of an Elan special feature.
Pretty sizeable ducktail / spoiler grafted in to the boot lid. Not sure what it's made up of, but the boot lid is seriously weighty for a fibreglass panel!
The somewhat unique paint looks to be an attempt at Ecurie Ecosse blue. This shot really shows just how fantastically metallic the finish is.
Sadly the paint is in pretty bad condition, aside from the front end repair. The bootlid is actually a different shade of blue to the rest of the car, there's parts where you can see brush strokes and paint runs on it also. There's also sections on the front and rear arches where there are bubbles under the paint which suggests moisture has compromised the gel coat.
Also in that picture is the edge of the Webasto sunroof. Very rare to see one fitted to the "baby Elan" rather than the more common fitting to the larger, and much flatter roofed, Plus2.
Edited by emicen on Wednesday 8th December 18:15
Perhaps it's the geek in me, but some of the period stuff on the car I just find so cool.
Remember the days before all this 01xxx phone number nonsense...?
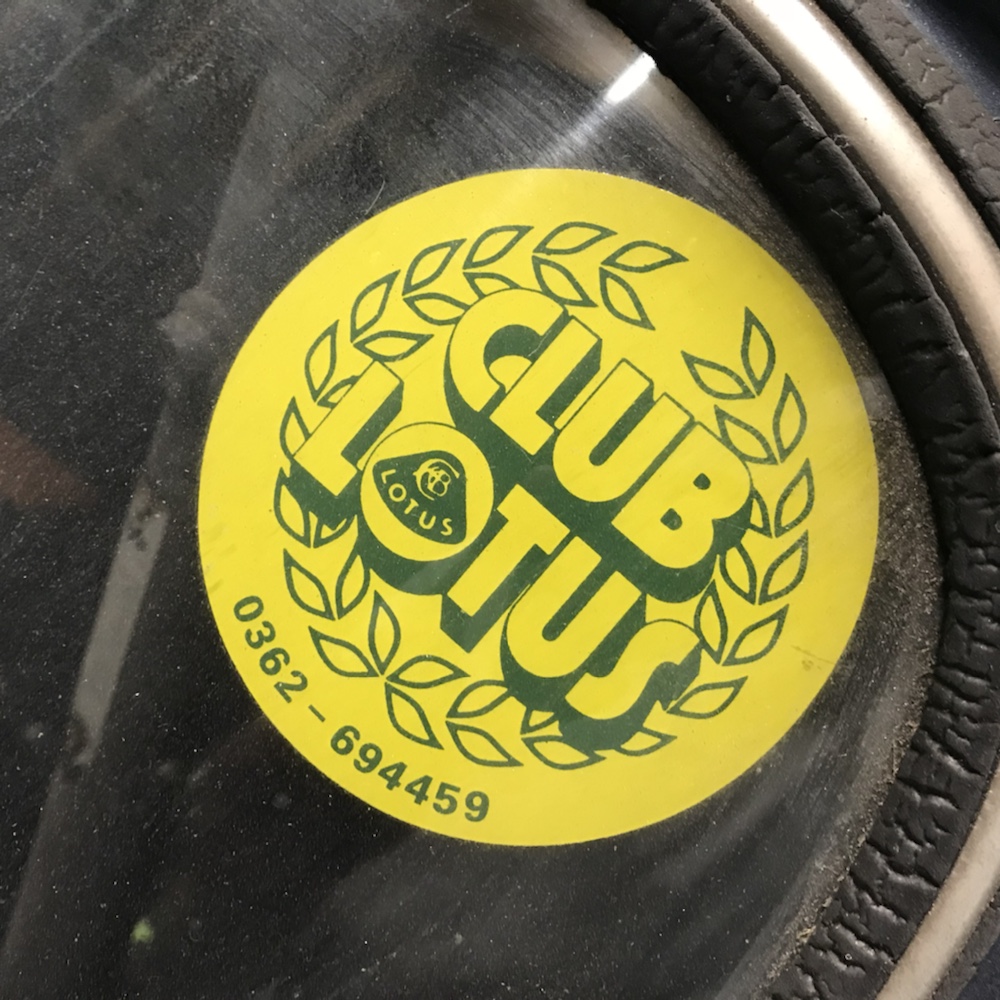
Conveniently this also shows just how gubbed the window seals are!
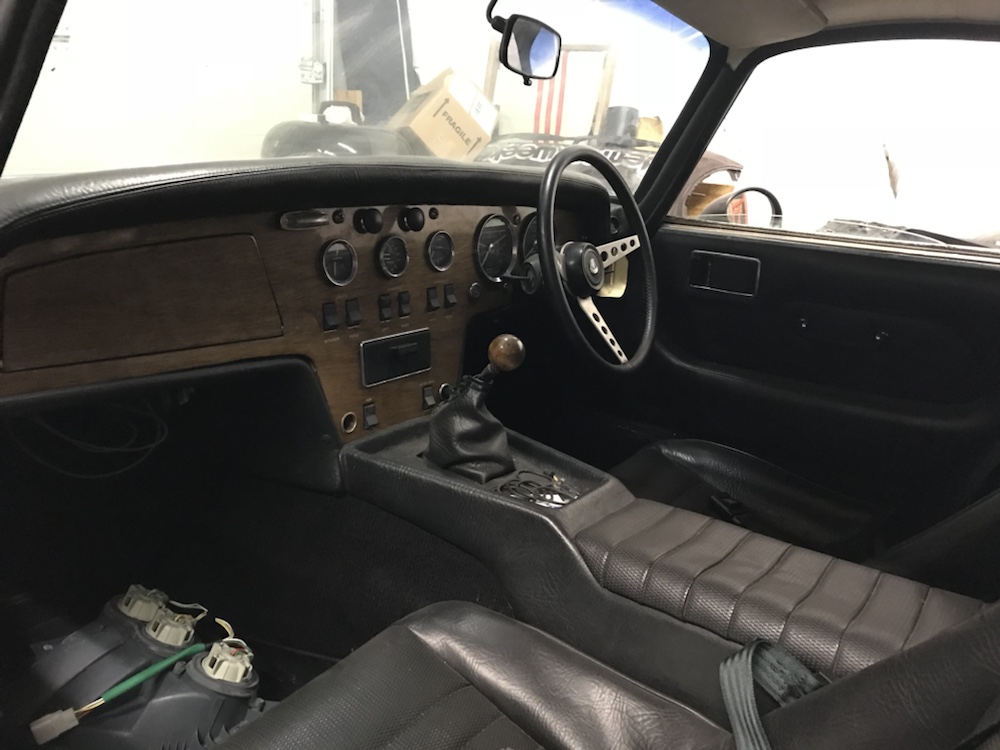
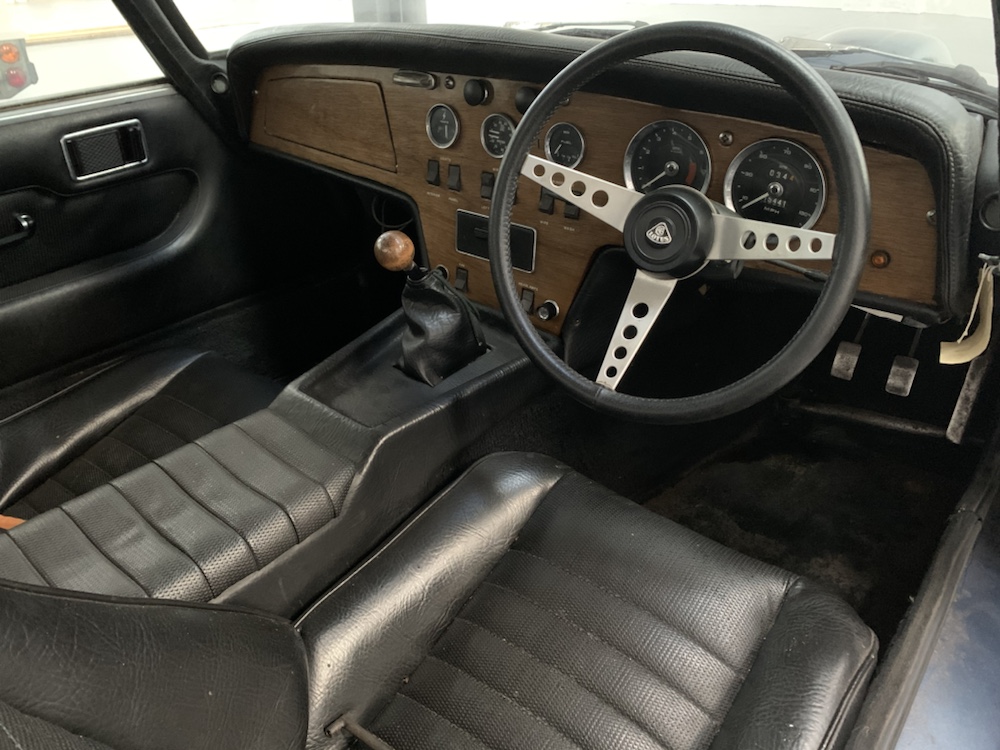
Inside escaped the majority of the dust, despite the electric window being jammed down on the driver's side the entire time it was parked up. It also smells fantastic, genuinely, not sarcasm. Real leather, fake leather, vinyl, fibreglass, wood, oil, just brilliant!
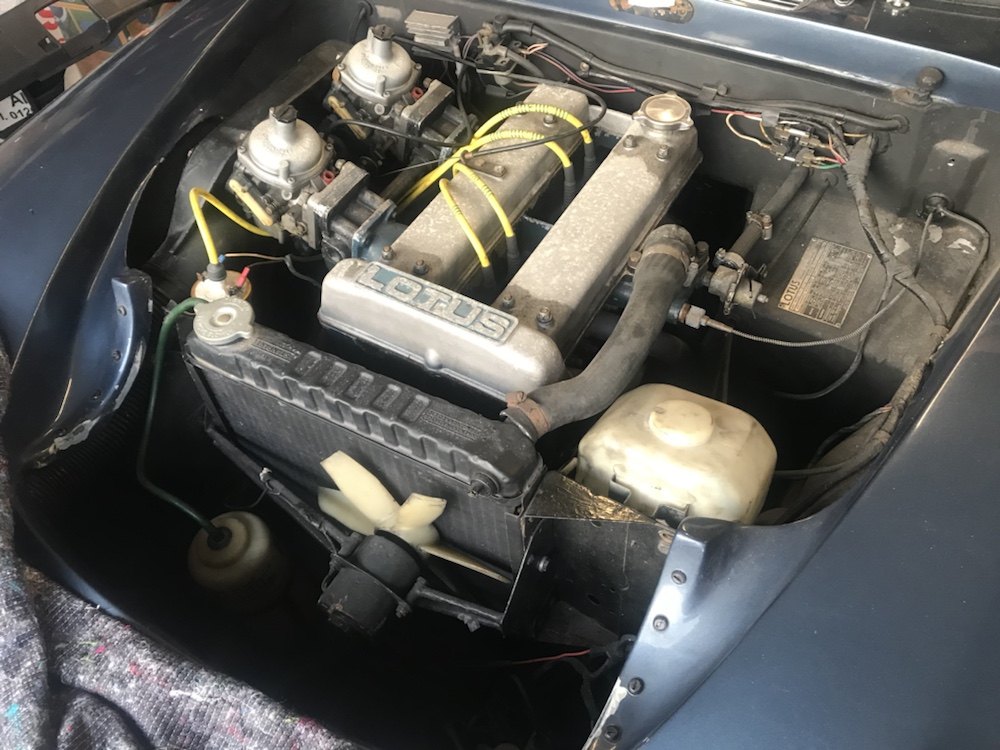
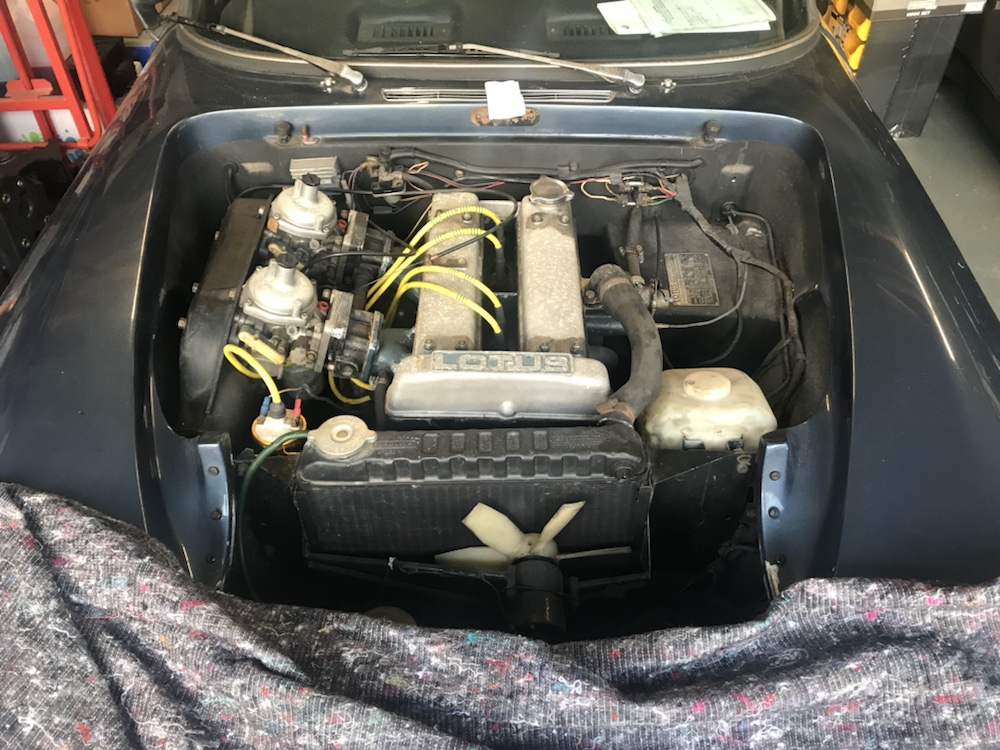
Interesting engine bay this, I don't think it's quite right. The radiator set up looks like the one from the Plus2 130S variant rather than an S4 but I can't be sure. An awful lot of Elan engine bay shots have uprated or altered cooling systems, with good reason, it was an overheating incident which saw ours parked up in the bad books.
It is a Stromberg carburettor equipped car, which means it's not got as much power potential as it's Weber clad brethren, but by all accounts, it's the more streetable engine and that's ultimately what the car will used for. Despite the (half)cage, there aren't any motorsport aspirations for her.
Remember the days before all this 01xxx phone number nonsense...?
Conveniently this also shows just how gubbed the window seals are!
Inside escaped the majority of the dust, despite the electric window being jammed down on the driver's side the entire time it was parked up. It also smells fantastic, genuinely, not sarcasm. Real leather, fake leather, vinyl, fibreglass, wood, oil, just brilliant!
Interesting engine bay this, I don't think it's quite right. The radiator set up looks like the one from the Plus2 130S variant rather than an S4 but I can't be sure. An awful lot of Elan engine bay shots have uprated or altered cooling systems, with good reason, it was an overheating incident which saw ours parked up in the bad books.
It is a Stromberg carburettor equipped car, which means it's not got as much power potential as it's Weber clad brethren, but by all accounts, it's the more streetable engine and that's ultimately what the car will used for. Despite the (half)cage, there aren't any motorsport aspirations for her.
Edited by emicen on Wednesday 8th December 18:15
Gudjohnsen said:
Very cool. Had never heard of Vegantune!
Interesting company Vegantune, they have a sort of classic British garagista tale, sadly ending the way most do.It’s a really interesting company history of them developing engines, working a fair bit on Elans and then deciding that with their engine and the things they would do different on the Elan, they should combine the two and create their own car the Evante, launched in 1983. Whilst the production Evante has some very distinguishable differences to our car, I found a copy of an early Evante brochure online and the similarities to our car are striking, hence the tie in with my dad’s comments about the car being used for some prototyping work.
Sadly the company went pop in 1991 and the company who bought the Evante design only made another handful of cars after that. There was a notion to rebirth it in the early 2000s but nothing came of it. Spyder now own the name [not sure if they own the rights to the name Vegantune as well, or just the Evante] and also the moulds for the fibreglass shell. Feels like a real shame, I’m not familiar with the costings at the time, but I’m guessing the somewhat aged platform, even with some modernising, wasn’t capable of competing with the mk1 MX-5/Miata on price/reliability/servicing despite being a similar proposition.
Showing how small a world we live in, I made a Facebook page for the car years ago then pretty much did nothing with it. One day I get a message on it from a woman who runs the Evante register. Her family ran Vegantune at the time our car was worked on and it was her husband who had painted it.
The website you are linking the images from doesn't appear to allow image linking, so no images are visible.
EDIT: The images do work in Firefox, so it's either a Google Chrome issue or a plugin - but as I'm not the only who can't see the images...
EDIT: The images do work in Firefox, so it's either a Google Chrome issue or a plugin - but as I'm not the only who can't see the images...
Edited by TonyRPH on Wednesday 8th December 08:25
TonyRPH said:
The website you are linking the images from doesn't appear to allow image linking, so no images are visible.
EDIT: The images do work in Firefox, so it's either a Google Chrome issue or a plugin - but as I'm not the only who can't see the images...
The website is mine, just a WordPress site hosted via Ionos.EDIT: The images do work in Firefox, so it's either a Google Chrome issue or a plugin - but as I'm not the only who can't see the images...
Edited by TonyRPH on Wednesday 8th December 08:25
Tried it on my work computer and works fine in internet explorer and Firefox, also works on my personal Apple phone, but not on Chrome or Edge or my Samsung work phone

If anyone with an IT nous could suggest a solution, I’m open to suggestions…
Edited by emicen on Wednesday 8th December 08:53
Cool story and look forward to following your restoration as it progresses! Love Elans, something so 'right' about the proportions and design of it - one of the early pictures of myself as a child is standing in the bare bodyshell of an S1 Elan my dad was restoring at the time, and my uncle still has an S4 Sprint so the family likes Lotuses (Loti?) 
emicen said:
The website is mine, just a WordPress site hosted via Ionos.
Tried it on my work computer and works fine in internet explorer and Firefox, also works on my personal Apple phone, but not on Chrome or Edge or my Samsung work phone
If anyone with an IT nous could suggest a solution, I’m open to suggestions…
your wordpress blog is not on https (SSL / security certificate)Tried it on my work computer and works fine in internet explorer and Firefox, also works on my personal Apple phone, but not on Chrome or Edge or my Samsung work phone
If anyone with an IT nous could suggest a solution, I’m open to suggestions…
Edited by emicen on Wednesday 8th December 08:53
pistonheads is
chrome etc. are blocking the loading of mixed media - i.e. a page on https and photos on http
firefox is allowing it...
solution - you need to upgrade your wordpress site to https

akirk said:
your wordpress blog is not on https (SSL / security certificate)
pistonheads is
chrome etc. are blocking the loading of mixed media - i.e. a page on https and photos on http
firefox is allowing it...
solution - you need to upgrade your wordpress site to https
Just been looking in to that. Can be tonight’s mission. Only got round to reinstating my website last night after Ionos demanding a php update nuked it in mid 2019 pistonheads is
chrome etc. are blocking the loading of mixed media - i.e. a page on https and photos on http
firefox is allowing it...
solution - you need to upgrade your wordpress site to https

akirk said:
emicen said:
The website is mine, just a WordPress site hosted via Ionos.
Tried it on my work computer and works fine in internet explorer and Firefox, also works on my personal Apple phone, but not on Chrome or Edge or my Samsung work phone
If anyone with an IT nous could suggest a solution, I’m open to suggestions…
your wordpress blog is not on https (SSL / security certificate)Tried it on my work computer and works fine in internet explorer and Firefox, also works on my personal Apple phone, but not on Chrome or Edge or my Samsung work phone
If anyone with an IT nous could suggest a solution, I’m open to suggestions…
Edited by emicen on Wednesday 8th December 08:53
pistonheads is
chrome etc. are blocking the loading of mixed media - i.e. a page on https and photos on http
firefox is allowing it...
solution - you need to upgrade your wordpress site to https
So giving the car a barnfind style wash down isn’t a restoration, next came some actual tool work to start looking in to the car’s issues and check for other problems, as yet unknown.
The whole reason the car was parked up was ultimately the overheating. Having just spent a decent wedge having work done on the engine to cure an overheating issue, also a rebuild of the driver’s electric window, my father took the car for a drive on a sunny summer day, mid 2001.
When it got to being a bit longer than expected, my mother and I weren’t that surprised when an AA flatbed trundled up the street. The electric window had jammed down, after being opened to let the extra heat out, the extra heat coming from running the blowers full chat to try and add cooling to an overheating engine.
Many 4 letter words were thrown at the car, it was allowed to cool in the street, then driven in to the garage where it was left to think about just what it had done.
Hence my priority number 1, was to try and check the overall health of the engine. Pulling the radiator cap, I wasn’t entirely surprised to find it was not full to the brim. Some crystallising and residue left in it wasn’t that much of a surprise. When I removed the top hose and plugged the radiator boss and the thermostat boss with rubber gloves, I discovered there was still coolant in the system though.
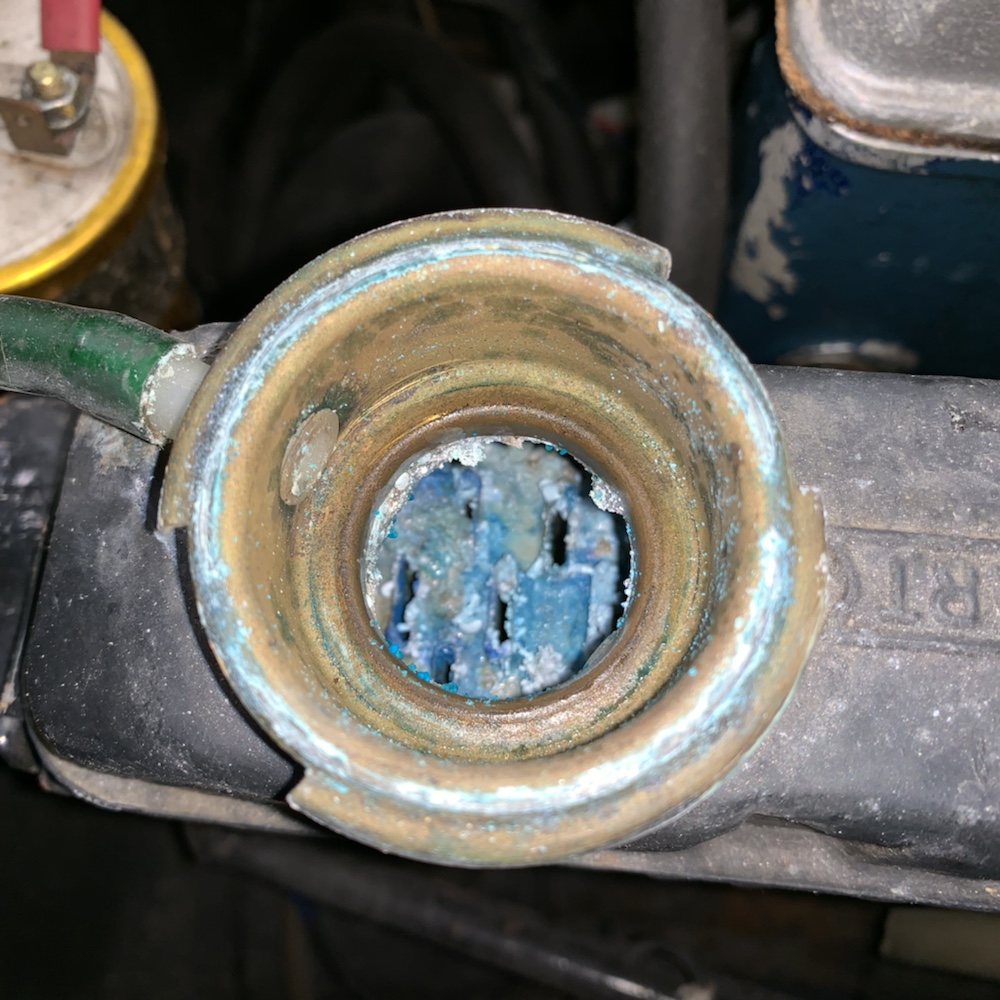
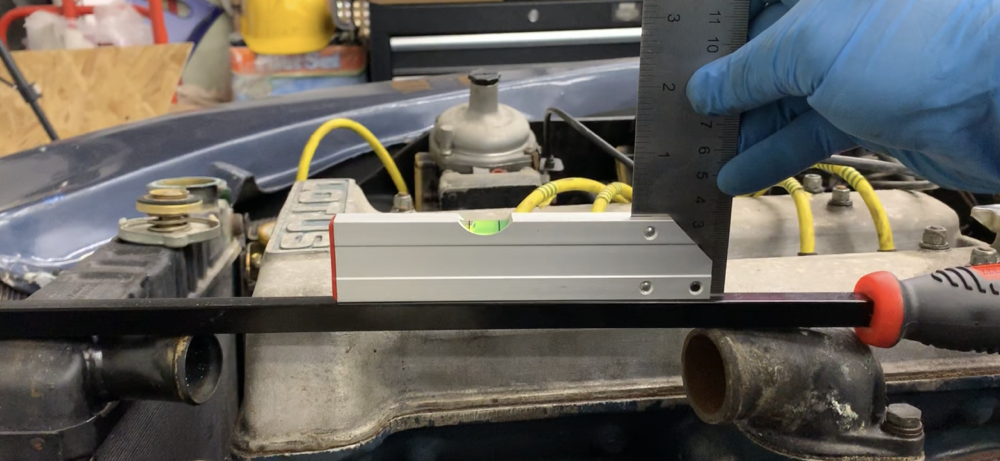
For a long time I have felt the cooling system has a glaring issue on the car and in other engine bay shots I’ve found online and on local racecars I’ve managed to have a nosey round, they have taken steps to address or mitigate this. The system inherently wants an air pocket.
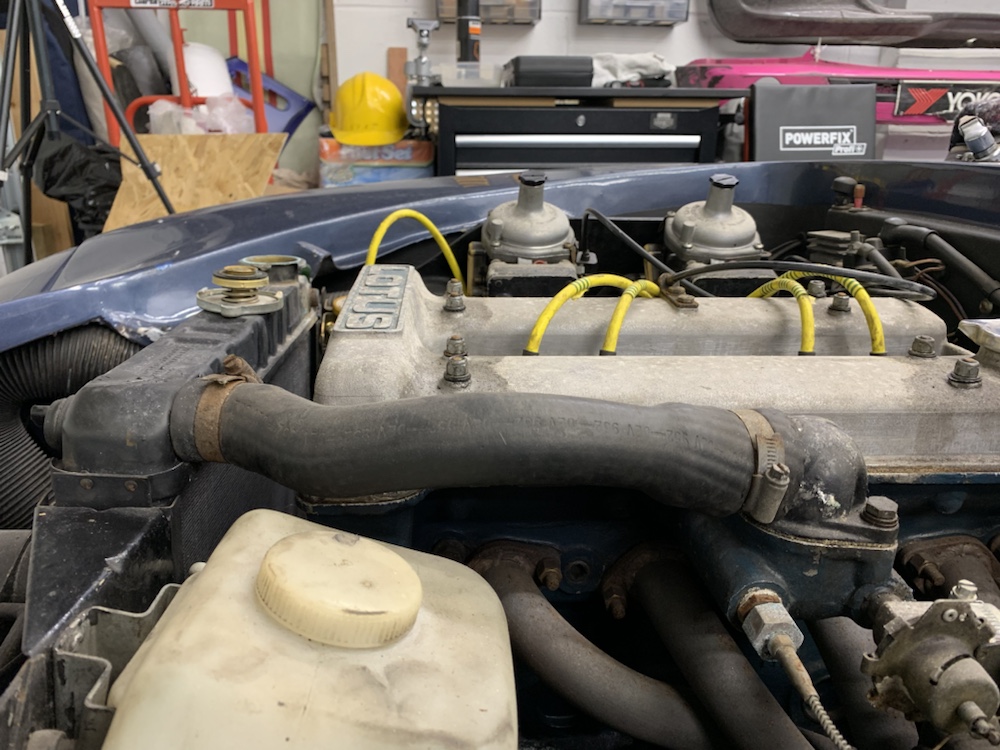
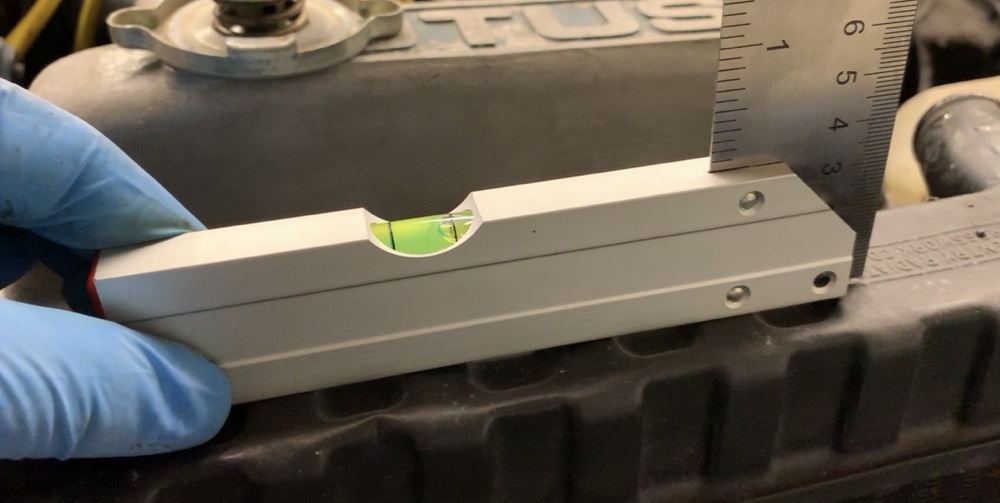
Slightly difficult to get a good shot of, but the radiator sits wonky and this puts the top of the tank on an angle, where the cap is lower than the top of the tank on the opposite side. The same elevated side of the tank is the one with the radiator top hose boss, which is above the thermostat elbow. This will be addressed via a header tank when being rebuilt.
Next up was checking the plugs, to get an idea how the car had been running in general. Each plug was pulled, numbered and inspected in turn.
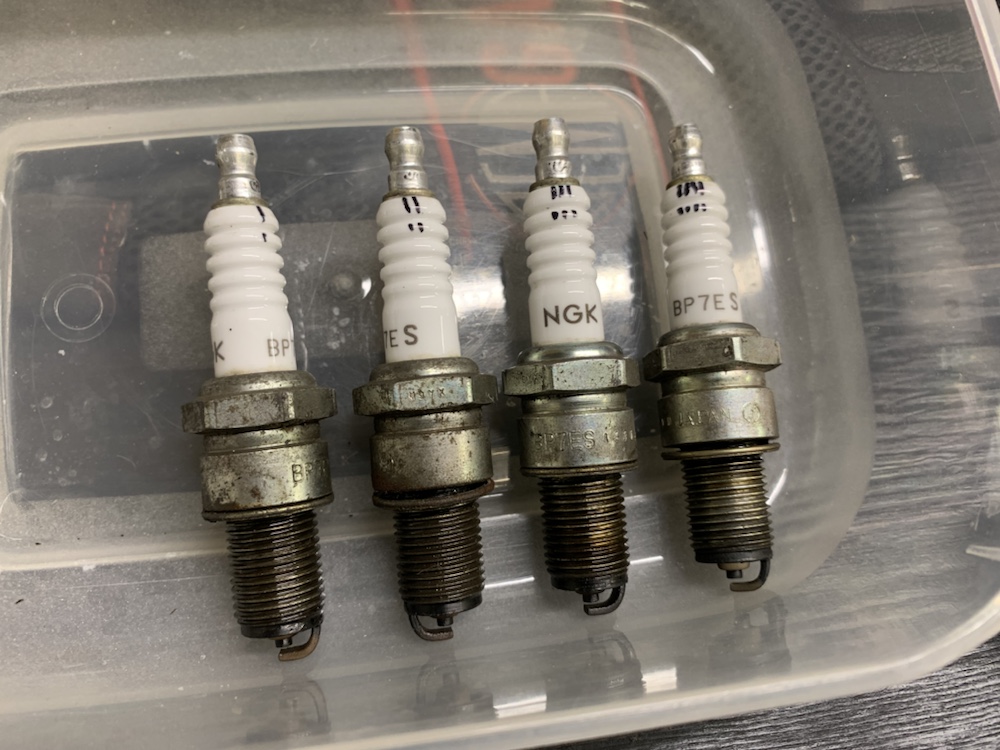
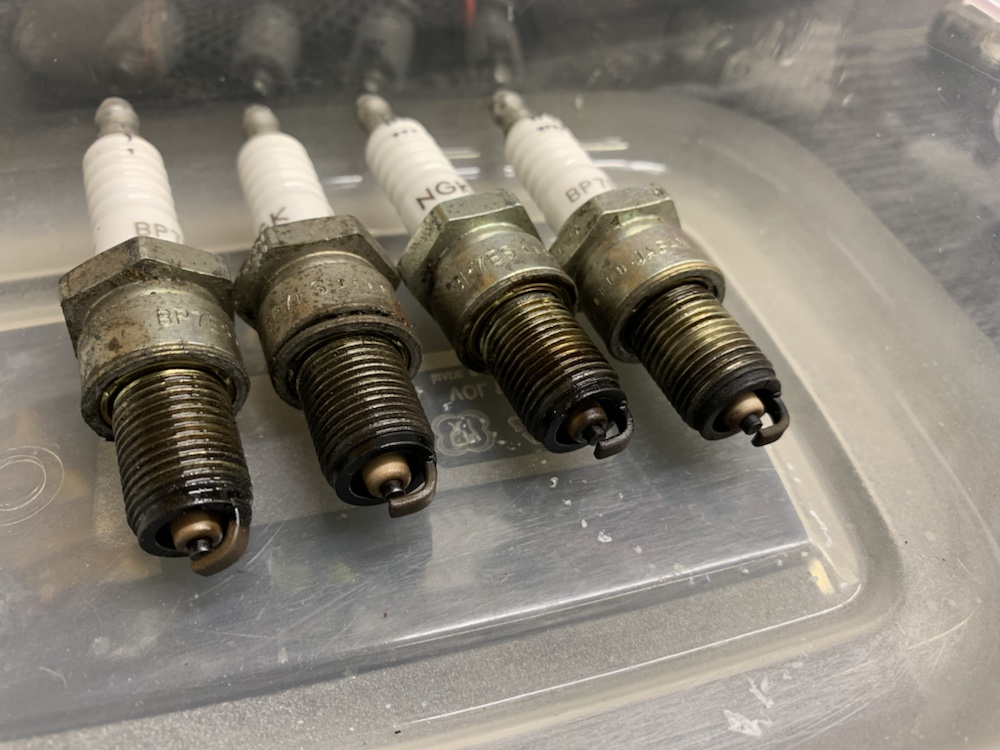
Overall, actually not too bad, although Cylinder #3 appears to have been running richer than the others.
Last check was the oil, to check for any signs of emulsion suggested a breach in the headgasket.
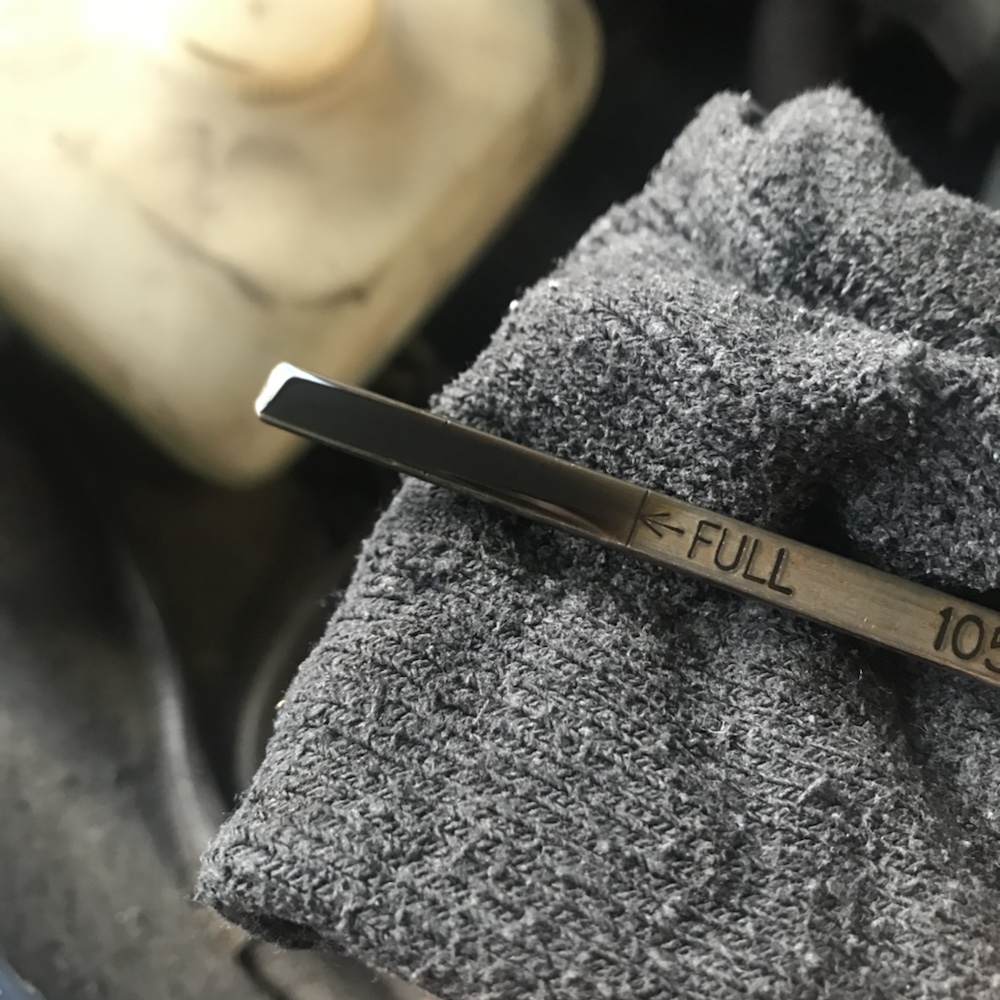
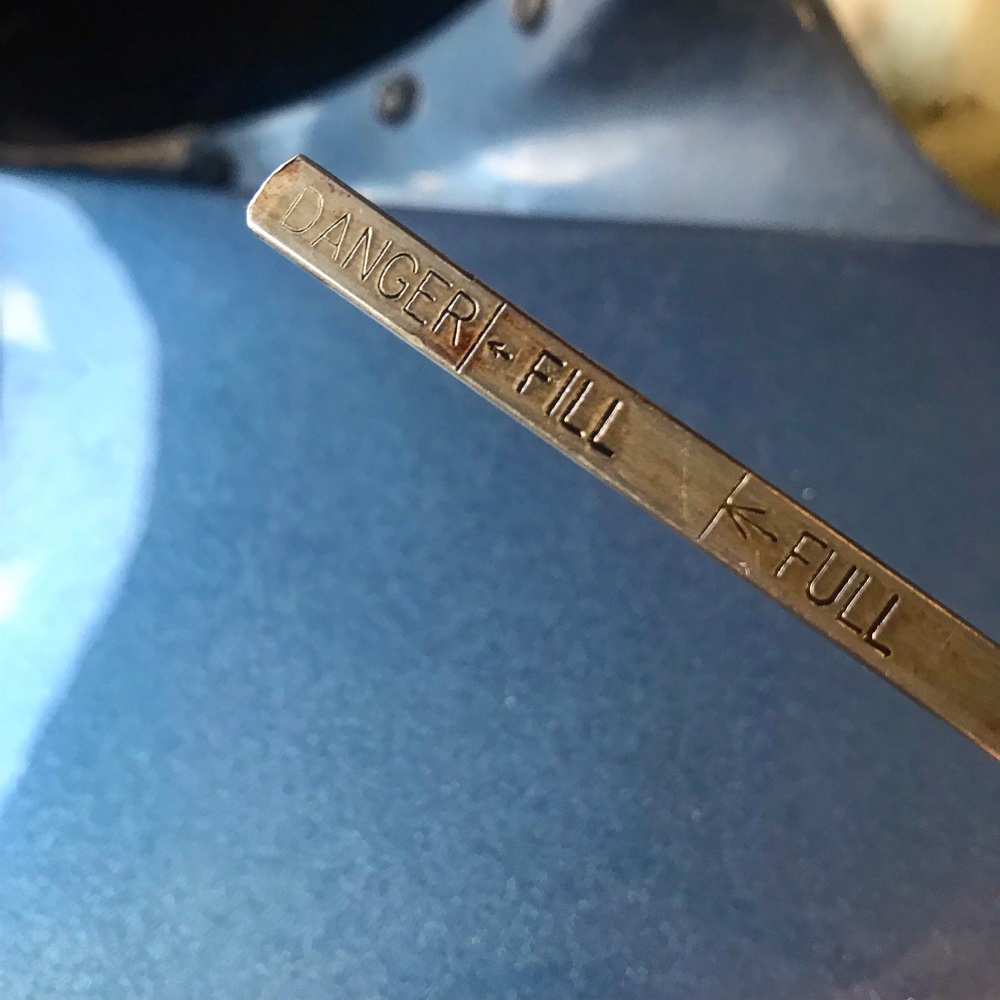
Whilst obviously in need of an oil change, no signs of emulsion or water/coolant present. As a side note, how brilliant are old dipsticks?!
The whole reason the car was parked up was ultimately the overheating. Having just spent a decent wedge having work done on the engine to cure an overheating issue, also a rebuild of the driver’s electric window, my father took the car for a drive on a sunny summer day, mid 2001.
When it got to being a bit longer than expected, my mother and I weren’t that surprised when an AA flatbed trundled up the street. The electric window had jammed down, after being opened to let the extra heat out, the extra heat coming from running the blowers full chat to try and add cooling to an overheating engine.
Many 4 letter words were thrown at the car, it was allowed to cool in the street, then driven in to the garage where it was left to think about just what it had done.
Hence my priority number 1, was to try and check the overall health of the engine. Pulling the radiator cap, I wasn’t entirely surprised to find it was not full to the brim. Some crystallising and residue left in it wasn’t that much of a surprise. When I removed the top hose and plugged the radiator boss and the thermostat boss with rubber gloves, I discovered there was still coolant in the system though.
For a long time I have felt the cooling system has a glaring issue on the car and in other engine bay shots I’ve found online and on local racecars I’ve managed to have a nosey round, they have taken steps to address or mitigate this. The system inherently wants an air pocket.
Slightly difficult to get a good shot of, but the radiator sits wonky and this puts the top of the tank on an angle, where the cap is lower than the top of the tank on the opposite side. The same elevated side of the tank is the one with the radiator top hose boss, which is above the thermostat elbow. This will be addressed via a header tank when being rebuilt.
Next up was checking the plugs, to get an idea how the car had been running in general. Each plug was pulled, numbered and inspected in turn.
Overall, actually not too bad, although Cylinder #3 appears to have been running richer than the others.
Last check was the oil, to check for any signs of emulsion suggested a breach in the headgasket.
Whilst obviously in need of an oil change, no signs of emulsion or water/coolant present. As a side note, how brilliant are old dipsticks?!
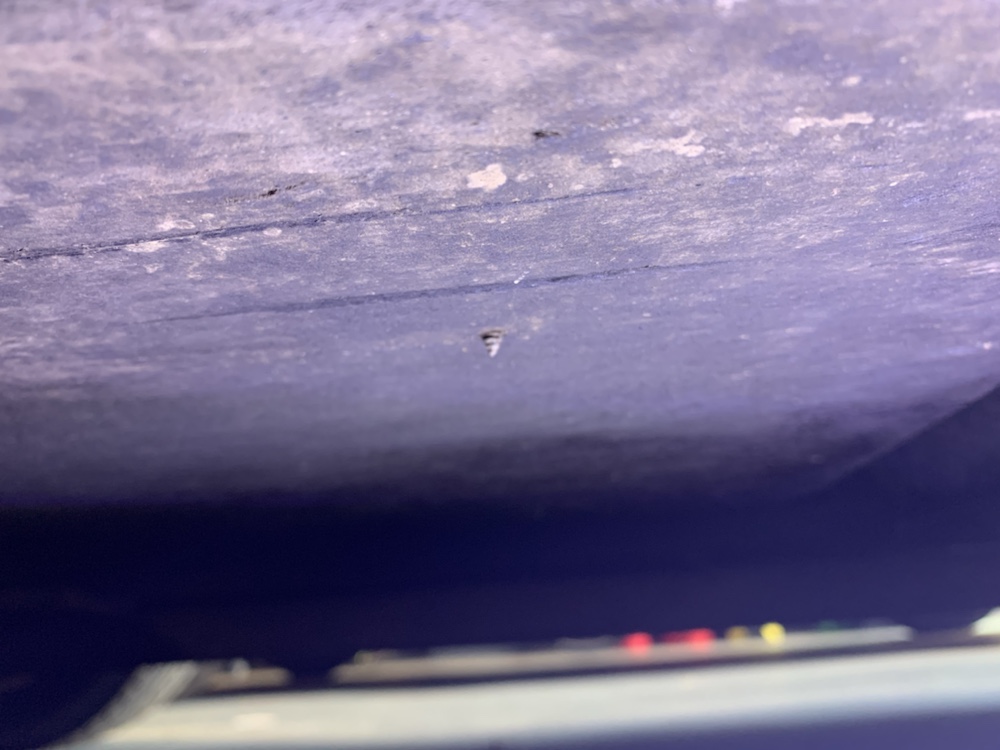
Next up, I wanted to get a look under the car and see how things were holding up. The jacking points on the Elan are actually not dissimilar to a normal steel monocoque car.
But... I just wasn't that keen on using them. Whilst I have no reason to think our sills are worse for wear, it can be an issue with the steel reinforcement inside corroding. So I decided not to take the chance and to go with option B (Blue Peter).
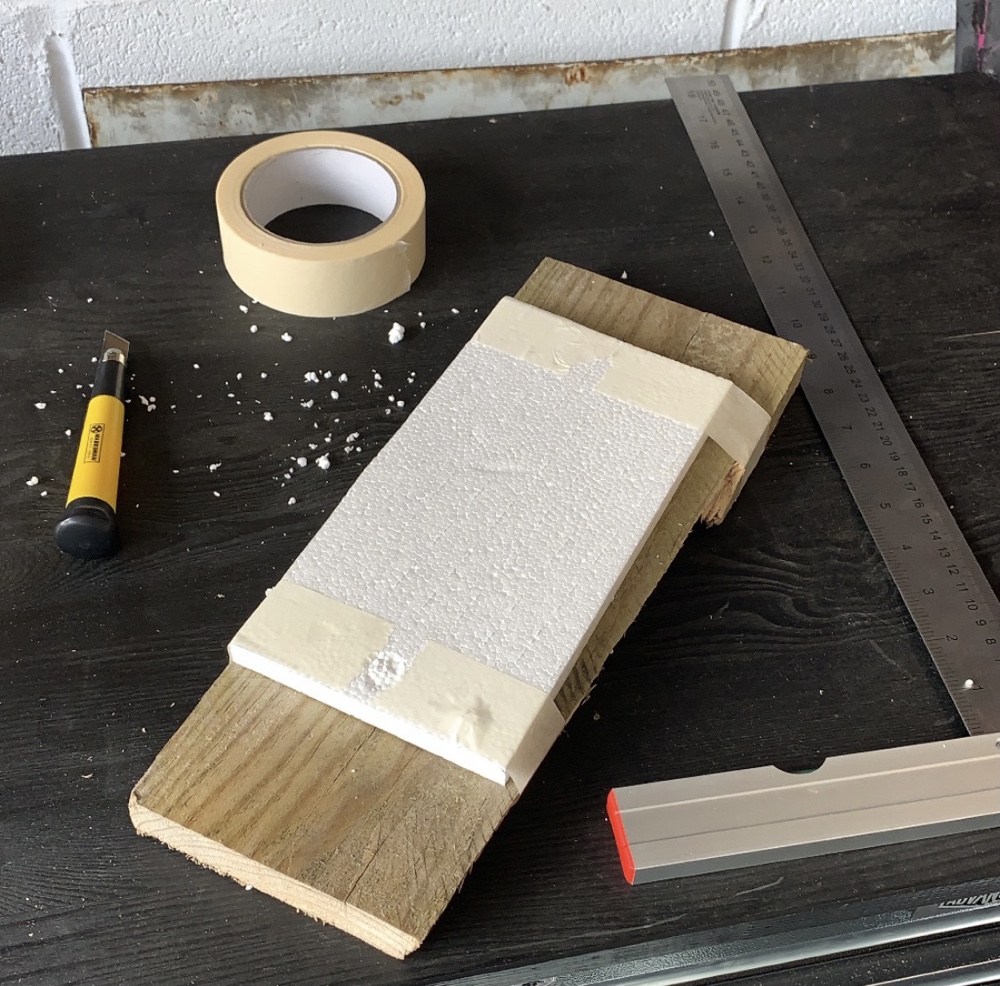
Using an off cut and a half inch sheet of polystyrene, I made a jacking pad for under the vacuum tube. This is a well known alternative jacking point and plenty strong, as that's where the towing eye is located, but it makes sense to spread the load as much as possible.
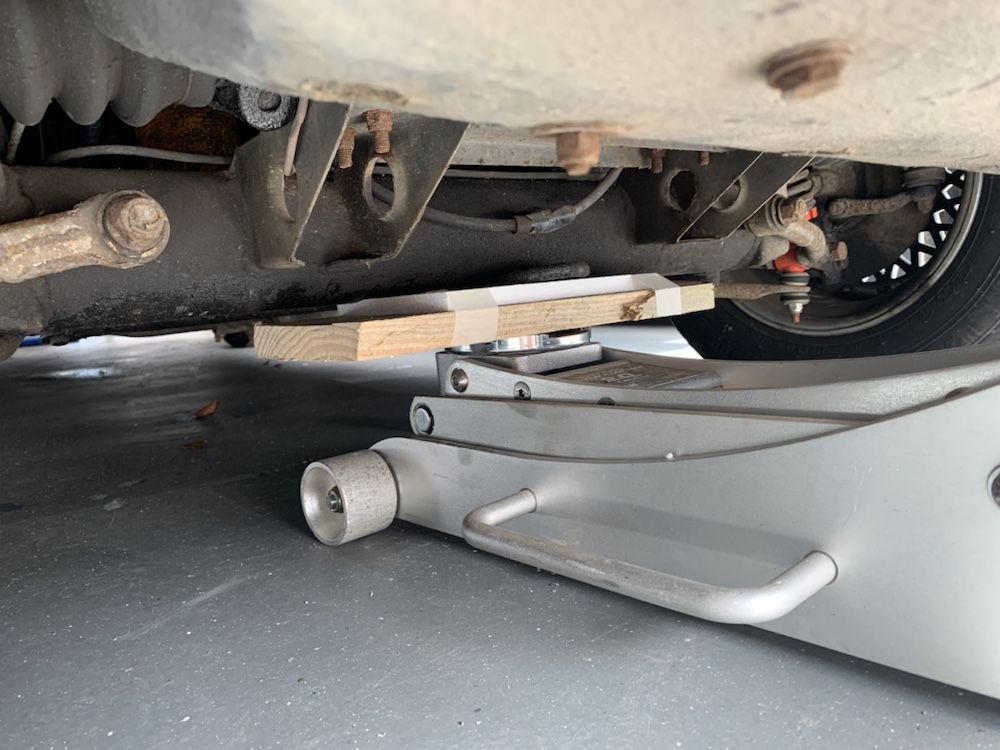
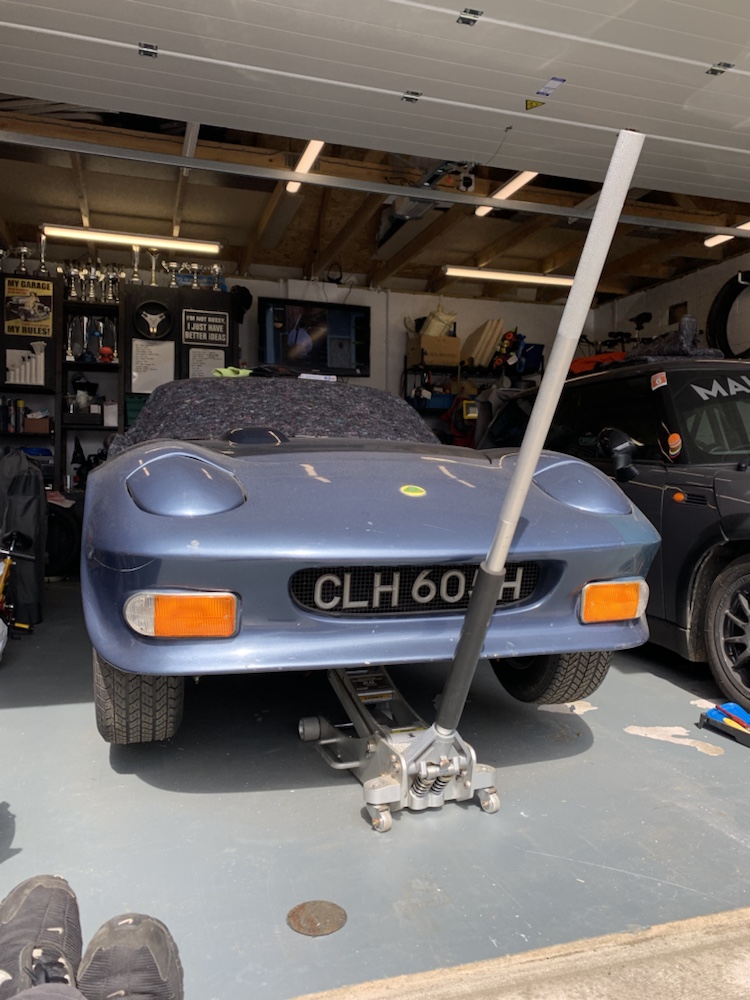
Obviously not going under the car without it being supported on axle stands, but was still able to get a decent look from the front and sides.
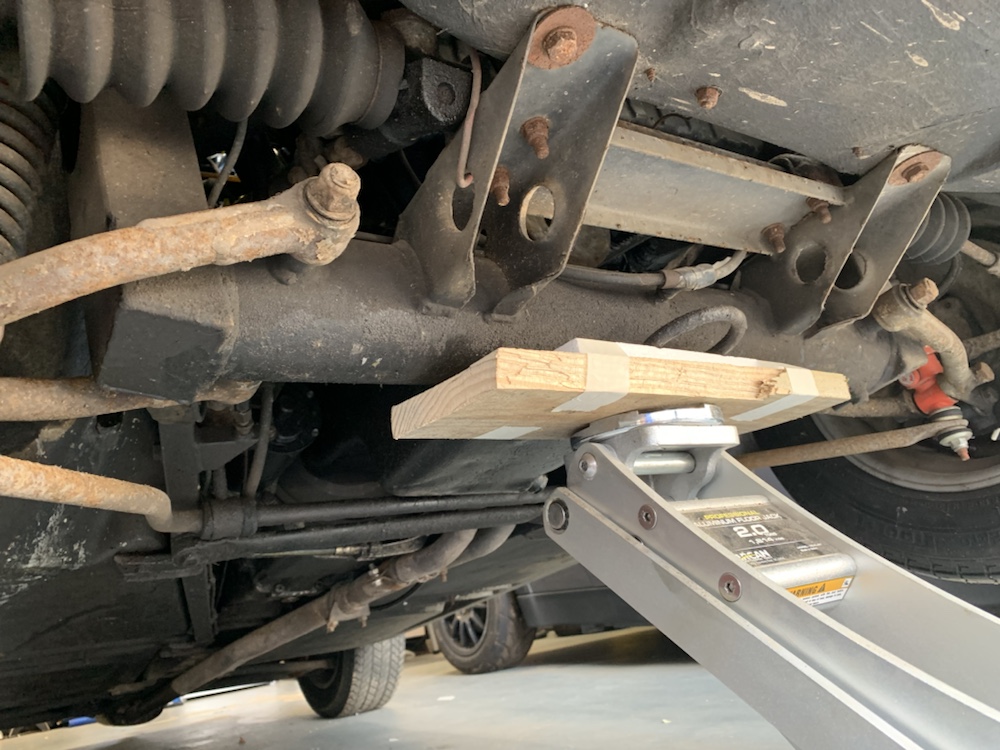
The chassis itself is in good condition, only light corrosion evident, as would be expected. Although I know it's been upgraded to a Spyder item, I don't know how old said chassis is.
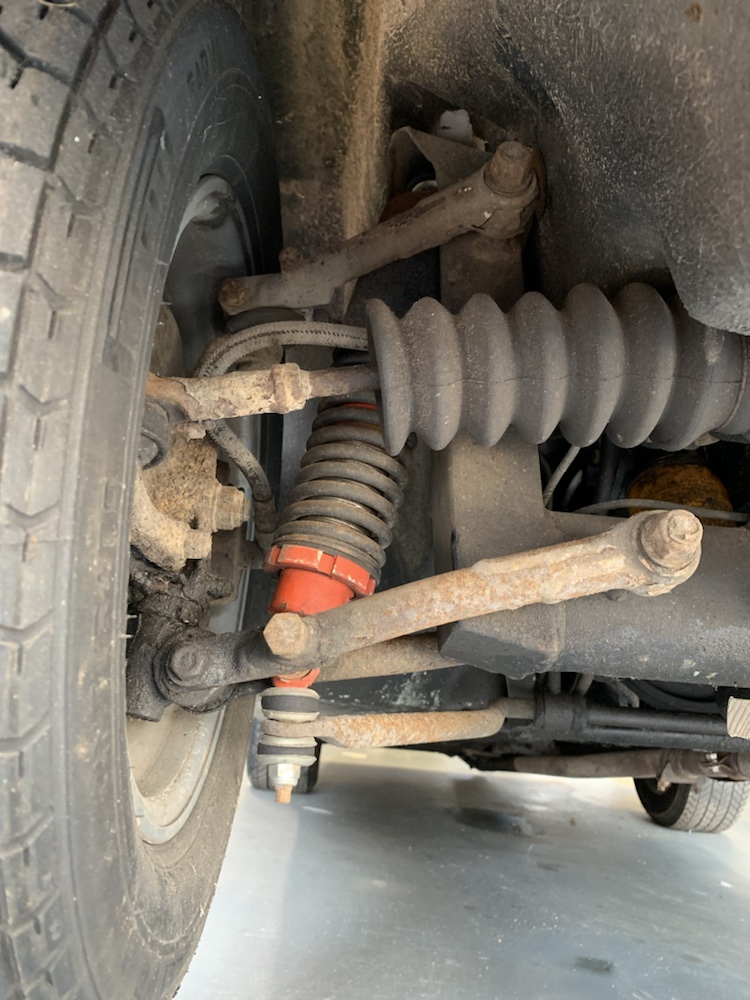
Front suspension arms are in decent condition, again, not standard items. The flakey chromed finish is on tube steel, which is not what the Elan came with, the original Lotus items were formed from welded steel plate. These appear to be upgraded Spyder items.
The front dampers are Avo coilovers, can't remember the year, but I'm relatively certain my father commissioned these in the mid 90s along with replacement damping adjustable inserts on the rear.
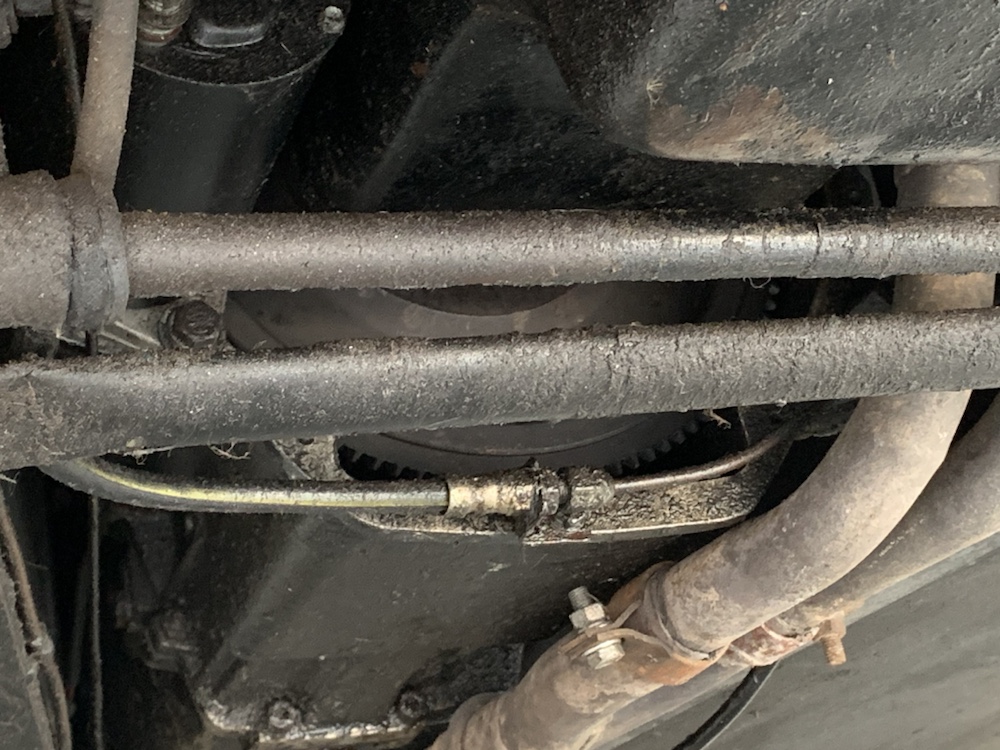
Evidence further back along the car of a leak coming from the crank seal, light haze of oil over the chassis brace and leading up to the bell-housing. More about that very open bell-housing at a later date.
Timeline wise, at this point we've reached the start of May-2020.
But... I just wasn't that keen on using them. Whilst I have no reason to think our sills are worse for wear, it can be an issue with the steel reinforcement inside corroding. So I decided not to take the chance and to go with option B (Blue Peter).
Using an off cut and a half inch sheet of polystyrene, I made a jacking pad for under the vacuum tube. This is a well known alternative jacking point and plenty strong, as that's where the towing eye is located, but it makes sense to spread the load as much as possible.
Obviously not going under the car without it being supported on axle stands, but was still able to get a decent look from the front and sides.
The chassis itself is in good condition, only light corrosion evident, as would be expected. Although I know it's been upgraded to a Spyder item, I don't know how old said chassis is.
Front suspension arms are in decent condition, again, not standard items. The flakey chromed finish is on tube steel, which is not what the Elan came with, the original Lotus items were formed from welded steel plate. These appear to be upgraded Spyder items.
The front dampers are Avo coilovers, can't remember the year, but I'm relatively certain my father commissioned these in the mid 90s along with replacement damping adjustable inserts on the rear.
Evidence further back along the car of a leak coming from the crank seal, light haze of oil over the chassis brace and leading up to the bell-housing. More about that very open bell-housing at a later date.
Timeline wise, at this point we've reached the start of May-2020.
So having done initial investigations;
- Paint has blisters appearing on the front and rear arches, nasty repair on the front corner, bootlid is a different shade of blue to the rest of the car
- Door fit is an absolute riot
- Window seals are completely perished front & rear
- Driver’s elec window needs repaired
- Brake master cylinder seals are most likely gone hence zero brake pedal
- Clutch slave cylinder looks shot
- Gearbox appears to have a tail seal leak
- Diff has a leak, looks like nose seal
- Driveshaft donuts are perished
- Fibreglass repairs needed in the wheel arches
- Overheating cause needs investigated, cooling system will need entirely flushed regardless
- Speedo doesn't work (hasn't since 1990)
- Split rims need rebuilt & resealed
- Oh, and the keys have gone missing
Bottom line, this isn't a recommissioning, it's a rebuild scenario. Time to take it apart!
Reading various manuals and accounts of restoring Elans, it's useful to get the body and chassis split early on to make everything more accessible.
Started out removing the seats, as they're on the big old list of things to take out to lighten the body before lifting off.
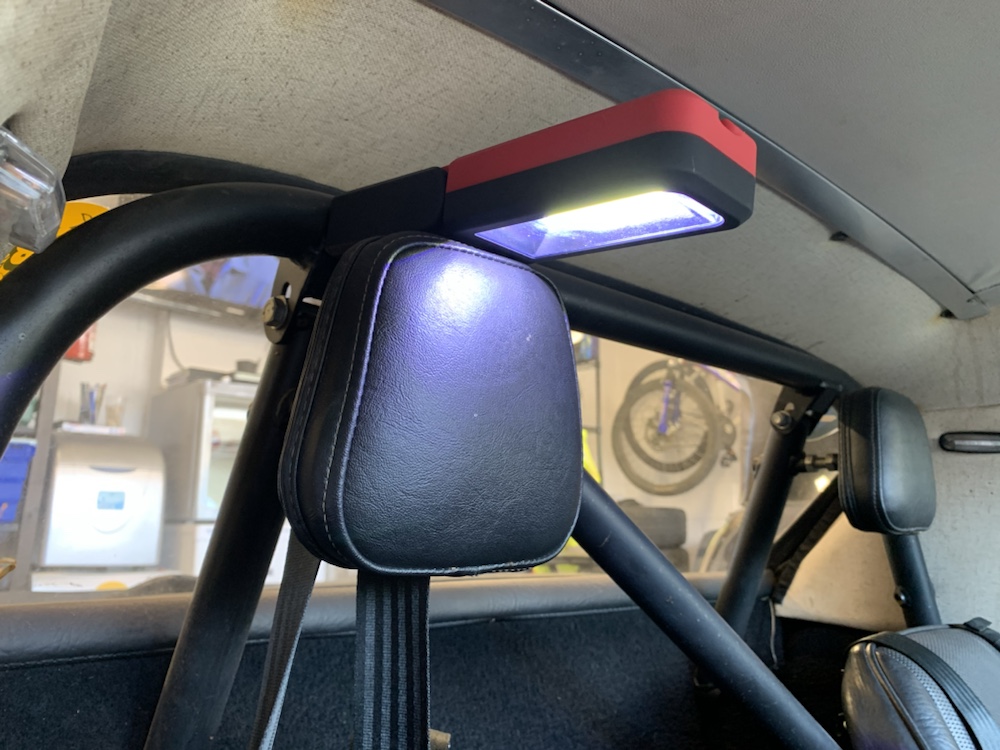
Incidental hot tip, roll cages make excellent hand light mounts.
Not a great start, and for someone who believes in omens, actually, rather troubling!
Thankfully only one of the bolts holding the driver's seat in sheared, the other and both passenger seat ones came free.
Not an uncommon issue with the bolts corroding and binding in to the bobbins. It is, however, a particular pain in the backside when you can't use heat to try and free them up. The bobbins are bonded in to the fibreglass shell and heating them to any meaningful extent would cause damage.

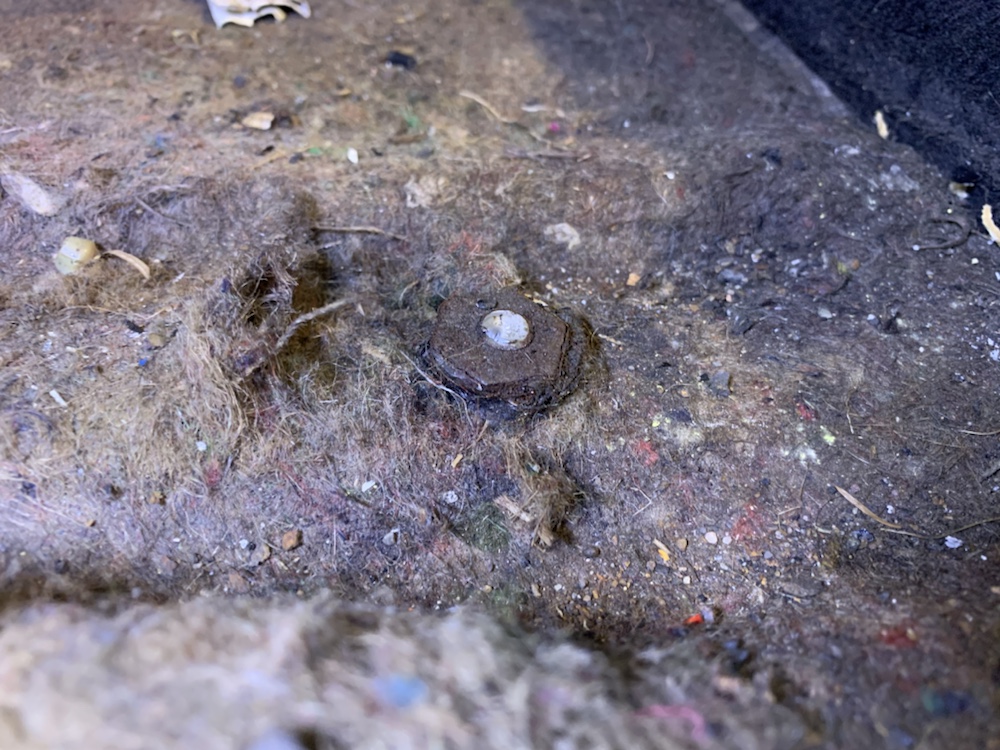
Seats out, the main floor carpets pop right out, literally. There's only poppers holding them down, in this case, the remains of poppers holding the remains of carpet down.
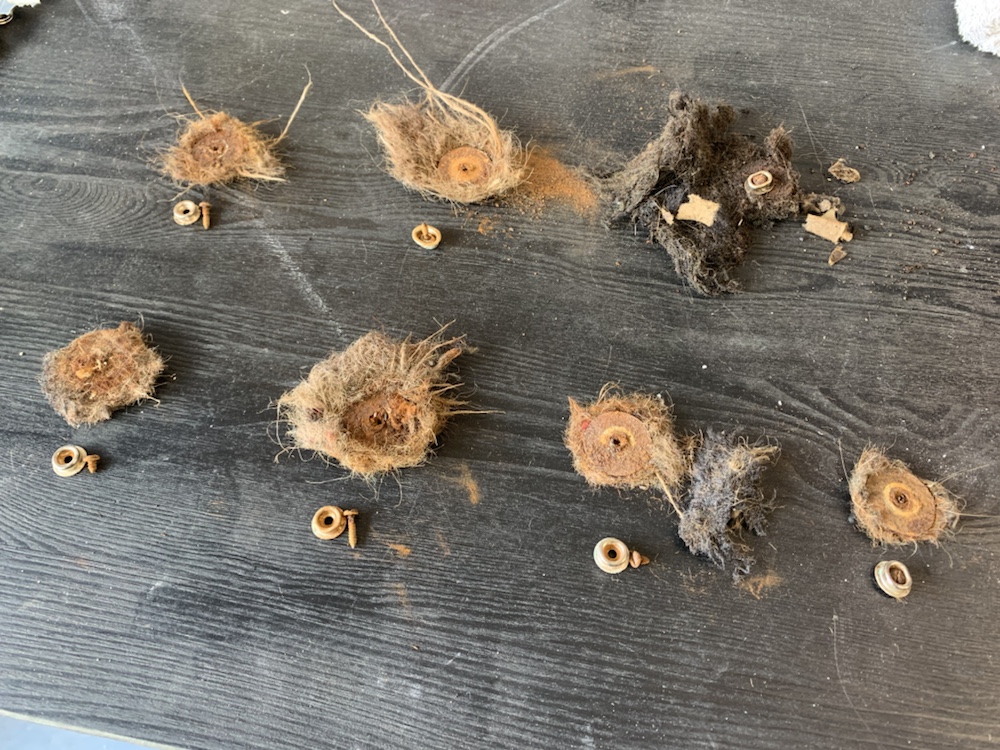
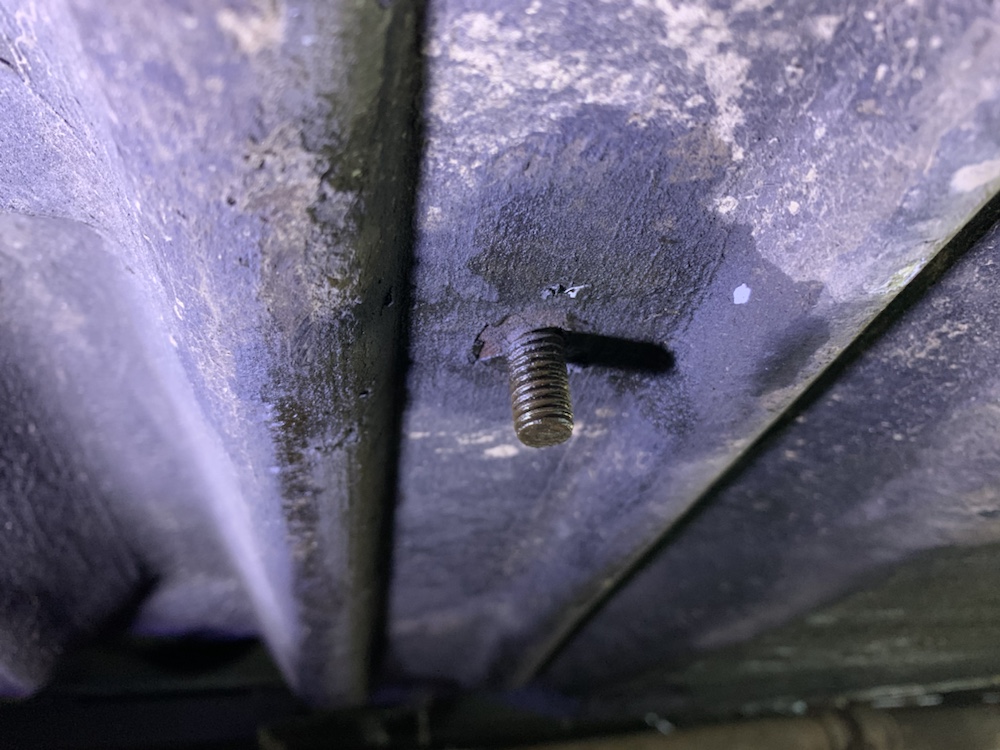
Top quality British build quality. Absolutely no consistency of screws used, some only a few millimetres, others long enough to poke right through the floor (although that only needs about ~8mm to be fair).

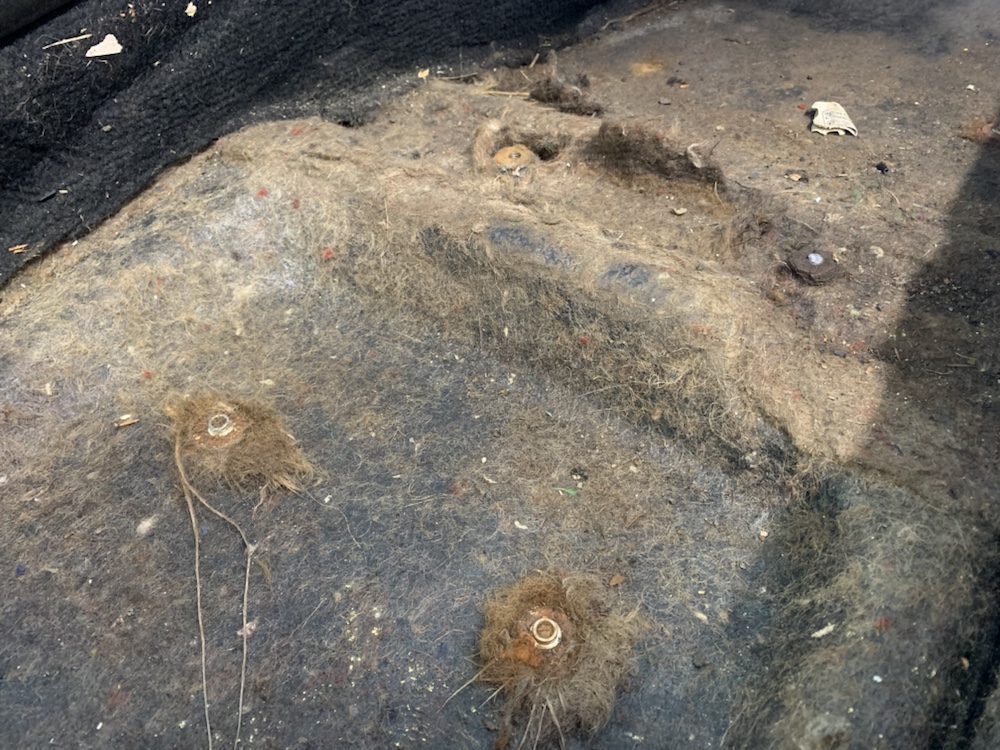
The remains of the carpet and underlay, plenty of the underlay remaining stuck to the floor. Good few hours wasted with a steam cleaner trying to scrape it out!
- Paint has blisters appearing on the front and rear arches, nasty repair on the front corner, bootlid is a different shade of blue to the rest of the car
- Door fit is an absolute riot
- Window seals are completely perished front & rear
- Driver’s elec window needs repaired
- Brake master cylinder seals are most likely gone hence zero brake pedal
- Clutch slave cylinder looks shot
- Gearbox appears to have a tail seal leak
- Diff has a leak, looks like nose seal
- Driveshaft donuts are perished
- Fibreglass repairs needed in the wheel arches
- Overheating cause needs investigated, cooling system will need entirely flushed regardless
- Speedo doesn't work (hasn't since 1990)
- Split rims need rebuilt & resealed
- Oh, and the keys have gone missing
Bottom line, this isn't a recommissioning, it's a rebuild scenario. Time to take it apart!
Reading various manuals and accounts of restoring Elans, it's useful to get the body and chassis split early on to make everything more accessible.
Started out removing the seats, as they're on the big old list of things to take out to lighten the body before lifting off.
Incidental hot tip, roll cages make excellent hand light mounts.
Not a great start, and for someone who believes in omens, actually, rather troubling!
Thankfully only one of the bolts holding the driver's seat in sheared, the other and both passenger seat ones came free.
Not an uncommon issue with the bolts corroding and binding in to the bobbins. It is, however, a particular pain in the backside when you can't use heat to try and free them up. The bobbins are bonded in to the fibreglass shell and heating them to any meaningful extent would cause damage.
Seats out, the main floor carpets pop right out, literally. There's only poppers holding them down, in this case, the remains of poppers holding the remains of carpet down.
Top quality British build quality. Absolutely no consistency of screws used, some only a few millimetres, others long enough to poke right through the floor (although that only needs about ~8mm to be fair).
The remains of the carpet and underlay, plenty of the underlay remaining stuck to the floor. Good few hours wasted with a steam cleaner trying to scrape it out!
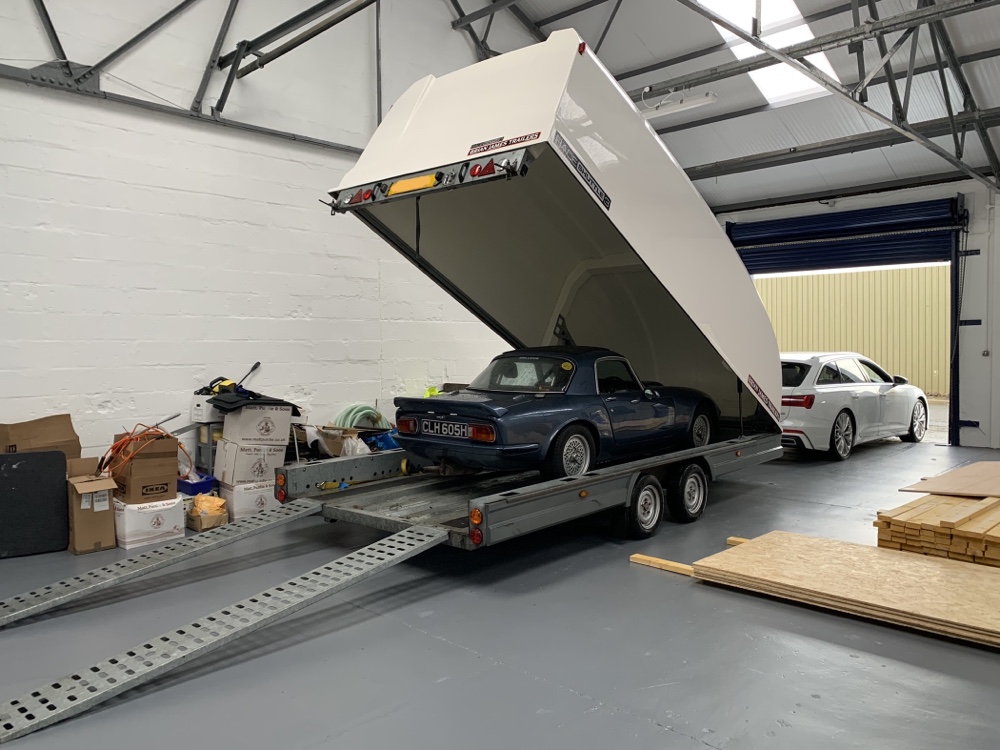
Now, at this point, I have to admit, progress was slow going. I really struggled with working on the car in cramped conditions when I'm constantly tripping over stuff and can't even get the doors properly open.
Thankfully, I managed to get the use of some workshop space to get things moving.
Also a chance to get some better pics, and find some more issues needing addressed...
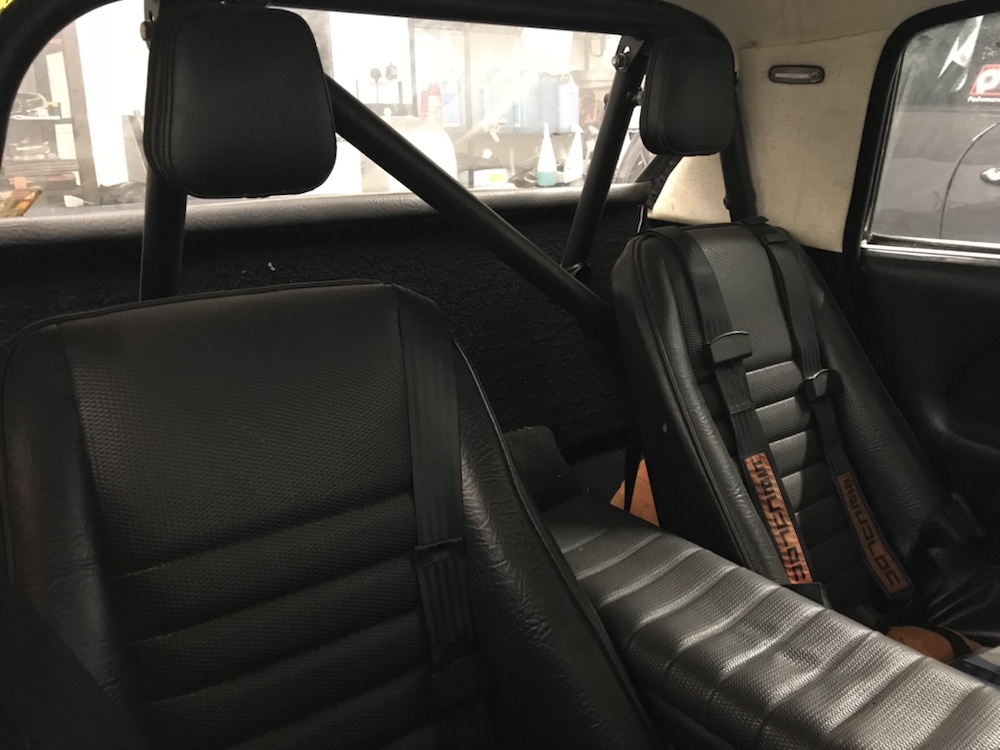
Nothing wrong here, just love this interior!
Shows the issue with the paint blistering on the rear arches. After having it checked out, it was confirmed that’s being caused by moisture getting under the gel coat, which means back to bare glass for a respray
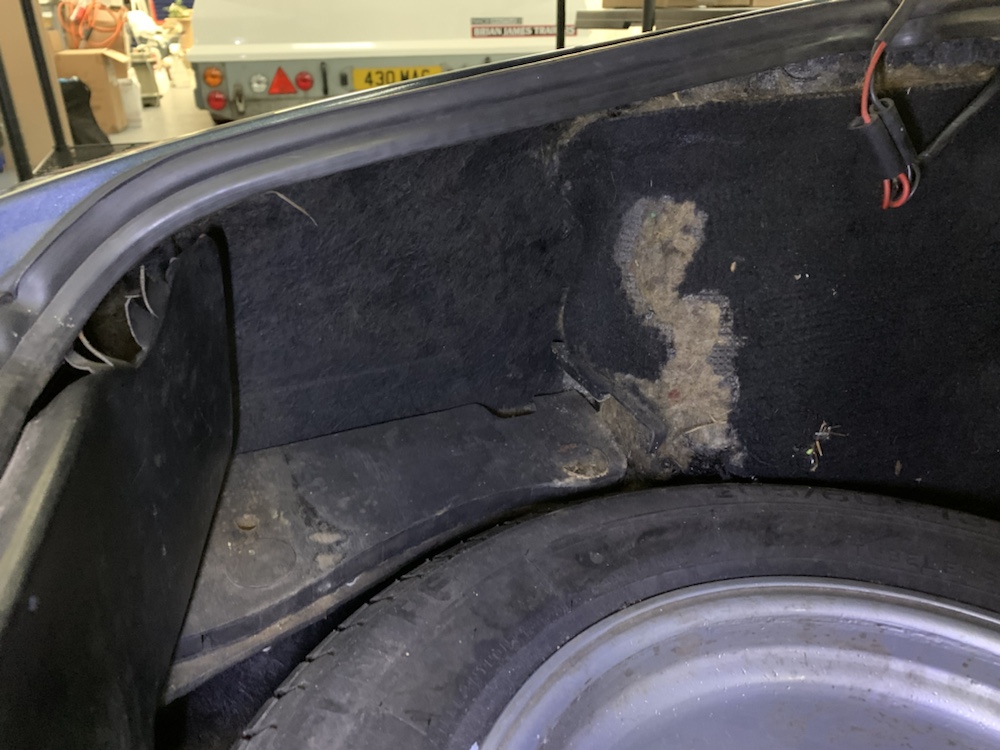
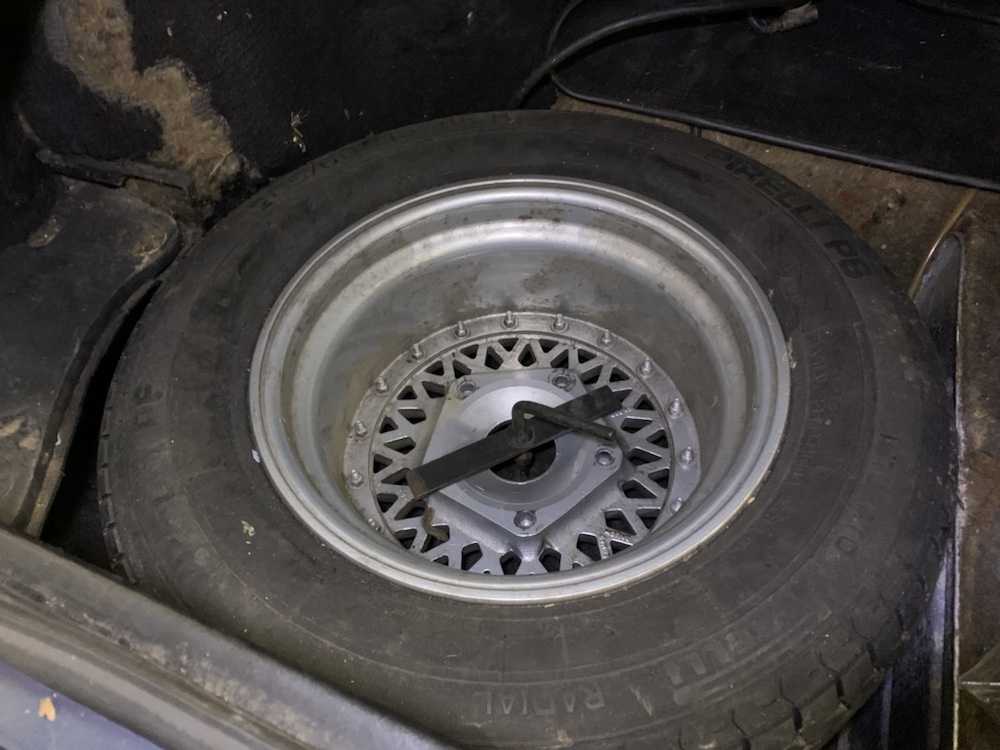
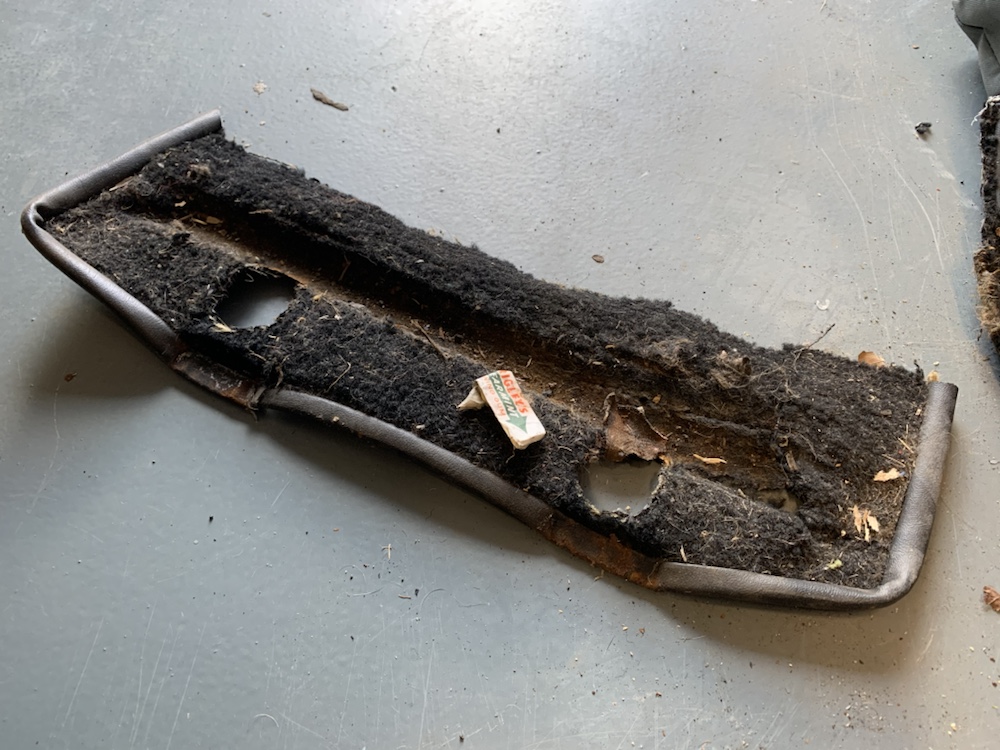
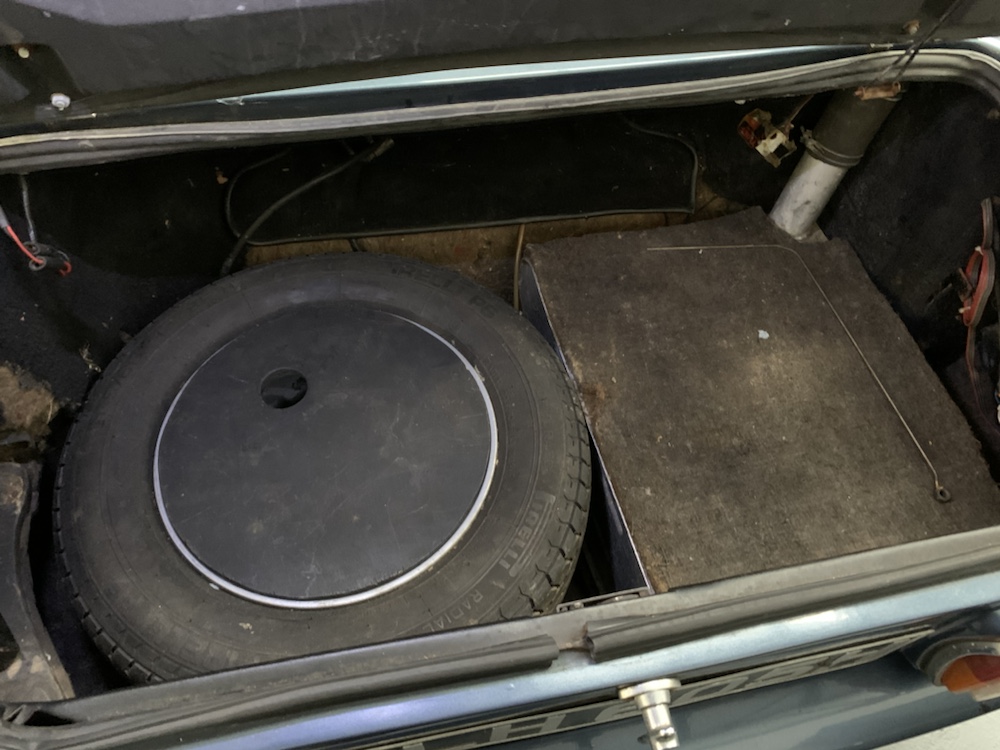
Boot trim is gubbed, but full size spare is pretty sweet!
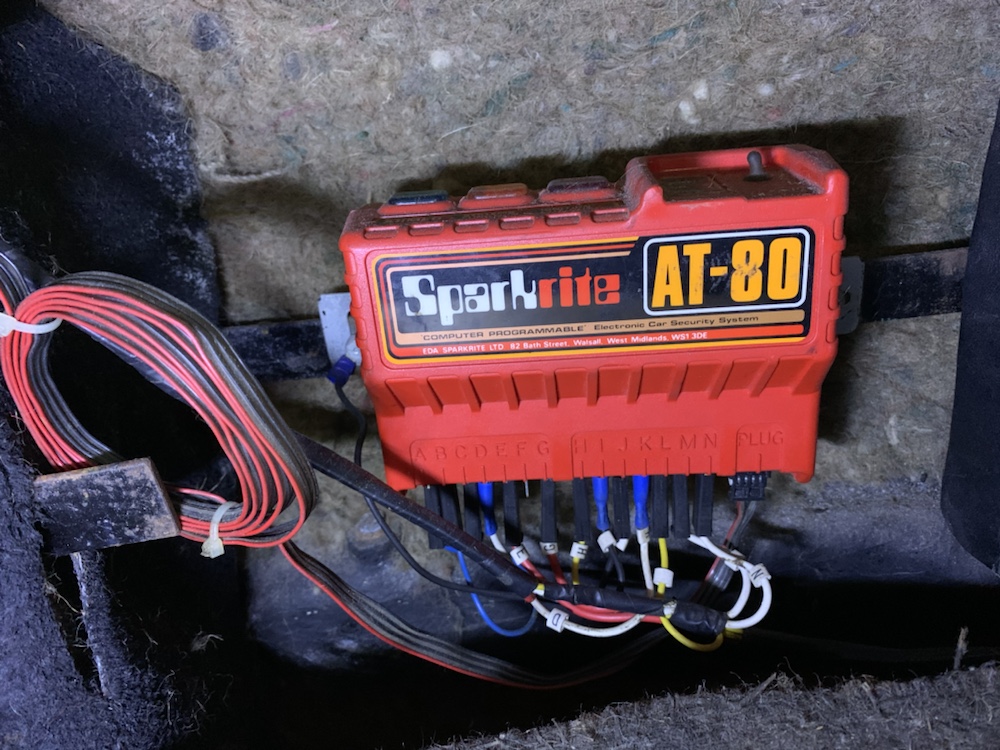
Hateful, hateful things
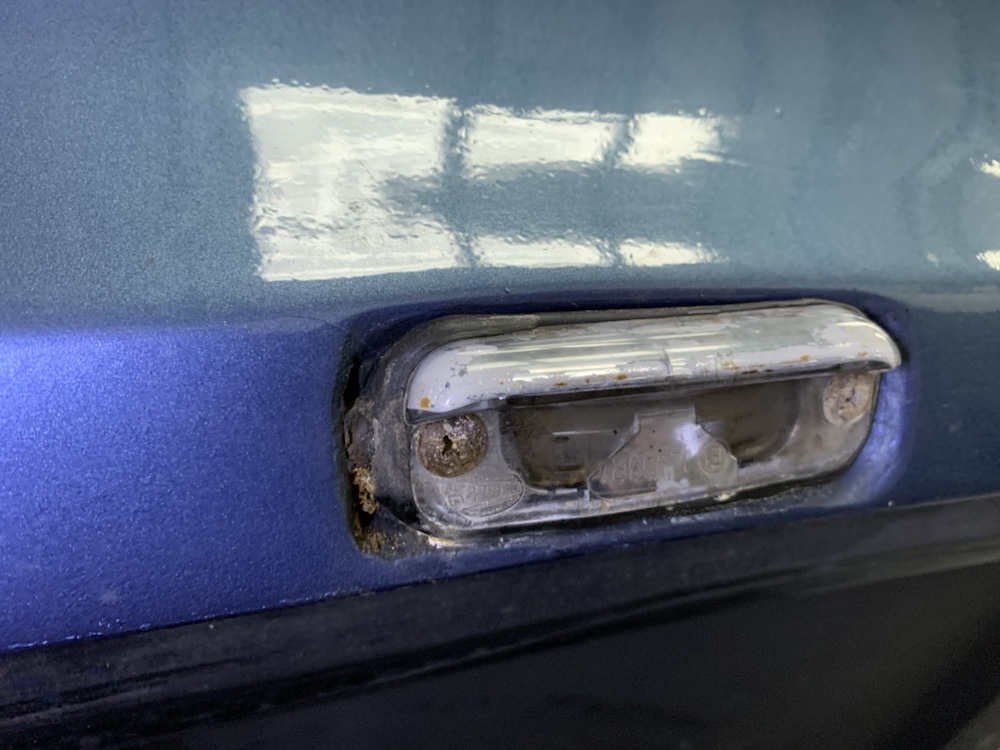
Numberplate lights dont even remotely fit
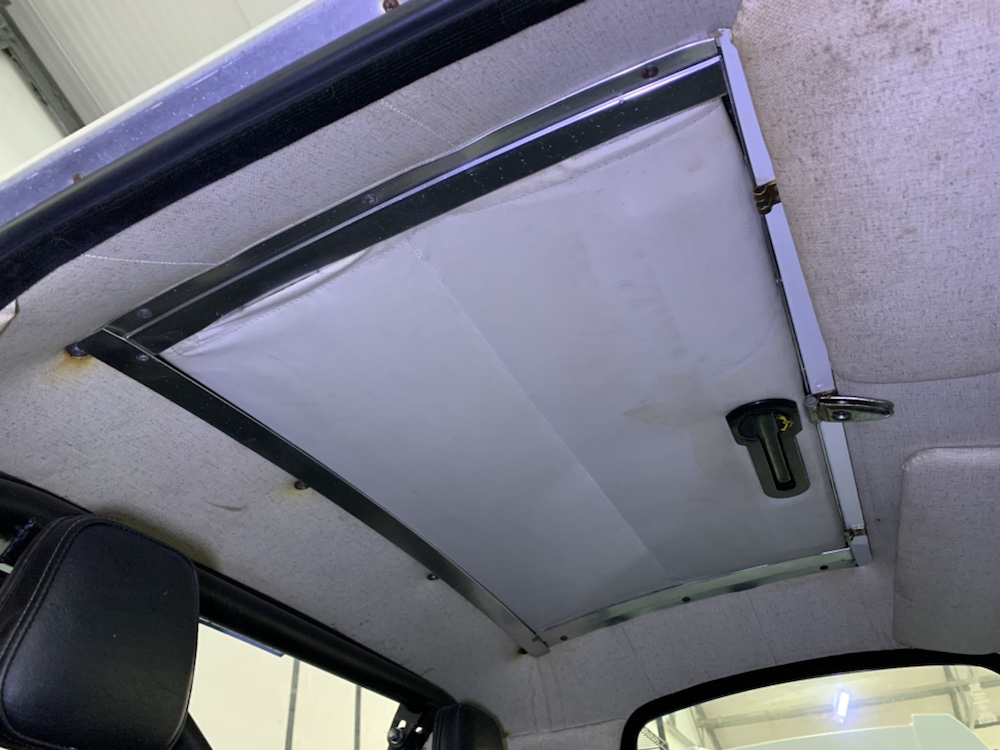
Headliner will probably need replaced, pretty grubby and some rust staining. Need to try and recreate the air deflector that should be at the front, it was slightly snapped in half a long time back.

Pinacle of British automotive wiring circa 1970...
Thankfully, I managed to get the use of some workshop space to get things moving.
Also a chance to get some better pics, and find some more issues needing addressed...
Nothing wrong here, just love this interior!
Shows the issue with the paint blistering on the rear arches. After having it checked out, it was confirmed that’s being caused by moisture getting under the gel coat, which means back to bare glass for a respray
Boot trim is gubbed, but full size spare is pretty sweet!
Hateful, hateful things
Numberplate lights dont even remotely fit
Headliner will probably need replaced, pretty grubby and some rust staining. Need to try and recreate the air deflector that should be at the front, it was slightly snapped in half a long time back.
Pinacle of British automotive wiring circa 1970...
Courtesy of the extremely useful forum over on LotusElan.net I had my first To Do list set. The list of tasks needing completed to remove the body from the chassis, leaving the drivetrain intact;
- Remove bonnet
- Disconnect battery cable
- Drain radiator, engine, transmission, rear differential
- Disconnect hoses, remove radiator
- Disconnect vacuum lines for head lights
- Disconnect water temp sensor and heater control valve on head
- Disconnect steering column, Remove the pinch bolt from the steering shaft coupling located near the front cross member. Under the instrument panel loosen the two U bolts securing the steering shaft. Pull the steering wheel back about 1 inch to disengage the splined steering shaft from the coupling.
- Disconnect throttle cable
- Remove airbox, carburetors and rear studs
- Unfasten and remove tailpipe/muffler /exhaust pipe from header
- Disconnect speedo cable, parking brake cable
- Disconnect clutch slave cylinder
- Disconnect ignition switch wire from starter and all ground wires to frame
- Disconnect brake lines from master cylinder
- Disconnect oil pressure line from block
- Disconnect primary ignition and high tension wires to distributor from coil
- Disconnect fuel line from fuel pump
- Remove transmission shift lever, plug tranny opening with wadded paper towel
- Remove horns mounted on front body/chassis through bolts
- Remove 12 UNC body chassis bolts from underneath
- Behind dash at the tunnel top, remove two UNF bolts on each side
- Behind carpet panel below the convertible top storage area remove the two UNF body/rear strut bolts
- Nearby on the outboard sides remove the bolts and clevis holding the seat
- To lighten the body for lift off: Remove fuel tank, Remove seats
- Remove the black ground wire connected to the differential rubber mount in boot.
- Remove the two seat belt inboard ring bolts that screw into the transmission tunnel portion of the frame.
- Remove the large rubber hole plug on the right side of the transmission tunnel, used to access the drive shaft u-joint.
- There are 16 bolts holding the body onto the chassis
- Check for any shims on frame and mark locations of them
The good news is, some parts were already struck off the list.
Bonnet is only held on with one big spring. Seats are already unbolted. It's like being half way there.
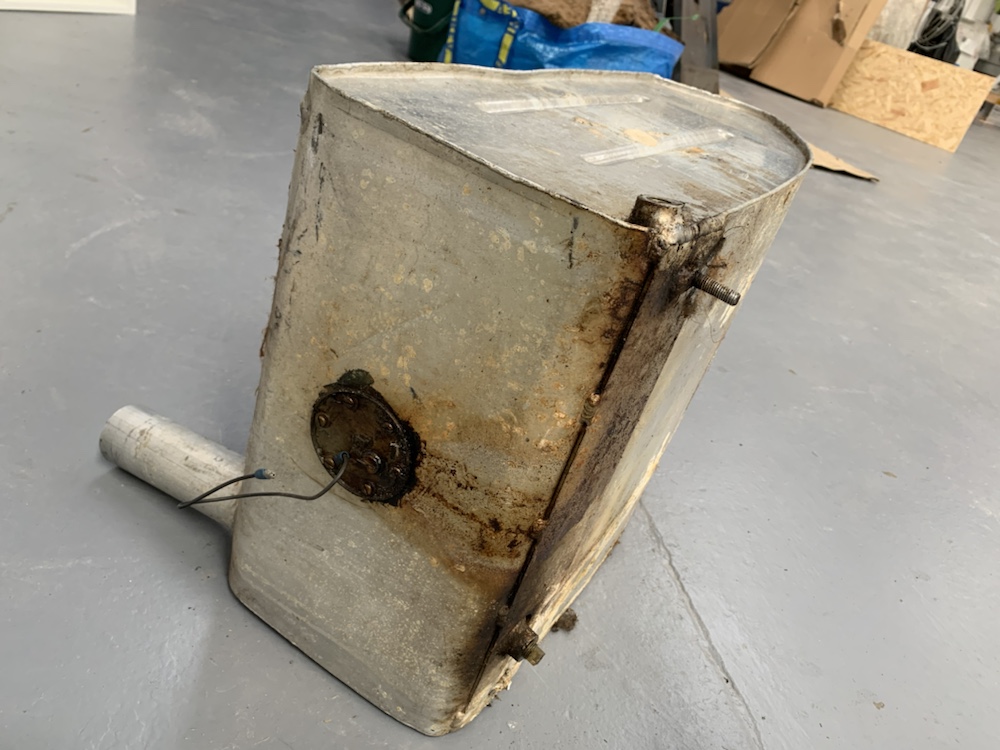
Next up, fuel tank removal.
Access is nice and easy.
The tank and filler cap are joined with a section of rubber hose, this was the most challenging part of removing the tank really. The tube forming the neck of the tank and the tube coming down from the filler cap are both fairly long, so there's not a lot of space in between, meaning the rubber hose is a long way on to each tube and there's not a lot of wiggle space in the middle. This is escalated when you have a 50 year old hose which is suitably hardened. Wound up just reverting to being a proper Glaswegian and knifing the life out of it.
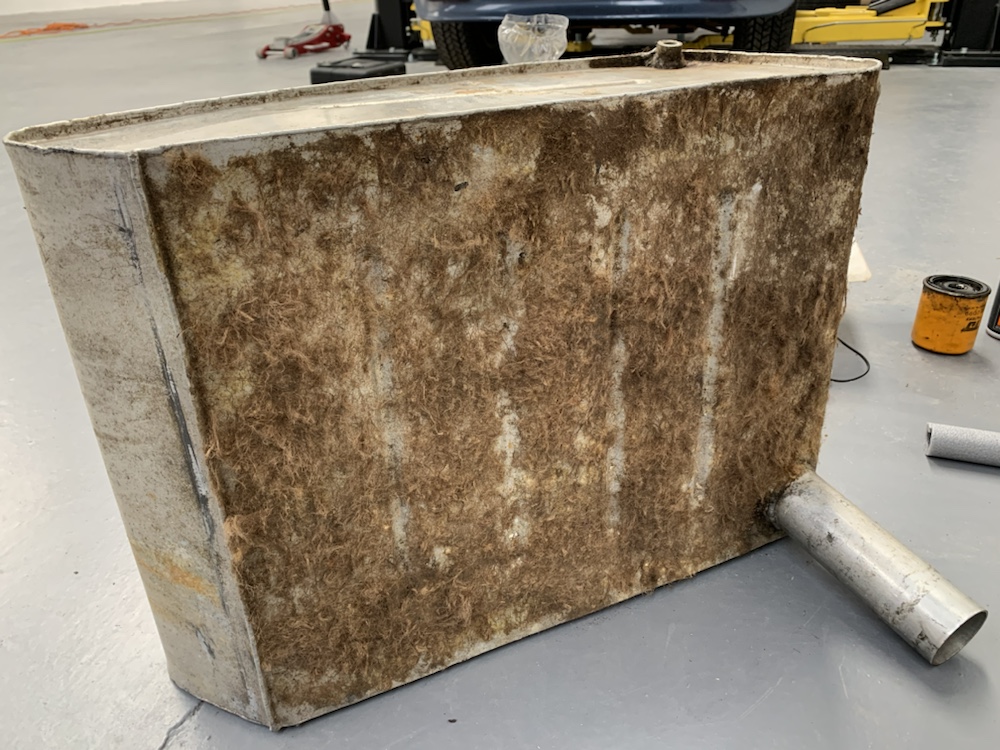
Some evidence of seeping from the sender unit so this will be resealed.
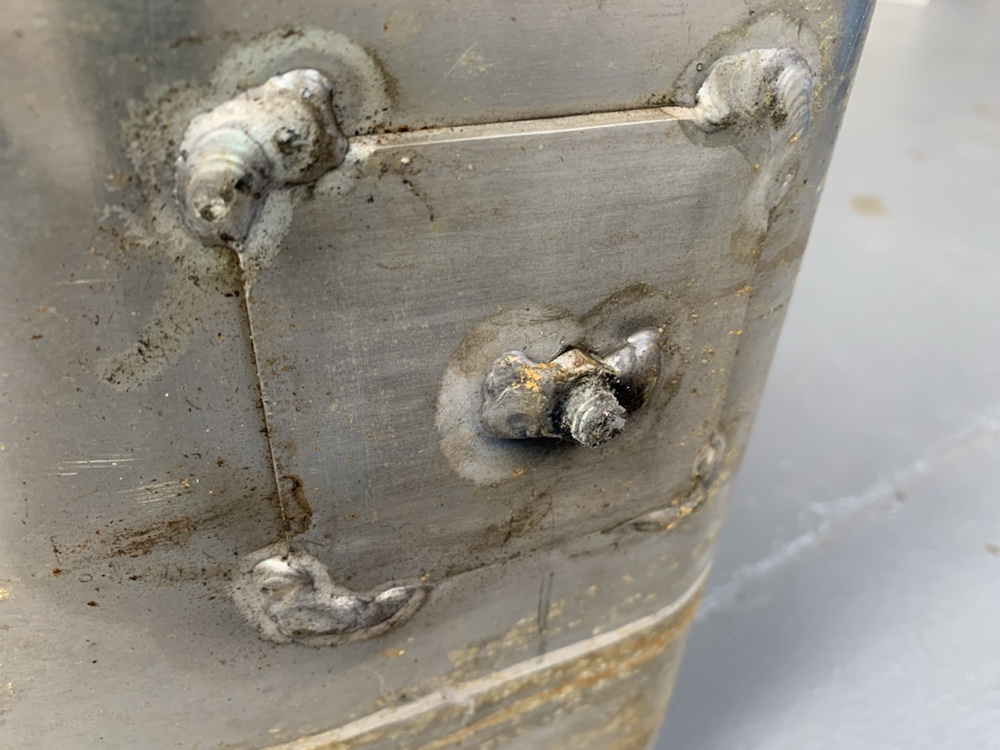
Annoying feature was the threads securing the tank. There are 3 threads welded to the tank, which secure the tank in the shell via nuts with large washers. Aluminium tank and threads, steel nuts and washers, struggle to believe this outcome wasn't perceived as inevitable, even in the 1960s.
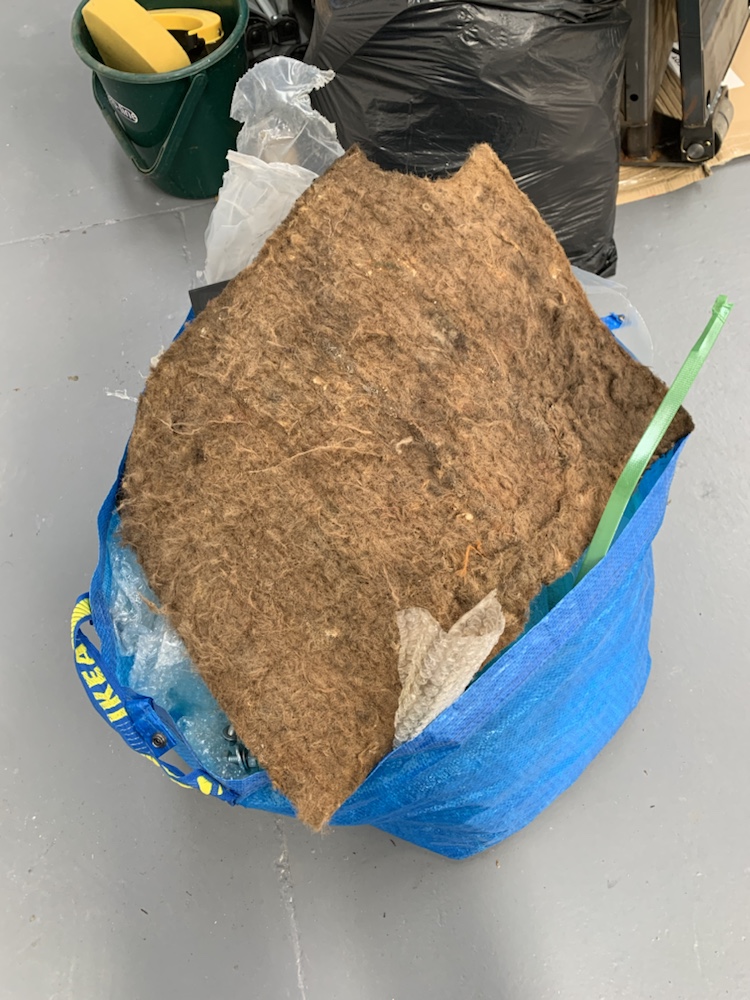
Yay, more bloody carpet fluff combined with half century old contact glue.
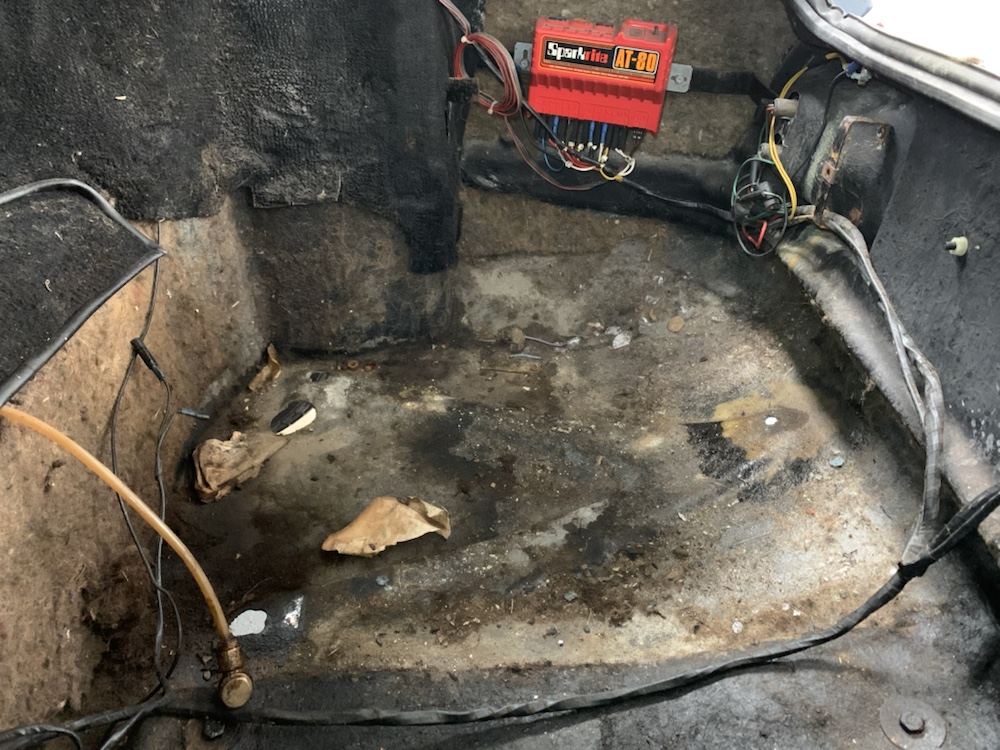
The boot now properly empty need a good clear out. Appears theres been some seeping from the banjo connection to the fuel line.

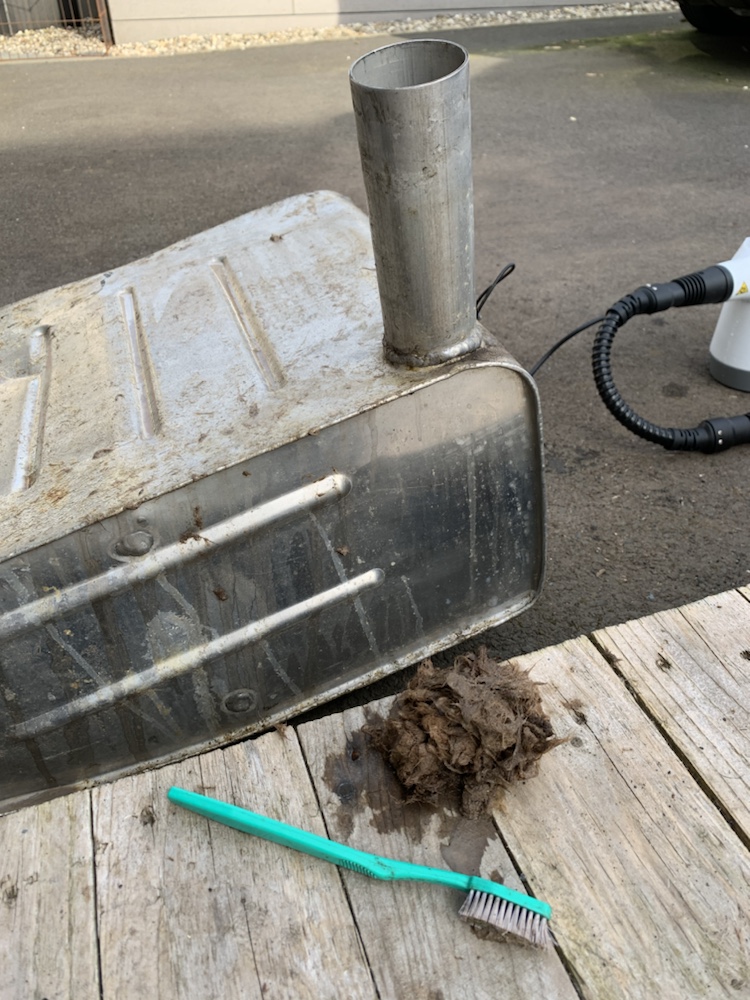
An afternoon with some glue & tar remover, various brushes and a steam cleaner saw off the remainung fluff
- Remove bonnet
- Disconnect battery cable
- Drain radiator, engine, transmission, rear differential
- Disconnect hoses, remove radiator
- Disconnect vacuum lines for head lights
- Disconnect water temp sensor and heater control valve on head
- Disconnect steering column, Remove the pinch bolt from the steering shaft coupling located near the front cross member. Under the instrument panel loosen the two U bolts securing the steering shaft. Pull the steering wheel back about 1 inch to disengage the splined steering shaft from the coupling.
- Disconnect throttle cable
- Remove airbox, carburetors and rear studs
- Unfasten and remove tailpipe/muffler /exhaust pipe from header
- Disconnect speedo cable, parking brake cable
- Disconnect clutch slave cylinder
- Disconnect ignition switch wire from starter and all ground wires to frame
- Disconnect brake lines from master cylinder
- Disconnect oil pressure line from block
- Disconnect primary ignition and high tension wires to distributor from coil
- Disconnect fuel line from fuel pump
- Remove transmission shift lever, plug tranny opening with wadded paper towel
- Remove horns mounted on front body/chassis through bolts
- Remove 12 UNC body chassis bolts from underneath
- Behind dash at the tunnel top, remove two UNF bolts on each side
- Behind carpet panel below the convertible top storage area remove the two UNF body/rear strut bolts
- Nearby on the outboard sides remove the bolts and clevis holding the seat
- To lighten the body for lift off: Remove fuel tank, Remove seats
- Remove the black ground wire connected to the differential rubber mount in boot.
- Remove the two seat belt inboard ring bolts that screw into the transmission tunnel portion of the frame.
- Remove the large rubber hole plug on the right side of the transmission tunnel, used to access the drive shaft u-joint.
- There are 16 bolts holding the body onto the chassis
- Check for any shims on frame and mark locations of them
The good news is, some parts were already struck off the list.
Bonnet is only held on with one big spring. Seats are already unbolted. It's like being half way there.
Next up, fuel tank removal.
Access is nice and easy.
The tank and filler cap are joined with a section of rubber hose, this was the most challenging part of removing the tank really. The tube forming the neck of the tank and the tube coming down from the filler cap are both fairly long, so there's not a lot of space in between, meaning the rubber hose is a long way on to each tube and there's not a lot of wiggle space in the middle. This is escalated when you have a 50 year old hose which is suitably hardened. Wound up just reverting to being a proper Glaswegian and knifing the life out of it.
Some evidence of seeping from the sender unit so this will be resealed.
Annoying feature was the threads securing the tank. There are 3 threads welded to the tank, which secure the tank in the shell via nuts with large washers. Aluminium tank and threads, steel nuts and washers, struggle to believe this outcome wasn't perceived as inevitable, even in the 1960s.
Yay, more bloody carpet fluff combined with half century old contact glue.
The boot now properly empty need a good clear out. Appears theres been some seeping from the banjo connection to the fuel line.
An afternoon with some glue & tar remover, various brushes and a steam cleaner saw off the remainung fluff
Edited by emicen on Monday 13th December 13:32
Gassing Station | Readers' Cars | Top of Page | What's New | My Stuff