2012 Range Rover Vogue TDV8 (L322)
Discussion


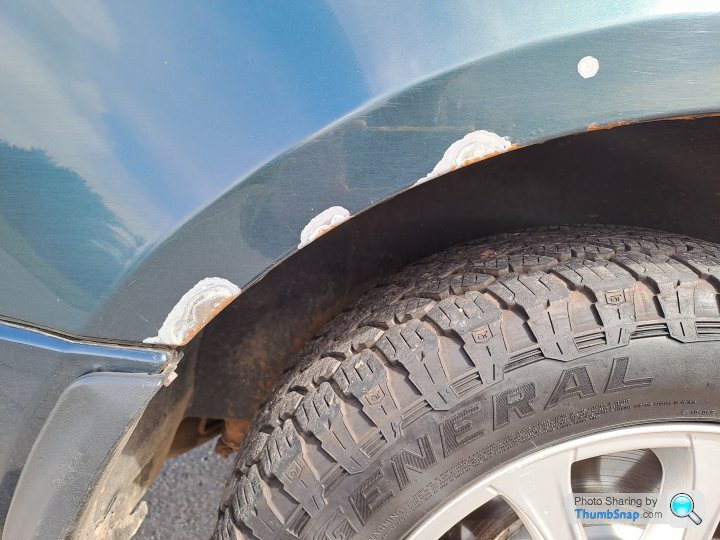
I'd been scanning for a few weeks my saved searches in the usual places plus BCA but most have tinted glass and I preferred not to have it. Eventually this popped up which was my ideal colour scheme - Galway green over sand, and it was only 20 minutes away. The downside is that it needs some bodywork but I am prepared to spend a bit so I've priced it in should it be a keeper. I will probably remove the side steps.
It came with lots of history from 2019 where it was run by a farm in Oxfordshire. It's definitely seen some work and it shows. It's had the oil cooler replaced plus some turbo O rings. A new/recon gearbox last year. There is no history before this and nothing online with LR but the service book is stamped. It's been serviced around every 10,000 miles and currently shows 155,000 miles.
After a road test I have discovered that there is no heat to the cabin and this could be a changeover valve problem. More digging to be done.
It has new 19" General Grabbers on the front and decent ones on the rear. The spare wheel is a different style from the other four. I have ordered oil and filter as it is due. It needs a really deep clean, though fortunately it does not smell of livestock. The rear shelf is missing and the bonnet badge is incomplete. It probably had some previous bodywork to the front bumper/front end. I will order 4 wheel nuts and bin the lockers.

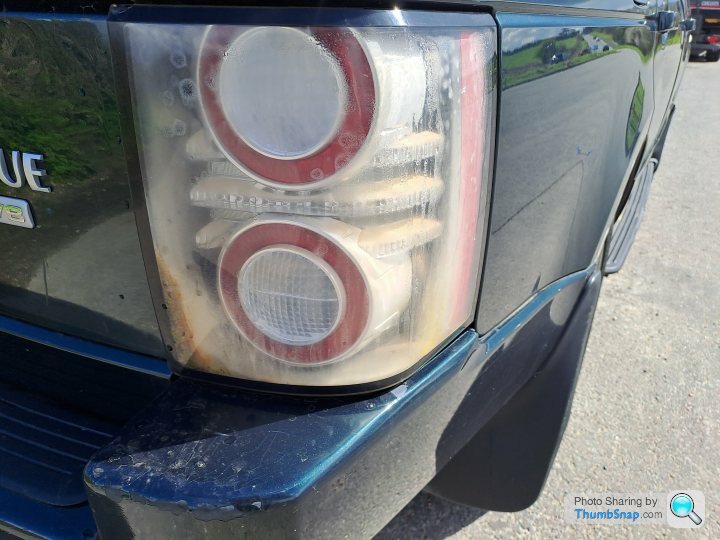
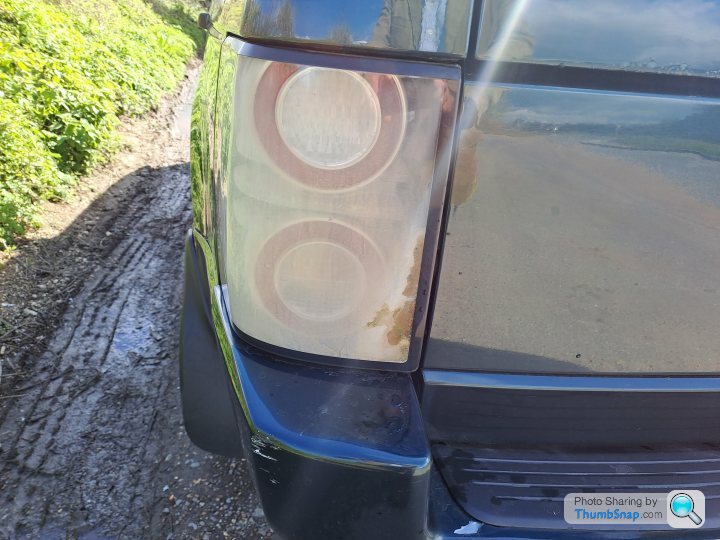
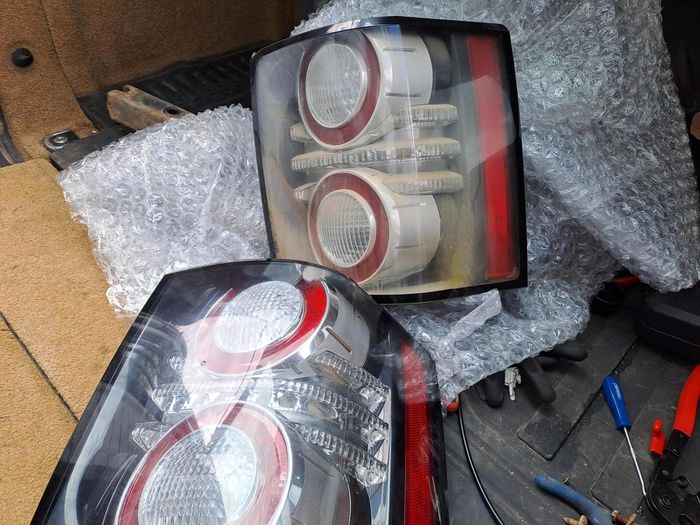
Rear lamps have discoloured.
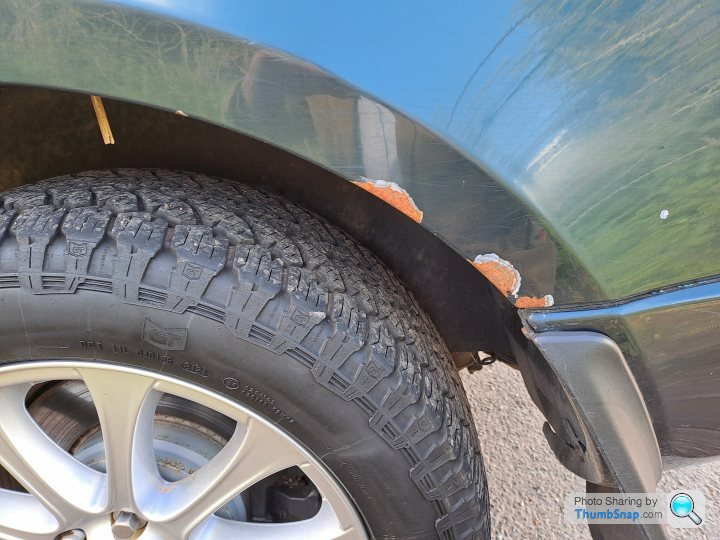
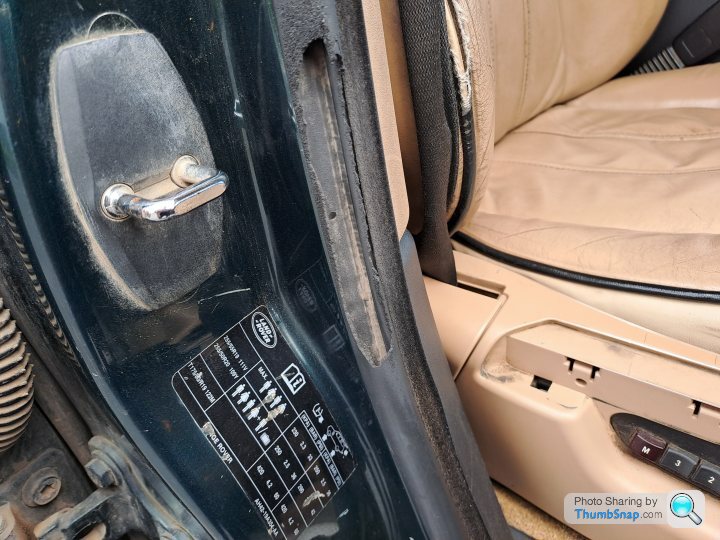
Front seat valance is broken/missing

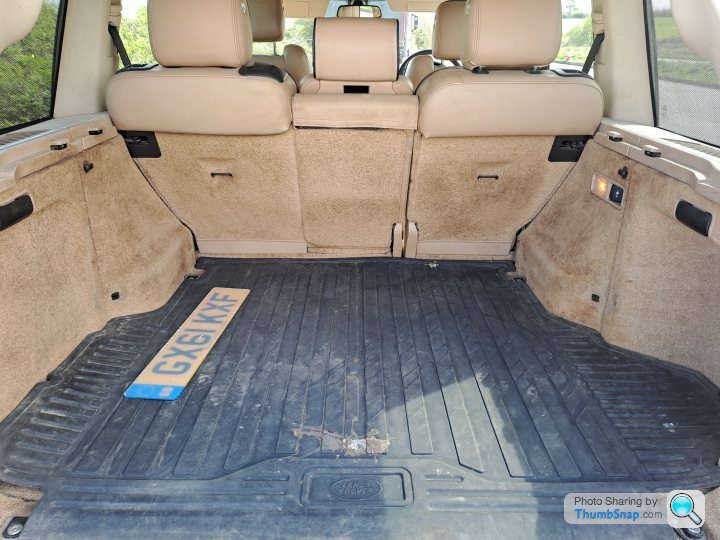
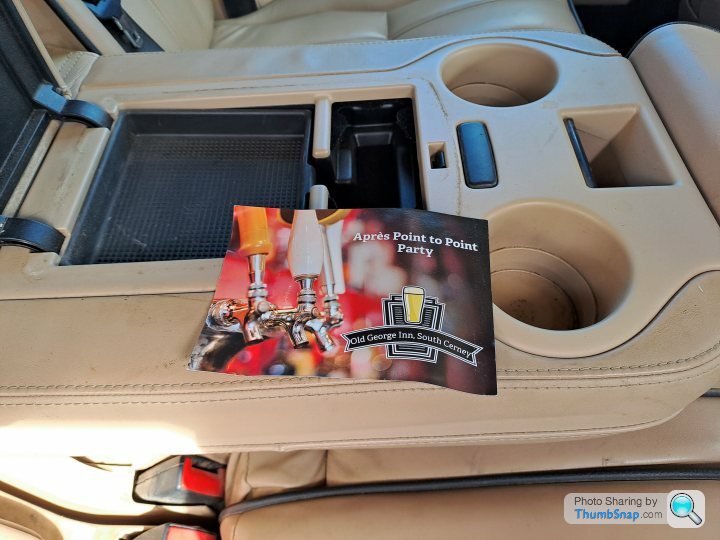
The best part of the inside is the rear.

I found this flyer in the rear armrest
It came with lots of history from 2019 where it was run by a farm in Oxfordshire. It's definitely seen some work and it shows. It's had the oil cooler replaced plus some turbo O rings. A new/recon gearbox last year. There is no history before this and nothing online with LR but the service book is stamped. It's been serviced around every 10,000 miles and currently shows 155,000 miles.
After a road test I have discovered that there is no heat to the cabin and this could be a changeover valve problem. More digging to be done.
It has new 19" General Grabbers on the front and decent ones on the rear. The spare wheel is a different style from the other four. I have ordered oil and filter as it is due. It needs a really deep clean, though fortunately it does not smell of livestock. The rear shelf is missing and the bonnet badge is incomplete. It probably had some previous bodywork to the front bumper/front end. I will order 4 wheel nuts and bin the lockers.
Rear lamps have discoloured.
Front seat valance is broken/missing
The best part of the inside is the rear.
I found this flyer in the rear armrest
Oh dear. An overheating warning but I caught it quickly. Fortunately the truck was only 15 minutes away so I'm back home waiting for it to cool. It does not crank though but it was OK when it loaded onto the truck.
The top hose was really hot. Hopefully it's something simple as a stuck thermostat.

The top hose was really hot. Hopefully it's something simple as a stuck thermostat.
I disconnected the battery for an hour and it started. There was a low coolant warning so more investigation required. I topped up with the orange coolant, hopefully that is correct as Halfords website said so but its in-store book said blue.
There are no obvious leaks but it's gained the noise of a cricket.
There are no obvious leaks but it's gained the noise of a cricket.
A mixed bag today. The easiest job was replacing the locking wheel nuts and throwing them in the bin.
A bit of dysonering in the boot to remove more bits of field but I could not remove the spare wheel on my own. I want to check the suspension compressor filter as it does not lower.
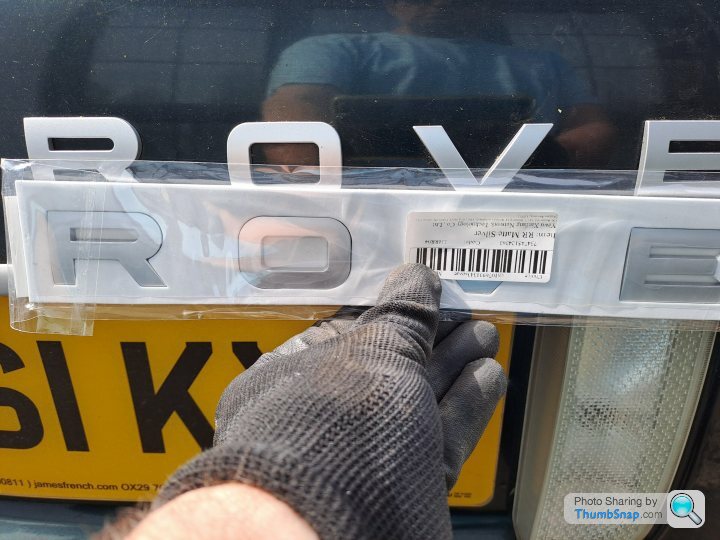
The new badges are a good match colourwise but the template is not quite correct and I couldn't find my acetone to remove the old glue.
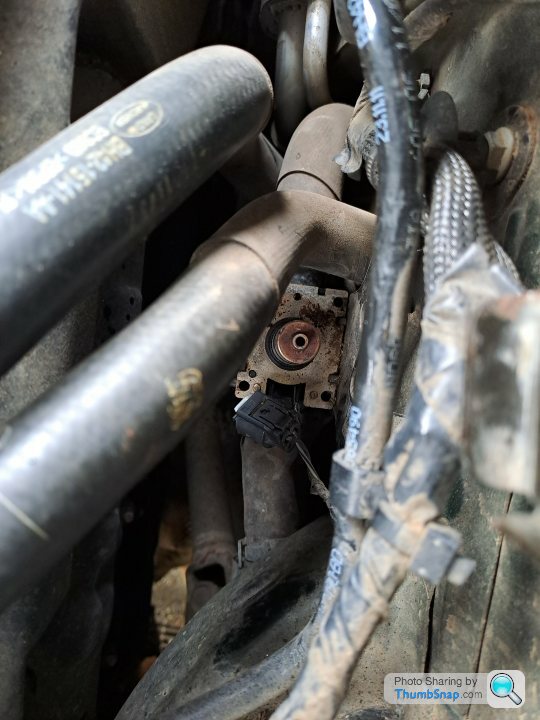
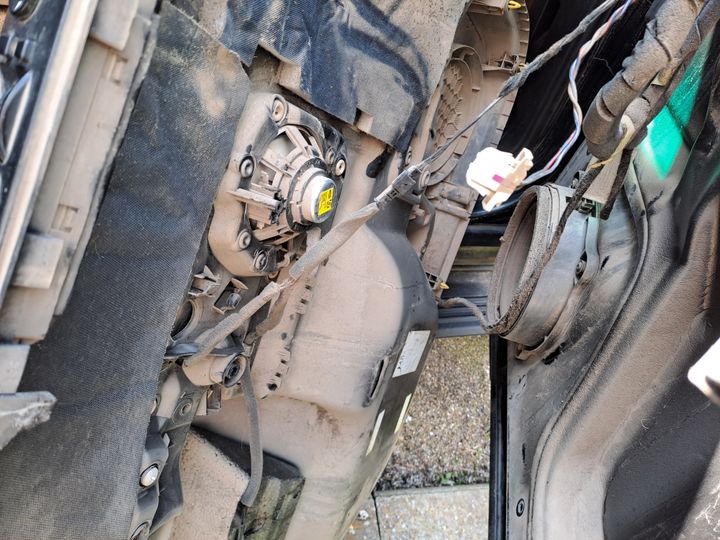
The crucial heater valve thing fought me as I expected but it ended up an RR win as I could not separate the body and I didn't have a deep 10mm socket to remove the bracket. I bought a new ratchet spanner to try tomorrow.
A bit of dysonering in the boot to remove more bits of field but I could not remove the spare wheel on my own. I want to check the suspension compressor filter as it does not lower.
The new badges are a good match colourwise but the template is not quite correct and I couldn't find my acetone to remove the old glue.
The crucial heater valve thing fought me as I expected but it ended up an RR win as I could not separate the body and I didn't have a deep 10mm socket to remove the bracket. I bought a new ratchet spanner to try tomorrow.
One thing this has revealed is that I need a trolley toolbox and a decent reorganisation.
I could not remove the hose clamps with my tools so proper hose clip pliers on order with hose clamps to block the coolant and all due this week. With no more hold-ups I should be able to replace this valve before The Scramble.
The bonnet badge is done but I am not happy with the first 'R' so I have ordered some adhesive badge tape.
With a Spanish road trip next week, I will probably SORN this for May.
My new hose clamp pliers arrived. The top two hoses were a doddle but I cannot release the lower hoses as the clamps are 90° turned away and thus there is no room. If the fuse box wasn't there it would be a lot simpler.
I am now searching for some angled pliers which may do the job and Youtube to see if I am missing a ruse. Very annoying.
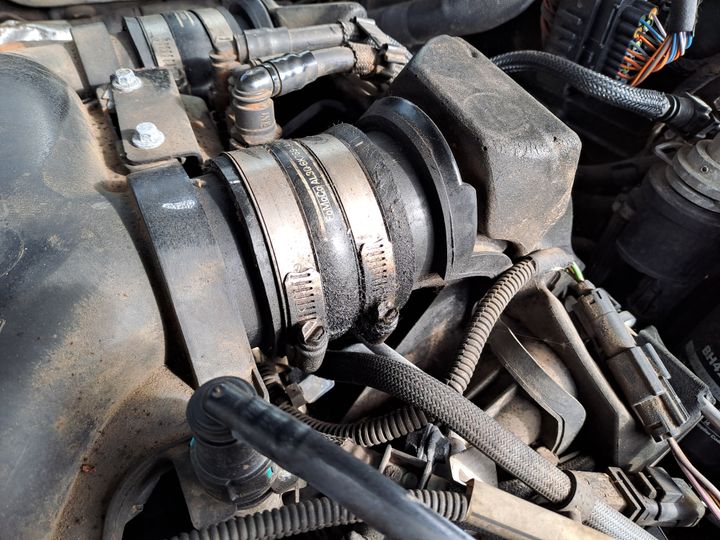
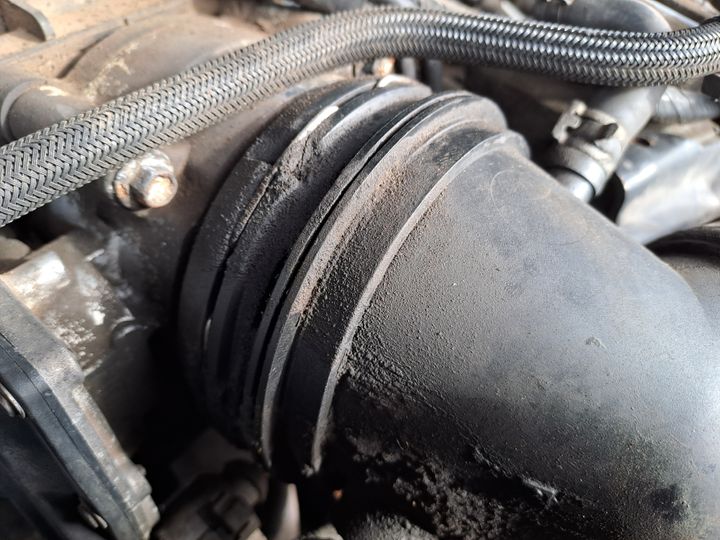
Intake hoses: There is some misting present so some new hoses required later.
I am now searching for some angled pliers which may do the job and Youtube to see if I am missing a ruse. Very annoying.
Intake hoses: There is some misting present so some new hoses required later.
Finally I have it all connected and an engine start today. I ran it up for a bit and there are signs of warm air from the heater but I ran out of coolant so it´s now cooling down. It never reached above a quarter on the gauge so I doubt the thermostat has opened.
I will revisit tomorrow.
I will revisit tomorrow.
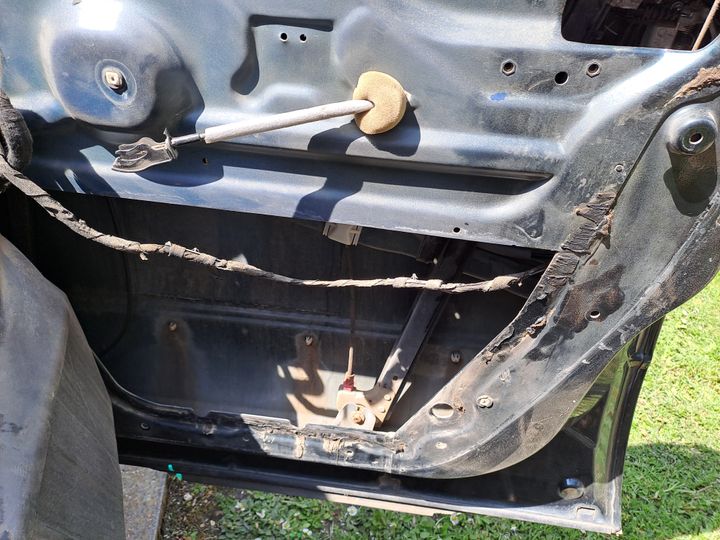
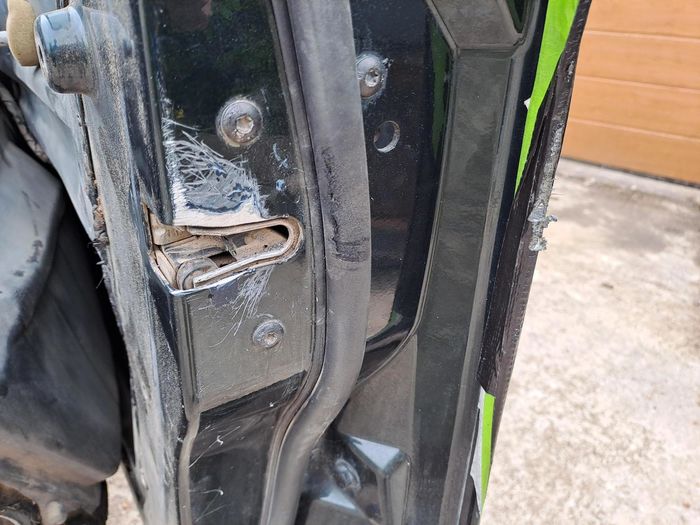
I decided to replace the door handle cable as it was notchy and at the end of its travel. Apart from discovering plenty of dust, I've made a massive blunder.
The cable was fine before closing the door as I tested it, now it won't open from the outside. I forgot to attach the inner handle cable so can't open from inside. Am I f ked?
ked?
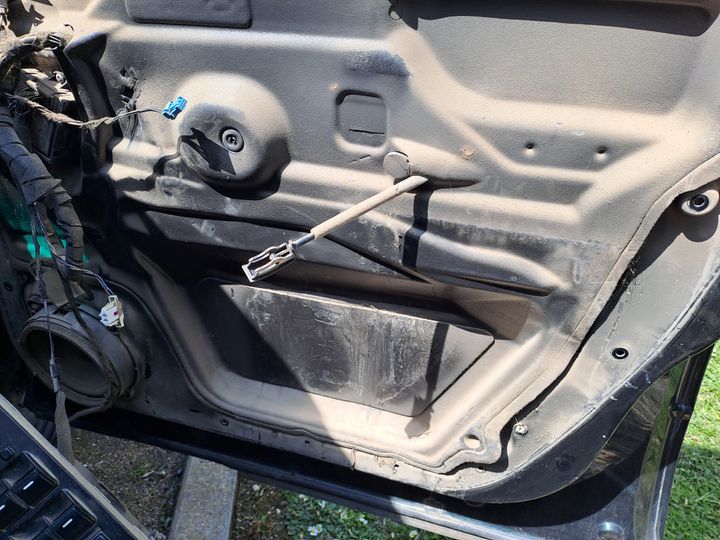
The cable was fine before closing the door as I tested it, now it won't open from the outside. I forgot to attach the inner handle cable so can't open from inside. Am I f
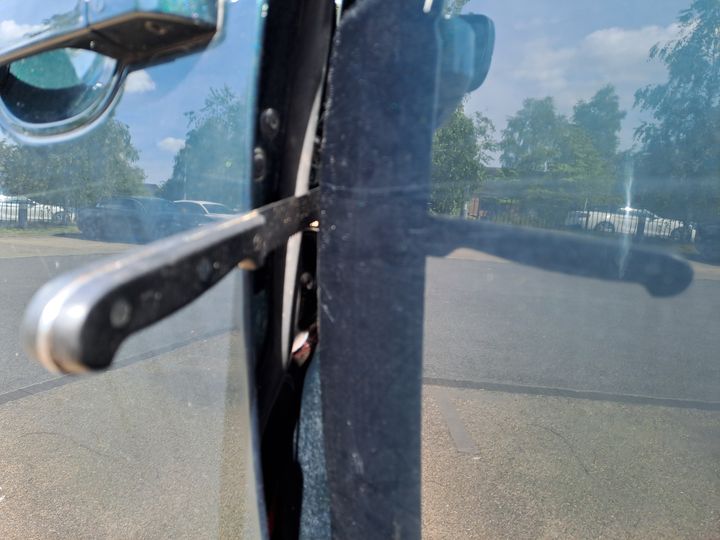
ked?I've watched a couple of YouTube videos that show cutting the door striker but using a knife on the other side as a test, I don't think this is practical unless the blade is very bendy.
Flex once the door is closed fully. I'm not fussed about the weatherseal rather rubbing against the door.

Otherwise I'll have to drill through the door card and await a breaker with the same trim.
Flex once the door is closed fully. I'm not fussed about the weatherseal rather rubbing against the door.
Otherwise I'll have to drill through the door card and await a breaker with the same trim.
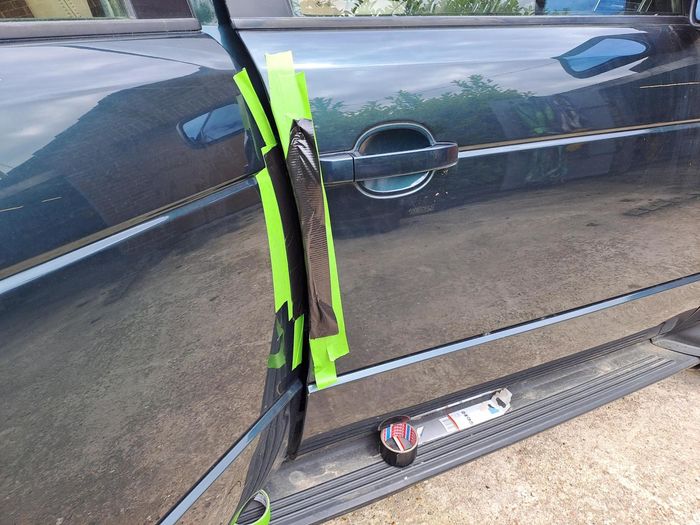
it's not pretty and in hindsight I would probably go through the door card but it's open. A bit of scraping on the door though. All because I did not secure one end of the cable correctly. Fool.
I tried a hacksaw but I lost interest at 90 mins so a friend's electric saw made quick work of it.
The handle release still doesn't feel as good as the other doors so I may buy a new latch. It was nice to drive it again though.

I tried a hacksaw but I lost interest at 90 mins so a friend's electric saw made quick work of it.
The handle release still doesn't feel as good as the other doors so I may buy a new latch. It was nice to drive it again though.
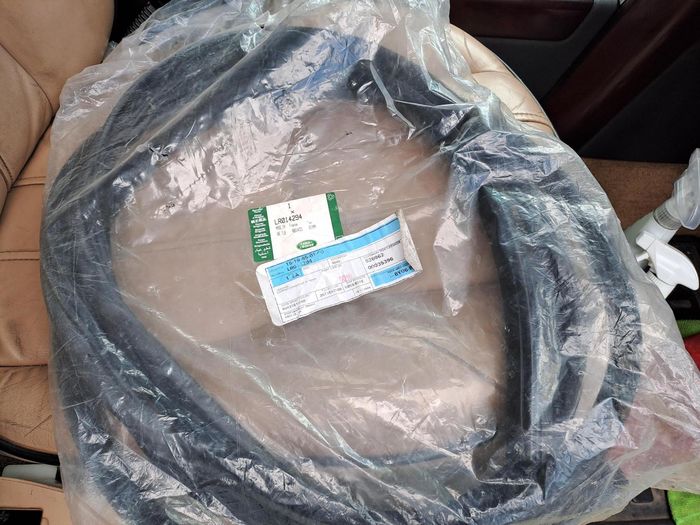
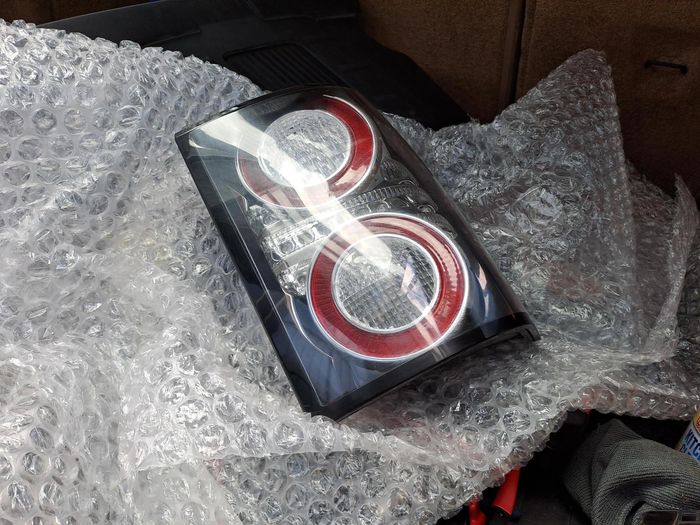
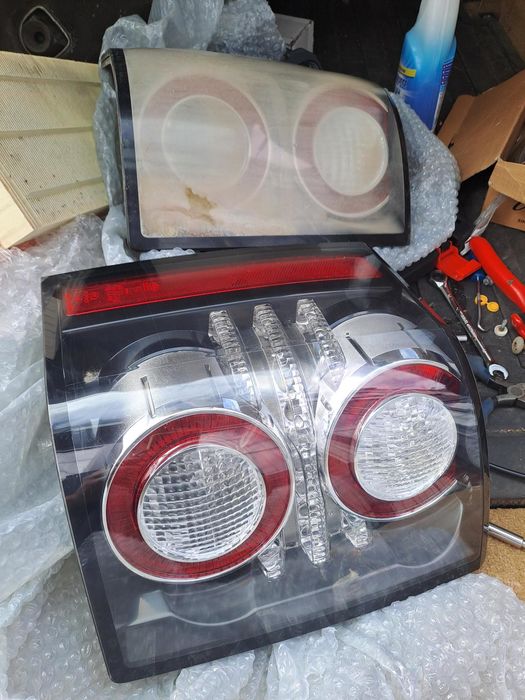
A couple of parts arrived today: a decent used rear lamp and NOS OSF body weatherseal.
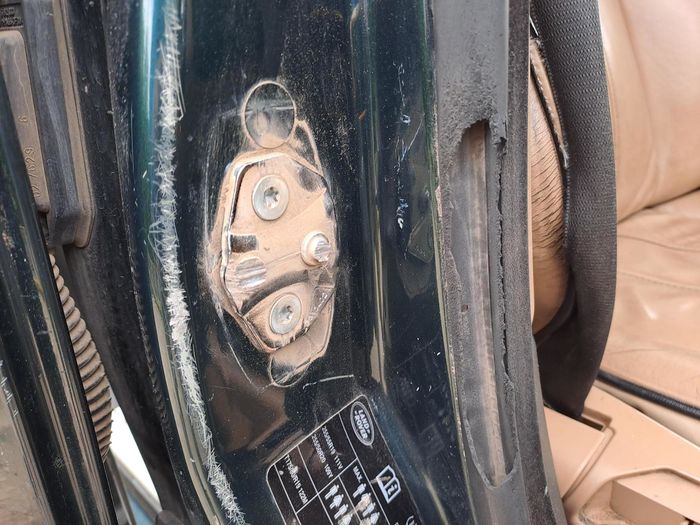
Compare and contrast:
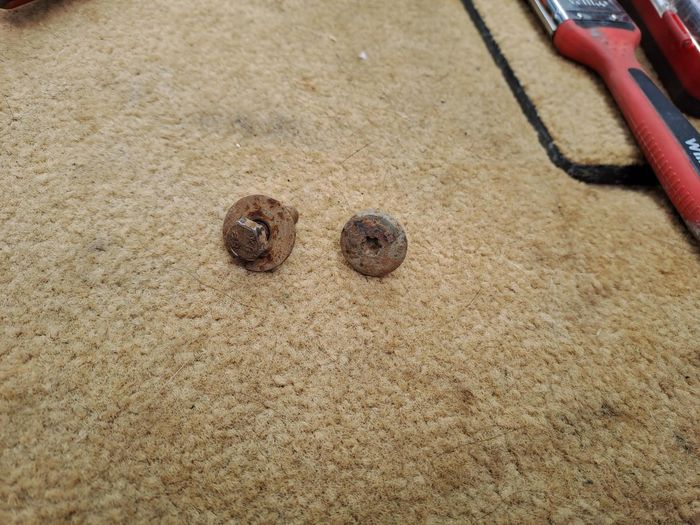
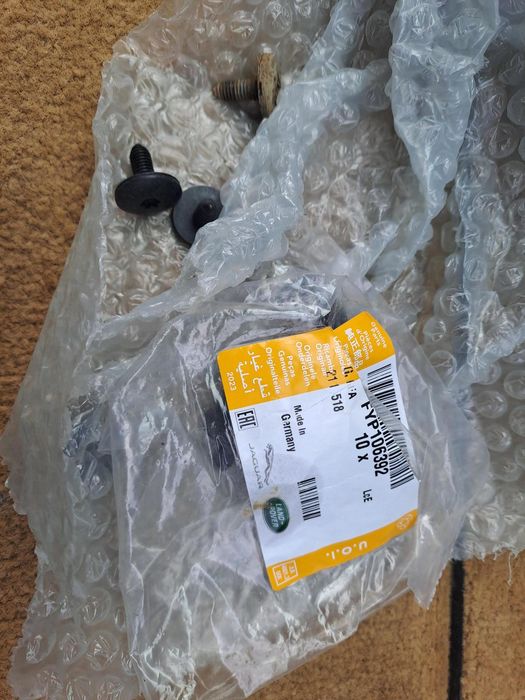
A lovely person used a 10mm bolt instead of the correct M6 screw which felt as though it would snap but fortunately it came out. I have ordered a bag of 10 of the correct screws from JLR Classic as they are all as one would expect for a 12 year old JLR part.
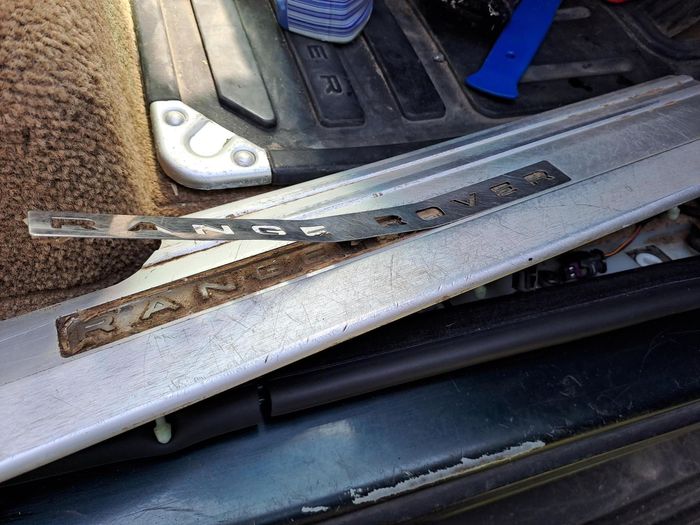
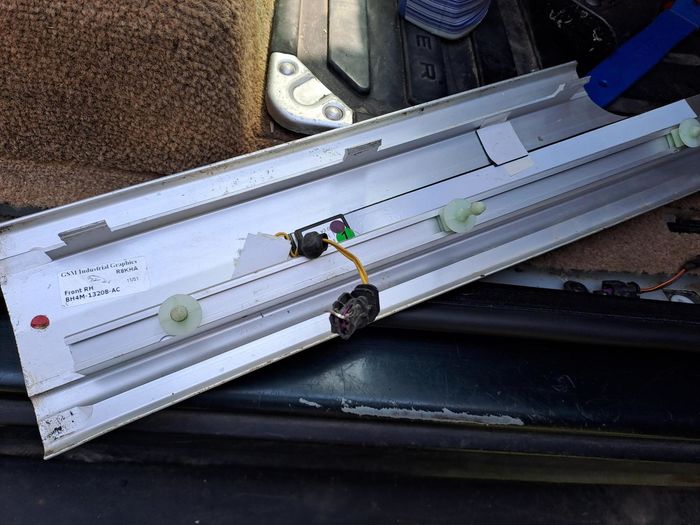
After fitting the weatherseal the sill plate would not go back, but it's had it anyway. I presume this is illuminated if it was working?
Compare and contrast:
A lovely person used a 10mm bolt instead of the correct M6 screw which felt as though it would snap but fortunately it came out. I have ordered a bag of 10 of the correct screws from JLR Classic as they are all as one would expect for a 12 year old JLR part.
After fitting the weatherseal the sill plate would not go back, but it's had it anyway. I presume this is illuminated if it was working?
Yes, I am reading the workshop manual and there is an adjustment process so I will do that. The lowest price for a new one i have seen is £200. It did open today though. Odd.
A win and a fail today.
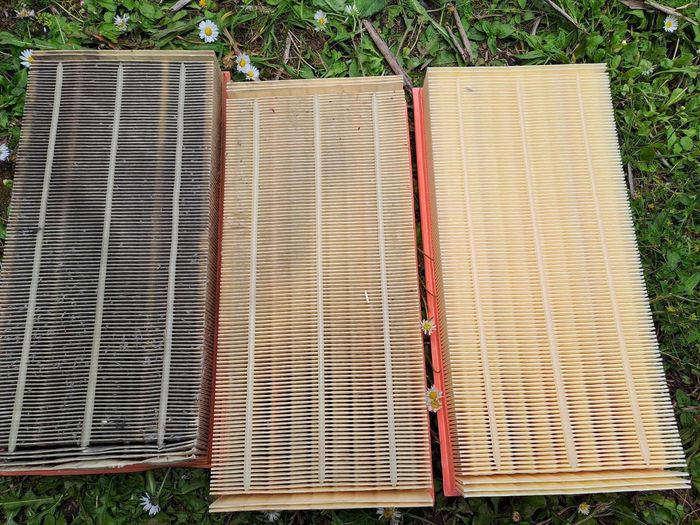
New air filters fitted: From left to right > RH; LH; new.
Depending on useage I reckon one could replace the LH filter at twice the mileage of the RH.
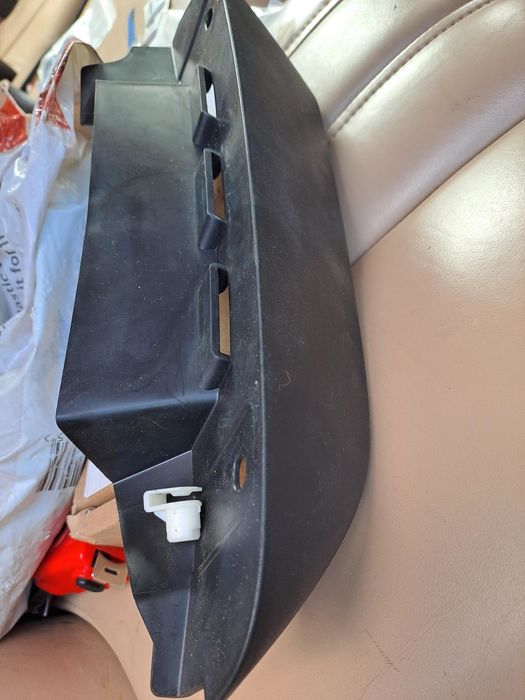
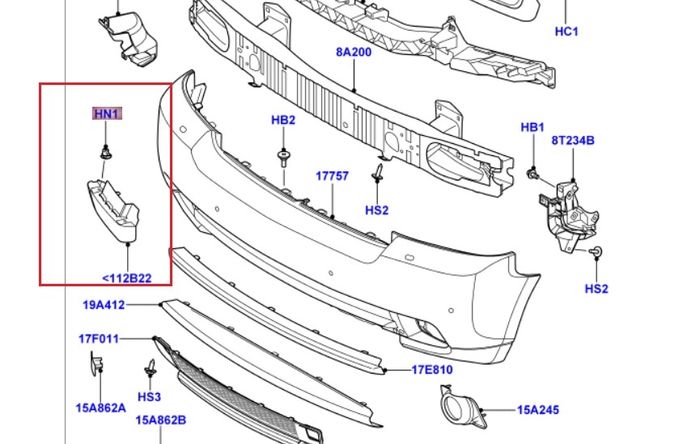
I must be missing something as I could not fit this RHF bumper deflector, despite ordering the correct plastic nuts. The fitting is hidden on the LHF but I think there must be a couple of screws required
A couple of more parts due tomorrow.
A win and a fail today.
New air filters fitted: From left to right > RH; LH; new.
Depending on useage I reckon one could replace the LH filter at twice the mileage of the RH.
I must be missing something as I could not fit this RHF bumper deflector, despite ordering the correct plastic nuts. The fitting is hidden on the LHF but I think there must be a couple of screws required
A couple of more parts due tomorrow.
I think I have fixed the door, fingers crossed. I RTFM more closely and I noticed a missing grommet where the three screws are that hold the latch. A peep in there is a 4mm Allen adjustment screw. I turned it fully clockwise and now the door reliably opens. The manual says wind it two turns but that does not open the door.
Coupled with the new weatherseal, the door has a more pleasing action. I need a new grommet though.
Coupled with the new weatherseal, the door has a more pleasing action. I need a new grommet though.
The new rear lamp screws are much better and I sourced a decent used LH rear lamp. I decided against the Chinese eBay ones as I could not find a review on them, good or bad.
If I can find any enthusiasm I may put one of the old lamps in the oven and see if that softens the glue enough to remove the lens.
If I can find any enthusiasm I may put one of the old lamps in the oven and see if that softens the glue enough to remove the lens.
Gassing Station | Readers' Cars | Top of Page | What's New | My Stuff