Chris' Mazda 323F V6
Discussion
With it finally on the work bench I could begin cleaning it inside and out. I didn't realise how bad it was inside, nothing some aerosol brake and clutch cleaner couldn't sort.
With the top cover removed, it revealed one of the VRIS butterflys
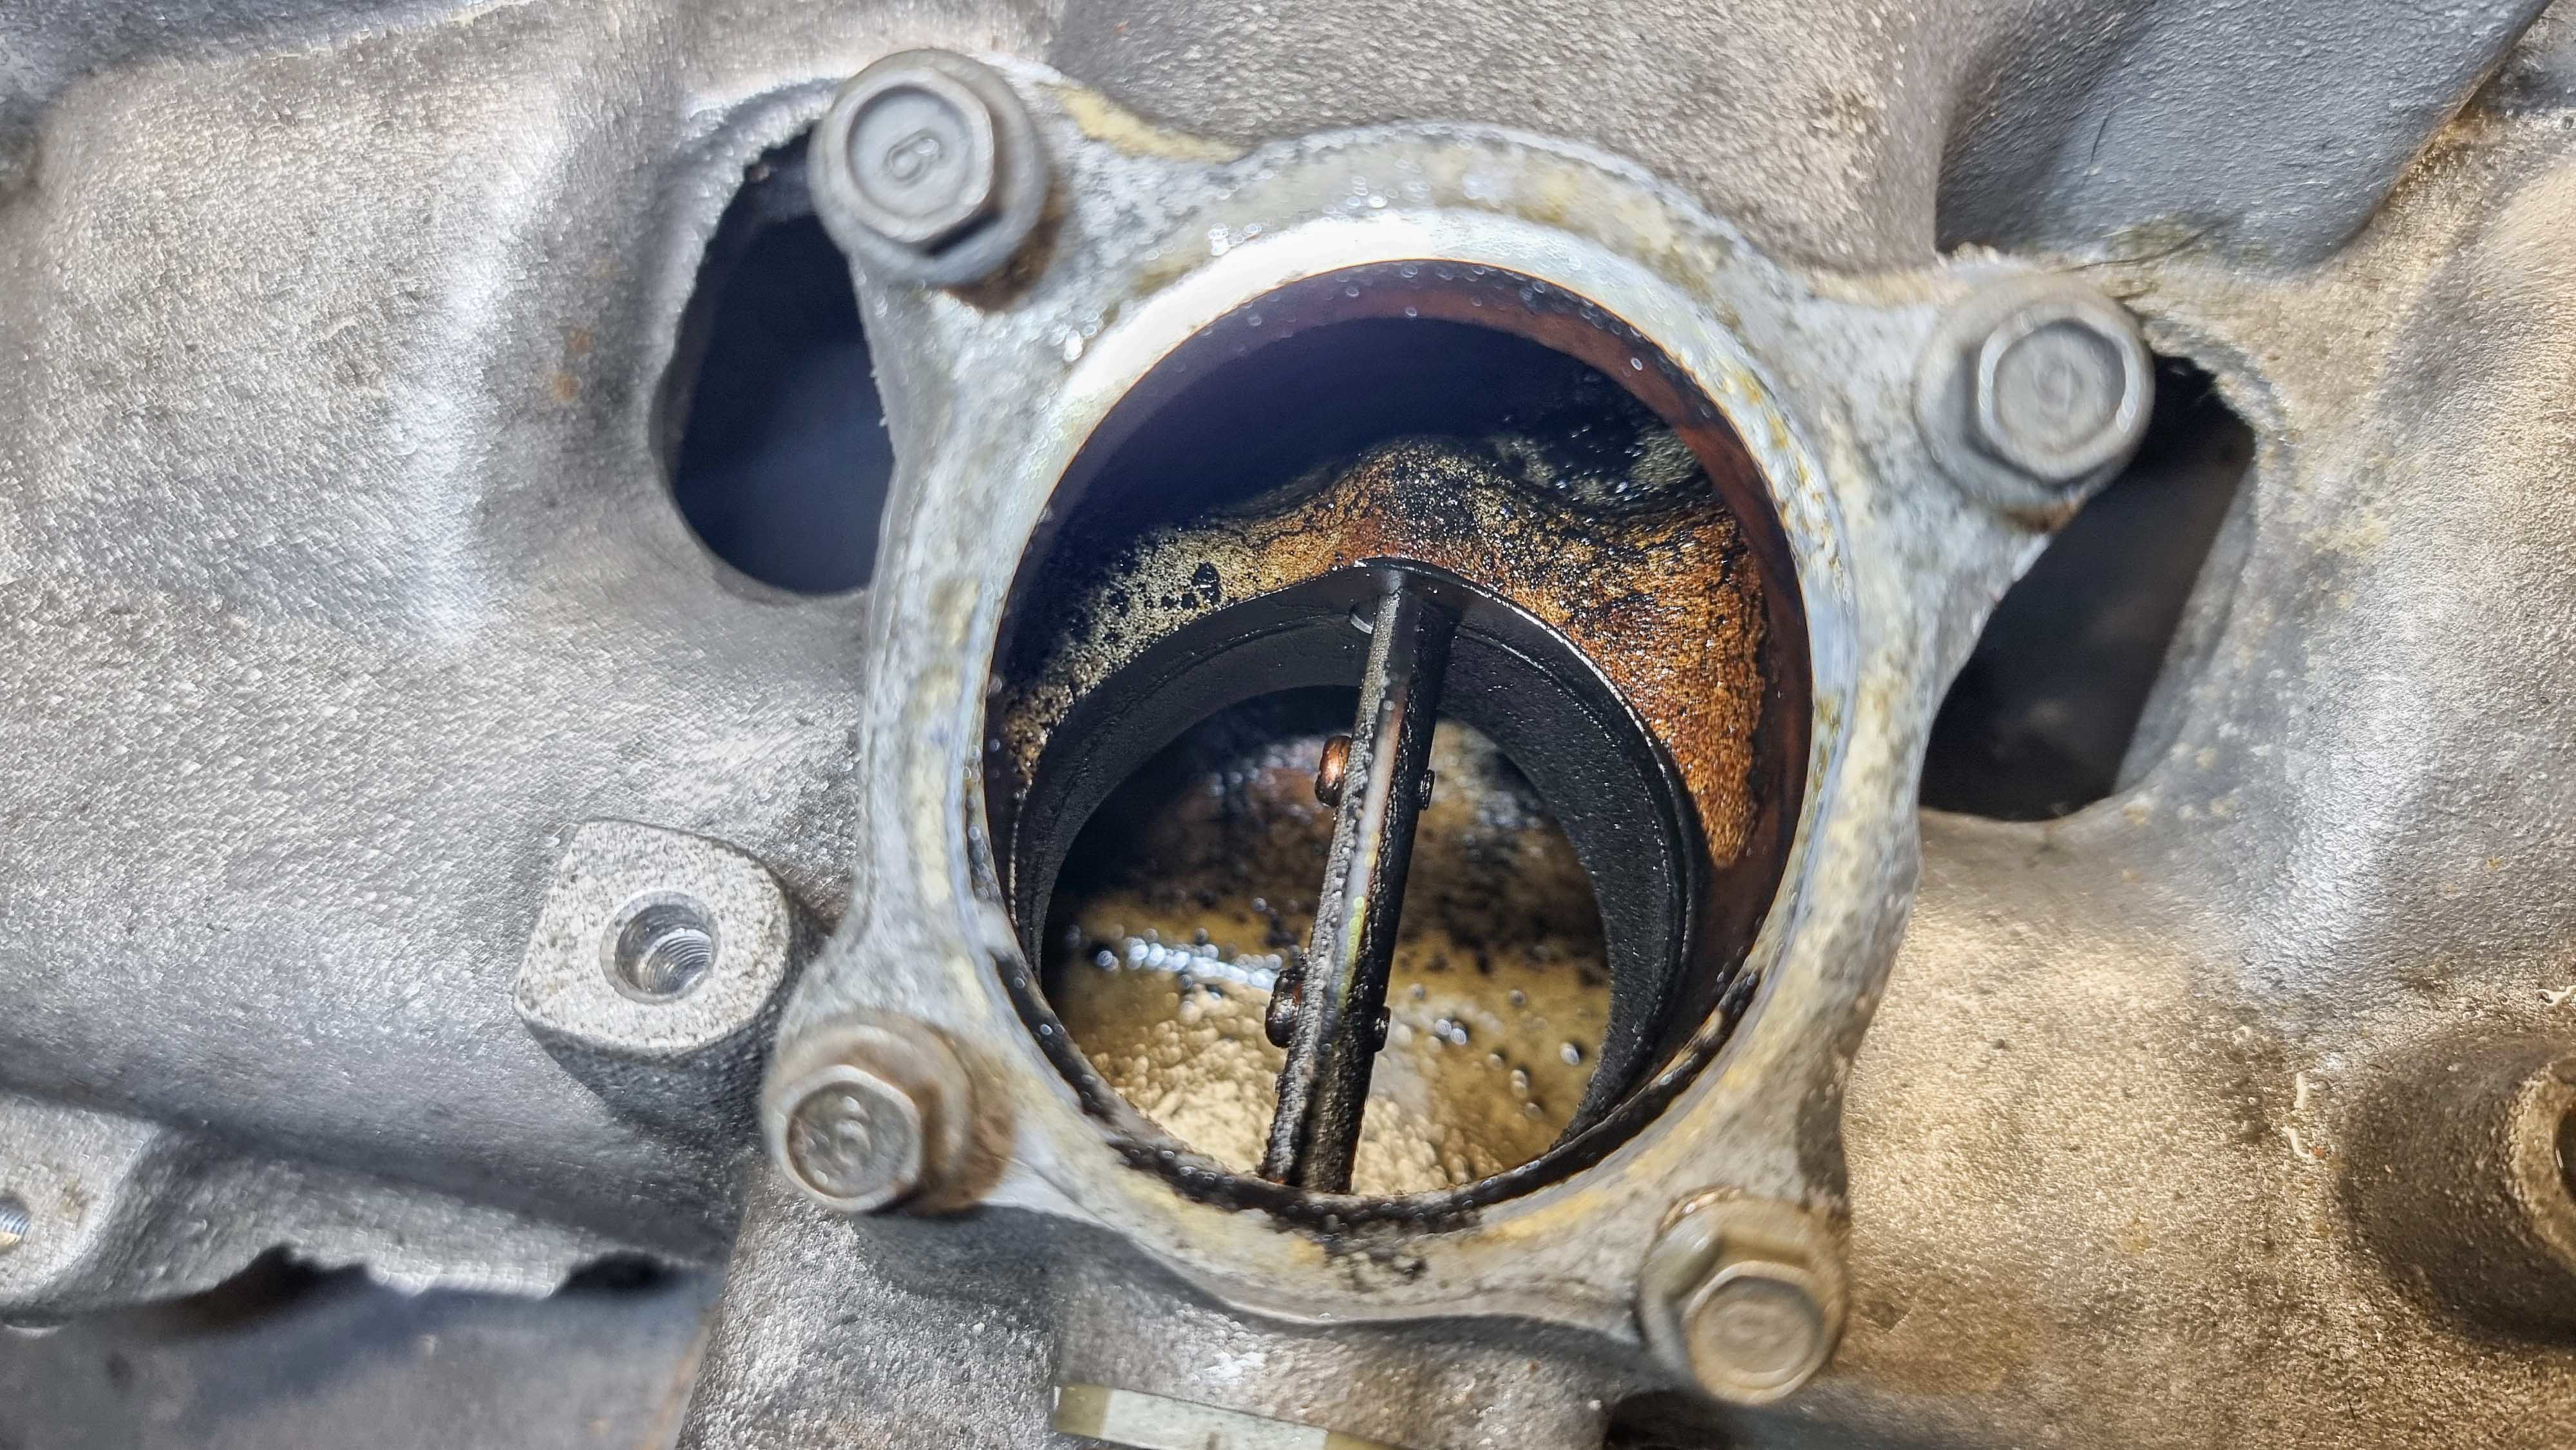
And here's the other butterfly on the end, which has the link pipe connected to it.

Other side of the link pipe


Inlet side behind the throttle body

Throttle Body

Eeeek!

The previous owner had painted the rocker covers last year in what looks to be a wrinkle black finish. It was ok, but I felt the engine bay needed some colour

I used some Motip Paint Remover to strip the paint from the covers. The first one took a little longer because I was too impatient in the video and started to scrape it too soon. It's best to leave it for 5mins+ and let the paint really bubble up.


With the various componants now prepped and masked up it was ready for paint. Etch primer followed by Simoniz Wheel Steel and then their Clear Lacquer


With both rocker covers now back to bare metal, they were degreased and had the baffle plates removed ready for etch primer and then white primer.

Next up was the top coat, I went with Honda Indy Yellow Pearl

It's hard to see the flake because it's so fine but it does pop nicely under direct light

With the lacquer left to dry over night, the next day it was finally time to reassemble. Starting with the baffle plates, I used some RTV sealant around the plates along with some threadlock on the screws.


Going back to the broken one way valve under the inlet manifold. I got a universal valve from work but made the hose coming off the vacuum chamber longer, making the valve more accessible. While I was trimming down the hose to make it fit better, instead of pulling the valve off, I ended up pulling off the barb I had previously glued on.
Annoyingly this was the LAST thing to do. I retraced my steps and removed the inlet manifold (again) to gain access to the broken barb.

I should have done this on the work bench, but you live and learn The barb pushes in but without doing a smoke leak test I'm unsure how well sealed it is.
So to conclude this update, here's a before photo

After


I painted various brackets and pipes in Simoniz Tough Satin Black, it's one of my favourite paints to use

It turns out the dipstick handle isn't designed to be leant on, ooops! Luckily I had a solution stashed away which I knew would come in handy at some point.
Jass Performance make a handle specifically for broken MX5 dipsticks and luckily it fits the 323F too

Strut Brace nuts still need replacing after I found out they're M10 x 1.25

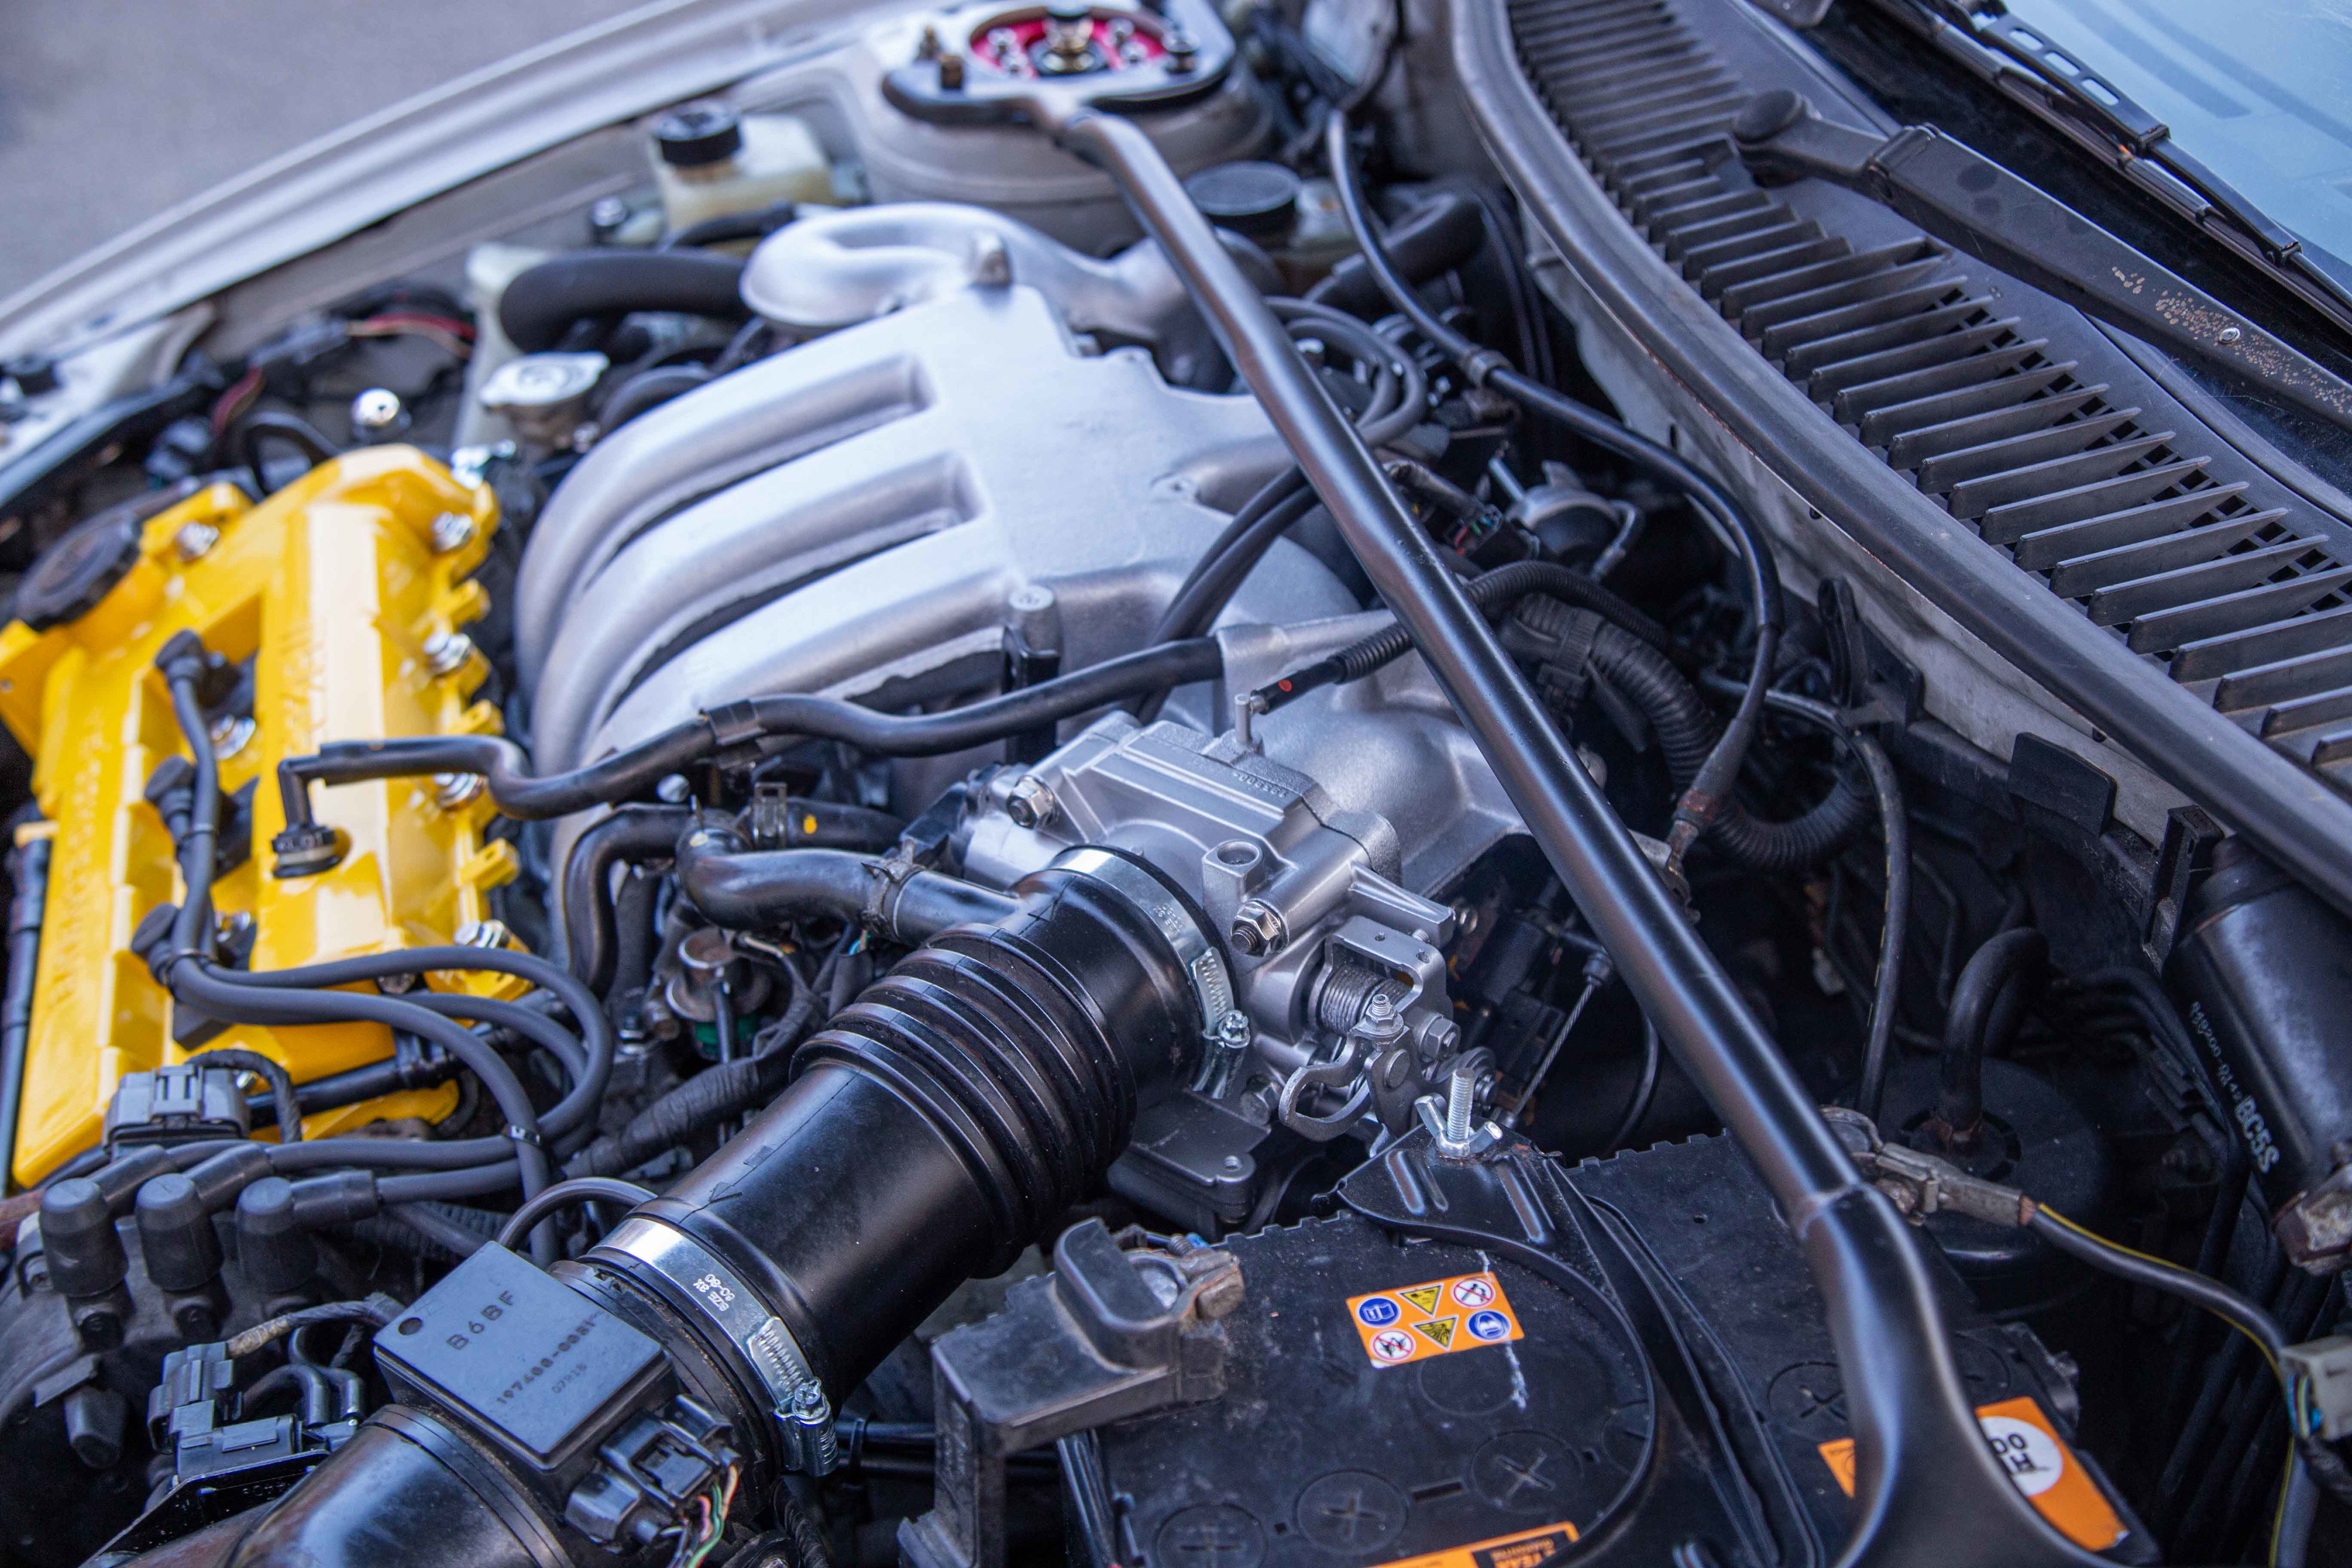
Stainless hardware makes all the difference (don't worry, I used threadlock on every single one). Zinc was an option, but I didn't know if it would be too much yellow


My Part 2 video on Youtube can be viewed here
https://www.youtube.com/watch?v=XpzIe_HieNU&t=...
With the top cover removed, it revealed one of the VRIS butterflys

And here's the other butterfly on the end, which has the link pipe connected to it.

Other side of the link pipe


Inlet side behind the throttle body

Throttle Body

Eeeek!

The previous owner had painted the rocker covers last year in what looks to be a wrinkle black finish. It was ok, but I felt the engine bay needed some colour

I used some Motip Paint Remover to strip the paint from the covers. The first one took a little longer because I was too impatient in the video and started to scrape it too soon. It's best to leave it for 5mins+ and let the paint really bubble up.


With the various componants now prepped and masked up it was ready for paint. Etch primer followed by Simoniz Wheel Steel and then their Clear Lacquer


With both rocker covers now back to bare metal, they were degreased and had the baffle plates removed ready for etch primer and then white primer.

Next up was the top coat, I went with Honda Indy Yellow Pearl

It's hard to see the flake because it's so fine but it does pop nicely under direct light

With the lacquer left to dry over night, the next day it was finally time to reassemble. Starting with the baffle plates, I used some RTV sealant around the plates along with some threadlock on the screws.


Going back to the broken one way valve under the inlet manifold. I got a universal valve from work but made the hose coming off the vacuum chamber longer, making the valve more accessible. While I was trimming down the hose to make it fit better, instead of pulling the valve off, I ended up pulling off the barb I had previously glued on.
Annoyingly this was the LAST thing to do. I retraced my steps and removed the inlet manifold (again) to gain access to the broken barb.

I should have done this on the work bench, but you live and learn
 The barb pushes in but without doing a smoke leak test I'm unsure how well sealed it is.
So to conclude this update, here's a before photo

After


I painted various brackets and pipes in Simoniz Tough Satin Black, it's one of my favourite paints to use

It turns out the dipstick handle isn't designed to be leant on, ooops! Luckily I had a solution stashed away which I knew would come in handy at some point.
Jass Performance make a handle specifically for broken MX5 dipsticks and luckily it fits the 323F too

Strut Brace nuts still need replacing after I found out they're M10 x 1.25


Stainless hardware makes all the difference (don't worry, I used threadlock on every single one). Zinc was an option, but I didn't know if it would be too much yellow


My Part 2 video on Youtube can be viewed here
https://www.youtube.com/watch?v=XpzIe_HieNU&t=...
roadie said:
That looks mega, great work! Have you noticed any difference in performance or economy since cleaning the intake parts?
The revs do seem to pick up better. The VRIS isn't working due to the broken barb on the vacuum chamber. I also found out the one way check valve I broke is also for the VRIS.I've got replacement parts on their way from Japan, will be a few weeks until they land at the doorstep so it'll be sluggish for the time being.
trails said:
hoodedreeper said:
Import number plates and yellow fog tint is usually my 2 go-to changes when I get a new car. The next time the bumper is off I may give it a try and see how it looks
Love a yellow fog lamp; I put a pair of yellow Cibie foglamps on my first car, a mkI XR2 back in 1990 
The only thing you can see is the glass lens itself, you can't get behind it without removing the bumper
Since the day I went to view and test drive the car, the clutch biting point was very high. To the point where my foot would only rise half an inch after the bite to the end of the pedal travel. Knowing this I've been driving with care to prolong the life before I could get it changed. It hadn't slipped at all up until 10 or so days ago.
My friend Danny came to the rescue and offered to help guide me through the job. I've only changed one clutch and that was on my Colt CZT with the help of another friend.
I apologise for the lack of photos, I did make a short video for Youtube but was unable to do a full on one due to copyright music in the background.
First start off by disconnecting the battery and remove the battery clamp, battery and battery tray. Next up is the intake hose and airbox, make sure you mark the vacuum hoses and put them back on the correct way.
Locate the starter motor on top left side of the gearbox underneath the distributor. Disconnect the two 12mm nuts and unplug the space connector on top. The starter motor has 3 bolts fixing it to the gearbox.
We decided to keep the slave cylinder connected and removed the 2 bolts that holds it to the side of the gearbox. Follow the clutch line along and it'll join to a short flexible hose which is attached to an L shaped bracket, this needs to be unbolted from the top of the gearbox.
Behind this towards the engine block is a large bracket that secures part of a electrical loom, this also needs unbolting.
Further to the right towards the rear of the engine block is the fuel filter in a cage bracket. I removed the long 10mm bolt on the cage bracket and pulled the filter out. There's two trim clips holding the electrical loom to the same bracket. Follow the bracket along the back of the engine and there's a bolt and captive nut, we slackened this to allow the bracket to move more freely.
In this area there's two plugs, one is the speedo drive and the other is the reverse light switch.
The last thing to do (from memory) at the top of the gearbox is to crack off the bell housing bolts. At the top centre there are two and one more to the right. On the left hand side of the gearbox, there's two more bolts and a third the opposite side (exhaust downpipe) which we originally missed.
Time to raise the ramp and start the removal underneath.
There's a horizontal curved brace with 2 bolts either side, this needs removing. Next was the long brace that goes from the cross member to subframe. The front has 2 bolts and the rear has 2 nuts. Towards the front of the brace is the front gearbox mount, there's two nuts here. With all of those removed the brace can be lifted away. The front gearbox mount has a single bolt that passes through, the round mount will then pull out. Make sure you don't loose the large washers and rubber bushes for the long brace.
You'll see two rods coming from the bottom of the gear stick,one is longer than the other. The short one is the gear selector and has a single bolt. The other goes to the gearbox and has a stud, the nut on mine stopped turning so it ended up removing the stud too.
We'll come back to the rear engine mount in a moment.
Drain the gearbox fluid. The drain plug is on the bottom of the gearbox, its a large bolt 22mm or 23mm (I can't remember sorry)
It's time to remove the wheels. The driveshaft hub nut is 32mm. Unbolting the lower ball joint will help swing the hub up to the side, giving you more access to the driveshaft once its been released from the hub. There's two options to remove the ball joint.
Option 1: Remove the pinch bolt leaving the ball joint on the suspension arm. This carries a risk of splitting the protective boot.
Option 2: Remove the ball joint from the suspension arm. There's a nut and bolt nearest the front and a single nut on top.
We went with option 2
The driver side driveshaft has a centre support bracket/bearing. There's two bolts attaching it to the engine block. With those removed, use a pry bar to help lever the driveshaft out from the gearbox. You may need to wiggle the inner joint while doing this to help.
The passenger side drivehaft is shorter so no need to remove any additional brackets. Removal from the gearbox is the same.
Lets re-look at the rear mount, this had 3 bolts. Two are above the passenger drive shaft and the other is slightly lower down next to the longer gear selector rod that you removed (the one with the stud)
With a transmission jack we took the weight of the gearbox and removed the bell housing bolts. Making sure nothing was getting caught on and around as we slowly lowered it down. Luckily it didn't need lifting/tilting, it came straight down.


We gave the gearbox a thorough clean inside and the areas which were damp on the outside. I checked the clutch plate went on the input shaft spline to check fitment and it was all ok. Using an alignment took, we could make sure the plate was central on the clutch cover before we bolted it to the flywheel.
The release bearing supplied was wrong. Left is the original and the right is the one supplied

Although it slid over the selector fork fine, the top part of the release bearing where the cover/cage crimps to itself that was fouling the inside of the gearbox. It's the part at 12 o'clock, on the right side item. We had no option but to re-use the old one.
The old (ADL Blueprint) correct release bearing FCR54-58

The new replacement (ADL Blueprint) and incorrect release bearing TKS54-33K

A photo of the old release bearing installed. You can see the clearance at the top near the casing

While I was making sure the clutch plate and cover was aligned, Danny gave the face of the flywheel a clean with some brake cleaner and sandpaper.

Clutch installed and torqued to spec

Refitting was the reversal. Make sure you refill the gearbox with 75W90, capacity is 2.7L.

Some Torque Setting
Front Hub Nut - 236>319 Nm
Clutch Cover - 17-23 Nm
My Youtube video can be seen here:
https://www.youtube.com/watch?v=DBK5y1KLZh4&t=...
My friend Danny came to the rescue and offered to help guide me through the job. I've only changed one clutch and that was on my Colt CZT with the help of another friend.
I apologise for the lack of photos, I did make a short video for Youtube but was unable to do a full on one due to copyright music in the background.
First start off by disconnecting the battery and remove the battery clamp, battery and battery tray. Next up is the intake hose and airbox, make sure you mark the vacuum hoses and put them back on the correct way.
Locate the starter motor on top left side of the gearbox underneath the distributor. Disconnect the two 12mm nuts and unplug the space connector on top. The starter motor has 3 bolts fixing it to the gearbox.
We decided to keep the slave cylinder connected and removed the 2 bolts that holds it to the side of the gearbox. Follow the clutch line along and it'll join to a short flexible hose which is attached to an L shaped bracket, this needs to be unbolted from the top of the gearbox.
Behind this towards the engine block is a large bracket that secures part of a electrical loom, this also needs unbolting.
Further to the right towards the rear of the engine block is the fuel filter in a cage bracket. I removed the long 10mm bolt on the cage bracket and pulled the filter out. There's two trim clips holding the electrical loom to the same bracket. Follow the bracket along the back of the engine and there's a bolt and captive nut, we slackened this to allow the bracket to move more freely.
In this area there's two plugs, one is the speedo drive and the other is the reverse light switch.
The last thing to do (from memory) at the top of the gearbox is to crack off the bell housing bolts. At the top centre there are two and one more to the right. On the left hand side of the gearbox, there's two more bolts and a third the opposite side (exhaust downpipe) which we originally missed.
Time to raise the ramp and start the removal underneath.
There's a horizontal curved brace with 2 bolts either side, this needs removing. Next was the long brace that goes from the cross member to subframe. The front has 2 bolts and the rear has 2 nuts. Towards the front of the brace is the front gearbox mount, there's two nuts here. With all of those removed the brace can be lifted away. The front gearbox mount has a single bolt that passes through, the round mount will then pull out. Make sure you don't loose the large washers and rubber bushes for the long brace.
You'll see two rods coming from the bottom of the gear stick,one is longer than the other. The short one is the gear selector and has a single bolt. The other goes to the gearbox and has a stud, the nut on mine stopped turning so it ended up removing the stud too.
We'll come back to the rear engine mount in a moment.
Drain the gearbox fluid. The drain plug is on the bottom of the gearbox, its a large bolt 22mm or 23mm (I can't remember sorry)
It's time to remove the wheels. The driveshaft hub nut is 32mm. Unbolting the lower ball joint will help swing the hub up to the side, giving you more access to the driveshaft once its been released from the hub. There's two options to remove the ball joint.
Option 1: Remove the pinch bolt leaving the ball joint on the suspension arm. This carries a risk of splitting the protective boot.
Option 2: Remove the ball joint from the suspension arm. There's a nut and bolt nearest the front and a single nut on top.
We went with option 2
The driver side driveshaft has a centre support bracket/bearing. There's two bolts attaching it to the engine block. With those removed, use a pry bar to help lever the driveshaft out from the gearbox. You may need to wiggle the inner joint while doing this to help.
The passenger side drivehaft is shorter so no need to remove any additional brackets. Removal from the gearbox is the same.
Lets re-look at the rear mount, this had 3 bolts. Two are above the passenger drive shaft and the other is slightly lower down next to the longer gear selector rod that you removed (the one with the stud)
With a transmission jack we took the weight of the gearbox and removed the bell housing bolts. Making sure nothing was getting caught on and around as we slowly lowered it down. Luckily it didn't need lifting/tilting, it came straight down.


We gave the gearbox a thorough clean inside and the areas which were damp on the outside. I checked the clutch plate went on the input shaft spline to check fitment and it was all ok. Using an alignment took, we could make sure the plate was central on the clutch cover before we bolted it to the flywheel.
The release bearing supplied was wrong. Left is the original and the right is the one supplied

Although it slid over the selector fork fine, the top part of the release bearing where the cover/cage crimps to itself that was fouling the inside of the gearbox. It's the part at 12 o'clock, on the right side item. We had no option but to re-use the old one.
The old (ADL Blueprint) correct release bearing FCR54-58

The new replacement (ADL Blueprint) and incorrect release bearing TKS54-33K

A photo of the old release bearing installed. You can see the clearance at the top near the casing

While I was making sure the clutch plate and cover was aligned, Danny gave the face of the flywheel a clean with some brake cleaner and sandpaper.

Clutch installed and torqued to spec

Refitting was the reversal. Make sure you refill the gearbox with 75W90, capacity is 2.7L.

Some Torque Setting
Front Hub Nut - 236>319 Nm
Clutch Cover - 17-23 Nm
My Youtube video can be seen here:
https://www.youtube.com/watch?v=DBK5y1KLZh4&t=...
I'm doing some catch up with the build thread. There's been lots of little jobs but nothing really worthy of its own update.
While doing the clutch change we swapped over the passenger side gearbox mount. The bracket that bolts to the gearbox is different on the V6 and I so happened to have ordered a 1.5/1.8 mount *eye roll*
Luckily that bracket is on a spindle that passes through the bush mount and is held on by a large nut. The bush itself looked the same so we swapped the bracket over and it all bolted into place.
The reason for the change was because I get a knock when changing gears and sometimes under harsh acceleration. I had purchased all 4 mounts but we only had time to do the one (which made sense because of the clutch change).
Although we did look at the front mount, but the one supplied was incrorrect. Turns out the studs are wider on the V6 model.
The driver side mount was the next one to look at. With the engine supported with a trolley jack and a piece of wood it was time to loosen the nuts.

There's 4 nuts on the top, one is for an earth strap which sits ontop of another nut.
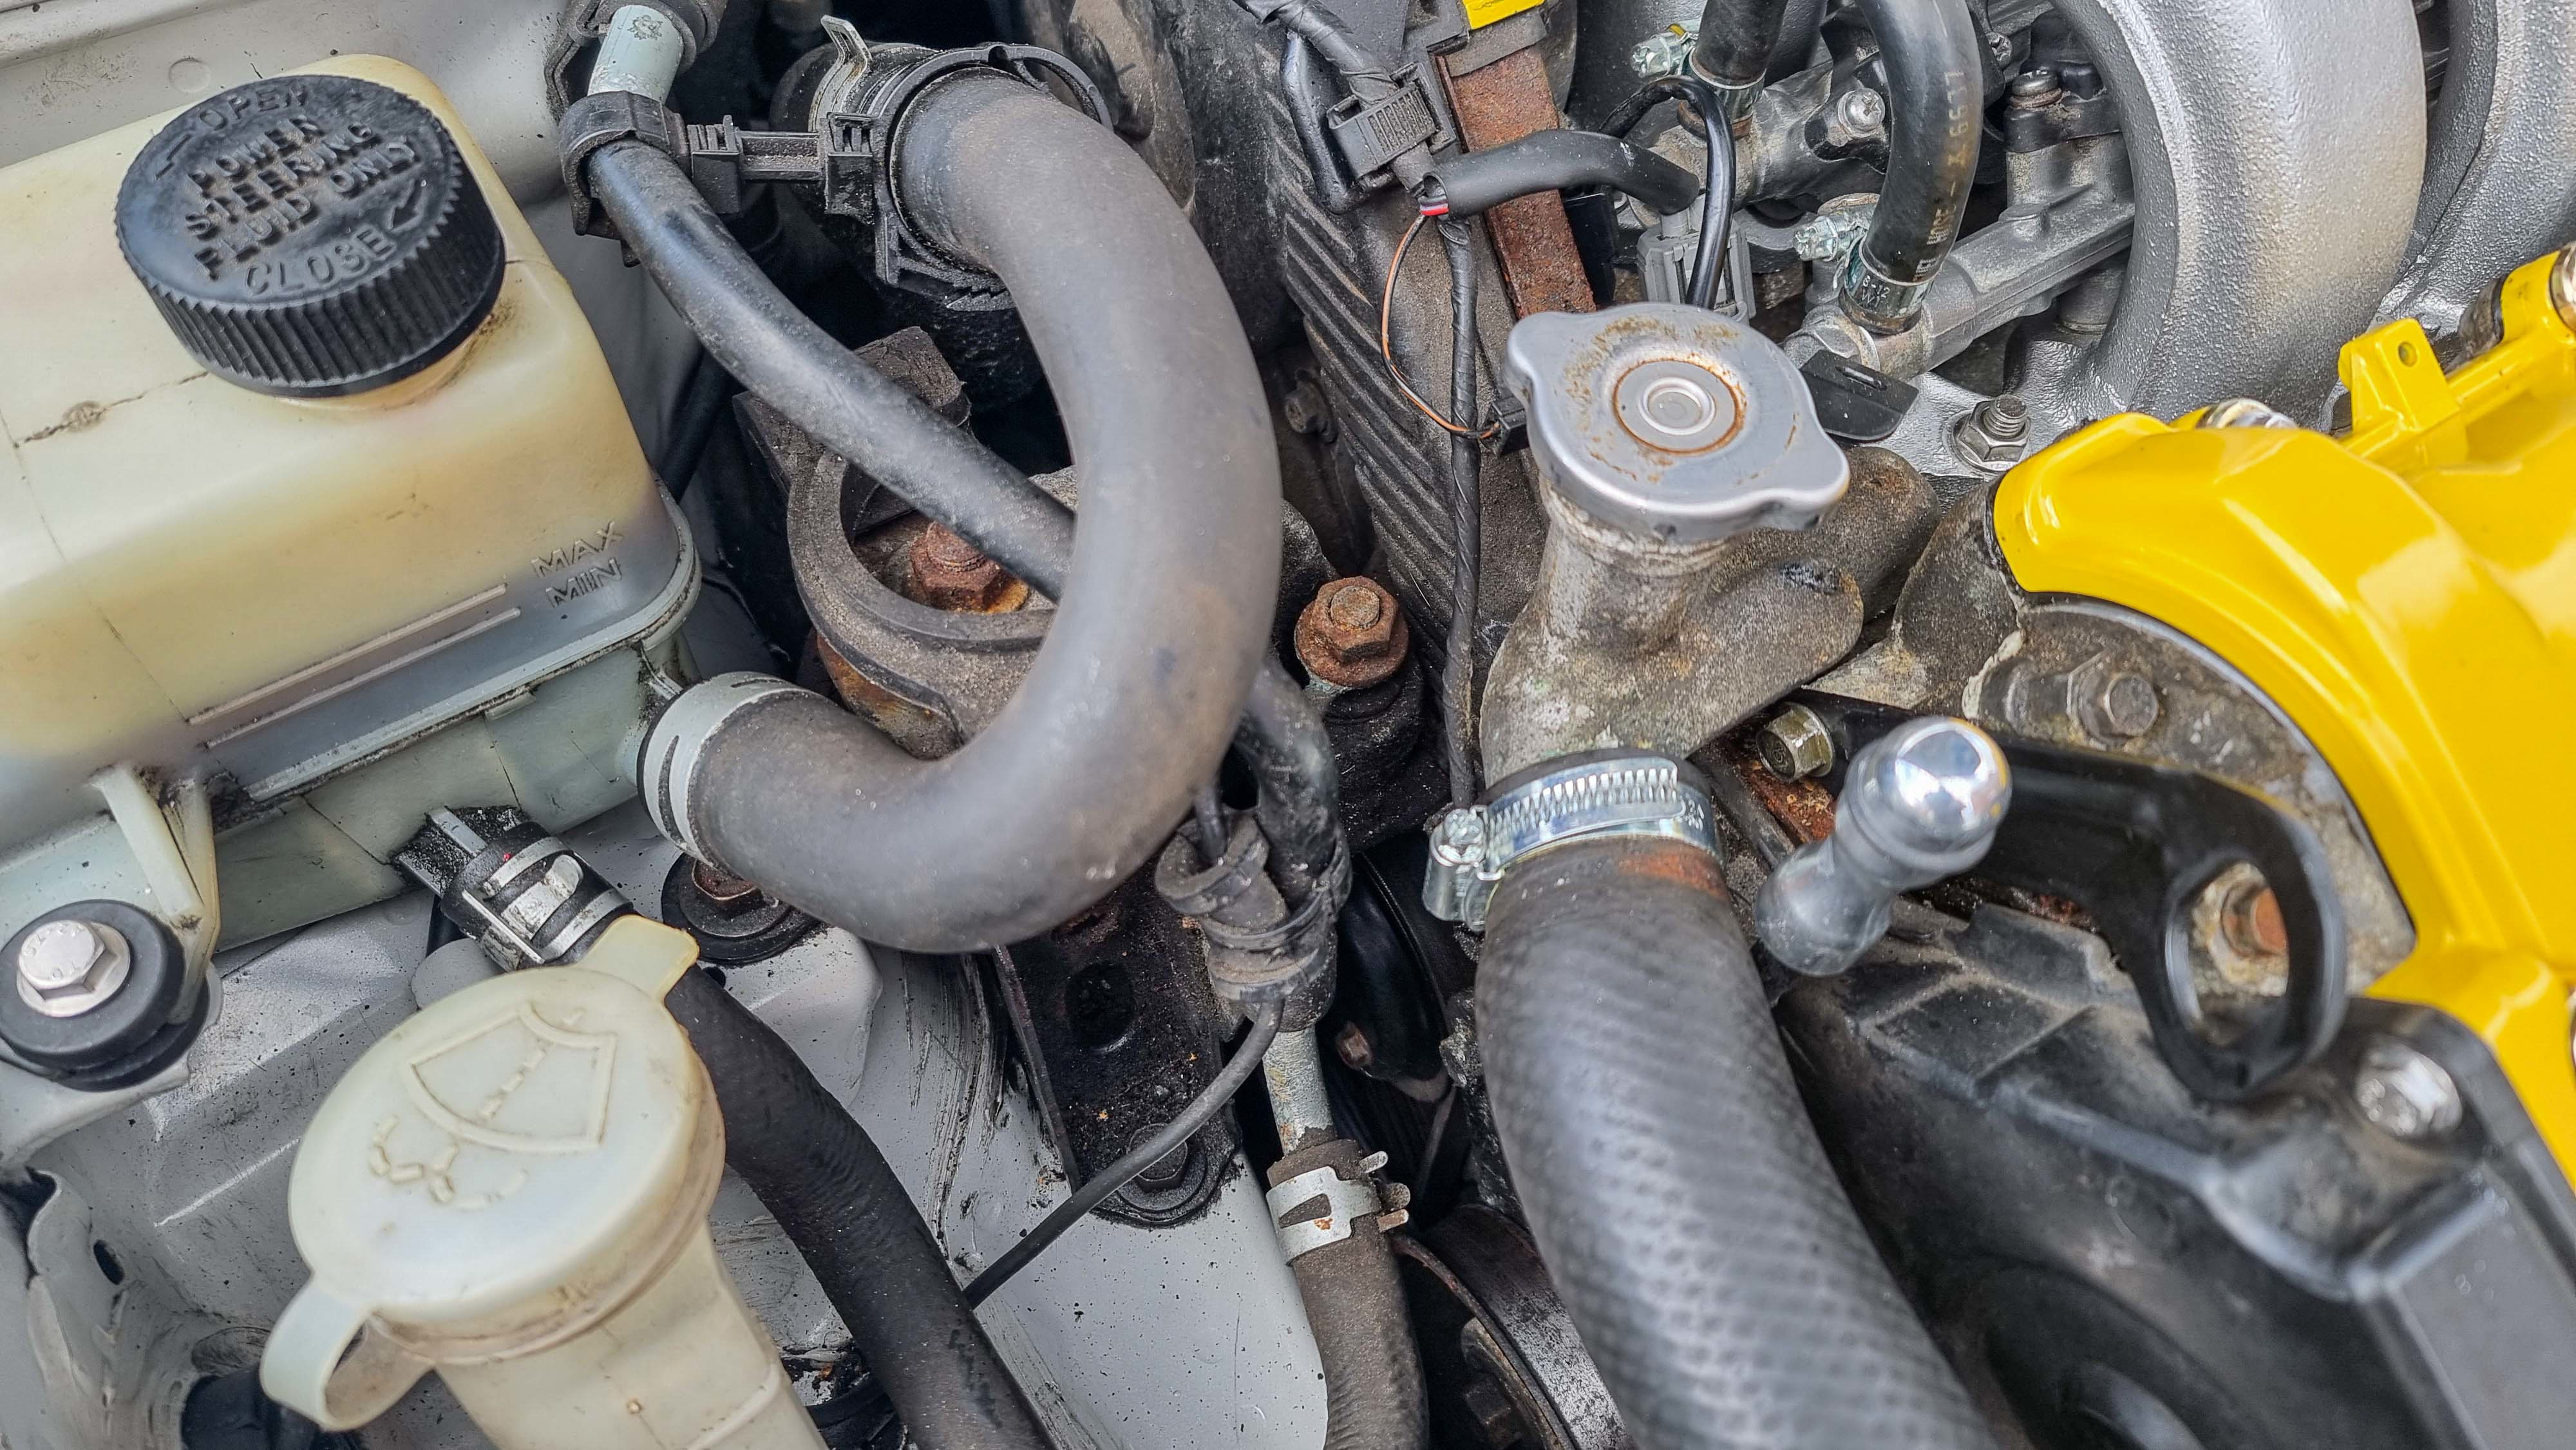
There's 2 bolts that hold the mount to the chassis. There's also a 10mm nut that holds a bracket onto the main mount.
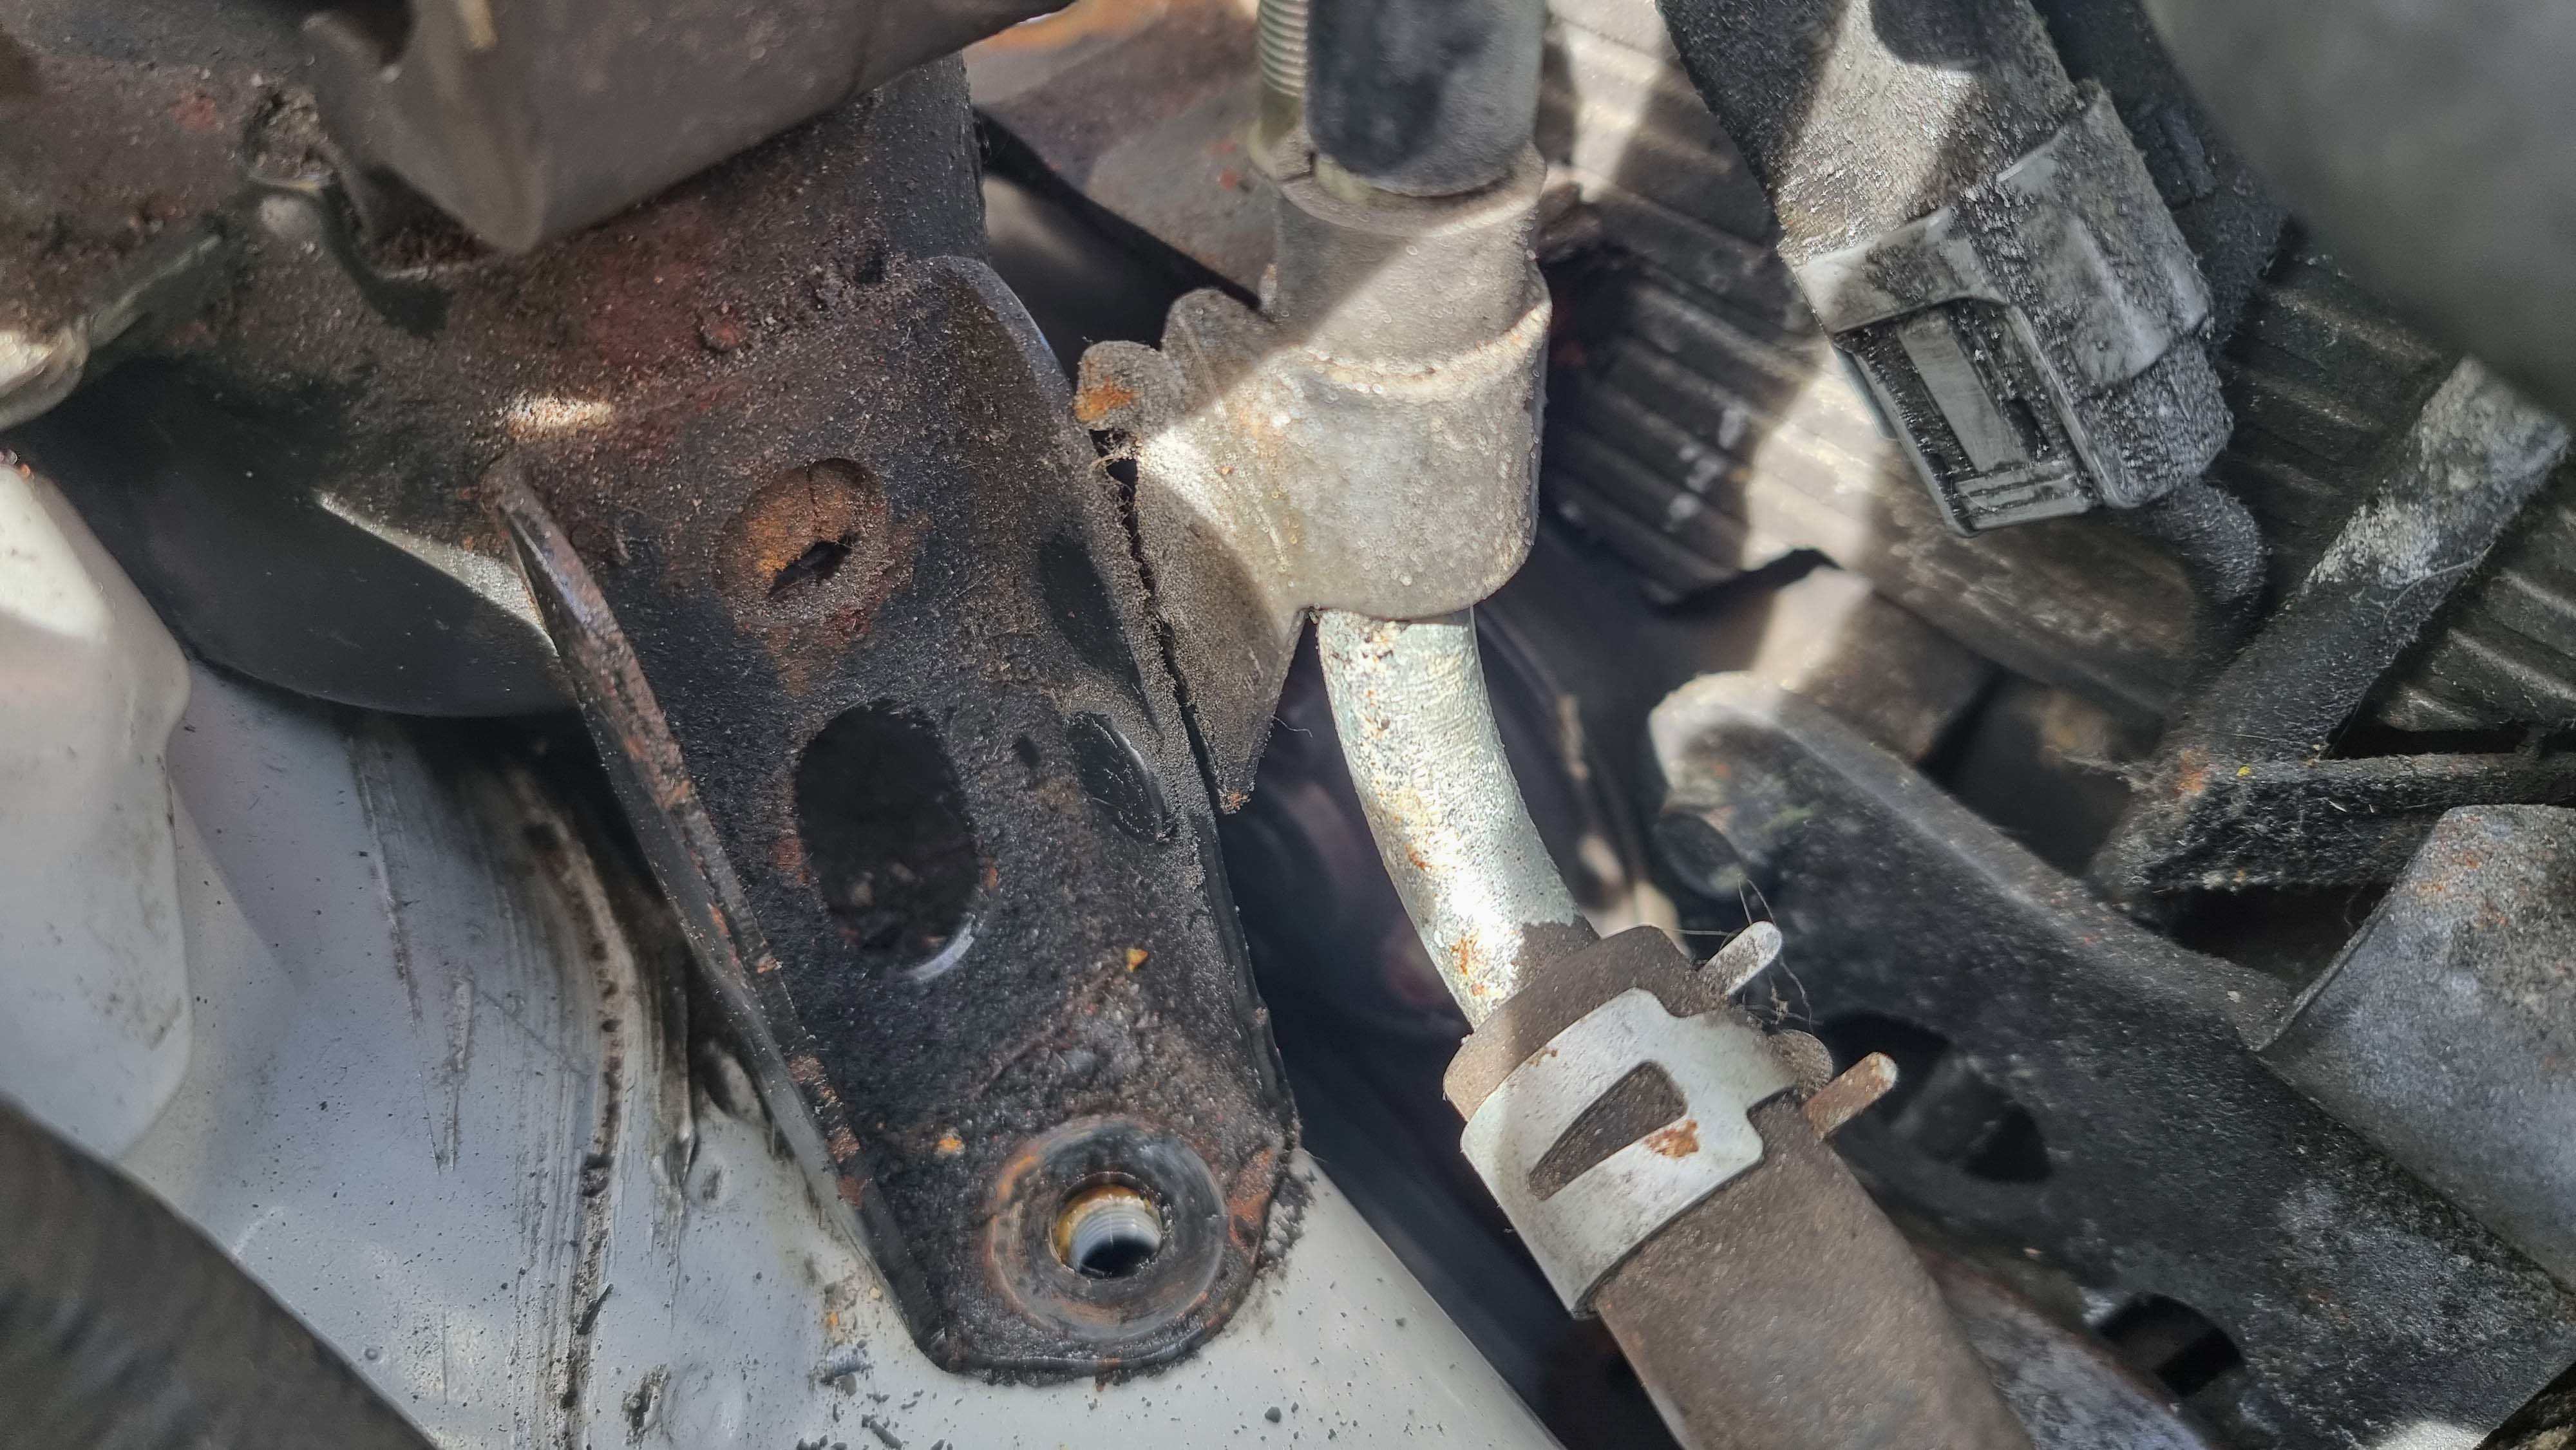
The powder steering reservoir needs unbolting and lifting up and off from the bracket. From here the mount can be removed while navigating under the hose.
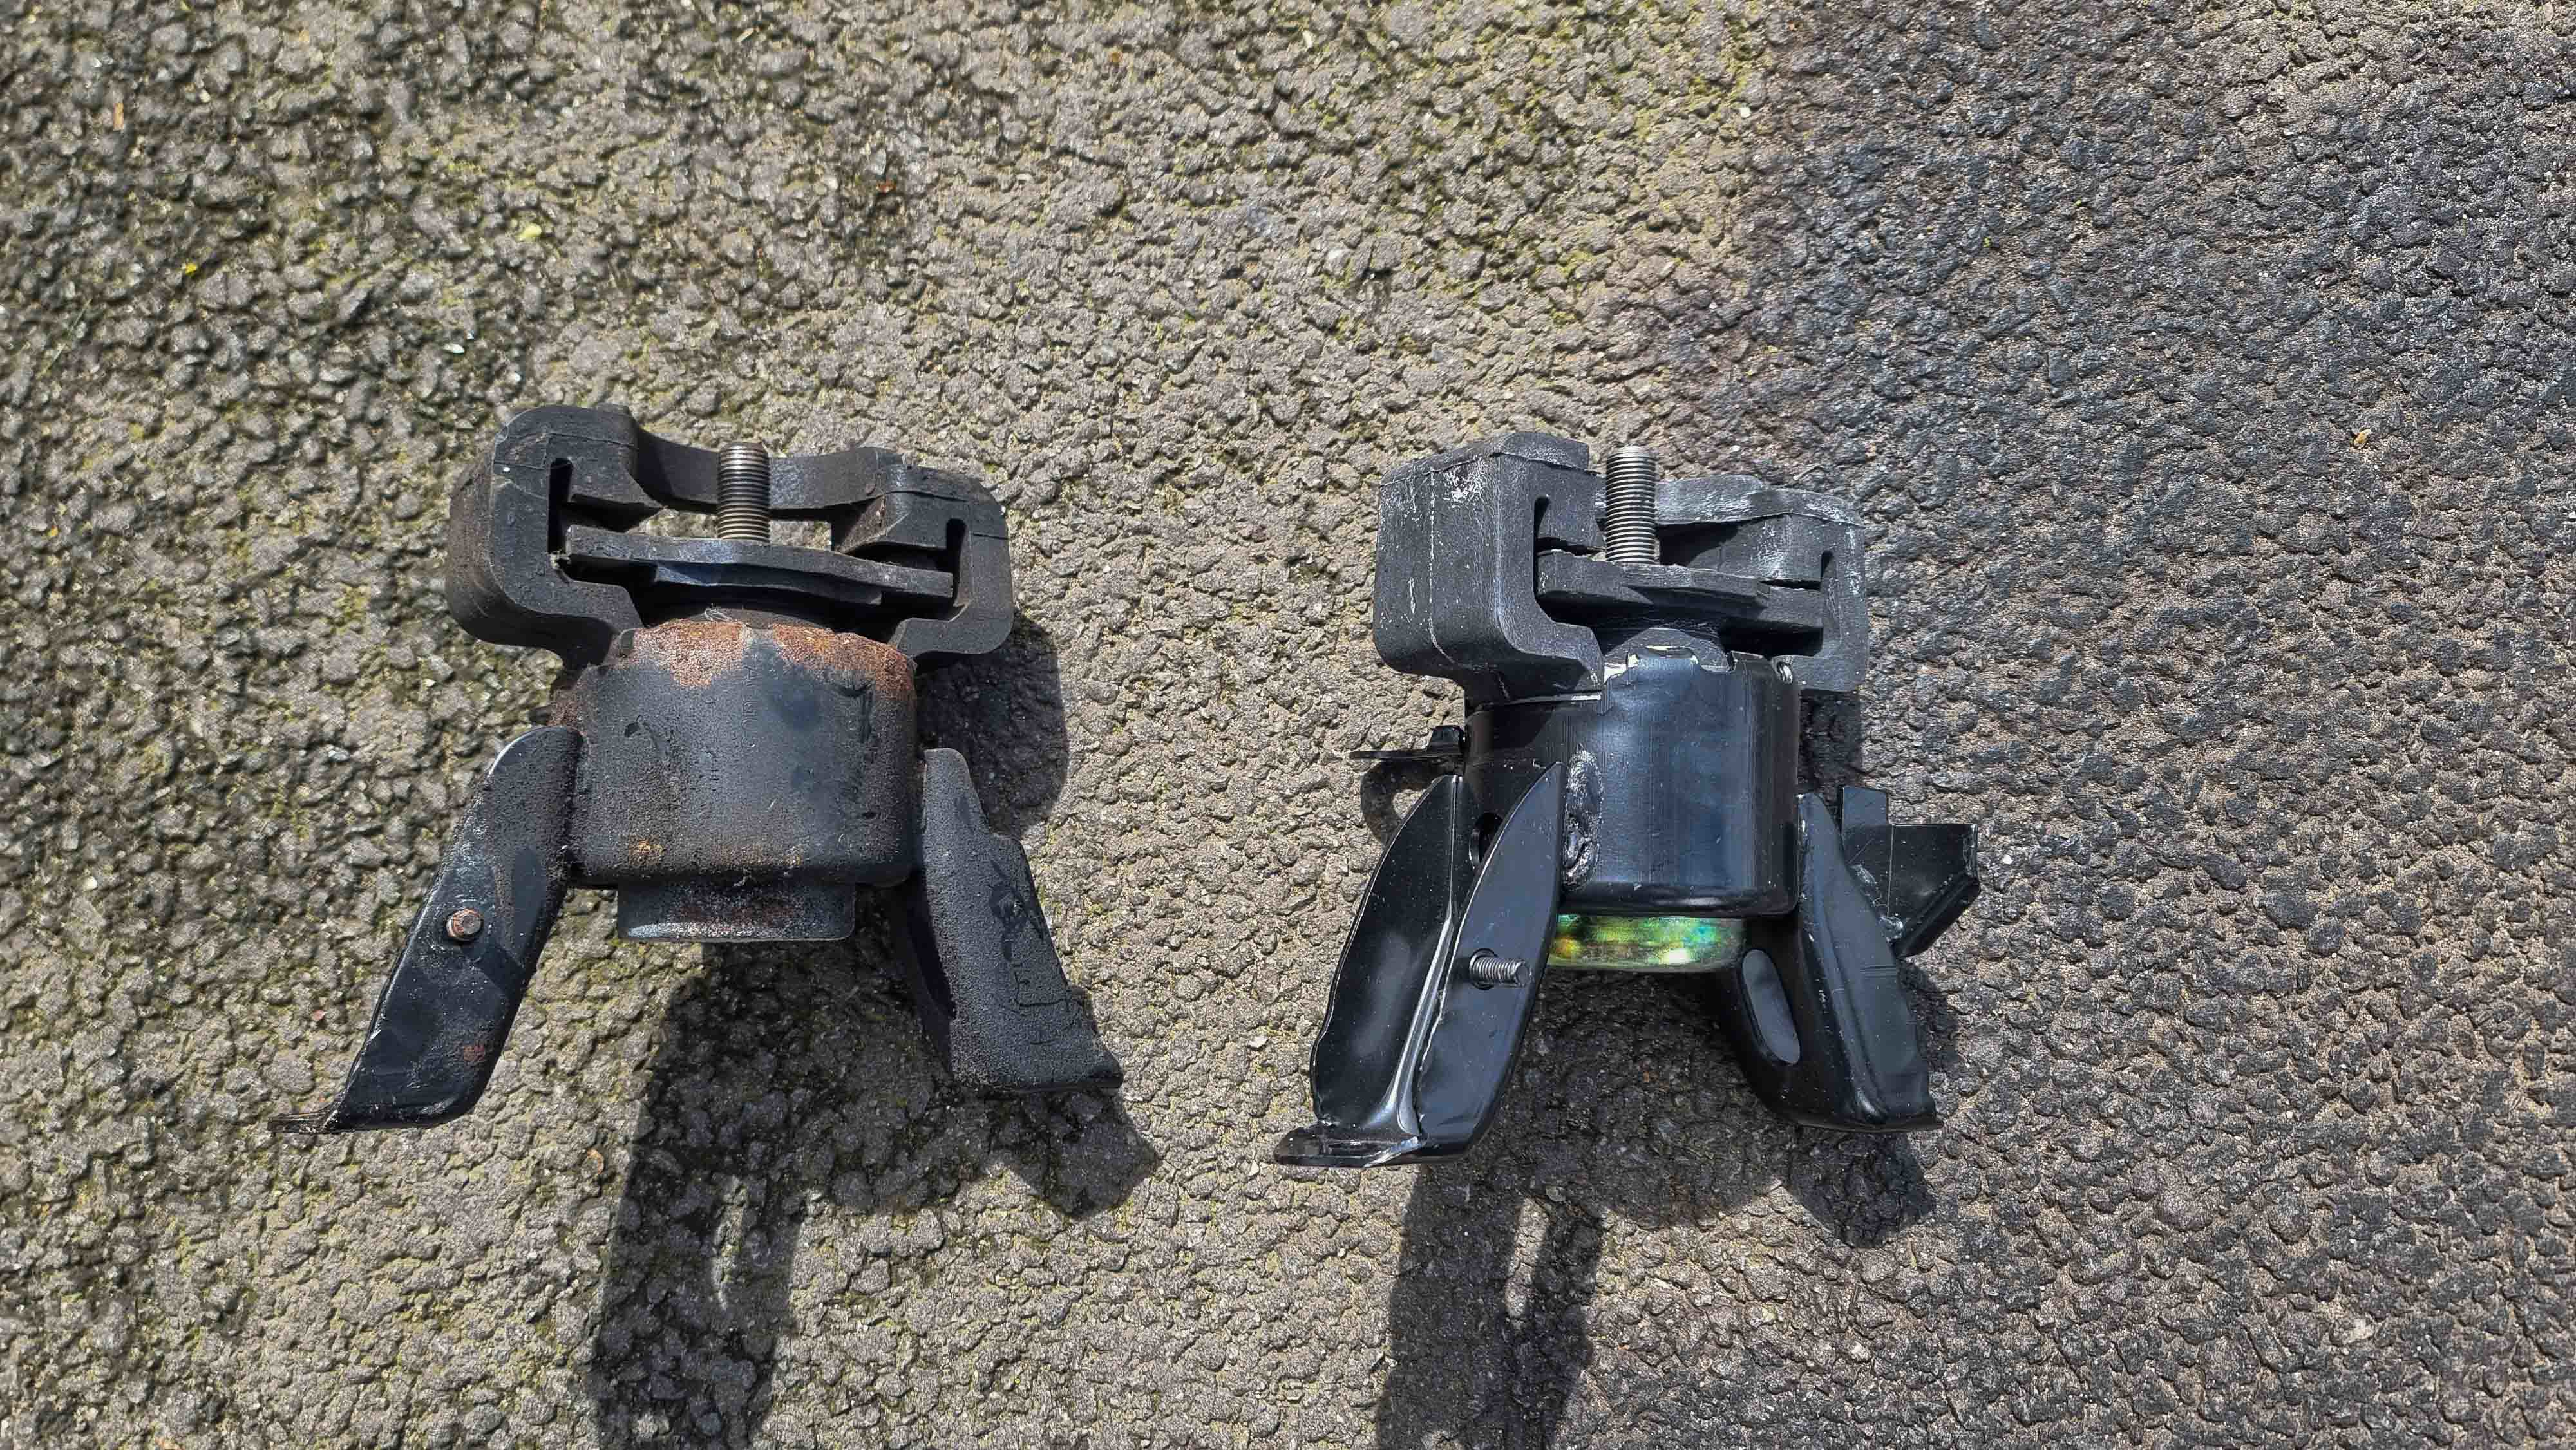
The mounts look pretty identical with a couple of minor differences. The top stud is longer on the new one and there's an additional bracket? on the right hand side which faces the bulk head.

At first thought I didn't think it would line up. But I threaded in the bolts by a couple of turns and they equally tighened up. The top bracket dropped straight on
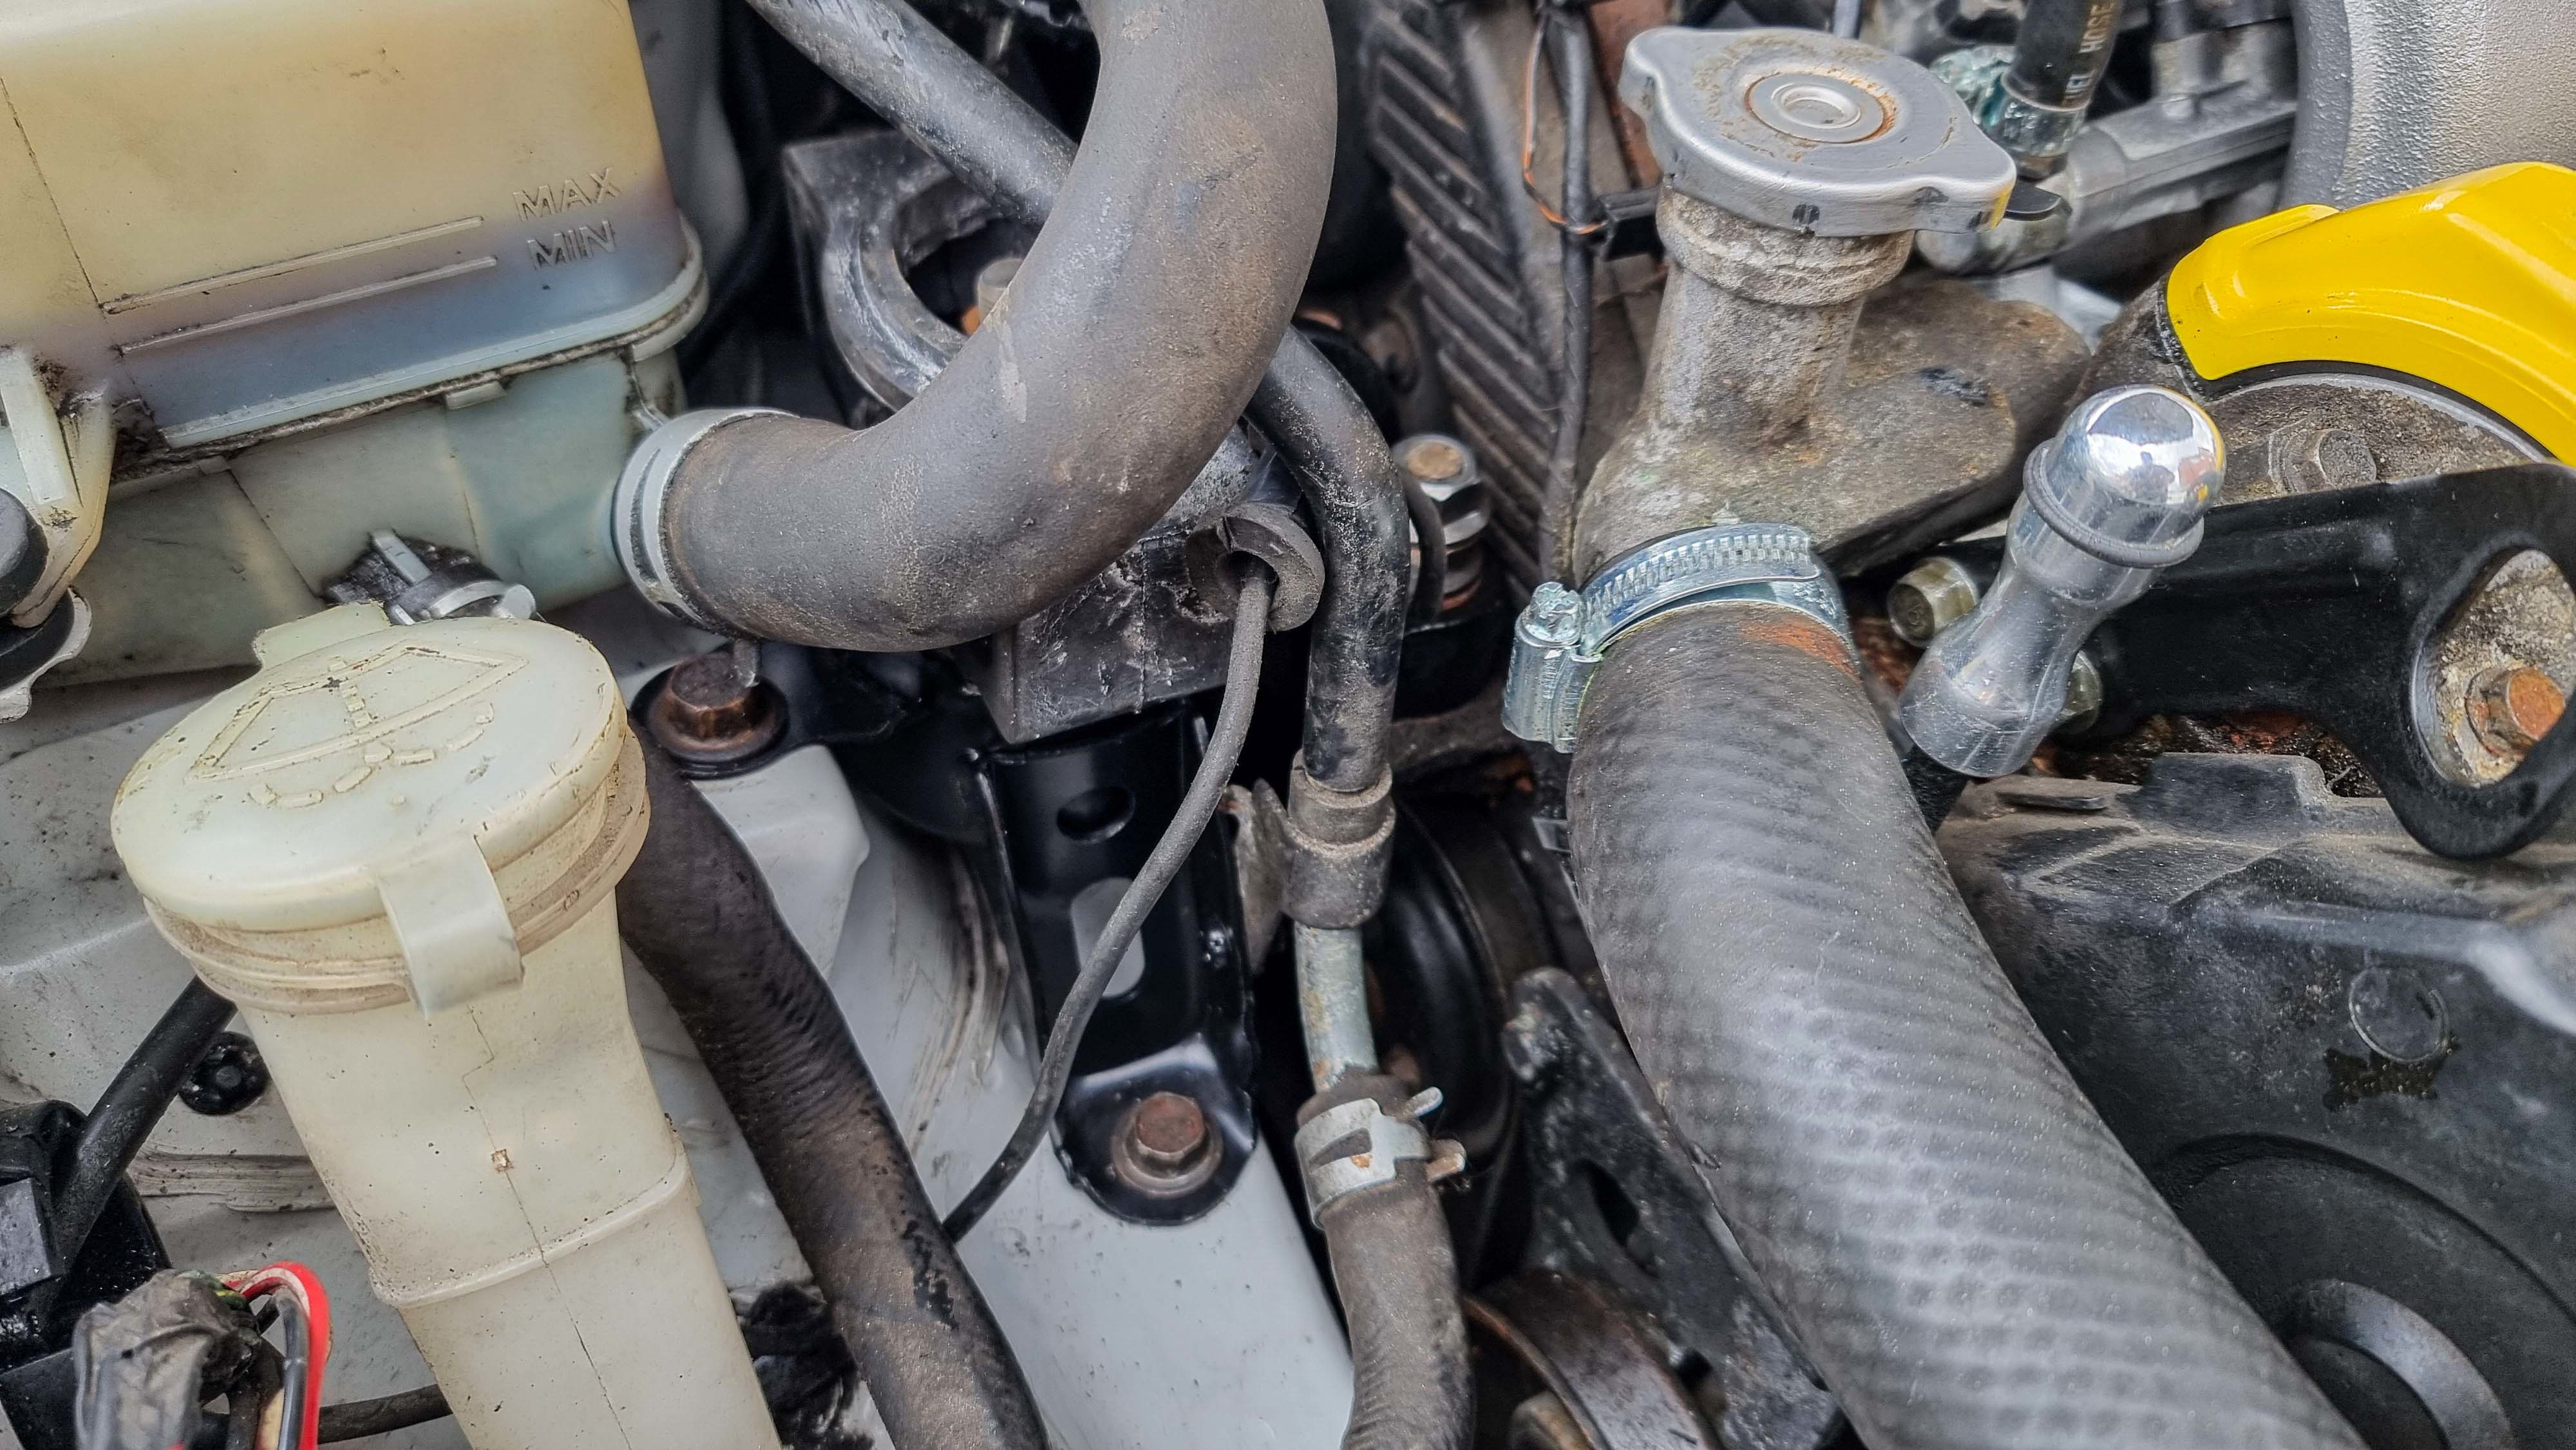

Unfortunately I still have the knocking noise. I've got front lower ball joints and stabaliser links to change. But I've got a strong feeling it's going to be the rear engine mount. To do that the subframe needs removing because access to the bolts is blocked by the bulkhead.
The next job was something that was being revisited from the engine bay refresh update. You may remember me breaking the check valve and barb on a vacuum chamber which are bolted to the underside of the inlet manifold.
I made an(other) order with Amayama for some replacement parts to fix the issue. I decided to buy both chambers, check valve and the elbow hose.
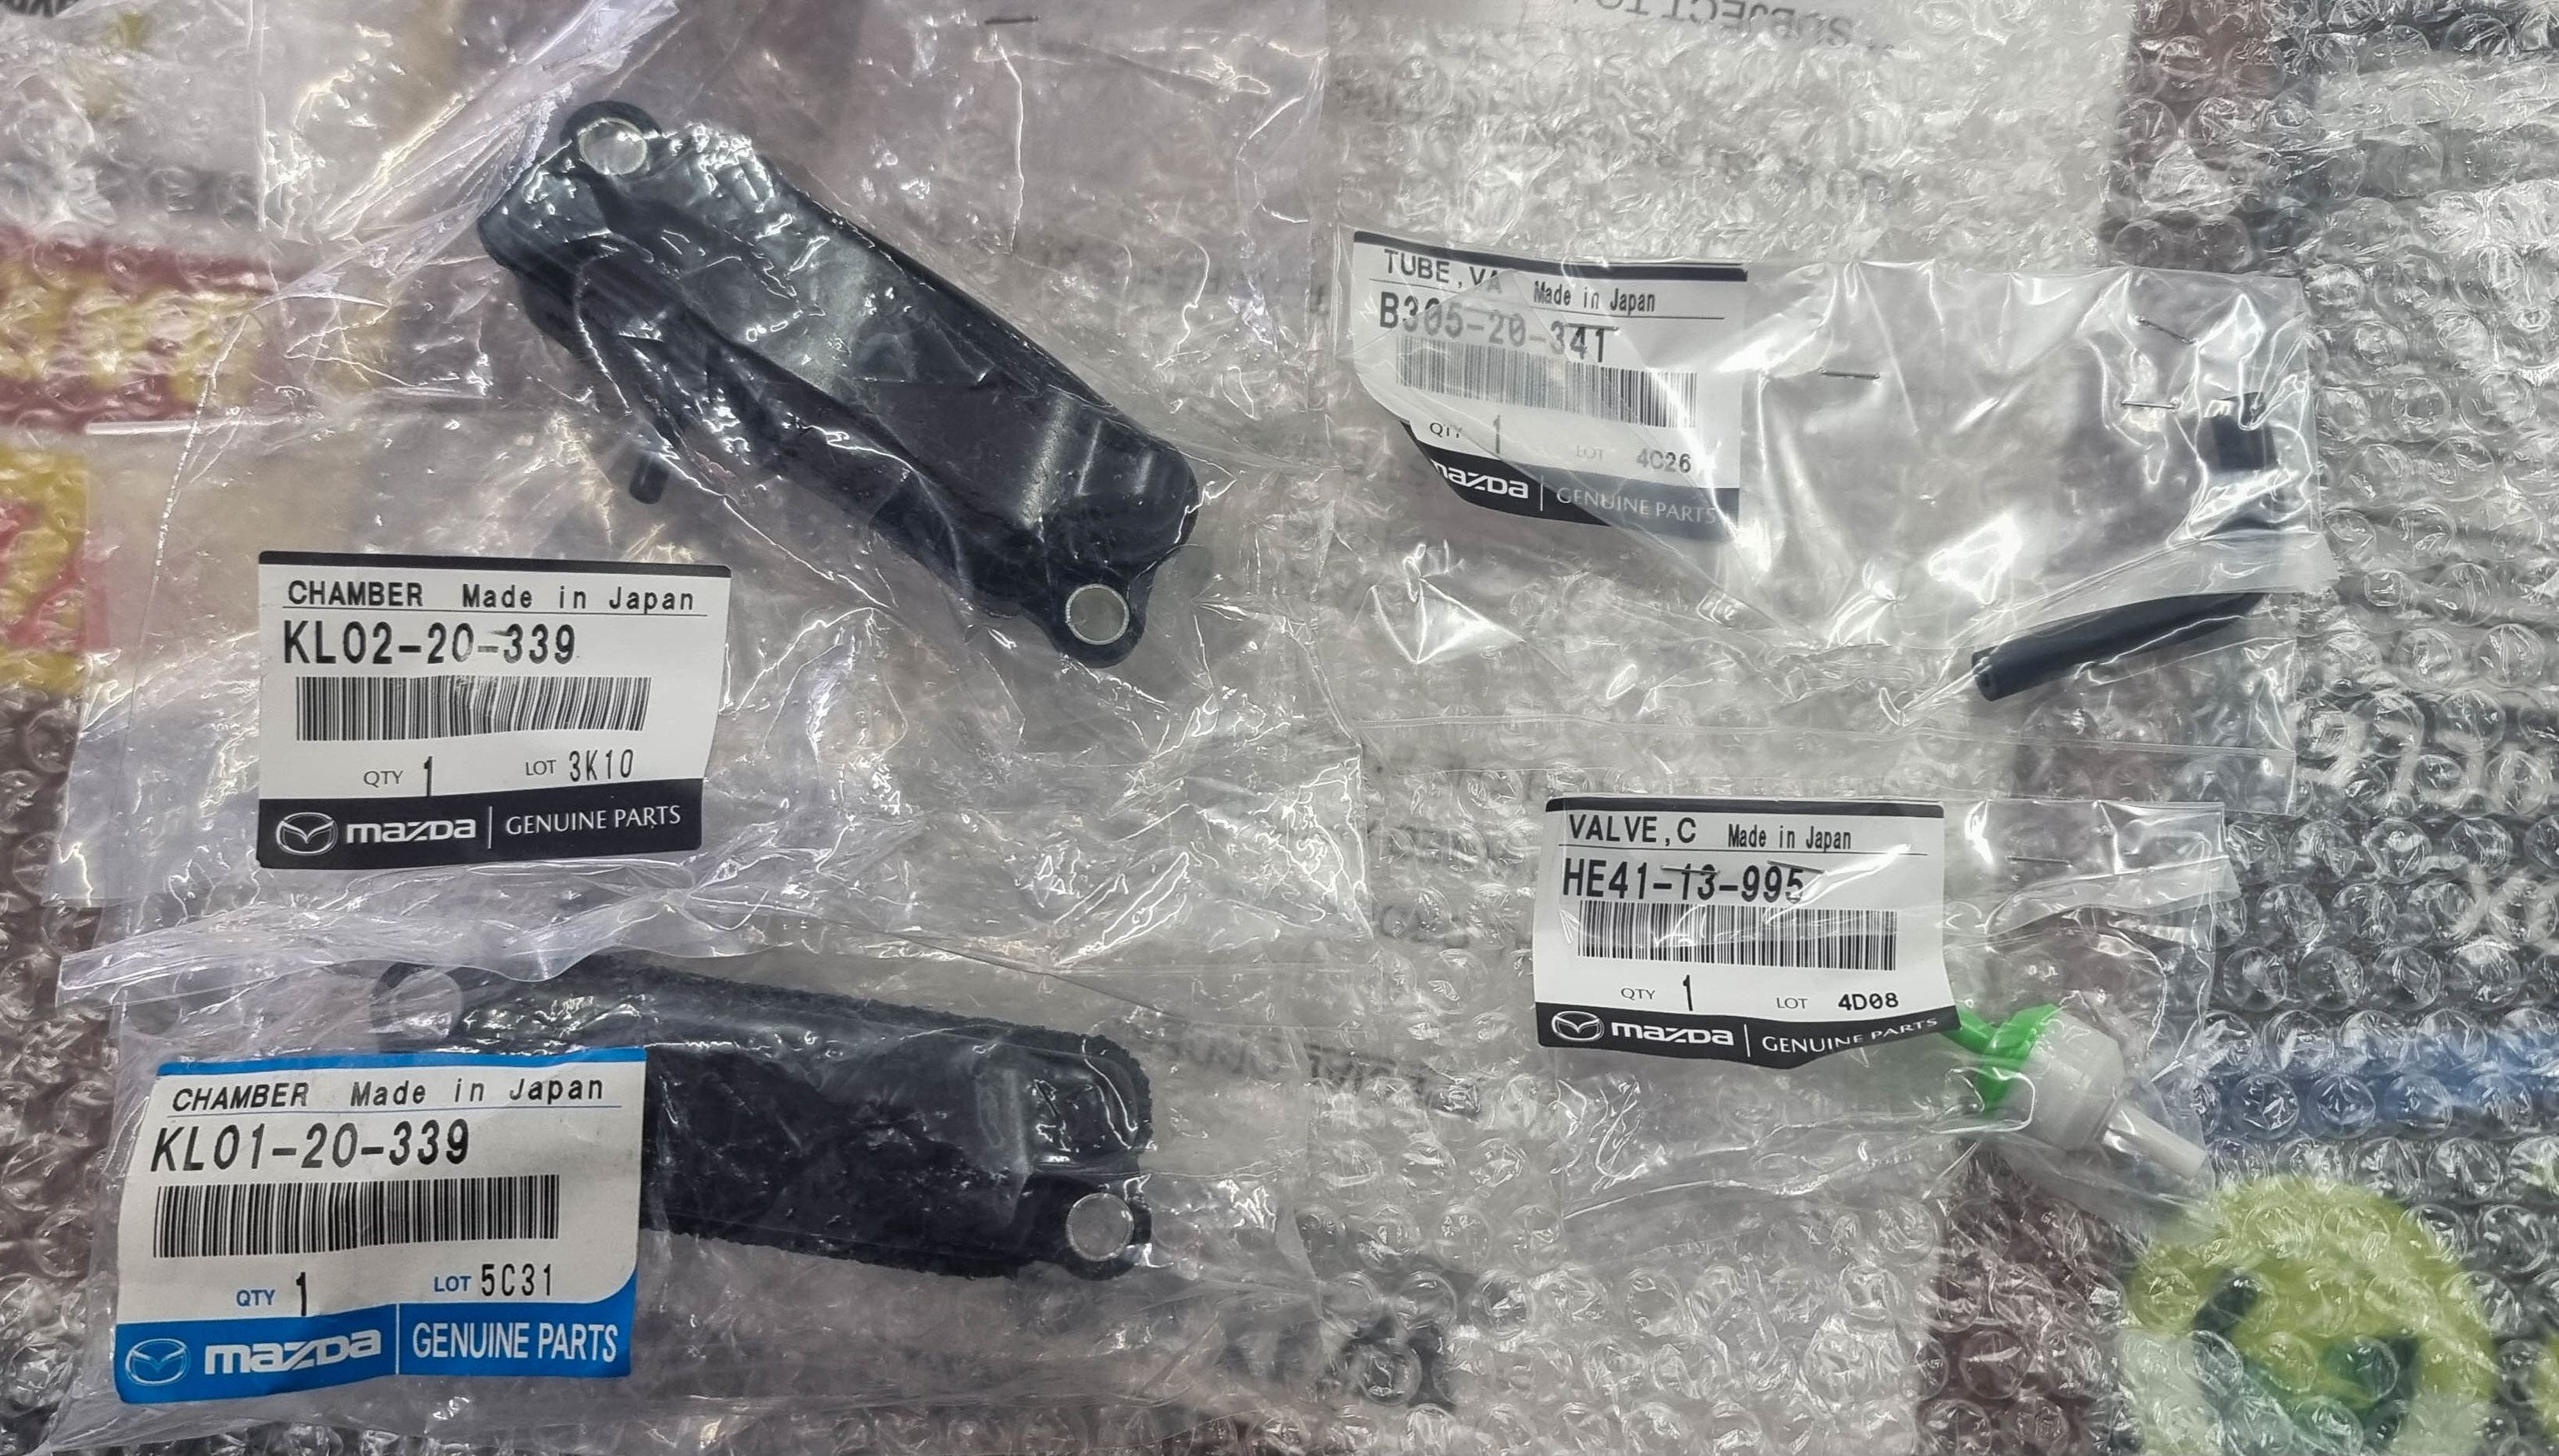
After the refresh I knew something wasn't right, the car was lacking a severe amount of power (well...what ever is left lol) So I knew it was related to the check valve I got from my work.
It didn't take long to remove the inlet manifold (I'm getting pretty good at doing this now!) to see what was causing me problems.
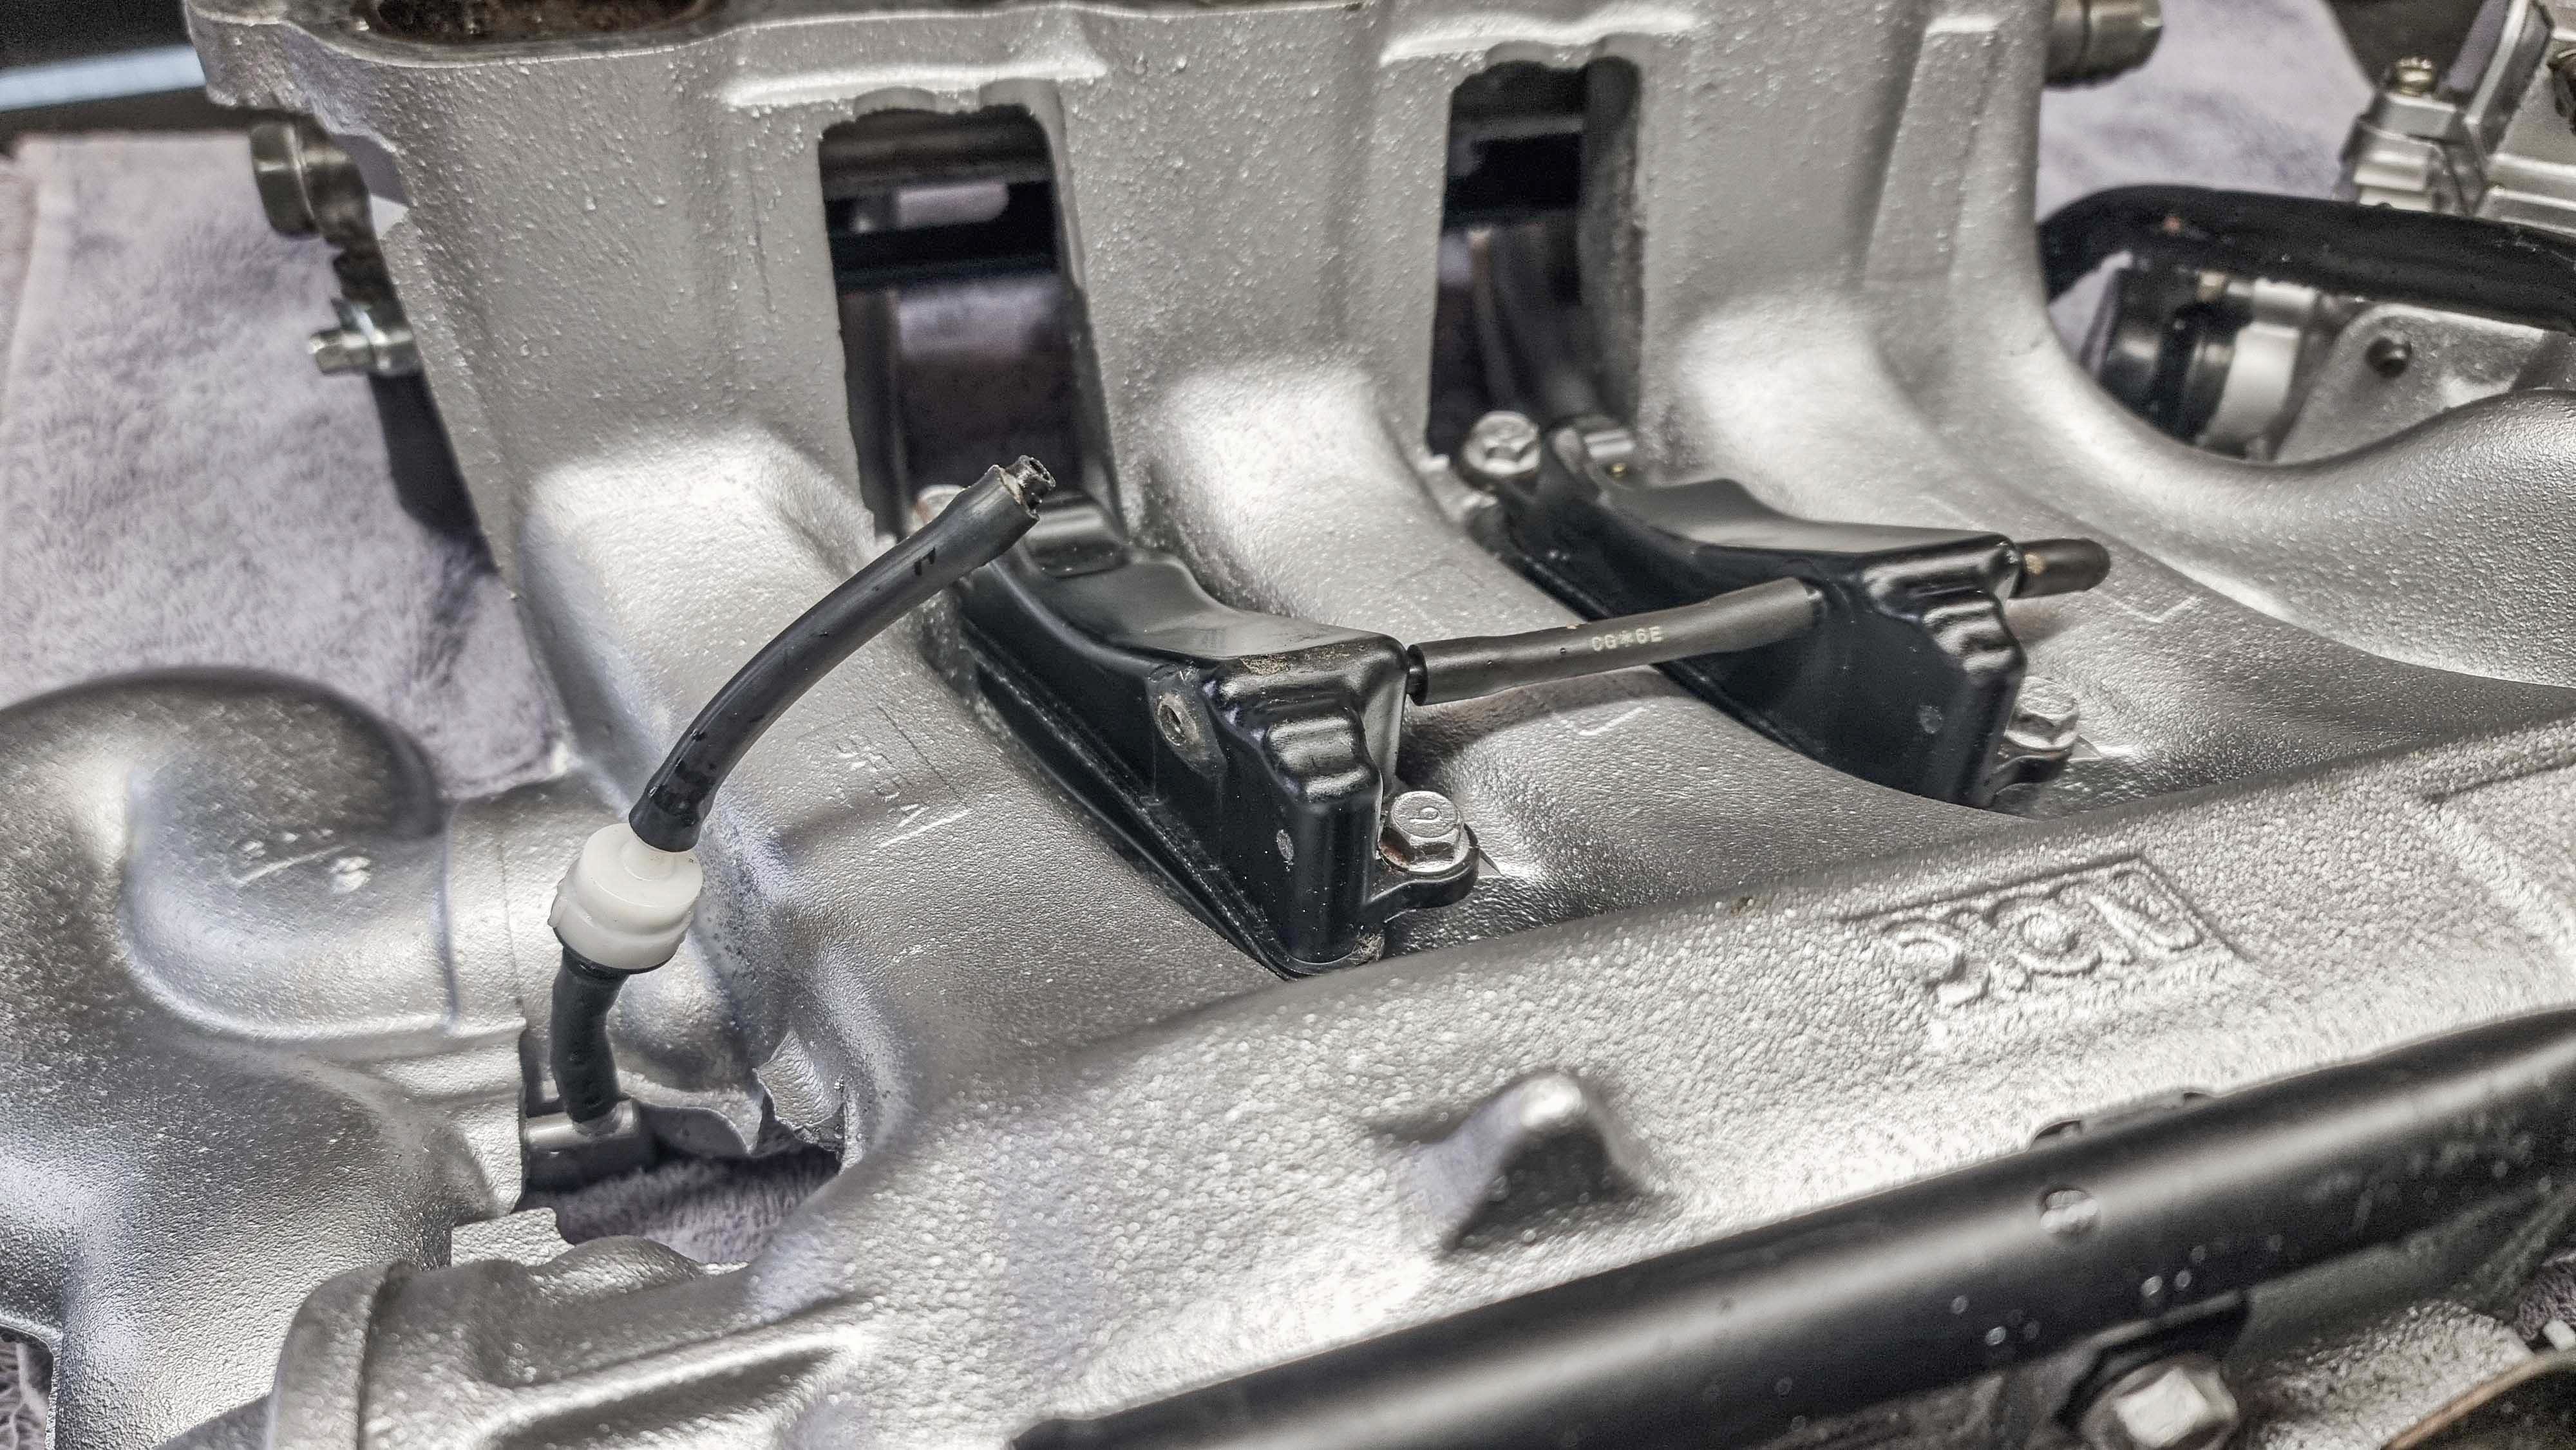
The barb had pulled itself out from the chamber (I already knew the glue had failed from last time), that would explain alot!
It didn't take long to fit the new parts, it's a good job I purchased the other chamber because that barb had snapped off to.
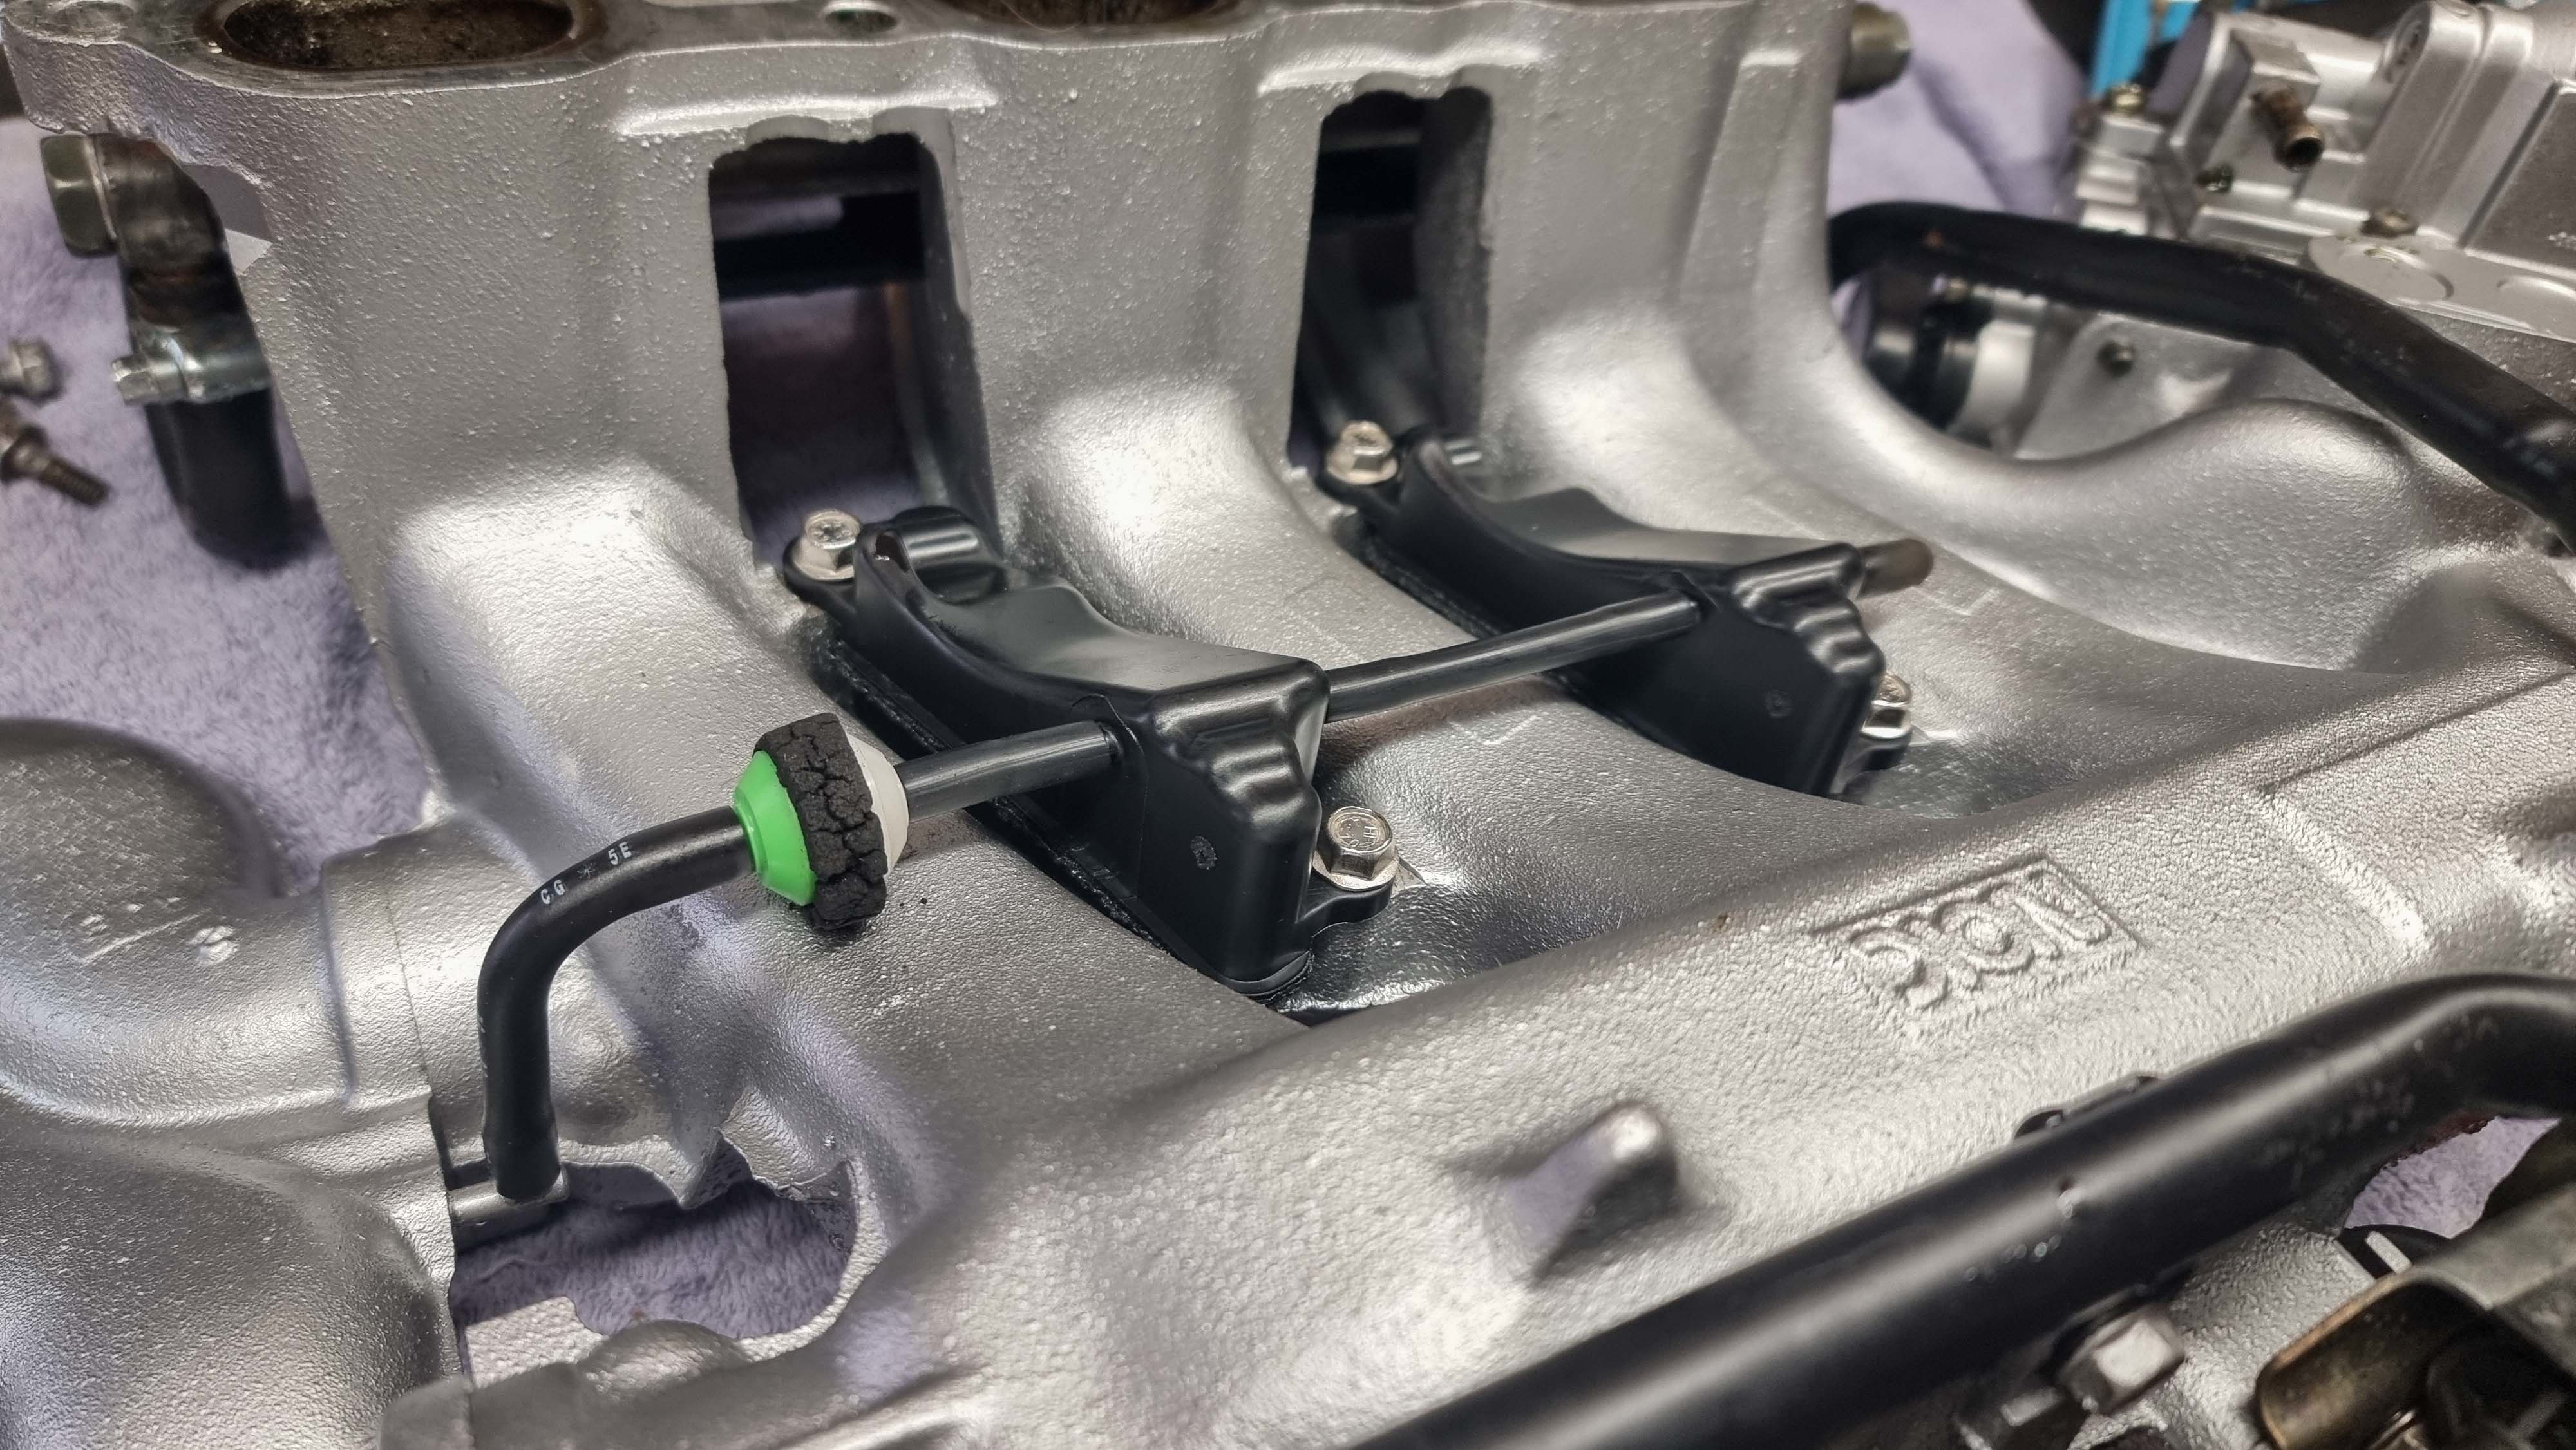
I'm kicking myself for not ordering a new foam buffer ring thing that goes around the check valve, it's just to stop the check valve from rubbing against the inlet manifold. Hopefully this one lasts a little while longer.
With it all back together it was time for a test drive. My face lit up when the VRIS engaged and the car was back to running normal again.
Youtube video can be found here:
https://www.youtube.com/watch?v=sLt9-6Hpxps
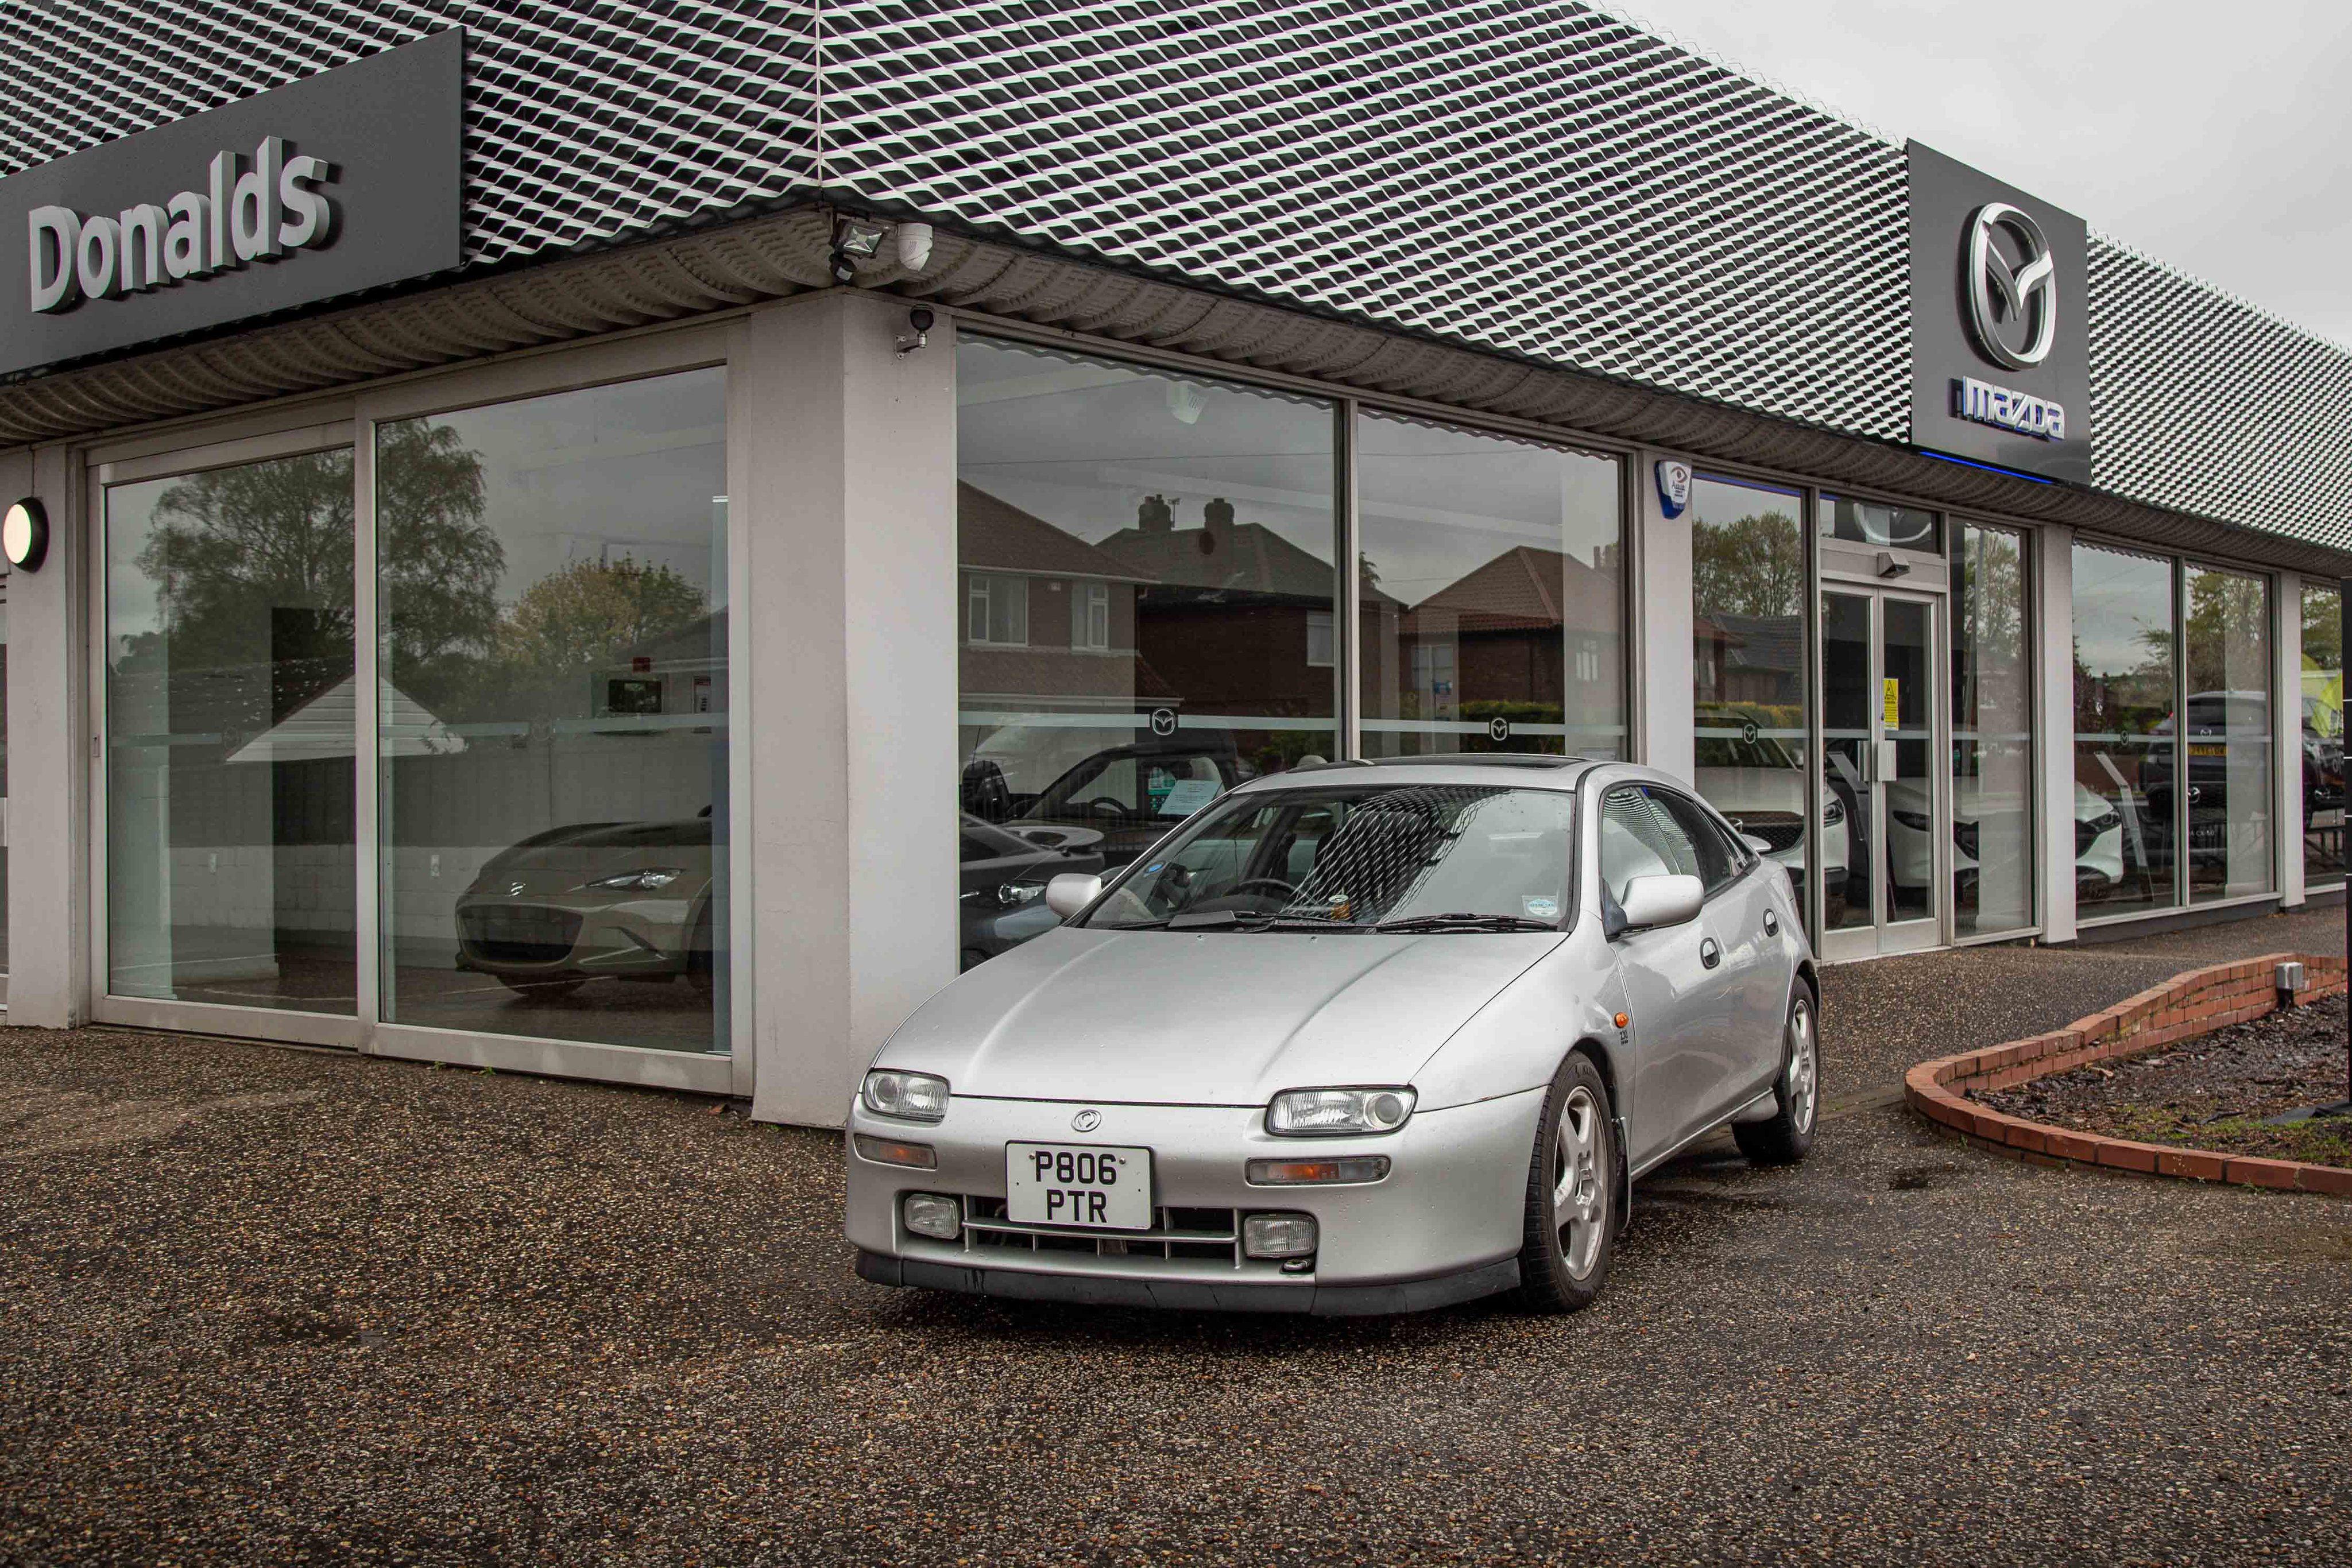
A couple of Sunday's ago I was invited to the local Mazda dealership for a small event they had organised for the 35th Anniversary of the MX5 (or Miata to some readers), it was also the 30th Anniversary of the 323F . The MX5 club were there having a number of cars on display. I did arrive late due to being at my Cars & Coffee event that I organise.
The rain hadn't stopped all morning so alot of people had already left. The event finished at 12:30pm and I waited till everyone had left so I could get some photos outside the dealership.
Fun Fact: The owners manual that I got sent by another member, that car was originally sold at this dealership back in the mid '90s. The staff even recognised the signatures in the service history.
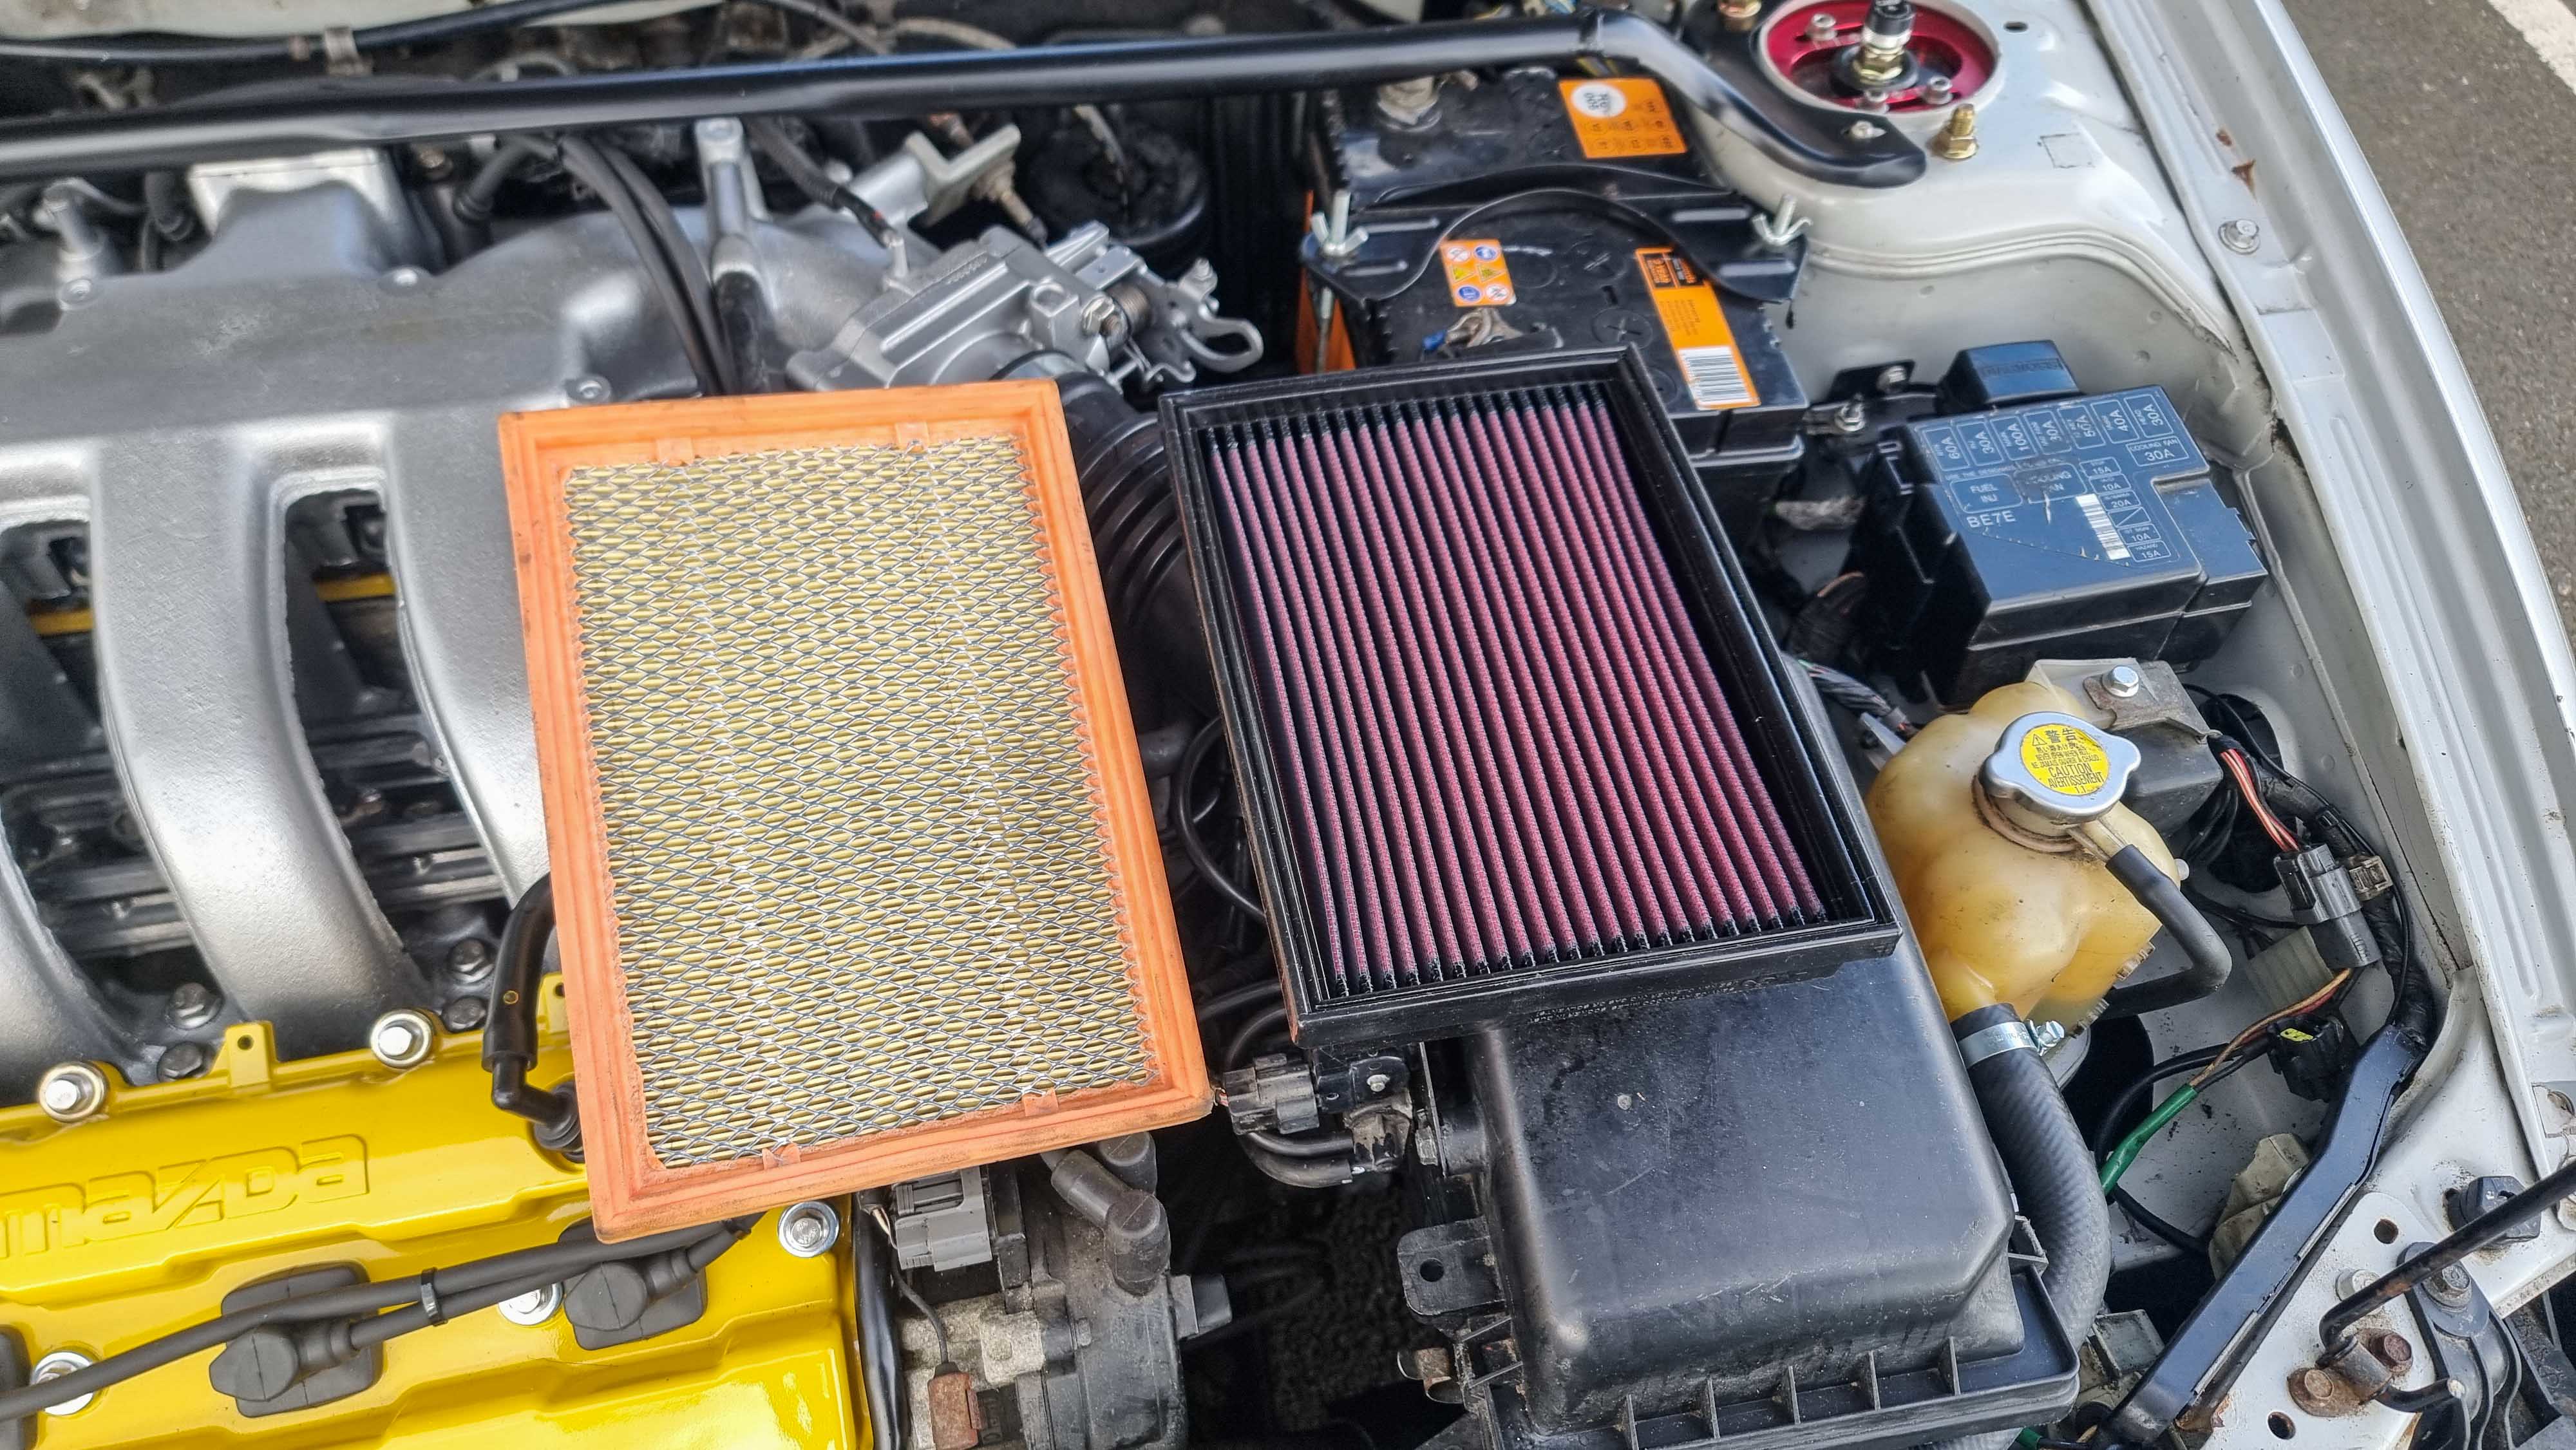
I managed to find a new old stock K&N panel filter. The bag had been opened so chances were high of the oil being non-existant. I ordered a recharge kit (cleaner and oil) and set about re-oiling the filter before installing.
The Youtube video can be found here:
https://www.youtube.com/watch?v=KWYx9-LvPlg
The last part of this update was an interior change. The car came with a steering wheel boss kit so I decided to put it to good use. These cars probably weren't designed for larger people like myself and I'm ashamed to admit that it can be a squeeze getting in and out.
With the battery disconnected and left for a couple of hours I could get to work with removing the airbag. There's x4 10mm bolts holding it on. With the airbag pulled out it revealed the loom, a large blue plug that housed a smaller blue plug and an orange one.
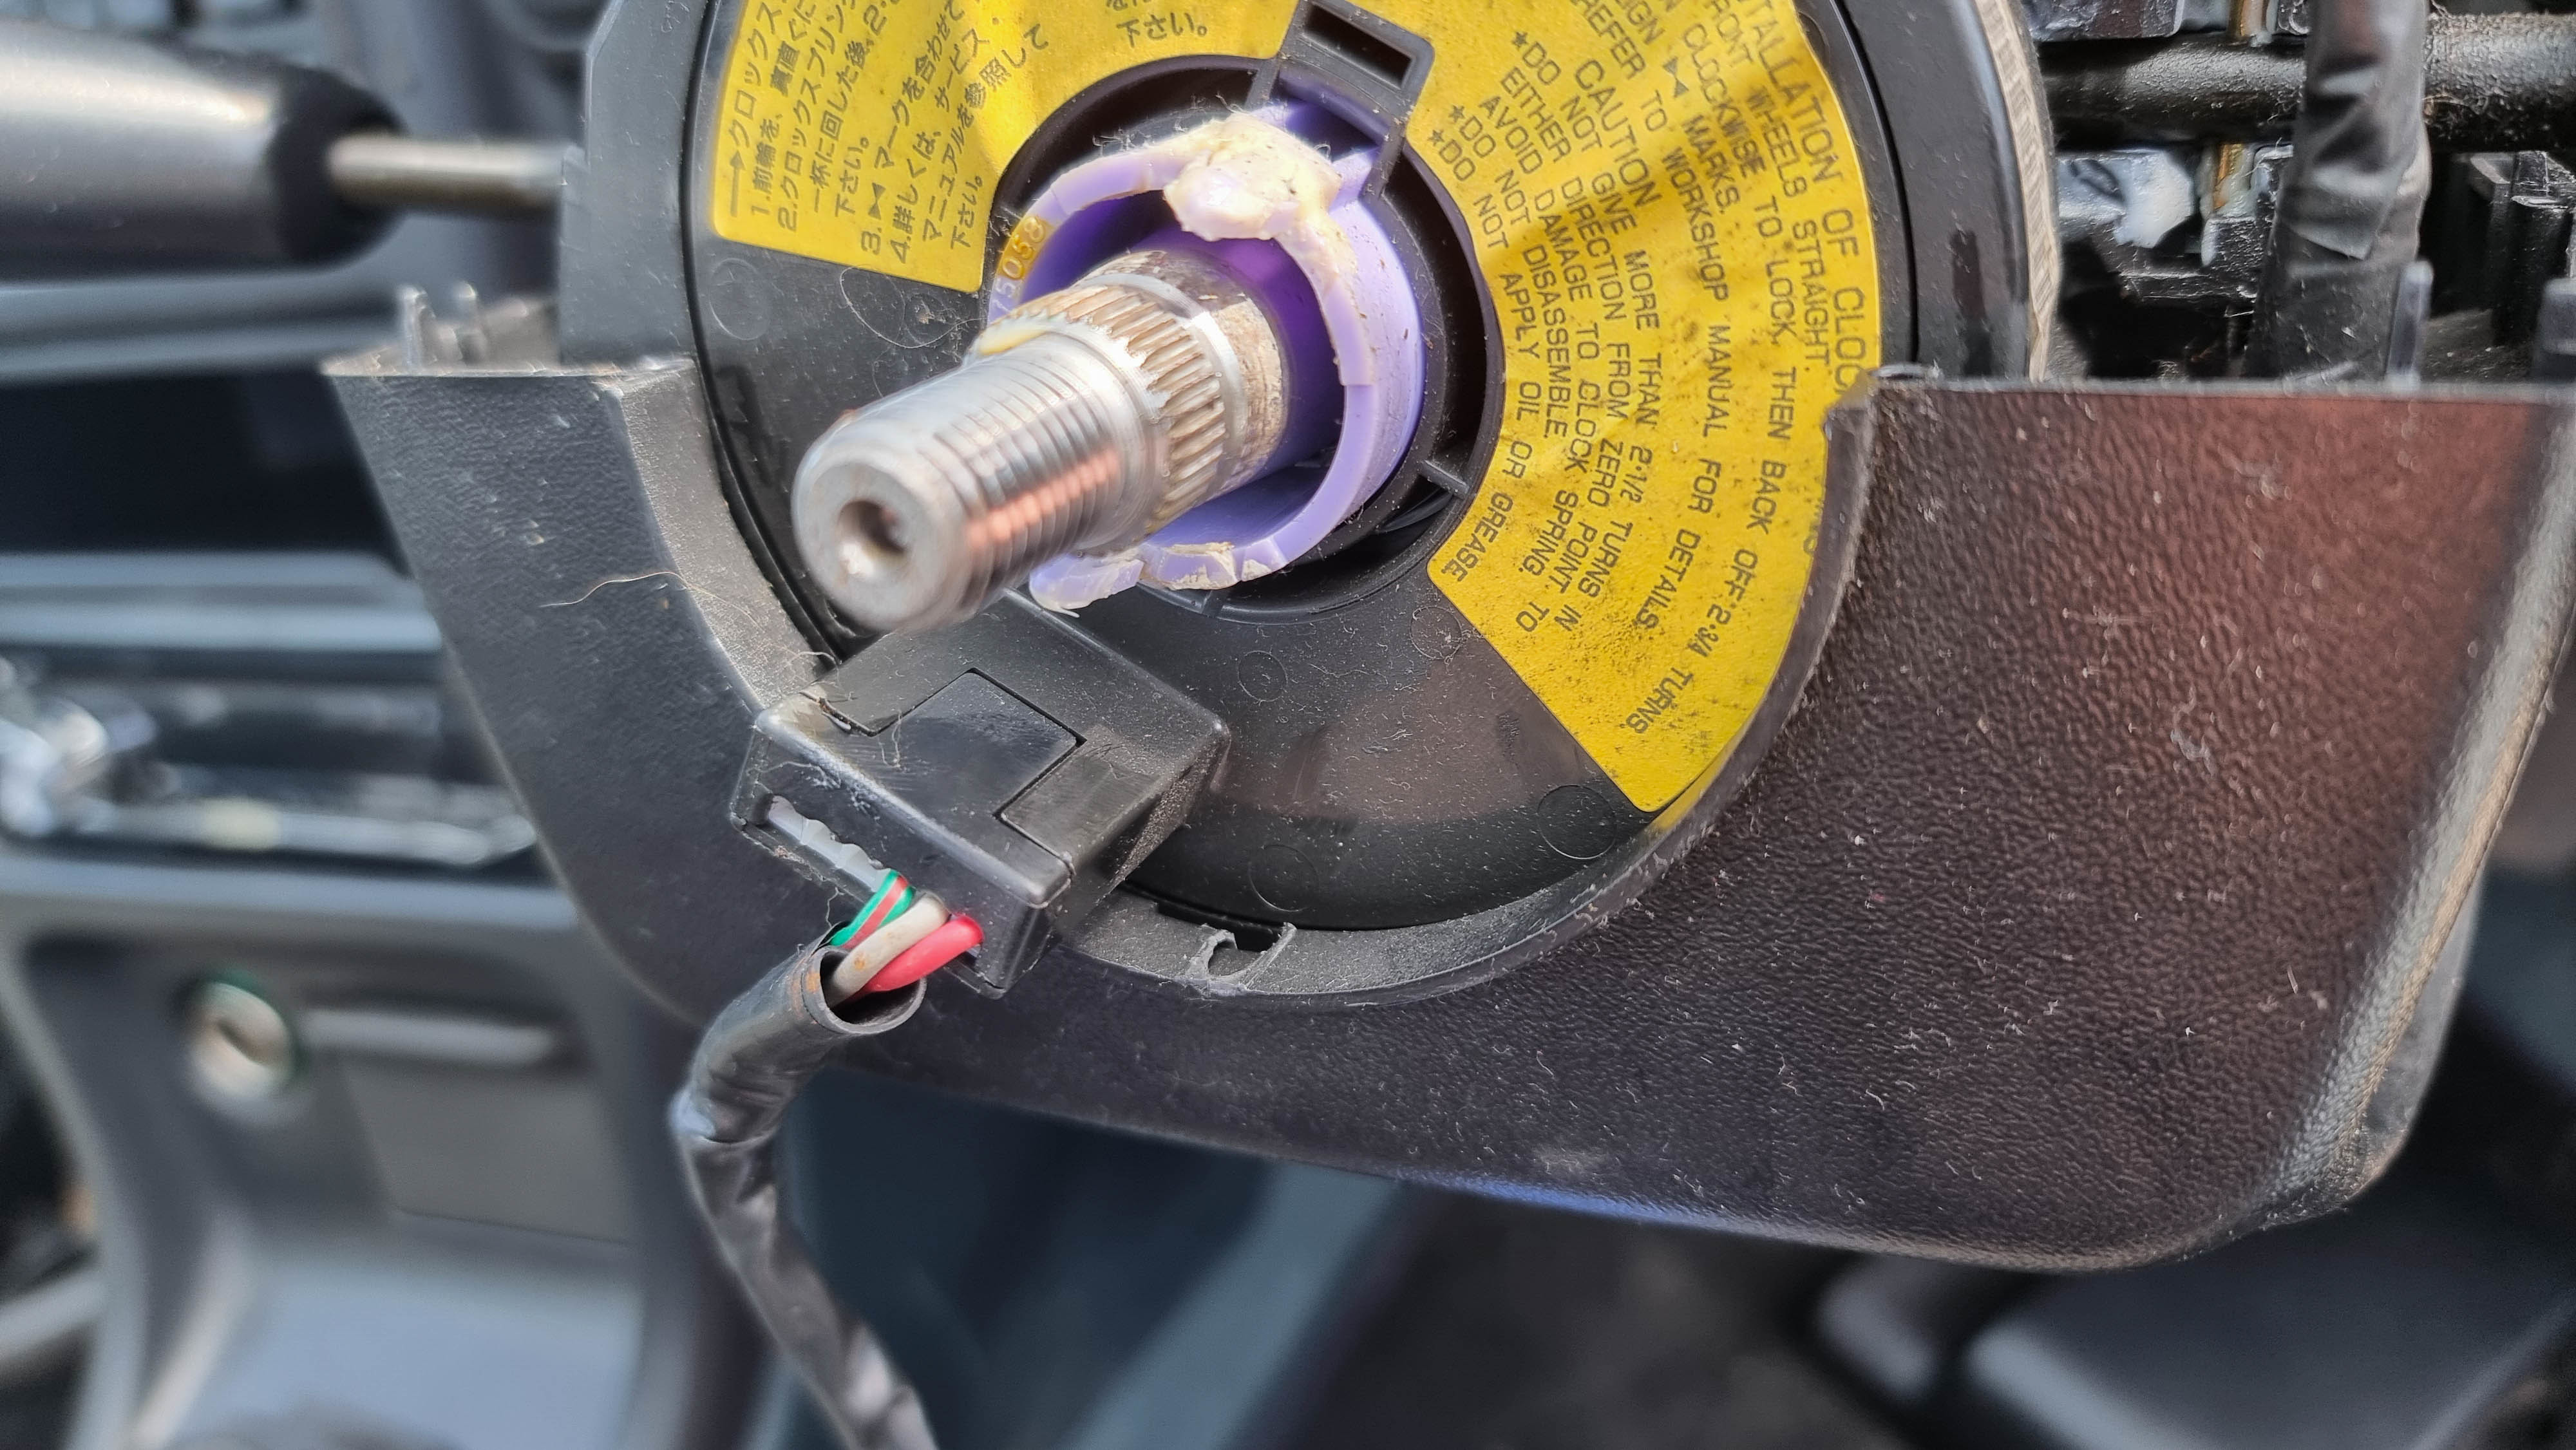
I couldn't unplug the short loom that goes to the clock spring. I followed the wiring back and found another blue and orange plug.
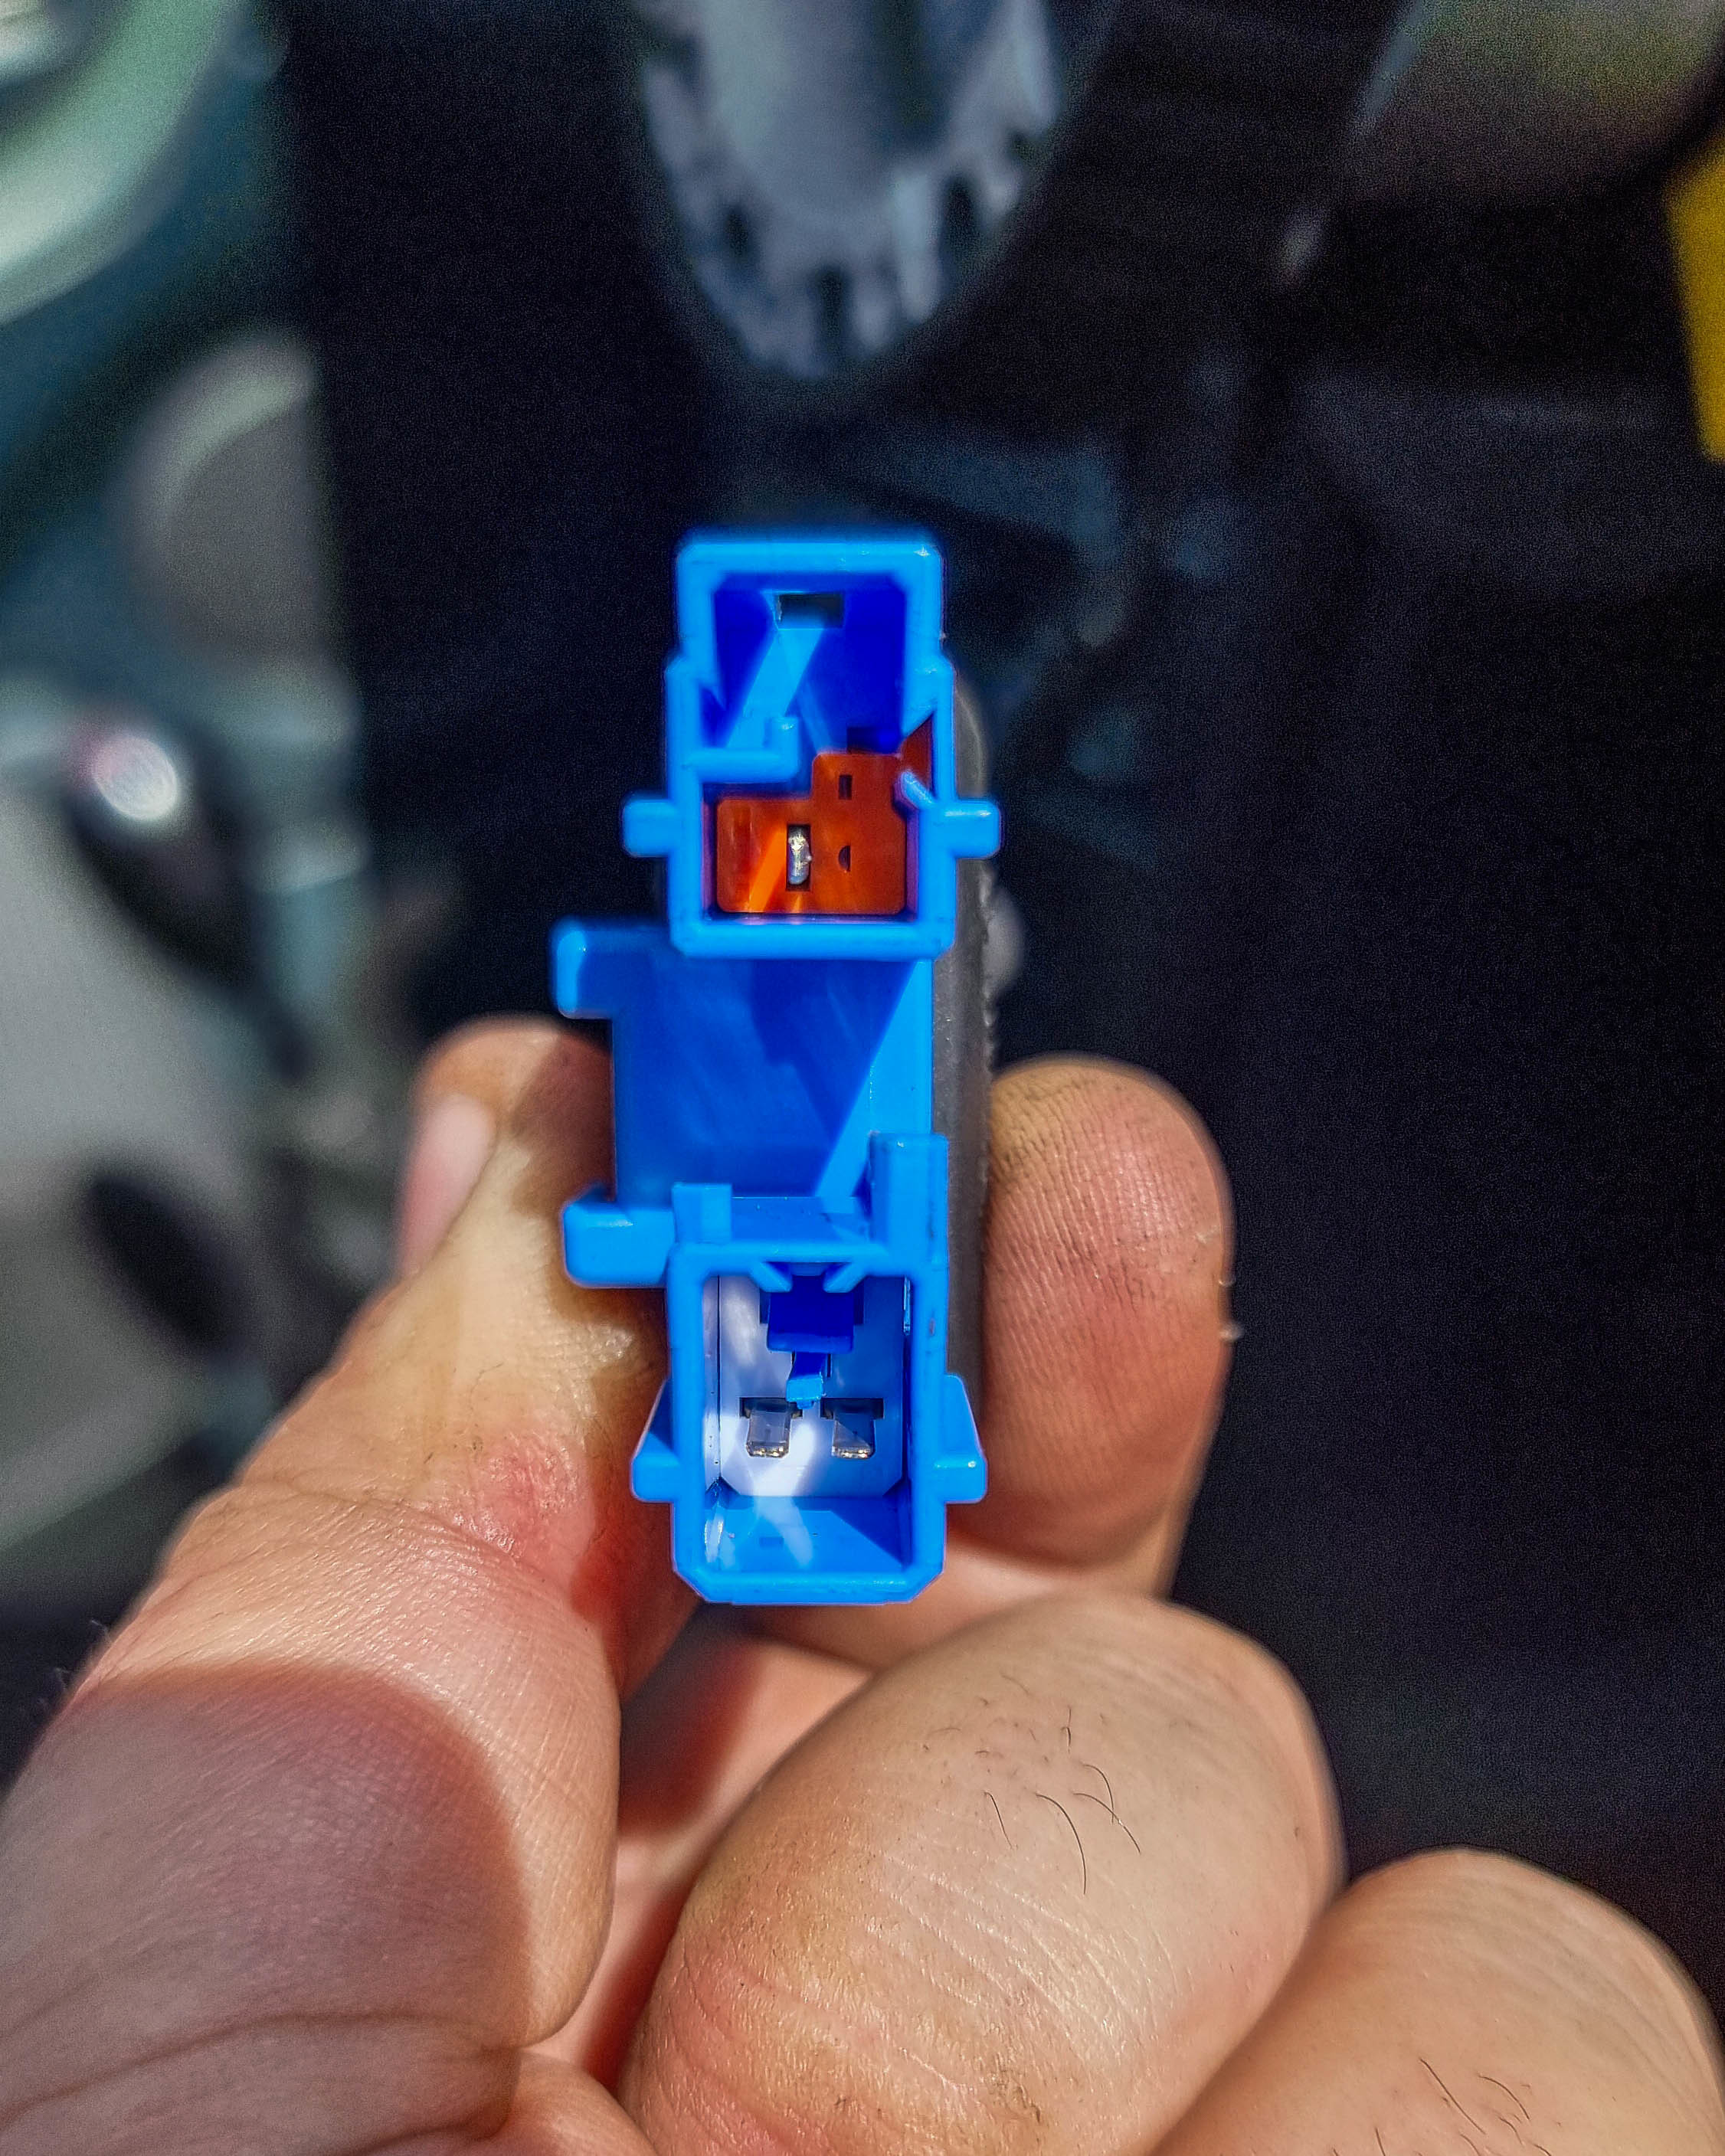
Club member Paul kindly sent me a couple of resistors, I pushed them into the blue plug and taped it up. I wrapped the wiring around the boss and pushed the cover for the HKB boss over the top.
Unfortunately the resistor still put the airbag light on the dash. I'm hoping its from a poor connection, but I didn't have my soldering iron to hand to make a little adaptor. I got the steering wheel bolted onto the hub and went for a test drive.
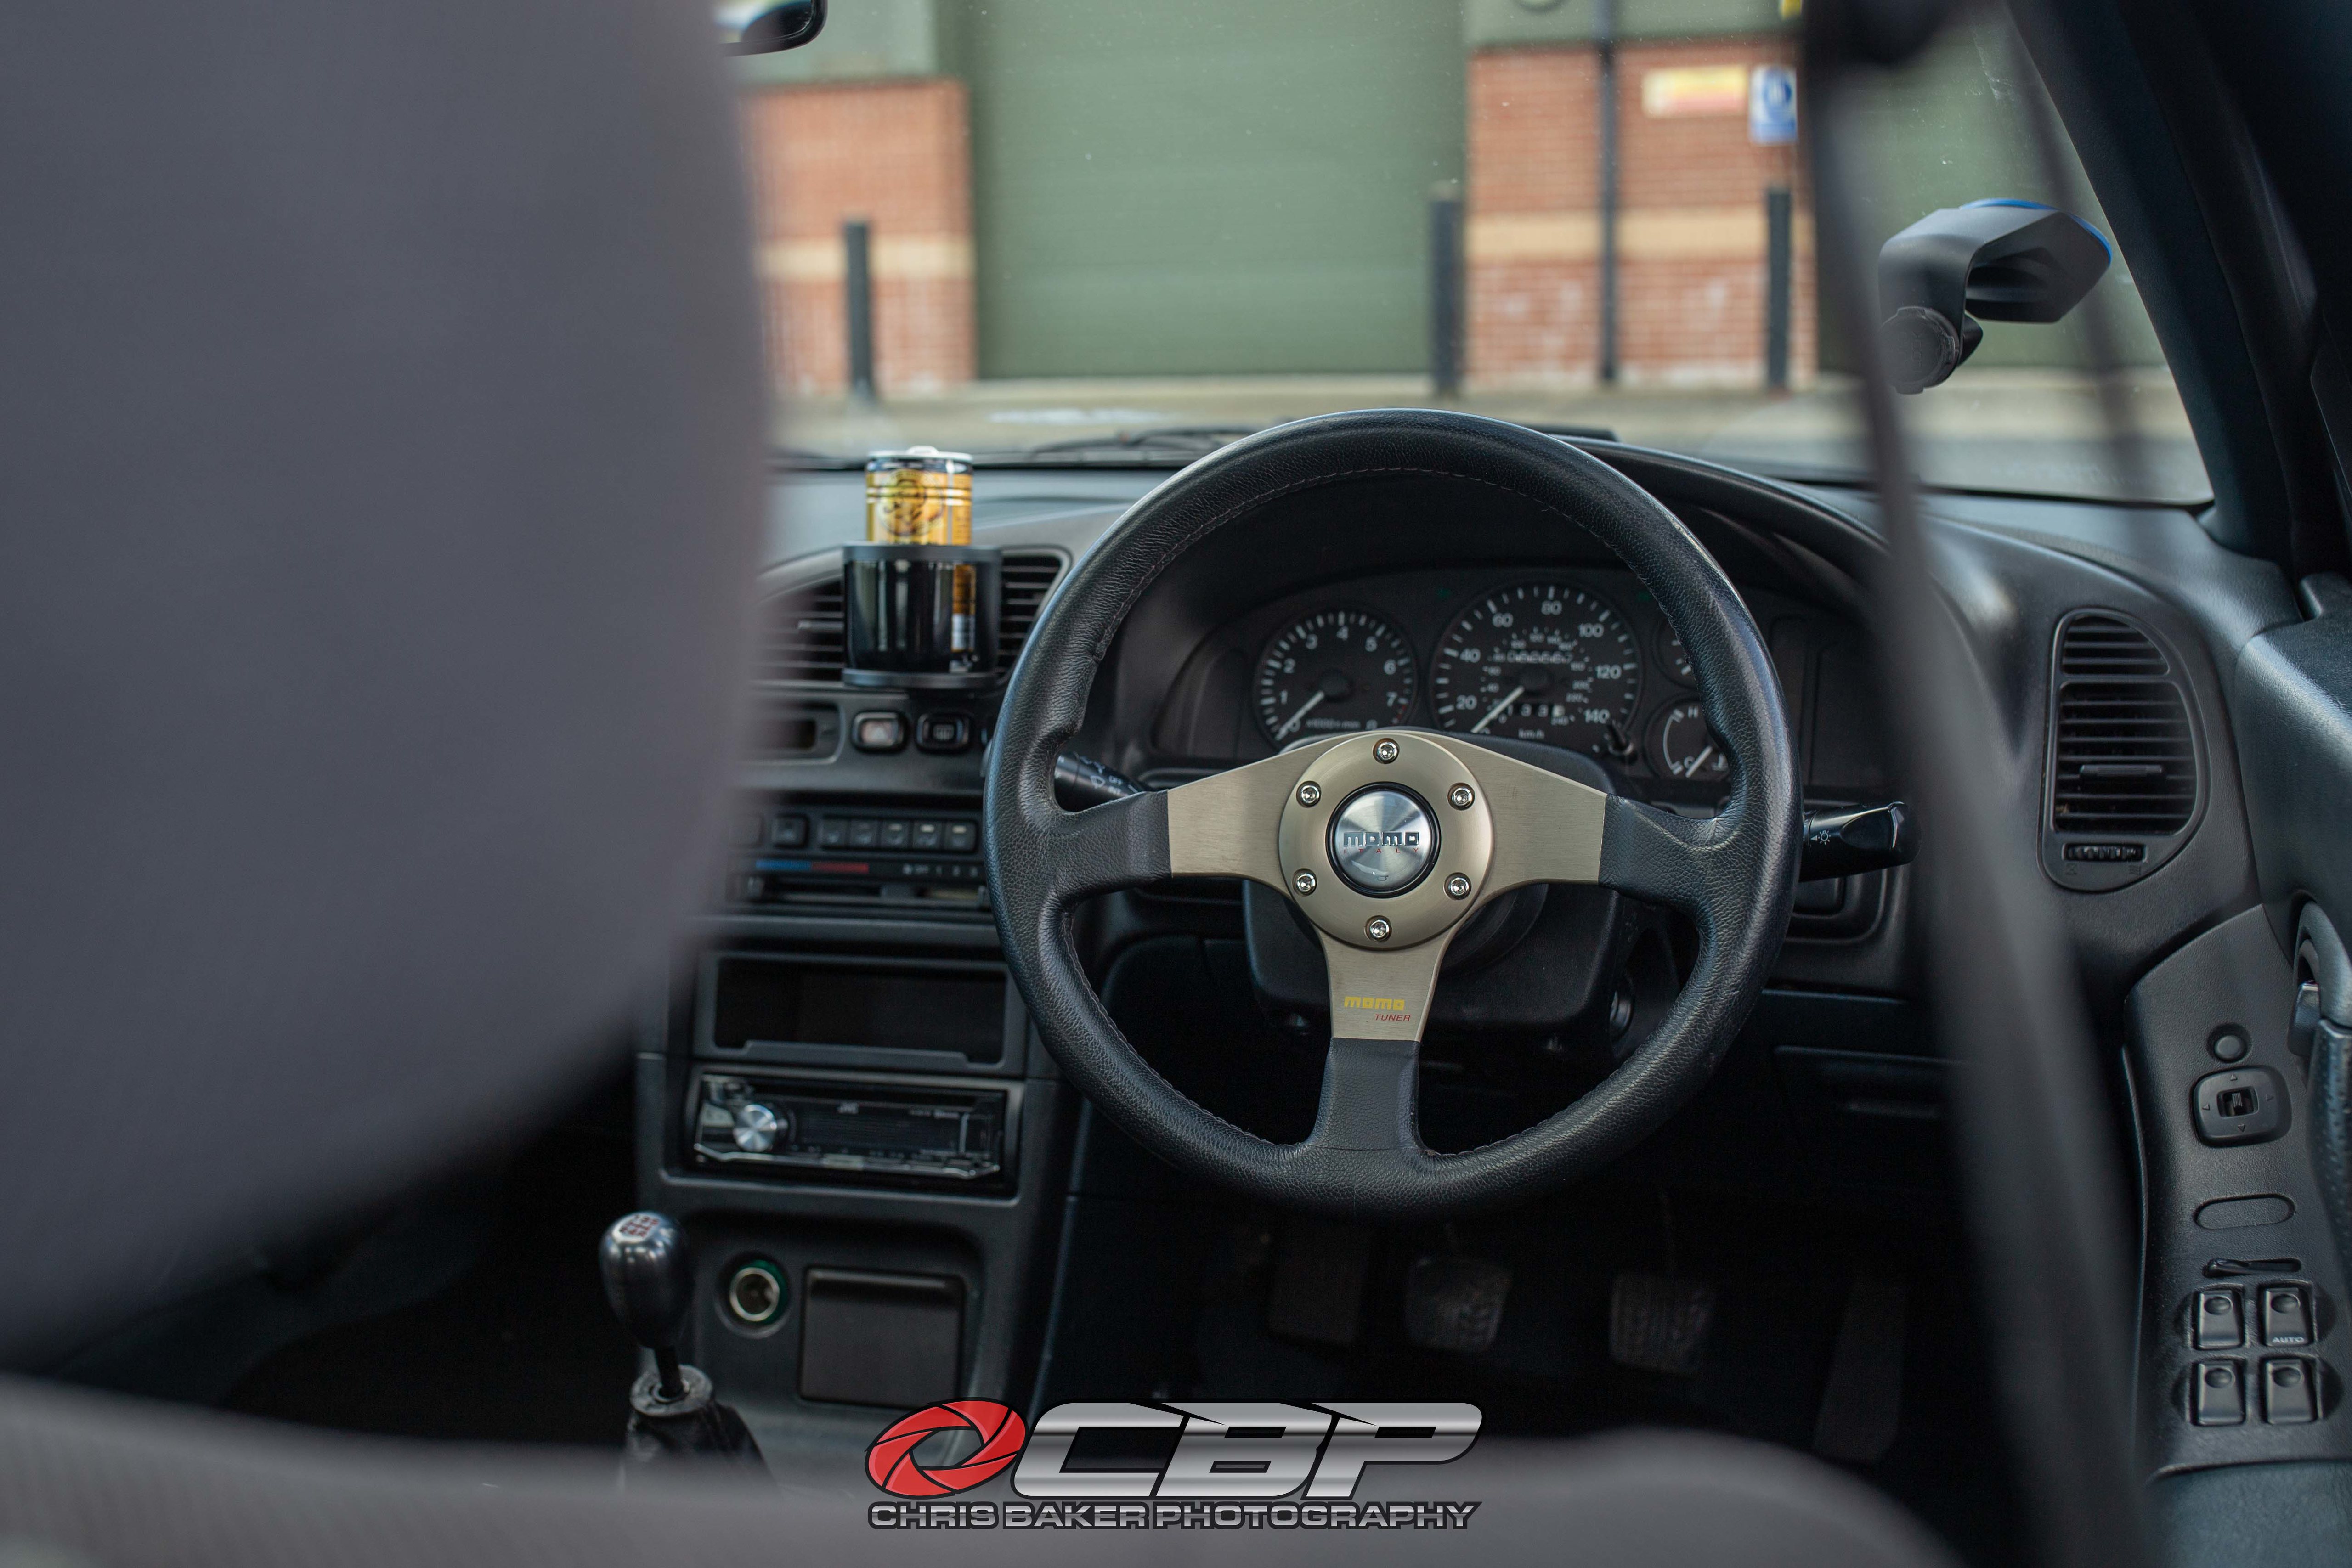
Finding a suitable steering wheel was tricky. The original measures 375mm but most steering wheels seem to be 350mm. I wanted something 90s styled to suit the car better.
After numerous messages to a long list of sellers I finally found this 320mm Momo Tuner on eBay in very good condition.
The youtube video can be found here:
https://www.youtube.com/watch?v=5DyBocEUXoc&t=...
Sorry for the long read, turns out it was a larger update than anticipated.
The next update is a big one, I've been wheel shopping!
While doing the clutch change we swapped over the passenger side gearbox mount. The bracket that bolts to the gearbox is different on the V6 and I so happened to have ordered a 1.5/1.8 mount *eye roll*
Luckily that bracket is on a spindle that passes through the bush mount and is held on by a large nut. The bush itself looked the same so we swapped the bracket over and it all bolted into place.
The reason for the change was because I get a knock when changing gears and sometimes under harsh acceleration. I had purchased all 4 mounts but we only had time to do the one (which made sense because of the clutch change).
Although we did look at the front mount, but the one supplied was incrorrect. Turns out the studs are wider on the V6 model.
The driver side mount was the next one to look at. With the engine supported with a trolley jack and a piece of wood it was time to loosen the nuts.

There's 4 nuts on the top, one is for an earth strap which sits ontop of another nut.

There's 2 bolts that hold the mount to the chassis. There's also a 10mm nut that holds a bracket onto the main mount.

The powder steering reservoir needs unbolting and lifting up and off from the bracket. From here the mount can be removed while navigating under the hose.

The mounts look pretty identical with a couple of minor differences. The top stud is longer on the new one and there's an additional bracket? on the right hand side which faces the bulk head.

At first thought I didn't think it would line up. But I threaded in the bolts by a couple of turns and they equally tighened up. The top bracket dropped straight on


Unfortunately I still have the knocking noise. I've got front lower ball joints and stabaliser links to change. But I've got a strong feeling it's going to be the rear engine mount. To do that the subframe needs removing because access to the bolts is blocked by the bulkhead.
The next job was something that was being revisited from the engine bay refresh update. You may remember me breaking the check valve and barb on a vacuum chamber which are bolted to the underside of the inlet manifold.
I made an(other) order with Amayama for some replacement parts to fix the issue. I decided to buy both chambers, check valve and the elbow hose.

After the refresh I knew something wasn't right, the car was lacking a severe amount of power (well...what ever is left lol) So I knew it was related to the check valve I got from my work.
It didn't take long to remove the inlet manifold (I'm getting pretty good at doing this now!) to see what was causing me problems.

The barb had pulled itself out from the chamber (I already knew the glue had failed from last time), that would explain alot!
It didn't take long to fit the new parts, it's a good job I purchased the other chamber because that barb had snapped off to.

I'm kicking myself for not ordering a new foam buffer ring thing that goes around the check valve, it's just to stop the check valve from rubbing against the inlet manifold. Hopefully this one lasts a little while longer.
With it all back together it was time for a test drive. My face lit up when the VRIS engaged and the car was back to running normal again.
Youtube video can be found here:
https://www.youtube.com/watch?v=sLt9-6Hpxps

A couple of Sunday's ago I was invited to the local Mazda dealership for a small event they had organised for the 35th Anniversary of the MX5 (or Miata to some readers), it was also the 30th Anniversary of the 323F
 . The MX5 club were there having a number of cars on display. I did arrive late due to being at my Cars & Coffee event that I organise.
The rain hadn't stopped all morning so alot of people had already left. The event finished at 12:30pm and I waited till everyone had left so I could get some photos outside the dealership.
Fun Fact: The owners manual that I got sent by another member, that car was originally sold at this dealership back in the mid '90s. The staff even recognised the signatures in the service history.
I managed to find a new old stock K&N panel filter. The bag had been opened so chances were high of the oil being non-existant. I ordered a recharge kit (cleaner and oil) and set about re-oiling the filter before installing.

The Youtube video can be found here:
https://www.youtube.com/watch?v=KWYx9-LvPlg
The last part of this update was an interior change. The car came with a steering wheel boss kit so I decided to put it to good use. These cars probably weren't designed for larger people like myself and I'm ashamed to admit that it can be a squeeze getting in and out.
With the battery disconnected and left for a couple of hours I could get to work with removing the airbag. There's x4 10mm bolts holding it on. With the airbag pulled out it revealed the loom, a large blue plug that housed a smaller blue plug and an orange one.

I couldn't unplug the short loom that goes to the clock spring. I followed the wiring back and found another blue and orange plug.
- FOR FUTURE REFERENCE ** The Orange plug with single wire is for the horn. The blue plug with 2 wires are for the airbag

Club member Paul kindly sent me a couple of resistors, I pushed them into the blue plug and taped it up. I wrapped the wiring around the boss and pushed the cover for the HKB boss over the top.
Unfortunately the resistor still put the airbag light on the dash. I'm hoping its from a poor connection, but I didn't have my soldering iron to hand to make a little adaptor. I got the steering wheel bolted onto the hub and went for a test drive.

Finding a suitable steering wheel was tricky. The original measures 375mm but most steering wheels seem to be 350mm. I wanted something 90s styled to suit the car better.
After numerous messages to a long list of sellers I finally found this 320mm Momo Tuner on eBay in very good condition.
The youtube video can be found here:
https://www.youtube.com/watch?v=5DyBocEUXoc&t=...
Sorry for the long read, turns out it was a larger update than anticipated.
The next update is a big one, I've been wheel shopping!
Since buying the car, I knew the S14 wheels weren't going to be a 'forever' wheel. They're not a bad looking wheel and they do suit the car, but I felt the large flat spokes were abit boring.
I've spent countless hours browsing through selling sites and despite specific searches, I kept being presented with everything but what I was looking for.
I wanted to stay with 16s, I knew this would limit my search but I wasn't expecting it to be so difficult. Majority of results came back as 15" (I'm unsure if they're fit over the brakes) or 17" (can look too big on the car) or the wrong PCD.
Here are a few options,unfortunately I didn't have a HUUUGE budget which also didn't help the search.
Rota Fighter (Volk Racing CE28 reps) Not a huge fan of multi spokes
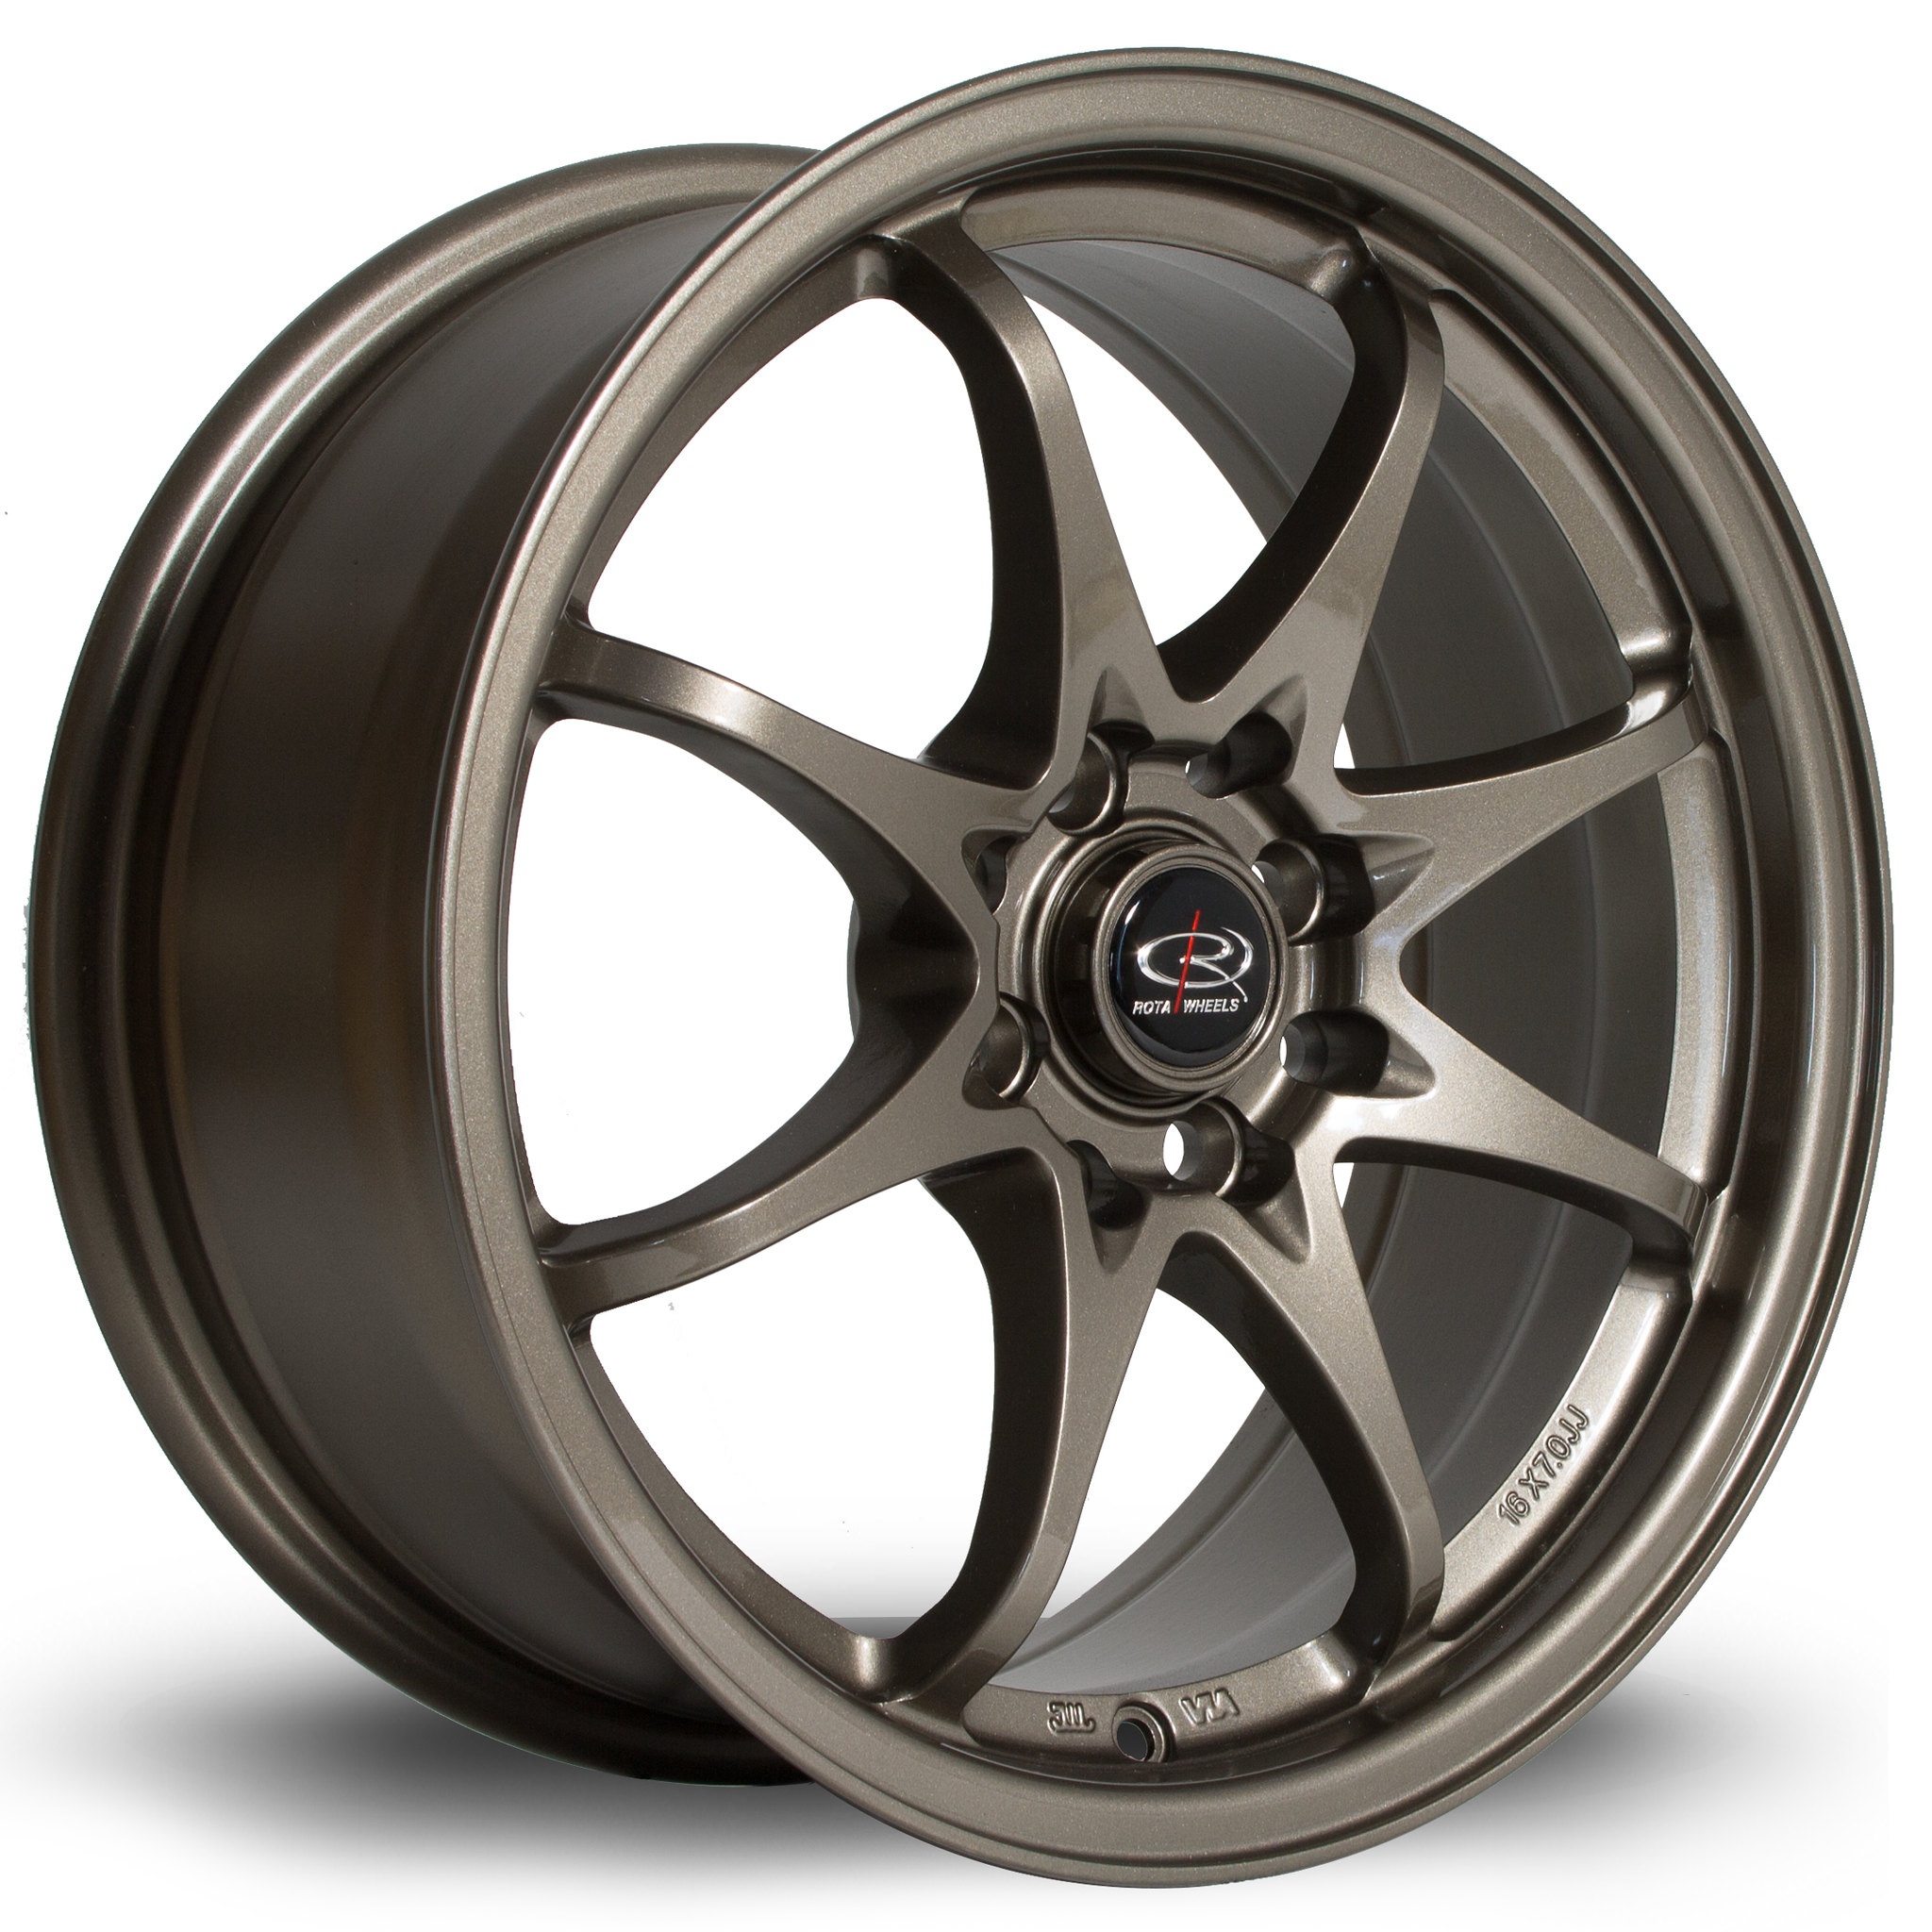
Japan Racing JR3/Rota Grid (Volk Racing TE37 reps)
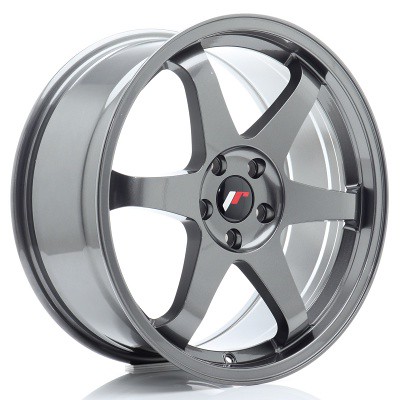
Japan Racing JR11 (Weds SA-99R reps) again, quite a few spokes
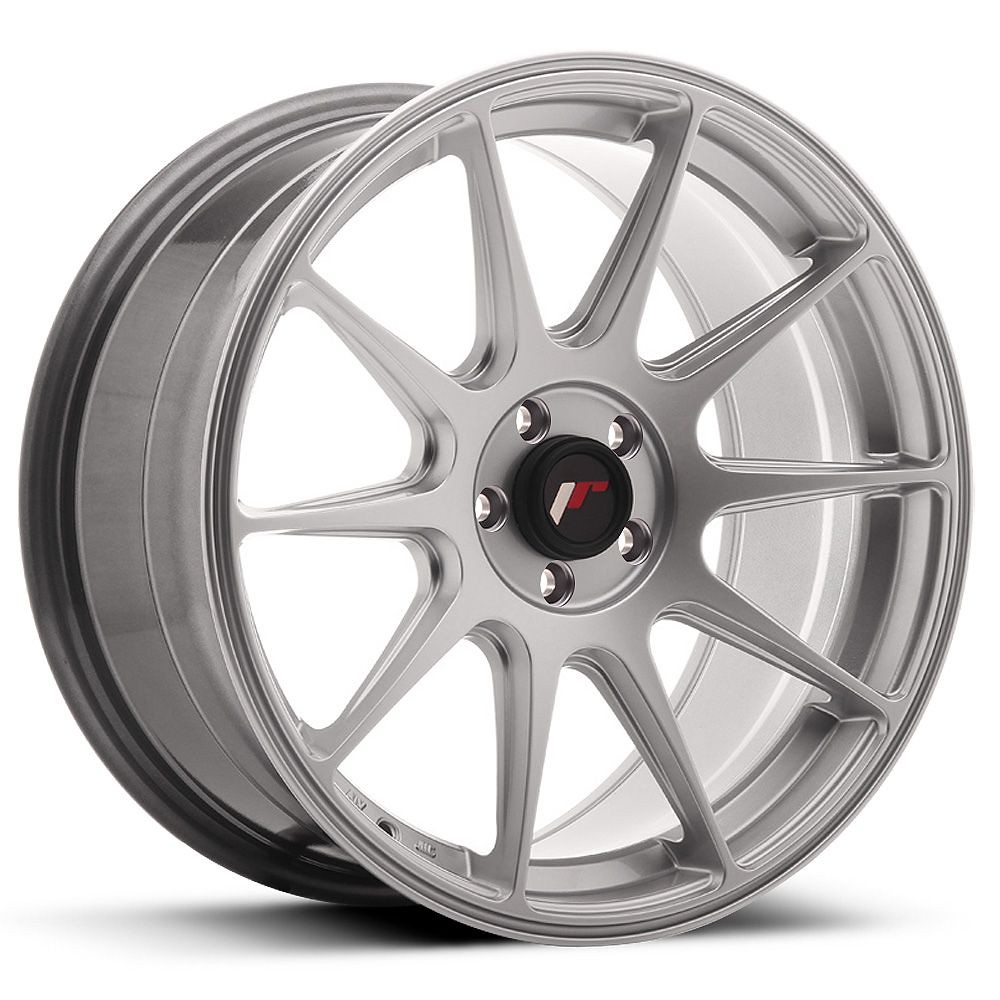
I've always liked the Enkei RFP01 design and it works on alot of cars. It was one wheel I couldn't find in the specs I was after (at the time)
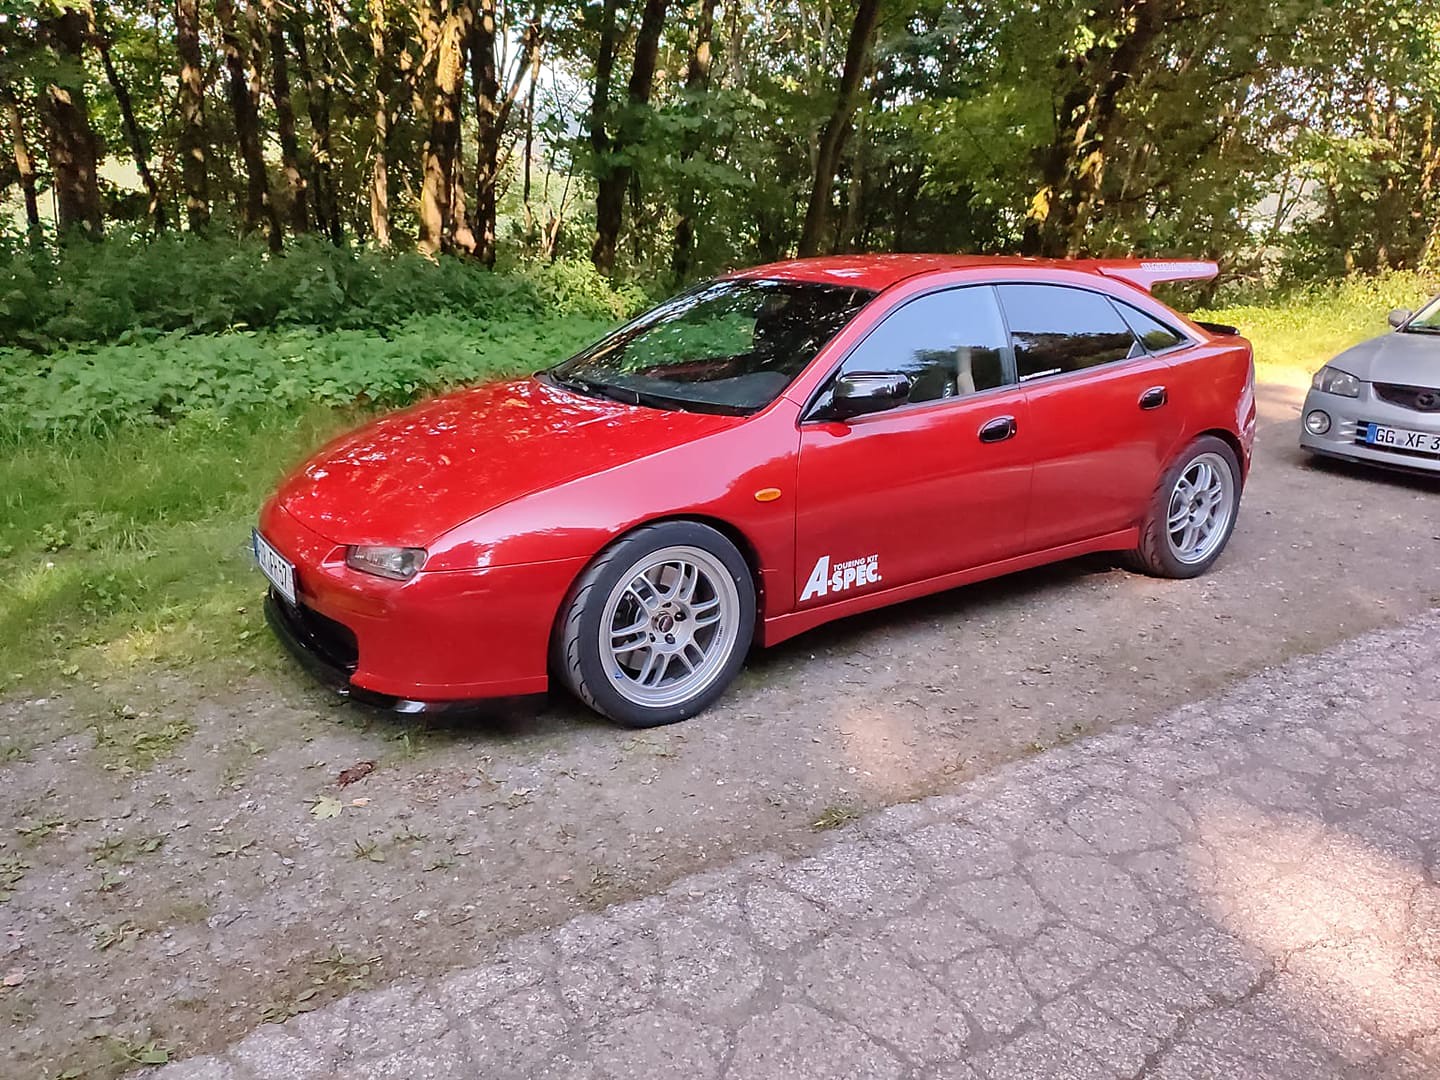
The Rota Slipstream were my first choice. I had these on the Motul K11 Micra, its a simple design which looks great
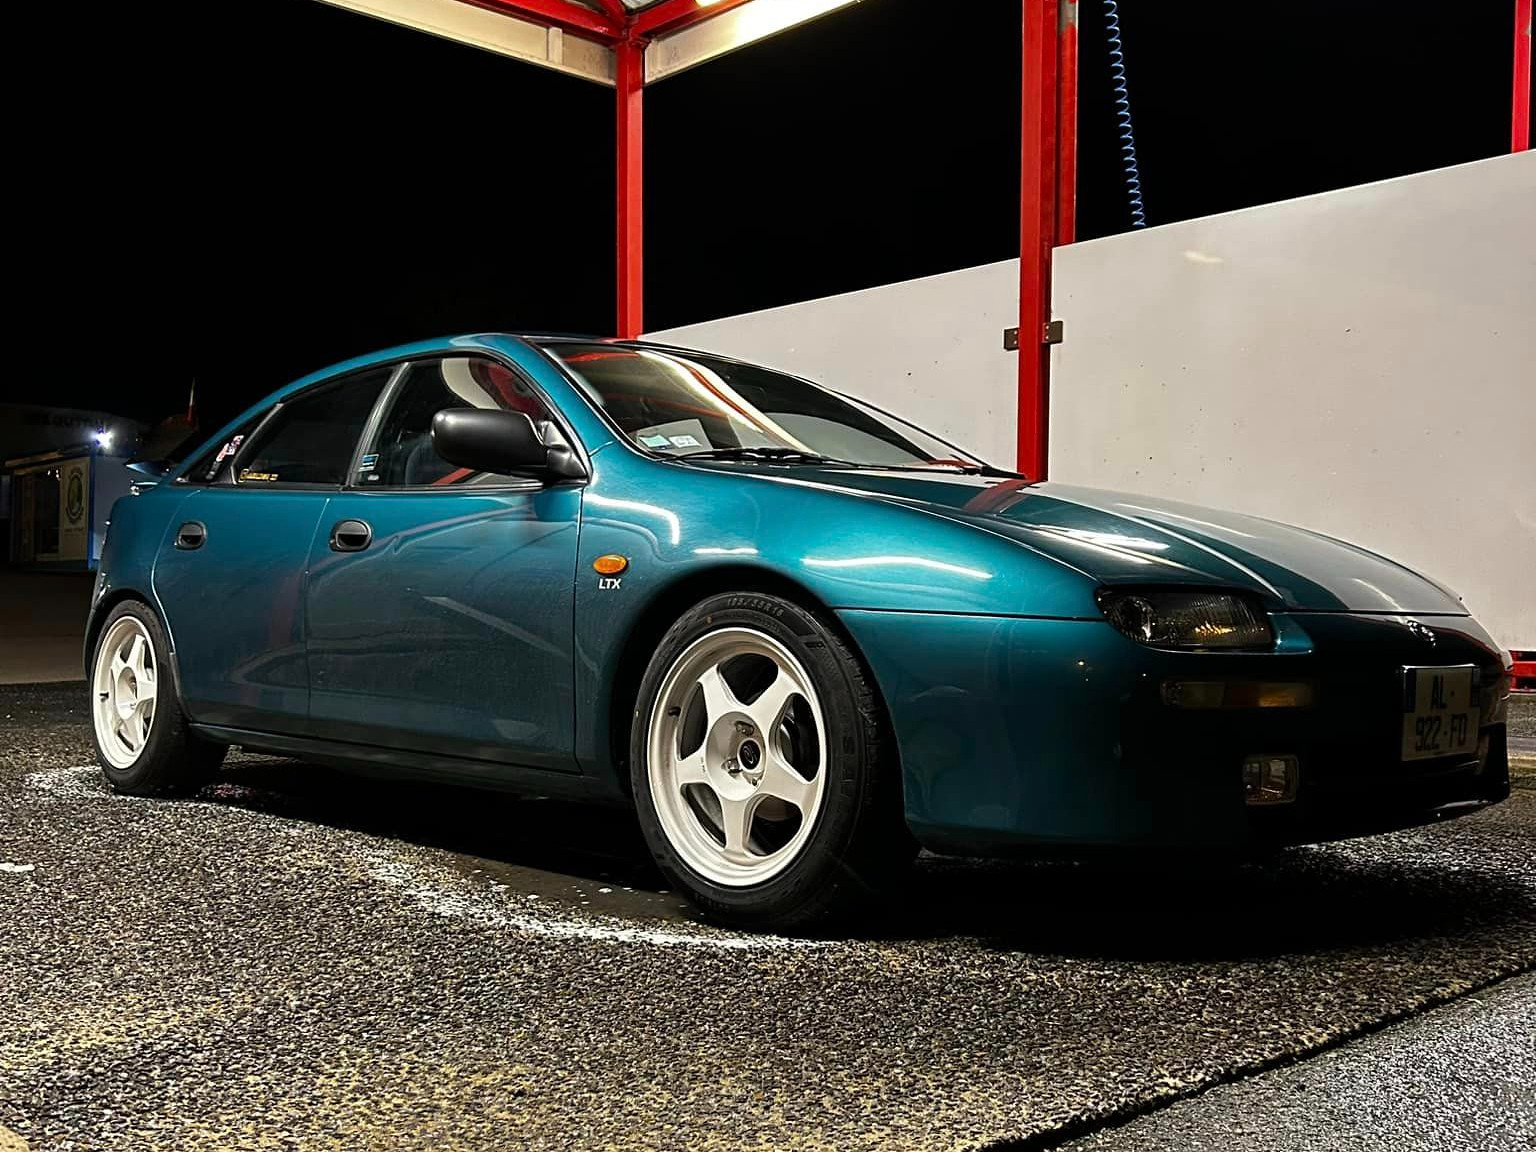
This grey 323F has the real deal Desmond Regamasters (or so the owner says)
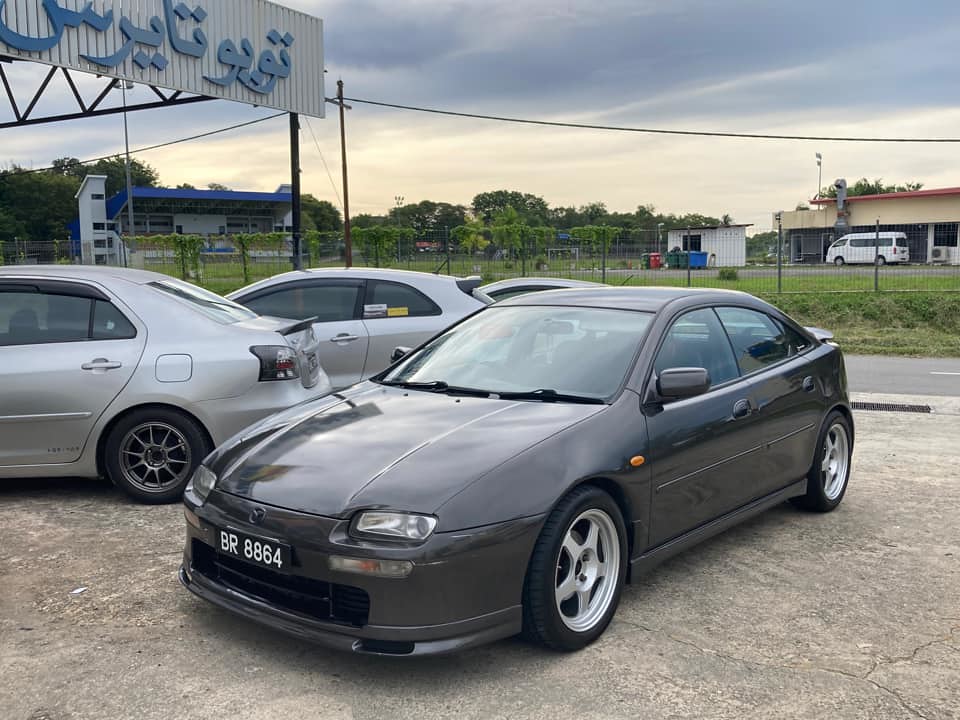
Mazdaspeed installed their MS01 wheel on their Lantis models, which came in 16". But as you can imagine these can hold a good 2nd hand value
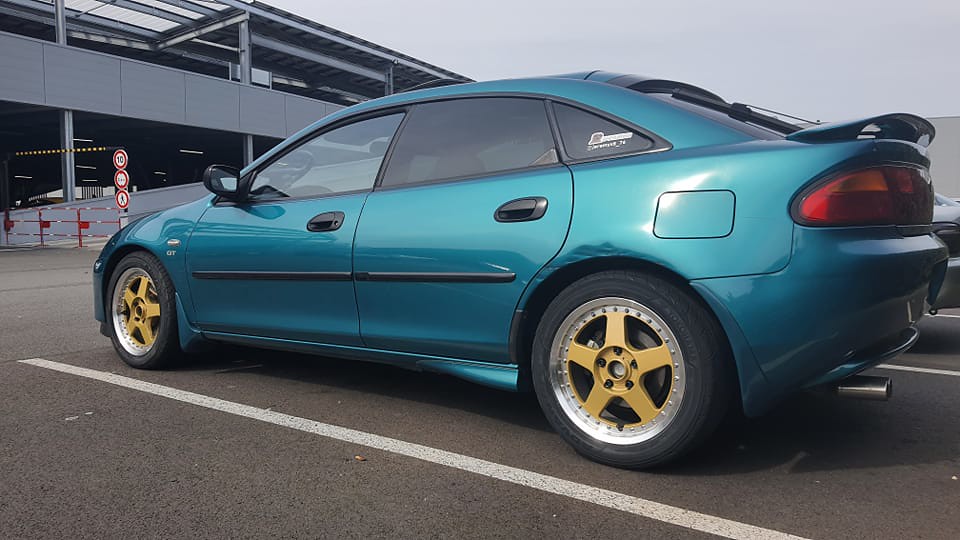
The more I searched for examples the more I prefered a 5 or 6 spoke design. I did come across a set of Work Equip 05s but by the time they're refurbed it'd be close to a 4 figure total. Plus my days of keeping polished lips clean are in the past from the Work Meister S1s on the purple MX5.
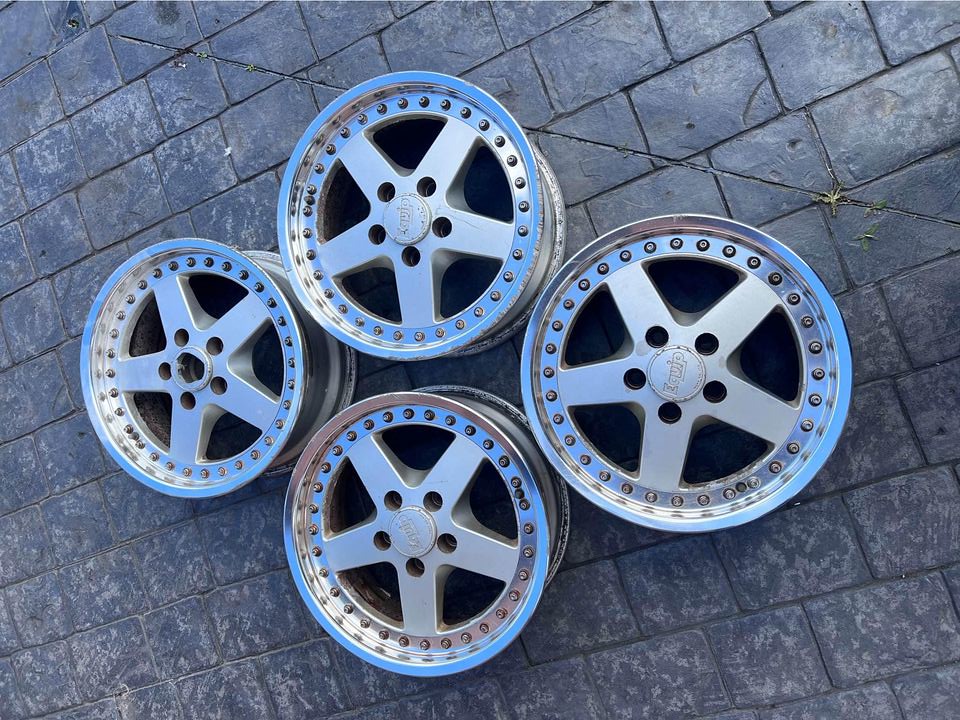
That's when I had a wheel design pop into my head which may tick all of the boxes. An OEM wheel from a rival manufacturer.
I sent out a few messages to people who may know the whereabouts of said wheel, which led me to a seller local to me. I immediately went to view them and providing they were all straight with no major damage or cracks, they'd be coming home with me.
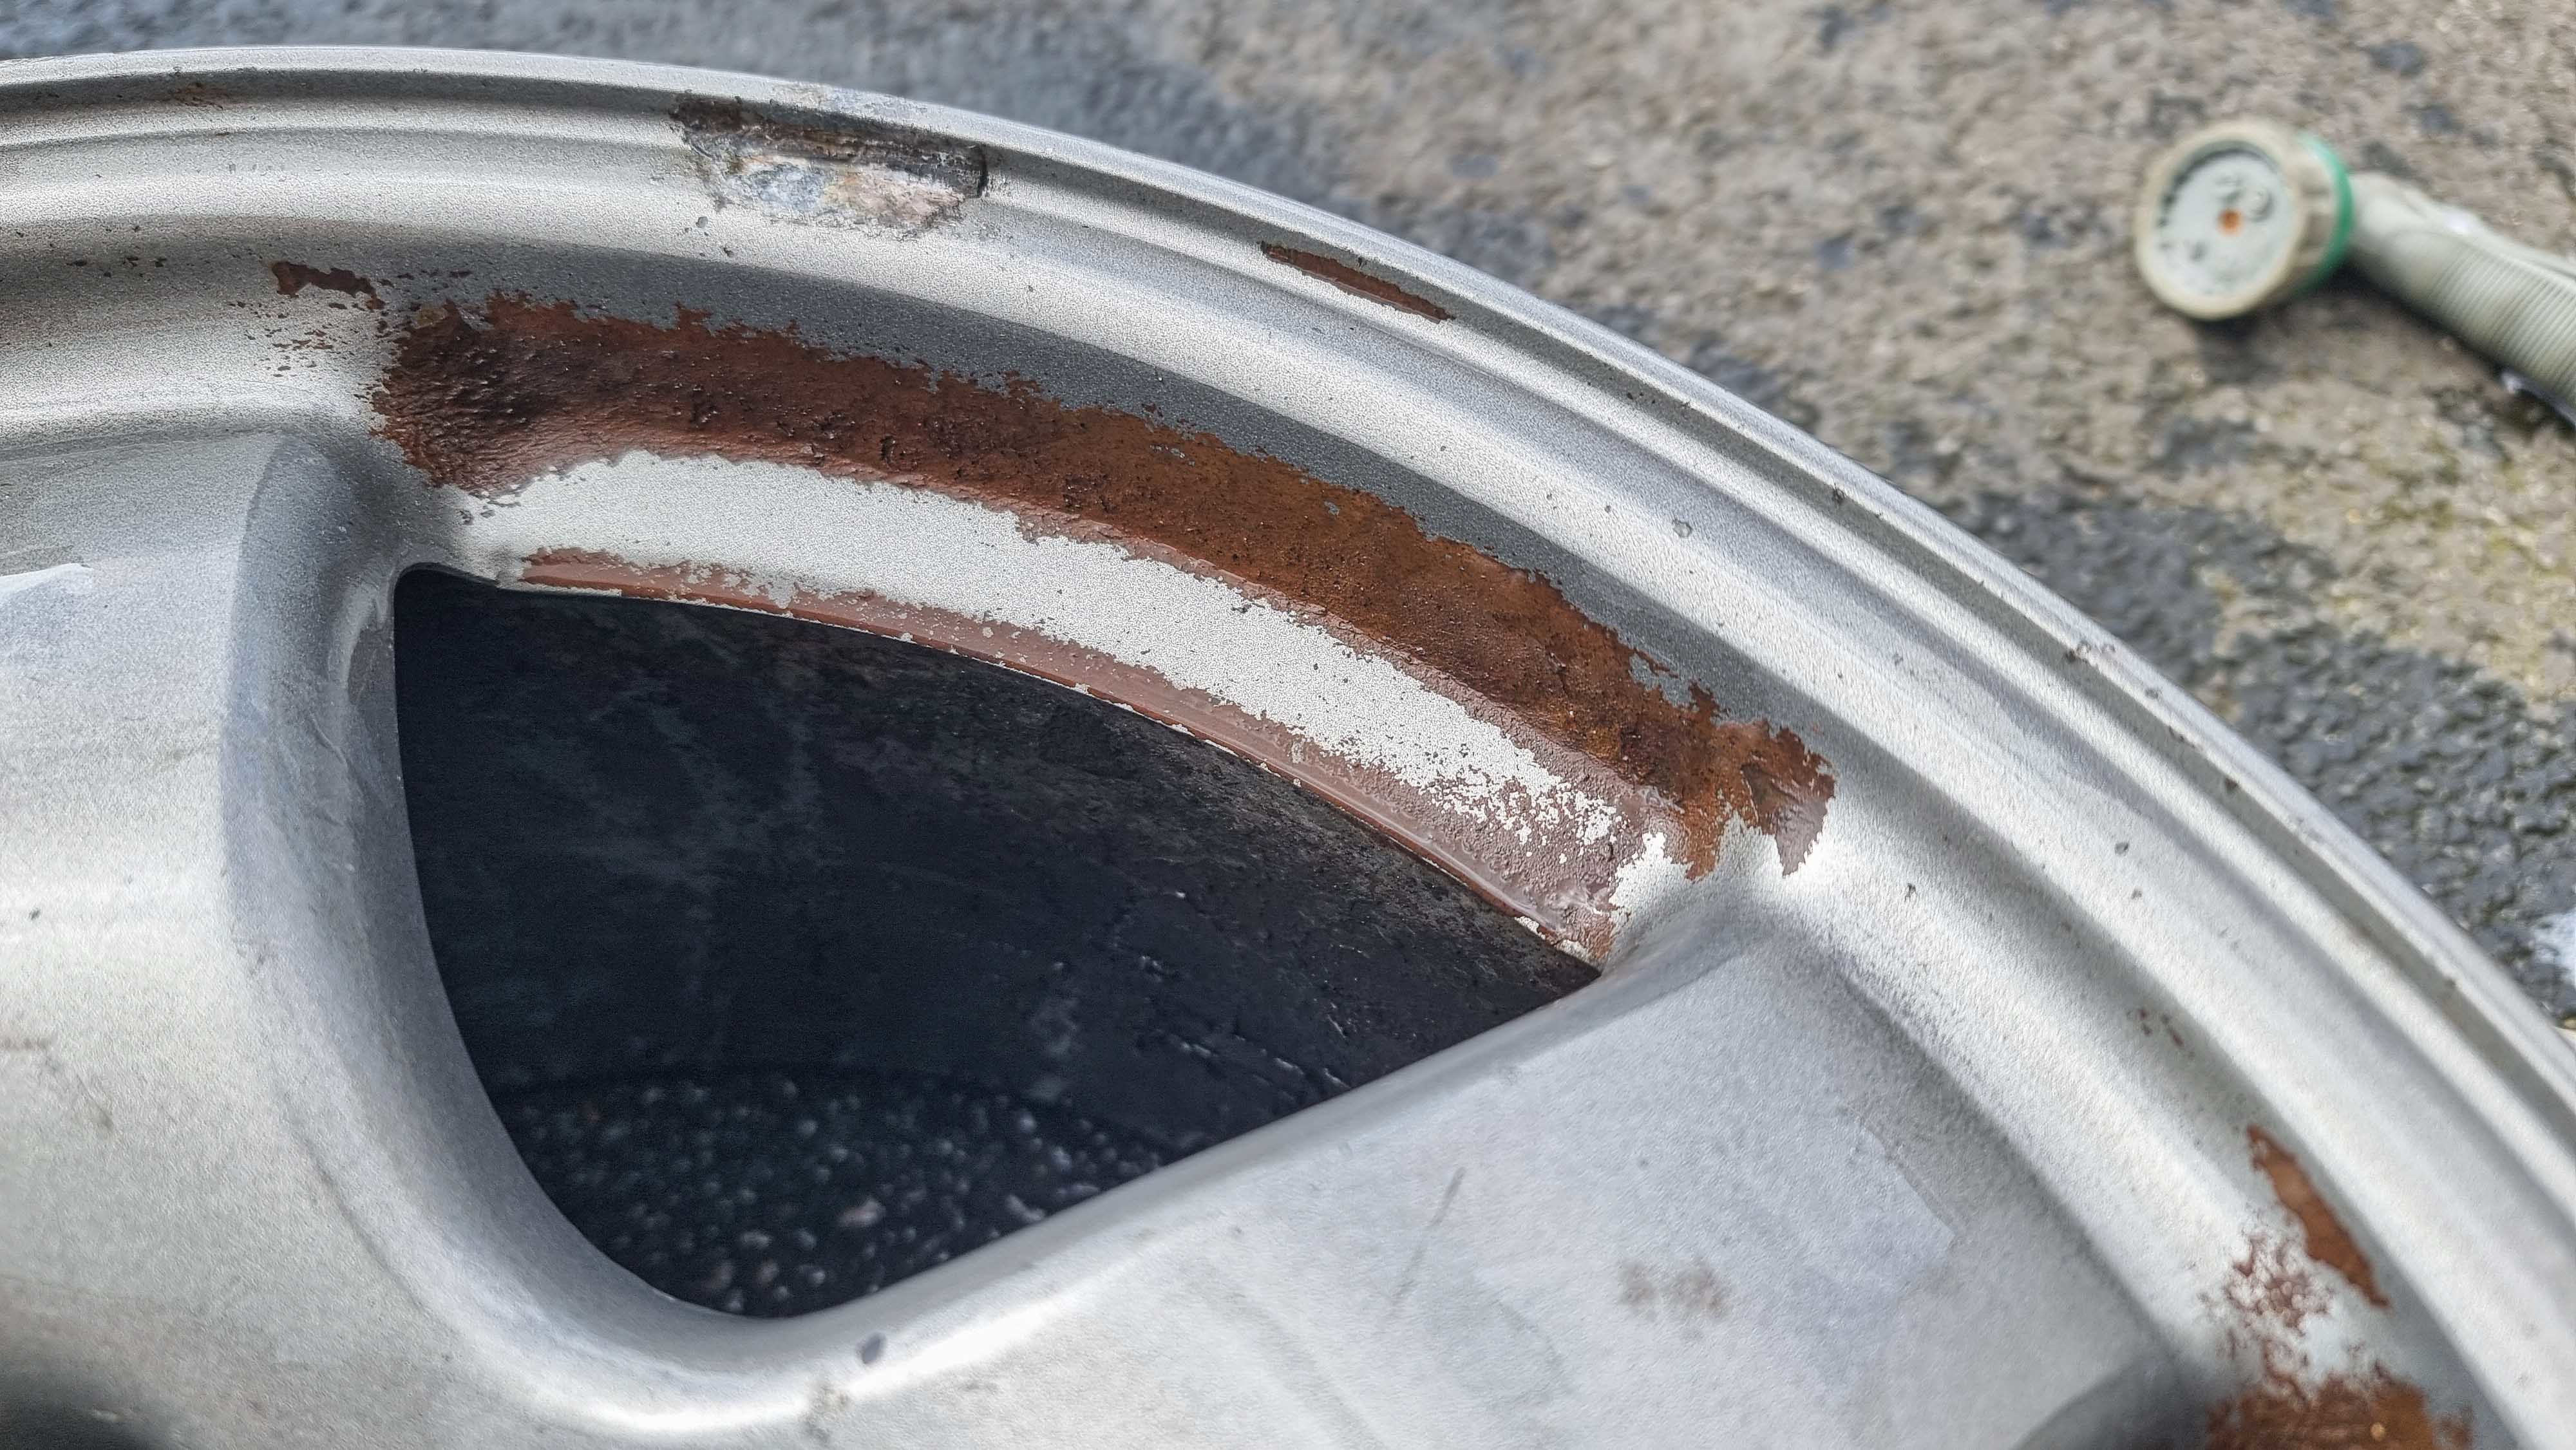
The wheels had been stored for a number of years outside, but the lips had quite alot of brake dust embedded
I tried the strongest wheel cleaner/fall out remover I had and it didn't shift it at all. This meant I would struggle to clean them and the only way was a refurb.

I was able to get my hands on a knackered tyre in the same size as the Kumhos. I used this for testing on the car to make sure they cleared the arches and brakes.
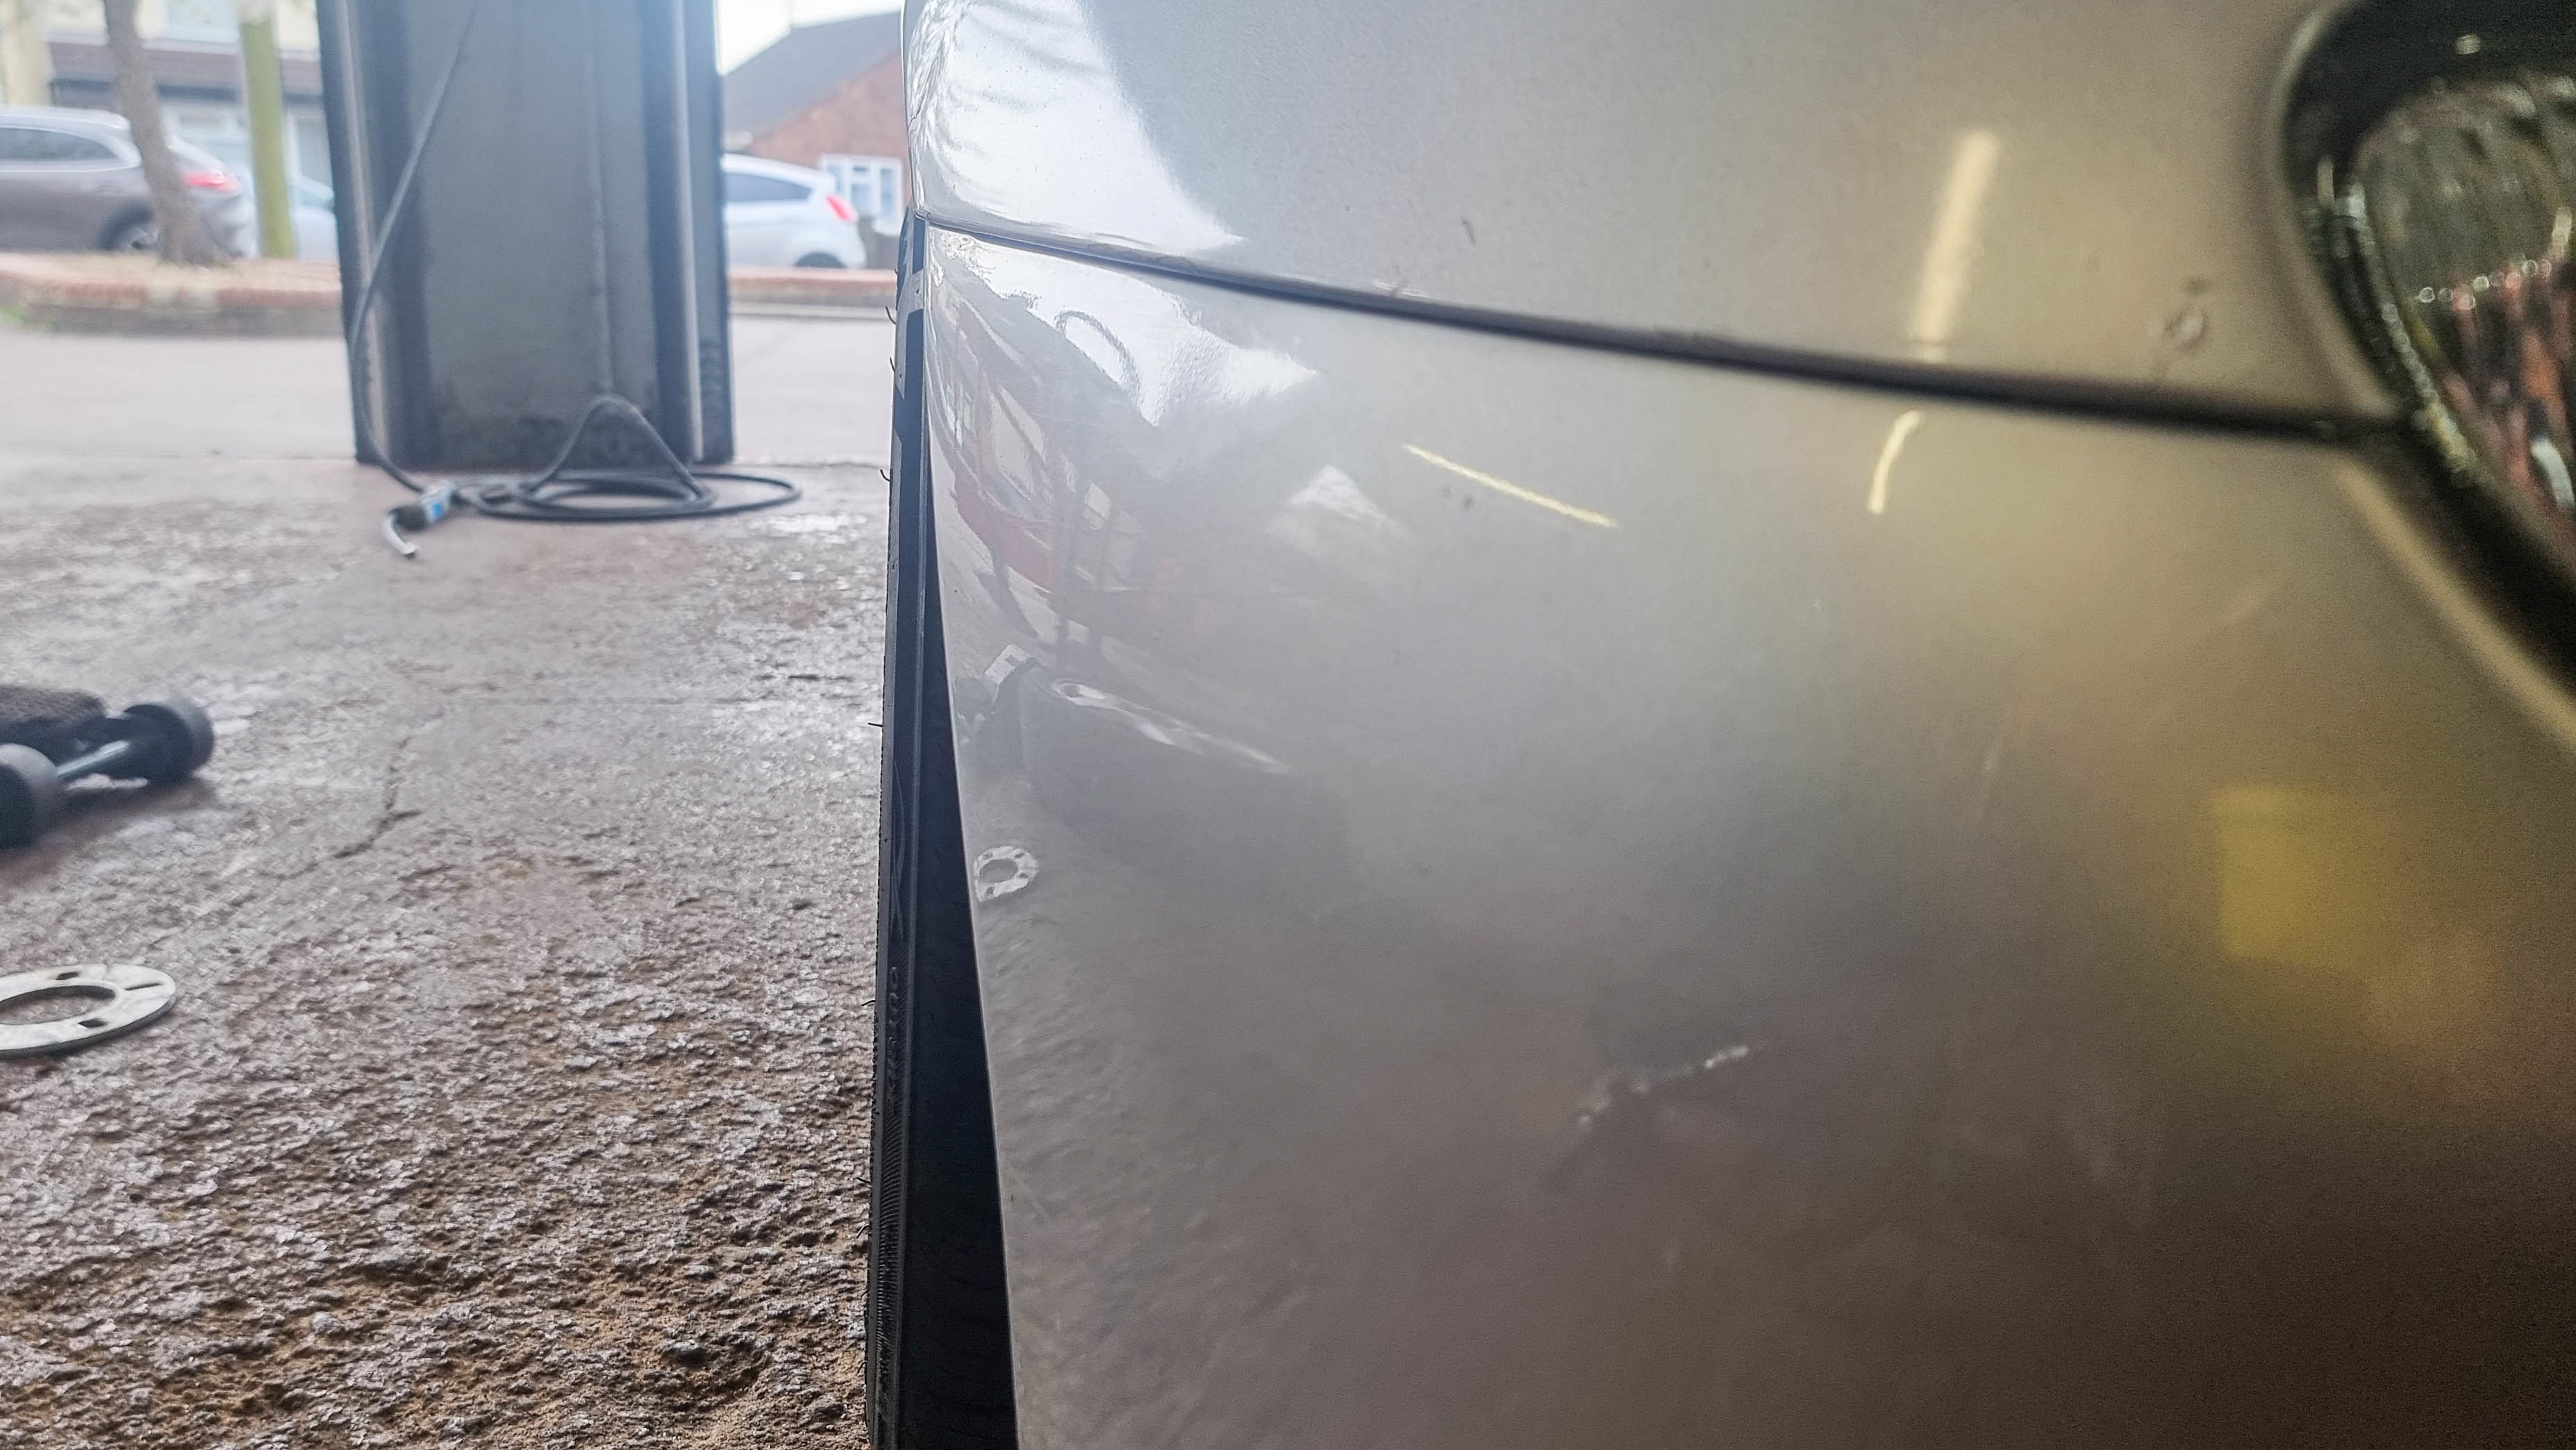
With no spacers it was a pretty good fit and plenty of clearance. A small spacer would be required due to the centre bore being smaller than the 323F hub.
It was all steam ahead so I got it booked in for a refurb. A friend of a friend was able to do them for me for a cash price. I asked for them to be sprayed in a gunmetal colour. Their response was they do a light or a dark gunmetal. I didn't want it too light where it'd be silver, but I didn't want it too dark and it's almost black.
I left him to decide and hoped they came out ok.
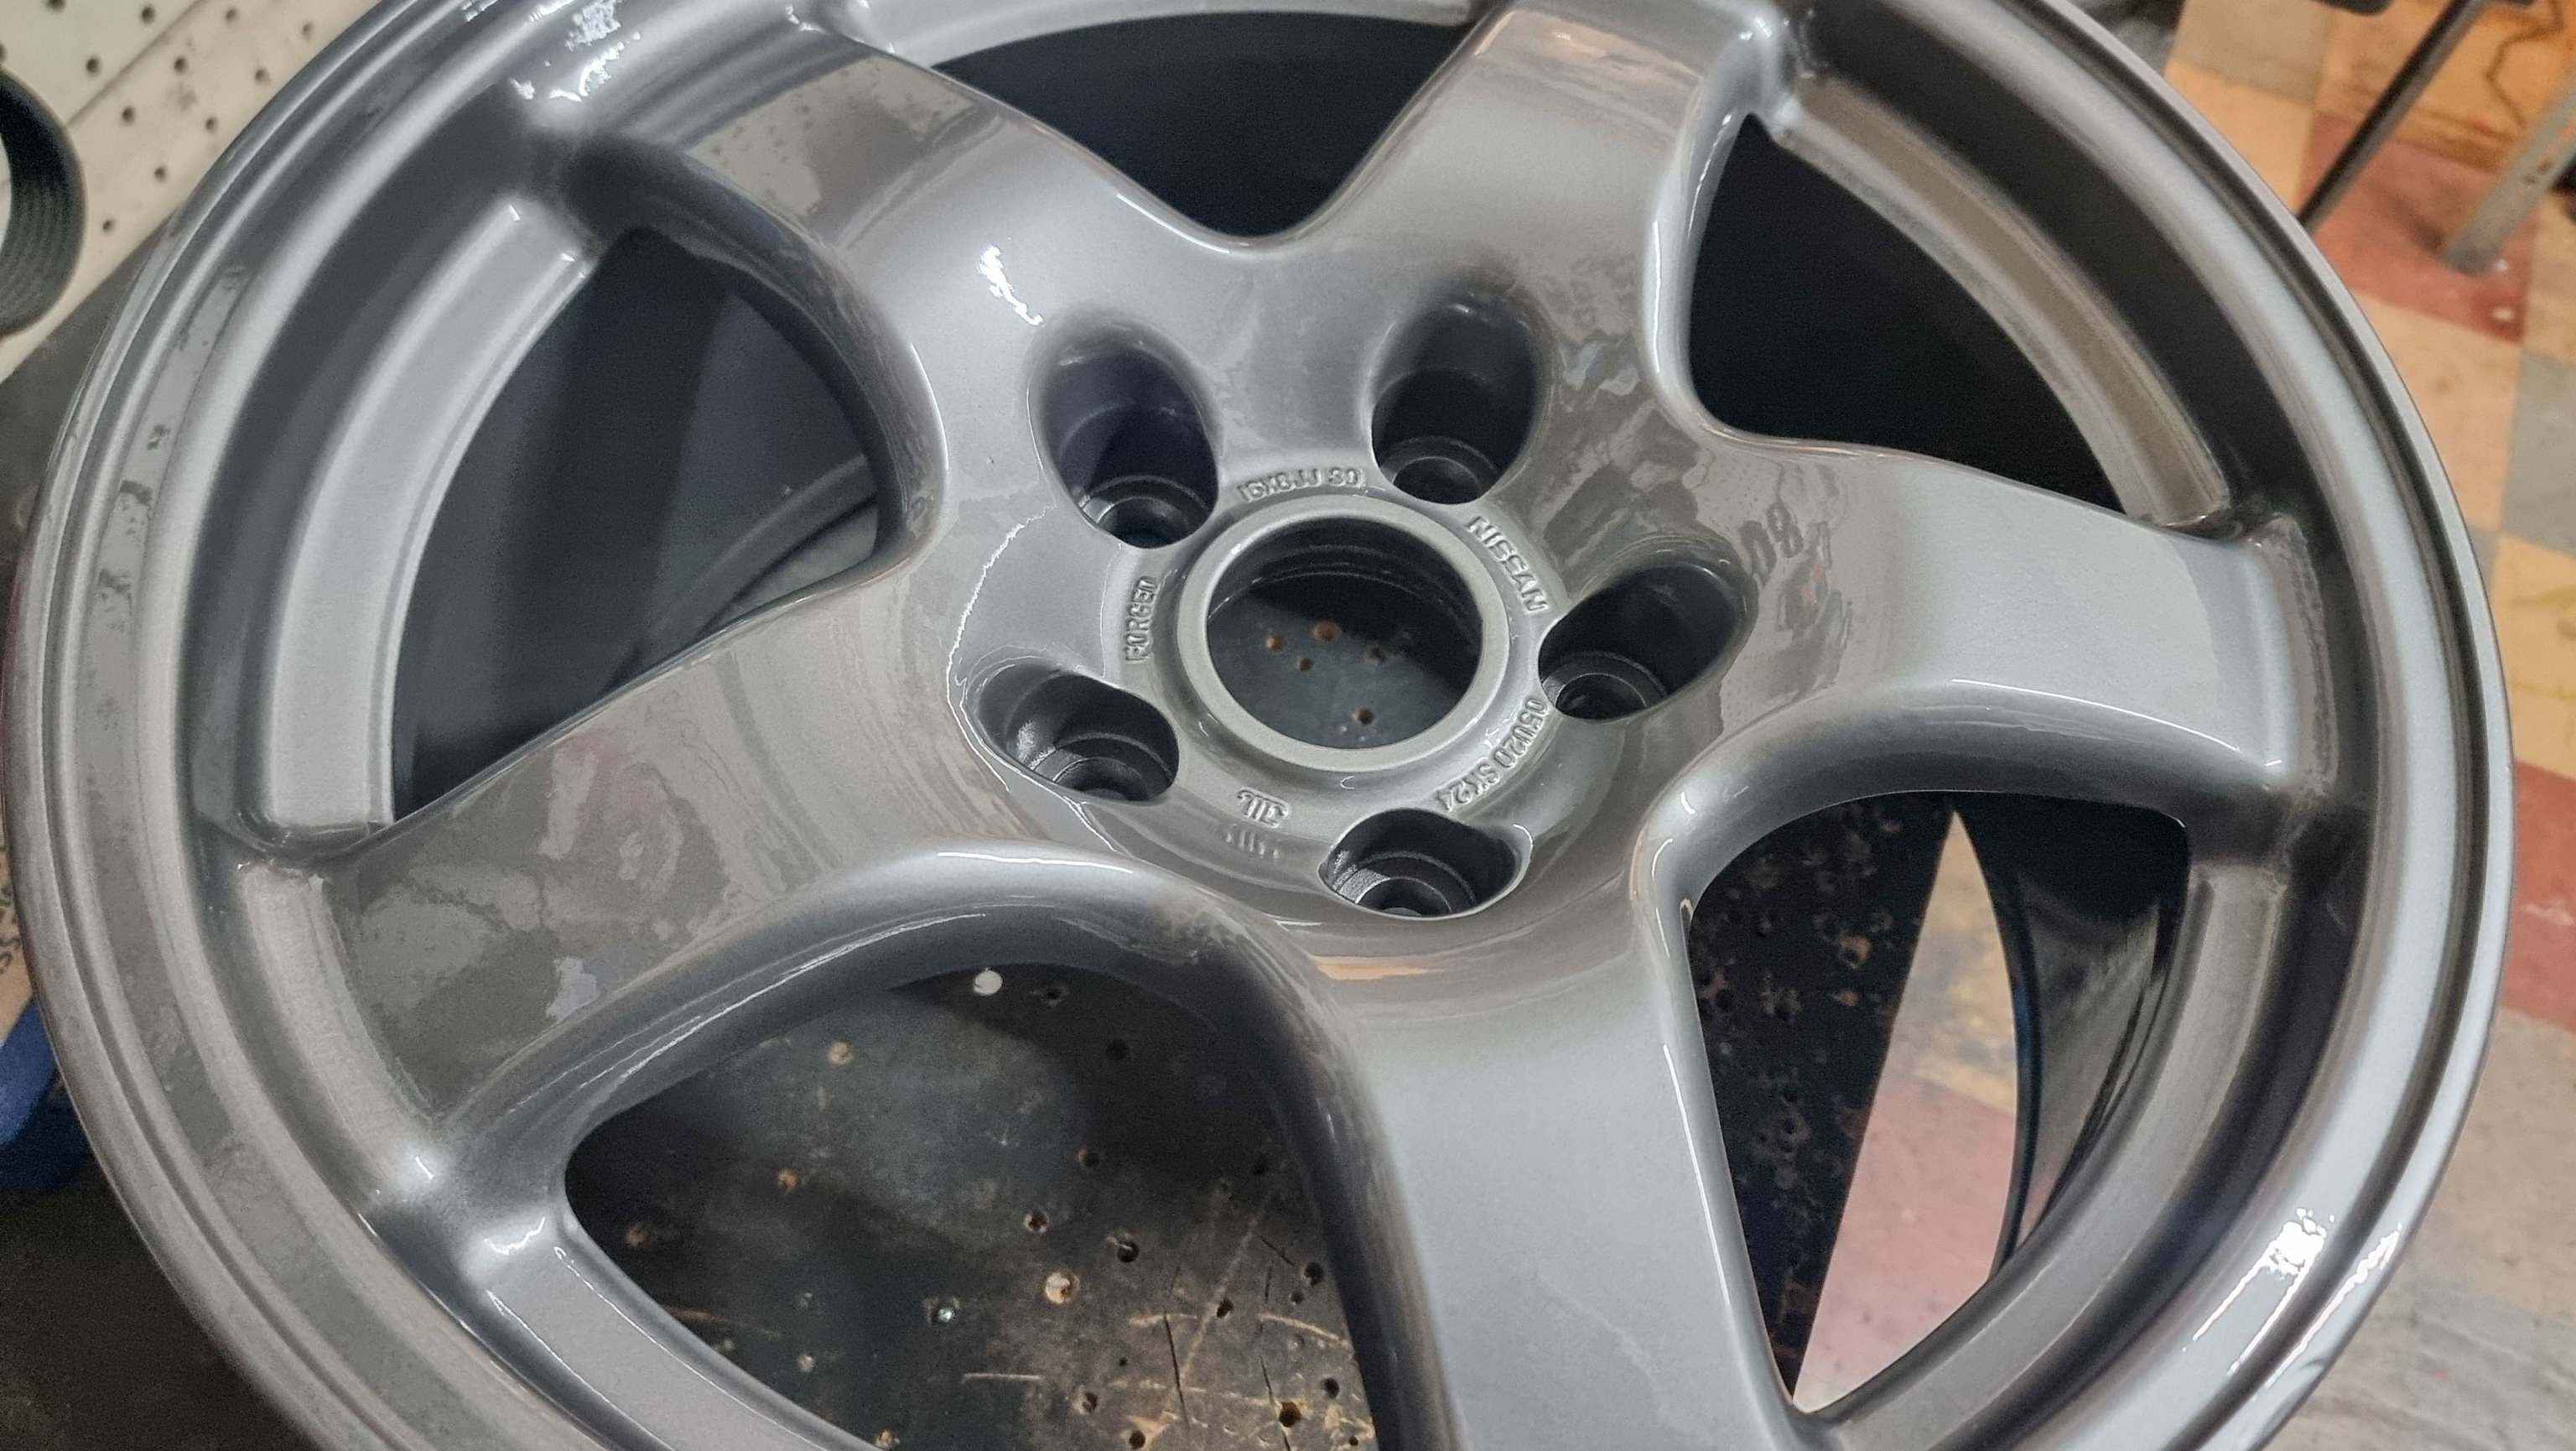
I'm very very happy with the colour and the overall condition is great considering how much corrosion and pitting the wheels had originally.
I gave them a layer Meguiars Ultimate Wax to help seal them
Forged Nissan R32 GTR 16x8j ET30 (technically ET27, I have 3mm spacers fitted), 205/50R16 Kumho tyres
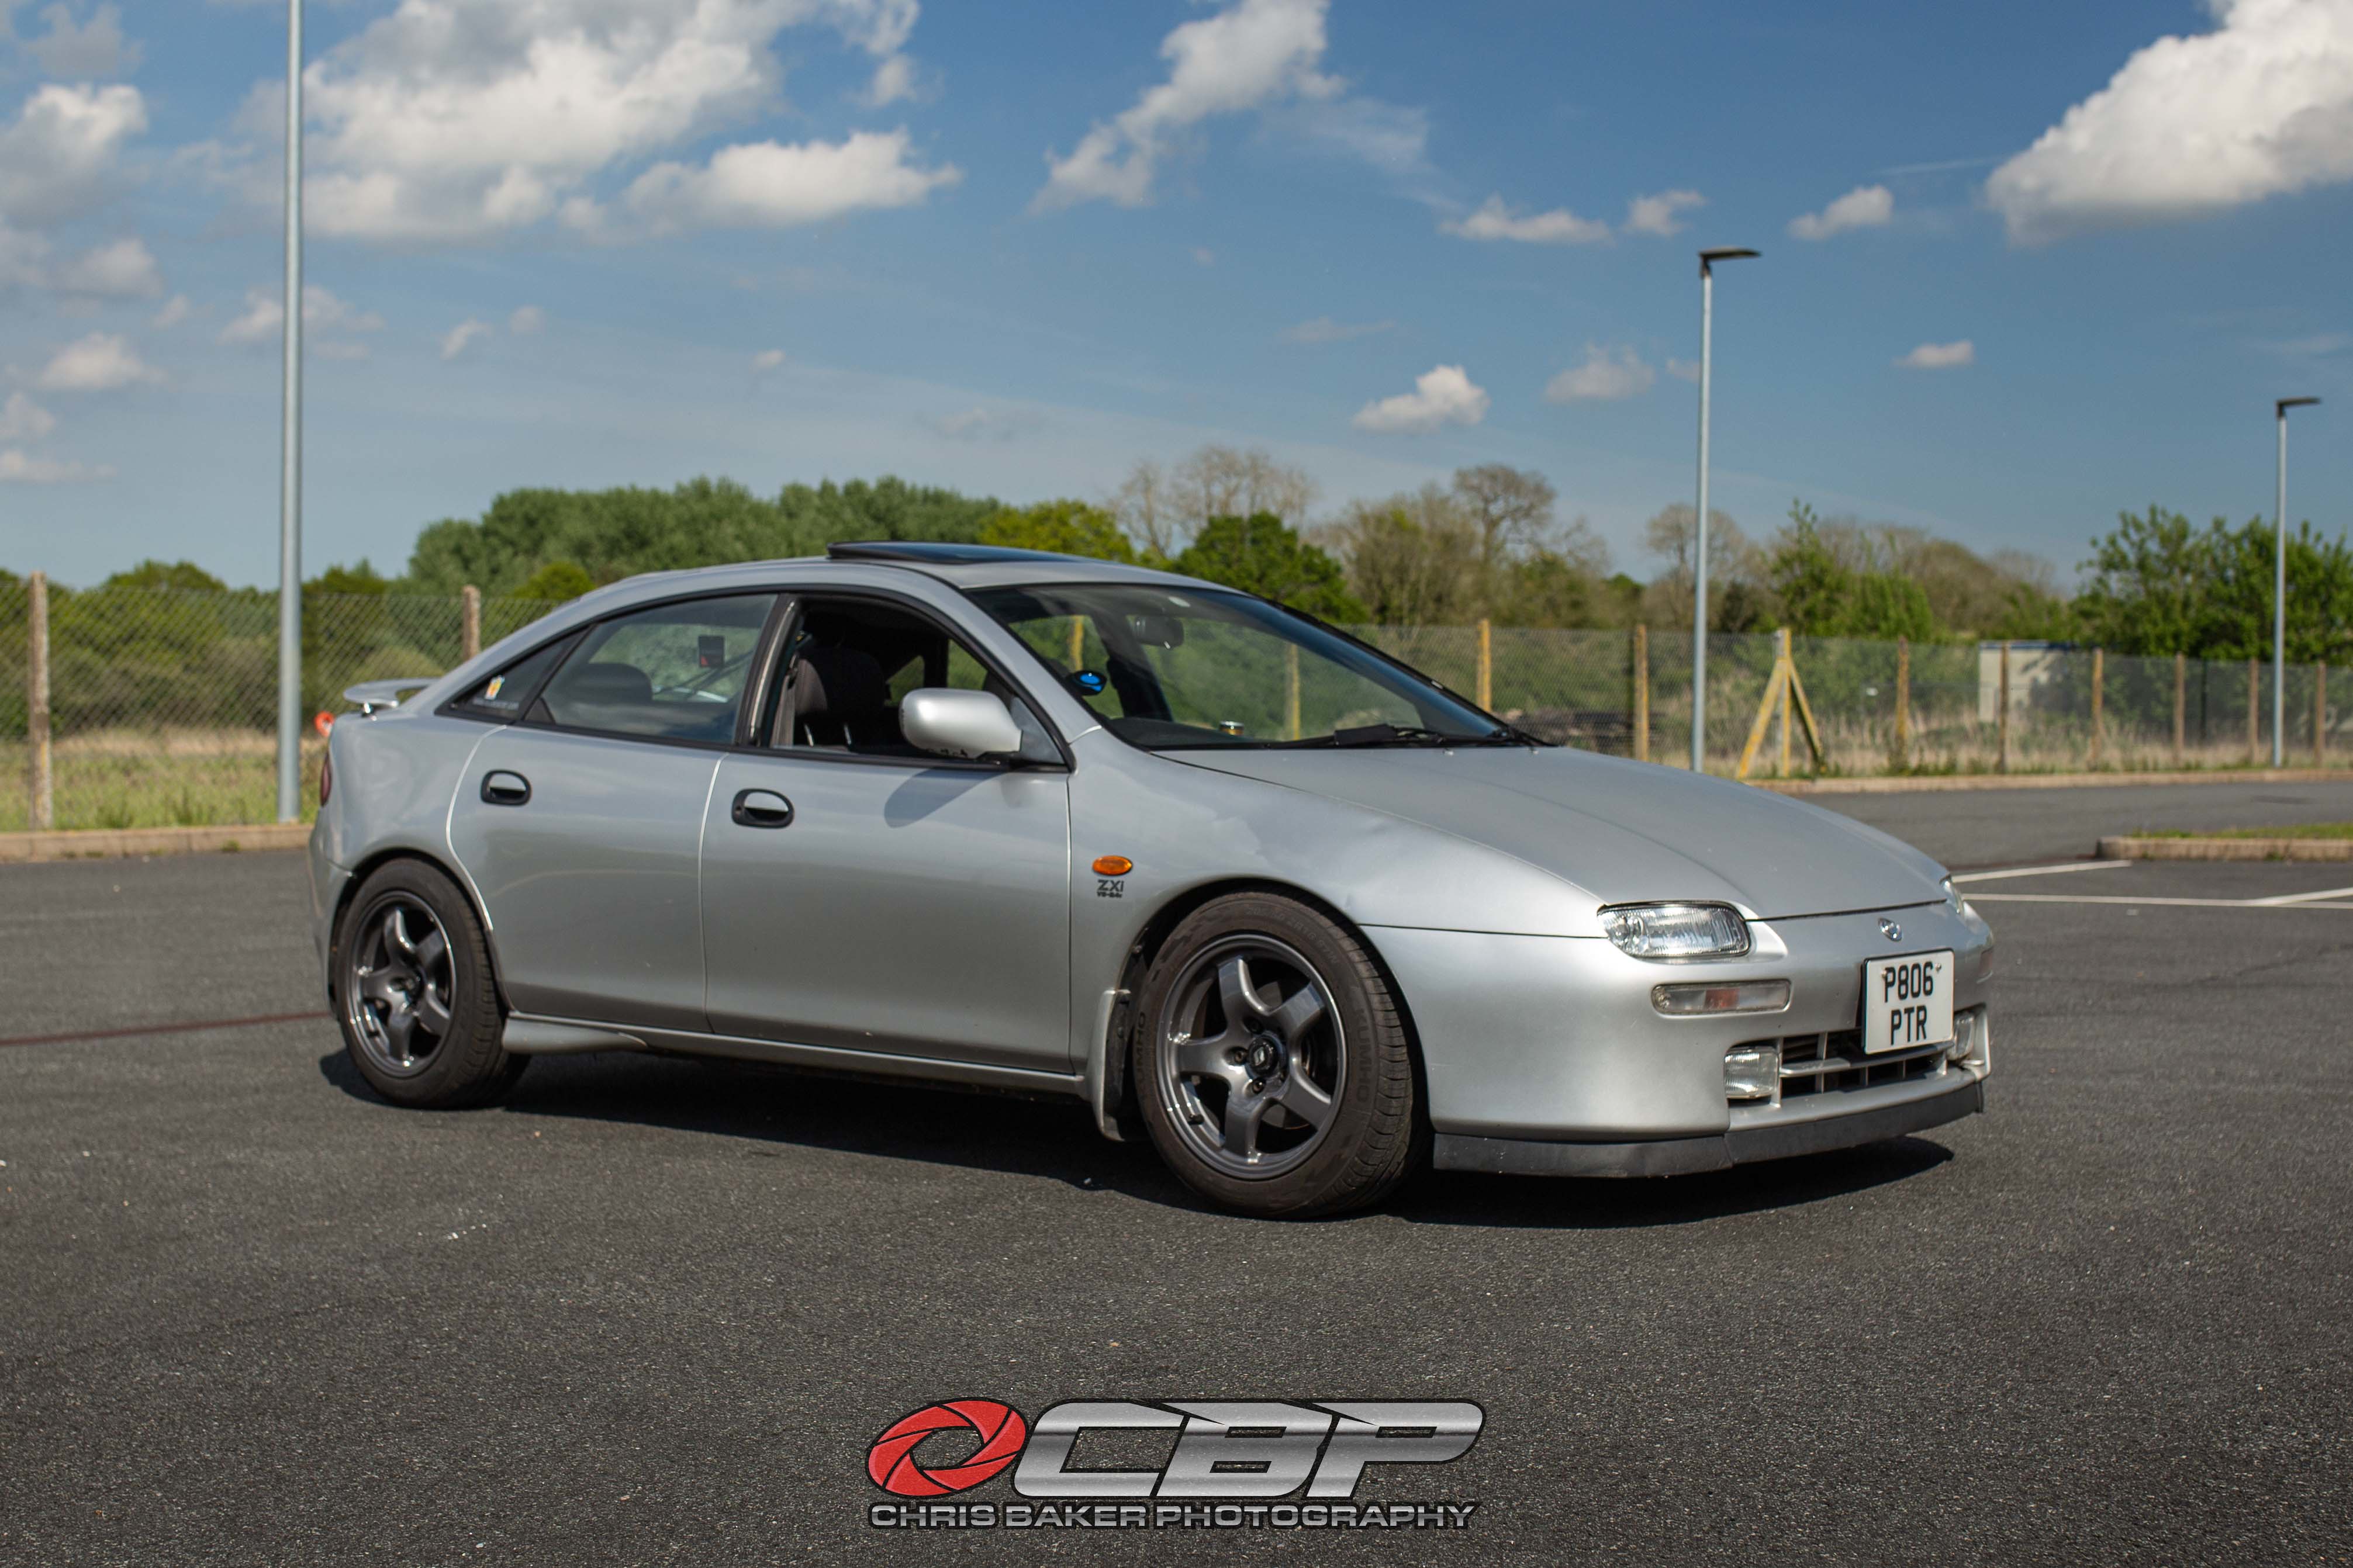
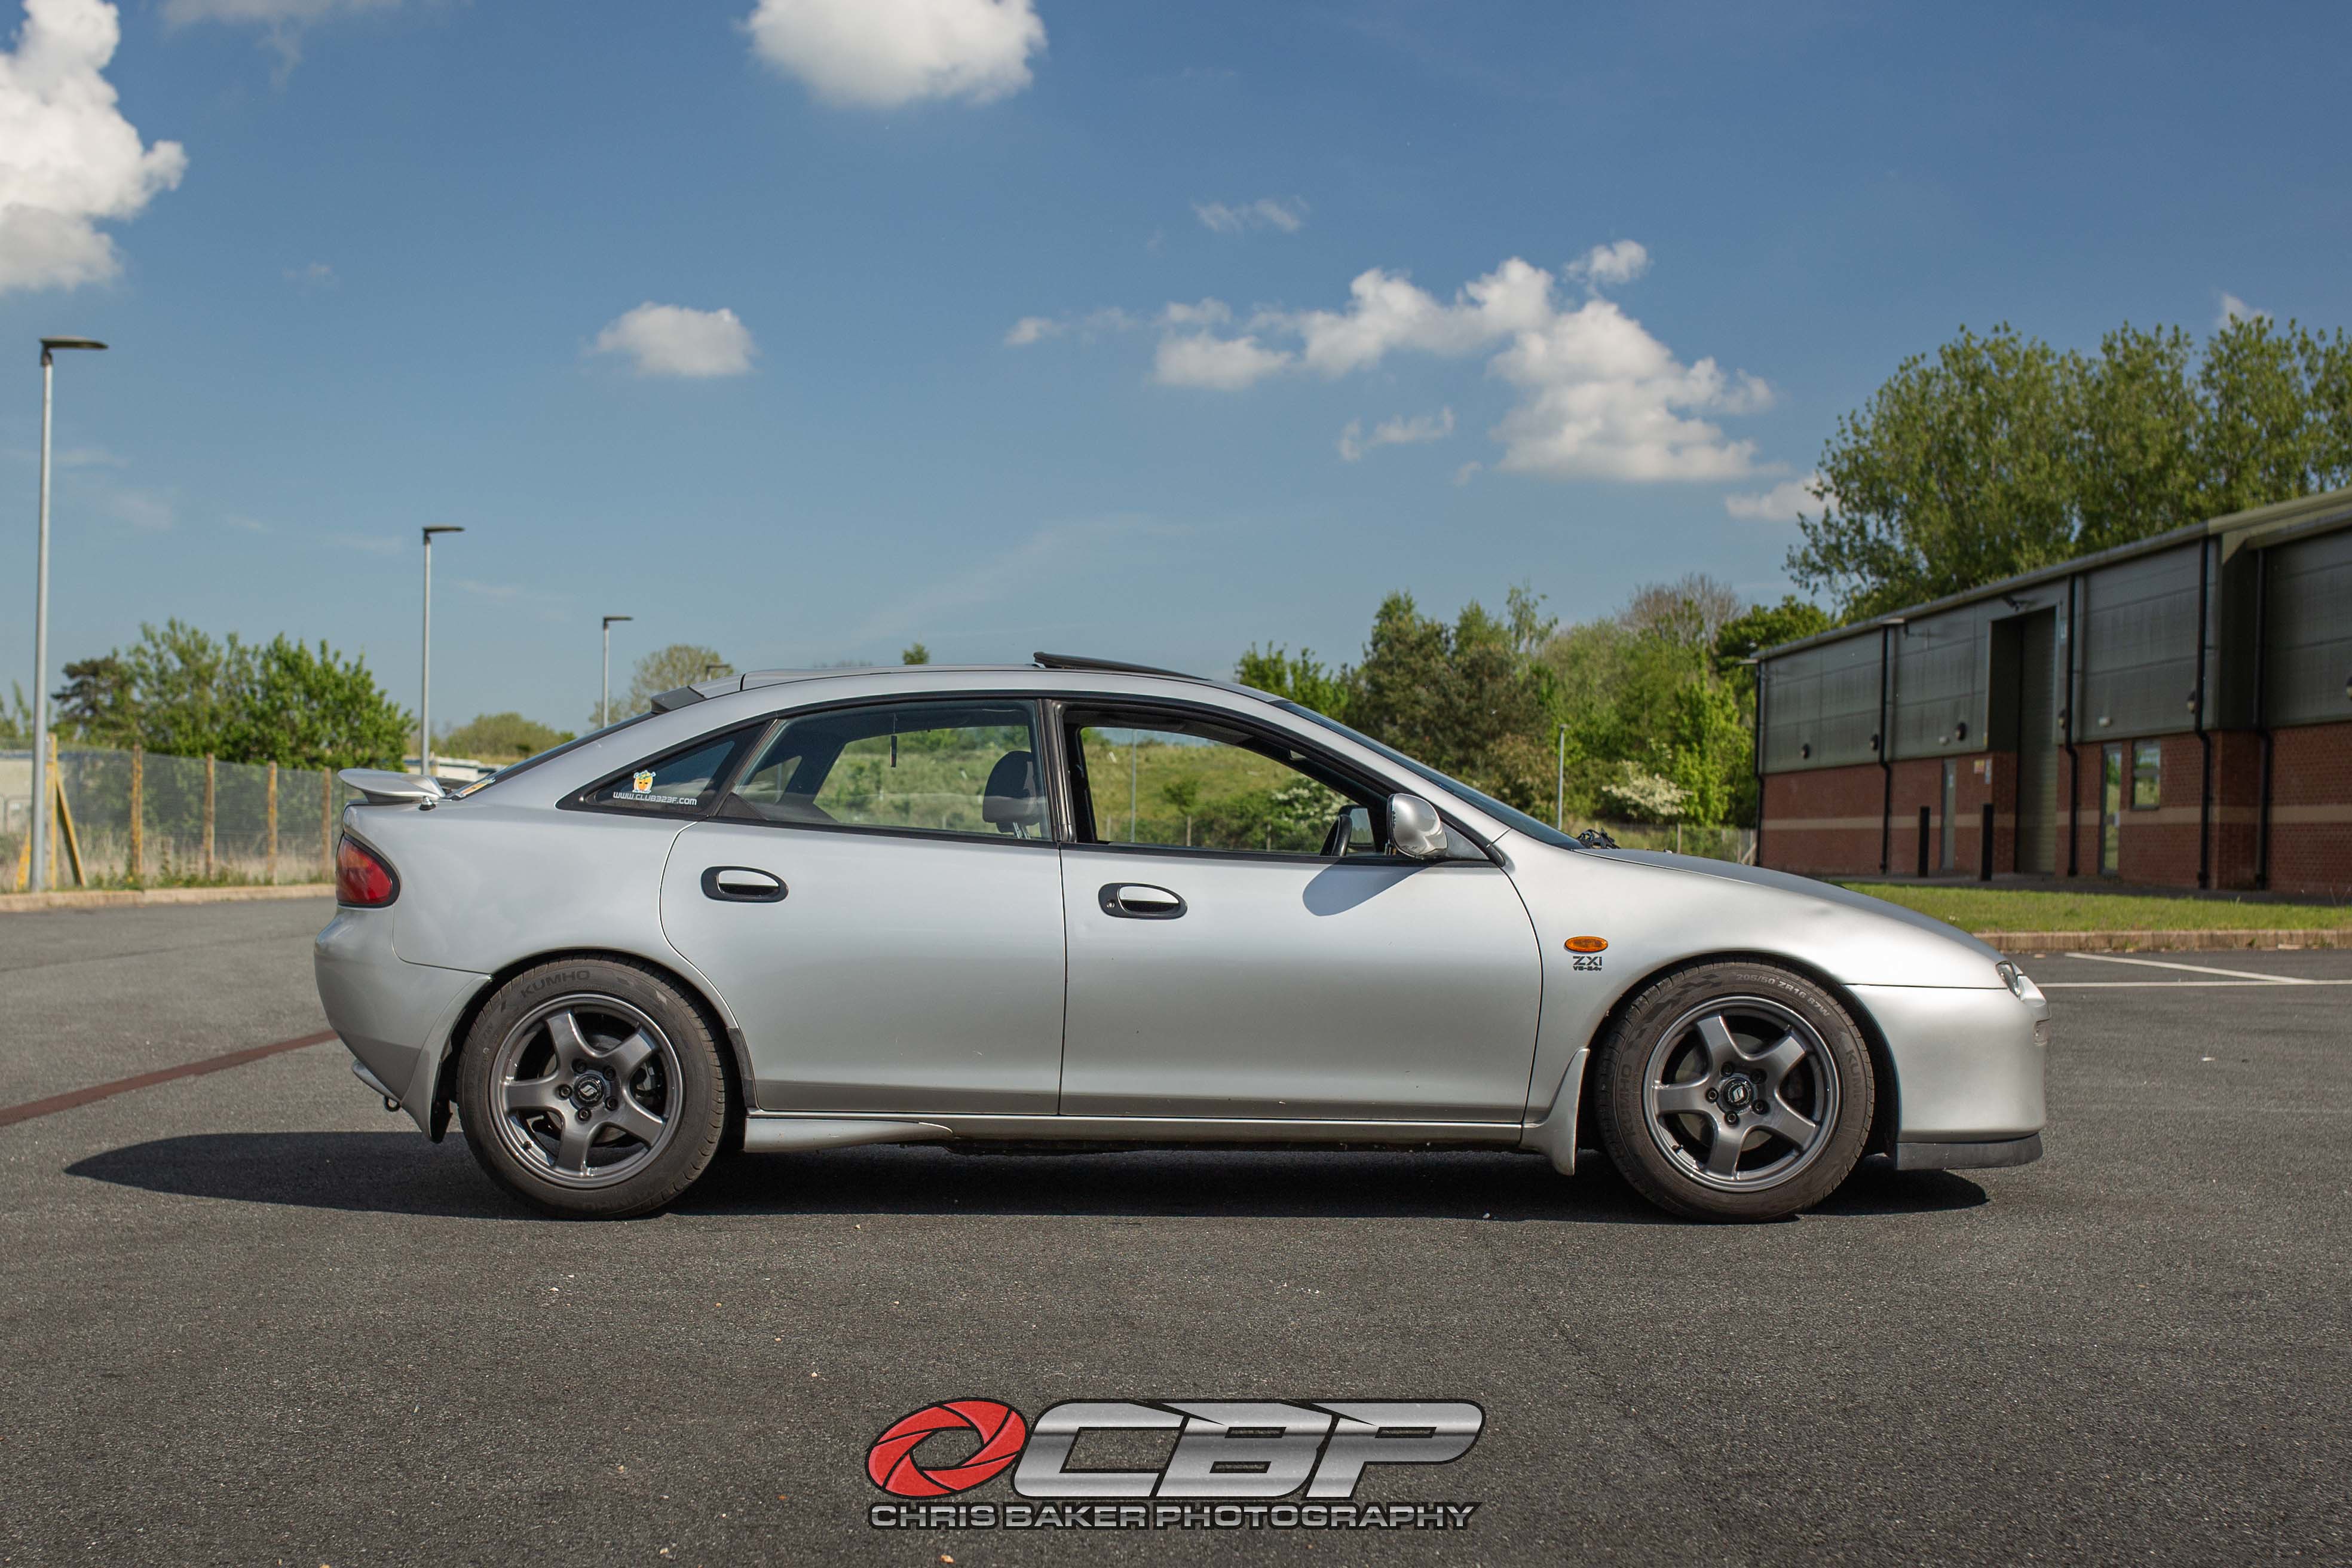
I lowered the BC Racing coilovers to eliminate the rear arch gap. Both axles were different heights! The front got lowered approx 10mm and the rear approx 15mm
The distance from the locking collars are:
Front: 40mm
Rear: 135mm
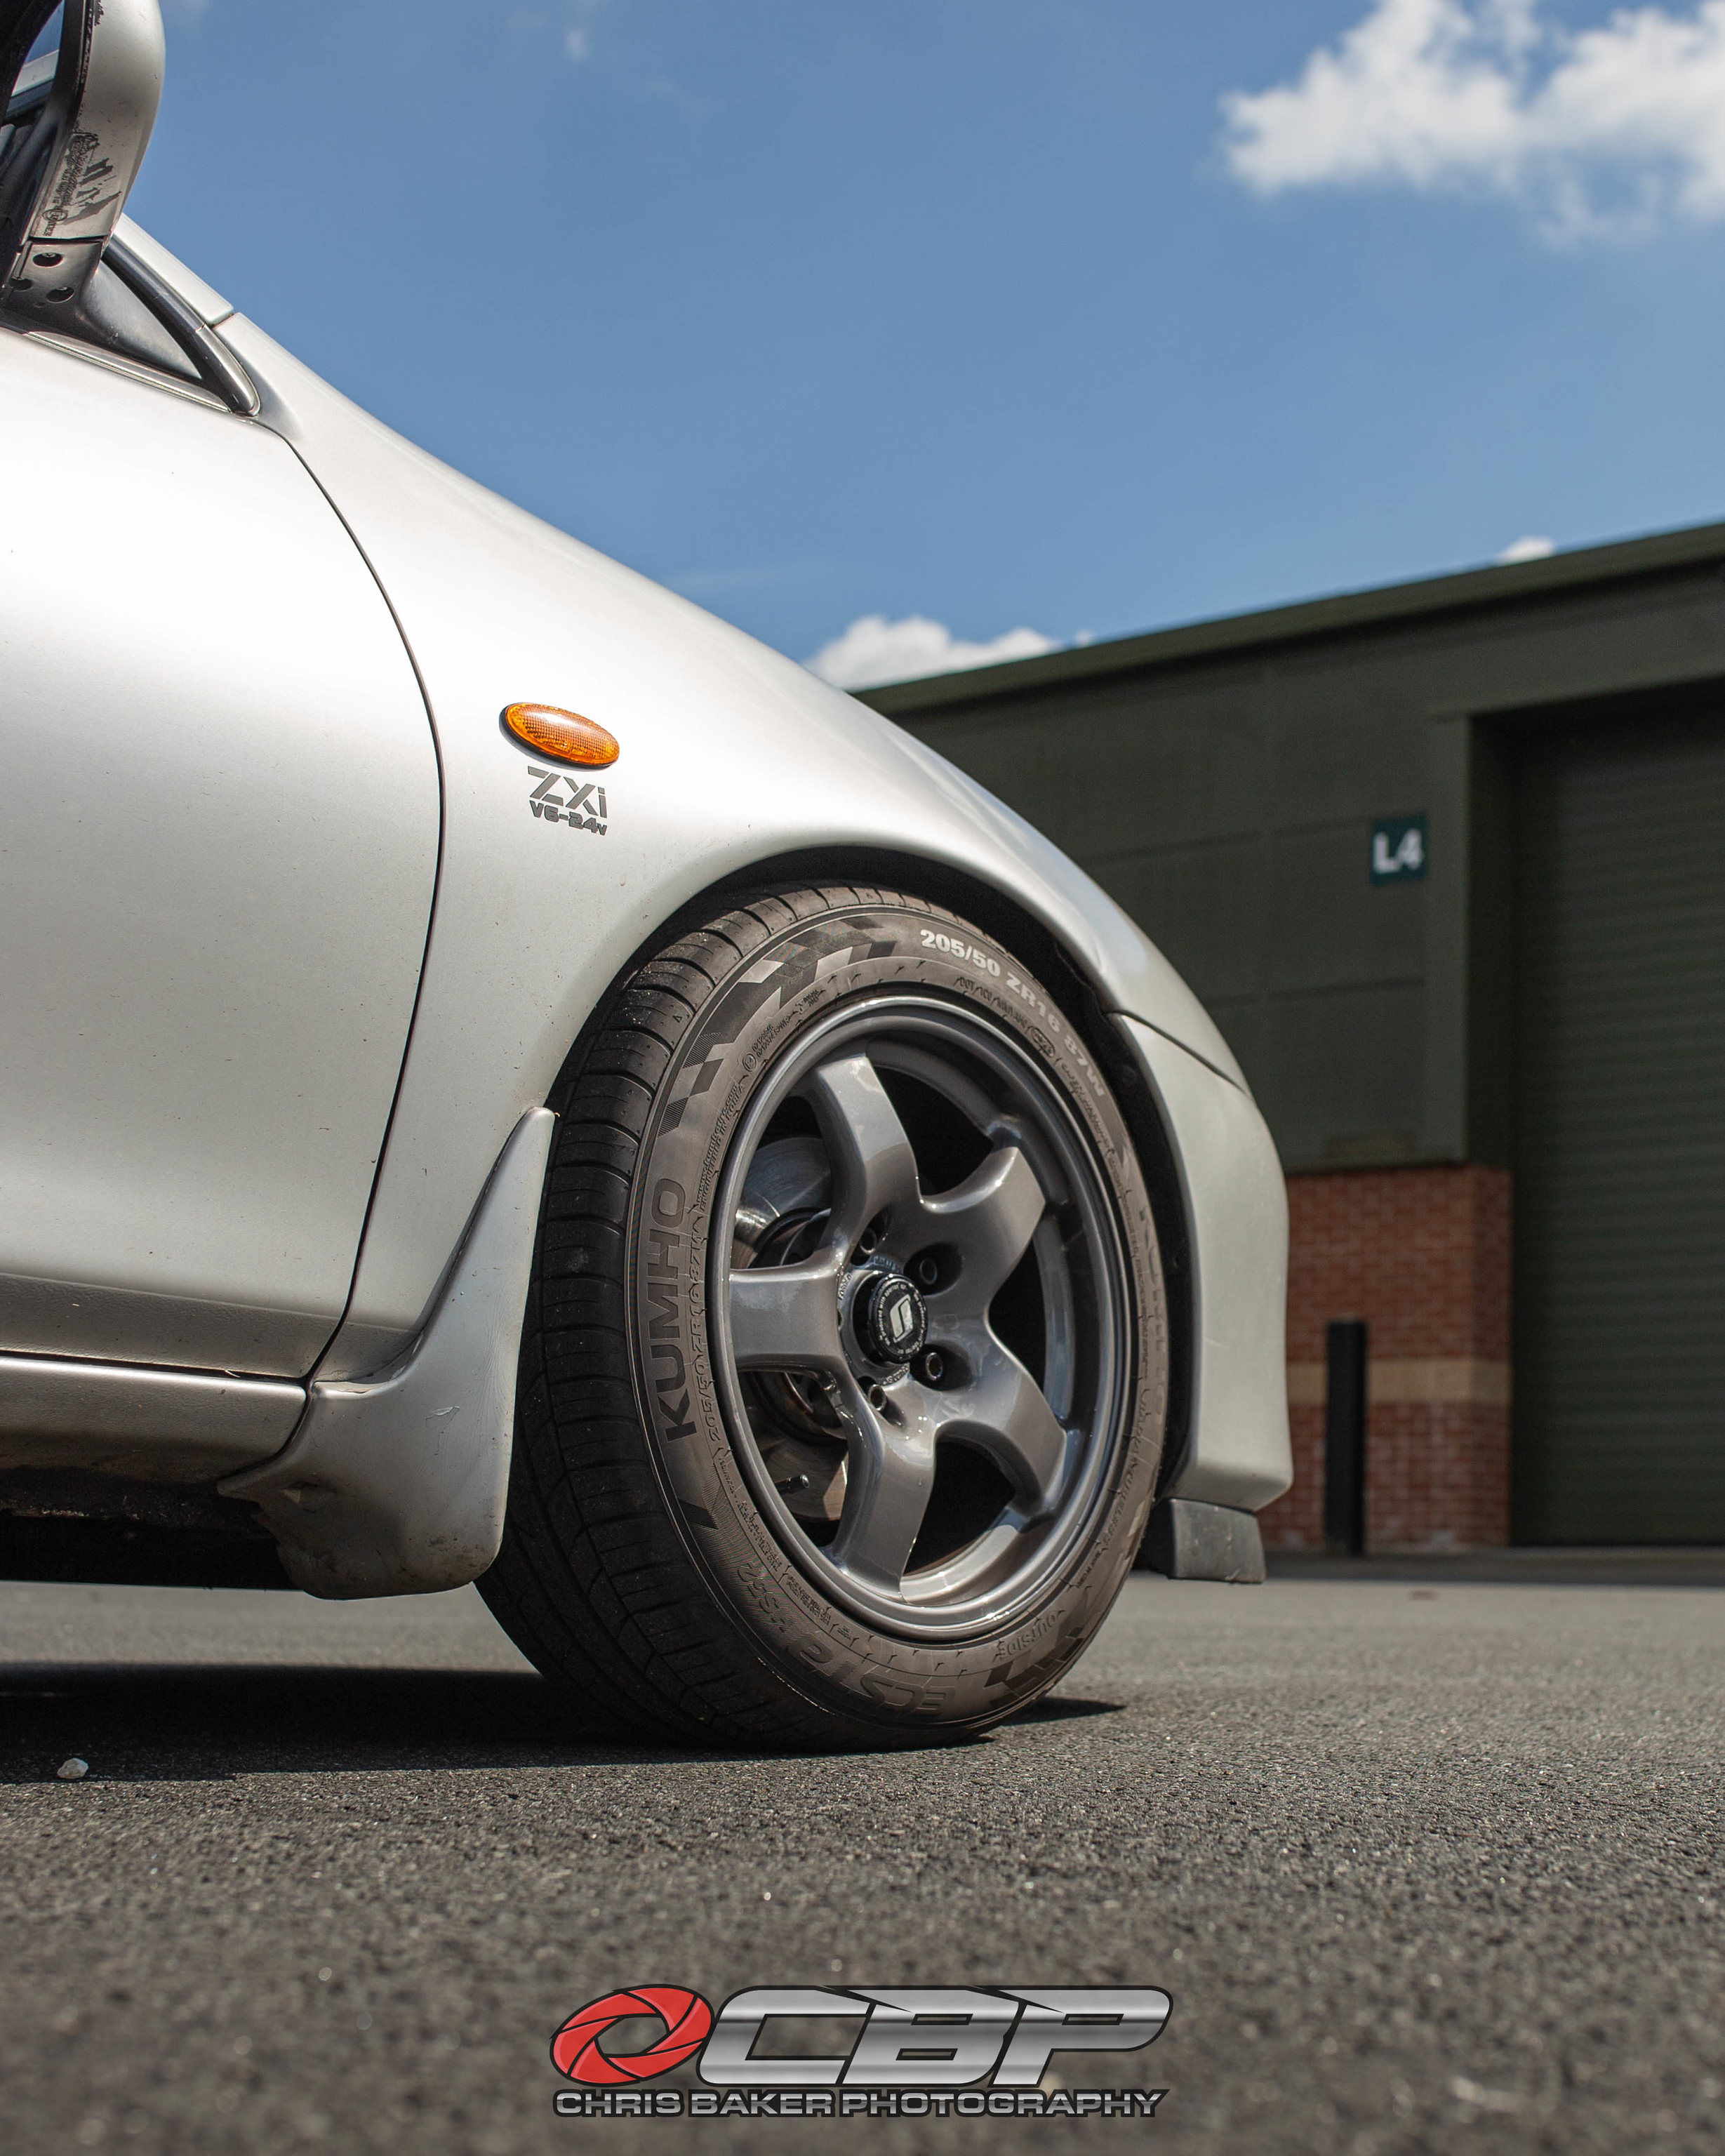


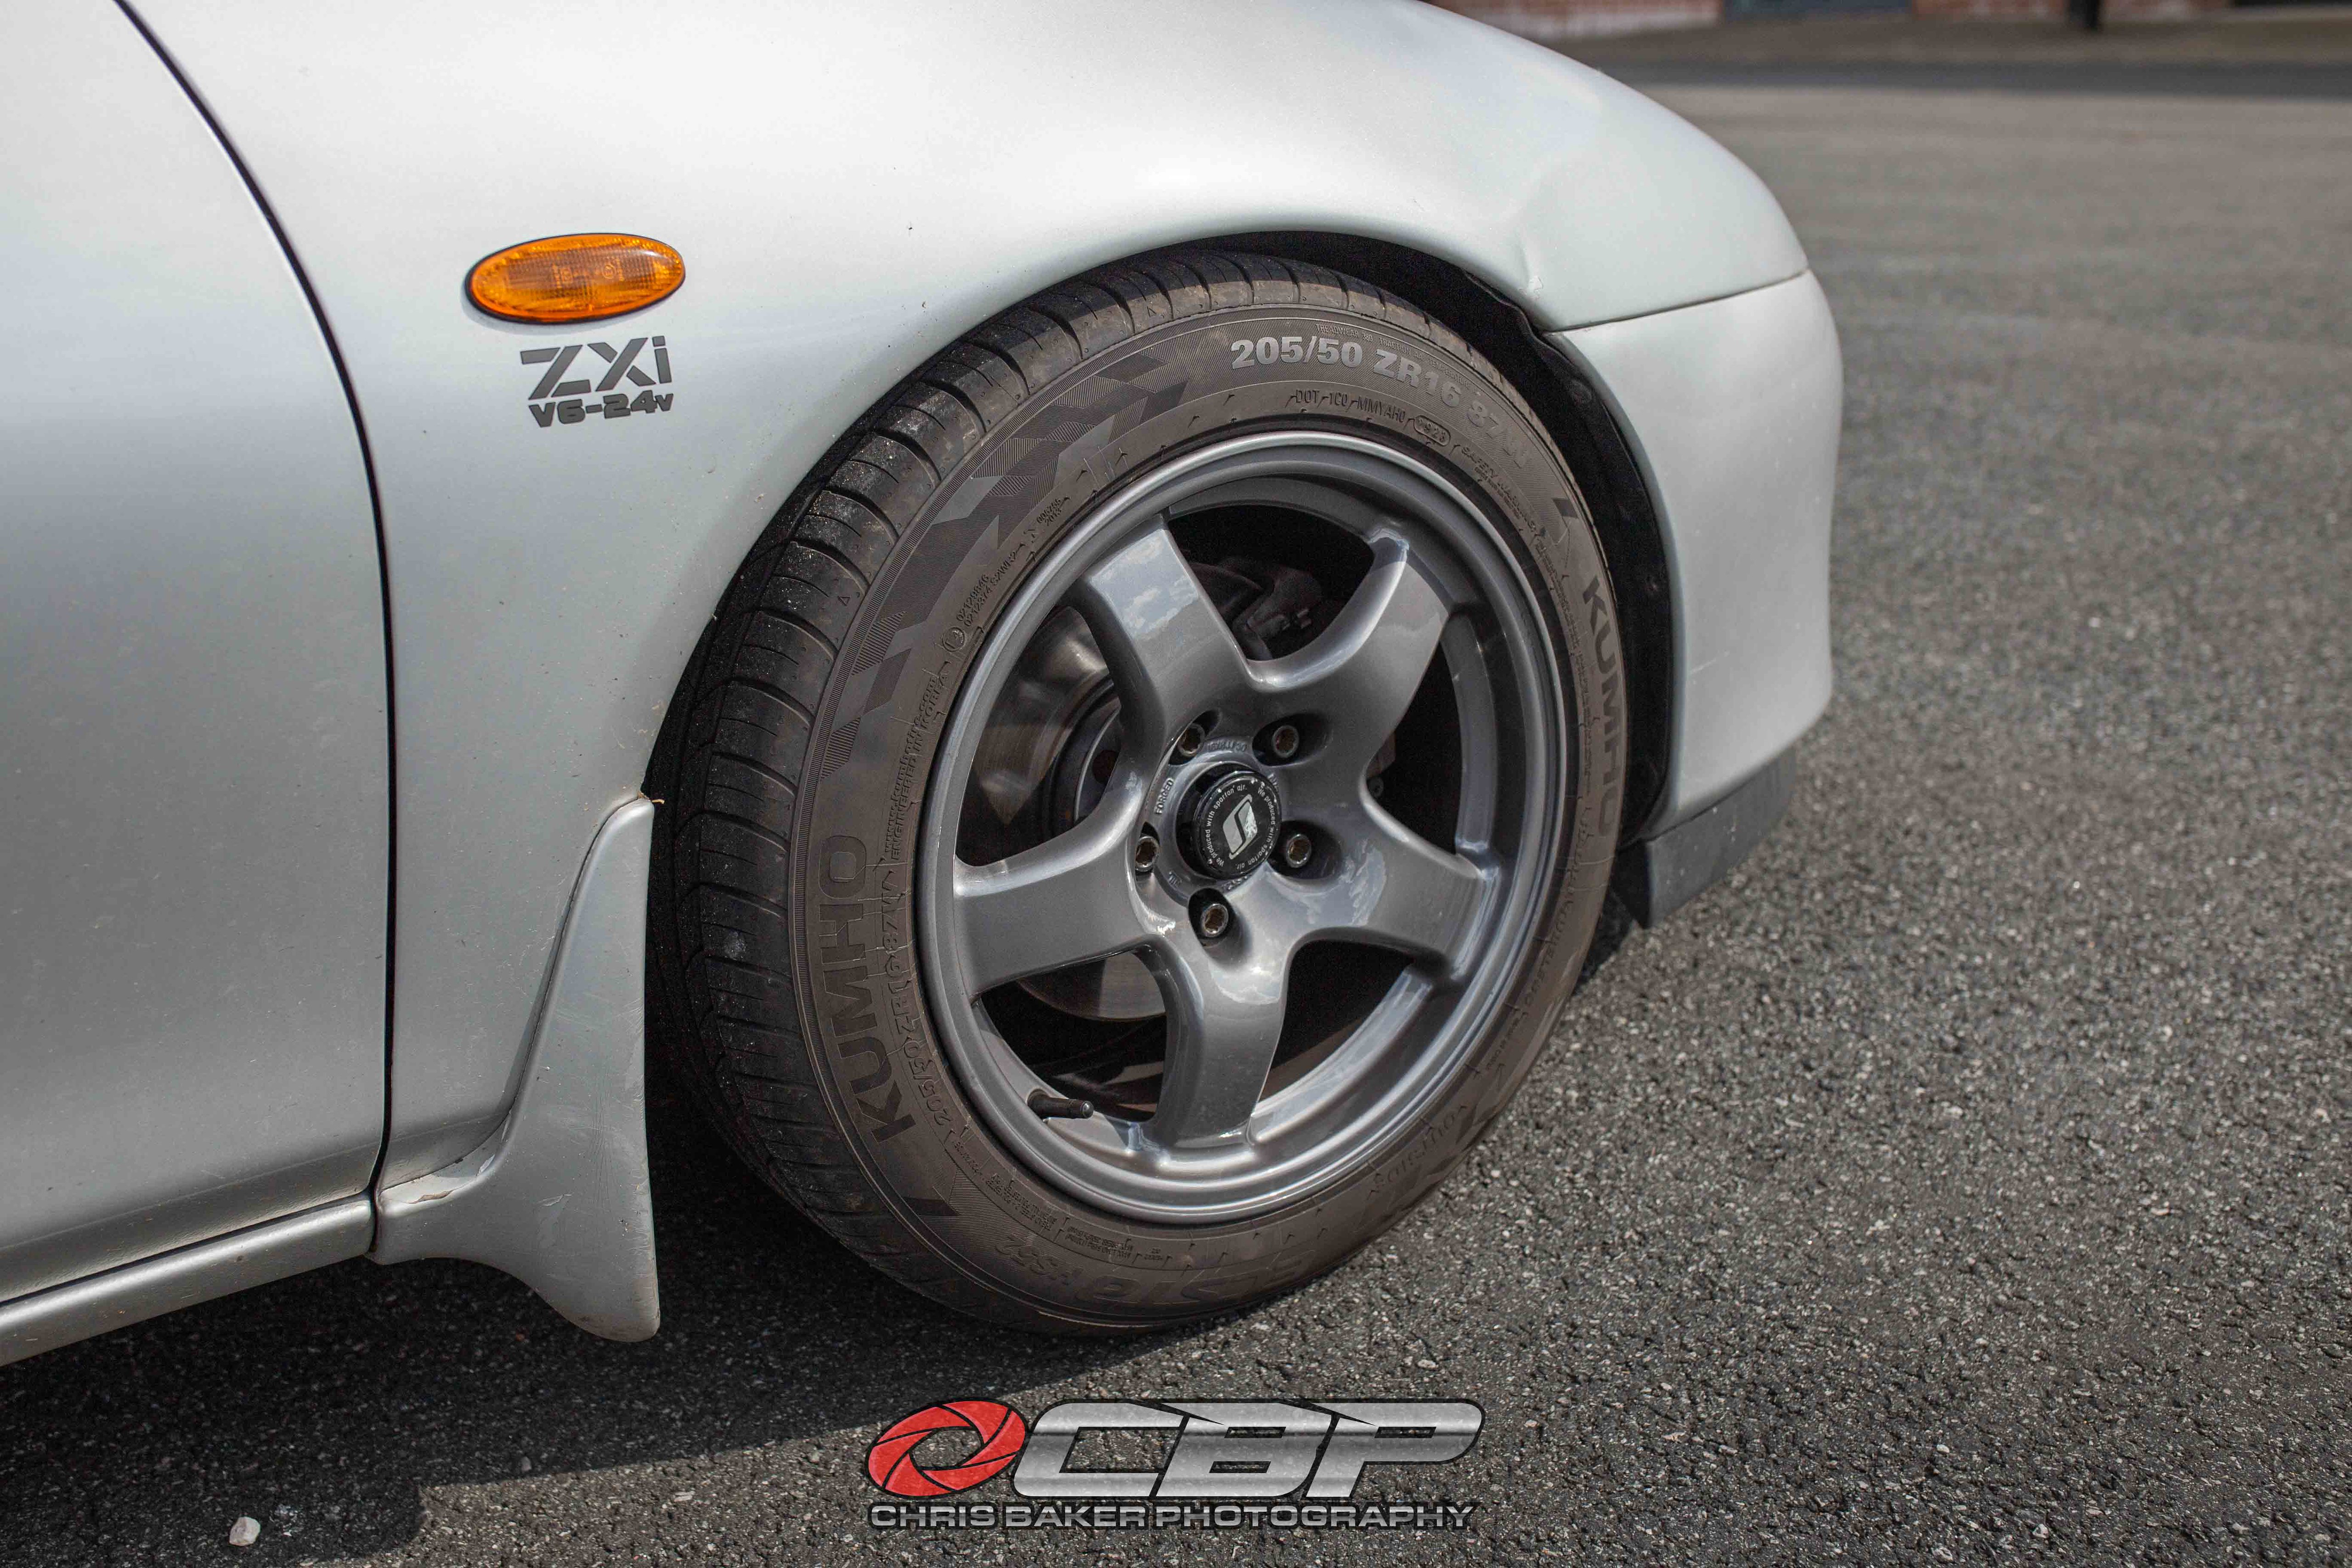
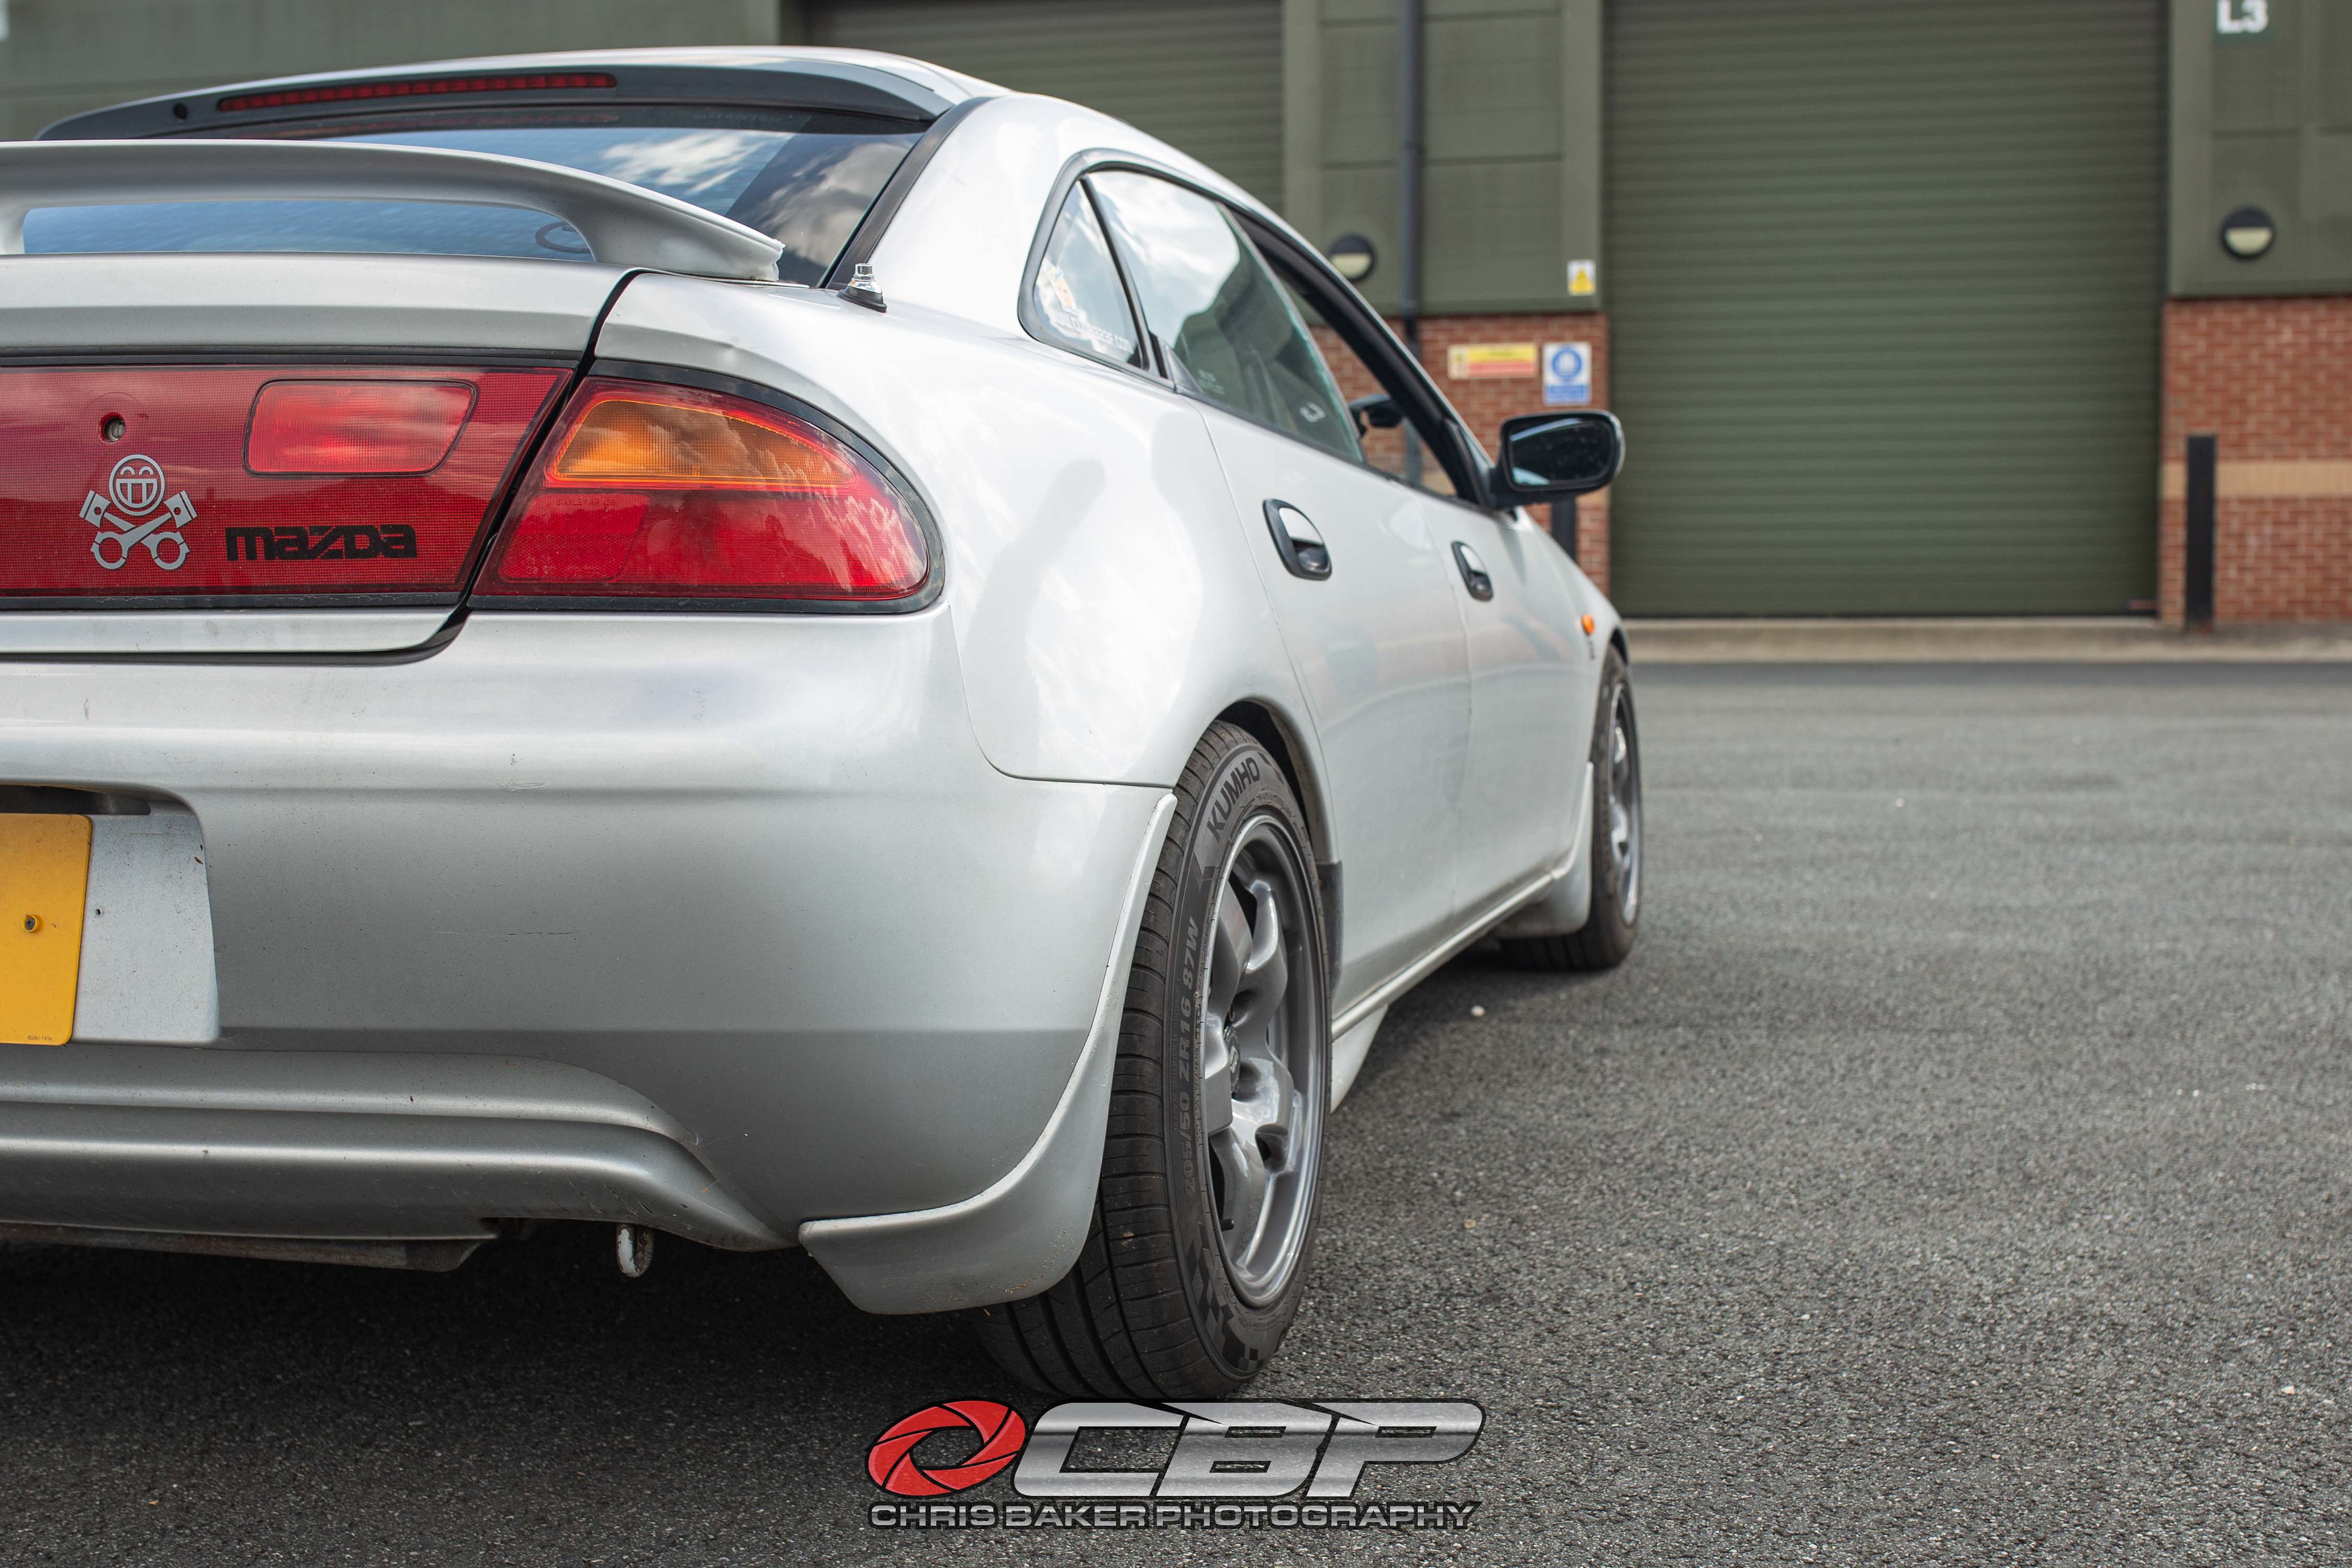
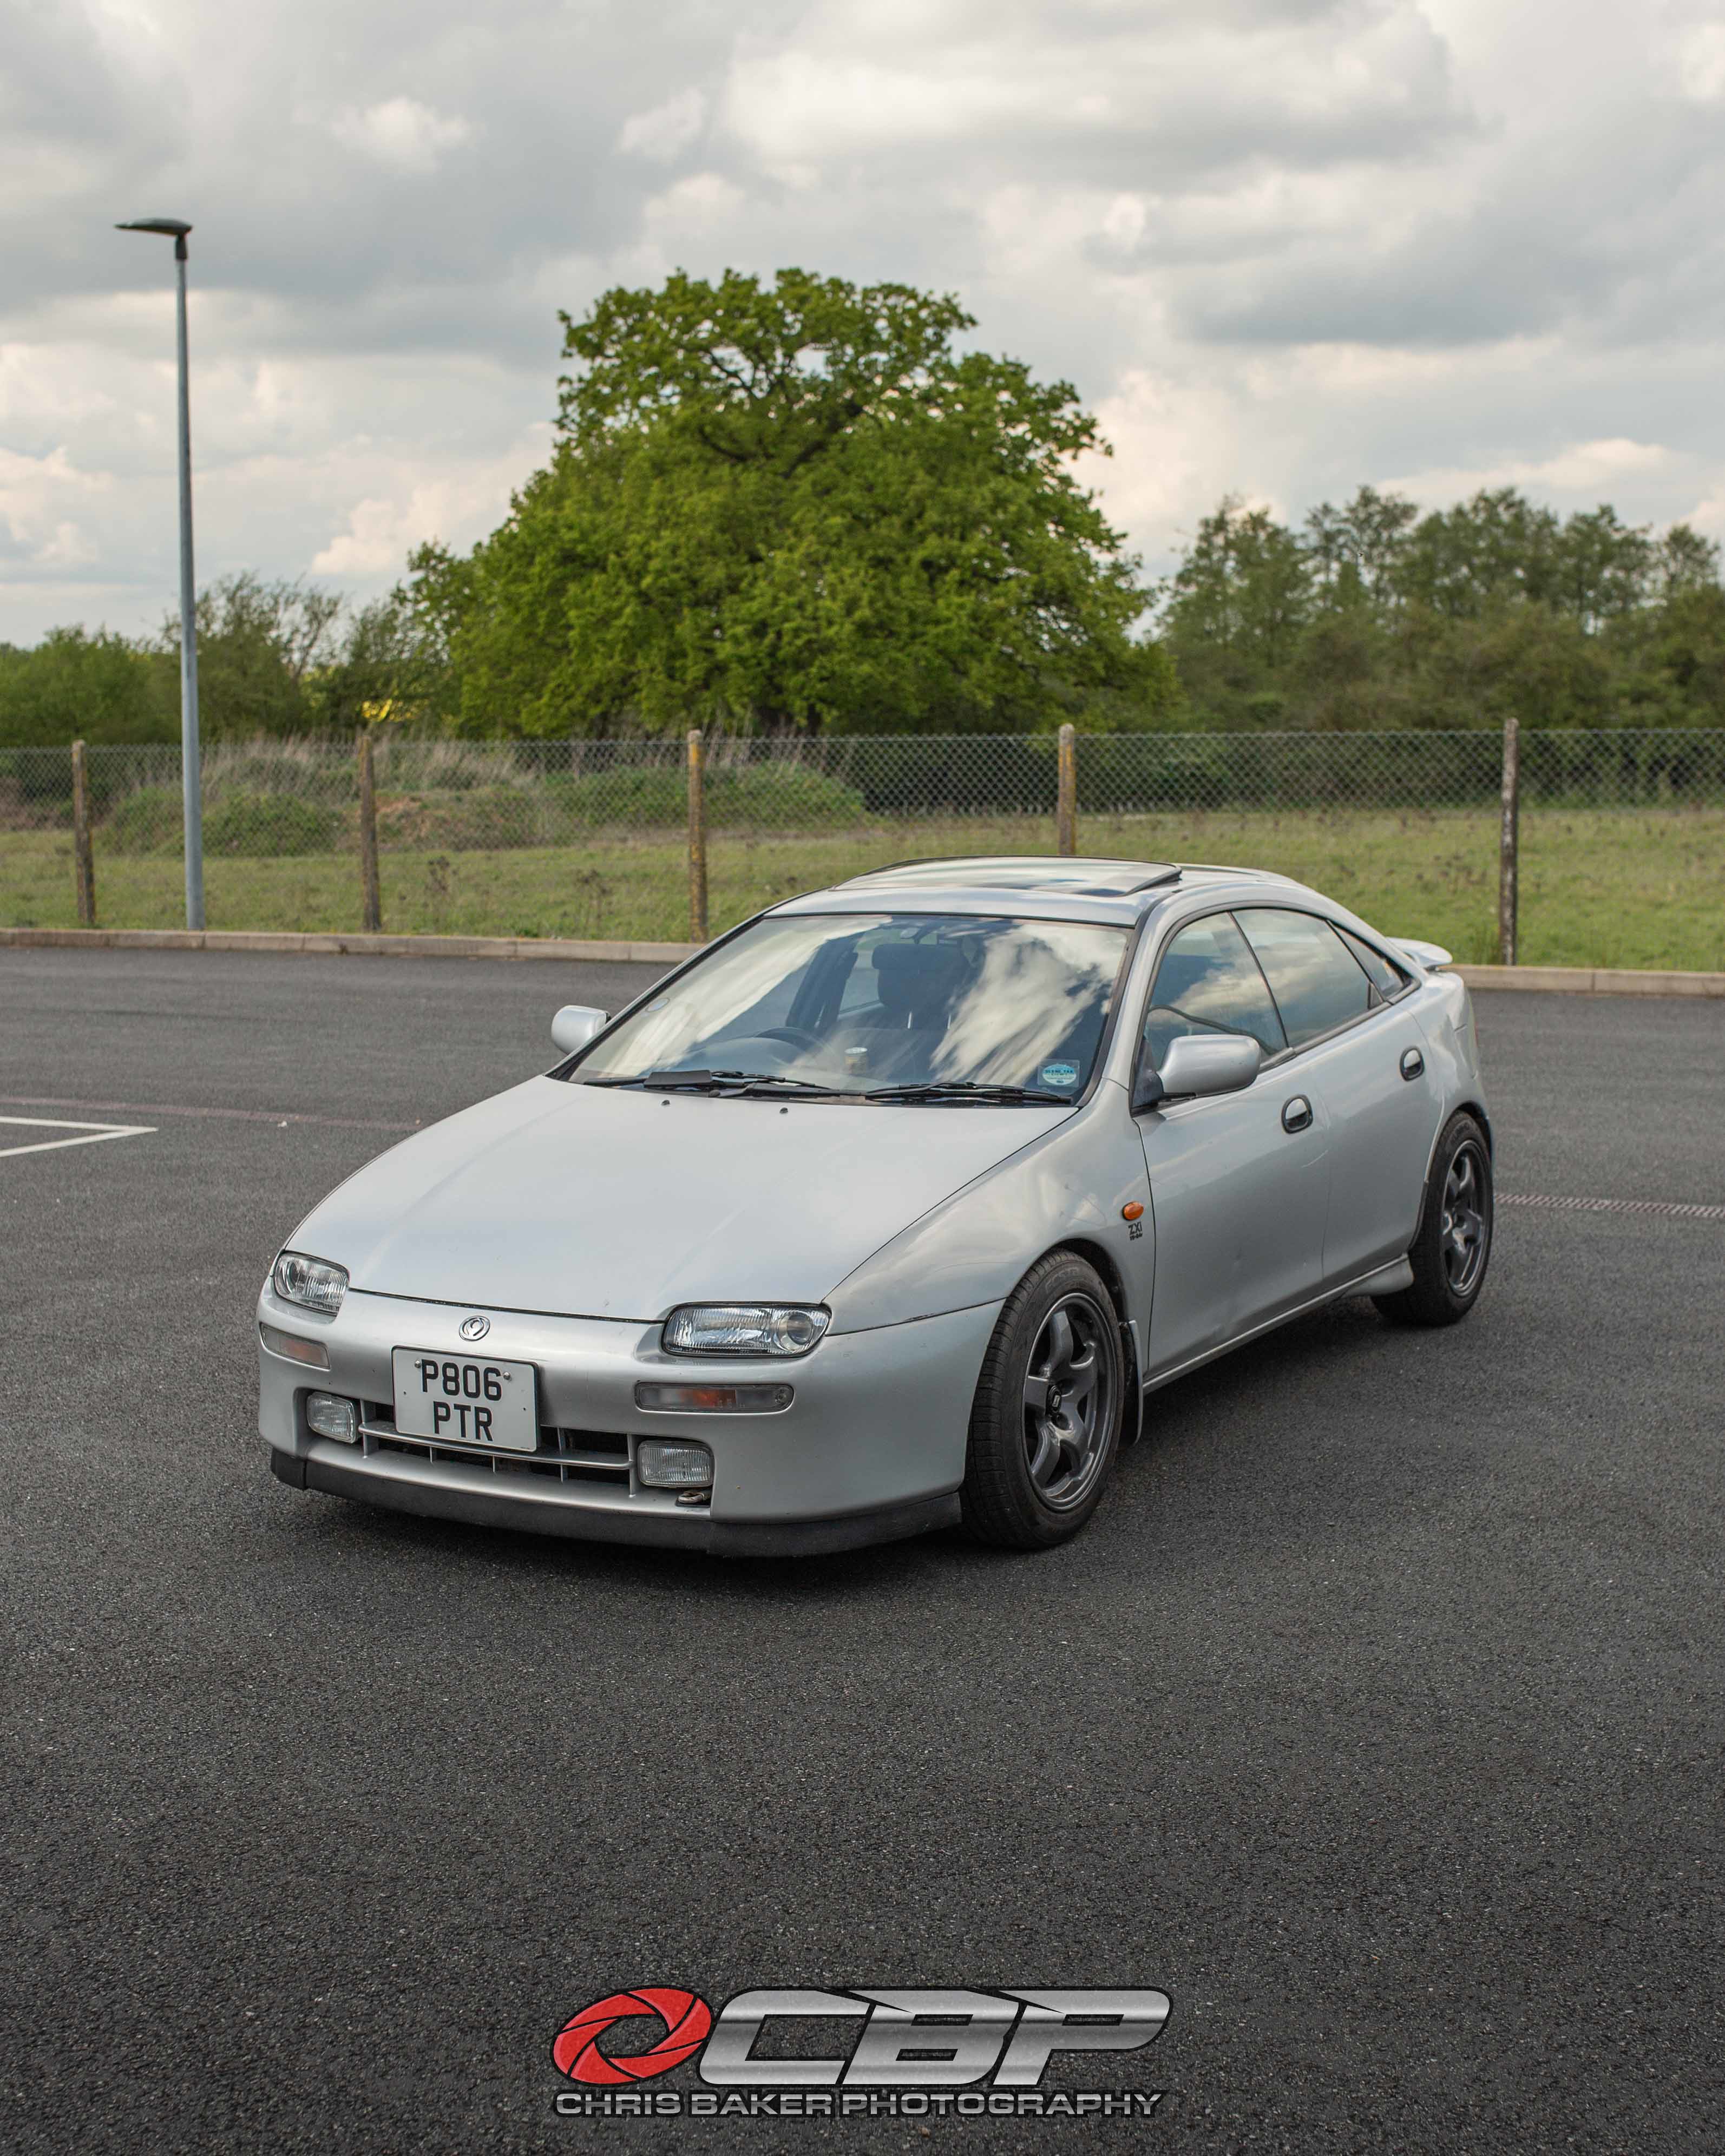
I'm extremely happy with the result!
What do you think?
The Youtube video can be found here (I tried improving my 'cinematic' editing):
https://www.youtube.com/watch?v=c6sT7wV61-c&t=...
I've spent countless hours browsing through selling sites and despite specific searches, I kept being presented with everything but what I was looking for.
I wanted to stay with 16s, I knew this would limit my search but I wasn't expecting it to be so difficult. Majority of results came back as 15" (I'm unsure if they're fit over the brakes) or 17" (can look too big on the car) or the wrong PCD.
Here are a few options,unfortunately I didn't have a HUUUGE budget which also didn't help the search.
Rota Fighter (Volk Racing CE28 reps) Not a huge fan of multi spokes

Japan Racing JR3/Rota Grid (Volk Racing TE37 reps)

Japan Racing JR11 (Weds SA-99R reps) again, quite a few spokes

I've always liked the Enkei RFP01 design and it works on alot of cars. It was one wheel I couldn't find in the specs I was after (at the time)

The Rota Slipstream were my first choice. I had these on the Motul K11 Micra, its a simple design which looks great

This grey 323F has the real deal Desmond Regamasters (or so the owner says)

Mazdaspeed installed their MS01 wheel on their Lantis models, which came in 16". But as you can imagine these can hold a good 2nd hand value

The more I searched for examples the more I prefered a 5 or 6 spoke design. I did come across a set of Work Equip 05s but by the time they're refurbed it'd be close to a 4 figure total. Plus my days of keeping polished lips clean are in the past from the Work Meister S1s on the purple MX5.

That's when I had a wheel design pop into my head which may tick all of the boxes. An OEM wheel from a rival manufacturer.
I sent out a few messages to people who may know the whereabouts of said wheel, which led me to a seller local to me. I immediately went to view them and providing they were all straight with no major damage or cracks, they'd be coming home with me.

The wheels had been stored for a number of years outside, but the lips had quite alot of brake dust embedded
I tried the strongest wheel cleaner/fall out remover I had and it didn't shift it at all. This meant I would struggle to clean them and the only way was a refurb.

I was able to get my hands on a knackered tyre in the same size as the Kumhos. I used this for testing on the car to make sure they cleared the arches and brakes.

With no spacers it was a pretty good fit and plenty of clearance. A small spacer would be required due to the centre bore being smaller than the 323F hub.
It was all steam ahead so I got it booked in for a refurb. A friend of a friend was able to do them for me for a cash price. I asked for them to be sprayed in a gunmetal colour. Their response was they do a light or a dark gunmetal. I didn't want it too light where it'd be silver, but I didn't want it too dark and it's almost black.
I left him to decide and hoped they came out ok.

I'm very very happy with the colour and the overall condition is great considering how much corrosion and pitting the wheels had originally.
I gave them a layer Meguiars Ultimate Wax to help seal them
Forged Nissan R32 GTR 16x8j ET30 (technically ET27, I have 3mm spacers fitted), 205/50R16 Kumho tyres


I lowered the BC Racing coilovers to eliminate the rear arch gap. Both axles were different heights! The front got lowered approx 10mm and the rear approx 15mm
The distance from the locking collars are:
Front: 40mm
Rear: 135mm


I'm extremely happy with the result!
What do you think?
The Youtube video can be found here (I tried improving my 'cinematic' editing):
https://www.youtube.com/watch?v=c6sT7wV61-c&t=...
Edited by hoodedreeper on Friday 10th May 22:49
roadie said:
I agree that they look great!
However, that the wheels are in perfect condition does highlight that the bodywork isn't if you know what I mean.
It is unfortunate, if the wheels didn't have the brake dust heavily bonded on and they cleaned up ok I would have fitted them as they were.However, that the wheels are in perfect condition does highlight that the bodywork isn't if you know what I mean.
I do hope to sort the dents out, but it won't be receiving any paint work (unless the passenger door is beyond repair)
paralla said:
Might be just me but I'd rather have nicely painted bodywork than nicely painted cam covers.
It's difficult knowing what to prioritise, especially when issues arise in the mean time (like the vacuum chambers breaking for example).Having mint bodywork wouldn't do me any favours if there's leaks or a mechanical failure somewhere.
A little update
The 323F has been off the road for 2 weeks and the R34 has been on daily duties. Not something I should complain about, except for the fuel consumption *cries*.
I was trying to eliminate the knocking noise by replacing the ball joints and drop links. Starting off with the driver side the ball joint came off with ease, the drop link not so much. We all know drop links never come off so I cut it off. Access was limited with everything still attached, I should have disconnected the tie rod end in the first place and the next bit wouldn't have been an issue.
With no room to get the angle grinder in, I decided to remove the lower arm to cut off the remaining drop link. That came off fine and it was time to refit the suspension arm. The rear bush/bracket went on fine but I had trouble with the long front bolt.
It would tighen to the point where approx 10mm of the bolt was poking out. I gave it abit more ooomph and it started to turn with ease. I tried un-doing it but the bolt just span. With a pry bar inbetween the suspension arm and subframe while turning the ratchet I could feel something move, then get wedged, then move etc
It looks like the captive nut inside the subframe had broken off and was spinning, doh! I managed to get a replacement bolt from the local Mazda dealer along with a couple of steel nuts from a hardware store.
The car was booked in to be sorted but there was a 2 week wait. The morning of the booking I moved the car to find a puddle of transmission fluid underneath the passenger wheel. I guess something got disrupted while I was working on the driver side.
The garage diagnosed it as a nipped gearbox seal when the clutch was changed. My Mazda dealer was able to get me a new seal and driveshaft clip next day, but there was another week wait for the garage to look at it.
So thats booked in for Friday 31st, hopefully this is the end of the bad luck. Fingers crossed!
Moving onto a slightly more interesting update...
I've booked a track day at Snetterton Circuit (my local) for Wednesday 26th June, woohoo!
I wanted to be able to monitor the oil pressure and oil temperature, but I didn't want modern LED gauges. I found a company called VDO who produce both LED and analogue units.
I gathered majority of the parts from Merlin Motorsport, the pressure gauge came from Europa Spares and the wiring componants from my work.

I began by routing the 17amp sensor wiring through the bulk head, tucking it around the carbon canister and along the fuel and vacuum hoses.

From here I tucked it underneath the distributor and used the existing wiring trunking.

I cable tied the new wiring to the Alternator/Oil Pressure Switch loom to keep things tidy

Next up was to remove the oil filter ready for the Mocal sandwitch plate. What I liked about this particular item was the seal was nice and wide, unlike others on the market where they're as thin as an O ring.
The sender unit and sensor screwed in but not so tight you couldn't see the threads. Both threads are tapered so didn't require a full send with a spanner.


With the sensor wires now through the bulk head I could feed them through the dash and out above the stereo. The car had a dash pocket which was a perfect place to mount the gauges.
I made sure to label everything using some cable tie tags. Nothing worse than a spaghetti of wires behind the dash which are all red and black with no clue what does what.

The gauge illuminaton required to be wired in seperately which made things a little messy. Originally I had spliced into the cig lighter illumination live but for some reason that wasn't working. In the end I used the two empty fuse slots on the 4 way fuse box.
I made sure to earth the illumination and gauges seperately as per the VDO instructions.

I let the car idle for 10-15mins to allow the oil temperature to increase to make sure the gauge works. It also allowed me to check for any possible leaks at the sandwich plate, luckily there wasn't any.

I just need to cover the stud on the fuse box to prevent any shortening, but its all good to go.
The Youtube video can be found here:
https://www.youtube.com/watch?v=WWTxobGG1xQ
The 323F has been off the road for 2 weeks and the R34 has been on daily duties. Not something I should complain about, except for the fuel consumption *cries*.
I was trying to eliminate the knocking noise by replacing the ball joints and drop links. Starting off with the driver side the ball joint came off with ease, the drop link not so much. We all know drop links never come off so I cut it off. Access was limited with everything still attached, I should have disconnected the tie rod end in the first place and the next bit wouldn't have been an issue.
With no room to get the angle grinder in, I decided to remove the lower arm to cut off the remaining drop link. That came off fine and it was time to refit the suspension arm. The rear bush/bracket went on fine but I had trouble with the long front bolt.
It would tighen to the point where approx 10mm of the bolt was poking out. I gave it abit more ooomph and it started to turn with ease. I tried un-doing it but the bolt just span. With a pry bar inbetween the suspension arm and subframe while turning the ratchet I could feel something move, then get wedged, then move etc
It looks like the captive nut inside the subframe had broken off and was spinning, doh! I managed to get a replacement bolt from the local Mazda dealer along with a couple of steel nuts from a hardware store.
The car was booked in to be sorted but there was a 2 week wait. The morning of the booking I moved the car to find a puddle of transmission fluid underneath the passenger wheel. I guess something got disrupted while I was working on the driver side.
The garage diagnosed it as a nipped gearbox seal when the clutch was changed. My Mazda dealer was able to get me a new seal and driveshaft clip next day, but there was another week wait for the garage to look at it.
So thats booked in for Friday 31st, hopefully this is the end of the bad luck. Fingers crossed!
Moving onto a slightly more interesting update...
I've booked a track day at Snetterton Circuit (my local) for Wednesday 26th June, woohoo!
I wanted to be able to monitor the oil pressure and oil temperature, but I didn't want modern LED gauges. I found a company called VDO who produce both LED and analogue units.
I gathered majority of the parts from Merlin Motorsport, the pressure gauge came from Europa Spares and the wiring componants from my work.

I began by routing the 17amp sensor wiring through the bulk head, tucking it around the carbon canister and along the fuel and vacuum hoses.

From here I tucked it underneath the distributor and used the existing wiring trunking.

I cable tied the new wiring to the Alternator/Oil Pressure Switch loom to keep things tidy

Next up was to remove the oil filter ready for the Mocal sandwitch plate. What I liked about this particular item was the seal was nice and wide, unlike others on the market where they're as thin as an O ring.
The sender unit and sensor screwed in but not so tight you couldn't see the threads. Both threads are tapered so didn't require a full send with a spanner.


With the sensor wires now through the bulk head I could feed them through the dash and out above the stereo. The car had a dash pocket which was a perfect place to mount the gauges.
I made sure to label everything using some cable tie tags. Nothing worse than a spaghetti of wires behind the dash which are all red and black with no clue what does what.

The gauge illuminaton required to be wired in seperately which made things a little messy. Originally I had spliced into the cig lighter illumination live but for some reason that wasn't working. In the end I used the two empty fuse slots on the 4 way fuse box.
I made sure to earth the illumination and gauges seperately as per the VDO instructions.

I let the car idle for 10-15mins to allow the oil temperature to increase to make sure the gauge works. It also allowed me to check for any possible leaks at the sandwich plate, luckily there wasn't any.

I just need to cover the stud on the fuse box to prevent any shortening, but its all good to go.
The Youtube video can be found here:
https://www.youtube.com/watch?v=WWTxobGG1xQ
With the track day just 3 weeks away I needed to finish some prep for the day.
Me and fire aren't friends after the engine fire in my first MX5 back in 2008, so the first safety precaution was to install an extinguisher.
The easiest way to mount it would be to the front of the passenger seat rail. I started off by making a cardboard template for a rough shape and to make the holes of the rail.
The original plan was to make it wider and flat to the floor with a slight bend in the metal. Upon offering up the fire extinguisher I realised I could make it half the width and it should tuck underneath the seat quite well.

I was happy with the way it had turned out. The mounting holes for the bracket were drilled and it was given a couple of coats of tough satin black.


The seat does clear the top, but I don't think it'll ever be that far forward.

The last time I did a track day was 2021 in the Motul Micra K11. I remember the tyres seemed to have been holding me back a little. It may also partly be me not having enough confidence in not just the tyres but the whole experience.
To help conquer that I decided to buy some better tyres. Originally I managed to purchase a pair of Nankang NS2Rs for £66 delivered. When they were mounted to the S14 wheels one had a tear on the inner shoulder, dammit!
Fast forward a few weeks and I found a pair of 2021 stamped AD08RS locally. I struggled to find another pair when two more pairs appeared on Facebook Marketplace. Both fell through, well one did the other stopped responding, so I decided to bite the bullet and buy a pair of new ones.

These are a 205/45/16 which should give me 10mm more arch clearance compared to the current 205/50 setup on the R32 wheels.

The last thing to do was to change the brake fluid. While the car was at the garage last week having the gearbox seal replaced, they bled the brakes for me too.
It seems to be a can of worms when asking for recommendations. Alot of people say either Castrol SRF or Motul RBF 660. I had a local performance garage owner Fast Eddy come into my work, we got chatting and he recommends the EBC BF307+. He's an EBC dealer and was able to drop some off for me.
I'm still using the Blueprint discs and pads and I've ordered replacements to take with me. Unfortunately there aren't any performance brake pads available so I'll have to be careful.

I'm probably over thinking alot of this, I just want to be prepared and not have the day cut short due to something silly (like boiling brake fluid for example)
The Youtube video can be found here:
https://www.youtube.com/watch?v=XL5NSj3csj4
Me and fire aren't friends after the engine fire in my first MX5 back in 2008, so the first safety precaution was to install an extinguisher.
The easiest way to mount it would be to the front of the passenger seat rail. I started off by making a cardboard template for a rough shape and to make the holes of the rail.
The original plan was to make it wider and flat to the floor with a slight bend in the metal. Upon offering up the fire extinguisher I realised I could make it half the width and it should tuck underneath the seat quite well.

I was happy with the way it had turned out. The mounting holes for the bracket were drilled and it was given a couple of coats of tough satin black.


The seat does clear the top, but I don't think it'll ever be that far forward.

The last time I did a track day was 2021 in the Motul Micra K11. I remember the tyres seemed to have been holding me back a little. It may also partly be me not having enough confidence in not just the tyres but the whole experience.
To help conquer that I decided to buy some better tyres. Originally I managed to purchase a pair of Nankang NS2Rs for £66 delivered. When they were mounted to the S14 wheels one had a tear on the inner shoulder, dammit!
Fast forward a few weeks and I found a pair of 2021 stamped AD08RS locally. I struggled to find another pair when two more pairs appeared on Facebook Marketplace. Both fell through, well one did the other stopped responding, so I decided to bite the bullet and buy a pair of new ones.

These are a 205/45/16 which should give me 10mm more arch clearance compared to the current 205/50 setup on the R32 wheels.

The last thing to do was to change the brake fluid. While the car was at the garage last week having the gearbox seal replaced, they bled the brakes for me too.
It seems to be a can of worms when asking for recommendations. Alot of people say either Castrol SRF or Motul RBF 660. I had a local performance garage owner Fast Eddy come into my work, we got chatting and he recommends the EBC BF307+. He's an EBC dealer and was able to drop some off for me.
I'm still using the Blueprint discs and pads and I've ordered replacements to take with me. Unfortunately there aren't any performance brake pads available so I'll have to be careful.

I'm probably over thinking alot of this, I just want to be prepared and not have the day cut short due to something silly (like boiling brake fluid for example)
The Youtube video can be found here:
https://www.youtube.com/watch?v=XL5NSj3csj4
Someone had painted the door mirror covers and the inner part of the door handles. I was in two minds whether to repaint these black to make them look OEM again or in silver.
I also wanted to re-paint the black trim parts because they had faded and were starting to look awful.

I started off by making a guide on how to remove the handles and mirrors for other 323F owners. That video can be found here:
https://www.youtube.com/watch?v=JJmpnRAkvoU&t=...
Next up was the prep. I used a grey 'ultra fine' scotch pad followed by some sand paper to smooth off the flaking edges, finishing with wiping with some white spirit.
The paint I got 'off the shelf' seems to be a little darker than the body of the car. I did use a grey primer instead of white which may contribute too (I'm no painter)


Very happy with the final result, the gloss black bases look much better!


The reassemble video can be found here:
https://www.youtube.com/watch?v=qcJXcTrfYCw
Wednesday 26th June
For what seemed like a life time since booking it, the track day was finally here! I got to Snetterton early so I could get the wheels swapped over, allowing me plenty of time to sign on, get noise tested and then the final briefing before the sighting laps.
The gentleman doing the noise test seemed quite pleased to see the car. We got chatting and he's previously owned x4 1.5 models and couldn't praise the car enough.
With the sighting laps completed it was time to head back to the pits to check the tyre pressures and wheel nut torque.

Having never owned/driven on semi slicks I was abit cautious when warming them up. I know I'm late to the party, but daaamn these tyres made a huge difference. They gave me so much more confidence, allowing me to push the car harder through corners without the worry of severe tyre squeal/wear.


I had a local company (Dan Wright Vehicle Services) in Norwich do a wheel alignment prior to the day. He added 2.5deg negative camber up front and a tiny bit of toe out. He also adjusted the BC Racing shock dampening to what he thinks would be best suited for the track.

The only 'issue' I had was the brake pedal went soft very briefly, to which I went straight back to the pit garage to cool down. I made sure to cool the brakes down enough in-between sessions to prolong their life, even though I had spare discs and pads. The Blueprint discs and pads DID survive the day, leaving the pads with approx. 50% friction material still left so plenty of life left. I think the saving grace was the EBC brake fluid.


The weather was scorching hot all day. Apart from the brakes, my other worry was coolant temperature. The car still has what looks like it's original radiator and I feared that springing a leak. But to my surprise the temp gauge stayed in the middle and I had no issues.


Overall it was a faultless day for the car. The VRIS system certainly helped kept the car stay in the power band. Once I figured out which gear I'd need for certain corners it made things much easier and the car didn't bog down.
The video from the car can be found here:
https://www.youtube.com/watch?v=LjRmhwEUefg
Sunday 30th June
This morning I popped along to the monthly Cars & Coffee meet that I organise. The rain did effect attendance but it was still a good morning.


I've been in abit of a tricky situation recently. Having been doing Youtube for about 3 years, the future content for the 323F is somewhat limited.
It would be a shame to stop making Youtube videos to just enjoy the car, but it's the journey I enjoy and ultimately that's what drives the Youtube channel forward.
So I've made the decision to sell the car. The advert can currently be found on Facebook Marketplace, Gumtree and PistonHeads Classified. I'm open to sensible offers so please don't be put off by the asking price.
It's no show queen when it comes to the body work, but it's solid underneath and it's had a heap of work carried out. All of which can be found in this build thread and on my Youtube.
I also wanted to re-paint the black trim parts because they had faded and were starting to look awful.

I started off by making a guide on how to remove the handles and mirrors for other 323F owners. That video can be found here:
https://www.youtube.com/watch?v=JJmpnRAkvoU&t=...
Next up was the prep. I used a grey 'ultra fine' scotch pad followed by some sand paper to smooth off the flaking edges, finishing with wiping with some white spirit.
The paint I got 'off the shelf' seems to be a little darker than the body of the car. I did use a grey primer instead of white which may contribute too (I'm no painter)


Very happy with the final result, the gloss black bases look much better!


The reassemble video can be found here:
https://www.youtube.com/watch?v=qcJXcTrfYCw
Wednesday 26th June
For what seemed like a life time since booking it, the track day was finally here! I got to Snetterton early so I could get the wheels swapped over, allowing me plenty of time to sign on, get noise tested and then the final briefing before the sighting laps.
The gentleman doing the noise test seemed quite pleased to see the car. We got chatting and he's previously owned x4 1.5 models and couldn't praise the car enough.
With the sighting laps completed it was time to head back to the pits to check the tyre pressures and wheel nut torque.

Having never owned/driven on semi slicks I was abit cautious when warming them up. I know I'm late to the party, but daaamn these tyres made a huge difference. They gave me so much more confidence, allowing me to push the car harder through corners without the worry of severe tyre squeal/wear.


I had a local company (Dan Wright Vehicle Services) in Norwich do a wheel alignment prior to the day. He added 2.5deg negative camber up front and a tiny bit of toe out. He also adjusted the BC Racing shock dampening to what he thinks would be best suited for the track.

The only 'issue' I had was the brake pedal went soft very briefly, to which I went straight back to the pit garage to cool down. I made sure to cool the brakes down enough in-between sessions to prolong their life, even though I had spare discs and pads. The Blueprint discs and pads DID survive the day, leaving the pads with approx. 50% friction material still left so plenty of life left. I think the saving grace was the EBC brake fluid.


The weather was scorching hot all day. Apart from the brakes, my other worry was coolant temperature. The car still has what looks like it's original radiator and I feared that springing a leak. But to my surprise the temp gauge stayed in the middle and I had no issues.


Overall it was a faultless day for the car. The VRIS system certainly helped kept the car stay in the power band. Once I figured out which gear I'd need for certain corners it made things much easier and the car didn't bog down.
The video from the car can be found here:
https://www.youtube.com/watch?v=LjRmhwEUefg
Sunday 30th June
This morning I popped along to the monthly Cars & Coffee meet that I organise. The rain did effect attendance but it was still a good morning.


I've been in abit of a tricky situation recently. Having been doing Youtube for about 3 years, the future content for the 323F is somewhat limited.
It would be a shame to stop making Youtube videos to just enjoy the car, but it's the journey I enjoy and ultimately that's what drives the Youtube channel forward.
So I've made the decision to sell the car. The advert can currently be found on Facebook Marketplace, Gumtree and PistonHeads Classified. I'm open to sensible offers so please don't be put off by the asking price.
It's no show queen when it comes to the body work, but it's solid underneath and it's had a heap of work carried out. All of which can be found in this build thread and on my Youtube.
C5_Steve said:
Looks fantastic on track! Shame you have to sell it but I think you're right, unless you have the space to keep it and another project for the channel it makes sense. You've done wonders with this one, I'm sure it'll go to a good home.
I wish I could keep all of the cars 
Happy to do a deal with a PH member

MightyBadger said:
RSTurboPaul said:
I wish I had that much spare cash to buy it, great car.
Gassing Station | Readers' Cars | Top of Page | What's New | My Stuff


