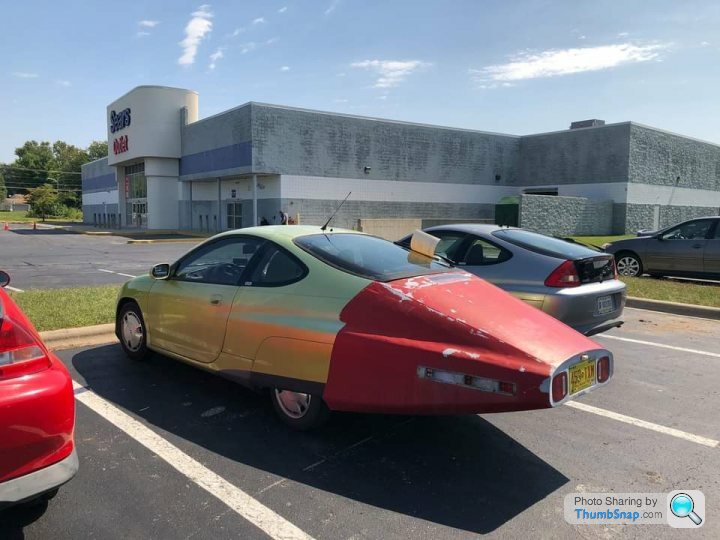
2001 Honda Insight ZE1 - Citrus Yellow
Discussion


peterperkins said:
What warning lights?
Hi Peter - that SRS light! Clips and water tightness must be added, then I can mop out the standing water, dry it out properly int he spring and track down whichever module is causing the issue.The low fuel light must be the sender on the in tank pump... that one is really bothering me now.
Cambs_Stuart said:
I had an issue last weekend where both of my cars where out of service, both needing chunks of money spend on them. It was cold, dark, I was tired and I was sorely temped go and get something much newer on a lease deal.
Do you ever have moments like that?
Sorry to hear that - I'm sure both will be back in working order and you'll be dispelling that notion of a lease/new purchase. I have never been tempted; apart from the cost of anything I would find interesting, I don't need a car for my commute, and (as you and I both know over all these years on PH), a good night's sleep and sometimes calling an expert or friend can make daunting/expensive fixes much more palateable. Do you ever have moments like that?
My wife generally thinks that if a car if becoming too fragile or unreliable we should track down another one for ~2k with an MOT and hint that I need to fix stuff 'in due course'. See: the 99 and the GTV. Luckily she's only ever interested in cars I would also be keen on, and we both are averse to anythign resembling regular payments.
B'Stard Child - still goign strong after 4 years, love it!
Both of the ULEZ cars out recently:


A common issue with the ZE1 is 'wet seatbelt syndrome', often accompanied by other leaks and damp in the cabin. Luckily, the community have several decent youtube and forum guides on how to deal with this, and Honda supply all the clips required to refit the trim. I have been tooling around now for a few thousand miles and the damp seats, and especially the prospect of a diagonal soaking actually means I can't wear 'nice' cloths, and my wife (truly a patient lady) has asked if we could find a seat liner...

Not so great dripping onto my lovely new battery pack...
 r
r
The overarching issue is failed bonding around the door trim and roof clips, as well as dry/cracked Hondabond (no, really) in the roof gutter.

There are 11 fasteners on each side for the door trim:
1. A 10mm bolt visible in above the hinge.
2. A 'button' round fastener by the wiper/scuttle - this is a slot and did not break/does not need to be bought.
3. Seven standard pillar clips - 91503-S3Y-003.
4. One 'locator' pillar clip - 91511-S3Y-003 - simialr to 3 but with an additional clippy bit thing widgit bit (Japanese translation).
5. One 'Square clip' - the primary suspect in most leaks - this didnt break on my removal and rarely seems to on the forums.
Plus a load of metal clips. This is a well fastned piece of trim.
Items 3. and 4. need to be bought from Honda - £55 for 16 clips in total - they break on removal.
In addition, there is a small 3 in piece of trim in the gutter to the boot - I decided to do them all on the same day. In addition to a good knife, rubber mallet, normal trim tools and coffee you will need some 3M double sided adhesive to reattach the rear 3in trim bit, plus a cylinder of your favourite sealant. I chose OB1 as it seems tough, I couldn't buy Hondabond and its held up being waterproof elsewhere in my life.

First up, masking worthy of Kubrick:

Then a stanley knife, on full extension, slips underneath and down the underside, with a rubber mallet to cut the 8 clips... This is hard to photo, just imagine these tools and hands in the right place. I also undid the 10mm bolt.


Lower plastic clips done, the top square clip can be gently teased out ("Careful now, Dougal")

Next a tricky bit - the upper metal clips, which need to be teased apart to release the trim - I used a small pair of pliers with a curved end (for hose clamps).
Once all out, it should just be the front 'button' which can be released by moving the trim towards the rear of the car. Phew.


Mmmm... lovely. A good clean up and removal of the clip corpses from the battefield.

Rear trim was a combination of screwdrivers and trim removal tools to remove, with patience...


Here's the 'locator' clip with its extra slot.

Some gently prodding at cracks revealed large holes in the bonding.

Also at the rear of the gutter:

Much scrape-age and cleanage later, this is the 3M tape I used for the two rear trim metal clips:

Test fit. Key is to have the clips high enough to retain a channel for the water to run out below. Like a stream eroding a canyon.

Expensive clips in and ready.

OB1 clear sealant perhaps isnt the easiest to see, but careful application to all joins, crack and holes, especially around the 'square clip' and also around the hole for each trim clip.


Done!

Bolt back in, masking off - exterior unchanged, it all clipped back correctly - now the test of the next serious British February to see if I have sealed it correctly.
Oh. The other side. Well... that will have to be another day.
Not so great dripping onto my lovely new battery pack...
rThe overarching issue is failed bonding around the door trim and roof clips, as well as dry/cracked Hondabond (no, really) in the roof gutter.
There are 11 fasteners on each side for the door trim:
1. A 10mm bolt visible in above the hinge.
2. A 'button' round fastener by the wiper/scuttle - this is a slot and did not break/does not need to be bought.
3. Seven standard pillar clips - 91503-S3Y-003.
4. One 'locator' pillar clip - 91511-S3Y-003 - simialr to 3 but with an additional clippy bit thing widgit bit (Japanese translation).
5. One 'Square clip' - the primary suspect in most leaks - this didnt break on my removal and rarely seems to on the forums.
Plus a load of metal clips. This is a well fastned piece of trim.
Items 3. and 4. need to be bought from Honda - £55 for 16 clips in total - they break on removal.
In addition, there is a small 3 in piece of trim in the gutter to the boot - I decided to do them all on the same day. In addition to a good knife, rubber mallet, normal trim tools and coffee you will need some 3M double sided adhesive to reattach the rear 3in trim bit, plus a cylinder of your favourite sealant. I chose OB1 as it seems tough, I couldn't buy Hondabond and its held up being waterproof elsewhere in my life.
First up, masking worthy of Kubrick:
Then a stanley knife, on full extension, slips underneath and down the underside, with a rubber mallet to cut the 8 clips... This is hard to photo, just imagine these tools and hands in the right place. I also undid the 10mm bolt.
Lower plastic clips done, the top square clip can be gently teased out ("Careful now, Dougal")
Next a tricky bit - the upper metal clips, which need to be teased apart to release the trim - I used a small pair of pliers with a curved end (for hose clamps).
Once all out, it should just be the front 'button' which can be released by moving the trim towards the rear of the car. Phew.
Mmmm... lovely. A good clean up and removal of the clip corpses from the battefield.
Rear trim was a combination of screwdrivers and trim removal tools to remove, with patience...
Here's the 'locator' clip with its extra slot.
Some gently prodding at cracks revealed large holes in the bonding.
Also at the rear of the gutter:
Much scrape-age and cleanage later, this is the 3M tape I used for the two rear trim metal clips:
Test fit. Key is to have the clips high enough to retain a channel for the water to run out below. Like a stream eroding a canyon.
Expensive clips in and ready.
OB1 clear sealant perhaps isnt the easiest to see, but careful application to all joins, crack and holes, especially around the 'square clip' and also around the hole for each trim clip.
Done!
Bolt back in, masking off - exterior unchanged, it all clipped back correctly - now the test of the next serious British February to see if I have sealed it correctly.
Oh. The other side. Well... that will have to be another day.
Thanks all - appreciate the well-wishes and yes it was the normal combination of annoying, fiddly and satisfying you would expect!
Today we used the Insight for a central London trip - front left tyre was strangely down to 20psi so pumped it up (will keep an eye on that...) and it sat out in the rain, plus there was a good deluge overnight. There is no (fresh) water on the driver's side.

We may have a success - passenger side to follow, but historically the right was far, far worse.
If this all goes to plan I'm then taking out the interior for a proper dry and deep clean, then sorting the fuel pump sender. And hopefully the seatbelt modules can be dried out fully and I can somehow reset the system...
Today we used the Insight for a central London trip - front left tyre was strangely down to 20psi so pumped it up (will keep an eye on that...) and it sat out in the rain, plus there was a good deluge overnight. There is no (fresh) water on the driver's side.
We may have a success - passenger side to follow, but historically the right was far, far worse.
If this all goes to plan I'm then taking out the interior for a proper dry and deep clean, then sorting the fuel pump sender. And hopefully the seatbelt modules can be dried out fully and I can somehow reset the system...
...and the other side is done. Another 100 miles and all weather conditions - so far - dry as a Stewart Lee set.
Before declippage:

During, with similar amounts of detritus pouring into the cabin.

The left side was not at bad as the right, but I had a good poke to dislodge any loose hondabond and pre-empt havign to revisit this...


Then it was time to give the Insight a proper wash for the first time this year at a friend's house. WIth the sun shinign it felt more like summer at 15 degrees - perfect car washing weather.

The D-ZUS fasteners for the spats made it wonderfully easy to remove them and dislodge the grime.

The colour really comes alive in the sun. Roll on summer!


Before declippage:
During, with similar amounts of detritus pouring into the cabin.
The left side was not at bad as the right, but I had a good poke to dislodge any loose hondabond and pre-empt havign to revisit this...
Then it was time to give the Insight a proper wash for the first time this year at a friend's house. WIth the sun shinign it felt more like summer at 15 degrees - perfect car washing weather.
The D-ZUS fasteners for the spats made it wonderfully easy to remove them and dislodge the grime.
The colour really comes alive in the sun. Roll on summer!
B'stard Child said:
Excellent work - hopefully dry for the forseable
Any plans to refurb the wheels??
I know the paintwork is a little faded in places but to me refurbed wheels make such a difference
They certainly do, eventually, but there's plenty of maintenance and fixes left to do on this and other cars. Any plans to refurb the wheels??
I know the paintwork is a little faded in places but to me refurbed wheels make such a difference
Finding someone in the UK who can replicate the correct finish and also match the (fragile) centre caps is proving a challenge. Recommendations welcome.
Om said:
That looks great in the sun. Fantastic colour.
The photos flatter the fading and miles, but yes the sun transforms it. Next up - some minor paint tidying and black trim rejuvination.Thanks all - yes I will eventually refurbish the wheels, just reviewing lots and lots of options...
Easter weekend prompted a short notice getaway to Wales. With the promise of fixed leaks and less of a damp canine smell, my wife agreed to use the Insight, and after a quick top up of tyre pressures and a check of the liquids it was ready to go.

Significant rain en route failed to derail the Insight. The last time I drove it in this downpour was just after purchase, and while it may have been my experience with the car, the newer tyres I believe provided a lot more confidence.

Fortunately the wettitude broke somewhere near Hay on Wye, and the next three days were spent ambling amongst bookshops, rambling and generally faffing about in the countryside.


We stayed in a timber house, actually built in the 'Zakopane' or Polish traditional style, which we loved.

Some other notable daily drivers:

Average mpg 71mpg, including lots of twisty bits and some traffic back in London.
Most importantly - no leaks!
ewand said:
I also had plastic undertray panels missing (or bodged by previous attempts at servicing) and bought a k3cyl full belly aluminium undertray to compensate. I loved my little Insight but during the 2020 lockdown, it hardly turned a wheel and its somewhat porous nature meant I decided in a fit of pique to get shot of it. The guy who bought it off me was a trader and immediately tried to flip it at significant uplift
https://www.pistonheads.com/news/ph-spottedykywt/h...
but in the end he had to settle for a good chunk less
https://carsonline.bonhams.com/en/listings/honda/i...
Thank Ewan - and appreciate your guidance throughout some of this journey! I definitely need to get an undertray.https://www.pistonheads.com/news/ph-spottedykywt/h...
but in the end he had to settle for a good chunk less
https://carsonline.bonhams.com/en/listings/honda/i...
Easter weekend prompted a short notice getaway to Wales. With the promise of fixed leaks and less of a damp canine smell, my wife agreed to use the Insight, and after a quick top up of tyre pressures and a check of the liquids it was ready to go.
Significant rain en route failed to derail the Insight. The last time I drove it in this downpour was just after purchase, and while it may have been my experience with the car, the newer tyres I believe provided a lot more confidence.
Fortunately the wettitude broke somewhere near Hay on Wye, and the next three days were spent ambling amongst bookshops, rambling and generally faffing about in the countryside.
We stayed in a timber house, actually built in the 'Zakopane' or Polish traditional style, which we loved.
Some other notable daily drivers:
Average mpg 71mpg, including lots of twisty bits and some traffic back in London.
Most importantly - no leaks!
Small but important improvement to the Insight - the strusts for the hatch have been replaced, thanks to SGS, reducing the risk of skull fracture that had terrfieid me since purchase.
The original struts have an L shape non-standard bracket welded on the the lower end, which SGS cut and reattached to the new set at no extra charge.
Very happy with their service and communication throughout. My skull is now a little safer.


The original struts have an L shape non-standard bracket welded on the the lower end, which SGS cut and reattached to the new set at no extra charge.
Very happy with their service and communication throughout. My skull is now a little safer.
Oh good to hear they helped you in a similar fashion!
It was mainly to check the door seal treatment... and also the estimated fuel cost couldnt be ignored.
The Alfa GTV did a road trip last year, we have one in the MG planned for later in the year.... the 164 is laid up and the Saab 99 is not long distance material. Its good to spread the mileage!
It was mainly to check the door seal treatment... and also the estimated fuel cost couldnt be ignored.
The Alfa GTV did a road trip last year, we have one in the MG planned for later in the year.... the 164 is laid up and the Saab 99 is not long distance material. Its good to spread the mileage!
Edited by Spinakerr on Sunday 5th May 21:24
With all the engine swaps, trialling and significant works going on in Readers Cars with the advent of 'the second fake summer', I'm likely lowering the standard by posting up some paint touch up efforts...
In the spares pile I found a battered can, and realised it must be left over from the bumper respray. Faded citrus vs new citrus concerns were trampled over given many of my scapes were down to the black plastic or bare aluminium.


The fresh paint looked like Predator blood, but was good enough and went on with a well used Winsor and Newton No.7 brush (Mrs Spinakerr restored oil paitnings for 15 years, so no pressure getting this right...).


Happy with that. Many light coats the key - I'll do soem more afetr the next wash.
Confidence buoyed, I tackle the scratch down the side and the botton of the door.


Right... next.. erm... some suitably impressive engineering. Oh, the fuel level sender and a full interior removal! Yes. That'll be much easier in fine weather.
MOT in June - SRS light still on, must tackle the seatbelt units and clear some codes...
In the spares pile I found a battered can, and realised it must be left over from the bumper respray. Faded citrus vs new citrus concerns were trampled over given many of my scapes were down to the black plastic or bare aluminium.
The fresh paint looked like Predator blood, but was good enough and went on with a well used Winsor and Newton No.7 brush (Mrs Spinakerr restored oil paitnings for 15 years, so no pressure getting this right...).
Happy with that. Many light coats the key - I'll do soem more afetr the next wash.
Confidence buoyed, I tackle the scratch down the side and the botton of the door.
Right... next.. erm... some suitably impressive engineering. Oh, the fuel level sender and a full interior removal! Yes. That'll be much easier in fine weather.
MOT in June - SRS light still on, must tackle the seatbelt units and clear some codes...
darkyoung1000 said:
Top brush work - any update is a good update! Hope clearing the light goes well and that the MOT gods smile upon you!
Nice work on the seals too, it must be very satisfying to drive through torrential weather and not suffer leaks, knowing it was your work that solved it. Given the state of the AX’s carpet, you must tell me how that feels….
Thank - wet carpets are standard fitment on a lot of 80s and 90s cars now, so yes always a relief to solve something! My main concern was how much of the original sealant I was removing, as it came out in chunks! Fortunately any weight gain from a half tube of sealant will be offset by my anxiety.Nice work on the seals too, it must be very satisfying to drive through torrential weather and not suffer leaks, knowing it was your work that solved it. Given the state of the AX’s carpet, you must tell me how that feels….
There are two warning lights to go on the Insight - present since purchase - fuel sender and SRS.

Insight community knowledge points to a combination of a stuck float in the tank being the main culprit for the fuel gauge; grot and damp in the seatbelt connectors a prime cause of SRS alerts. Both require a strip of the midship - the area between the seats and the hatch.

Seat was an easy 4 13mm bolts, plus a tough 14mm on the seatbelt. No connectors or wires.


Wafer thin carpet removed after careful plastic clip and plug extractions.


Hmm... are those speaker holes? We'll come back to those...
Inner door trim unclipped without fuss - a collection of long nosed pliers, proddy implements and screwdrivers aids this process considerably.

A number of 11mm bolts later... one final tough one behind the handbrake cover.

We're through the ionosphere...

Lingering damp evidence all needs to be cleaned up... mould is everyone's favourite.

Some retained water in the foam below the seatbelts too... delightful.

Four more 11mm bolts. The factory in Takanezawa must just be full of 11mm socket sets and plastic clip tools.

Right! Let's have a look at the fuel pump...oh...


But of course. Its a mousehome. In fact its likely the 'granny annex' to the main abode that was in the engine bay.
Before the float, this little gnawed-through wire might just be the cause of the fuel sender failure...!

Gloves on, vacuum out...

Much better. Liberal antibacterial plus rags applied throughout, and we have a bit more of a scene to assess. One wire has been completely cut by tiny teeth, the other three have marks but appear intact. Fancy Honda plugs abound with covers, clips and Crystal Maze release mechanisms.
Electrical repairs are not my favourite - however I have conceded over the years that crimping and connectors is a last resort. With only a hint of a sigh I dug out my soldering iron and chopped out the nibbled section.

Success, topped off with some of my favourite 'quick drying wire paint' that I have used a fair bit on project over fancy heatshrink.

Having now been crouched at awkward angles for a few hours, I decided to fall slightly sideways and get the key in the ignition.

Yes! An actual fuel level!
Phew. Big win for me - I wasn't looking forward to fishing around in the petrol and ordering a new assembly from Honda if I broke something fragile.
Next up - the seatbelt connectors, deeper interior clean to purge the final bits of damp and mould smell, plus (probably) a carpet and seat complete removal to steam clean them.
Preview of random newspaper on the floorpan.

Edited by Spinakerr on Sunday 12th May 08:16
Thanks all - good to know these problems are surmountable, even in a Replicantchaser from the year 2049.
Today followed the success of yesterday - the SRS light is off!
Fortunately it went exactly to plan - disconnect battery, unbolt and unplug the seatbelts, clean and recheck all connections a few times...

Unplug a few more yellow items in the loom...remove crud where possible.

Reconnect battery, key in ignition and insert the Honda unapproved service device in the MES connector. This allows a reset of the SRS system, and it clipped into a fuse panel above the accelerator pedal (RHD). Top yellow connector here:


You then follow a procedure of inserting the tool when the light illuminates a few times. Then it flashes to say thankyou.
Amazingly, first time through the SRS light disappeared - fantastic!

This was all before lunchtime.
I have started to tackle the mould marks but I'll need one of those fancy carpet cleaners and take out the drivr's seat & all upholstery. That's a job for next weekend.
cwoodsie2 said:
Great update and that sounds very satisfying. Walk the dog past a house with two of these and they’re just emerging from car covers at the back of the drive - think they may also be a bit pourous! Think they look fab
I'm happy to offer my waterproofing services for a few pennies and tea.darkyoung1000 said:
Great stuff, nice work on carefully uncovering the issue and fixing it. That wire paint looks like interesting stuff…. Much easier to apply than heat shrink (which yes, I always forget to put on first, or leave to close to the area being soldered so it shrinks prematurely)!
Its very good stuff, will take a pic next time before it is packed up. I too have a litany of swearwords for heatshrink that shrinks elsewhere on the wire.Today followed the success of yesterday - the SRS light is off!
Fortunately it went exactly to plan - disconnect battery, unbolt and unplug the seatbelts, clean and recheck all connections a few times...
Unplug a few more yellow items in the loom...remove crud where possible.
Reconnect battery, key in ignition and insert the Honda unapproved service device in the MES connector. This allows a reset of the SRS system, and it clipped into a fuse panel above the accelerator pedal (RHD). Top yellow connector here:
You then follow a procedure of inserting the tool when the light illuminates a few times. Then it flashes to say thankyou.
Amazingly, first time through the SRS light disappeared - fantastic!
This was all before lunchtime.
I have started to tackle the mould marks but I'll need one of those fancy carpet cleaners and take out the drivr's seat & all upholstery. That's a job for next weekend.
Scope creep ahoy!
With the warning lights doused I almost waited patiently for the rear speakers... until I remembered this would be an ideal opportunity to track down any final leaks.

Just a handful of screws and clips secure the handbrake trim, console and main carpet - all swiftly removed for a good clean and demould.


Sure enough, damp in the footwells... this could be historic so I thought best to pull the whole lot out, dry it out and see what happens.

Random FT supplement... and black mould propogator.


I only had to wait a day or two for the first false british summer period to expire and rain sweep in. Behold, leak discovered at the front the doors, under the speaker panel. A cursory scamper through the 80s neon drenched Matrix known as 'insightcentral' revealed this could be as simple as the door membranes needing to be resealed. WIthout them water pools in the door seal and overflows onto the inside.

Next up - some top draw door card action...
With the warning lights doused I almost waited patiently for the rear speakers... until I remembered this would be an ideal opportunity to track down any final leaks.
Just a handful of screws and clips secure the handbrake trim, console and main carpet - all swiftly removed for a good clean and demould.
Sure enough, damp in the footwells... this could be historic so I thought best to pull the whole lot out, dry it out and see what happens.
Random FT supplement... and black mould propogator.
I only had to wait a day or two for the first false british summer period to expire and rain sweep in. Behold, leak discovered at the front the doors, under the speaker panel. A cursory scamper through the 80s neon drenched Matrix known as 'insightcentral' revealed this could be as simple as the door membranes needing to be resealed. WIthout them water pools in the door seal and overflows onto the inside.
Next up - some top draw door card action...
Edited by Spinakerr on Sunday 26th May 10:00
Door cards on the Insight match the rest of the construction philosophy - simple, small number of fittings, well designed.
The wing mirror reverse trim pops off, one scren in the pull handle and two in the grab handle.


Two more behind the speaker grille, and the card then pops and lifts off, thankfully the door handle mechanism and lever can be left in place. I'm glad I modified those speaker terminals rather than soldering them on - neatly unclipped!


Membrane is in place, but the evidence of leakage is clear.


Driver's side had perhaps been looked at by a previous owner. While the gaffer tape looks bad, there is a decent black silicone bead underneath.

I dusted off the tube of OB1 I had used to seal the roof, and the nice lady at screwfix gave me a few spare nozzles when I pleaded my case (and they were out of stock for a multipack), so both membranes were carefully resealed.

That may be the end of it... we'll see. I'm sure somethign else will now develop.
While I had the sealant gun in hand I also slathered the boot electric seal, which can be another cause of water ingress.

Next up - after some failed attempts, the Pioneer two ways arrived with suitable innocuous and inoffensive grille design. Why do so many speakers look like the torture implements laid out for Bond in Tomorrow Never Dies?

Some gentle modification to the aluminium panel, some new holes drilled and test fit looks good. Once the carpet is freshly cleaned I can make the incision and ensure they sit flush.


As they are Pioneer to match the front (and the head unit) I know I can modify the terminals to remain clippable.
Finally - carpet cleaning and 'refitting is the reversal of removal' Haynes-style aggrevated completion.
The wing mirror reverse trim pops off, one scren in the pull handle and two in the grab handle.
Two more behind the speaker grille, and the card then pops and lifts off, thankfully the door handle mechanism and lever can be left in place. I'm glad I modified those speaker terminals rather than soldering them on - neatly unclipped!
Membrane is in place, but the evidence of leakage is clear.
Driver's side had perhaps been looked at by a previous owner. While the gaffer tape looks bad, there is a decent black silicone bead underneath.
I dusted off the tube of OB1 I had used to seal the roof, and the nice lady at screwfix gave me a few spare nozzles when I pleaded my case (and they were out of stock for a multipack), so both membranes were carefully resealed.
That may be the end of it... we'll see. I'm sure somethign else will now develop.
While I had the sealant gun in hand I also slathered the boot electric seal, which can be another cause of water ingress.
Next up - after some failed attempts, the Pioneer two ways arrived with suitable innocuous and inoffensive grille design. Why do so many speakers look like the torture implements laid out for Bond in Tomorrow Never Dies?
Some gentle modification to the aluminium panel, some new holes drilled and test fit looks good. Once the carpet is freshly cleaned I can make the incision and ensure they sit flush.
As they are Pioneer to match the front (and the head unit) I know I can modify the terminals to remain clippable.
Finally - carpet cleaning and 'refitting is the reversal of removal' Haynes-style aggrevated completion.
It is a decent design for the door - the drain holes are neat and arranged correctly, but any rain entering from the weatherstrip and glass angle would hit the mebrane and then leak in before it gets to the drains. Hopefully this little round has lessened it!
No date on the FT, it was so encrusted with black mould I didnt study it directly. The previous owbet did say he helped the owner before him take some of the interior out.
More hiae testing and interior refitting to follow over the bank holiday I hope!
No date on the FT, it was so encrusted with black mould I didnt study it directly. The previous owbet did say he helped the owner before him take some of the interior out.
More hiae testing and interior refitting to follow over the bank holiday I hope!
With life duties and minor emergencies taking up weekends, I just couldn't get to the Insight before the MOT expired mid June.
This weekend the car needed to be moved (it will become apparent why...) so I brewed a good coffee, rolled it out the garage and assesed the situation.
This lot:

Needed to go in here:

I spent a good while with brushes and disinfectant gettign rid of all mould traces - not fun.


I even removed the ingrained FT supplement:

Door cards went on easily - that was fresh in my mind! The rest of it... well let's just say photos are your friend when you have 50 clips in a box.
I tried out my new purchase - the Vax spot cleaner - on all carpet and fabric items. We may - MAY - have purged the damp smell.


Rear speakers then! Honda supplied the wiring in a neat clip, and as with the front speakers it was a fund puzzle to extricate the terminals, lightly bend them to fit on normal Pioneer speakers and check operation.
Thank you, insight central!

The rest of the interior went back in without fuss - it is actually relatively simple, as you might suggest, and luckily no sacrificial clips to replace.
On to the tricky bit - cutting the holes for the new speakers:

I subscribe to the adage 'measure 413 times, cut once' and it went to plan. Main irritation was the fluffy sound deadening/insulation snagging all of the T-1000 arsenal ("Knives, and stabbing weapons").

The cut may look ragged but it tucked nicely into the grilles, which I selected for their subdued appearance.


I then drilled some new pilot holes into the aluminium and found 8 suitable screws to get through the carpet and hamster bedding.

Happy with that!

With everything cleaned, installed, treated and tested it was time for the MOT! Just one problem...

This weekend the car needed to be moved (it will become apparent why...) so I brewed a good coffee, rolled it out the garage and assesed the situation.
This lot:
Needed to go in here:
I spent a good while with brushes and disinfectant gettign rid of all mould traces - not fun.
I even removed the ingrained FT supplement:
Door cards went on easily - that was fresh in my mind! The rest of it... well let's just say photos are your friend when you have 50 clips in a box.
I tried out my new purchase - the Vax spot cleaner - on all carpet and fabric items. We may - MAY - have purged the damp smell.
Rear speakers then! Honda supplied the wiring in a neat clip, and as with the front speakers it was a fund puzzle to extricate the terminals, lightly bend them to fit on normal Pioneer speakers and check operation.
Thank you, insight central!
The rest of the interior went back in without fuss - it is actually relatively simple, as you might suggest, and luckily no sacrificial clips to replace.
On to the tricky bit - cutting the holes for the new speakers:
I subscribe to the adage 'measure 413 times, cut once' and it went to plan. Main irritation was the fluffy sound deadening/insulation snagging all of the T-1000 arsenal ("Knives, and stabbing weapons").
The cut may look ragged but it tucked nicely into the grilles, which I selected for their subdued appearance.
I then drilled some new pilot holes into the aluminium and found 8 suitable screws to get through the carpet and hamster bedding.
Happy with that!
With everything cleaned, installed, treated and tested it was time for the MOT! Just one problem...
Last Saturday the movement of various driveway obstructions and my obsession with getting things fitted properly meant I just missed the drop-in MOT place.
However, the 'test drive' went all to plan, bar a horn that sounded like a dying fly trapped in a windowsill.
I therefore decided to make the most of the early evening, excavating another Honda 110DB horn to fit. Two little issues - the original is buried far down the front of the radiator, the bracket absolutely seized with rust...

...secondly, the original has an earth, the replacement is 'single wire'. This I believe is due to the aluminium spacebody of the Insight, but could just be Honda variance.
Quick 5 minute job, right? Not if you are me. I spent a good while assembling spanners and prods to dislodge the original horn. Not luck.
I then spent a good while failing to solder the old wires onto the new connector - my iron finally quit, clearly it had been on its way out!

Replacement fired up, I also faffed about making an earthing point on the back of the new horn.
Finally, I spent even more of the (now evening) designing and assembling a new bracket from exising bracket that would attach to spare bolt hole in the slam panel.


I am, however, happy with the end result. I will trim the old horn into obscurity if I ever take the bumper off and air con radiator out. Hopefully I'll never have to do that, ha!
Cue air con dying... today.
Still! I don't need air con for an MOT.
Passed! Phew!

However, the 'test drive' went all to plan, bar a horn that sounded like a dying fly trapped in a windowsill.
I therefore decided to make the most of the early evening, excavating another Honda 110DB horn to fit. Two little issues - the original is buried far down the front of the radiator, the bracket absolutely seized with rust...
...secondly, the original has an earth, the replacement is 'single wire'. This I believe is due to the aluminium spacebody of the Insight, but could just be Honda variance.
Quick 5 minute job, right? Not if you are me. I spent a good while assembling spanners and prods to dislodge the original horn. Not luck.
I then spent a good while failing to solder the old wires onto the new connector - my iron finally quit, clearly it had been on its way out!
Replacement fired up, I also faffed about making an earthing point on the back of the new horn.
Finally, I spent even more of the (now evening) designing and assembling a new bracket from exising bracket that would attach to spare bolt hole in the slam panel.
I am, however, happy with the end result. I will trim the old horn into obscurity if I ever take the bumper off and air con radiator out. Hopefully I'll never have to do that, ha!
Cue air con dying... today.
Still! I don't need air con for an MOT.
Passed! Phew!
Gassing Station | Readers' Cars | Top of Page | What's New | My Stuff