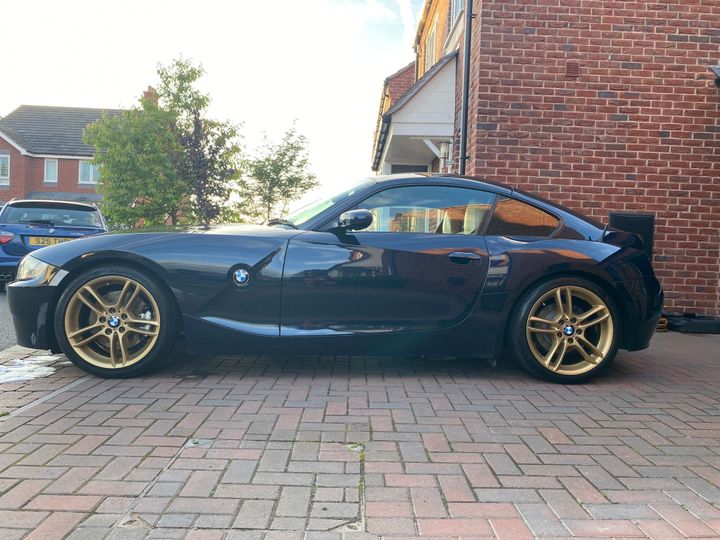
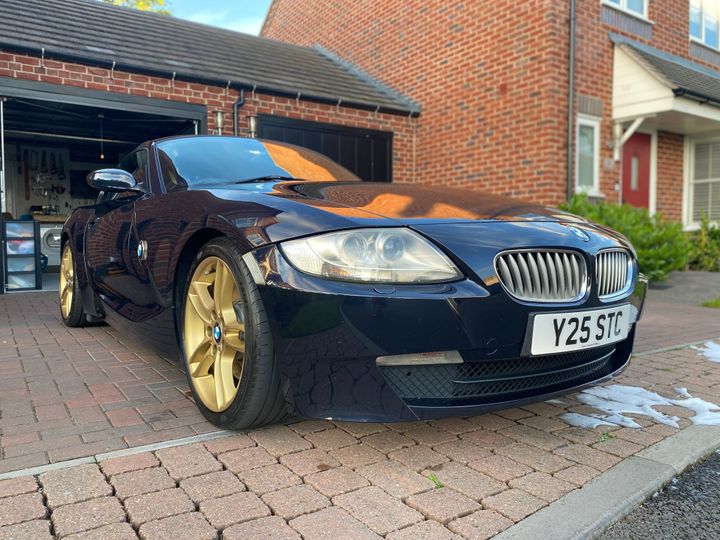
My midlife crisis purchase; E86 BMW Z4 Coupe
Discussion


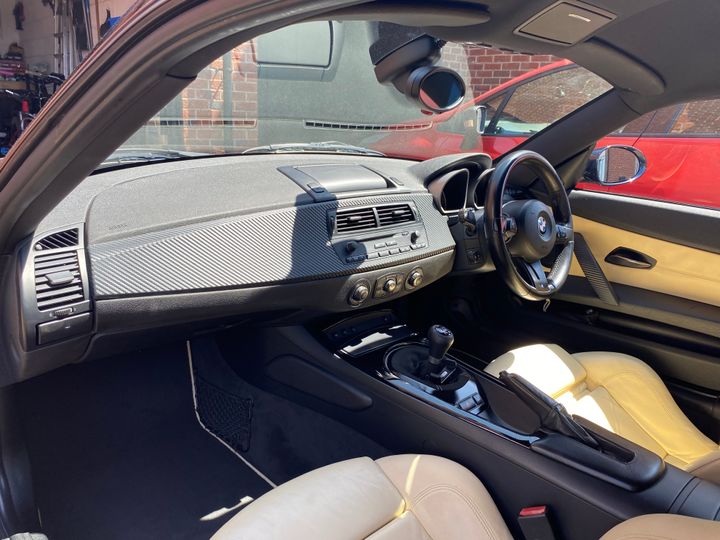
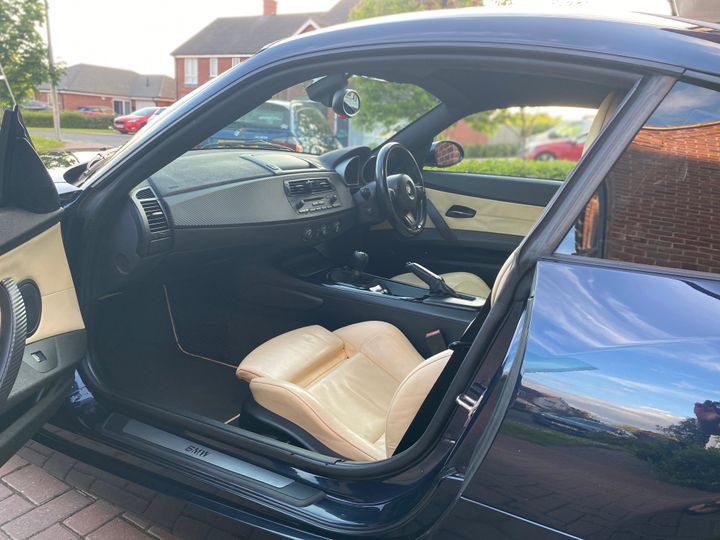
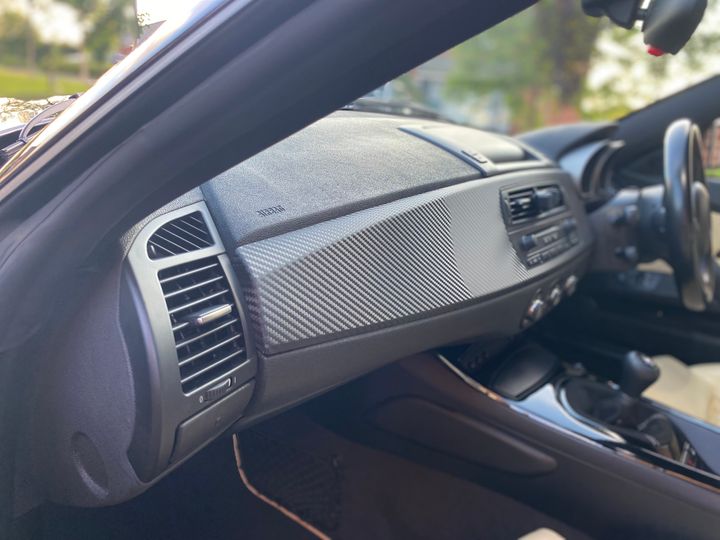
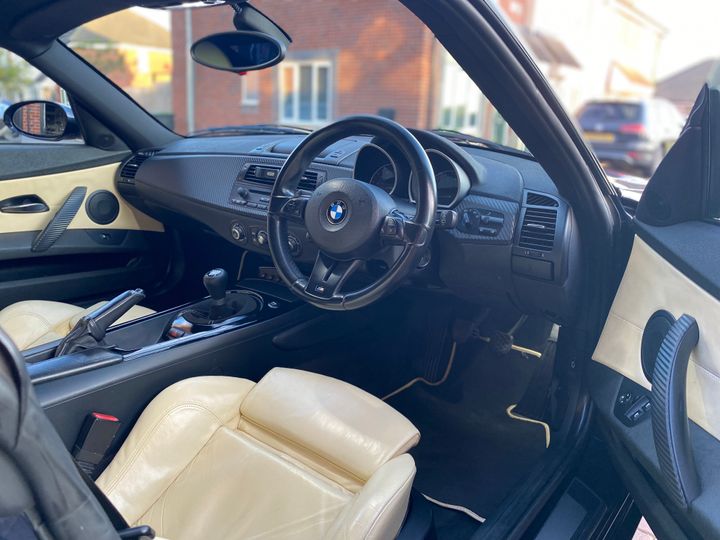
My car came with the very sought after gloss black trim which I’m in the minority for not really liking it. It’s a daft finish for interior trim because it shows up every mark, piece of dust and fingerprint as well as reflections etc.
Mine wasn’t in great condition either. I’m guessing it’s got too hot at some point because there are some random cracks in the finish. The trim around the light controls was particularly bad. The passenger trim had vertical crack too.
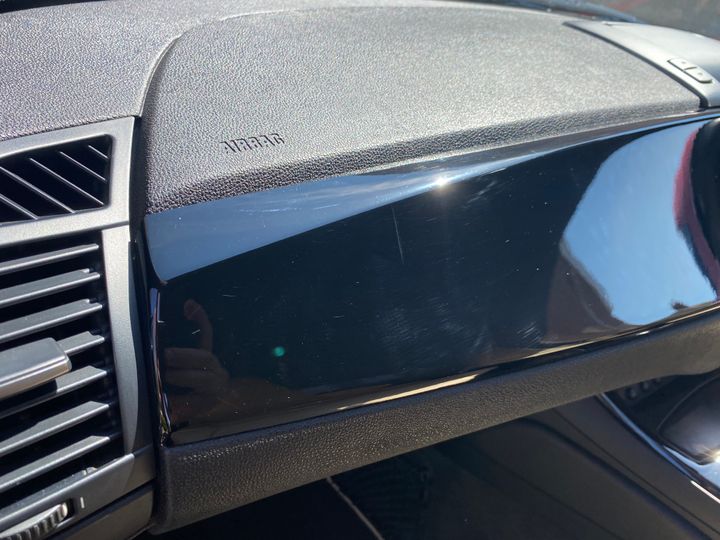
There aren’t too many alternatives so I bought a set of brushed aluminium trim and decided to wrap it (silver with the champagne leather would look crack).
The Z4 isn’t the easiest car to work on when it comes to the interior trim; there are lots of bits screwed in place or with funny hard to get at fixings.
First up was to removed the passenger side air vent / cup holder which is held in place with two screws.

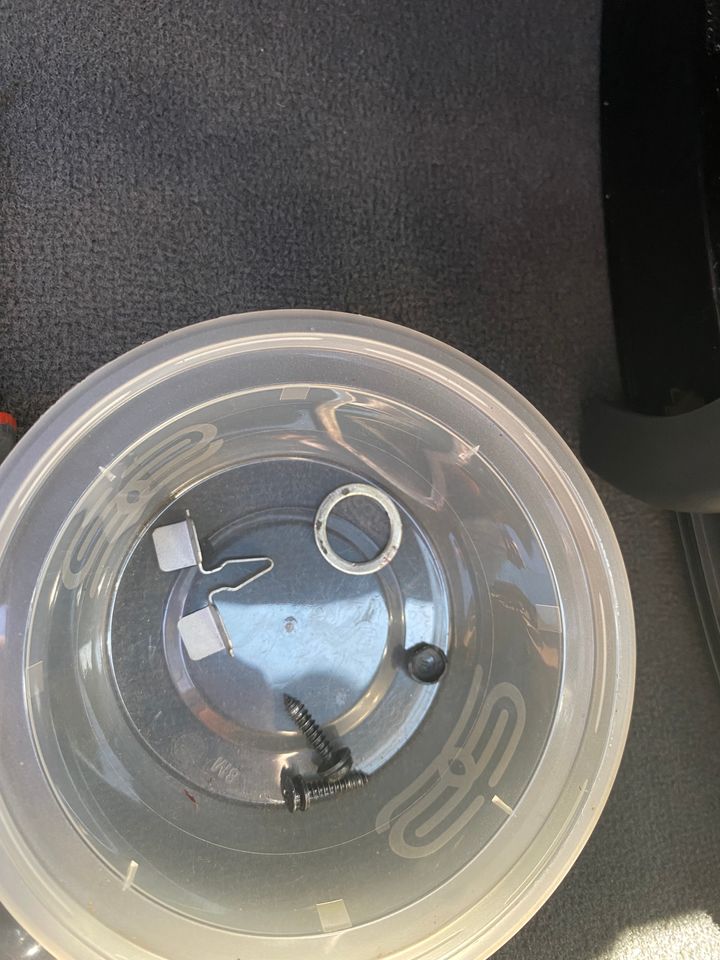
The end of the trim by the vent is held in place with a funny spring clip and a washer. Which needs to be squeezed together whilst digging into your fingers.
The it was time to remove the air vents which I think are a pain. You need to get at the metal clips at the top and bottom through the vents. Thanks BMW.

Head unit out next which is easy enough; two screws, the quadlock connector and the aerial connector.

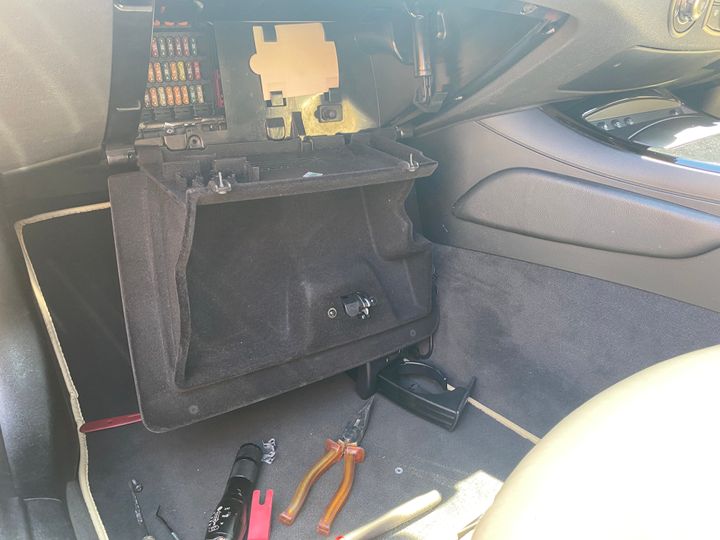
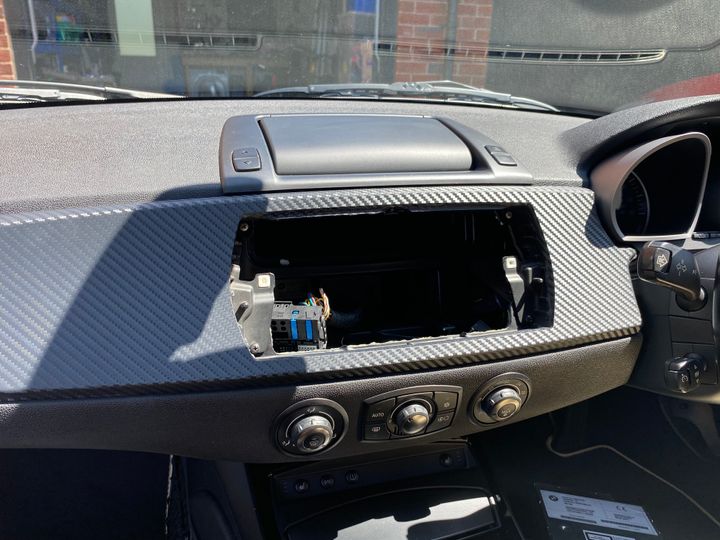
There are four screws behind the head unit / air vent and then it’s brute force to get the trim off. One of the clips came out and fell where I couldn’t see it so I had to pop the glove box out which is actually really easy because it’s held in with six screws.
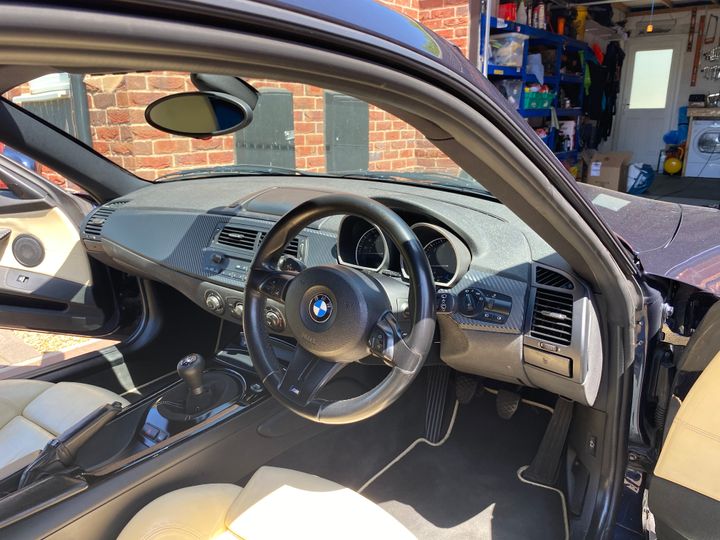
All recesses were cleaned etc before the wrapped trim was fitted.
And back together.
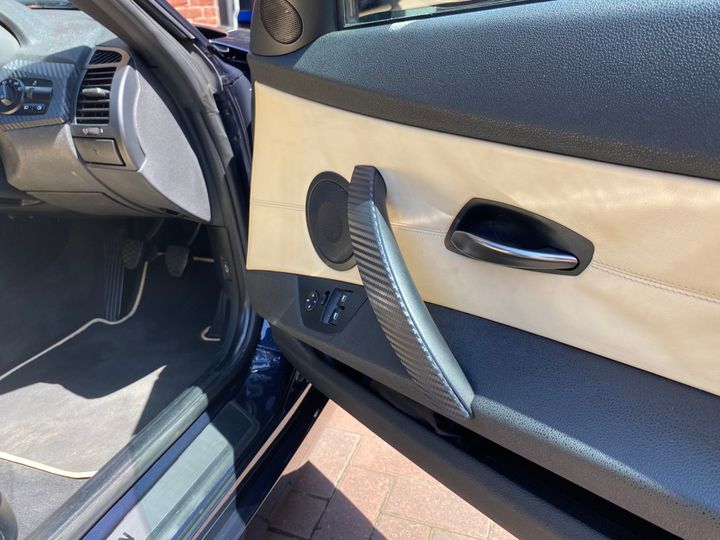
I’d done the door handles and light switch trim before.
The centre console trim is up next but I need to remove the whole centre console because it’s held in place with screws! Joy.
Mine wasn’t in great condition either. I’m guessing it’s got too hot at some point because there are some random cracks in the finish. The trim around the light controls was particularly bad. The passenger trim had vertical crack too.
There aren’t too many alternatives so I bought a set of brushed aluminium trim and decided to wrap it (silver with the champagne leather would look crack).
The Z4 isn’t the easiest car to work on when it comes to the interior trim; there are lots of bits screwed in place or with funny hard to get at fixings.
First up was to removed the passenger side air vent / cup holder which is held in place with two screws.
The end of the trim by the vent is held in place with a funny spring clip and a washer. Which needs to be squeezed together whilst digging into your fingers.
The it was time to remove the air vents which I think are a pain. You need to get at the metal clips at the top and bottom through the vents. Thanks BMW.
Head unit out next which is easy enough; two screws, the quadlock connector and the aerial connector.
There are four screws behind the head unit / air vent and then it’s brute force to get the trim off. One of the clips came out and fell where I couldn’t see it so I had to pop the glove box out which is actually really easy because it’s held in with six screws.
All recesses were cleaned etc before the wrapped trim was fitted.
And back together.
I’d done the door handles and light switch trim before.
The centre console trim is up next but I need to remove the whole centre console because it’s held in place with screws! Joy.

cerb4.5lee said:
I'm with you Sam regarding piano black trim. I always wanted it, until I got to experience it in the F56 MCS. After that I decided I didn't like it because it marked far too easily.
I had the carbon effect trim in the Z4M, and I really liked that a lot. Nice work.
It was the piano black trim that I spec’d in my wife’s old Cooper that tuned me off it too. Looked great when we collected the car and sI had the carbon effect trim in the Z4M, and I really liked that a lot. Nice work.
 t after.
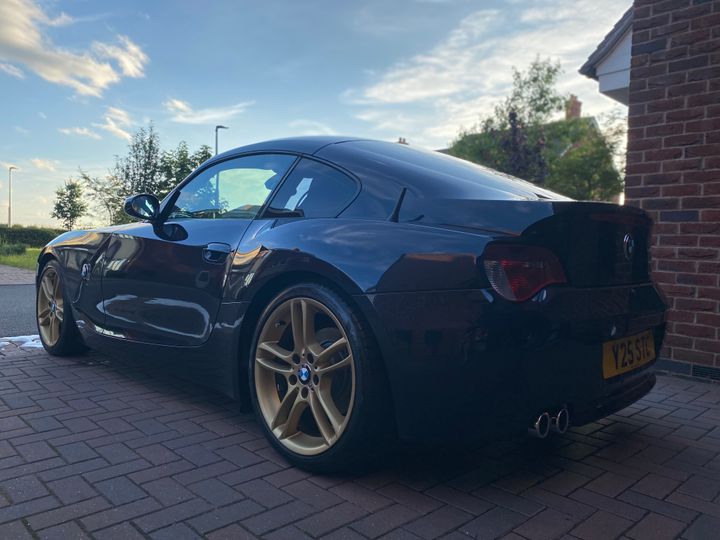
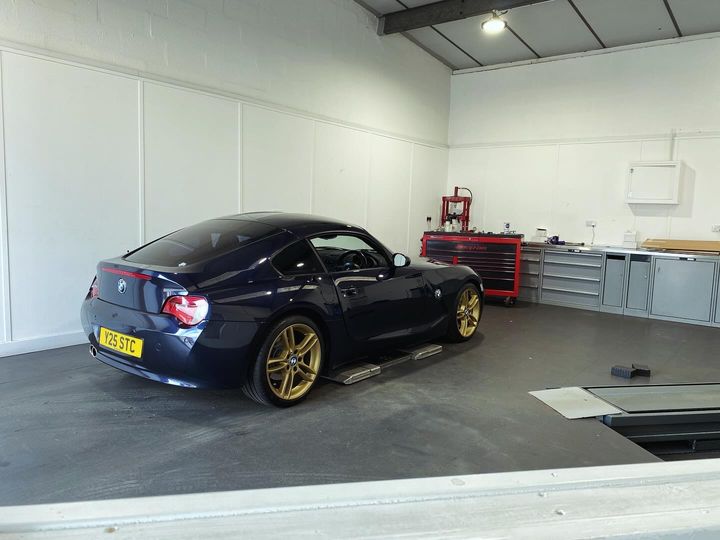
Gave the little Z4 a quick wash and a top up coat of wax this evening.
I need to fit the wrapped centre control, but having to remove the entire centre console to do so isn’t exactly making me charge into it.
I’m taking it to Spires first thing tomorrow for a proper alignment. It’s technically fine as it is, but I think there’s a definite room for improvement being set up by someone who takes their time etc.
cerb4.5lee said:
It looks so well Sam. 
I love it for sure.
A cracking choice of car you've made I reckon.
Cheers Lee I love it for sure.
A cracking choice of car you've made I reckon.

It’s definitely a six footer, but I’m quite taken with it. It’s a pretty car especially from the rear.
Sod’s Law that in the way to Spires this morning, it absolutely shat it down with rain.
pidsy said:
Is there some way of fitting Apple car play to one of these?
Yes if you have the factory fitted nav. A place in London has a solution. You need to add the TV tuner if not already fitted. https://carphonics.co.uk/shop/upgrades/apple-carpl...
I took the Zed to Spires Tuning for a proper alignment this morning.
It was popped on the ramps to start with to make sure all of the bolts could be undone (they’re were fine, even the ones not changed).
Matt then spent some time aligning it including one of the locating pins on the passenger side top mount so that the camber could be balanced.
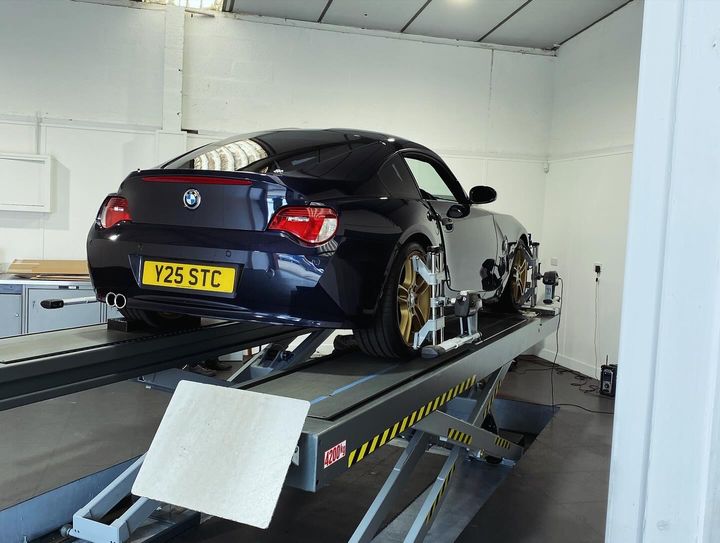
Although it’d had a basic alignment after changing some of the suspension parts, the car still felt a bit crap like the front and rear ends were doing their own thing. It turns out that the passenger rear was toeing out quite a bit despite showing as in spec on the print out I was given at the last place. The rear negative camber was dialled down a bit (these had a lot from factory).
The drive home revealed a car that is genuinely transformed. The front end has much more feel on turn in and the turning right, both ends of the car are working together. Based on my experience with Centre Gravity, String Theory and Spires, these more expensive alignments are definitely worth the cash.
It was popped on the ramps to start with to make sure all of the bolts could be undone (they’re were fine, even the ones not changed).
Matt then spent some time aligning it including one of the locating pins on the passenger side top mount so that the camber could be balanced.
Although it’d had a basic alignment after changing some of the suspension parts, the car still felt a bit crap like the front and rear ends were doing their own thing. It turns out that the passenger rear was toeing out quite a bit despite showing as in spec on the print out I was given at the last place. The rear negative camber was dialled down a bit (these had a lot from factory).
The drive home revealed a car that is genuinely transformed. The front end has much more feel on turn in and the turning right, both ends of the car are working together. Based on my experience with Centre Gravity, String Theory and Spires, these more expensive alignments are definitely worth the cash.
B'stard Child said:
Good to hear it's now much better but I don't agree with your conclusion - It's more important that the person doing the alignment has a clue what he's doing and can set up the equipment properly - expensive doesn't always equal excellent results
True, I guess what I meant was that the ones that understand what they’re doing and take their time do a much better job…they just happen to cost more. Some people think it’s nuts to spend hundred plus quid on an alignment when Quik Fit will do it for £40 or whatever.
I agree that expensive isn’t better; BMW did an appalling job on my M140i which basically crabbed sideways of you accelerated hard.
d_a_n1979 said:
That's good going Sam!
I've gone from £418 to £650 - zero changes (no points/no claims/25 years driving); could not get it lower anywhere; had some companies refuse to quote. Absolutely mental...
I thought so too. I've gone from £418 to £650 - zero changes (no points/no claims/25 years driving); could not get it lower anywhere; had some companies refuse to quote. Absolutely mental...
My automatic renewal was almost double (it was the most competitive last year). I’ve never understood the random number generator that insurance companies use.
d_a_n1979 said:
I was told by Howdens (used to be A-Plan) that if my car was a 'modified' 325i they'd have isured it, but seeing as it's a diesel; they wouldn't quote... That, I do not get, at all!
AF wanted close to £1300
Lowest on the usual sites was £1200
All that for a 4 pot diesel that does max, 5k miles a year and sits locked away on the drive the rest of the time...
It’s absolutely bonkers isn’t it? I couldn’t believe it when my modded 335i was a chunk cheaper to insure than the 330i. Odd. AF wanted close to £1300
Lowest on the usual sites was £1200
All that for a 4 pot diesel that does max, 5k miles a year and sits locked away on the drive the rest of the time...
axel1990chp said:
I tried to change over my 530i insurance of a 3 litre barge to a 1.6 suzuki swift sport and they wanted to increase it from the C~£420 to £957 - with a £95 admin fee, despite me doing it myself over their website portal... They pull it out of their arses don't they!
Edit: dont laugh at my new car
You always get shafted when you change car part way through a policy. £95 admin fee is a pisstake though. Edit: dont laugh at my new car
Nothing wrong with a Swift Sport. They’re cool little things.
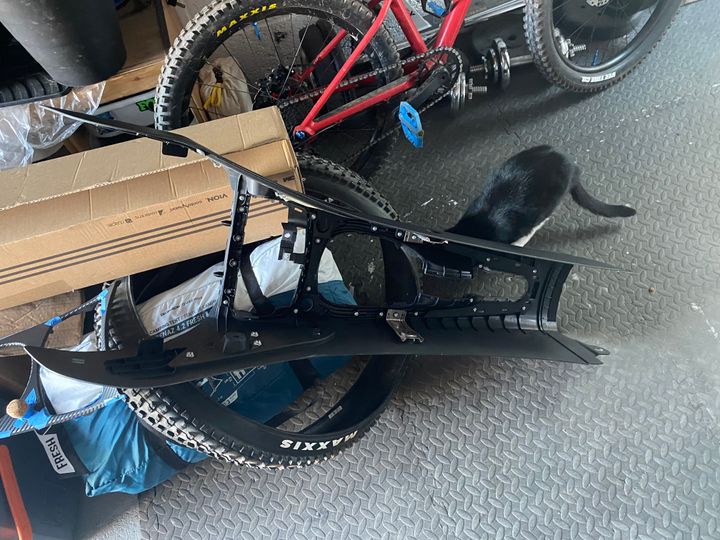
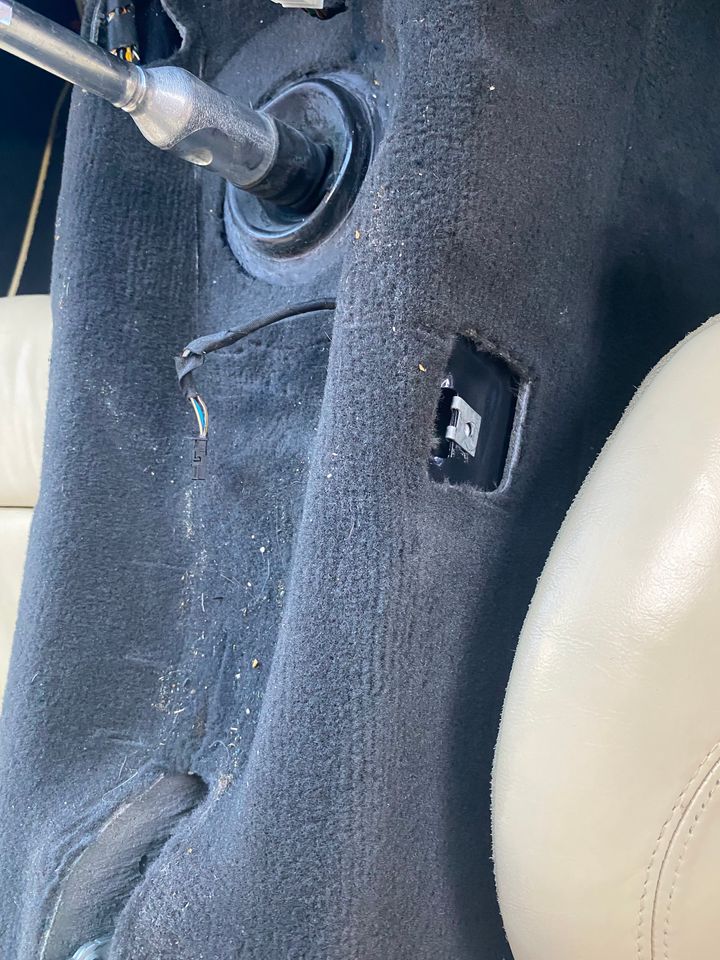
I finally made a start on fitting the centre console trim which is actually a st load of work. There are an awful lot of parts to remove. The trim itself is screwed in place with a load of torx screws. The entire centre console needs to be removed which means removing;
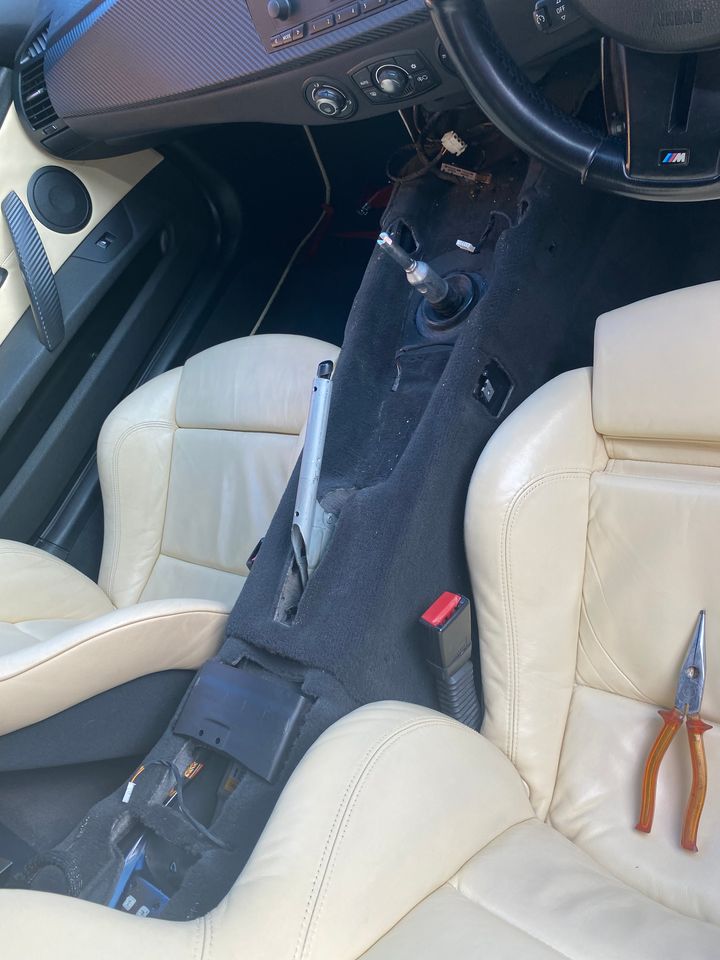

The many torx screws
Under the centre console there was 18 years of dusty crumbs and other detritus
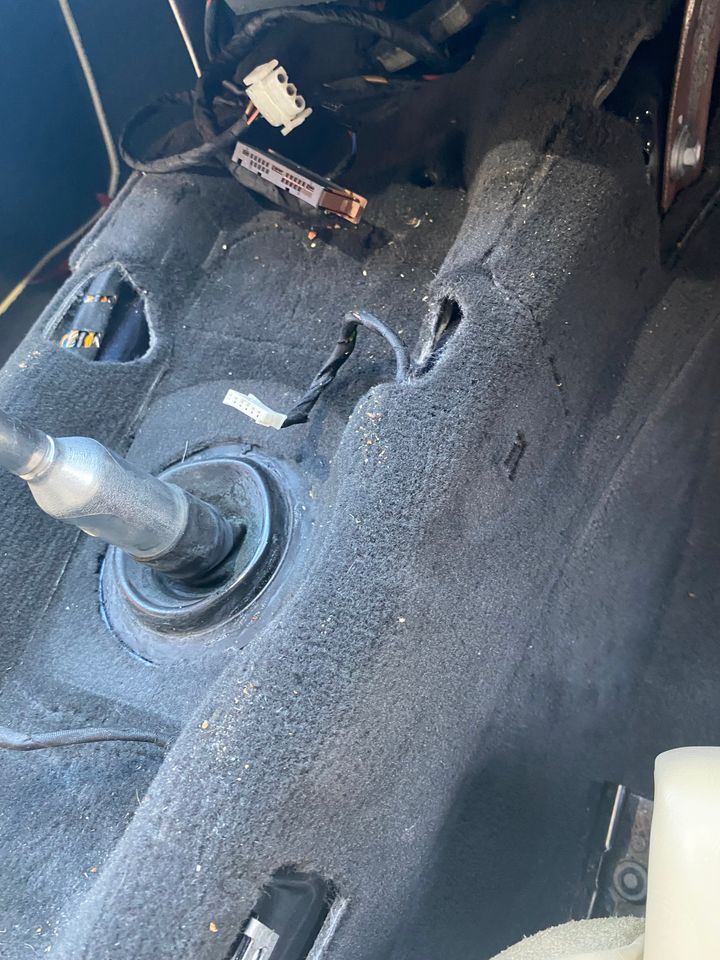
This was all cleaned as were any bits that could be seen with the trim removed.
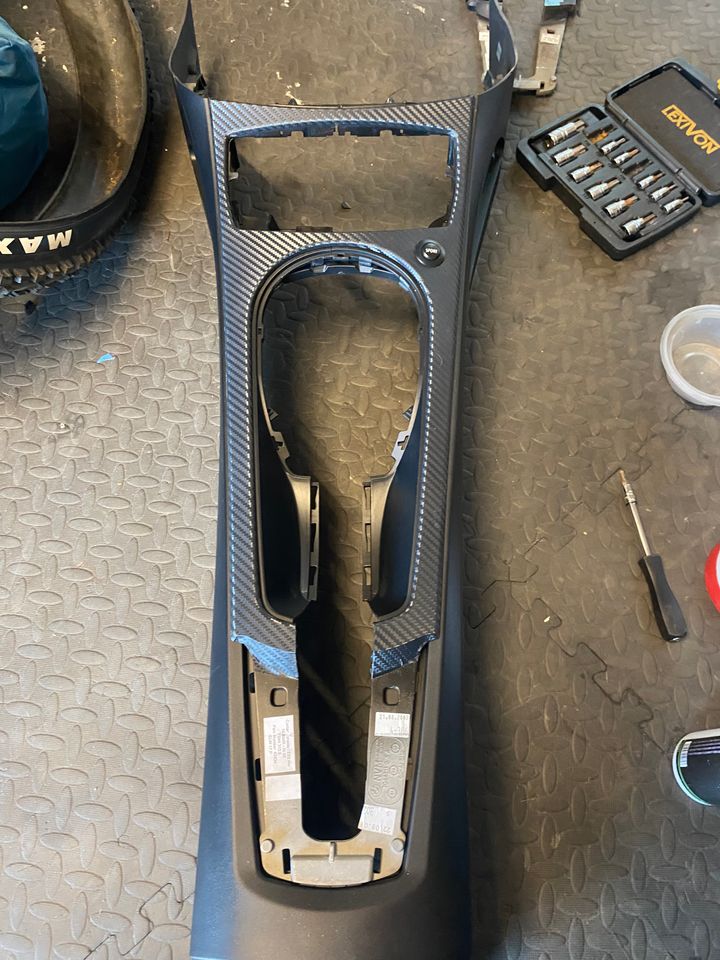
Wrapped trim in place ready to be fitted.
I made decent progress getting it all refitted but ran out of light so will finish it quickly tomorrow morning and take some pictures.
t load of work. There are an awful lot of parts to remove. The trim itself is screwed in place with a load of torx screws. The entire centre console needs to be removed which means removing;- gear knob and gaiter
- gear surround trim
- ashtray
- panel with heated seat and DTC switches
- handbrake grip, gaiter and arm rest
- centre section of rear storage area
- knee pads
The many torx screws
Under the centre console there was 18 years of dusty crumbs and other detritus
This was all cleaned as were any bits that could be seen with the trim removed.
Wrapped trim in place ready to be fitted.
I made decent progress getting it all refitted but ran out of light so will finish it quickly tomorrow morning and take some pictures.
d_a_n1979 said:
Bluddy'ell Sam! Didn't realise it was such an invasive job!
Just replied on the BMW General chat section; it looks spiffing
Yeah, it’s an absolute ball ache. Even the dash trim is really. It’s not like any of my previous BMW’s where it’s basically a push fit. Just replied on the BMW General chat section; it looks spiffing
It was worth it though.
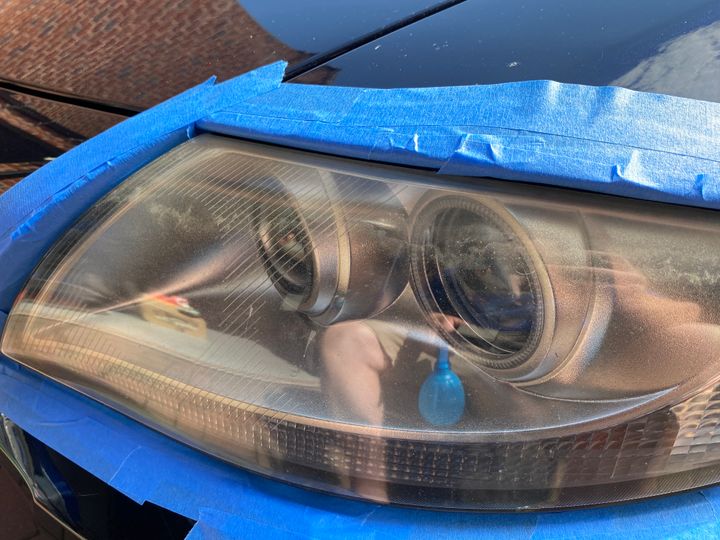
The headlights on my car were pretty poor. I tried to take some pictures but they didn’t come out that well.


So I decided to try and improve them last night. Masked up, ready for sanding.
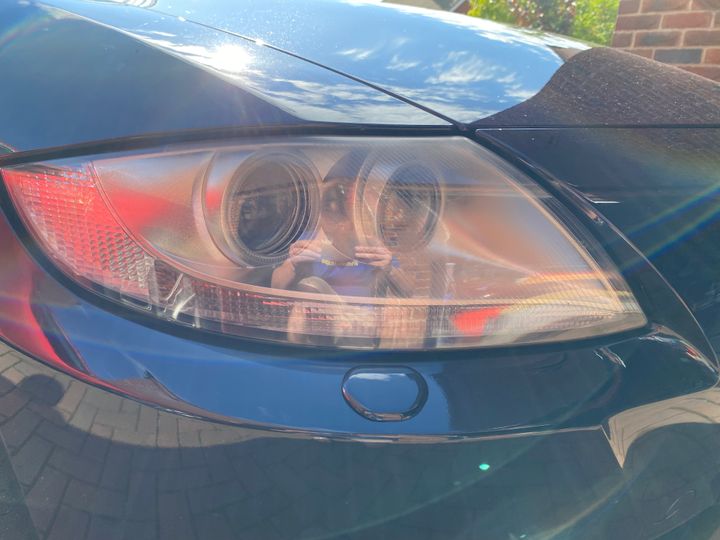
With some 800 grit wet and dry, there was a lot of yellow running off. I then went over them with 1200 and 3000 grit before polishing them with my DA. Once it was all cleaned up, I sprayed them with some Meguiars UV protection.
The sun didn’t make taking pictures easy, but there is an improvement.
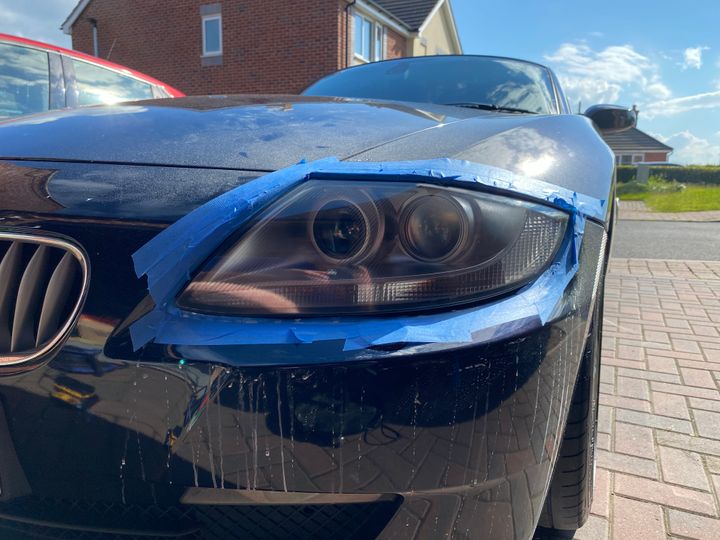
So I decided to try and improve them last night. Masked up, ready for sanding.
With some 800 grit wet and dry, there was a lot of yellow running off. I then went over them with 1200 and 3000 grit before polishing them with my DA. Once it was all cleaned up, I sprayed them with some Meguiars UV protection.
The sun didn’t make taking pictures easy, but there is an improvement.
Gassing Station | Readers' Cars | Top of Page | What's New | My Stuff