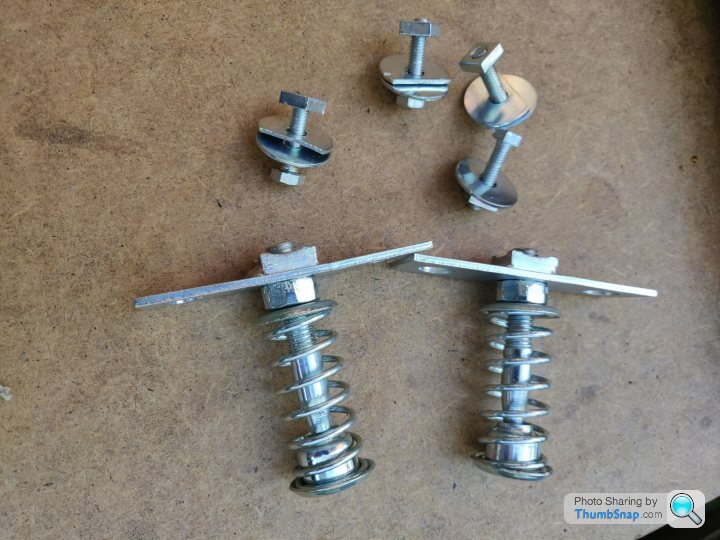
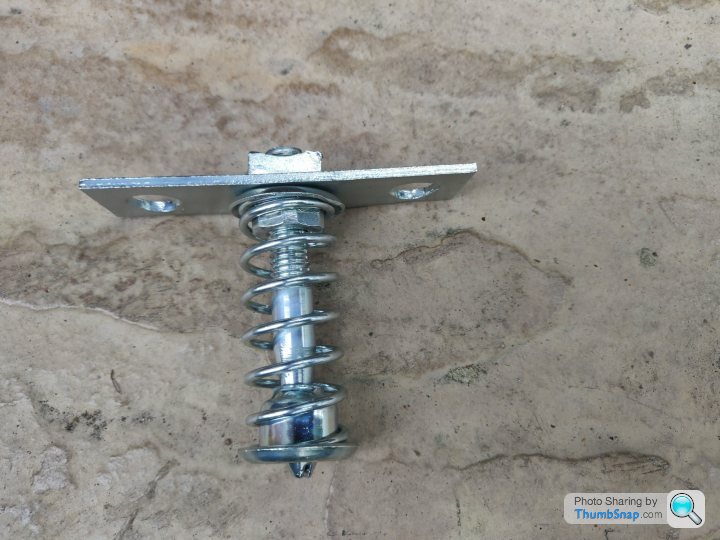
1600M progress update
Discussion
It's been over a year since my first posts on here so I'm overdue I think.
Completed or underway
1. Chassis painted
2. Drive shafts, hubs and prop cleaned, checked, painted and new UJs fitted.
3. Rear uprights had the old pins drilled and were vapour blasted. There was too much corrosion damage to the holes though, so it's off having 14mm dia EN16T custom pins machined (as others have done).
4. Spitfire diff rebuild. Took ages but enjoyable.
5. Repair of front wing.
6. Built a Speeduino ECU (to be used for ignition only).
For anyone like me who's found it difficult to get hold of, e.g. 14mm EN16T, I can recommend these people
http://www.m-machine-metals.co.uk/
No connection to them, just found that they have a load of stuff at decent prices. The service and delivery is good too.
Here's a few pics of the wing repair, for newbies like me who may benefit from a few ideas.
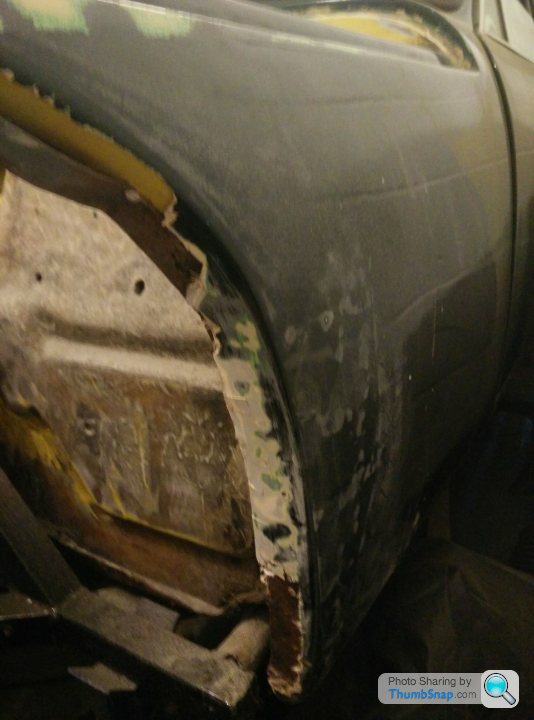
Before pic showing rusty metal making up the wing profile
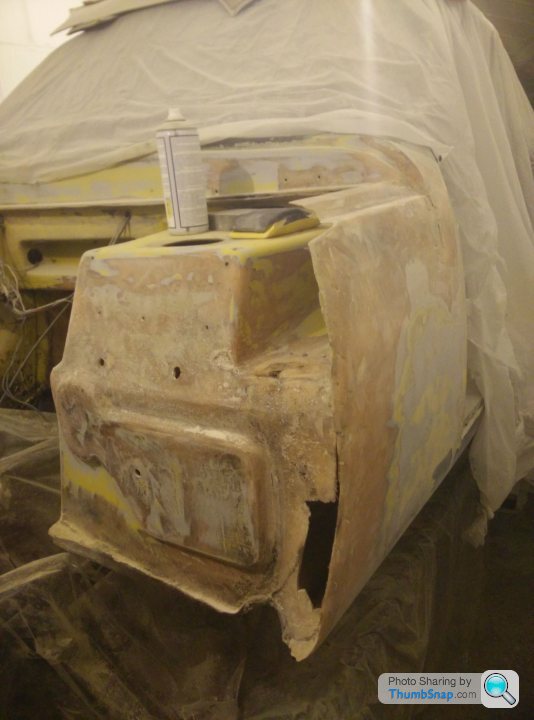
Dodgy areas removed and everything cleaned up and feathered good and sharp.
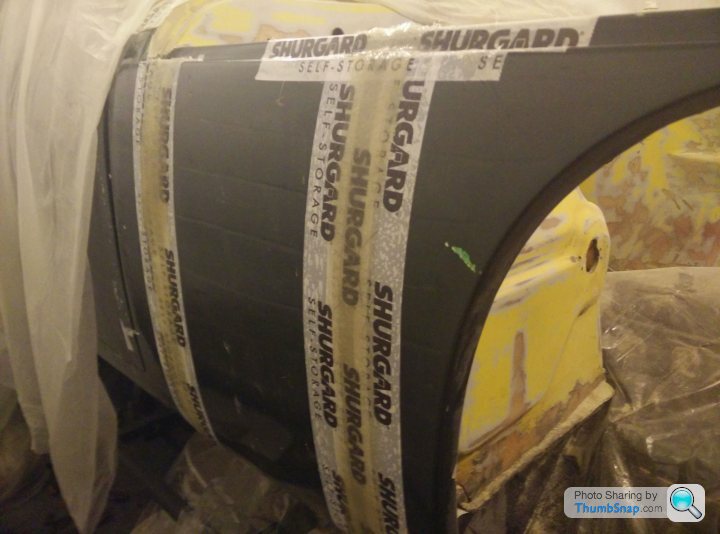
Making formas (spelling?) from the RH wing. One extends to the top profile.
I then slowly persuaded a sheet of 2mm A0 cardboard to sit closely to the RH wing, then carefully trimmed it to size, taking care to match the wheel arch profile as closely as possible. The 2mm card is sort of sandable, if you're careful.
I then carefully cut another piece to match the wheel arch return profile.
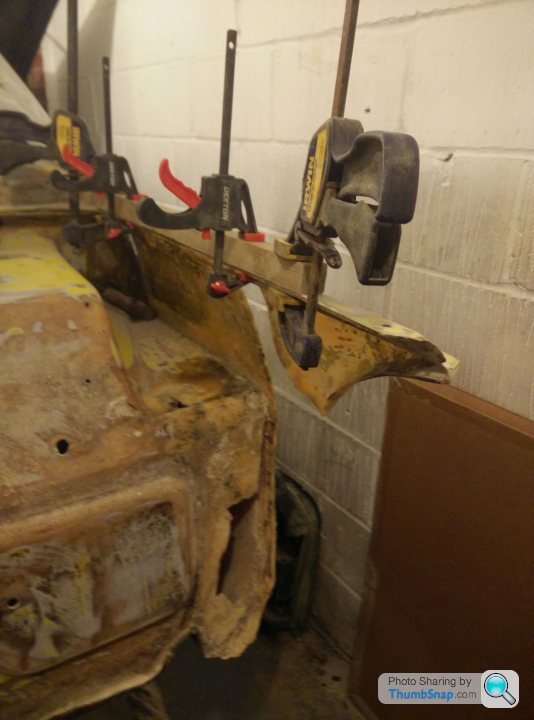
The surviving fragment of the wing was re-attached.
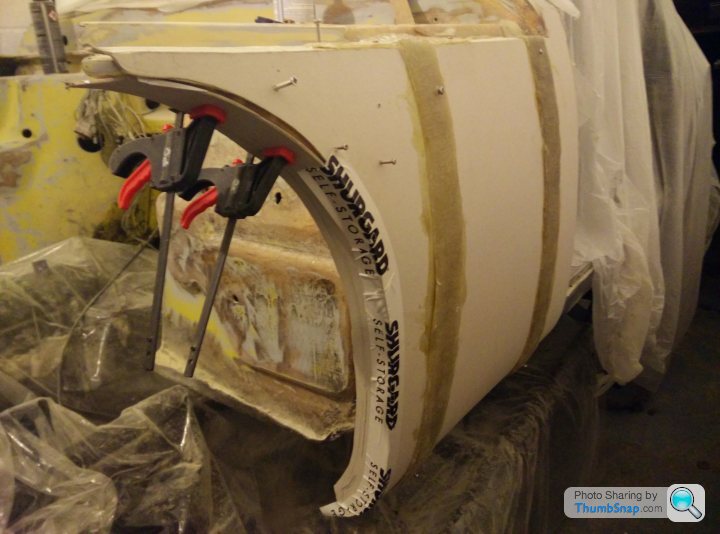
It was then a matther of reversing the cardboad, contact-gluing the formas in place and securing with self tappers to keep everything firmly clamped down as close as possible to the remains of the wing. Then the return profile was taped/clamped/screwed in place.
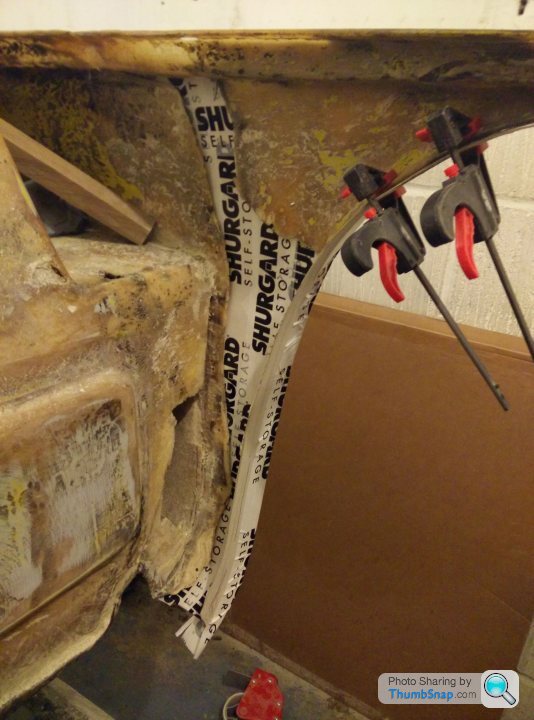
Ready for the 'glass.
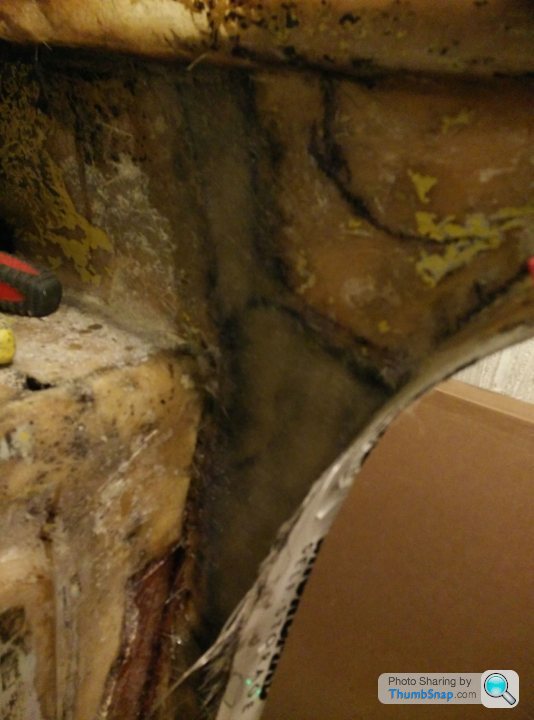
Laid up with 2 layers of tissue and 2-3 layers of matting.
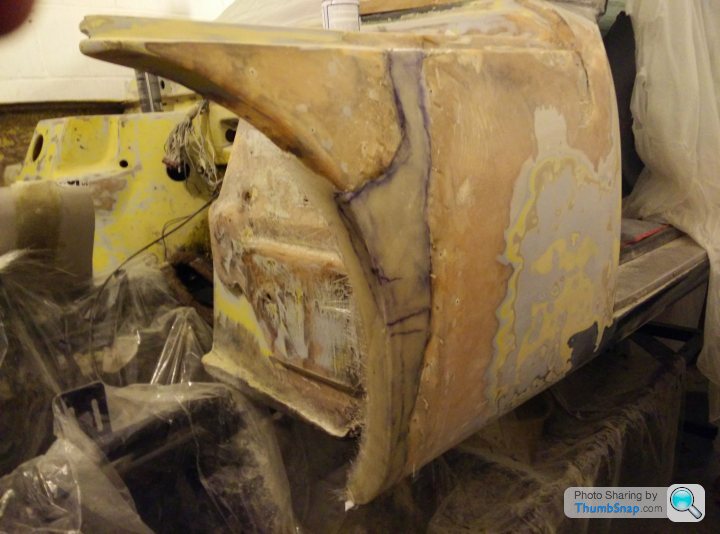
Cardboard removed.
Resin was still green at this point so I gave it some rough shaping with a mini surform.
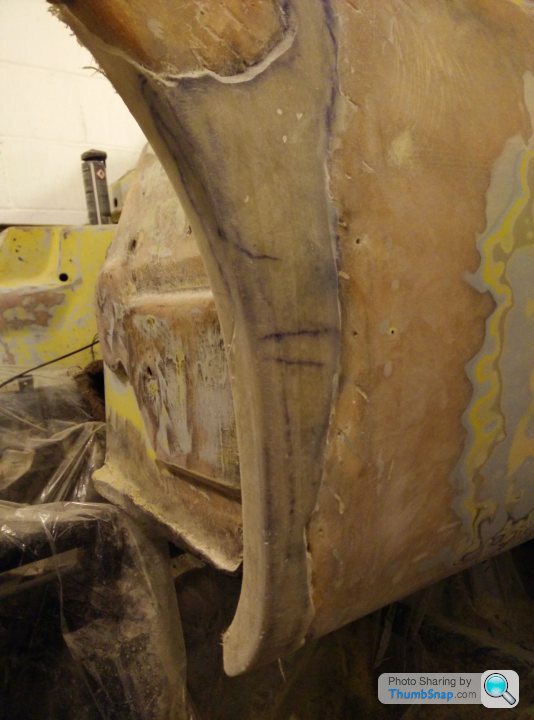
Not too many bubbles and the profile is fairly good IMO.
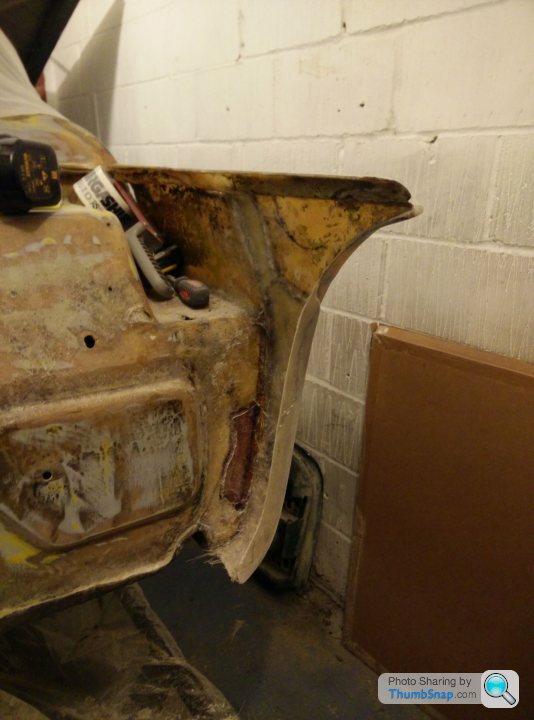
The only part that was a bit of a fail was a small area where the wing curves sharply under in the sill area. Easily sorted though.
Since then I've feathered in the new section to the old and some repairs to the profiles on the wing top. I'm not doing much more for now as I can't check the bonnet fit until I drop the body back onto the chassis.
Woefully mis-remembered from here:
https://oldgeebee.wordpress.com/2012/07/04/rear-up...
Will have another think and speak to my machining man The uprights haven't been reamed yet so turning the pins down to the minimum required won't be an issue.
I don't think I'll need to change the bush tubes as oldgeebee did, as I reckon it will be possible to press the tubes in after the bottom wishbones are on.
I have new pins from tvr parts, which were a reasonable fit until I sprayed some WD40 in there. After a while they were sliding around like mad.
As a side note the short pins they sell are wrong for the M series IMO. The threaded section is v long on both ends and would mean that if fitted, one of the holes in the upright would have threaded bar only through it. Just wrong.
Re: the pins - yes just found a pic. The nut needs to sit inside the spring on top of the retaining washer, correct?
Thanks Adrian!
Dom
https://oldgeebee.wordpress.com/2012/07/04/rear-up...
Will have another think and speak to my machining man
 The uprights haven't been reamed yet so turning the pins down to the minimum required won't be an issue.
I don't think I'll need to change the bush tubes as oldgeebee did, as I reckon it will be possible to press the tubes in after the bottom wishbones are on.
I have new pins from tvr parts, which were a reasonable fit until I sprayed some WD40 in there. After a while they were sliding around like mad.
As a side note the short pins they sell are wrong for the M series IMO. The threaded section is v long on both ends and would mean that if fitted, one of the holes in the upright would have threaded bar only through it. Just wrong.
Re: the pins - yes just found a pic. The nut needs to sit inside the spring on top of the retaining washer, correct?
Thanks Adrian!
Dom
Hi Dollyman,
I had thought about bushes, didn't think I could get them ready made though. Dumb of me.
How about these?
http://www.bearingshopuk.co.uk/bearings-bushes/oil...
1/2" ID 5/8" OD Oilite bushes in various lengths.
What is the best way to bond them? Would high strength loctite do it?
I had thought about bushes, didn't think I could get them ready made though. Dumb of me.
How about these?
http://www.bearingshopuk.co.uk/bearings-bushes/oil...
1/2" ID 5/8" OD Oilite bushes in various lengths.
What is the best way to bond them? Would high strength loctite do it?
Couple of pics of the diff rebuild
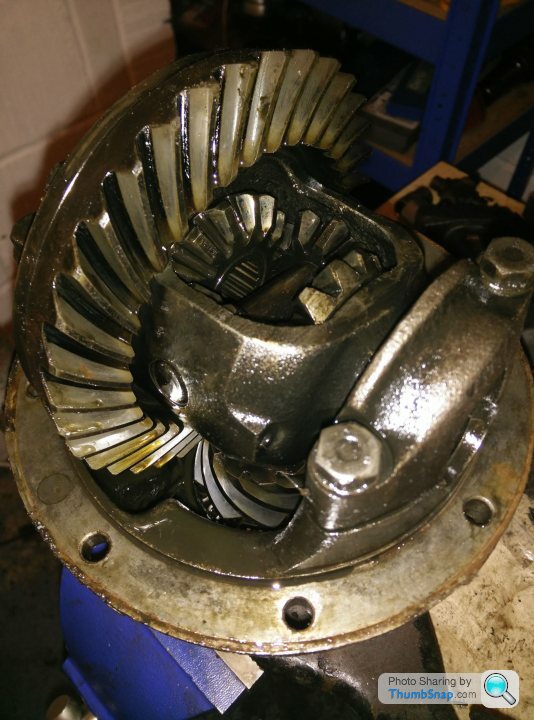
Before pic, with added dust and grot from removing the diff cover. Contact pattern is partly visible in the dirty oil.
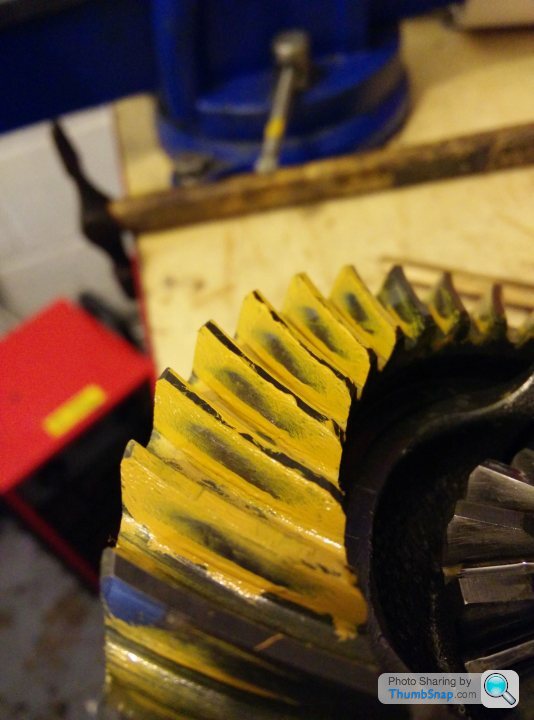
Drive side contact pattern. +6 thou of shims under the pinion head bearing.
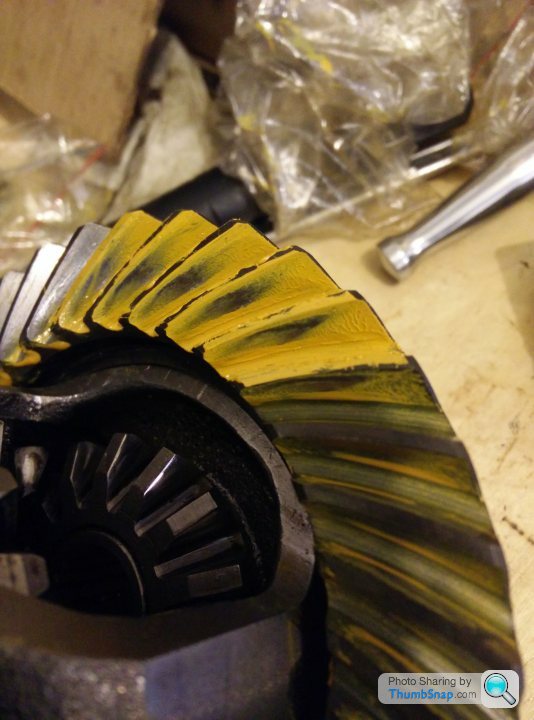
Coast side contact pattern.
Backlash is within spec all the way around the CW. Preload is 18in/lbs. No measurable backlash on the secondary gears.
The CWP has wear but I was advised that this looks OK. Bad wear would tend to show itself more diagonally across the teeth. Also, completely smooth teeth is not a good sign, apparently.
So I'll either have an opera singer in the back of the car, or I won't
Dom

Before pic, with added dust and grot from removing the diff cover. Contact pattern is partly visible in the dirty oil.

Drive side contact pattern. +6 thou of shims under the pinion head bearing.

Coast side contact pattern.
Backlash is within spec all the way around the CW. Preload is 18in/lbs. No measurable backlash on the secondary gears.
The CWP has wear but I was advised that this looks OK. Bad wear would tend to show itself more diagonally across the teeth. Also, completely smooth teeth is not a good sign, apparently.
So I'll either have an opera singer in the back of the car, or I won't

Dom
startStop said:
Hi Dollyman,
I had thought about bushes, didn't think I could get them ready made though. Dumb of me.
How about these?
http://www.bearingshopuk.co.uk/bearings-bushes/oil...
1/2" ID 5/8" OD Oilite bushes in various lengths.
What is the best way to bond them? Would high strength loctite do it?
I will let you know when I have done some.. I struggled to get Imperial in an inch length so looked at 16mm which are available with 12mm ID and 25mm length.. I am going to only part drill the hole so that the bush cannot go all the way through the upright. :-) Your other option is to buy 0versize pins from Adrian if you have not already bored out to 14mm I had thought about bushes, didn't think I could get them ready made though. Dumb of me.
How about these?
http://www.bearingshopuk.co.uk/bearings-bushes/oil...
1/2" ID 5/8" OD Oilite bushes in various lengths.
What is the best way to bond them? Would high strength loctite do it?

Looks like Loctite 603 is recommended for Oilite bearings.
I suppose the Loctite could be applied to the casting and the pin, to stop the pin rotating and the bush/pin actually becoming a bearing surface. Maybe not though, as this is better than movement in the bush/casting.
Random number from - http://www.getyourbearings.co.uk/oilitephosphorbro...
Max load of Oilite bearings is approx 14N/mm2
Maybe someone else may know how that would equate to loads when hitting a pothole, kerbing a wheel etc.
I'm overthinking this - I'll shut up now
Dom
startStop said:
Looks like Loctite 603 is recommended for Oilite bearings.
I suppose the Loctite could be applied to the casting and the pin, to stop the pin rotating and the bush/pin actually becoming a bearing surface. Maybe not though, as this is better than movement in the bush/casting.
Random number from - http://www.getyourbearings.co.uk/oilitephosphorbro...
Max load of Oilite bearings is approx 14N/mm2
Maybe someone else may know how that would equate to loads when hitting a pothole, kerbing a wheel etc.
I'm overthinking this - I'll shut up now
Dom
Turn up some 5/8 phosphor bronze and bore out to half inch then I suppose the Loctite could be applied to the casting and the pin, to stop the pin rotating and the bush/pin actually becoming a bearing surface. Maybe not though, as this is better than movement in the bush/casting.
Random number from - http://www.getyourbearings.co.uk/oilitephosphorbro...
Max load of Oilite bearings is approx 14N/mm2
Maybe someone else may know how that would equate to loads when hitting a pothole, kerbing a wheel etc.
I'm overthinking this - I'll shut up now
Dom

N.
Hi Alan,
From here https://www.gaterosplating.co.uk/index.php?route=c...
I went for the Ultimate kit with power supply, which is expensive but the power supply makes setting up the amperage for each session a doddle. Otherwise you have to deal with a dodgy coil resistor that gets hot. You'll need a tank heater if plating in the winter like I was.
If you do order from here or somewhere else, make sure to get some more of the zylite maintenance fluid, as the kits only come with a fairly small amount. It's the maintenance fluid that keeps the plating bright and shiny.
I found their dry acid salts a bit pants. It probably works electrolytically and is enough for pre-plating activation, but won't shift rust IMO. I bought "Clover chemicals Acid Wash 80", which is about 20% HCl. This stuff does the job.
The alkali cleaner is better, but does need to be 60-70C ish to work. I added some caustic soda to give it some more welly. Still needs to be hot though.
All in all maybe £230ish. The consumables are the electrodes, zylite maintenance fluid and degreaser/acid/alkali. You'll never run out of the passivates and the plating solution will last forever. I figure that the more stuff I plate, the cheaper it is until it approaches "free"
Dom
From here https://www.gaterosplating.co.uk/index.php?route=c...
I went for the Ultimate kit with power supply, which is expensive but the power supply makes setting up the amperage for each session a doddle. Otherwise you have to deal with a dodgy coil resistor that gets hot. You'll need a tank heater if plating in the winter like I was.
If you do order from here or somewhere else, make sure to get some more of the zylite maintenance fluid, as the kits only come with a fairly small amount. It's the maintenance fluid that keeps the plating bright and shiny.
I found their dry acid salts a bit pants. It probably works electrolytically and is enough for pre-plating activation, but won't shift rust IMO. I bought "Clover chemicals Acid Wash 80", which is about 20% HCl. This stuff does the job.
The alkali cleaner is better, but does need to be 60-70C ish to work. I added some caustic soda to give it some more welly. Still needs to be hot though.
All in all maybe £230ish. The consumables are the electrodes, zylite maintenance fluid and degreaser/acid/alkali. You'll never run out of the passivates and the plating solution will last forever. I figure that the more stuff I plate, the cheaper it is until it approaches "free"

Dom
Gassing Station | TVR Classics | Top of Page | What's New | My Stuff


