Cleaning Debris from the Radiator
Discussion
I bought one of these, which reaches all the way to the back of the cavity where the muck accumulates.
https://www.amazon.co.uk/gp/product/B08L5HYKZP/ref...
https://www.amazon.co.uk/gp/product/B08L5HYKZP/ref...
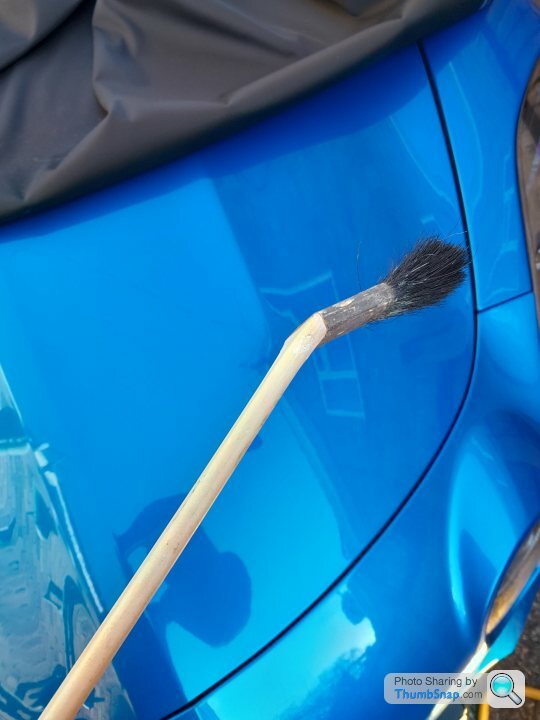
I've been concerned about the build up of leaves etc at the top of the main rad for a while, particularly given the knock-on problems with heat near the fuel pump. I didn't fancy using a hoover pipe on the matrix, so used an angled radiator brush intended for painting behind domestic ones, as opposed to cleaning automotive ones!
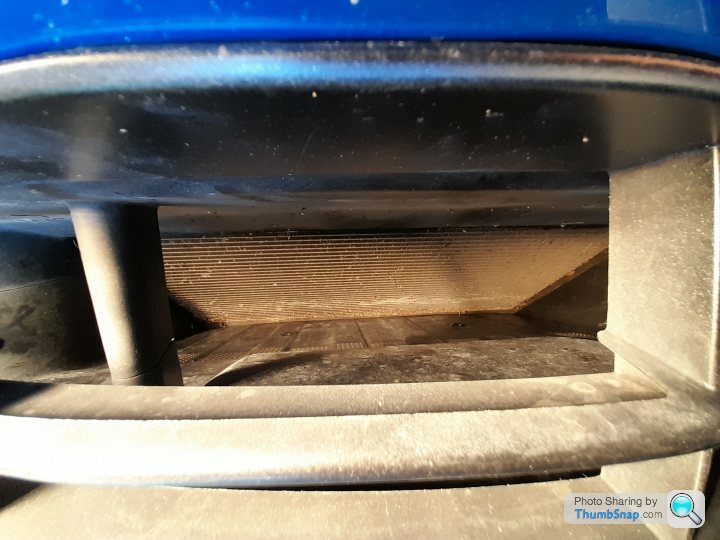
This was the state of play when I started; the car (MY22) has done 11k miles.
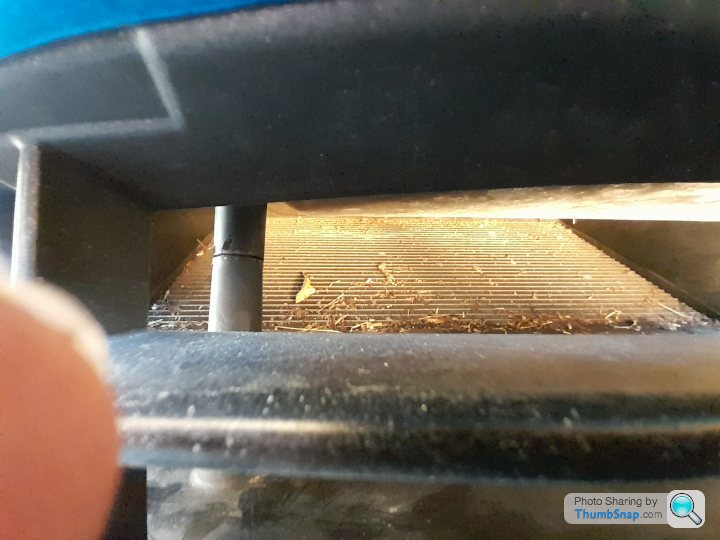
I managed to shift what looked like quite a bit of detritus
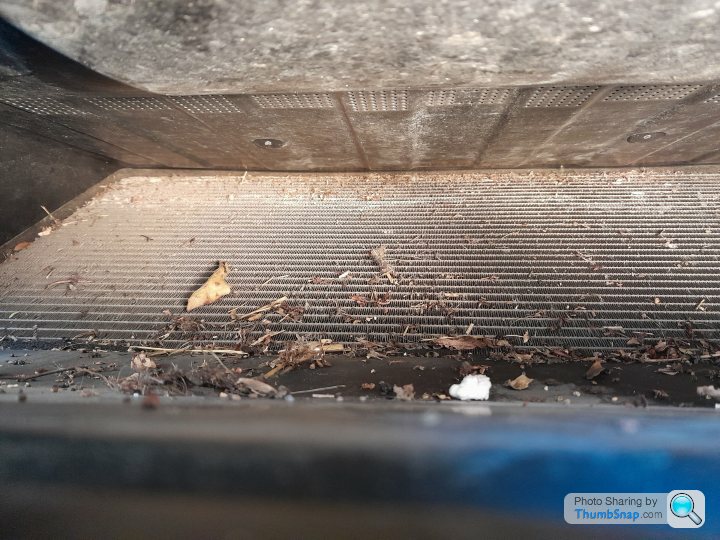
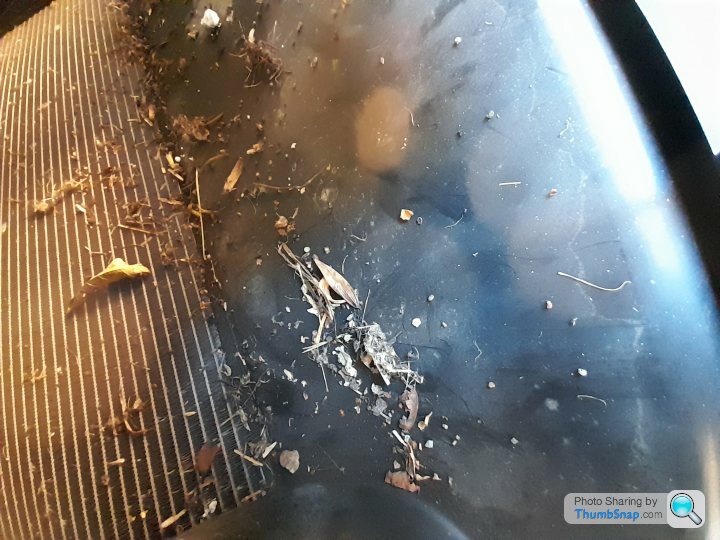
The final tool was a sharpened piece of 6mm dowel to get into the top return:
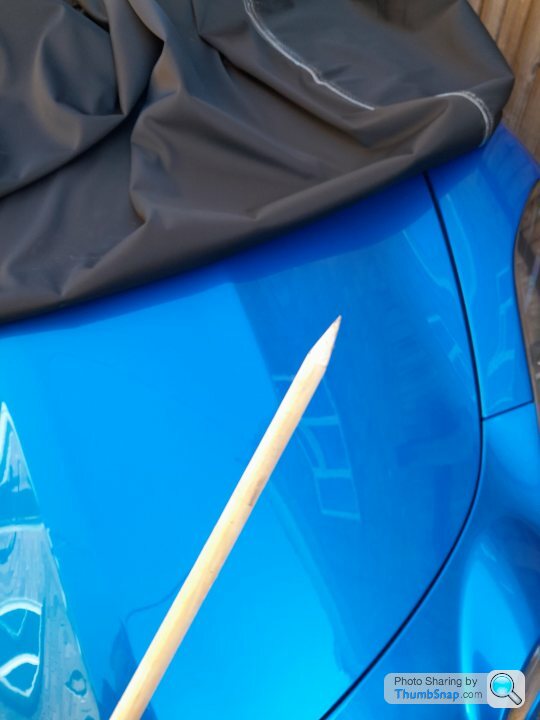
Which I used to stroke muck out, not jab or prod! The finished job was an improvement:
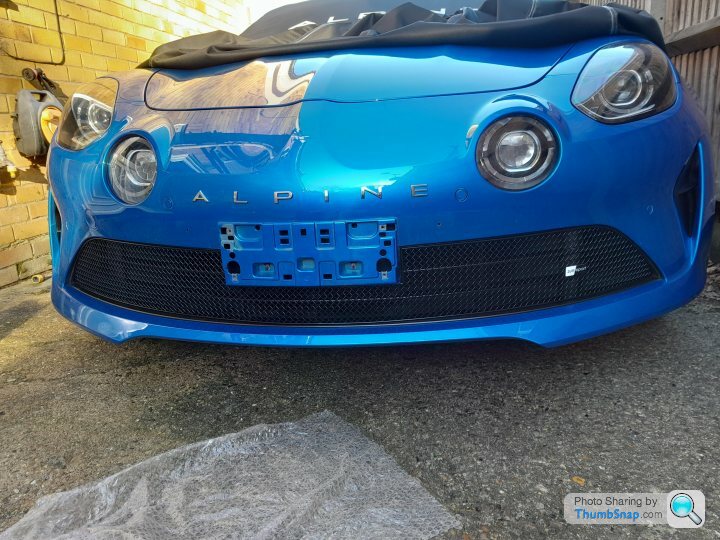
Because I don't want to do this again, I invested in a Zunsport grille. I don't like the look of them, but I like what they do! Twenty minutes saw it fitted.

This was the state of play when I started; the car (MY22) has done 11k miles.

I managed to shift what looked like quite a bit of detritus


The final tool was a sharpened piece of 6mm dowel to get into the top return:

Which I used to stroke muck out, not jab or prod! The finished job was an improvement:

Because I don't want to do this again, I invested in a Zunsport grille. I don't like the look of them, but I like what they do! Twenty minutes saw it fitted.

I have one too for the same issue. Also aware of how big an object can enter the standard grille - easily big enough to hole a rad.
If you order on the website you can put in your email and get 10% off. It's cheapest via their website as the other suppliers offer the same price, but without the discount.
They are good quality and I like the look of them (in black).
What is however annoying is that I clearly missed a large leaf when cleaning out prior to installing the grille. It moved and became visible afterwards.

I can see the logic of fitting the Zunsport grille but I'm curious to know if anyone is aware of a grille that can be fitted behind the OEM slats? This guy in Singapore (https://www.youtube.com/watch?v=jkAyeSmE70M) seems to have found a neat solution that does the same job but is more discreet.
See the section from 1'40".
See the section from 1'40".
Spokeyblokey said:
I can see the logic of fitting the Zunsport grille but I'm curious to know if anyone is aware of a grille that can be fitted behind the OEM slats? This guy in Singapore (https://www.youtube.com/watch?v=jkAyeSmE70M) seems to have found a neat solution that does the same job but is more discreet.
See the section from 1'40".
I think that if you were to do that you'd end up having to remove bumpers etc to access it. In which case I'd just buy a piece of grille and cut it myself to fit as the fit/finish around the edges will be entirely hidden. See the section from 1'40".
Spokeyblokey said:
I can see the logic of fitting the Zunsport grille but I'm curious to know if anyone is aware of a grille that can be fitted behind the OEM slats? This guy in Singapore (https://www.youtube.com/watch?v=jkAyeSmE70M) seems to have found a neat solution that does the same job but is more discreet.
See the section from 1'40".
I had assumed that his grille man fabricated the grille and then removed the bumper to fit it. I would have much preferred that look, but wasn't prepared to dismantle my car in order to get it.See the section from 1'40".
And yes, the grille looks better without the logo, but I forgot to specify it! On the plus side, I ordered it yesterday and it arrived today.
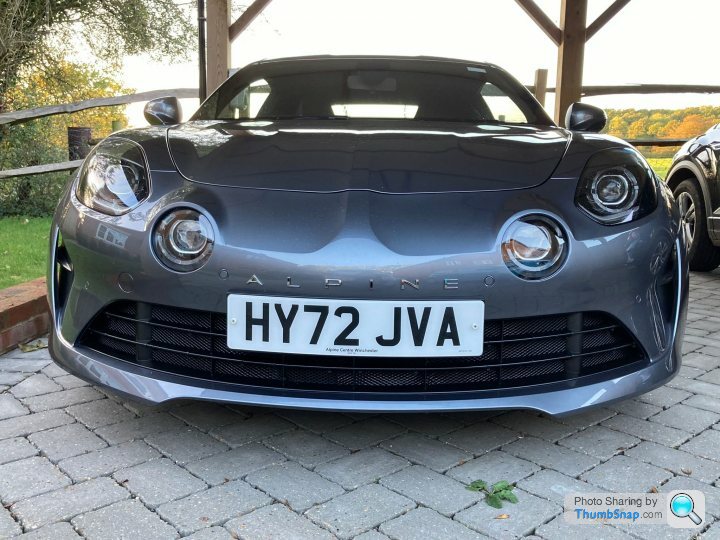
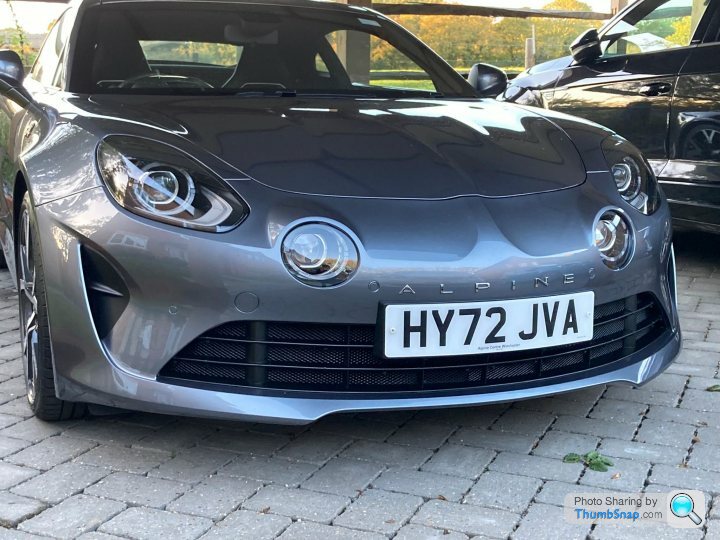
I have done it. I loved the idea of grille behind the slats when I first saw it. It was a right pain in the a s but I'm happy enough with the result and it works well.
I used this
https://www.amazon.co.uk/gp/product/B098T5KHT4/ref...
& some 100mm cable ties
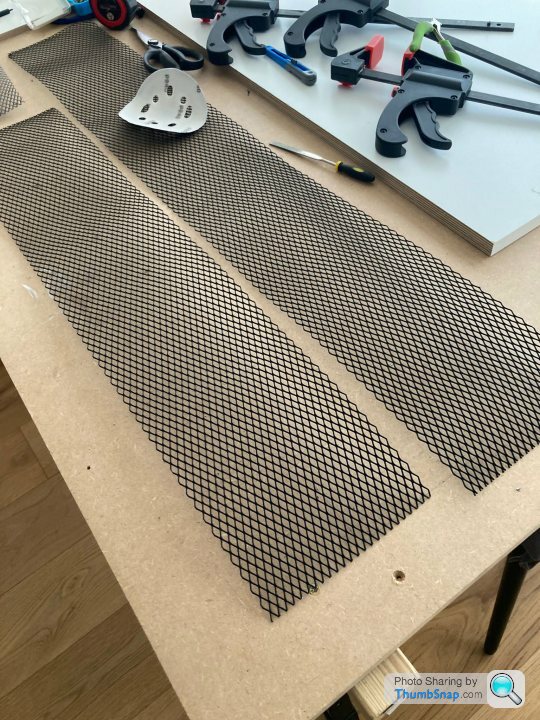
I divided the mesh horizontally into 2 lengths, just a bit taller than the opening.
Then I templated the curved side bits with some paper, transferred it onto the L of one length, the R of the other, and cut out.
Next I cut out a notch for the number plate plinth on the L and R pieces, where the mesh would hit if at full height. I measured from the inside and again ensured a bit of overlap. In the end I actually opted for a third piece (which runs just under the number plate section) so that I could make the main 2 bits a bit shorter for ease of getting it in.
I pre-threaded the cable ties in line with the horizontal slats - I couldn't see an easy way to retrieve them through the mesh if doing it after positioning.
You have to feed the sheet in flat through the central slats and then pull it upright and turn at the same time, its difficult and despite sanding the sharp aluminum edges I still managed to scratch a bit of the inner plastic tray when feeding it in, I'm sure it can be revived whenever I come to remove the grille.. The cable tie ends helped with maneuvering it around.
Once upright, each piece needs to feed behind the main upright on each L / R side, this is tight (cable ties need to go through too!) and it makes the mesh a lot more rigid and hard to move about once its fed through. With much swearing, wishing I hadn't bothered, googling the best plastic trim repair polish and plastering my cut fingers (even through gloves!) I got it all into place, and did the cable ties. Then I slipped in the middle piece, which was easier and overlapped the side bits, it's hard to spot the join lines unless you're right down there.
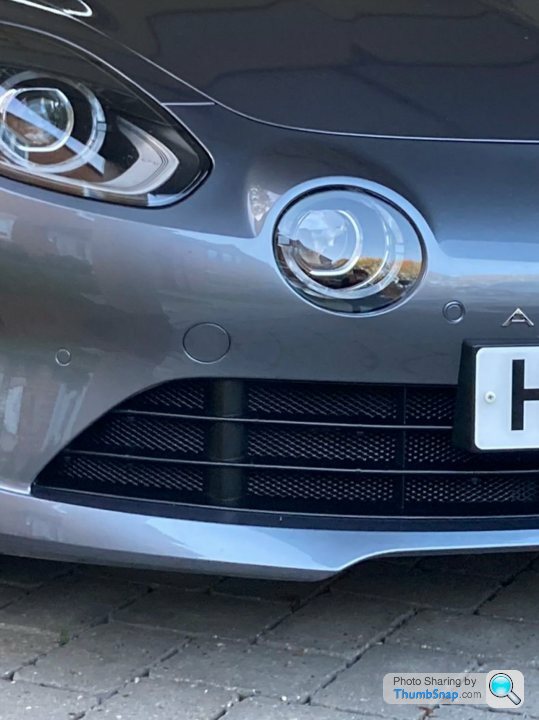
IMO it's a bit more subtle than the Zunsport, but probably looks a bit DIY if you really get close and scrutinise it. When standing up and back it looks good though, shame they didn't OEM something similar. I might loose a few cable ties or try to push round the locking bits at some point as there a few of those on show (I made sure they were all aligned at least!)
The one on the Youtube video looks a better job I think, presumably with more fixing options and much better access if you were to disassemble. I found a disassembly video and it looked too much for a weekend on the drive.
 [url]
[url]
 s but I'm happy enough with the result and it works well.
I used this
https://www.amazon.co.uk/gp/product/B098T5KHT4/ref...
& some 100mm cable ties
I divided the mesh horizontally into 2 lengths, just a bit taller than the opening.
Then I templated the curved side bits with some paper, transferred it onto the L of one length, the R of the other, and cut out.
Next I cut out a notch for the number plate plinth on the L and R pieces, where the mesh would hit if at full height. I measured from the inside and again ensured a bit of overlap. In the end I actually opted for a third piece (which runs just under the number plate section) so that I could make the main 2 bits a bit shorter for ease of getting it in.
I pre-threaded the cable ties in line with the horizontal slats - I couldn't see an easy way to retrieve them through the mesh if doing it after positioning.
You have to feed the sheet in flat through the central slats and then pull it upright and turn at the same time, its difficult and despite sanding the sharp aluminum edges I still managed to scratch a bit of the inner plastic tray when feeding it in, I'm sure it can be revived whenever I come to remove the grille.. The cable tie ends helped with maneuvering it around.
Once upright, each piece needs to feed behind the main upright on each L / R side, this is tight (cable ties need to go through too!) and it makes the mesh a lot more rigid and hard to move about once its fed through. With much swearing, wishing I hadn't bothered, googling the best plastic trim repair polish and plastering my cut fingers (even through gloves!) I got it all into place, and did the cable ties. Then I slipped in the middle piece, which was easier and overlapped the side bits, it's hard to spot the join lines unless you're right down there.
IMO it's a bit more subtle than the Zunsport, but probably looks a bit DIY if you really get close and scrutinise it. When standing up and back it looks good though, shame they didn't OEM something similar. I might loose a few cable ties or try to push round the locking bits at some point as there a few of those on show (I made sure they were all aligned at least!)
The one on the Youtube video looks a better job I think, presumably with more fixing options and much better access if you were to disassemble. I found a disassembly video and it looked too much for a weekend on the drive.


 [url]
[url]AH_13 said:
I have done it. I loved the idea of grille behind the slats when I first saw it. It was a right pain in the a s but I'm happy enough with the result and it works well.
That looks really good - despite the cable ties. Well done! s but I'm happy enough with the result and it works well.
Looks way better than the Zunsport grille, and adds something to the OEM look. Very nice.
rubes78 said:
It looks like the Zunsport grille -in fact I think it is a Zunsport grille. It has the rectangular plate for the badge, but with the logo removed.I have some aluminium grill mesh on the shelf waiting for a warm weekend to take the same approach.
In the meantime, I use a long extension on a workshop air compressor to dislodge the detritus. Then hoover it from the floor. I can't be trusted not to damage the rad fins with the hoover.
In the meantime, I use a long extension on a workshop air compressor to dislodge the detritus. Then hoover it from the floor. I can't be trusted not to damage the rad fins with the hoover.
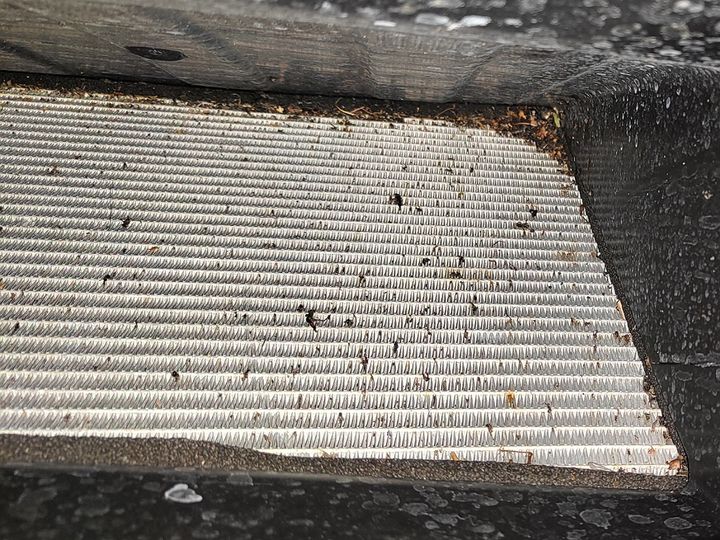
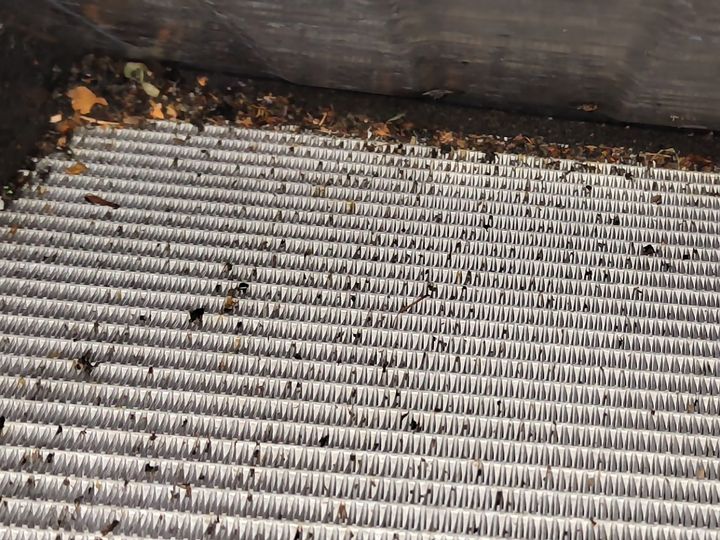
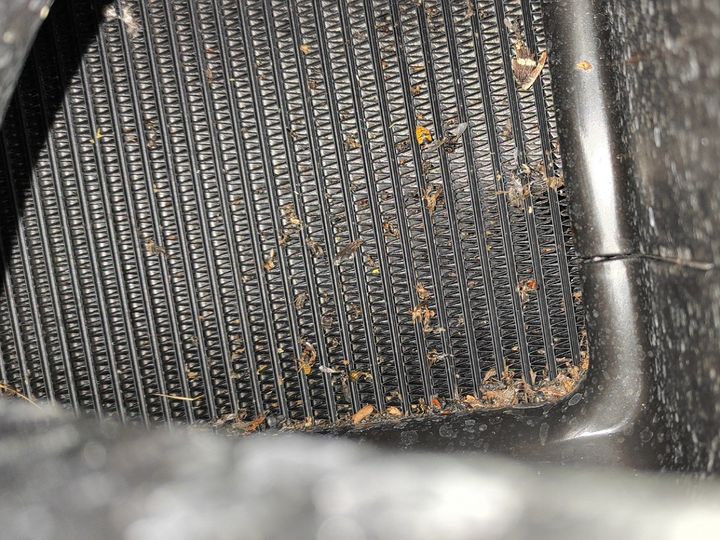
Installed a Zunsport grill to my 2024 A110 soon after delivery to protect the radiator from stone chips and larger debris. I was also hoping it prevents clogging up from insects, but unfortunately that is not the case. That is how it looked after 5 month and 4000 km. So even if you installed a radiator grill you should remove it at least once a year to vacuum the insects and small particels off. Strangewise that was never necessary in 25 years ownership of my Lotus Elise S1, also having the radiator installed inside the front compartement, but flat instead of inclined and a different airflow direction (bottom to top). Not even a single bug ended up at the radiator.
[url]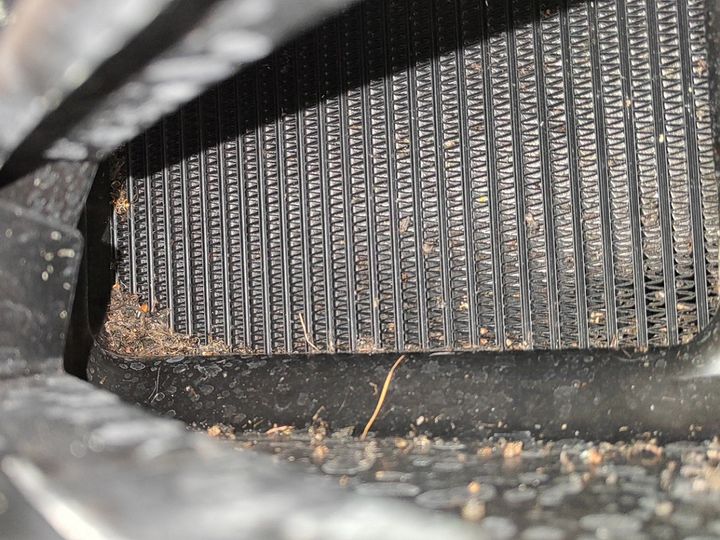 |https://forums-images.pistonheads.com/679934/202501023636304[/url
]
[url]
]
Gassing Station | Alpine | Top of Page | What's New | My Stuff


