Badly seized engine bolt
Discussion


I have a badly seized engine bolt on a motorcycle, It's on a HondaCBF500, the engine bolt really is a long shaft with a thread each end and nylock nuts each end.
The 'bolt' is seized where it passes through the engine on one side, it's a steel bolt passing through and aluminium crankcase. Basically the engine hangs from two upper engine bolts and this front seized one holds the front of the engine. There is a three inch space each side between the hanging part of the frame and the crankcase.
I have tried all the normal things, PB Blaster penetrating fluid, air gun, a 3\8 one as I think a 1/2in one is to heavy a knock on it. I have tried heat but the cooling rubber pipes are close by.
I have used a syringe to squirt the penetrating fluid into the spacer, taking the bike for a good run to get it hot and hopefully it seeps in but nothing has happened.
I have seen induction heaters but I cant get close enough to the seized area, and they are dammed expensive. I have also looked for a high frequency device but have not found any thing.
Any suggestions??????
Thanks for the reply's.
Yes it's that long 10mm shaft with the threads each end. One end if free so it's just the other end thats the problem, it is well and truly seized. I have welded a 4mm steel plate on the end of a 10mm nut, then ground it back so i now have a 20mm long nut that only has 10mm of thread that has a blank end, this let's the hammer action of the air gun hammer on the end of the long stud without damaging the threads.
I don't think doing the nut up tight will pull it through, just strip the threads, I will be right up the creek then. It's the spacers that make it difficult.
You have given me an idea though, yes put the normal nut on the seized end with pressure but use my made up nut with the blank end at the other end and use the air gun on it.
Will try that tomorrow.
Bit late with the replies, sorry.
The long stud passes through the two engine mounts, so one it loose (free) and the other one corroded.
My idea of tightening the seized end up and using the air gun on the other end did not work.
I will take some pictures over the weekend and post them.
The long stud passes through the two engine mounts, so one it loose (free) and the other one corroded.
My idea of tightening the seized end up and using the air gun on the other end did not work.
I will take some pictures over the weekend and post them.
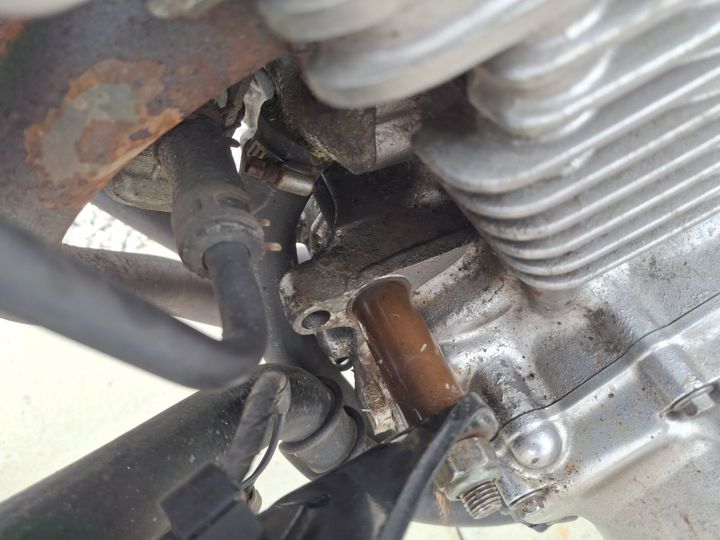
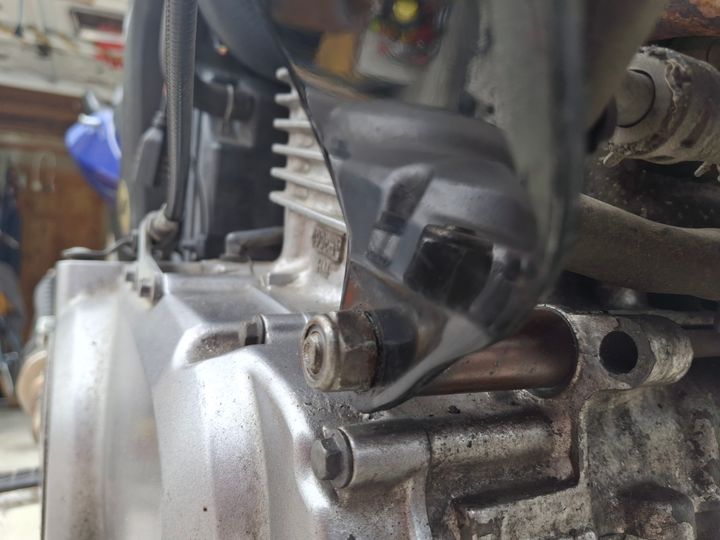
Hope this is explanatory enough. It seems my description has not been exact enough, the stud is 14in (36cm) long with threads each end that are about 1 1/2in in length.
Each end of the stud has a spacer around 3in long each end that fit between the down section of the frame and the radiator hanger. The right hand end is free, not seized, the left hand end is the one that is seized. Hammering on the end of the shaft is a no go as the actual engine mount are quite small and will not take any hammering.
I am carrying on with the penetrating liquid and will see if this works. If it is still seized come the colder weather I will cut the shaft off and drill it out.
That was the first thing I did, I then welded a 4mm bit of metal onto a 10mm nut. Ground it down the the shape of the 10mm nut I can no use my air gun to hammer on the end of the 10mm stud without damaging the threads on the stud.
But no good, the actual engine lugs are quite small and have heard of broken cases, I do not want to go there !!!!!!
Like i said I will keep on trying the penetrating fluid and air gun but think it will need to be cut pff then drill out the seized part, but thats a winter job, plus we are in the throes of moving to Kent and I want to set up my new workshop (garage) as it will be a dual purpose place.
I do a bit of wood turning and make pens out of AK47 bullets.
Diffs are made of cast iron and can put up with a bit of knocking, this is a cast aluminium casing so knocking side ways is not a good idea.. The mountings are surprisingly small, later bike the cases were beefed up and two bolts were not one long stud.
Been for a run today got the engine good and hot then gave it a good squirt of penetrating fluid, tightened the nut on the on the seized side leaving it under tension.
Been for a run today got the engine good and hot then gave it a good squirt of penetrating fluid, tightened the nut on the on the seized side leaving it under tension.
njw1 said:
The diff casing on a Sierra is aluminium, the through bolt is steel, hence it getting stuck. I didn't go mad with the hammering either, just a few light taps either way with a small(ish) hammer, I can understand why you wouldn't want to do it with an engine casing to be fair.
Anyway, good luck with it!
Cheers mate, you know my reluctance for the hammering. Anyway, good luck with it!
Gassing Station | Home Mechanics | Top of Page | What's New | My Stuff