
New Project Ransomes MG Crawler Restoration (With a Twist!
Discussion


Now that the majority of the big, heavy work on my F-150 Lightning is finally done, and I'm actually getting some miles under its belt, I found myself doing what I probably shouldn't have been doing… browsing eBay for another project.
This time, though, I fancied something a little different.
I've been keeping an eye out for one of these little Ransomes crawlers for quite some time. There are a few fully restored, running examples about, but buying something that's already finished has never really appealed to me. For me, half the enjoyment is taking something that's a bit tired, stripping it down, figuring out how it all works and bringing it back to life.
And where's the fun in buying something that doesn't need fixing?
Anyway, this little Ransomes popped up on eBay at what I thought was a pretty reasonable price. It wasn't running, but from what I could establish, it didn't need a huge amount to get going again. A carburettor rebuild, a bit of attention to the timing and, believe it or not, a single wire for the magneto.
Famous last words, perhaps!
Mechanically, it seems to be a fairly straightforward little machine, which makes a refreshing change from working on the Lightning.
Now, as you can see from the photographs, the current red and blue colour scheme is giving me some serious Noddy vibes. I'm not entirely sure what the previous owner's inspiration was, but it's certainly colourful!
This is where my plans will probably upset a few of the purists.
I'm not particularly interested in restoring it to exactly how it left the factory. Don't get me wrong, I appreciate a beautifully restored, original machine, but I fancy putting my own stamp on this one.
The plan is to strip it down over the winter, sort out anything mechanical that needs attention, and give it a proper cosmetic restoration.
I'm thinking a lovely deep red coach enamel for the main bodywork, black wheels and running gear, with some polished brass and chrome details dotted around. Things like the controls, handles and fuel tank straps could look fantastic with a bit of attention.
Something that retains all the character of an old British crawler, but with a slightly more bespoke, almost vintage show-machine appearance.
I'm under no illusions that this will be to everyone's taste, particularly those who believe everything should be painted exactly as it was when it rolled out of the factory.
But that's the beauty of these little projects. It's my machine, I'm doing the work, and I might as well build something I genuinely like looking at.
Besides, after spending months lying underneath a supercharged American V8, the prospect of tinkering with a tiny old crawler over the winter sounds rather appealing.
So here we go again. Another eBay purchase, another collection of rusty bolts, and another project that will almost certainly take longer and cost more than originally planned.
What could possibly go wrong?
mk85 said:
Nice. I fancy either one of these or a small vineyard tractor like a Fiat myself. I have a small plot of land where it would be useful. Also considering a TE20 as there's plenty about but maybe a bit big. Will follow with interest. Edited by Jte3397 on Sunday 18th October 23:37

Well, the little Ransomes is now safely tucked away in the workshop, and I've finally had a chance to start having a proper look at it.
The carburettor seems to be the main issue at the moment, as it's leaking fuel from just about everywhere it possibly can!
First job was to get the carb off and see what we're dealing with. After a bit of messing around, I decided to see if the engine would actually fire.
A little fuel directly down the inlet, a bit of persuasion, and she fired into life!
That's a massive positive, as at least I now know the engine runs, which is one less thing to worry about.
Next on the list is stripping down the carburettor, replacing the gaskets and hopefully getting it running properly under its own fuel supply.
I'm sure there will be plenty more surprises along the way, but that's half the fun of buying something that needs a bit of love!
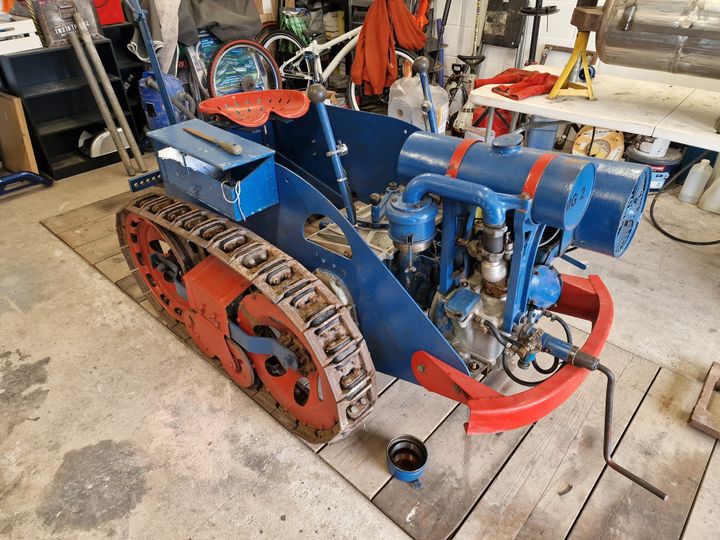
The carburettor seems to be the main issue at the moment, as it's leaking fuel from just about everywhere it possibly can!
First job was to get the carb off and see what we're dealing with. After a bit of messing around, I decided to see if the engine would actually fire.
A little fuel directly down the inlet, a bit of persuasion, and she fired into life!
That's a massive positive, as at least I now know the engine runs, which is one less thing to worry about.
Next on the list is stripping down the carburettor, replacing the gaskets and hopefully getting it running properly under its own fuel supply.
I'm sure there will be plenty more surprises along the way, but that's half the fun of buying something that needs a bit of love!
Well, the carburettor is now on the bench and slowly coming apart.
As you can see from the photos, the gaskets are well and truly past their best, which probably explains why it was leaking fuel from just about every possible opening!
One thing I did find quite interesting was the fuel filter arrangement. Rather than your conventional filter, it's made up of a series of alternating small and large washers stacked together.
I can't imagine it's filtering anything down to microns, that's for sure! Haha.
Anyway, eBay has taken another hit, and I've ordered some fuel-resistant gasket material so I can make up a fresh set of gaskets.
The plan now is to give everything a thorough clean, check the internals, make up the new gaskets and hopefully get the old girl running properly again.
It's all fairly simple engineering, which is part of the appeal of these old machines. No computers, no sensors, just good old-fashioned mechanical bits that can be stripped, cleaned and repaired.
Famous last words, perhaps!
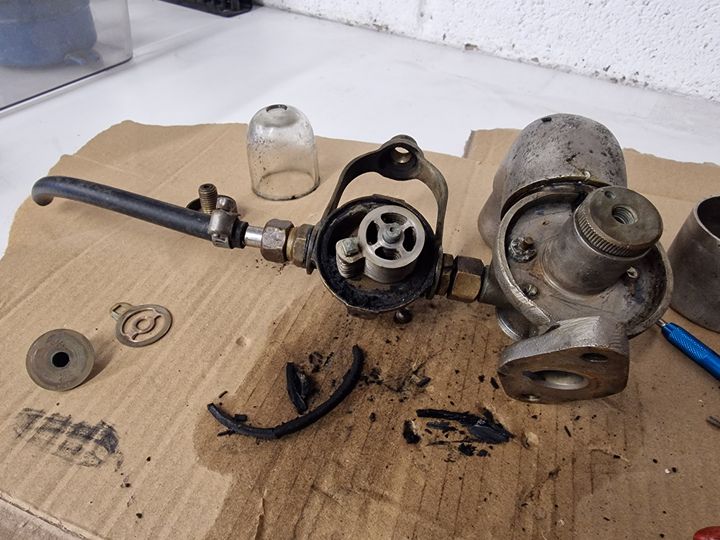
As you can see from the photos, the gaskets are well and truly past their best, which probably explains why it was leaking fuel from just about every possible opening!
One thing I did find quite interesting was the fuel filter arrangement. Rather than your conventional filter, it's made up of a series of alternating small and large washers stacked together.
I can't imagine it's filtering anything down to microns, that's for sure! Haha.
Anyway, eBay has taken another hit, and I've ordered some fuel-resistant gasket material so I can make up a fresh set of gaskets.
The plan now is to give everything a thorough clean, check the internals, make up the new gaskets and hopefully get the old girl running properly again.
It's all fairly simple engineering, which is part of the appeal of these old machines. No computers, no sensors, just good old-fashioned mechanical bits that can be stripped, cleaned and repaired.
Famous last words, perhaps!
So here is my chat gpt idea for the colour scheme.
Afew things will be slightly diffrent but overall the colour i think I will be going for.
I have some carb parts due this week and the gasket material turned up too. So will be making some progress to get it running and checked over before the strip down starts
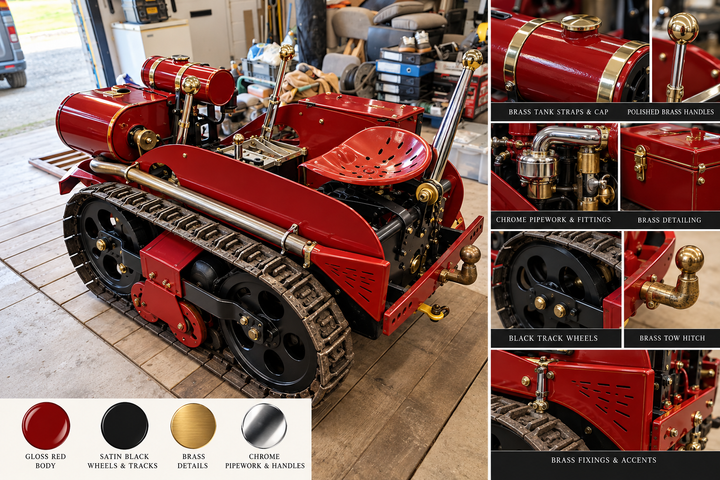
Afew things will be slightly diffrent but overall the colour i think I will be going for.
I have some carb parts due this week and the gasket material turned up too. So will be making some progress to get it running and checked over before the strip down starts
Ransomes MG2 Restoration – The Carburettor Saga Continues!
So, with the wife away for the weekend, I decided there was no better place to strip down and clean a carburettor than the living room! 😂
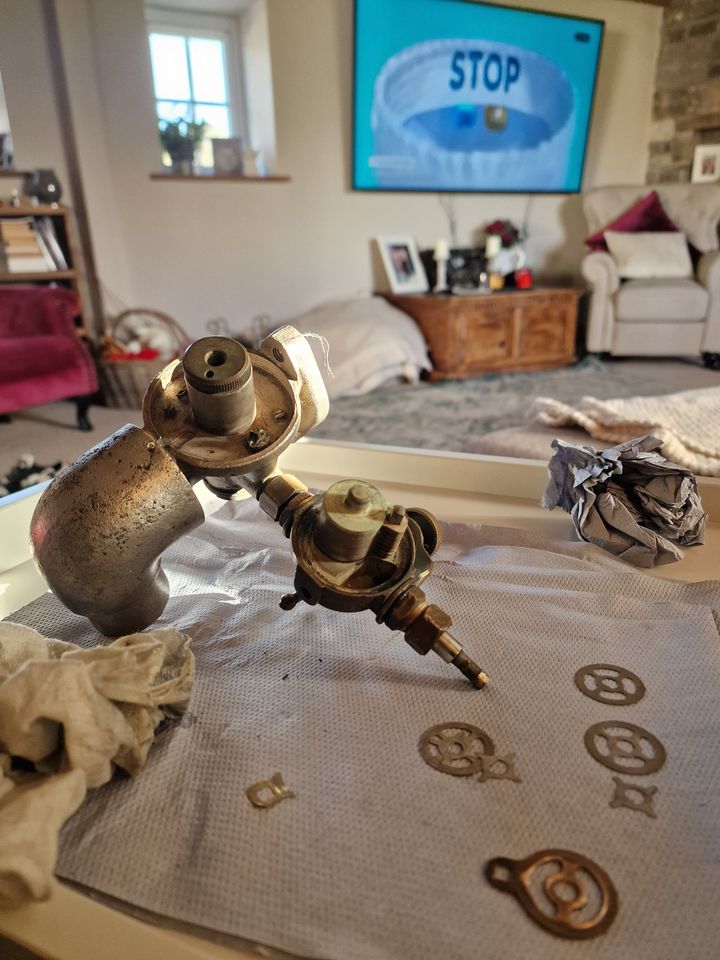
The carb was completely stripped, and I spent some time cleaning all the intricate little plates that make up the fuel filter. Quite an interesting bit of old engineering!
My gasket material also turned up, along with my replacement brass carburettor float, so things were finally starting to come together.
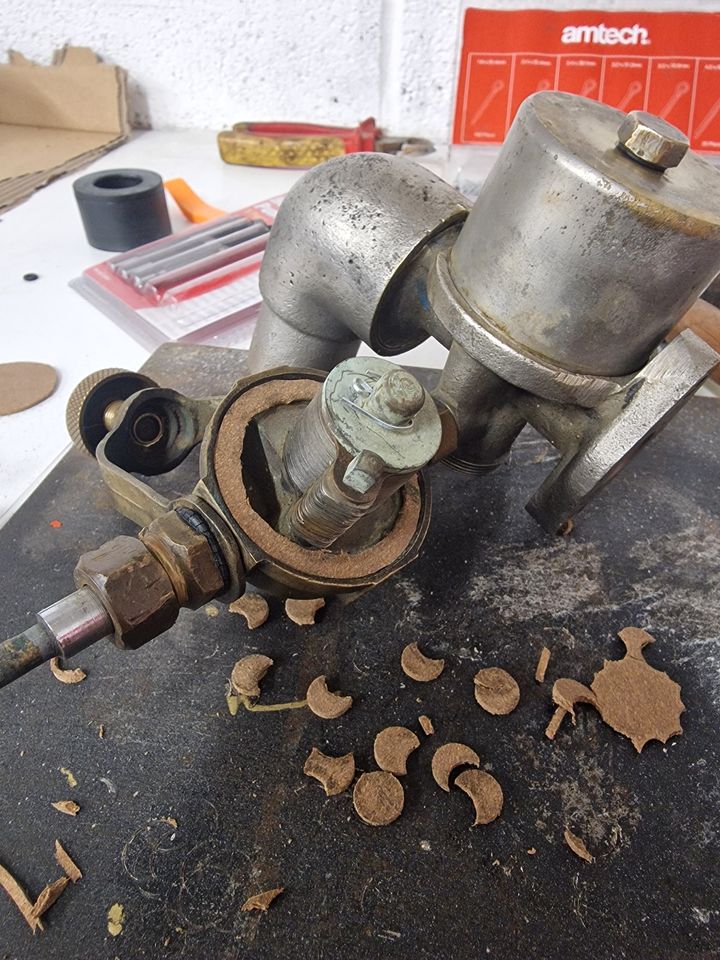
Annoyingly, my nice set of fine scalpels has disappeared from the workshop, so I had to make do with a pair of scissors and a hole punch set I bought years ago and had never actually used. Finally got my money's worth out of it! 😂
With everything cleaned, new gaskets made, the replacement brass float fitted and the carburettor reassembled, it was time to see if she'd run.
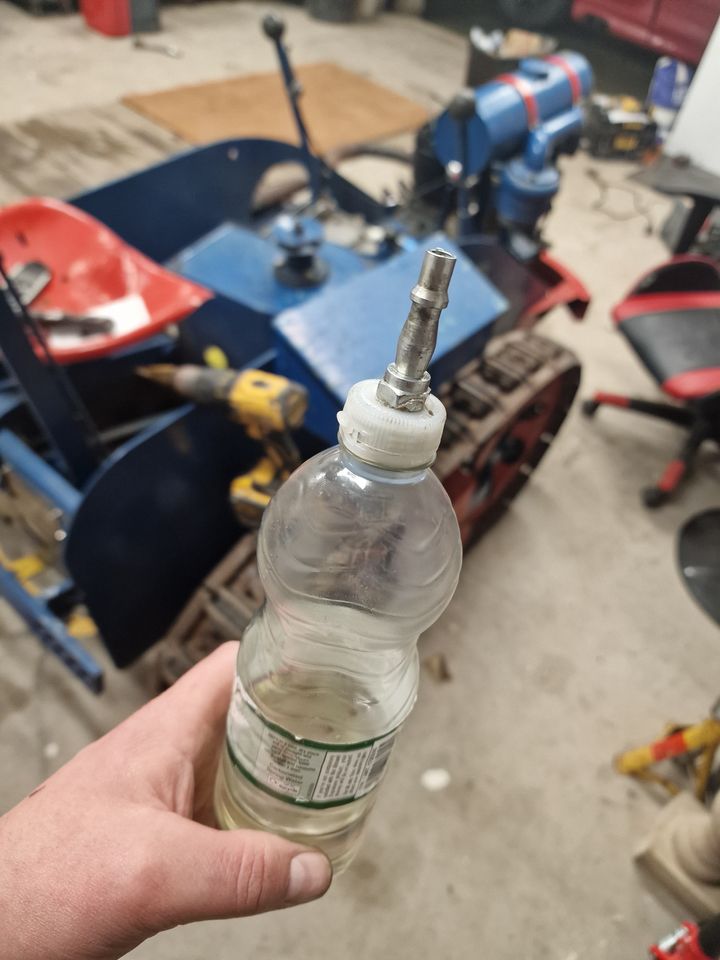
I still need to clean out the original fuel tank, so I didn't want to put fresh petrol into that just yet. Instead, I quickly knocked together a temporary fuel tank using a small bottle with an airline adaptor fitted into the cap. A bit of workshop improvisation!
Unfortunately, after a good 20 minutes of cranking, she still refused to fire up.
On the positive side, not a single leak from the carburettor or fuel filter with some new o ring seals, which is a massive improvement over the petrol fountain I started with!
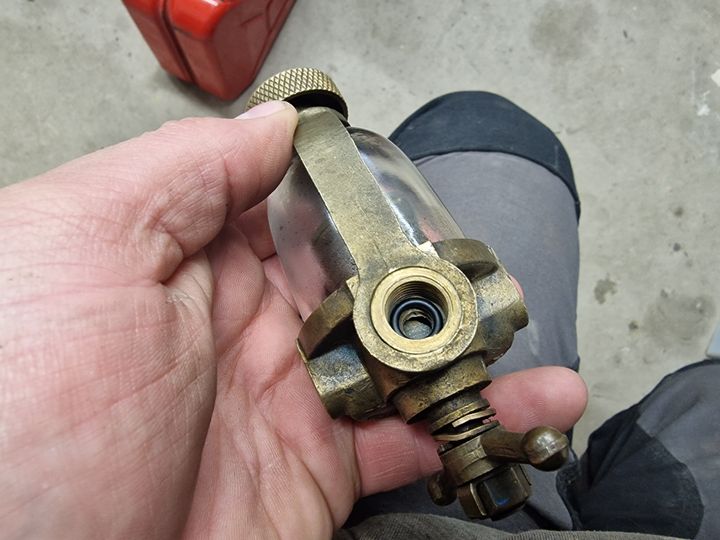
A little squirt of Easy Start produced a promising pop, so I'm now suspecting that fuel isn't making its way through the carburettor and into the engine.
Looks like the carb might be coming apart again!
One step forward, two steps back. The joys of restoring old machinery! 😂🔧
So, with the wife away for the weekend, I decided there was no better place to strip down and clean a carburettor than the living room! 😂
The carb was completely stripped, and I spent some time cleaning all the intricate little plates that make up the fuel filter. Quite an interesting bit of old engineering!
My gasket material also turned up, along with my replacement brass carburettor float, so things were finally starting to come together.
Annoyingly, my nice set of fine scalpels has disappeared from the workshop, so I had to make do with a pair of scissors and a hole punch set I bought years ago and had never actually used. Finally got my money's worth out of it! 😂
With everything cleaned, new gaskets made, the replacement brass float fitted and the carburettor reassembled, it was time to see if she'd run.
I still need to clean out the original fuel tank, so I didn't want to put fresh petrol into that just yet. Instead, I quickly knocked together a temporary fuel tank using a small bottle with an airline adaptor fitted into the cap. A bit of workshop improvisation!
Unfortunately, after a good 20 minutes of cranking, she still refused to fire up.
On the positive side, not a single leak from the carburettor or fuel filter with some new o ring seals, which is a massive improvement over the petrol fountain I started with!
A little squirt of Easy Start produced a promising pop, so I'm now suspecting that fuel isn't making its way through the carburettor and into the engine.
Looks like the carb might be coming apart again!
One step forward, two steps back. The joys of restoring old machinery! 😂🔧
Cool thread, it brings back some memories! When I were a lad my dad had a Ransomes MG6. It had the single furrow plough, a cultivator & discs. From memory none were very effective, but it was great fun to tit about on, like driving a baby tank. It was hand painted blue & orange like yours which I guess is ‘correct’ but your proposed colour looks ace.
He also had a Fordson crawler with a blade on the front. Kind of the same but bigger.
Love stuff like this, good luck with it!
He also had a Fordson crawler with a blade on the front. Kind of the same but bigger.
Love stuff like this, good luck with it!
Gassing Station | Homes, Gardens and DIY | Top of Page | What's New | My Stuff