Discussion


Austin_Metro said:
Marcellus, do you do that with repeated passes - with what - jigs and a router? Any other photos of doing it. It’s a decent copy.
No photos of the in process….. repeated passes on a spindle moulder….we started with the round part which was the top part of a skirting, fortunately the tool for the skirt is made from four cutters so we just used two of them and removed the bottom part, then we rebated the top part followed by a small scotia and finished with a little rebate. The bottom was a large scotia, rebate block, small capillary finishing with a rebate block.
So, seven passes through the spindle moulder.
Not really something we do that often, so a great challenge and we’re quite pleased with the results…
Edited by Marcellus on Sunday 26th May 16:57
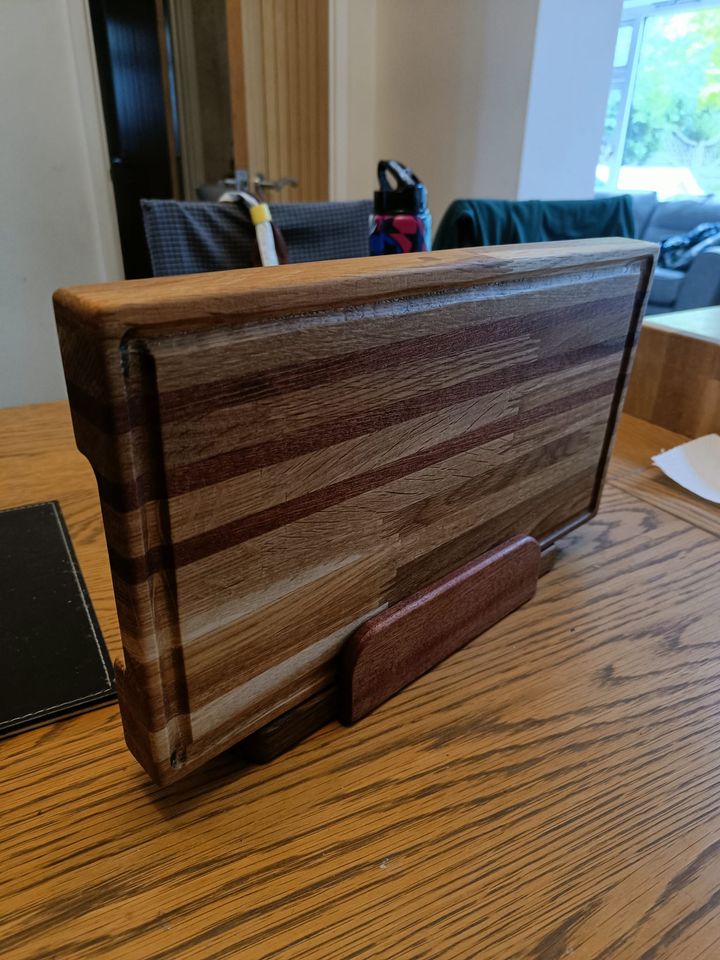
Finished my latest board.
Made this one following a request from my mum. Its going to be a present for my cousin who was recently engaged.
11 pieces of Oak from an old oak dining room table with three pieces of Sapele. First time creating a juice groove as well as cut outs for the handles.
The juice groove and handles required me to build specialist jigs and getting the juice groove right was a pita...notice the odd notch in the corner
Tried to get youngest to follow me with the dust extractor, but that just didn't work out and it wasn't his fault either.
Looks good from a distance.
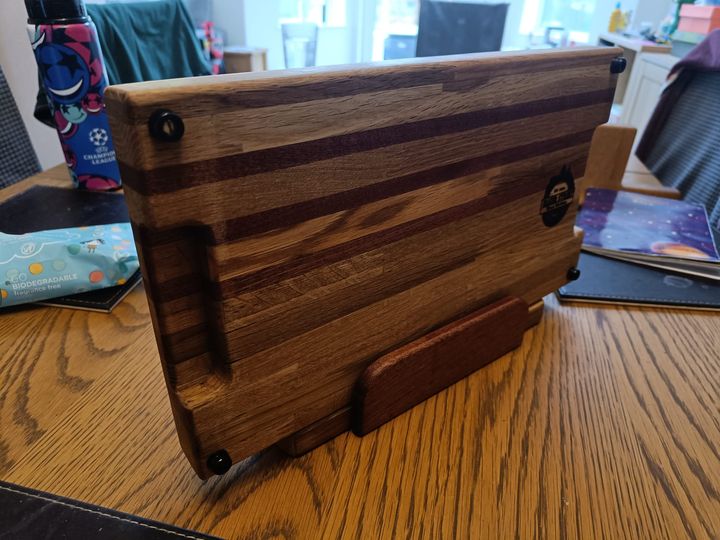
Made this one following a request from my mum. Its going to be a present for my cousin who was recently engaged.
11 pieces of Oak from an old oak dining room table with three pieces of Sapele. First time creating a juice groove as well as cut outs for the handles.
The juice groove and handles required me to build specialist jigs and getting the juice groove right was a pita...notice the odd notch in the corner
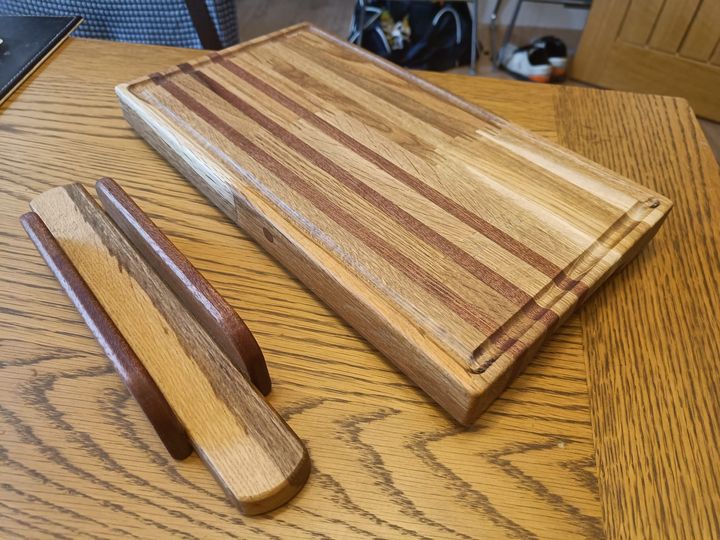
Tried to get youngest to follow me with the dust extractor, but that just didn't work out and it wasn't his fault either.
Looks good from a distance.
A big thanks to Wolfie for the fairy doors inspiration!
I made 4, just ready in time for my grand daughter visiting. My knowledge of fairy physiology is quite limited, so I assumed a mean fairy height of around 20 cms, with a door height of around 30, to allow for any outliers. One was fixed to a tree in the garden, and my daughter is taking the other 3 home to do do something similar there.
The littl'un (5), who's going through a fairy mad phase anyway, was completely captivated and I reckon she stayed up most of the night watching the door in the garden hoping to spot any fairy traffic.
Well done that man!

Spurred on by the fairy doors I opted to make a bird box in the shape of my favourite cafe and gave the owner it as a gift. Using some of that unknown wood I had for the facing pieces.
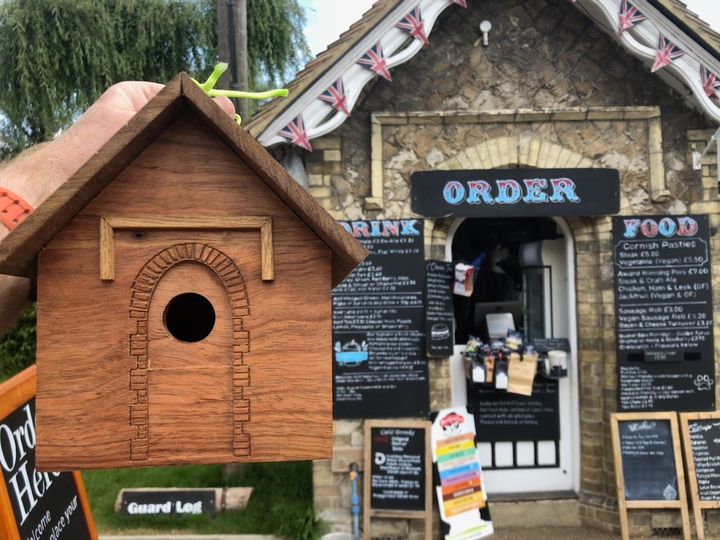
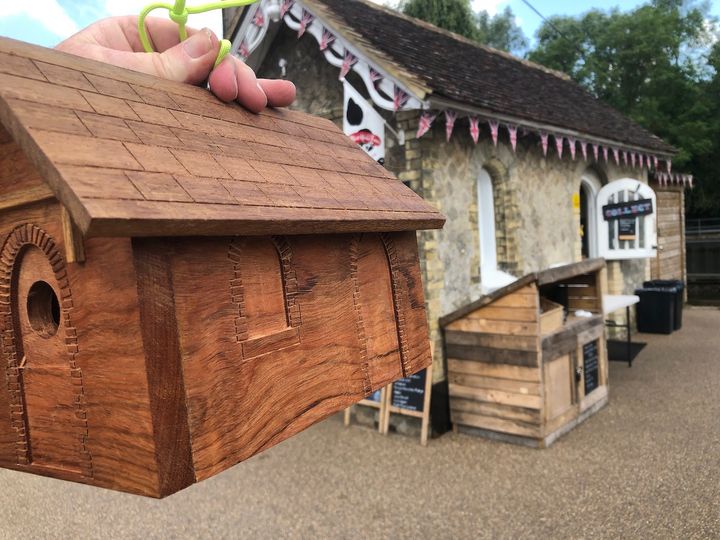
Probably too late for this season, but it'll be ready for the next one. Sized for tits to enter.
Cafe is the Old Toll House at Allington Lock.
Probably too late for this season, but it'll be ready for the next one. Sized for tits to enter.
Cafe is the Old Toll House at Allington Lock.
Some wonderful things on here of late, I love the two bird boxes.
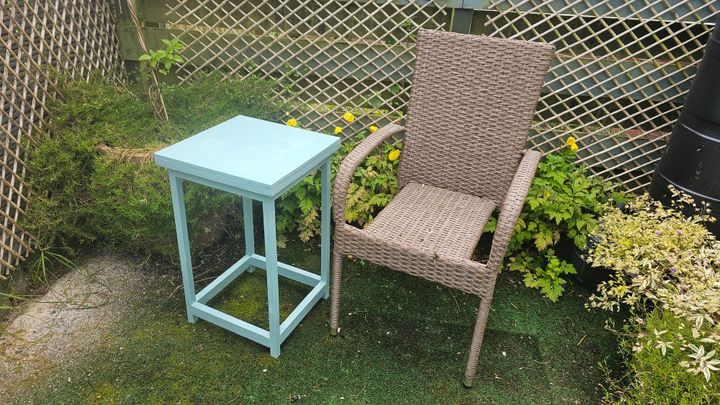
My latest thing is super basic, but I'm still quite pleased with it. I wanted a better table for the garden, and wanted to try something different, in that I've only used glue in the construction. The wood itself was packaging, from washing machines and cookers and suchlike. Nowt fancy, but straight.
One coat of wood primer, and three coats of Cuprinol weatherproof paint, which is being tested straight away as its pishing down now!
Overall, I'm dead happy with the result, it's a much better size for the garden, it will hold a book and a pint glass, and it doesn't wobble!!
This morning, for your perusal, David Stanley's latest offering :- 977 Lots of Antique and Modern Woodworking and Allied Trades Tools.
These Auctions happen every 3 months or so and although I rarely buy anything there's a usually selection of highly desirable planes alongside more mundane but often fascinating tools from a bygone era.
First thing I do is sort from highest to lowest price to ogle the good stuff.
https://www.davidstanley.com/catalogue/AB25A662303...
Do the carpentry experts in here have any tips for building adjustability into drawer fronts?
I have a birch plywood sideboard that I assembled from parts cut by Cutwrights. The drawer fronts themselves are perfect for size (as they're CNC cut), but I've made my own plywood drawer box mated to push-to-open runners. I could really do with a means of in-situ 3D adjustment, similar to how you'd get with kitchen drawer systems.
At the moment, the gaps and out-of-plane are maybe only 1mm out, but it looks awful!
This sort of thing ?
https://www.hafele.co.uk/en/product/drawer-front-a...
I've not used them but I know they're commonly used by manufacturers.
https://www.hafele.co.uk/en/product/drawer-front-a...
I've not used them but I know they're commonly used by manufacturers.
loughran said:
This morning, for your perusal, David Stanley's latest offering :- 977 Lots of Antique and Modern Woodworking and Allied Trades Tools.
These Auctions happen every 3 months or so and although I rarely buy anything there's a usually selection of highly desirable planes alongside more mundane but often fascinating tools from a bygone era.
First thing I do is sort from highest to lowest price to ogle the good stuff.
https://www.davidstanley.com/catalogue/AB25A662303...
How much for a plane !!!! These Auctions happen every 3 months or so and although I rarely buy anything there's a usually selection of highly desirable planes alongside more mundane but often fascinating tools from a bygone era.
First thing I do is sort from highest to lowest price to ogle the good stuff.
https://www.davidstanley.com/catalogue/AB25A662303...
crmcatee said:
loughran said:
This morning, for your perusal, David Stanley's latest offering :- 977 Lots of Antique and Modern Woodworking and Allied Trades Tools.
These Auctions happen every 3 months or so and although I rarely buy anything there's a usually selection of highly desirable planes alongside more mundane but often fascinating tools from a bygone era.
First thing I do is sort from highest to lowest price to ogle the good stuff.
https://www.davidstanley.com/catalogue/AB25A662303...
How much for a plane !!!! These Auctions happen every 3 months or so and although I rarely buy anything there's a usually selection of highly desirable planes alongside more mundane but often fascinating tools from a bygone era.
First thing I do is sort from highest to lowest price to ogle the good stuff.
https://www.davidstanley.com/catalogue/AB25A662303...

More investment opportunities here...
https://www.ebay.co.uk/str/teaandteakantiquetools?...
and especially here...
https://www.jimbodetools.com/collections/planes?so...
Rob. said:
Do the carpentry experts in here have any tips for building adjustability into drawer fronts?
I have a birch plywood sideboard that I assembled from parts cut by Cutwrights. The drawer fronts themselves are perfect for size (as they're CNC cut), but I've made my own plywood drawer box mated to push-to-open runners. I could really do with a means of in-situ 3D adjustment, similar to how you'd get with kitchen drawer systems.
At the moment, the gaps and out-of-plane are maybe only 1mm out, but it looks awful!
If you mean the gaps round the edges, the only time I did drawers like this with a separate front, I used double sided tape to stick the front to the drawer carcass, slid it around for an equidistant fit, then screwed in from the back for a permanent fix. If the fixed drawer front is not lying flush with the surrounding carcass use some thin shims to correct it.I have a birch plywood sideboard that I assembled from parts cut by Cutwrights. The drawer fronts themselves are perfect for size (as they're CNC cut), but I've made my own plywood drawer box mated to push-to-open runners. I could really do with a means of in-situ 3D adjustment, similar to how you'd get with kitchen drawer systems.
At the moment, the gaps and out-of-plane are maybe only 1mm out, but it looks awful!
wolfracesonic said:
If you mean the gaps round the edges, the only time I did drawers like this with a separate front, I used double sided tape to stick the front to the drawer carcass, slid it around for an equidistant fit, then screwed in from the back for a permanent fix. If the fixed drawer front is not lying flush with the surrounding carcass use some thin shims to correct it.
I had an inkling I should have used a double front, so yours and loughran's posts confirms it. Thanks. Gassing Station | Homes, Gardens and DIY | Top of Page | What's New | My Stuff