Anyone interested in home-built sailing dinghies?
Discussion


That's been a fairly intensive weekend, and some dinghy happened along the way. Unfortunately my photographic record captures everything half-done.
I glued up the internal timbers in the bow on Friday.

On Saturday these were all trimmed and excess epoxy dealt with and now it looks quite tidy.
Then, we temporarily bolted up the chainplates to the hull and made both shrouds and one of the forestays. These have a loop at the top swaged in place and are swaged to a turnbuckle at the bottom finally attached to the hull fittings with a quickly removable pin. Luckily being interested in cars but not interested in paying for third parties to keep the things I like running, I bought a 20 tonne hydraulic press around 10 years ago. It has paid for itself many times over in garage bills avoided, and served again in swaging the cables nicely. I'm very glad I have it!
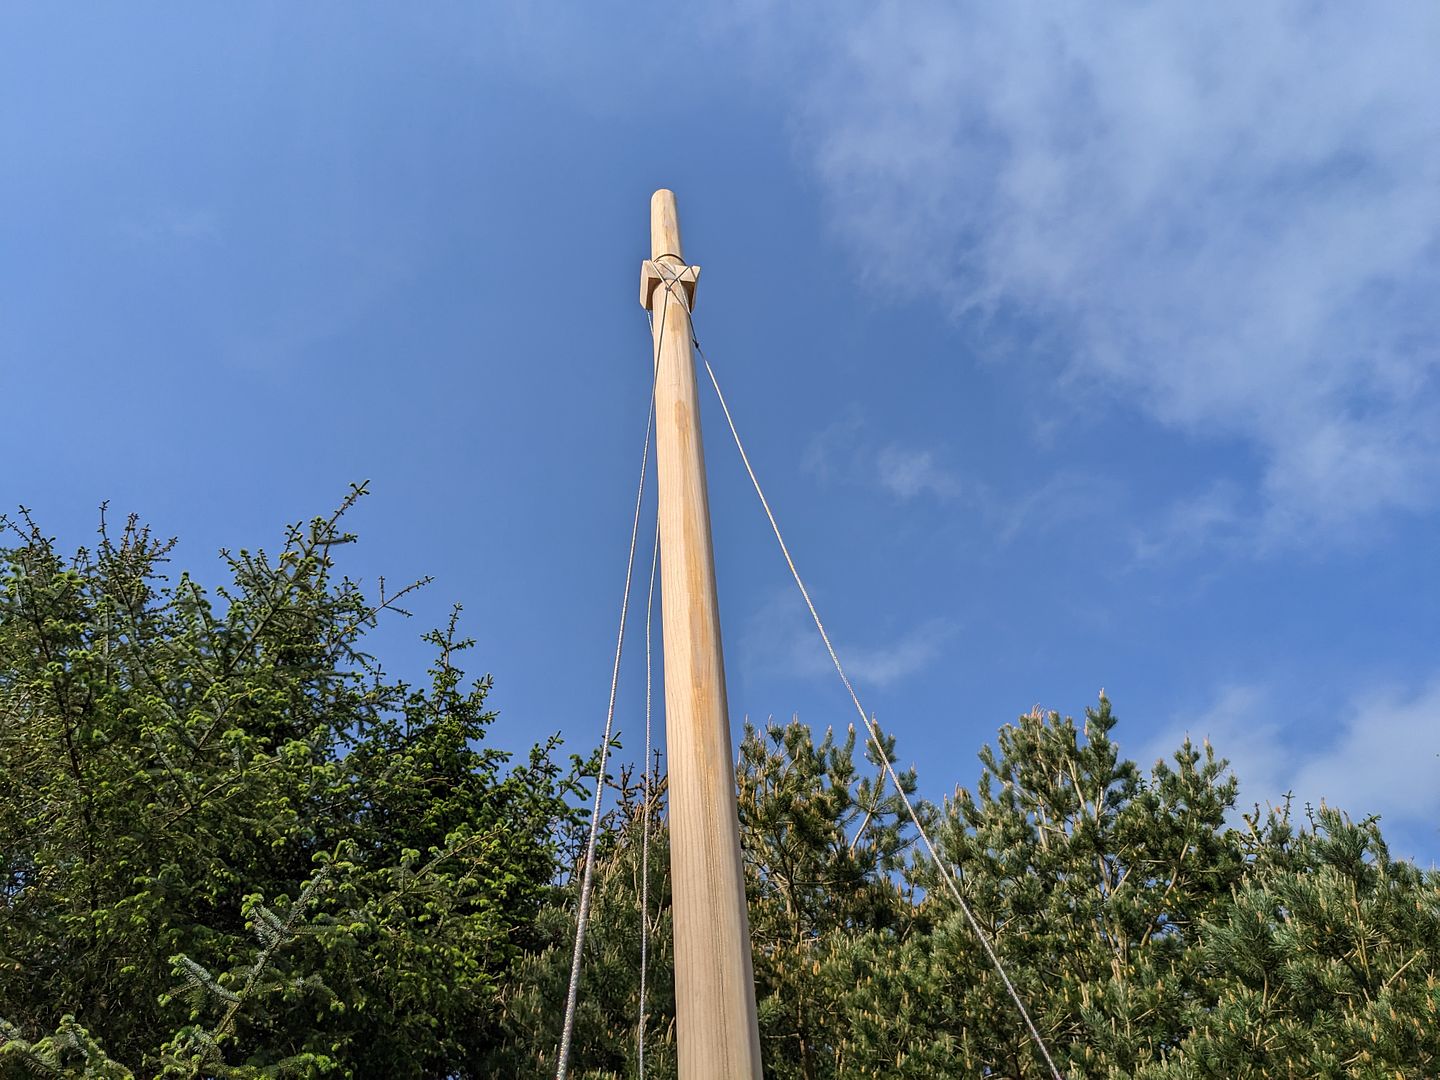
When the loops at the top were done the 3 stays were cut about 150mm / 6 inches over and the mast was stepped and angles checked before the actual length was measured leaving me plenty adjustment either way on the turnbuckles.

The turnbuckle fittings were then swaged to the bottom end of each cable. In my childish glee at seeing my very first dinghy with the mast in and standing rigging in and snugged up (not too tight) I took a short video but neglected to take a still photograph with it all in place properly...
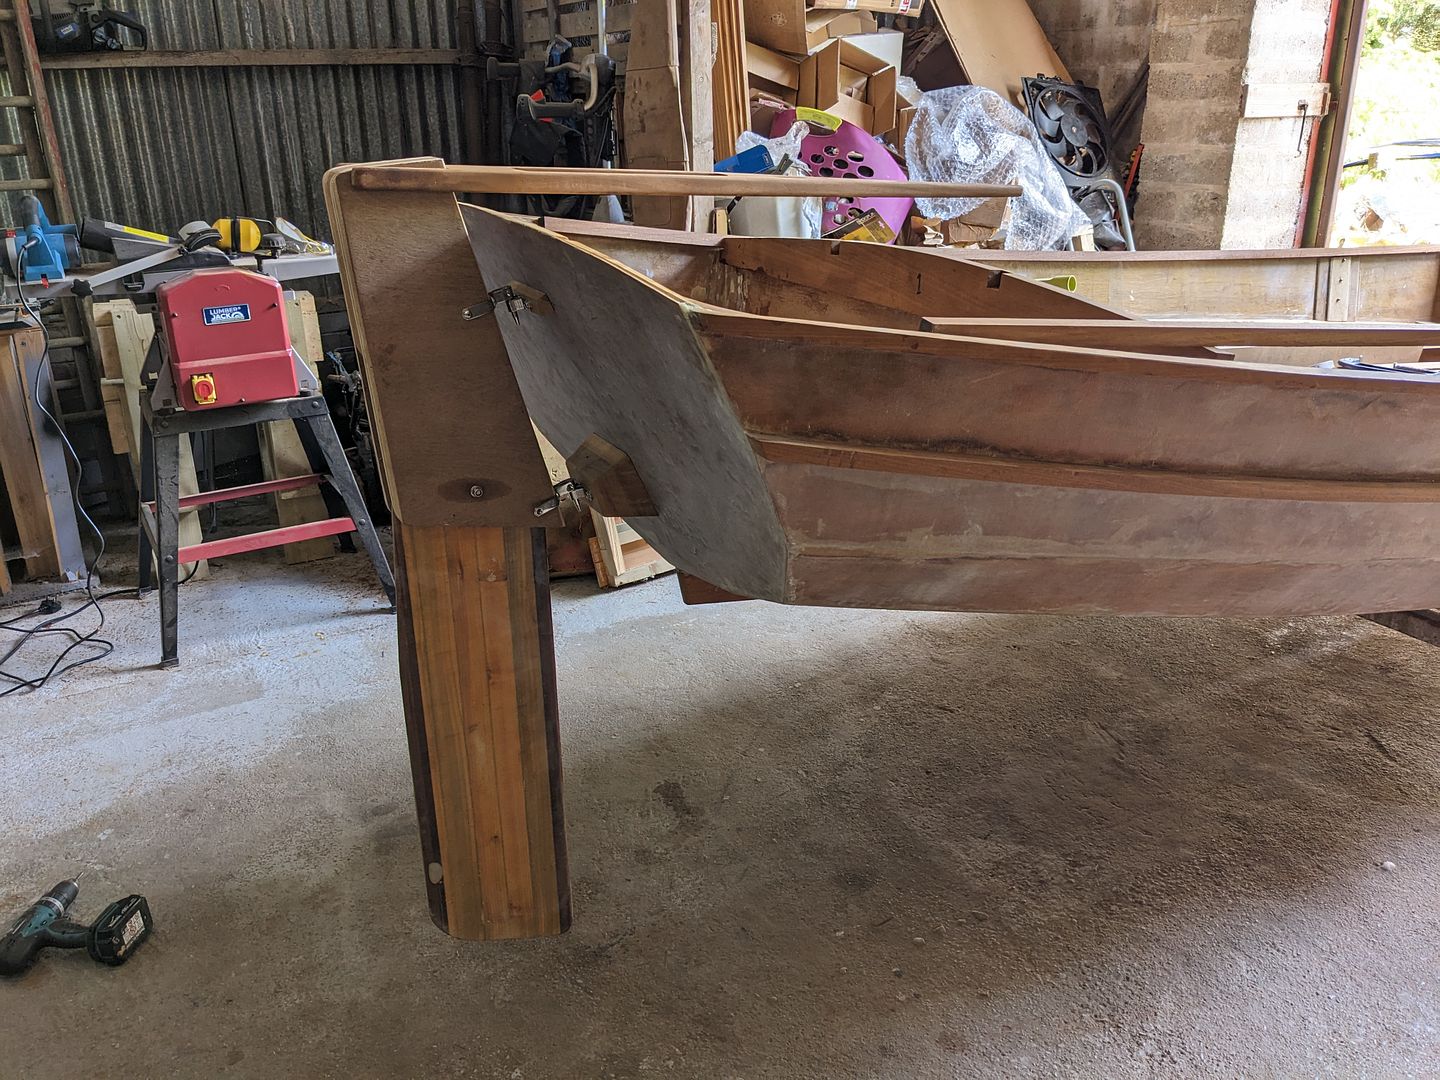
Today I "dry" fitted the rudder. Whilst the gudgeons are almost certainly fine and it's hard to imagine hurting the 8mm diameter pins themselves, the Allen pintles are maybe a bit weedy. It feels fine, but I acknowledge that rudders and their hardware can get quite a bit of punishment. I think I'll keep the pins but fabricate some heavier bands to fix to the headstock.
I glued up the internal timbers in the bow on Friday.
On Saturday these were all trimmed and excess epoxy dealt with and now it looks quite tidy.
Then, we temporarily bolted up the chainplates to the hull and made both shrouds and one of the forestays. These have a loop at the top swaged in place and are swaged to a turnbuckle at the bottom finally attached to the hull fittings with a quickly removable pin. Luckily being interested in cars but not interested in paying for third parties to keep the things I like running, I bought a 20 tonne hydraulic press around 10 years ago. It has paid for itself many times over in garage bills avoided, and served again in swaging the cables nicely. I'm very glad I have it!
When the loops at the top were done the 3 stays were cut about 150mm / 6 inches over and the mast was stepped and angles checked before the actual length was measured leaving me plenty adjustment either way on the turnbuckles.
The turnbuckle fittings were then swaged to the bottom end of each cable. In my childish glee at seeing my very first dinghy with the mast in and standing rigging in and snugged up (not too tight) I took a short video but neglected to take a still photograph with it all in place properly...
Today I "dry" fitted the rudder. Whilst the gudgeons are almost certainly fine and it's hard to imagine hurting the 8mm diameter pins themselves, the Allen pintles are maybe a bit weedy. It feels fine, but I acknowledge that rudders and their hardware can get quite a bit of punishment. I think I'll keep the pins but fabricate some heavier bands to fix to the headstock.
Hi folks,
It's been a busy summer so far, and not in the good way!
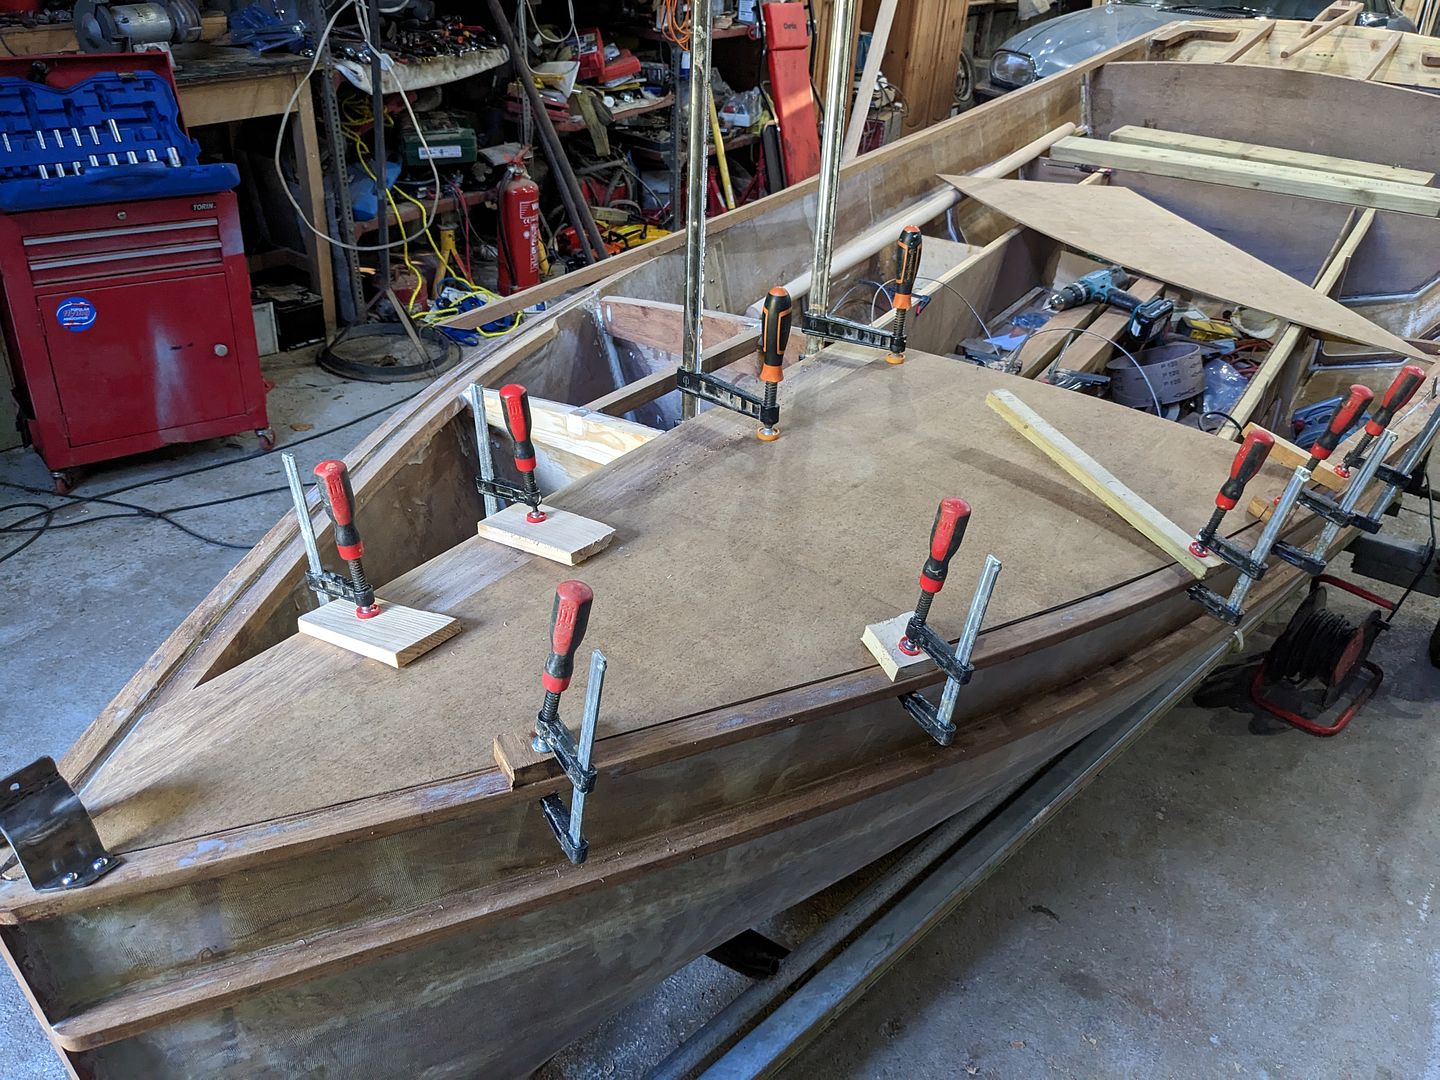
The foredeck isn't glued down yet but the bits fit reasonably nicely now:
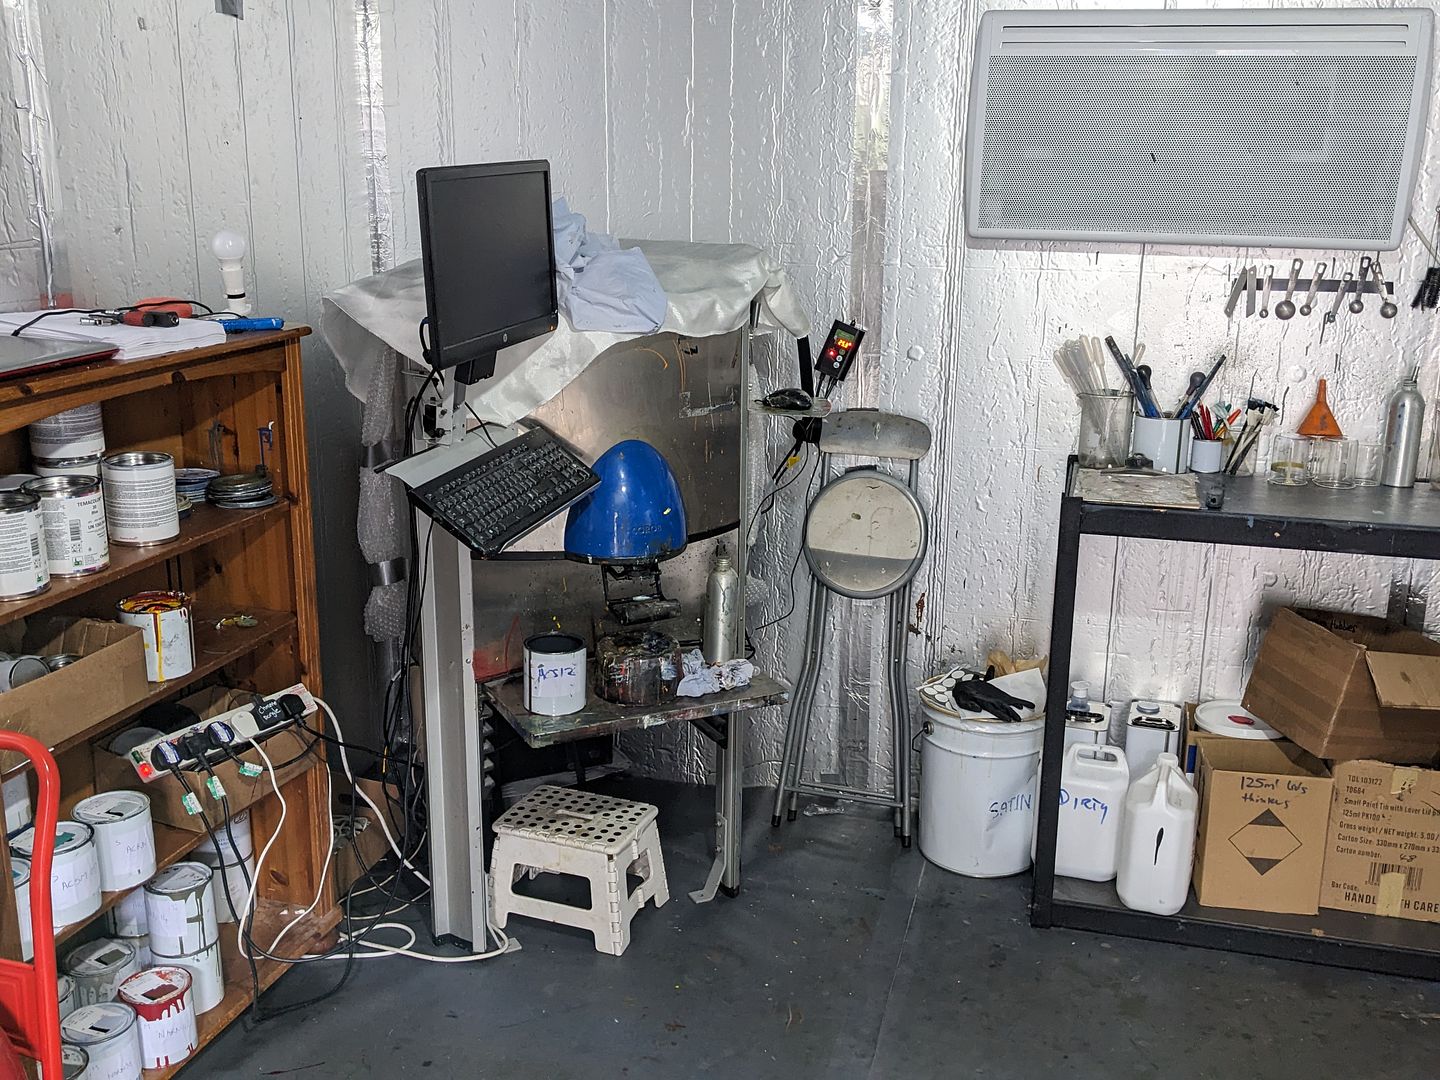
I've decided though that it's getting high time I finished the outside of the hull, so I ordered up hard wearing paint products suitable for marine use from a supplier I know very well and trust.
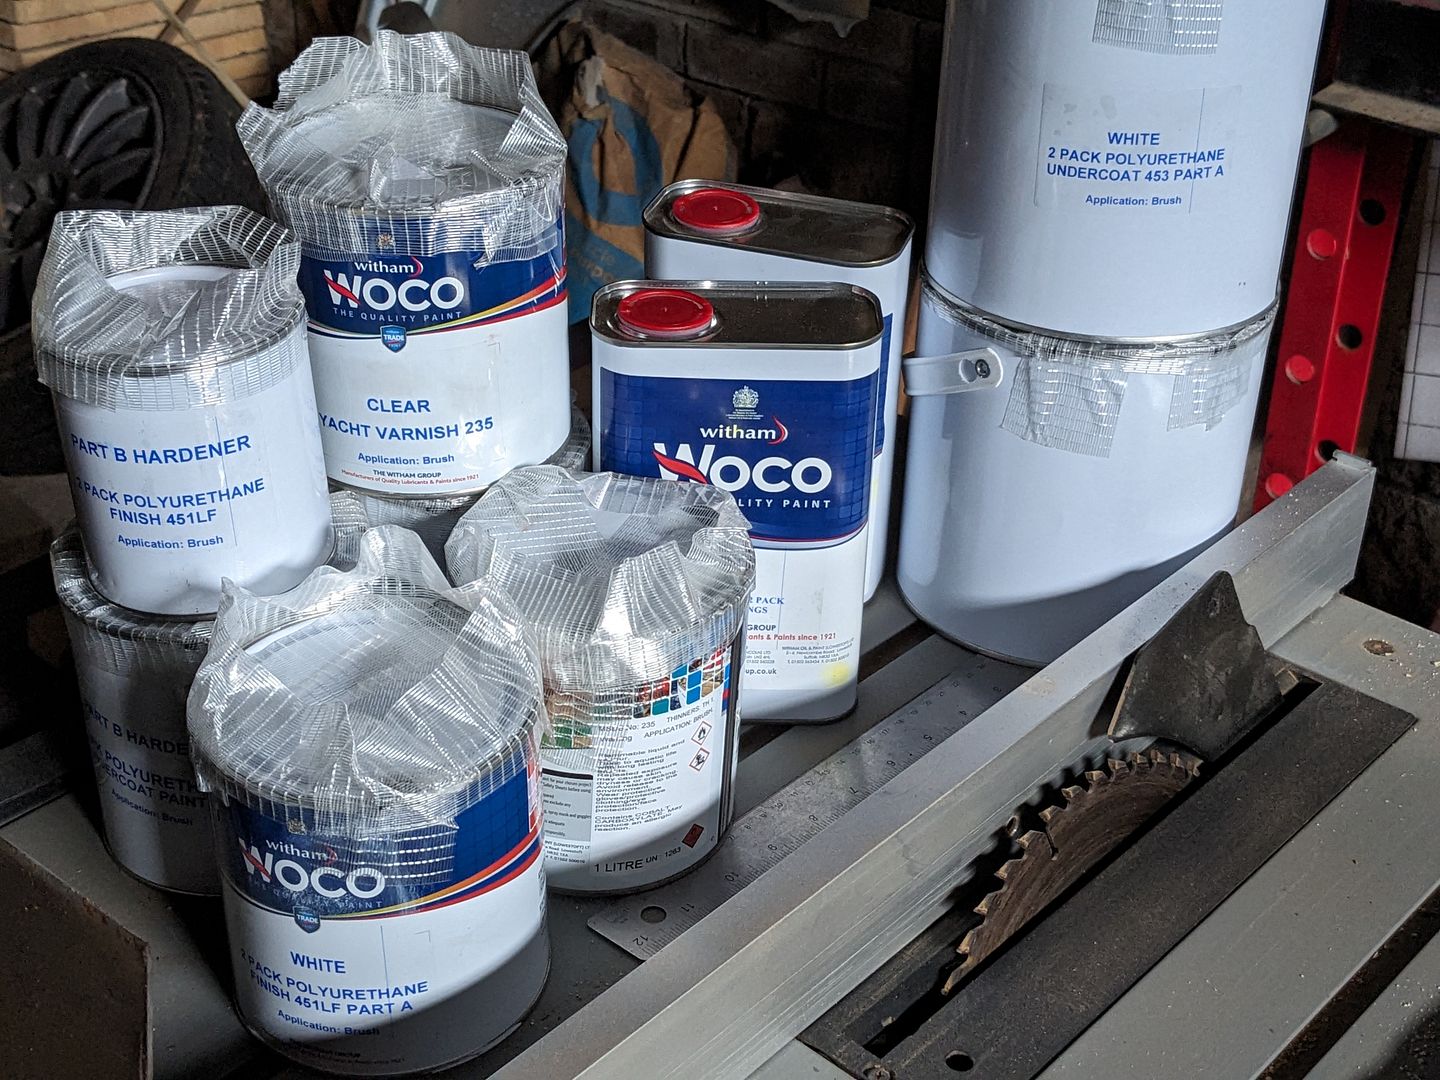
Other than the varnish for my spars of course, they are all white but they are chemically compatible with the liquid colourants I use in my little model paint business so I am able to make the exact shade I want for the hull above the rubbing strips on my paint mixing machine
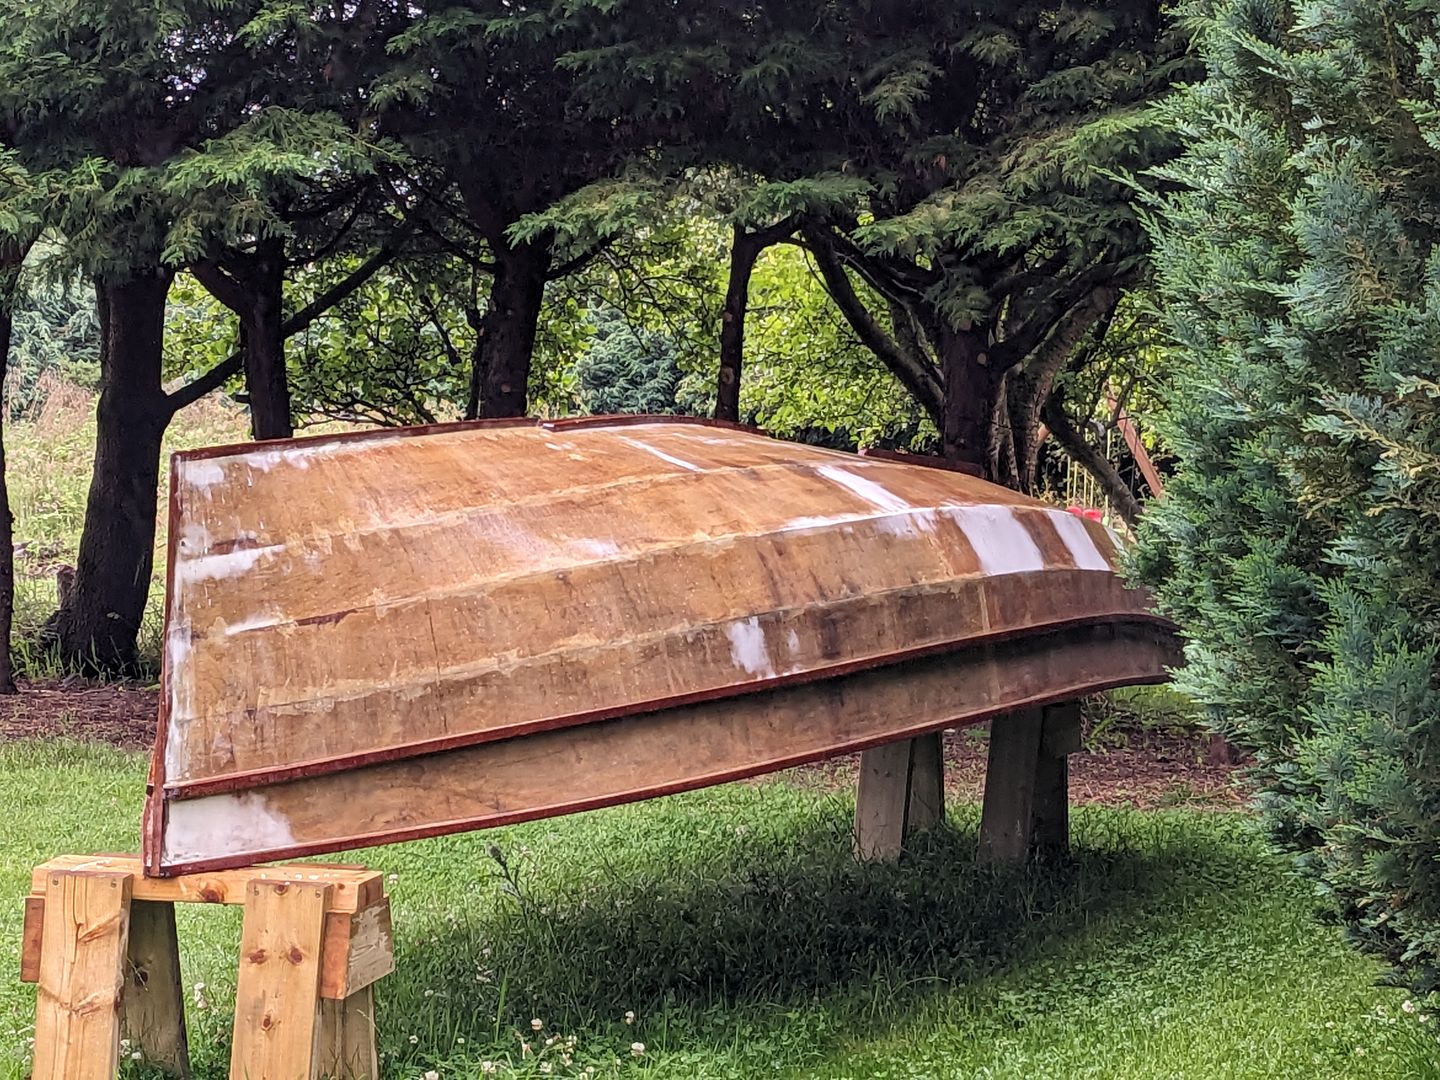
With the goal of getting the hull dressed up in mind I relocated it out into the garden and flipped it over again. I still had two hardwood strips to glue on either side of the daggerboard slot, which I did.

I've then become a bit fussier than I originally intended and have been using a baton and a pencil to mark out areas that will annoy me and dealing with them ahead of paint, and rollering on additional coats of epoxy in the process.
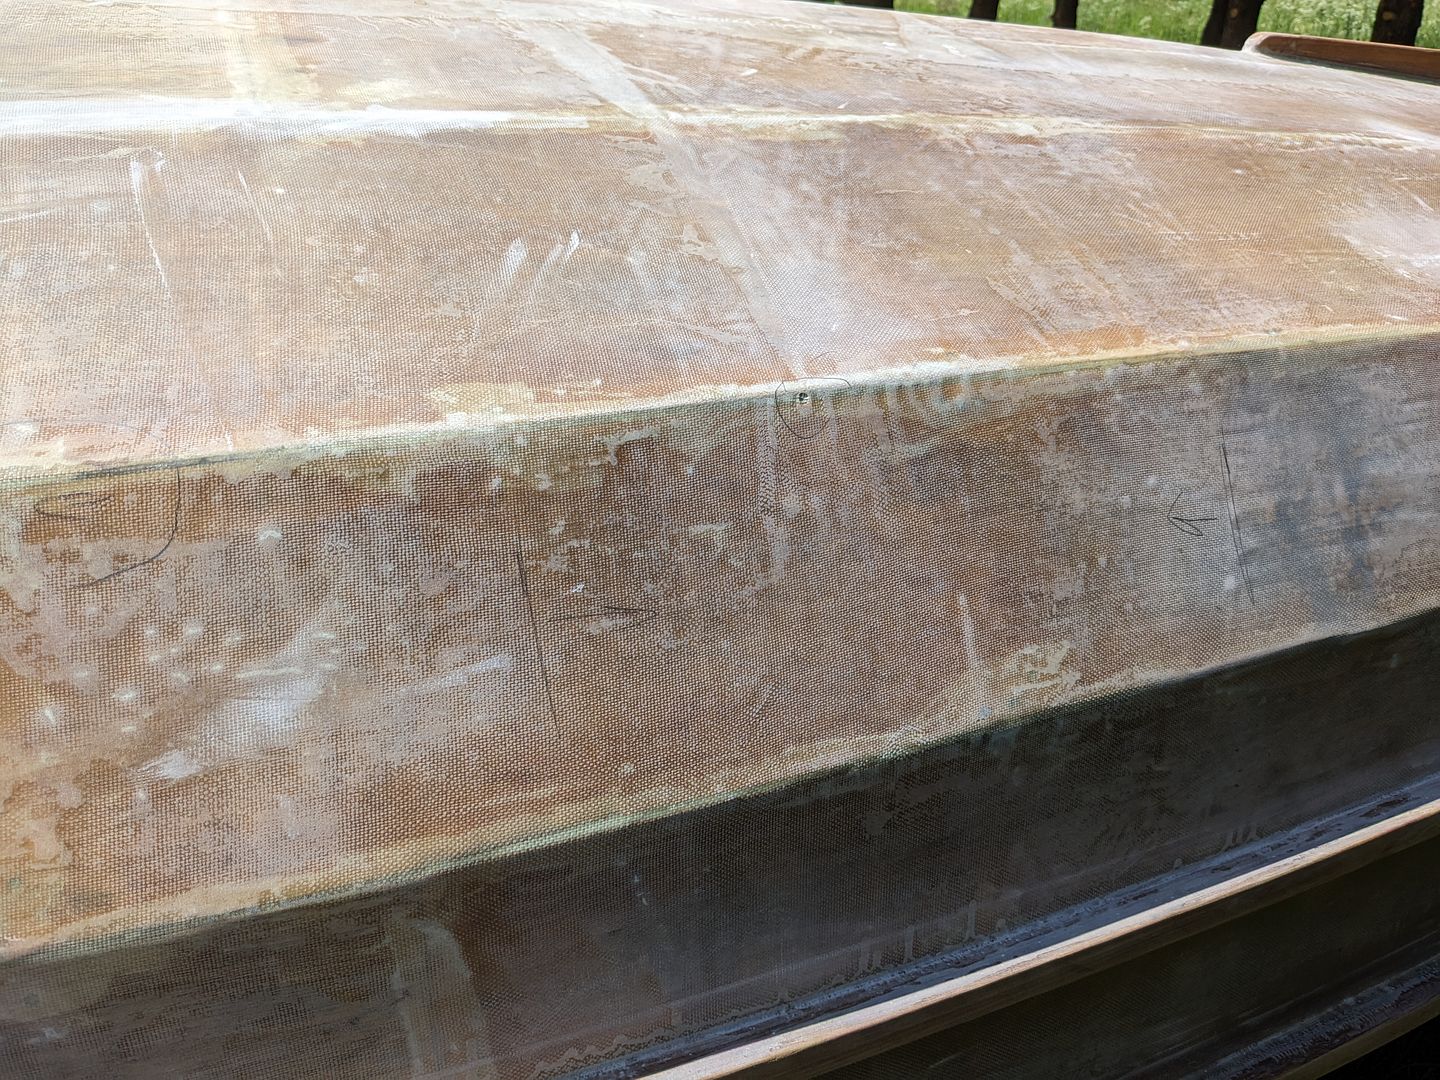
Overall I think it'll be ok and I'm trying not to be too hard on myself. With the benefit of hindsight I should have spent more time on the original scarph joints of the plywood as there have been little humps at the joints. They are not deep under the batons, but if the paint finish is glossy I'll see the unfairness in the reflections so there are big wide skims of epoxy and microballoon filler to fair this out. If I get to build a second boat, I'll do things differently. I still fully intend to finish this dinghy and enjoy it though, so want to avoid the trap I so easily fall into which is finding something less than perfect and abandoning the project because of it.
It's been a busy summer so far, and not in the good way!
The foredeck isn't glued down yet but the bits fit reasonably nicely now:
I've decided though that it's getting high time I finished the outside of the hull, so I ordered up hard wearing paint products suitable for marine use from a supplier I know very well and trust.
Other than the varnish for my spars of course, they are all white but they are chemically compatible with the liquid colourants I use in my little model paint business so I am able to make the exact shade I want for the hull above the rubbing strips on my paint mixing machine
With the goal of getting the hull dressed up in mind I relocated it out into the garden and flipped it over again. I still had two hardwood strips to glue on either side of the daggerboard slot, which I did.
I've then become a bit fussier than I originally intended and have been using a baton and a pencil to mark out areas that will annoy me and dealing with them ahead of paint, and rollering on additional coats of epoxy in the process.
Overall I think it'll be ok and I'm trying not to be too hard on myself. With the benefit of hindsight I should have spent more time on the original scarph joints of the plywood as there have been little humps at the joints. They are not deep under the batons, but if the paint finish is glossy I'll see the unfairness in the reflections so there are big wide skims of epoxy and microballoon filler to fair this out. If I get to build a second boat, I'll do things differently. I still fully intend to finish this dinghy and enjoy it though, so want to avoid the trap I so easily fall into which is finding something less than perfect and abandoning the project because of it.
I've been painting a 2-pack polyurethane undercoat on the hull lately, and I have one more coat to go. The finish isn't going to be what I imagined when I started, but it will be serviceable. The whole boat isn't what I imagined at the start, but it'll be serviceable. I can always build another boat later and employ what I've learned along the way.
I made a fitting for the end of the bowsprit on Saturday.

I was supposed to do some more paint yesterday but instead decided that the best thing to do in the hot weather was metalwork. I think I've now made all the custom fabrications apart from however I attach the bobstay at the stem.
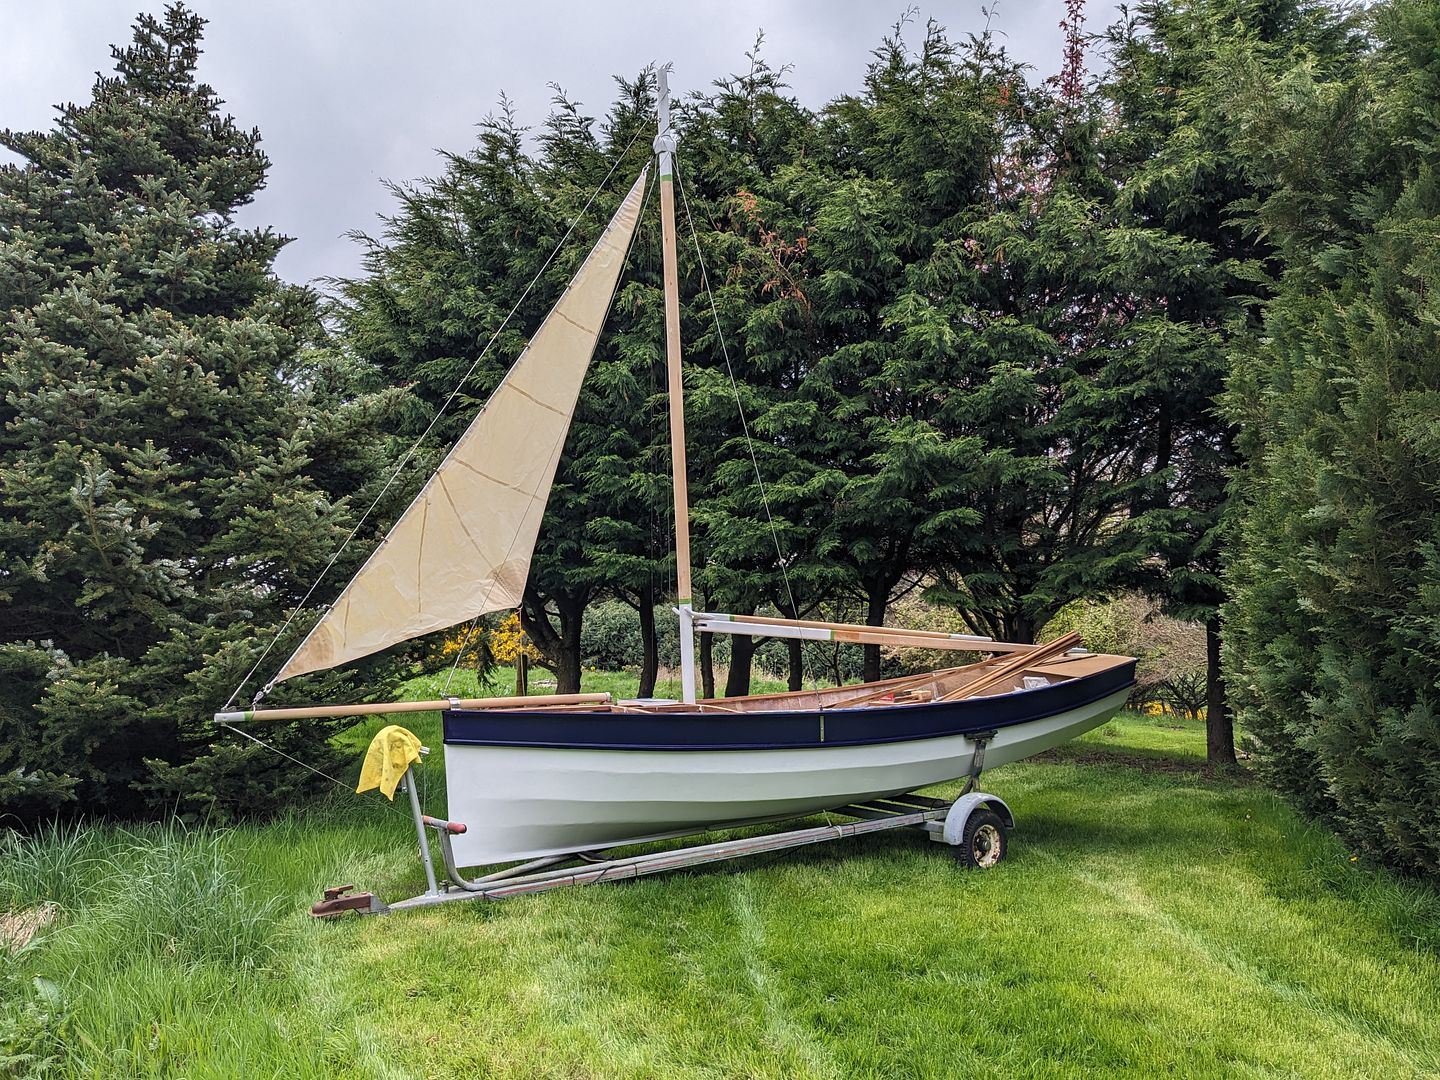
Still, that meant I was able to attach the bowsprit (almost) properly, therefore the second forestay could be made, but not properly tensioned just yet. Using some cheap string as a halyard, I found running the jib up irressistable.
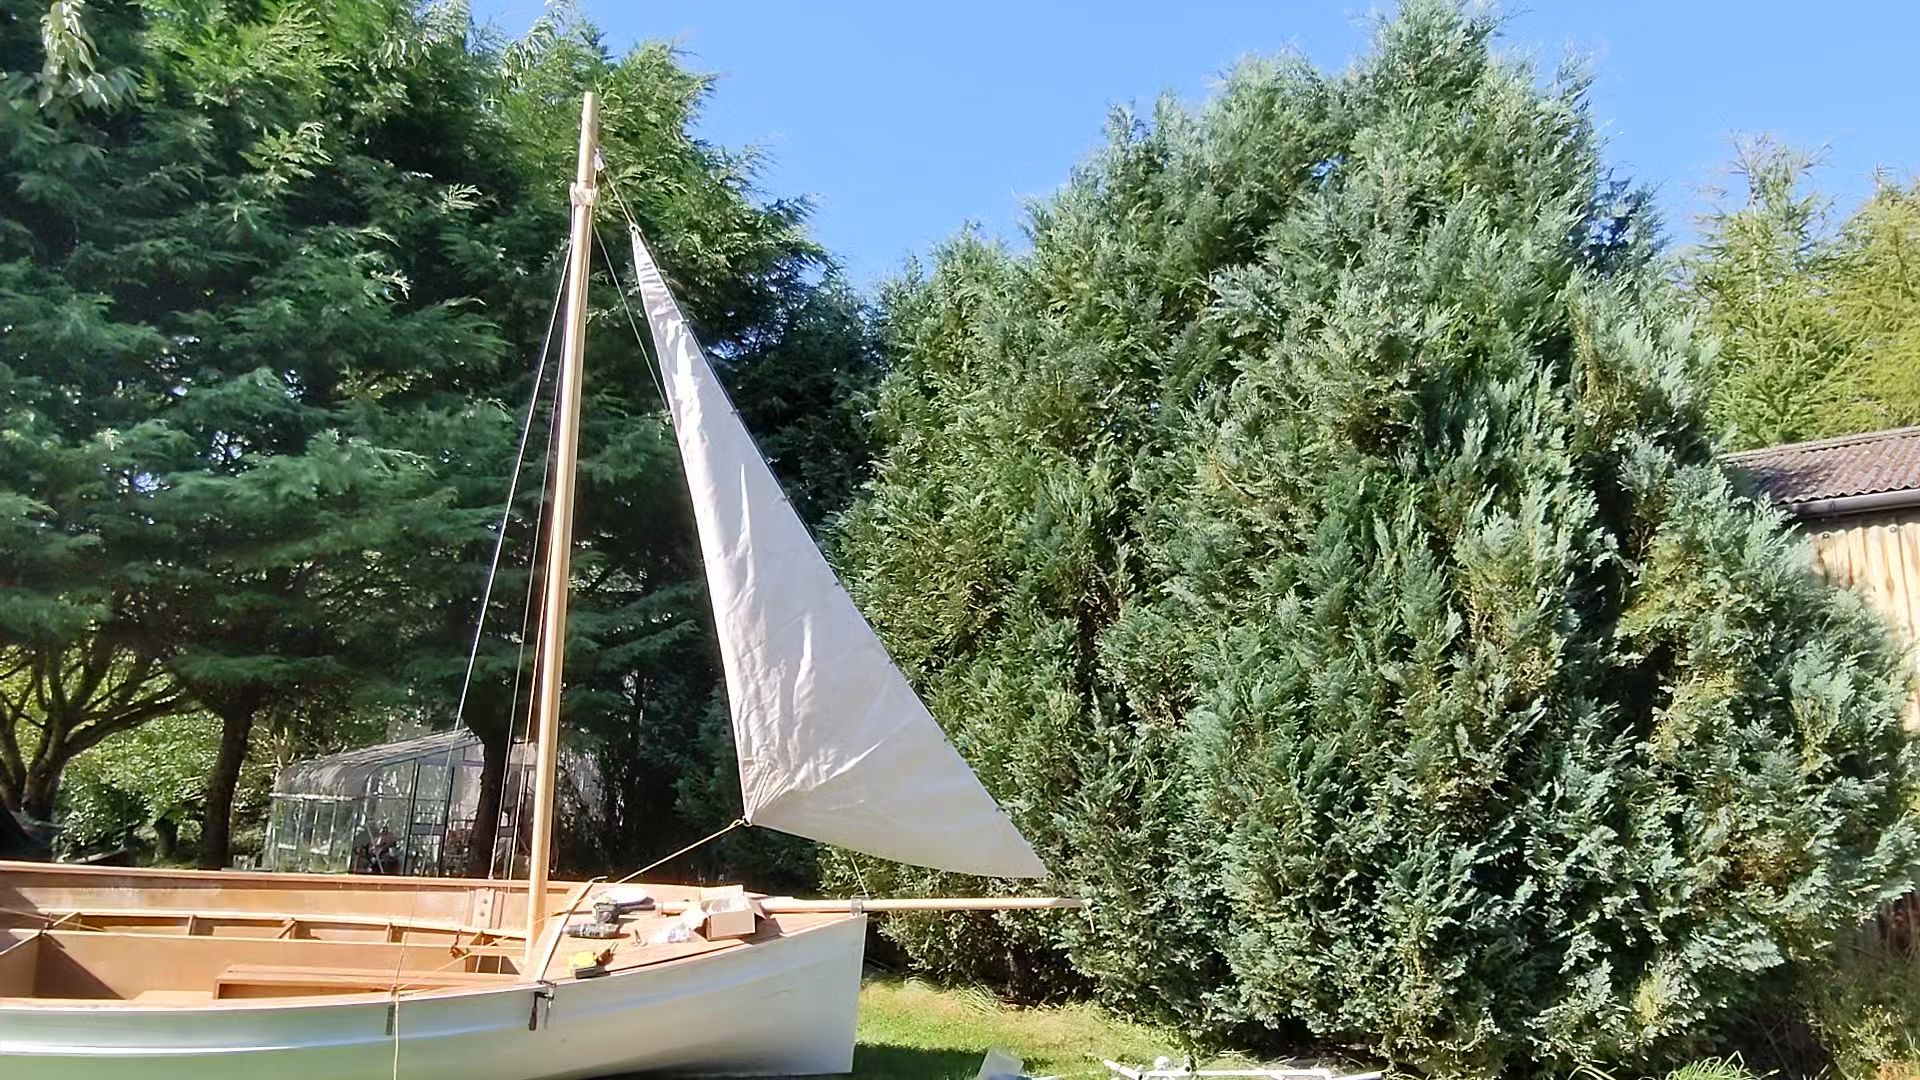
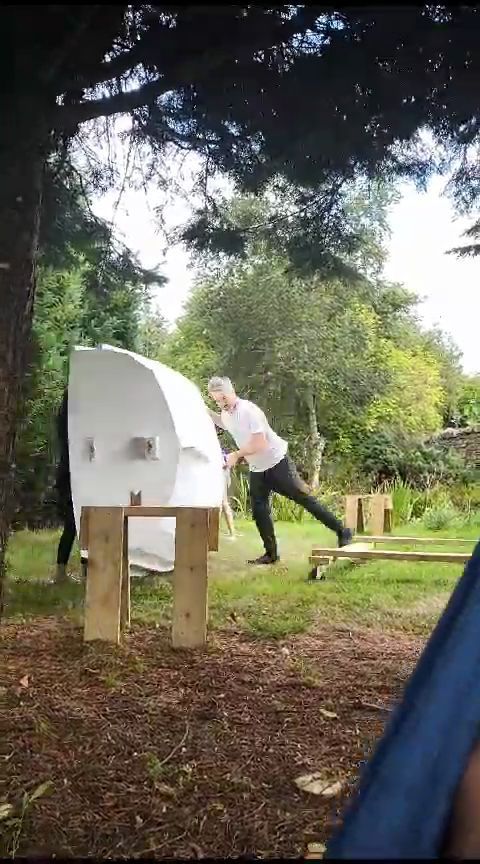
We then did some garden sailing to check the rough positions for the sheet fairleads although I'll revisit that once the bobstay plus proper cord for the halyards allow me to get the luff tension somewhere sensible.

Lastly, we dismantled and flipped her back over before some rain came in...
I made a fitting for the end of the bowsprit on Saturday.
I was supposed to do some more paint yesterday but instead decided that the best thing to do in the hot weather was metalwork. I think I've now made all the custom fabrications apart from however I attach the bobstay at the stem.
Still, that meant I was able to attach the bowsprit (almost) properly, therefore the second forestay could be made, but not properly tensioned just yet. Using some cheap string as a halyard, I found running the jib up irressistable.
We then did some garden sailing to check the rough positions for the sheet fairleads although I'll revisit that once the bobstay plus proper cord for the halyards allow me to get the luff tension somewhere sensible.
Lastly, we dismantled and flipped her back over before some rain came in...
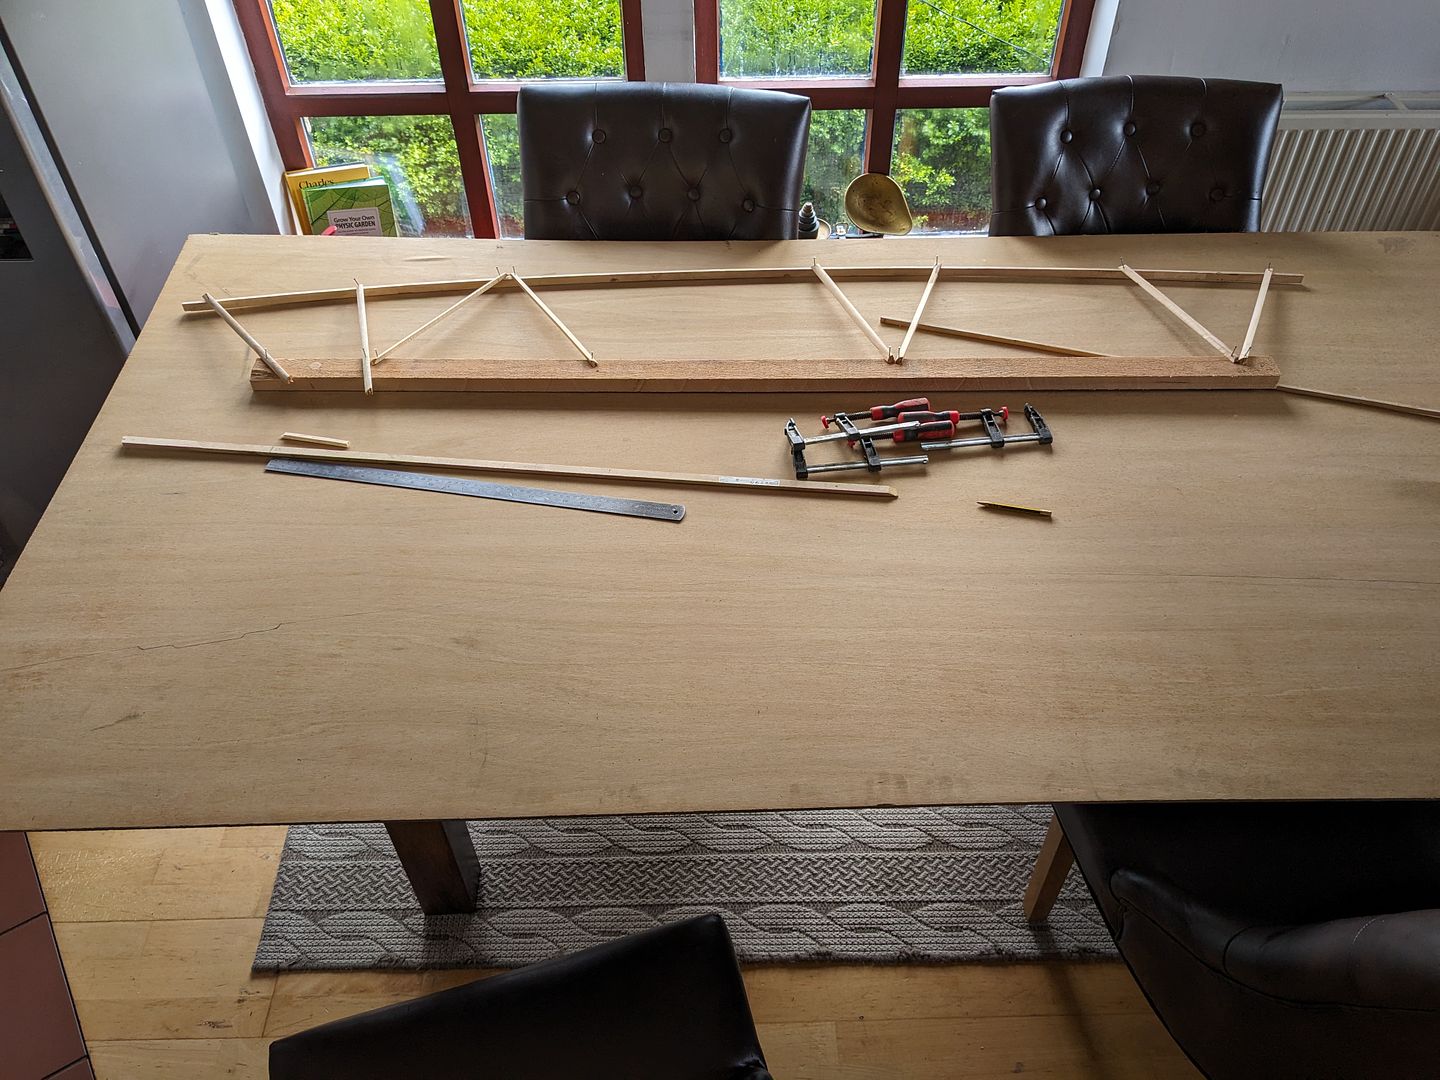
On Saturday my friend helped me machine down unwieldy lengths of Douglas Fir and glued two of them together. Yesterday morning my daughters helped me glue the other two together, then machine yesterday's to final dimensions, mark out the taper, cut the taper, plane and sand the corners off and last night I've fettled the gooseneck fitting. The whole thing is now ready for a final smooth sanding and varnishing.
If anyone's unsure what this is, then a re-familiarisation with renowned classical poet Baldrick's masterpiece "The German Guns" should give you the inspiration you need.
That just leaves the shorter gaff to make from yesterday morning's glue up, although that needs hardwood jaws made before tapering and shaping.
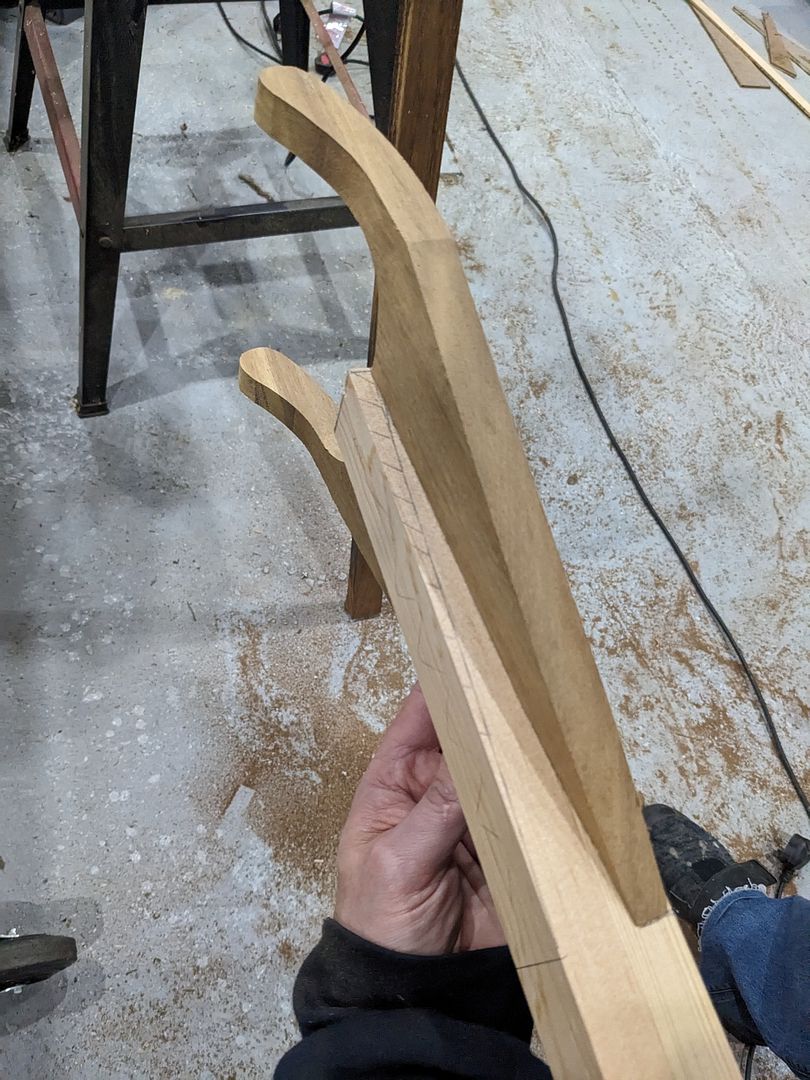
I've been making the jaws for the gaff from Iroko. There is still work to be done - they're too wide for a start, but that was intentional to ensure I didn't do a me and make them too narrow!
I'll round over the corners of the jaws themselves before gluing them to the Douglas Fir spar, and I'll cut the various tapers on the spar itself before gluing on the jaws. I also will plane down the corners of the spar but leave final rounding until the jaws are permanently attached.

I'll round over the corners of the jaws themselves before gluing them to the Douglas Fir spar, and I'll cut the various tapers on the spar itself before gluing on the jaws. I also will plane down the corners of the spar but leave final rounding until the jaws are permanently attached.
I haven't shared any updates for a while - work was taking a toll on me. I did make some improvements to the hull where the white basecoat showed it was needed. I could have carried on forever with that but my wife is quite pragmatic and told me to just stop and that nobody who matters to me is going to care. In the interests of finishing the boat and getting on the water therefore, I have applied the polyurethane white topcoat over the weekend. Is it perfect? Absolutely not. Is it even good? No, not really. It's serviceable though.
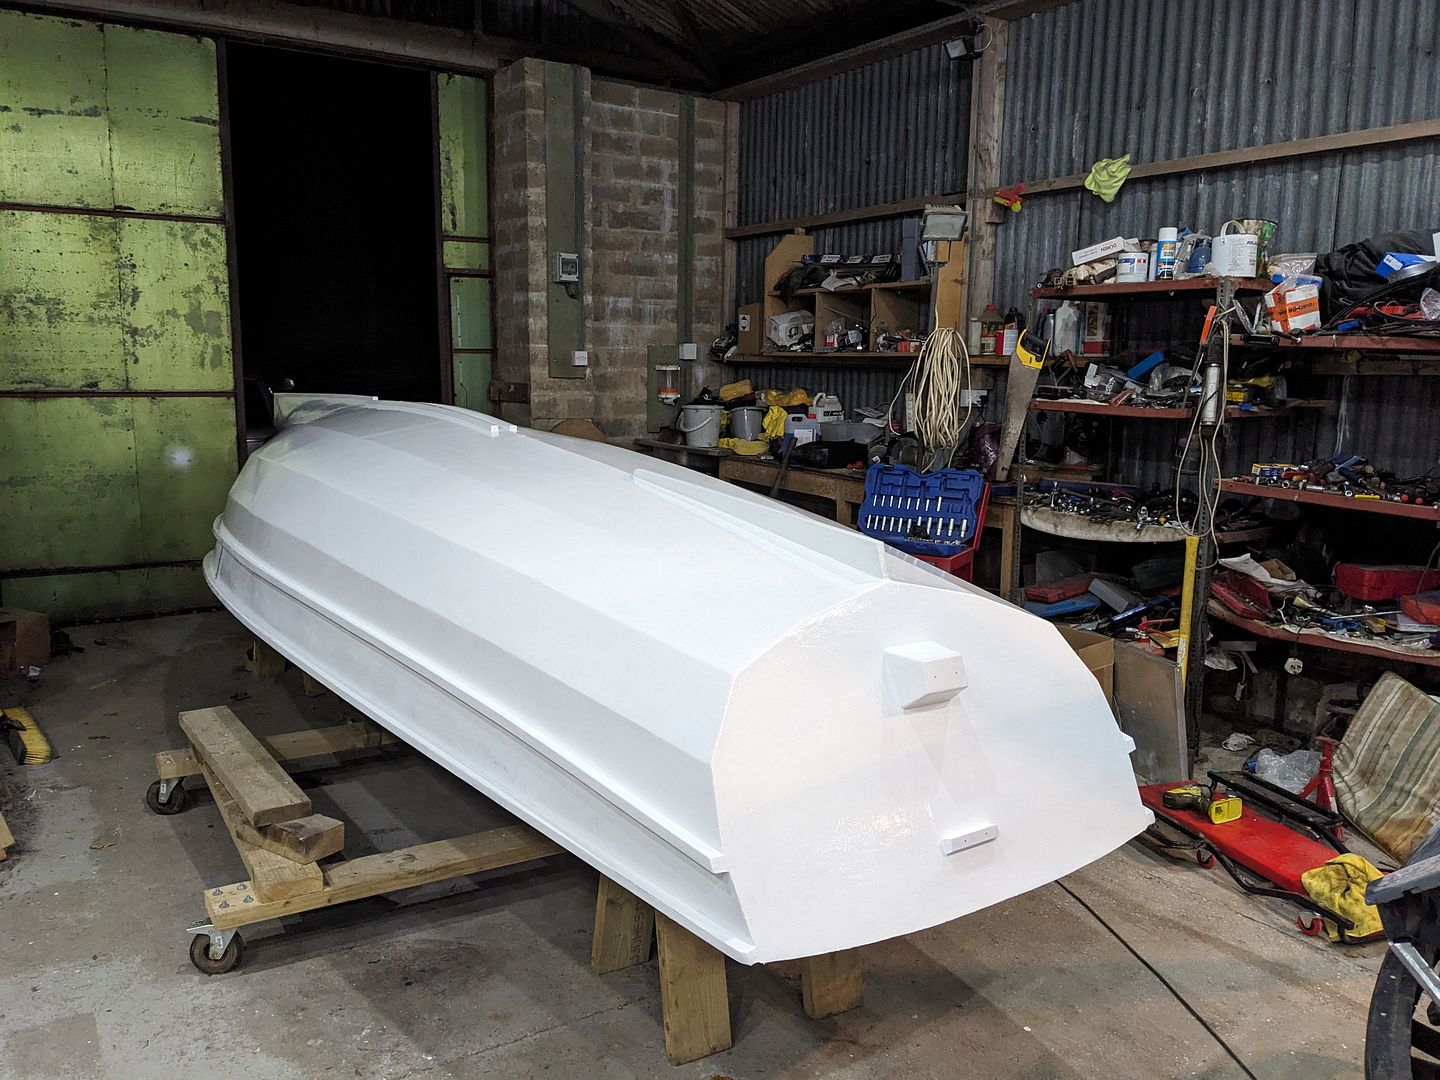
Next I think I will mix the colour for the upper part of the hull above the rubbing strip (which I have not done a good job of in finding a fair line towards the aft end - if I did this again I'd mark screw holes on the plank while it was still flat on the floor to ensure I had the mid-point of the plank pre-drilled all the way from stem to stern), mask below (above??) the rubbing strip and get it painted up to (down to?) the shear line.
I'm about to order stainless steel strip to screw to the false keels as per plans which provides some wear protection, then I don't think I will need the hull upside down again for the rest of the build.
ConnectionError said:
Well I think it looks great,
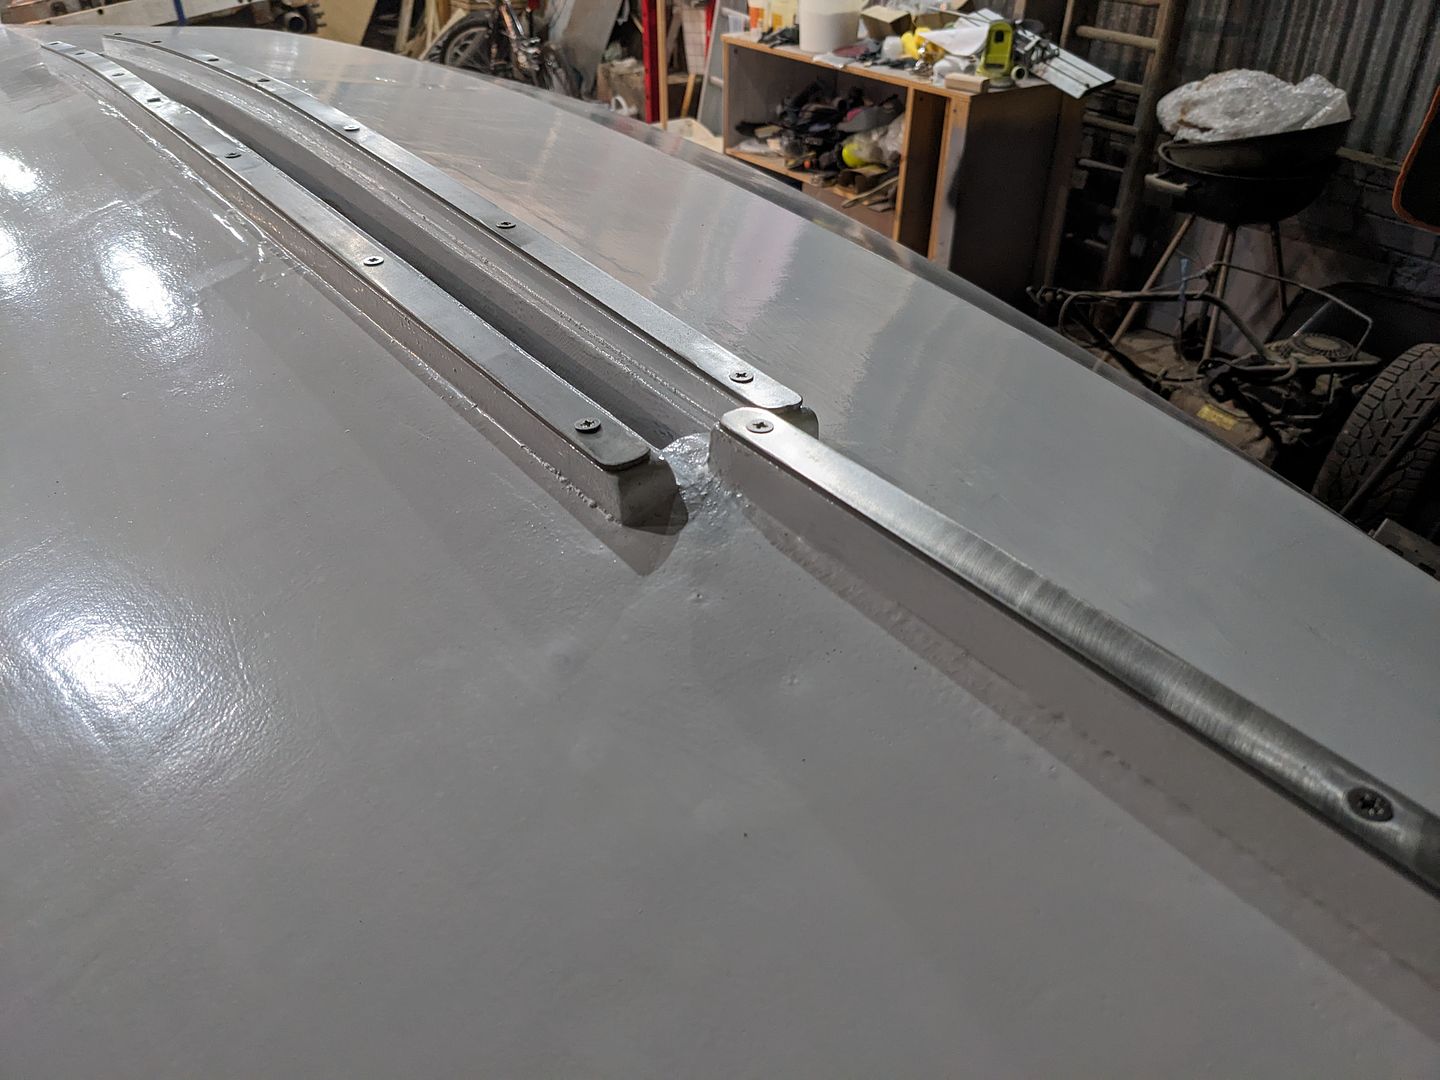
Thank you, that is very kind I've now got the stainless steel rubbing strips dry fitted to the keel. One or two countersinks need to go a bit deeper ideally but I've now spent more on 5mm drill bits and HSS TIN coated countersink bits than I did on the flat bar. I think I mentioned before that I hate working with stainless steel. I'm not sure any of the countersink bits have any more to offer as despite going slowly and keeping the work oiled to minimise heat, the stainless steel is savage on the tools. The TIN coating vanishes and the bits are blunt in no time...
Anyway, here we are. Next I'm going to remove these along with the dry fitted stainless steel fittings such as the chainplates etc, get the top plank painted the final contrasting colour, then reassemble all this stuff with appropriate sticky gunk to prevent water ingress along the screws and into the wood.

I thought that was it, then, and it was ready to turn upright finally but fortunately I remembered that I forgot I have to make a gasket for the daggerboard case and fit that, so I'll be on the sewing machine next I think...
I've had a bad run with cars recently which has soaked up a lot of time (I'm still not done actually). Still, I have cut some plywood bits this weekend which was enjoyable.
I started by making a template for the thwarts.
The template looks and indeed was pretty rough, but I'm pleased to say the thwart fit nicely with minimal fuss. You'll see that unfortunately we've had a soaking in the rain which isn't ideal but it's drying out nicely and as a strictly short term thing shouldn't hurt marine ply overly much. (the boat's place in the big shed is currently occupied by a sick car but that'll be done soon enough - I need it working - and the boat can go back indoors.)
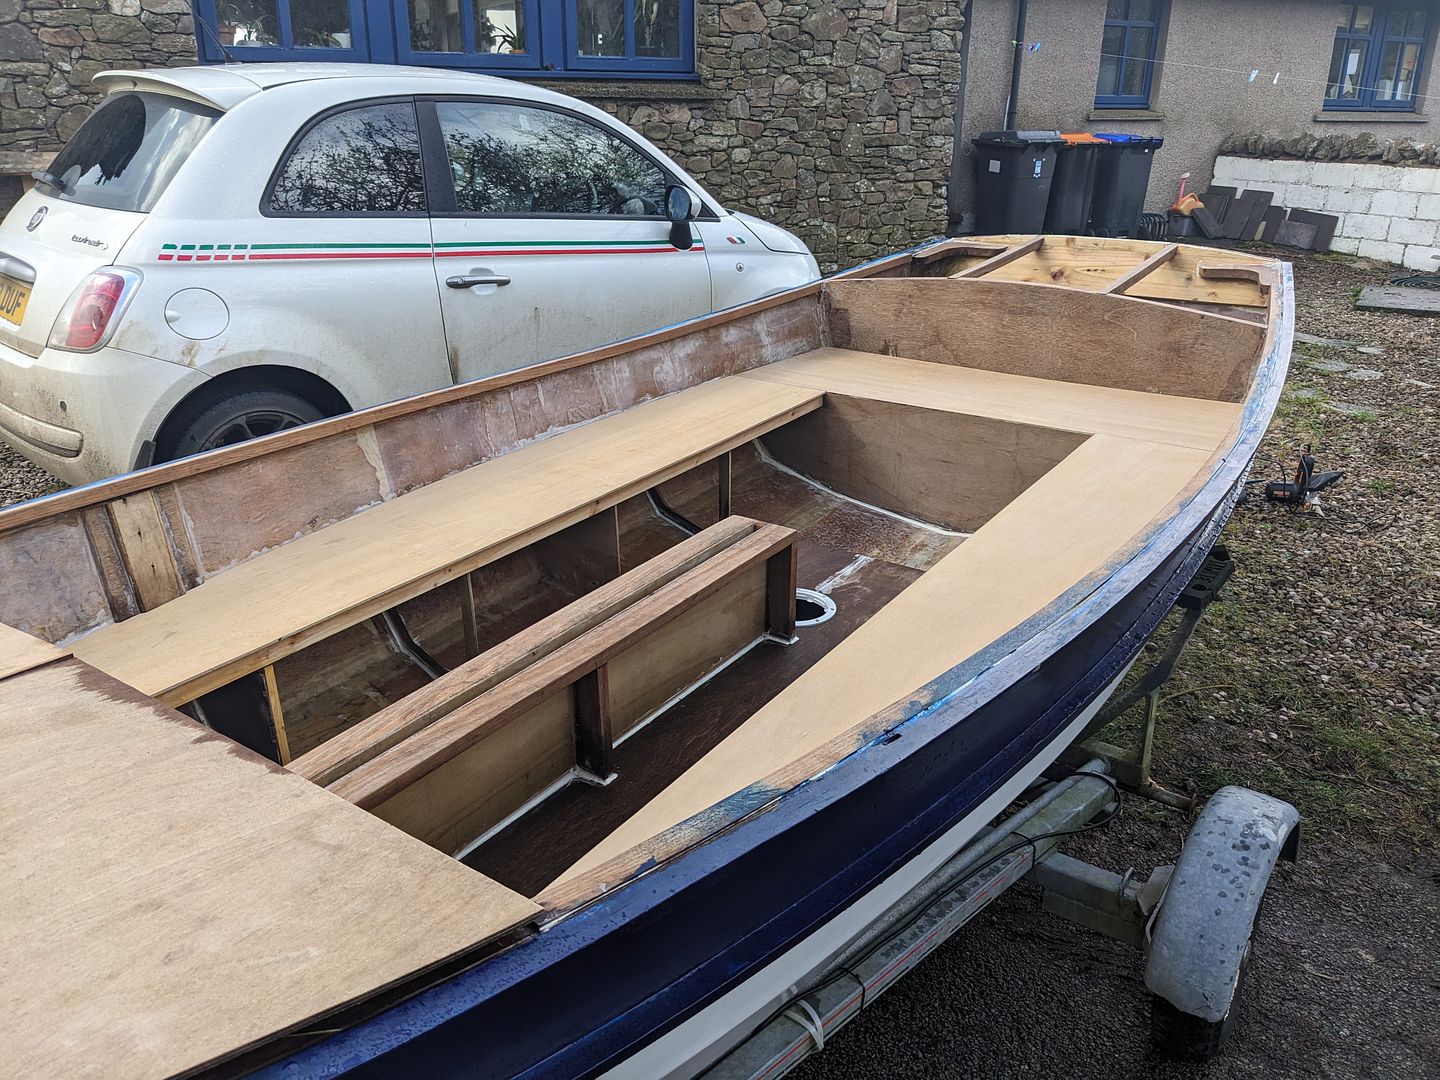
I've started cutting the pieces of the aft deck from what ply I have left too.

I need to make lockers for storage under the thwarts and will frame these out before gluing the plywood down. I've been thinking for months now about the advantages and disadvantages of different ways to do this, but I'm definitely open to suggestions.
I started by making a template for the thwarts.
The template looks and indeed was pretty rough, but I'm pleased to say the thwart fit nicely with minimal fuss. You'll see that unfortunately we've had a soaking in the rain which isn't ideal but it's drying out nicely and as a strictly short term thing shouldn't hurt marine ply overly much. (the boat's place in the big shed is currently occupied by a sick car but that'll be done soon enough - I need it working - and the boat can go back indoors.)
I've started cutting the pieces of the aft deck from what ply I have left too.
I need to make lockers for storage under the thwarts and will frame these out before gluing the plywood down. I've been thinking for months now about the advantages and disadvantages of different ways to do this, but I'm definitely open to suggestions.
Hi folks,
I've been scuttering about, as my grandmother from Perth, the old on in Scotland, used to say with the jib. In retrospect one could criticise earlier decisions made but actually I really enjoy the problem solving... I more or less followed the plans suggestions for attachment points when I made the fitting at the end of the bowsprit. The only other one of these I'm aware of that's been built with the cutter rig has a flying jib and no outer forestay. Because I always intended to put the forestay there, but designed the sails before most of the rig was there due to using my jib and staysail as the sail making course subjects, I chose to have a hanked on jib which has beautiful little brass piston hanks on it.
The realisation set in, however, that perhaps I didn't want a light air jib that had to be hanked onto a forestay and the tack shackled on 3 feet beyond the stem of a dinghy as it would mean I couldn't pull it in if the wind picked up, and hence I'd probably be reluctant to set it at all much of the time.
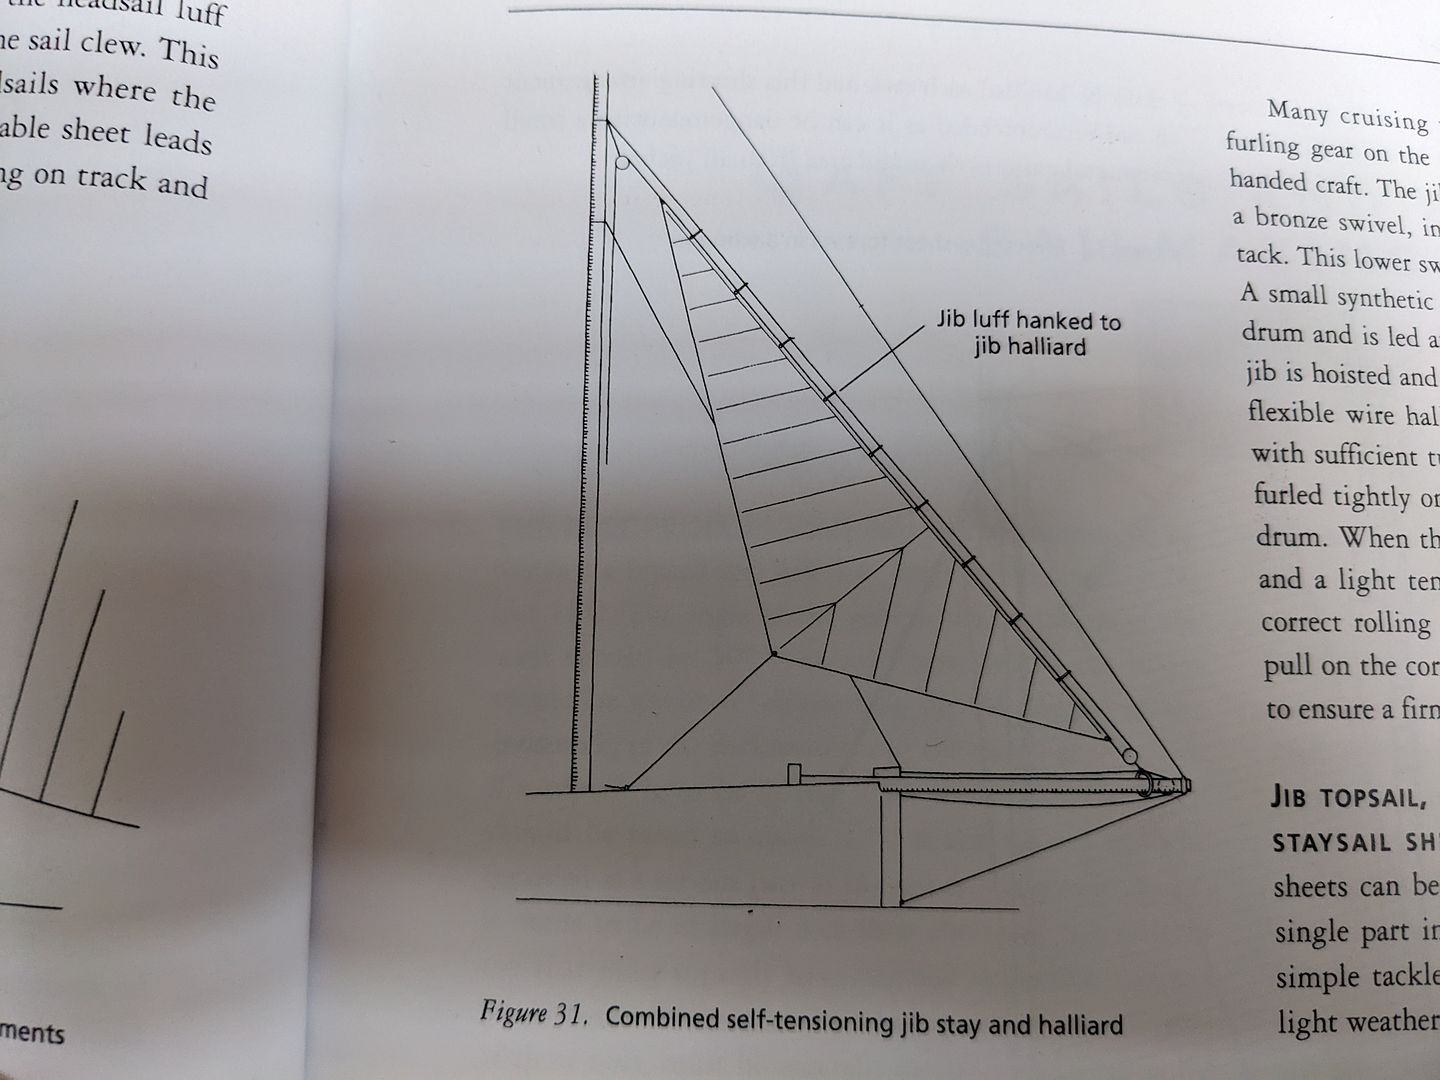
Mark, the sail making instructor did send me home with his personal copy of The Gaff Rig Handbook by John Leather suggesting I'd have more immediate use for it than he, which was immensely kind of him. He also suggested that having built the rest so far I could consider a traveller, and that sounded like fun.
In the book there was a diagram showing how to hank the jib onto the running rig, so I decided to try this. I haven't bought any proper rope yet so I'm using cheap stringy stuff just to figure out how it's all going to work and what lengths I'm going to need.
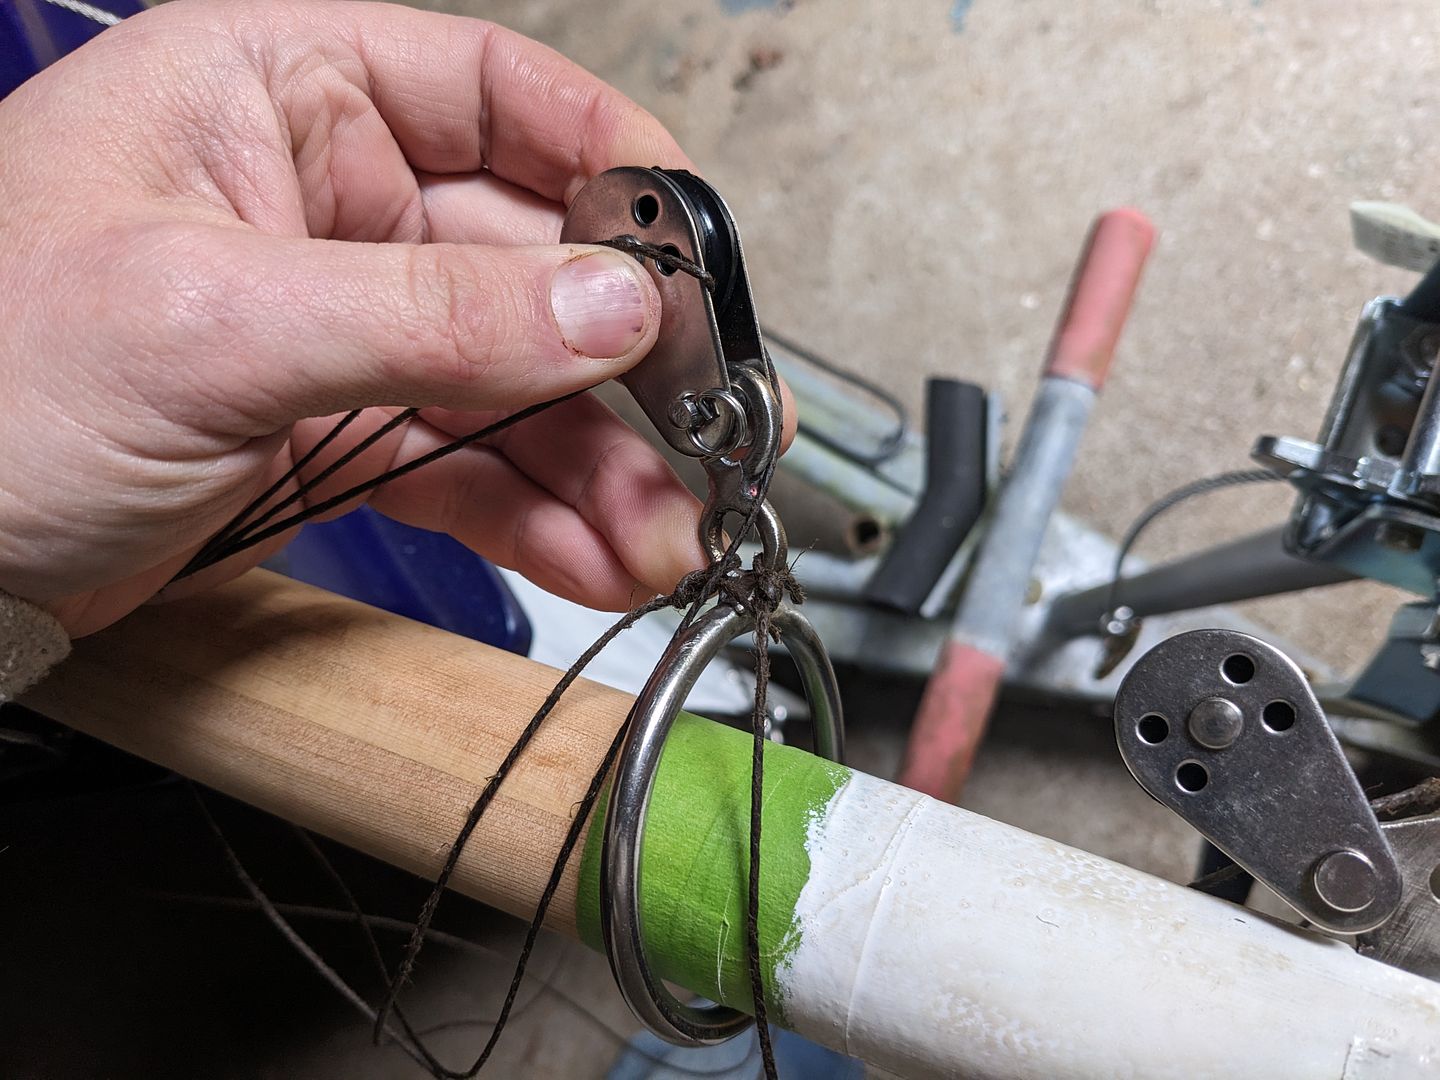
I ordered a pile of inexpensive stainless steel fittings and experimented. I used an S hook, squashed one end into a loop, welded it shut then welded this onto a stainless ring as my traveller.
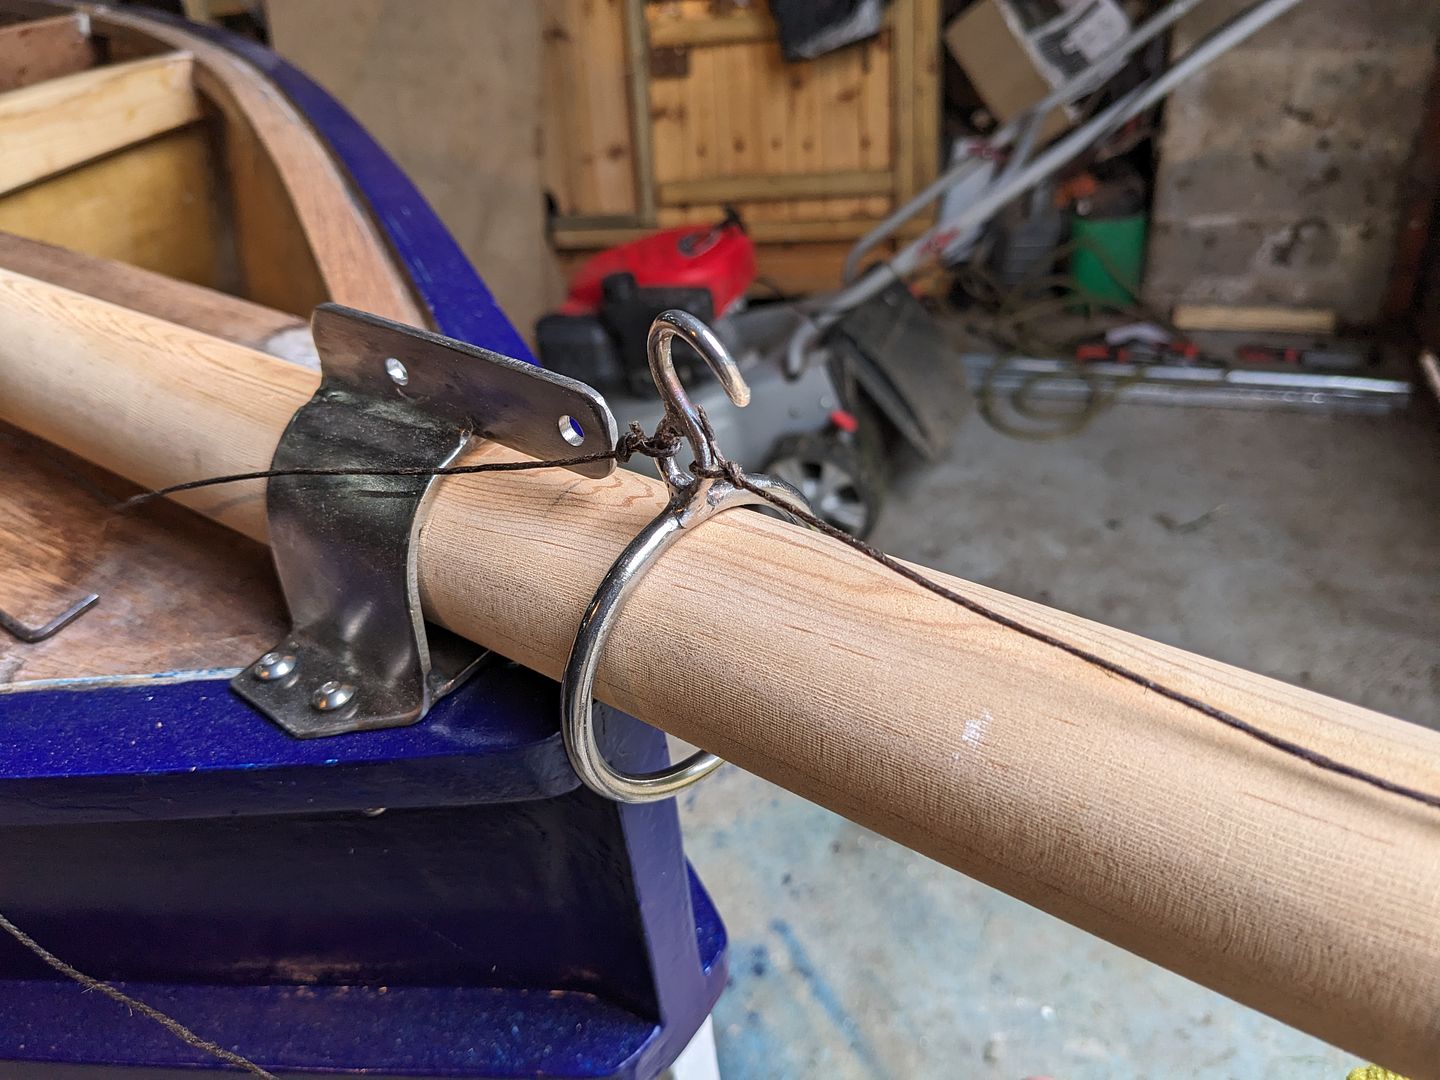
Fitting a pulley to the bowsprit fitting where the plans would have you shackle the jib tack to does the other half of the job.
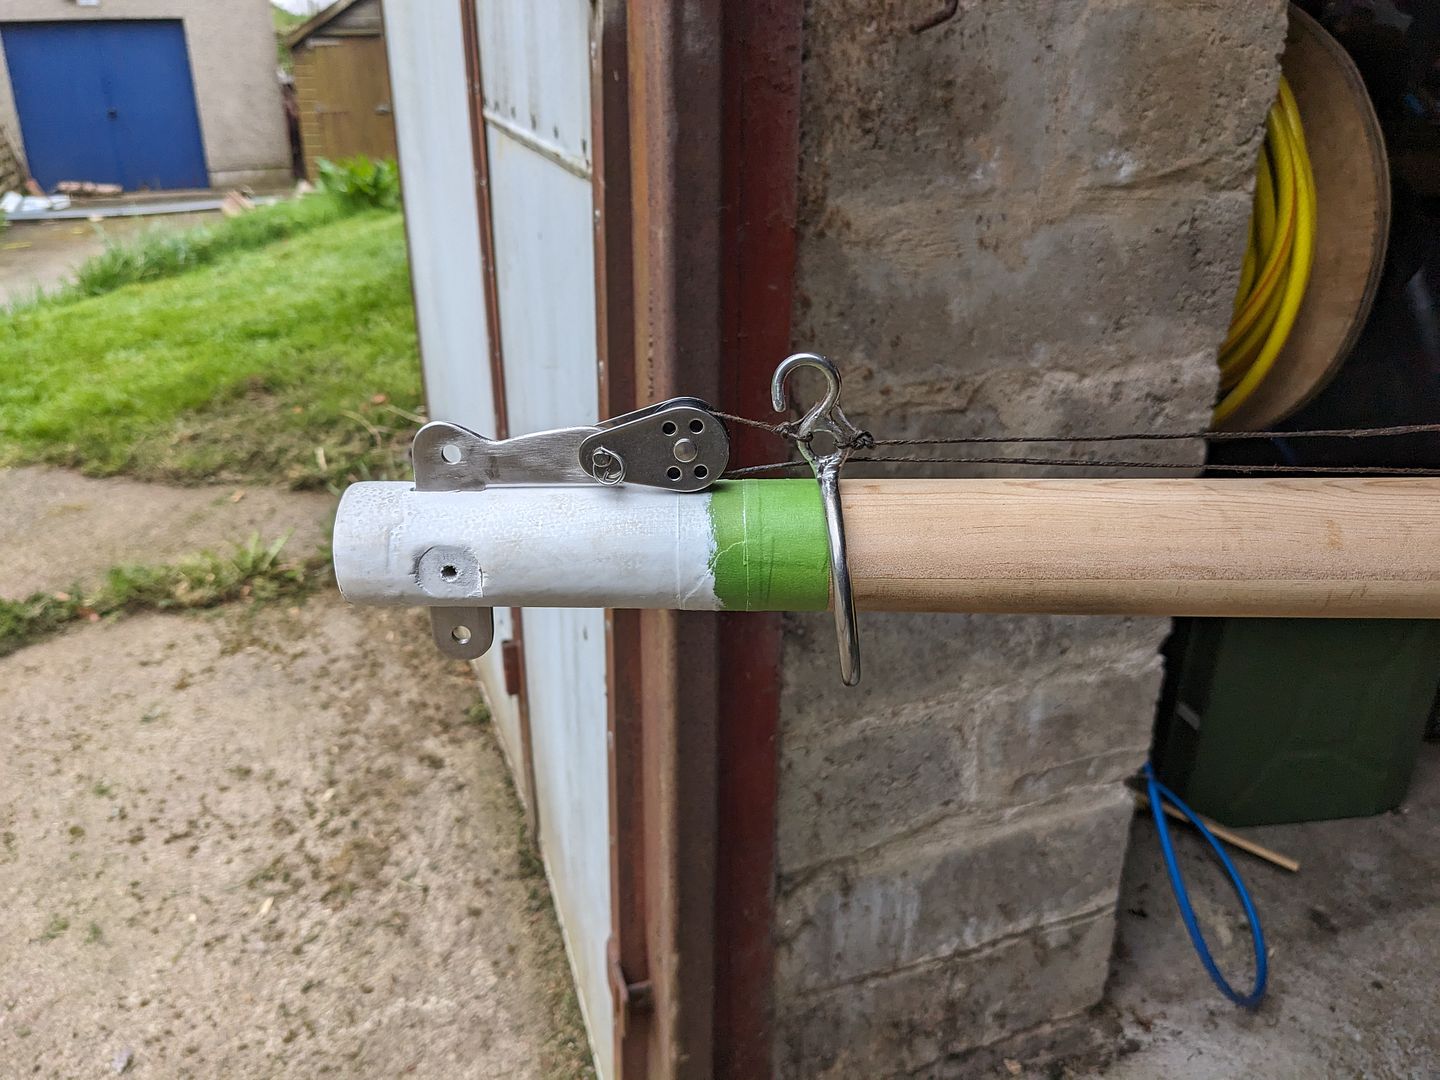
I didn't like the growth in distance from tack to end of the bowsprit though so I shortened the original fitting thus which is neater.

I also sqeezed shut the top of the S hook to make a figure-8 and used the new eyelet at the top to attach the tack's pulley to. When I get the proper 6mm rope I might need to attach a second eyelet for the traveller inhaul & outhaul. No big deal though...
This works better than I hoped. The strop at the top of the mast is attached to a lower pair of hooks, but I think next time I'll sling it off the higher pair and use the lowers for the gaff running rig. Using the higher one will bring the luff in line with the outer forestay as designed. It works though, so I'm quite pleased, and this will allow a hanked on light air jib to be hauled in or out from leaning on the foredeck.
I imagine this will not meet the approval of many dinghy sailers who prefer to keep things simple, which I can understand, but frankly if I start to feel the same way I can build another dinghy.
I've been scuttering about, as my grandmother from Perth, the old on in Scotland, used to say with the jib. In retrospect one could criticise earlier decisions made but actually I really enjoy the problem solving... I more or less followed the plans suggestions for attachment points when I made the fitting at the end of the bowsprit. The only other one of these I'm aware of that's been built with the cutter rig has a flying jib and no outer forestay. Because I always intended to put the forestay there, but designed the sails before most of the rig was there due to using my jib and staysail as the sail making course subjects, I chose to have a hanked on jib which has beautiful little brass piston hanks on it.
The realisation set in, however, that perhaps I didn't want a light air jib that had to be hanked onto a forestay and the tack shackled on 3 feet beyond the stem of a dinghy as it would mean I couldn't pull it in if the wind picked up, and hence I'd probably be reluctant to set it at all much of the time.
Mark, the sail making instructor did send me home with his personal copy of The Gaff Rig Handbook by John Leather suggesting I'd have more immediate use for it than he, which was immensely kind of him. He also suggested that having built the rest so far I could consider a traveller, and that sounded like fun.
In the book there was a diagram showing how to hank the jib onto the running rig, so I decided to try this. I haven't bought any proper rope yet so I'm using cheap stringy stuff just to figure out how it's all going to work and what lengths I'm going to need.
I ordered a pile of inexpensive stainless steel fittings and experimented. I used an S hook, squashed one end into a loop, welded it shut then welded this onto a stainless ring as my traveller.
Fitting a pulley to the bowsprit fitting where the plans would have you shackle the jib tack to does the other half of the job.
I didn't like the growth in distance from tack to end of the bowsprit though so I shortened the original fitting thus which is neater.
I also sqeezed shut the top of the S hook to make a figure-8 and used the new eyelet at the top to attach the tack's pulley to. When I get the proper 6mm rope I might need to attach a second eyelet for the traveller inhaul & outhaul. No big deal though...
This works better than I hoped. The strop at the top of the mast is attached to a lower pair of hooks, but I think next time I'll sling it off the higher pair and use the lowers for the gaff running rig. Using the higher one will bring the luff in line with the outer forestay as designed. It works though, so I'm quite pleased, and this will allow a hanked on light air jib to be hauled in or out from leaning on the foredeck.
I imagine this will not meet the approval of many dinghy sailers who prefer to keep things simple, which I can understand, but frankly if I start to feel the same way I can build another dinghy.
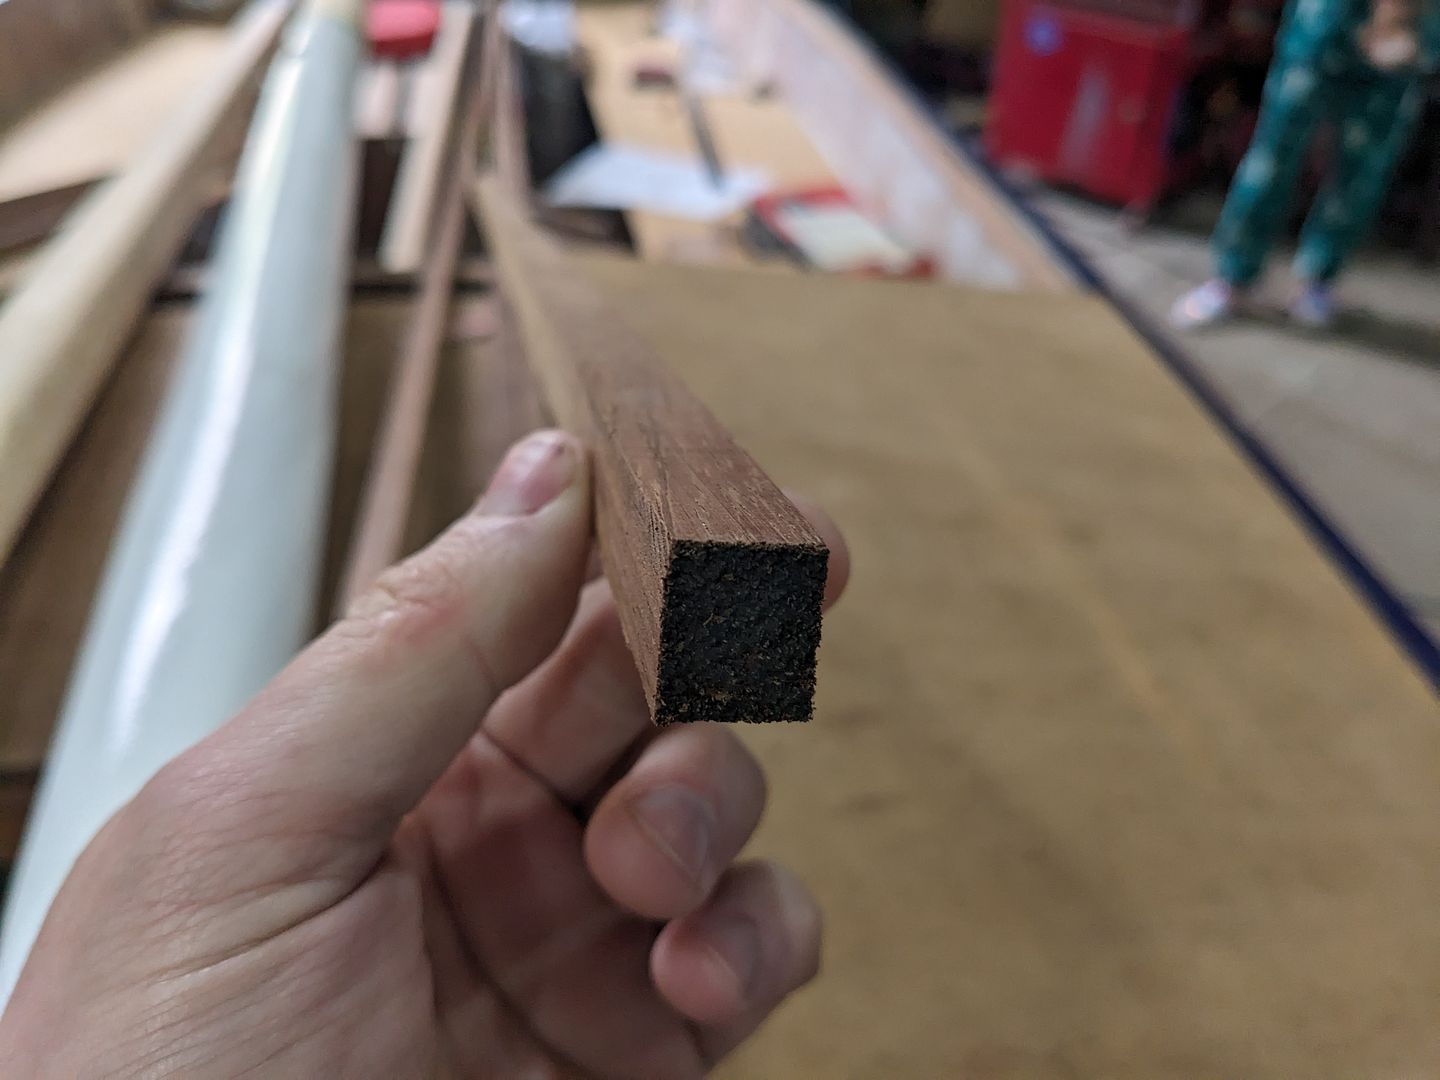
I have also machined up some iroko to build the lockers. These were ripped from a long board which had been planed to thickness, than ran through the table saw two more times to cut a smaller section out giving me an L shape to glue round the jambs with some seal strip for splash-proofness (I do not expect them to be truely waterproof) and a rectangular section to glue to the opening part perimeter to land in the L and squish the seal strip stuff.
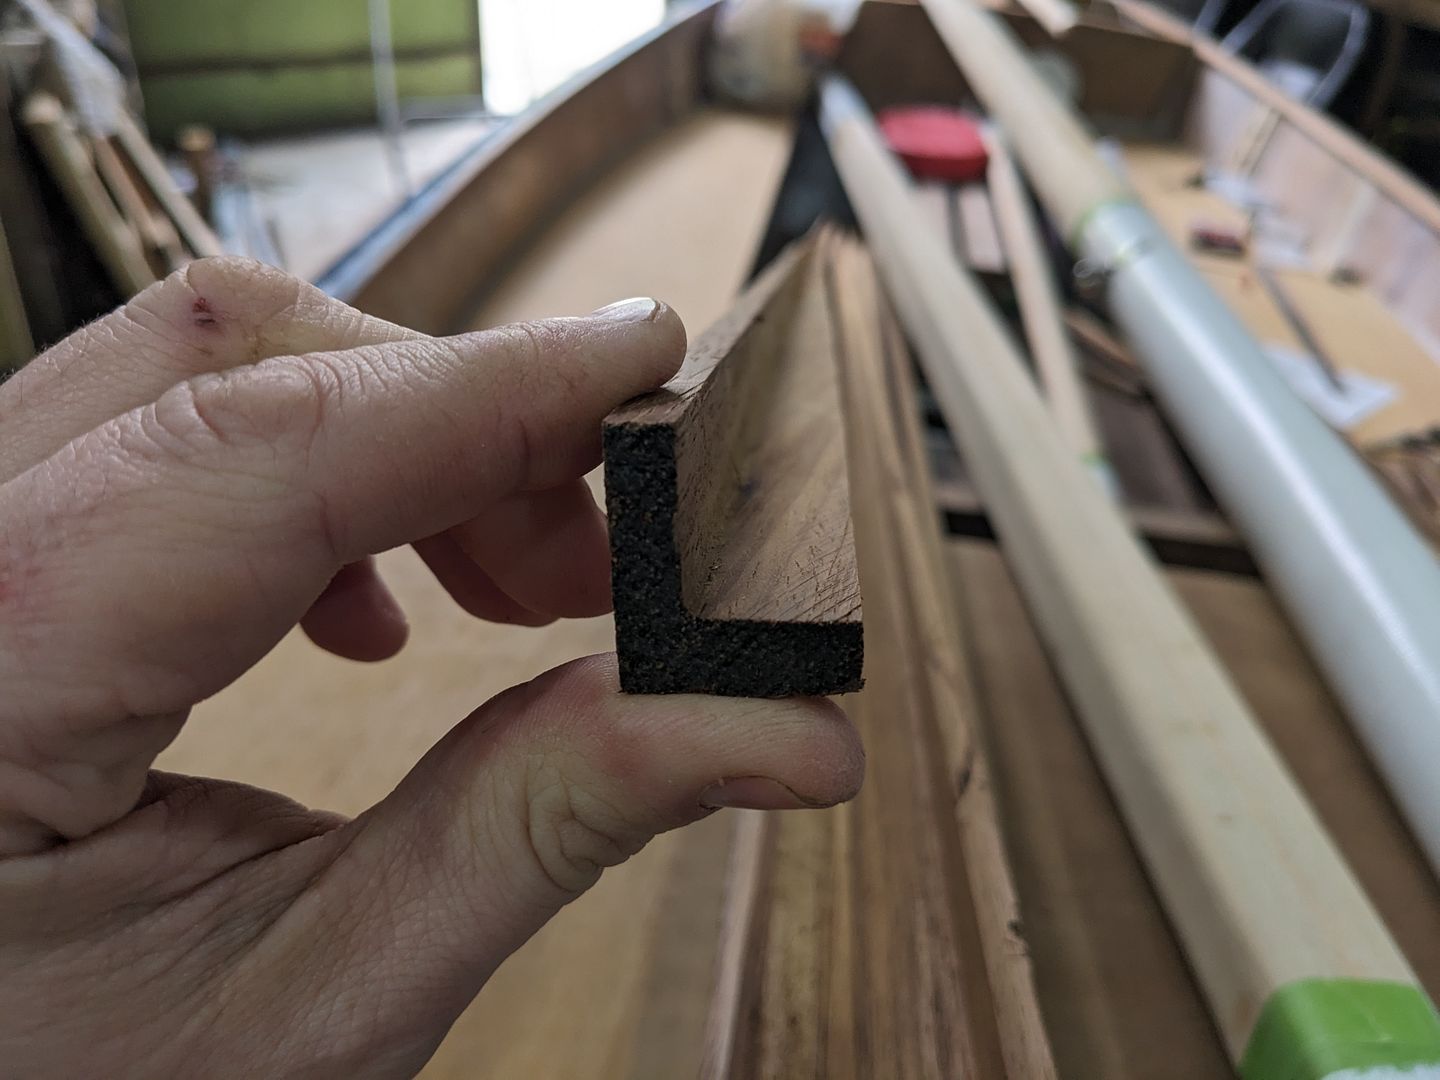
Lots more measuring, marking a cutting next. Then gluing, which I enjoy somewhat less.
Lots more measuring, marking a cutting next. Then gluing, which I enjoy somewhat less.
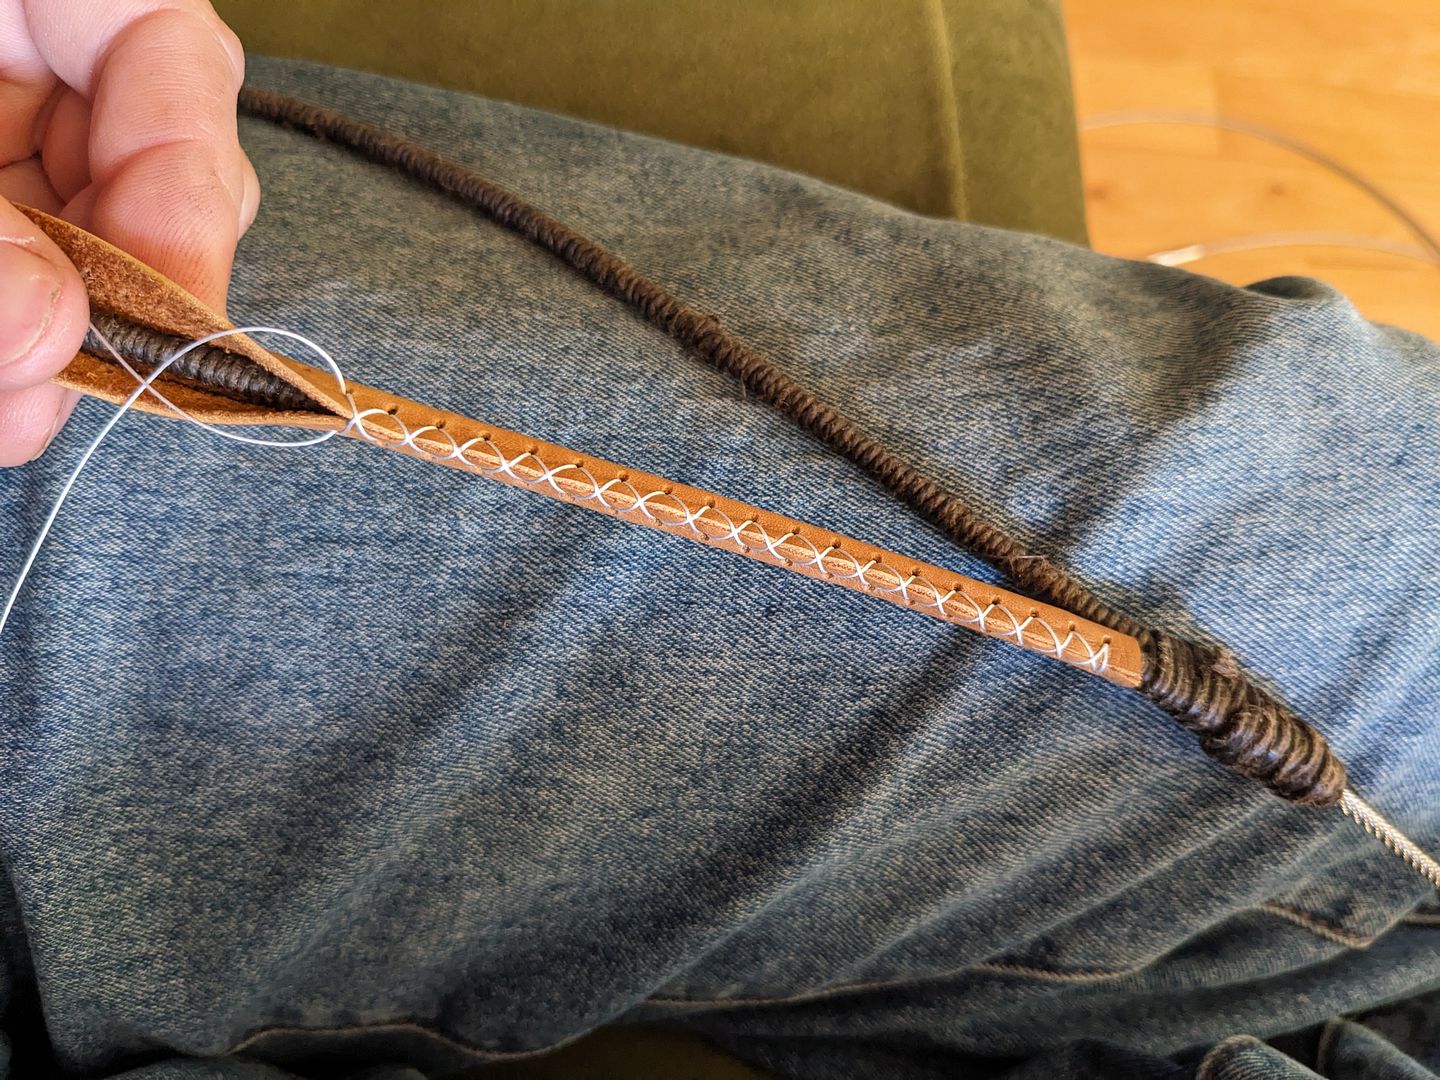
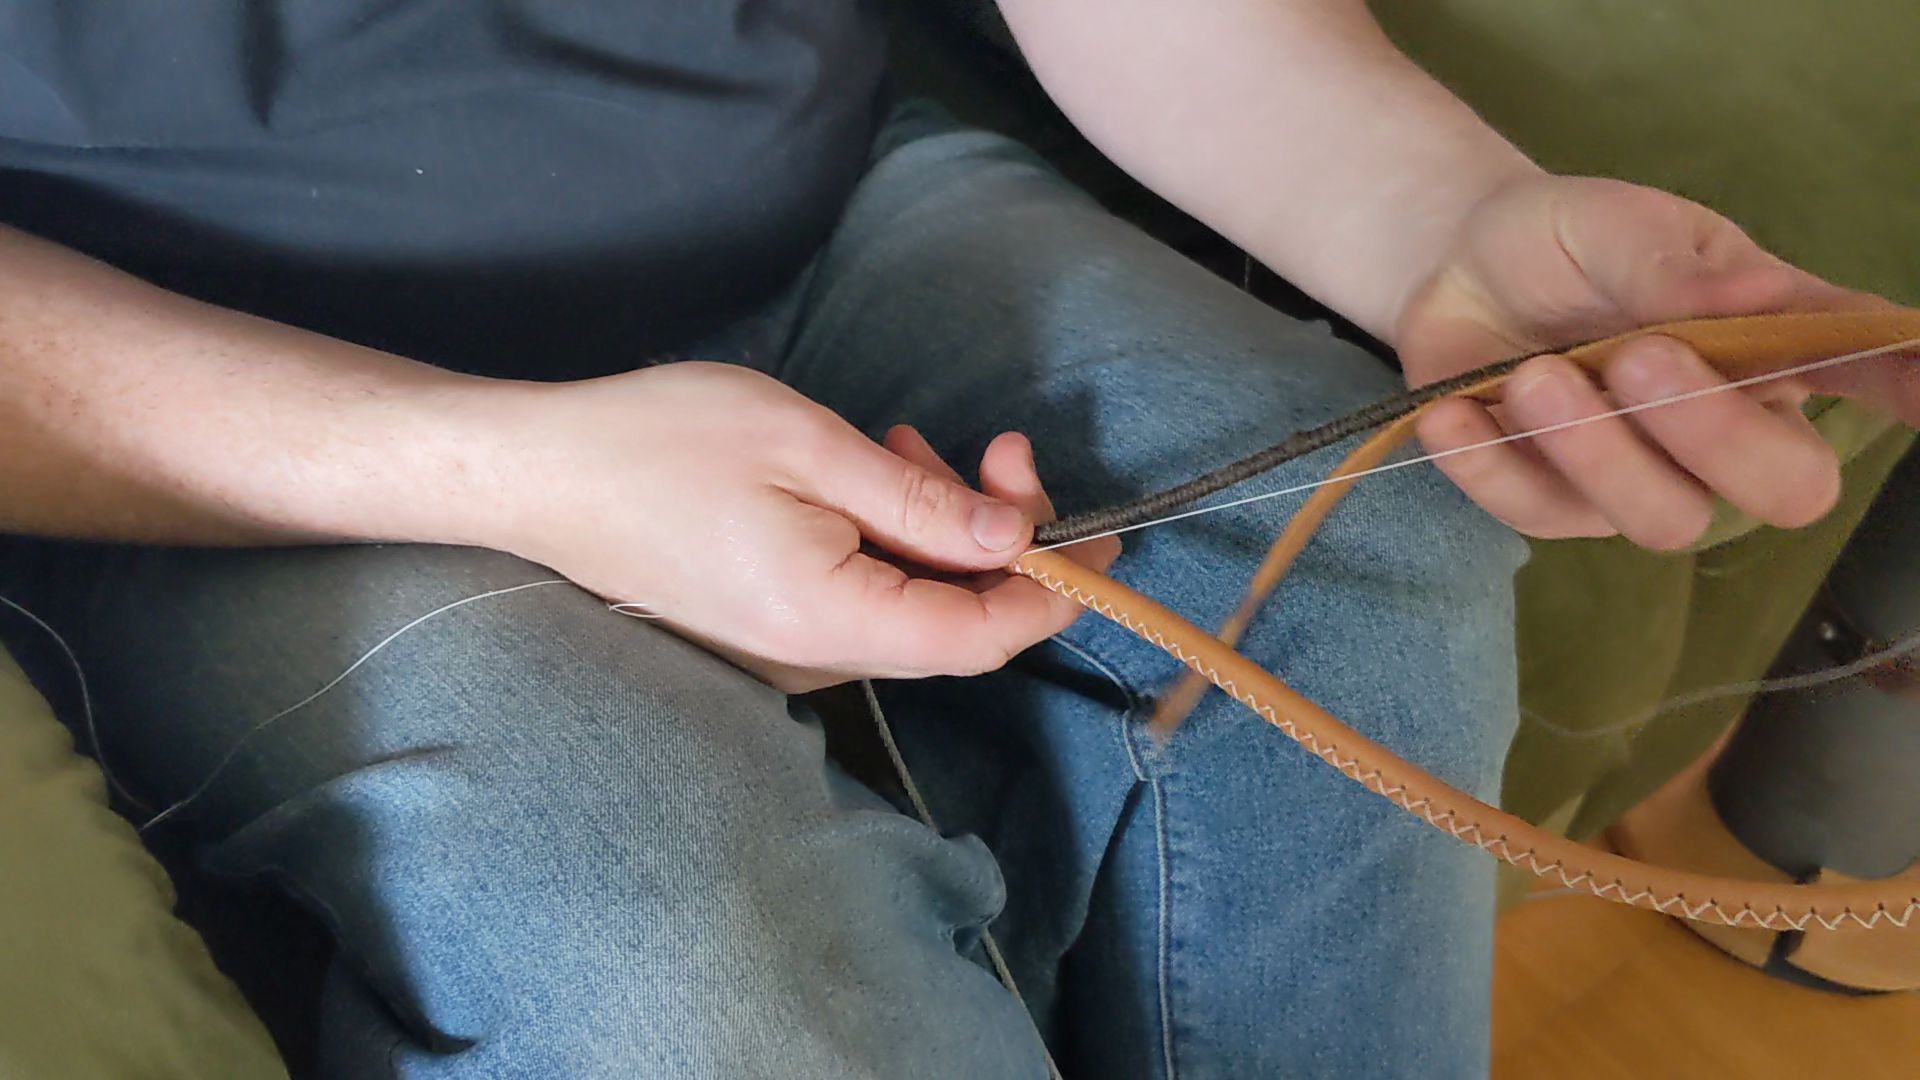
I've been putting off the remaining glue-ups for the thwarts as I don't much enjoy using 2-part resins. I need to crack on with that. In the mean time though, I thought I'd try some leather stitching. The mast is glassed around the partners so I'm not hugely worried about abrasion from the 7x7 steel cable shrouds and forestays, but the gaff jaws as a minimum needed leather so I decided to practise with the shrouds and forestays.
We picked up a big leather arm chair and matching foot stool from Facebook Marketplace for £20 with the intention of stripping the leather from it. As it turned out, it was a very comfy chair so whilst we did strip the leather off, my wife reupholstered it with a velour cloth. Still, second hand furniture is a great way to get a lot of leather for not a lot of money
I whipped the 3mm 7x7 with marline first to bulk up the diameter a little, but it was still a small diameter so by the time the leather is punched there needs to be more material than would be needed on a larger rope shroud. Still, I am pleased with this.
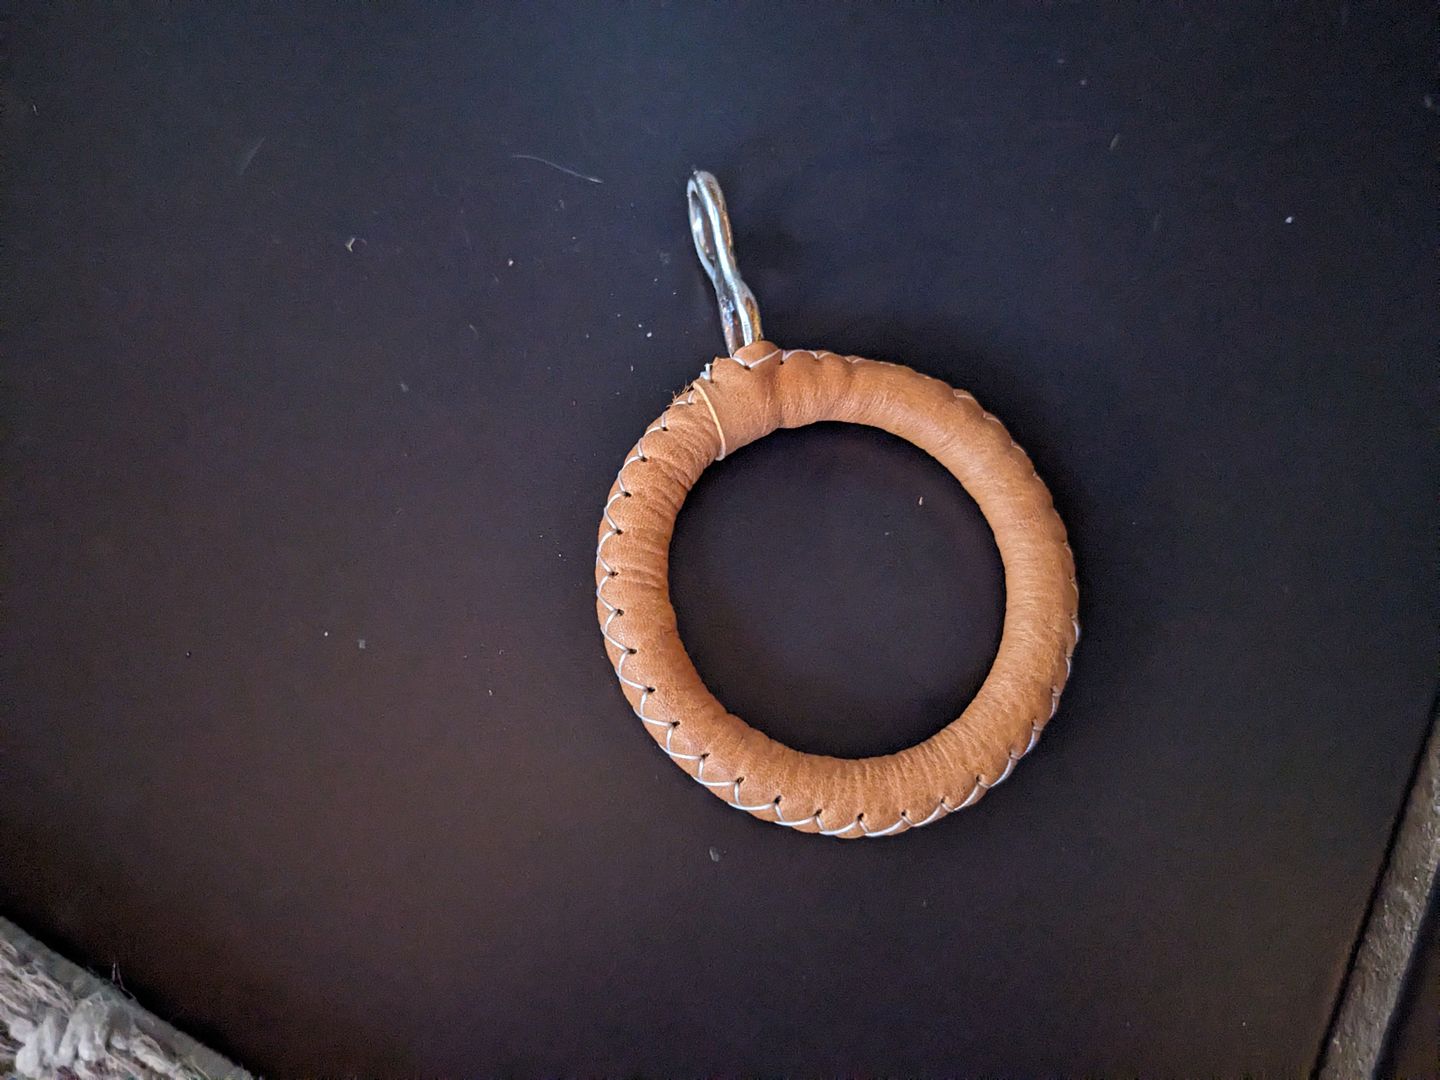
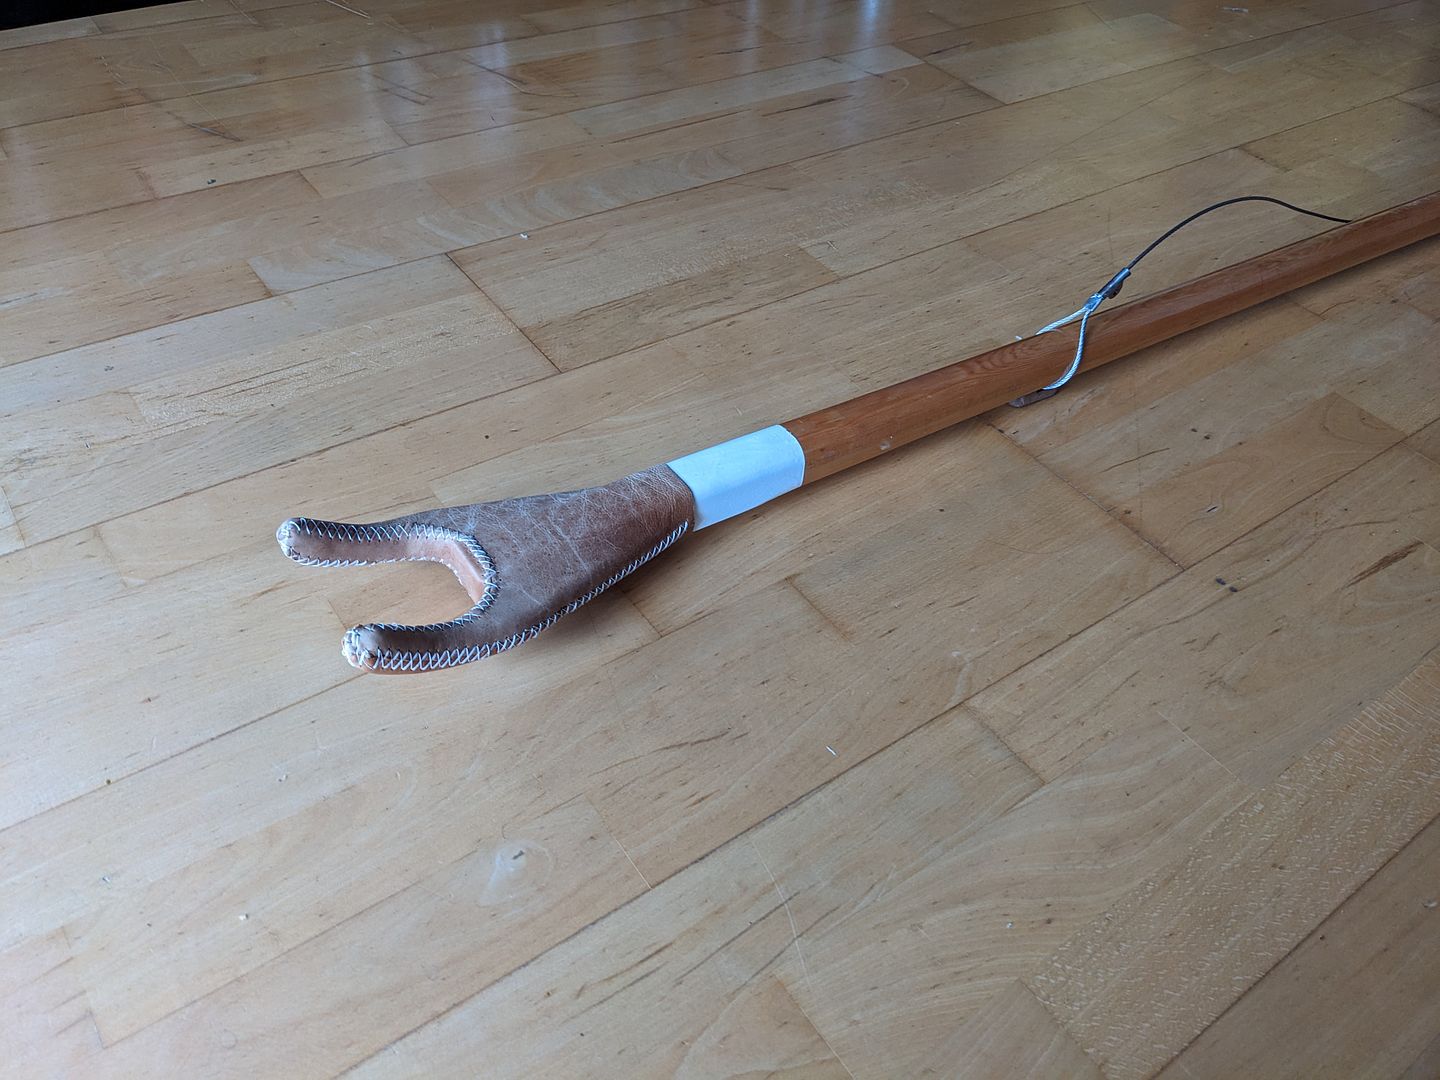
Some more leather work...
Bow sprit traveller:
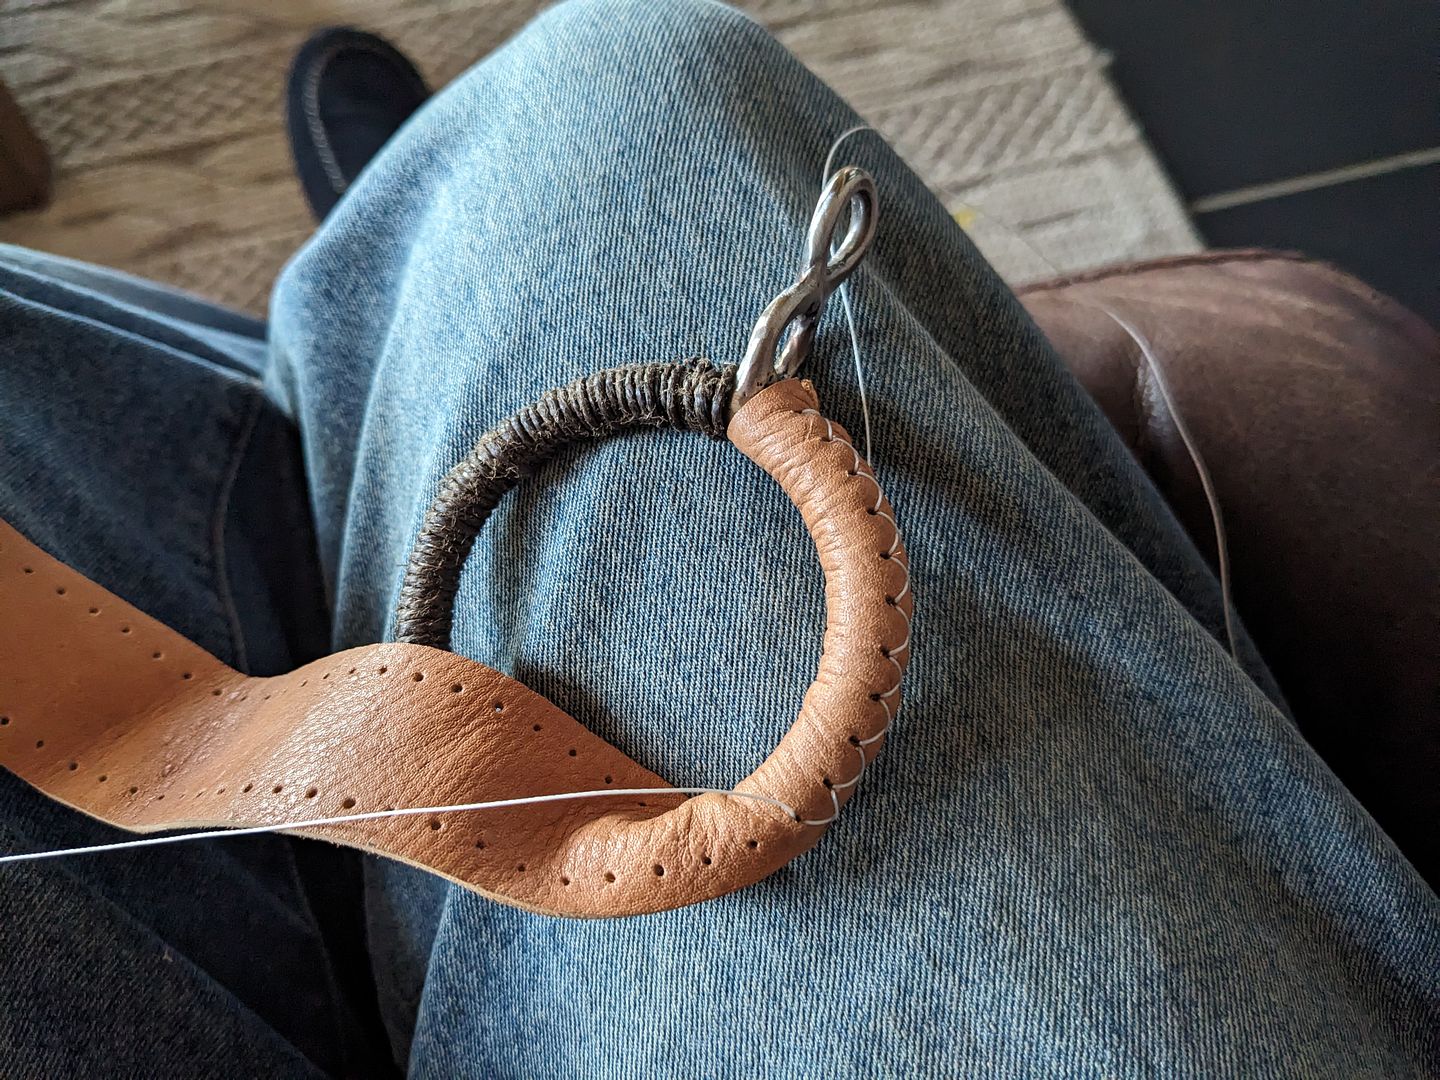
Gaff Jaws:
We picked up a big leather arm chair and matching foot stool from Facebook Marketplace for £20 with the intention of stripping the leather from it. As it turned out, it was a very comfy chair so whilst we did strip the leather off, my wife reupholstered it with a velour cloth. Still, second hand furniture is a great way to get a lot of leather for not a lot of money
I whipped the 3mm 7x7 with marline first to bulk up the diameter a little, but it was still a small diameter so by the time the leather is punched there needs to be more material than would be needed on a larger rope shroud. Still, I am pleased with this.
Some more leather work...
Bow sprit traveller:
Gaff Jaws:
Gassing Station | Boats, Planes & Trains | Top of Page | What's New | My Stuff