Anyone interested in home-built sailing dinghies?
Discussion


This weekend I rounded off the tops of the frames and glued in the braces.

I think it's time to fibreglass the inside now, as once the large breasthook which goes all the way back to the frame ahead of the mast, to provide a solid mounting for the bowsprit, access in here will get a bit more awkward.
My dad visited today, which allowed me to get the first lamination of the remaining lower rubbing strip fitted. I'm really pleased with how this is looking. We're a long way from finished but I wasn't sure I'd ever get this far to be honest.
D1bram said:
Looking good this! I think I've seen you on the cruising dinghies facebook group too.
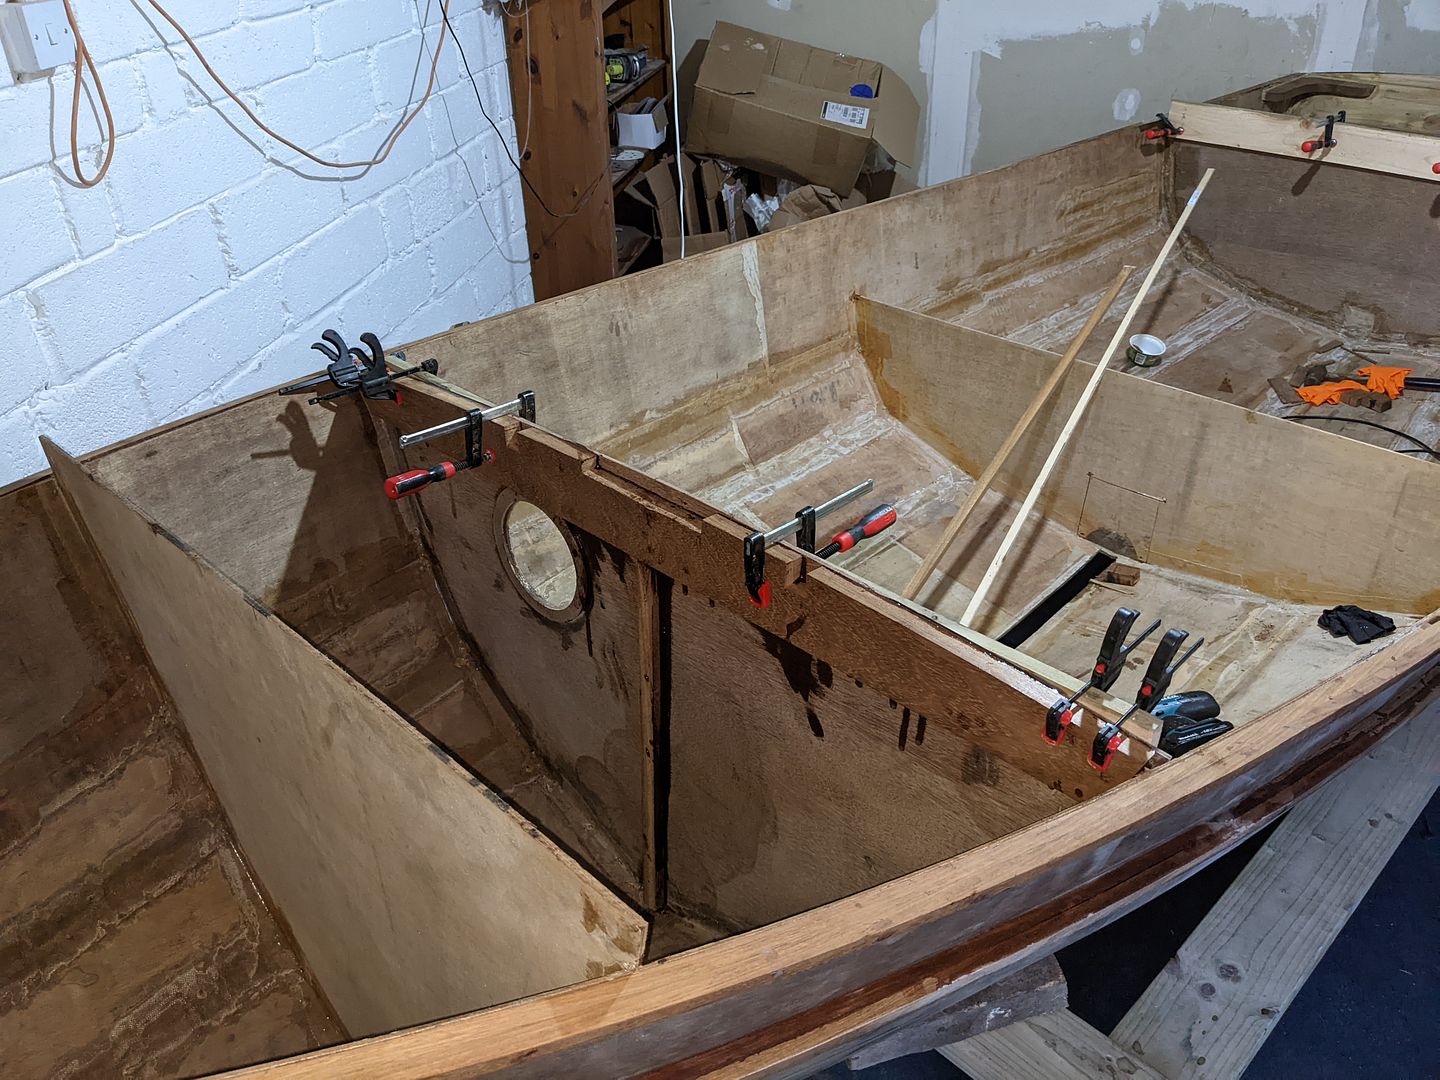
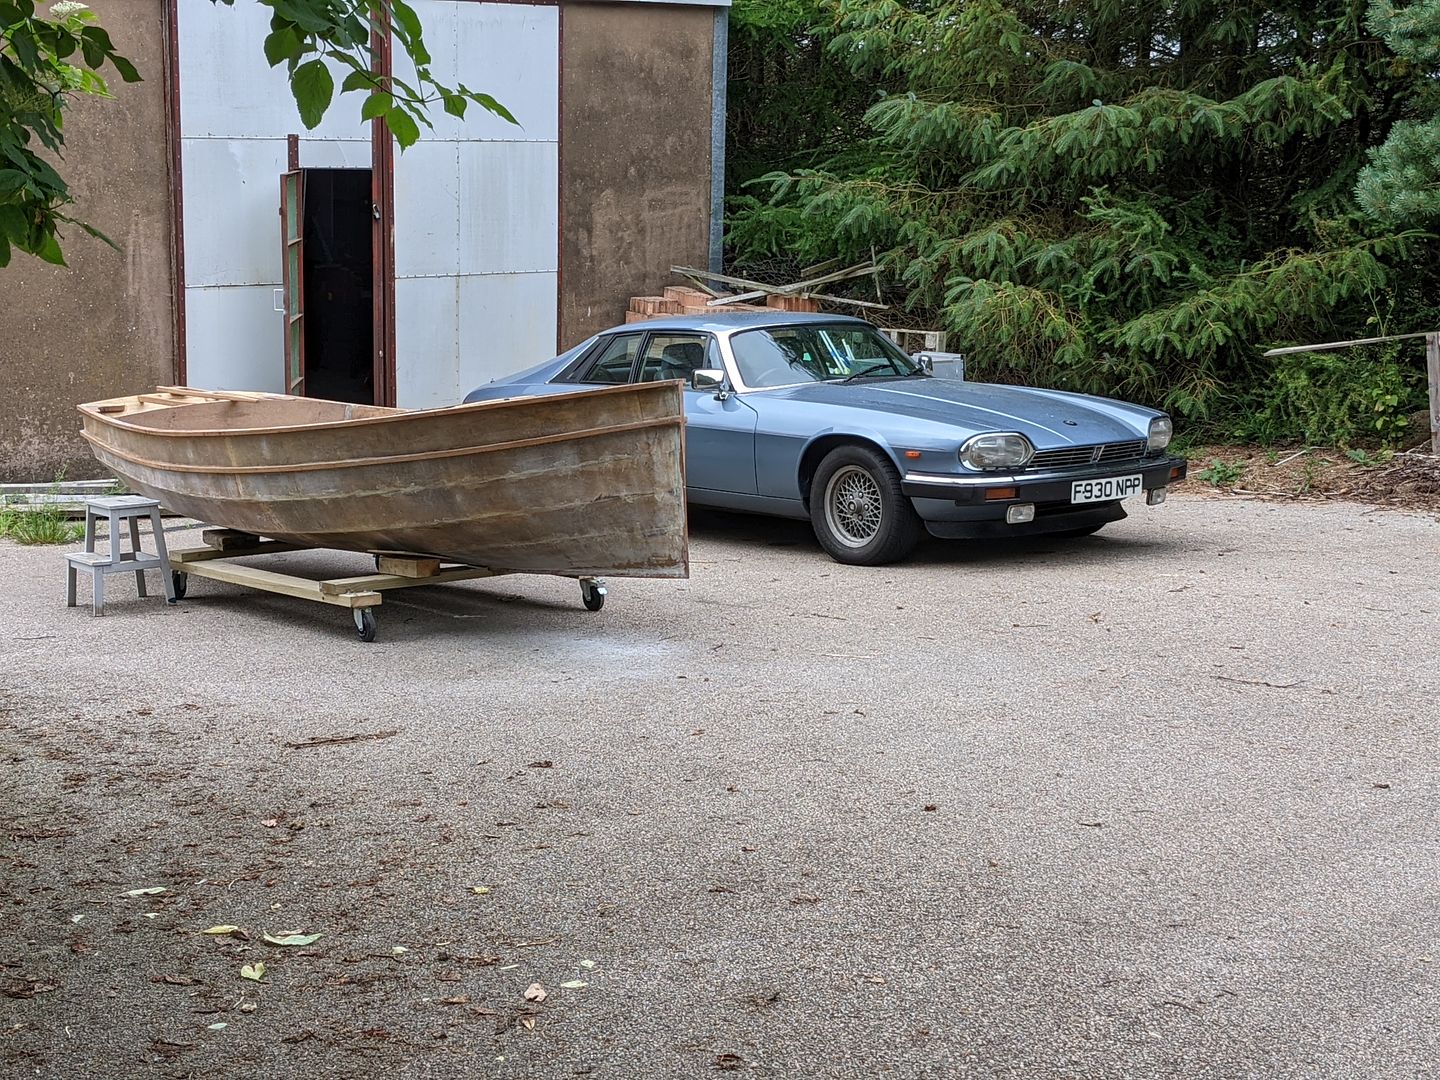
Hi, you probably have. I did join the Dinghy Cruising Association when I started this, which I'm happy I did. I'm not generally one for club "scenes" but I knew I'd run out of knowledge very fast doing this and the cruising dinghy seem really helpful.I've done a little more work inside, then wheeled it out for a better look at it. I haven't fitted the second lamination of that last rubbing strip yet, but will do soon.
The new bits include some batons which will strengthen and support the decked areas, as well as the large breasthook which will support the bowsprit and transmit its loads back into the hull - or at least I hope it will
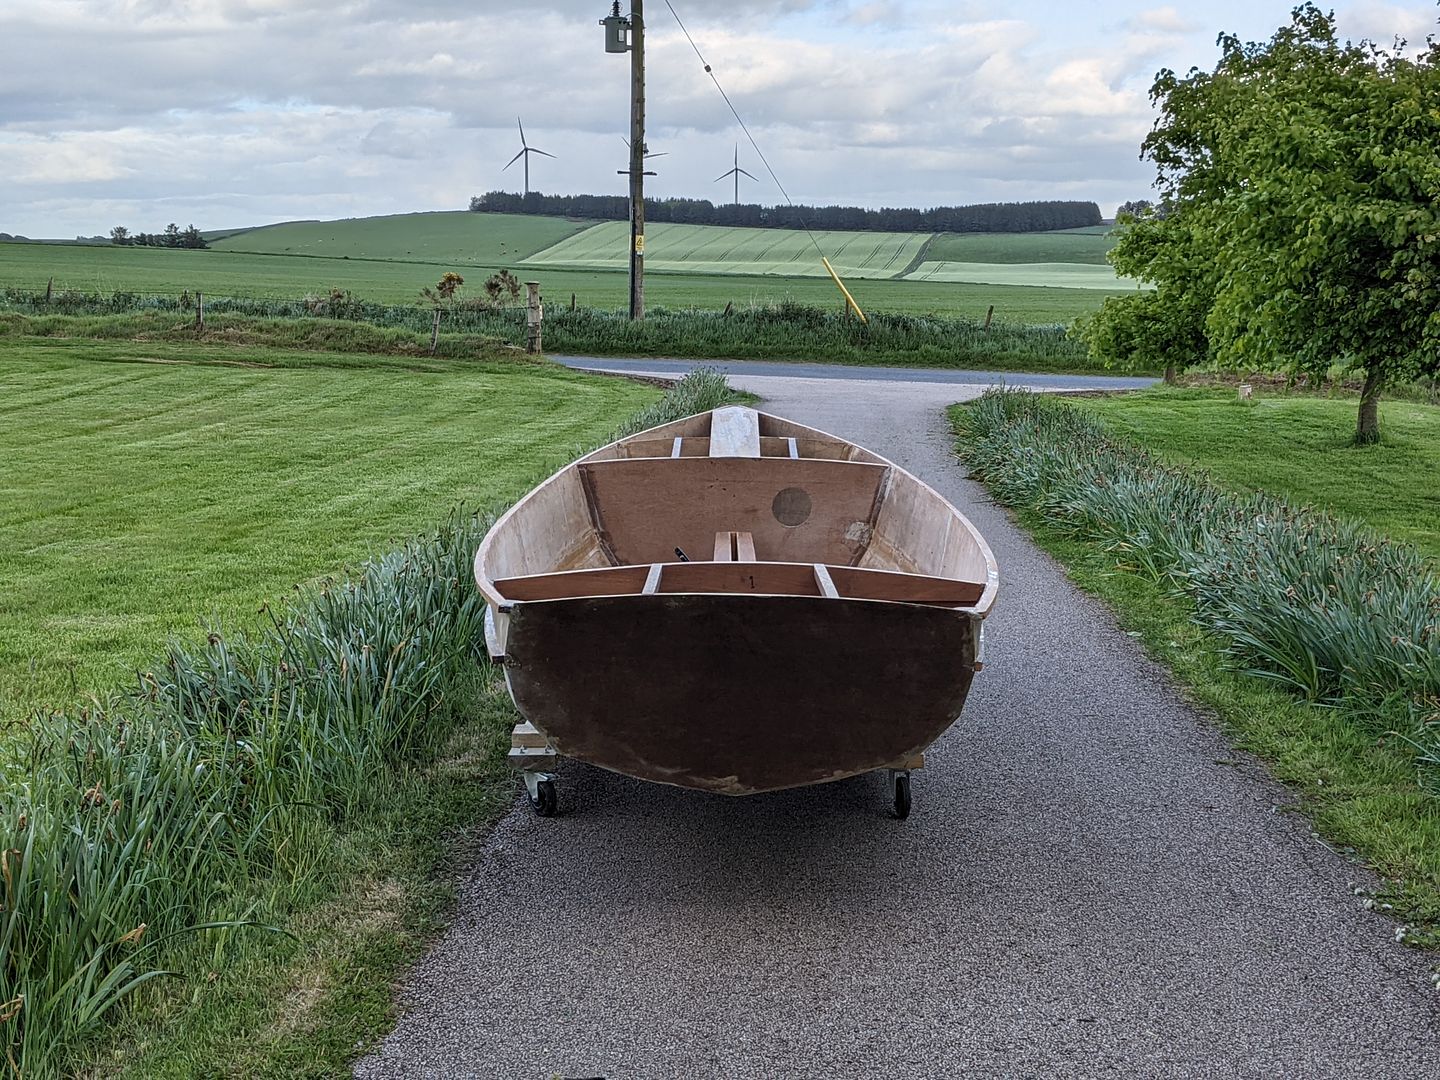
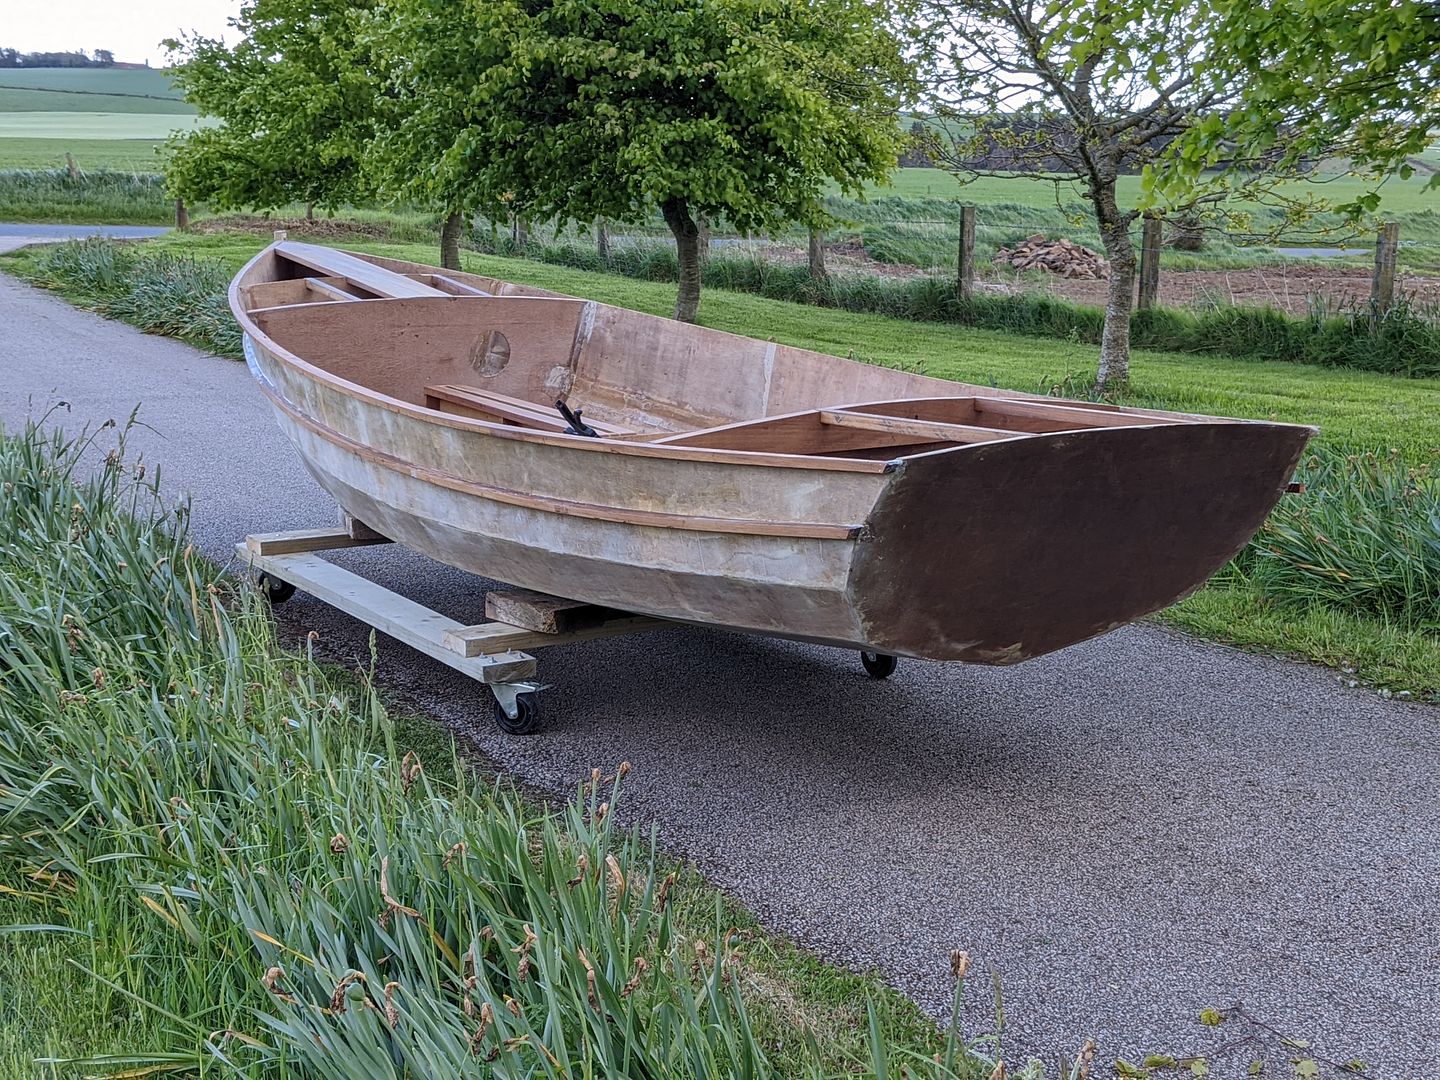

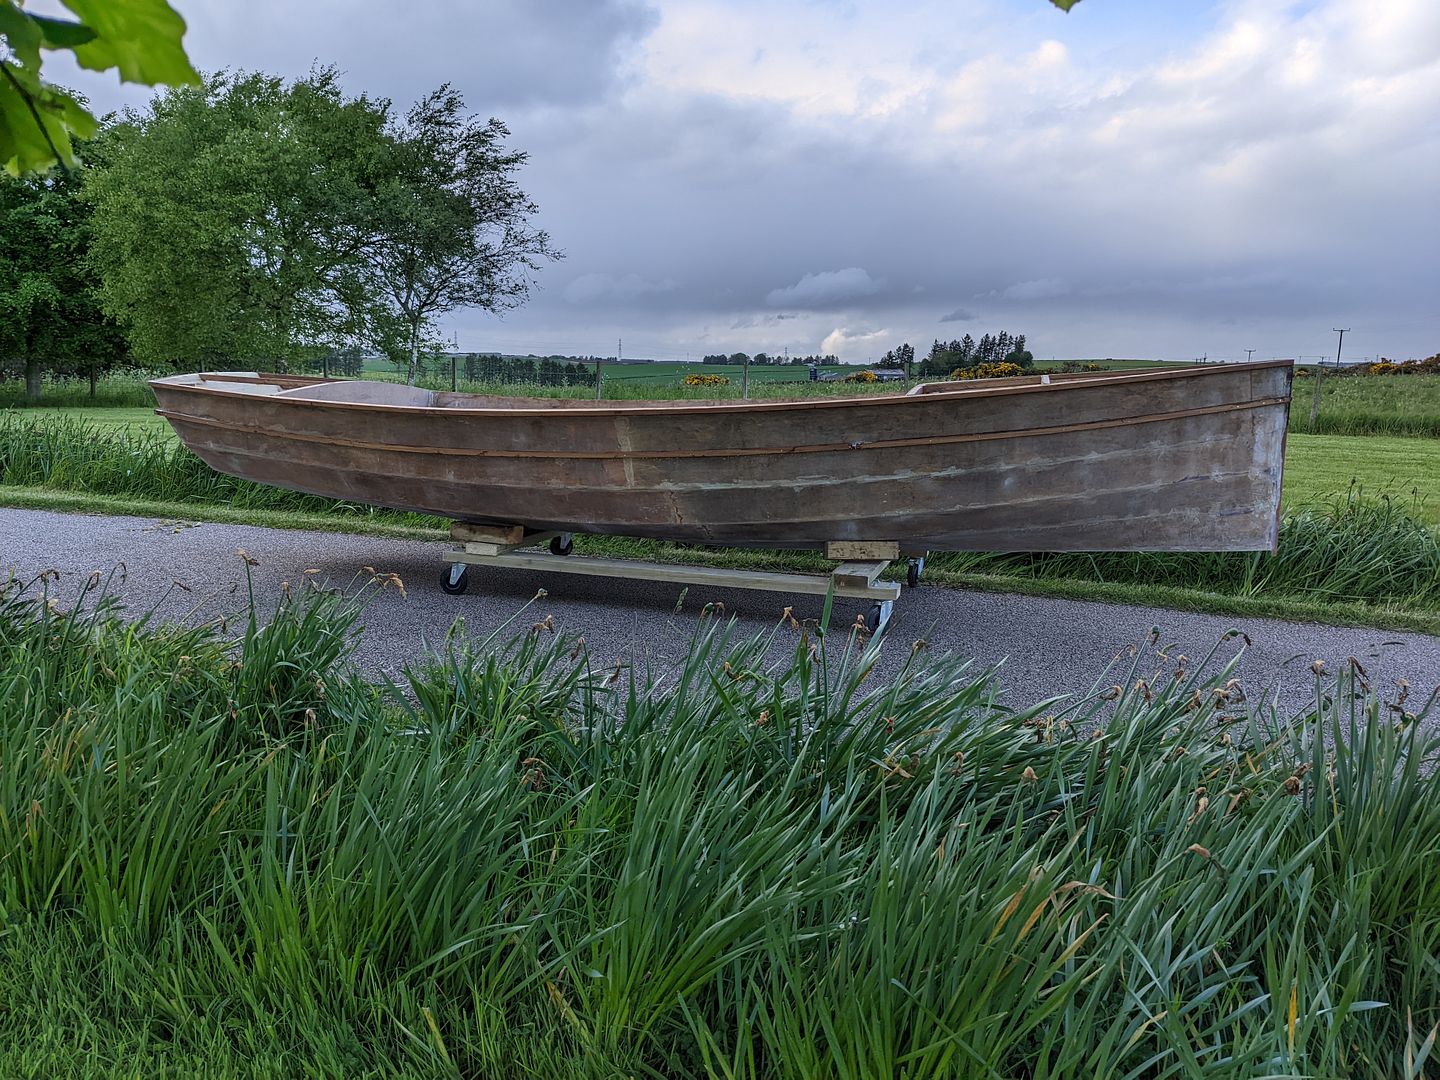
The new bits include some batons which will strengthen and support the decked areas, as well as the large breasthook which will support the bowsprit and transmit its loads back into the hull - or at least I hope it will
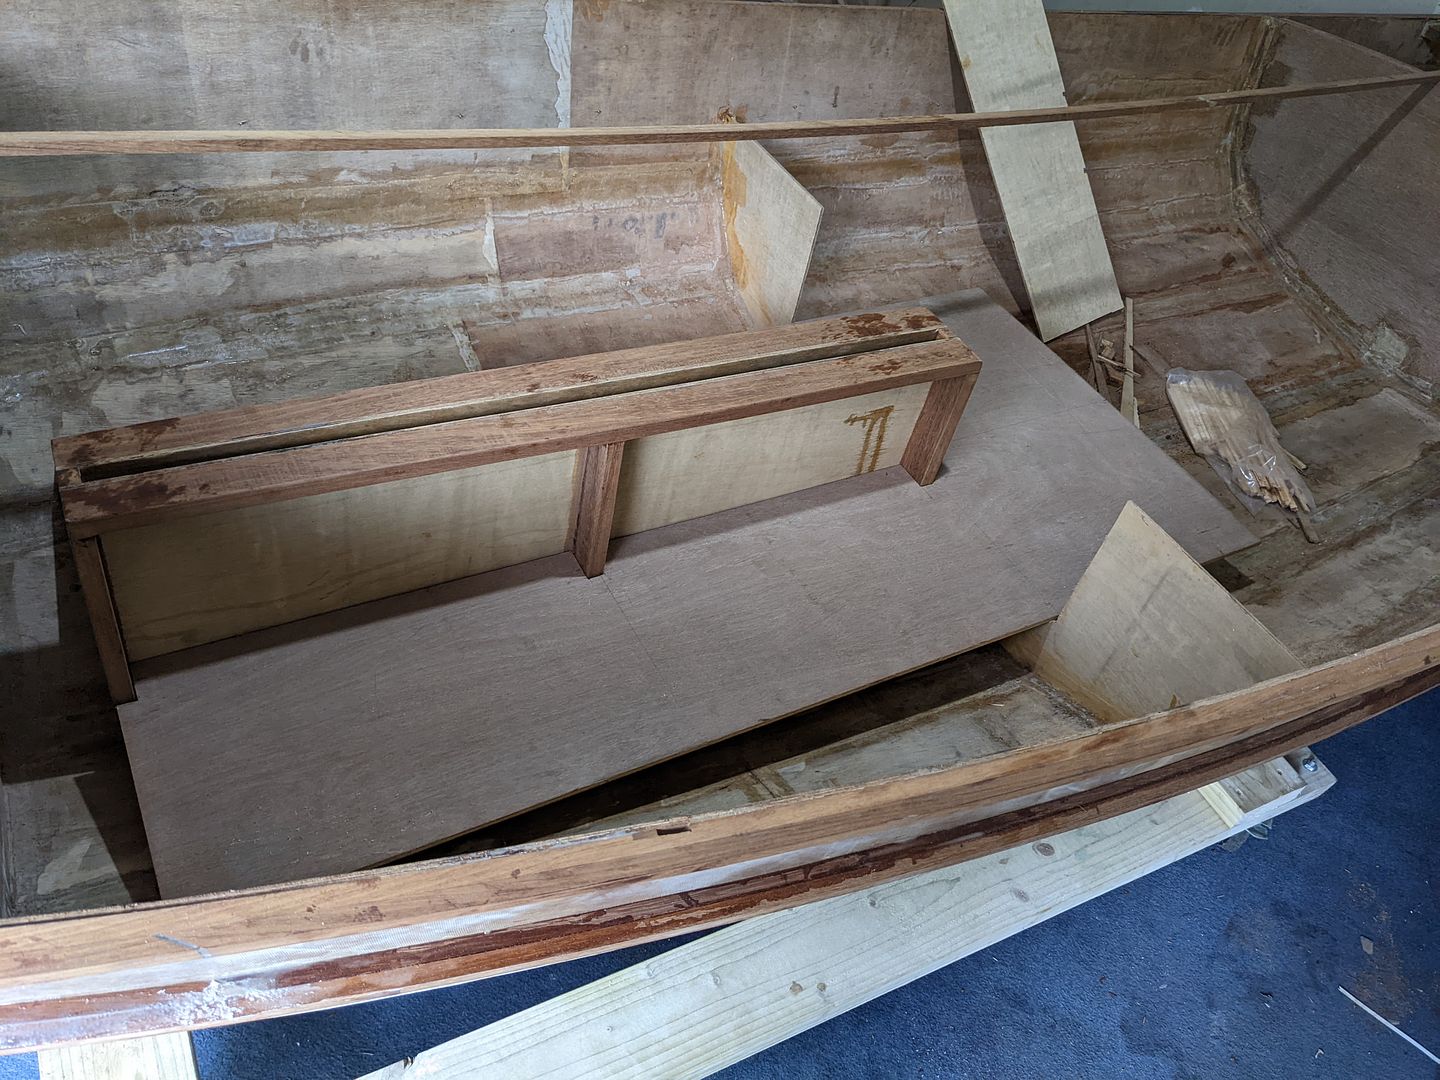
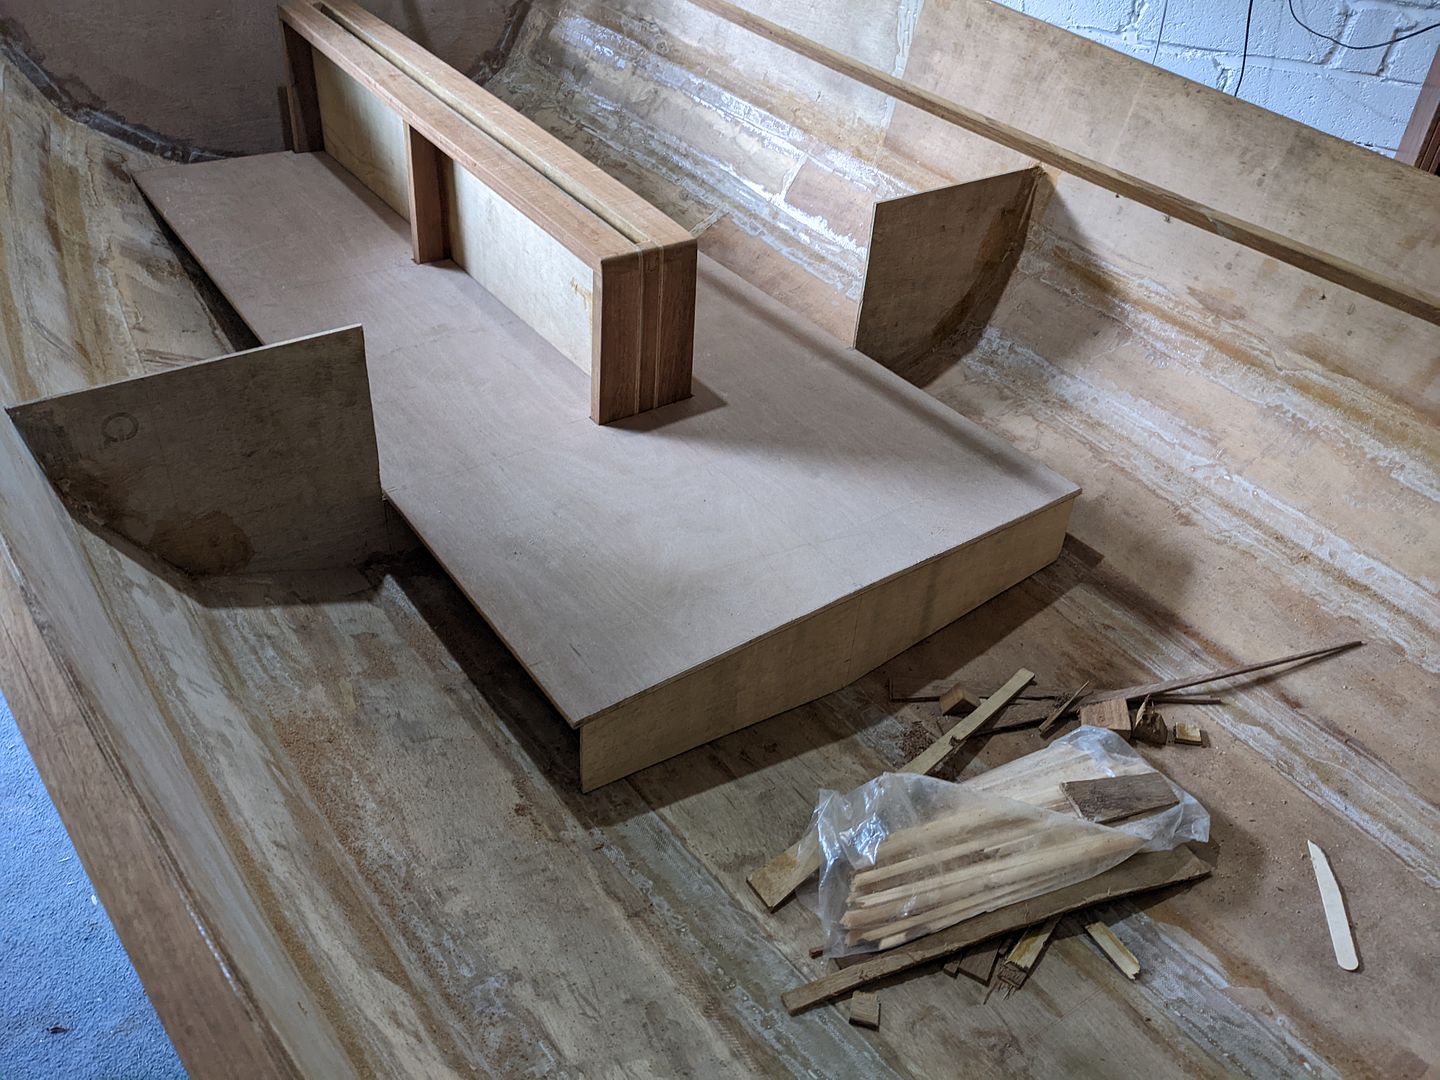
I've also started on the ballast tank. The top of the tank needs trimmed shorter at the forward end, and it will need to be split down the middle to allow it to be fitted after the daggerboard case is in but I found it easier to make it in one piece initially.

This sticky mess is going to be the mast step once the epoxy has cured and I've trimmed it to final dimensions.
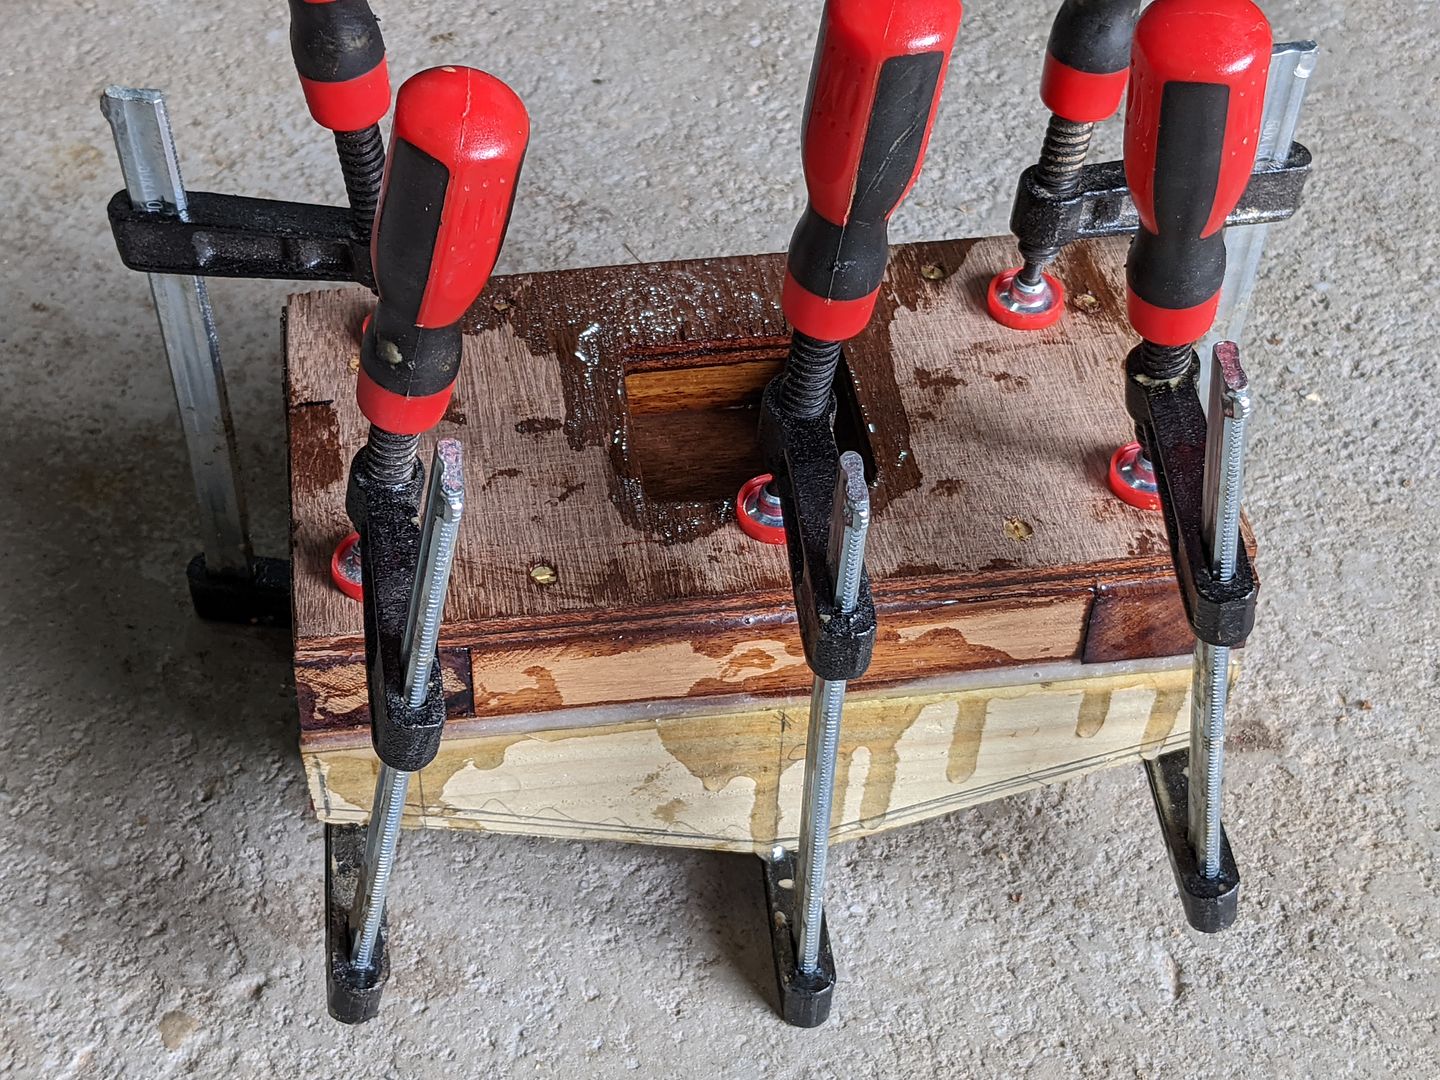
This sticky mess is going to be the mast step once the epoxy has cured and I've trimmed it to final dimensions.
The abomination in the previous post became safe to handle without getting covered in wet epoxy.
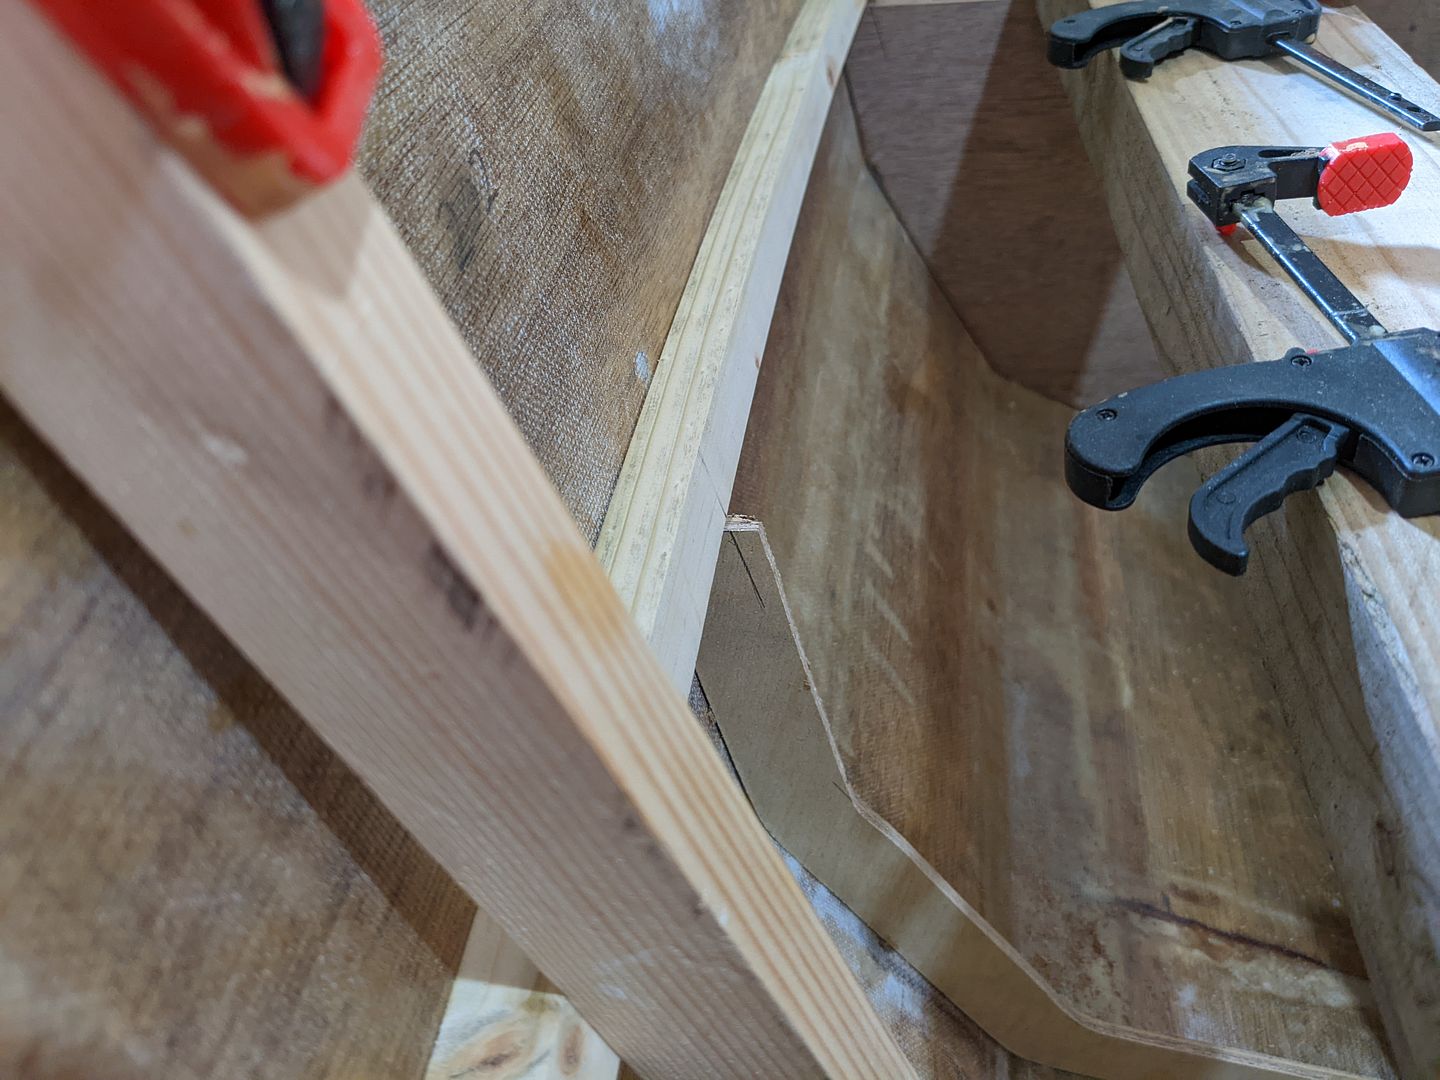
Tonight, I carefully sneaked up on it first finding some clean square edges amongst the mess, then triple checking my measurements and angles. The hull bottom is obviously changing shape in various ways along its length.
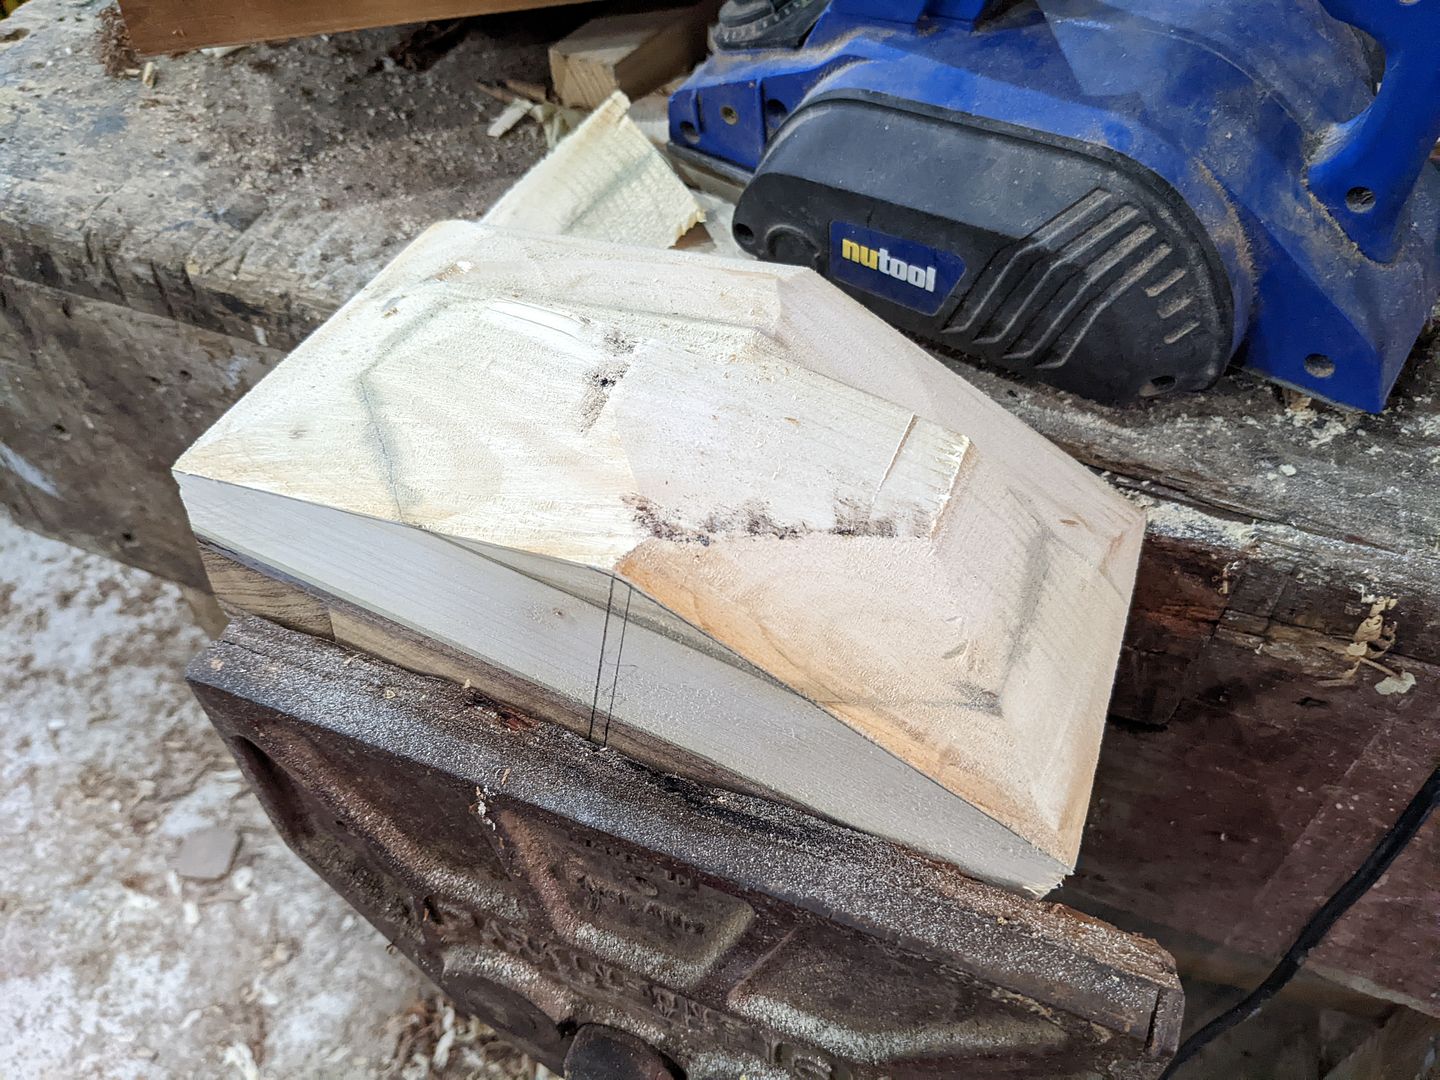
It turned out neat enough by being patient and taking it slowing and steadily.

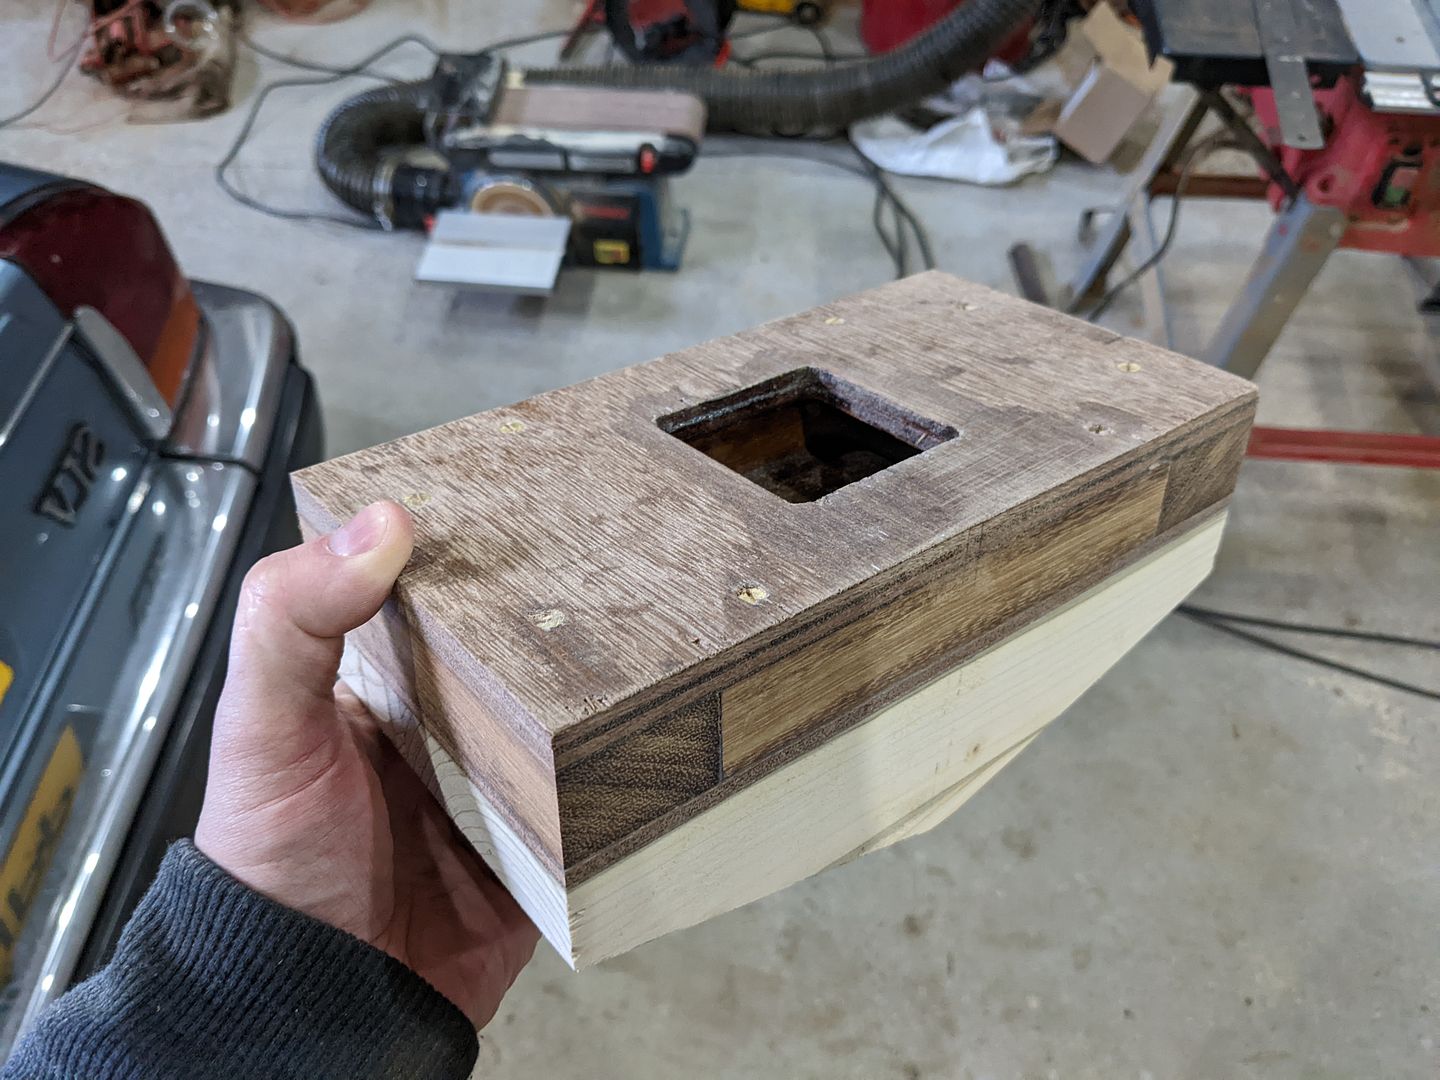
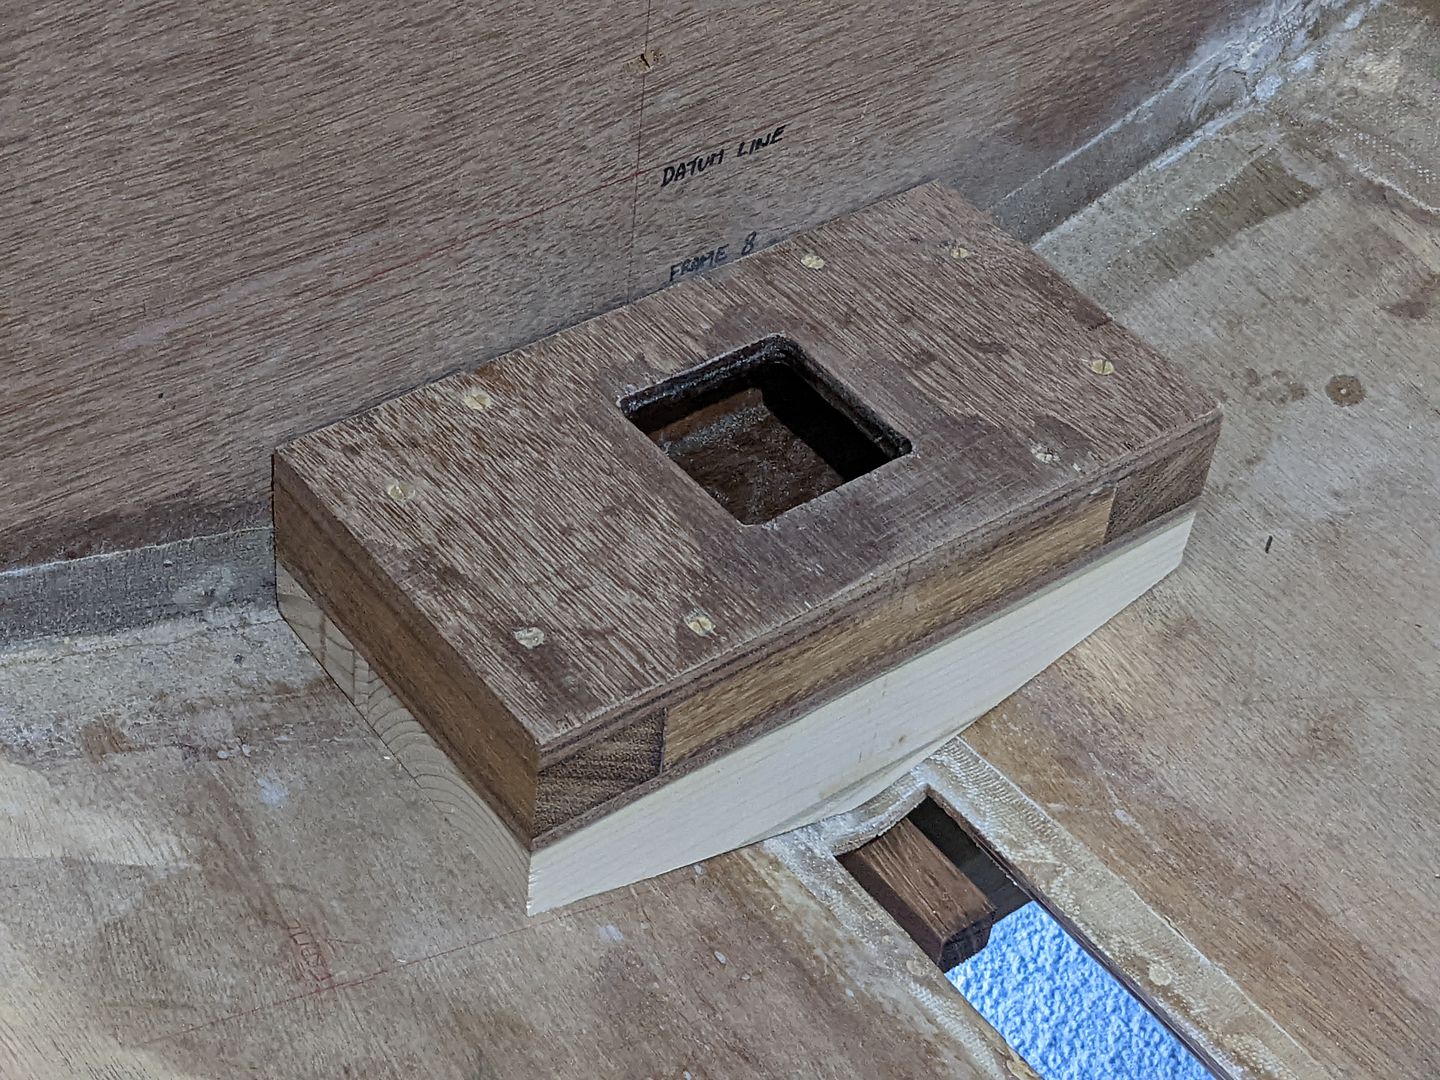
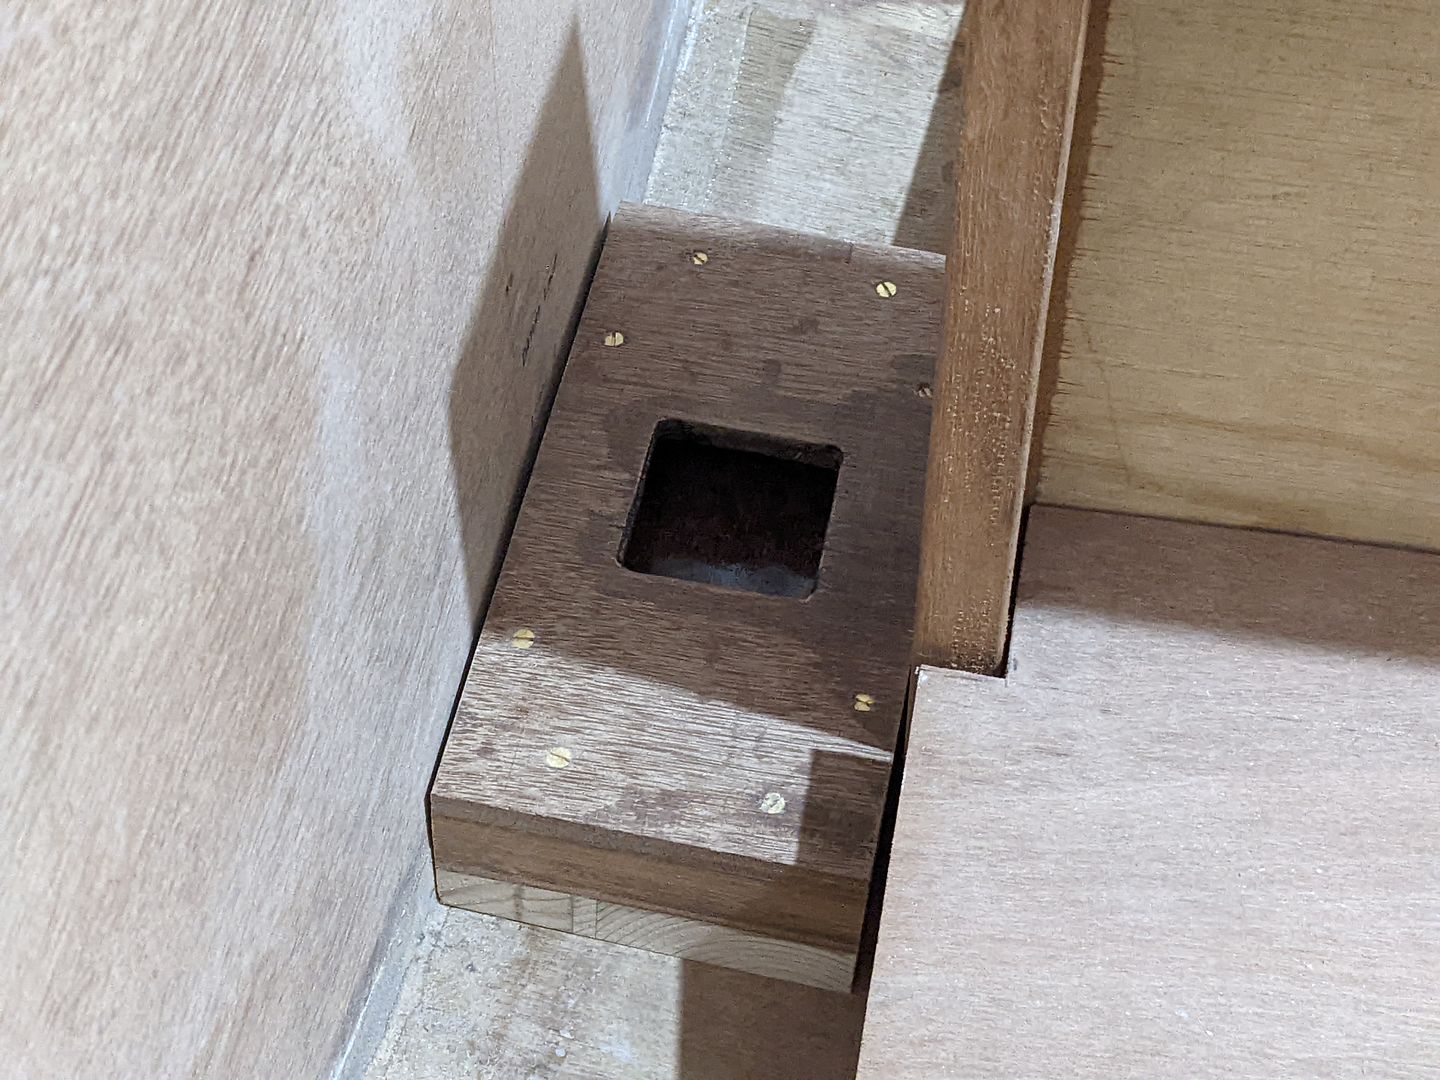
Perhaps none could be so surprised as I that I appear to have got the measurements, angles and the actual woodwork right because it actually fits properly where it's supposed to go. The plans call for a belt and braces glue and screw fitting - the latter being right through the bottom hull planks.
Tonight, I carefully sneaked up on it first finding some clean square edges amongst the mess, then triple checking my measurements and angles. The hull bottom is obviously changing shape in various ways along its length.
It turned out neat enough by being patient and taking it slowing and steadily.
Perhaps none could be so surprised as I that I appear to have got the measurements, angles and the actual woodwork right because it actually fits properly where it's supposed to go. The plans call for a belt and braces glue and screw fitting - the latter being right through the bottom hull planks.
I've added a short 8mm OD x 6mm ID stainless steel tube to the stem where the bobstay will fasten via a through-bolt. The bobstay will attach to the bowsprit. I used some of the excess tube to make a couple of drains for the mast step, which are drilled in at angles from the corners of the box where water may otherwise collect.
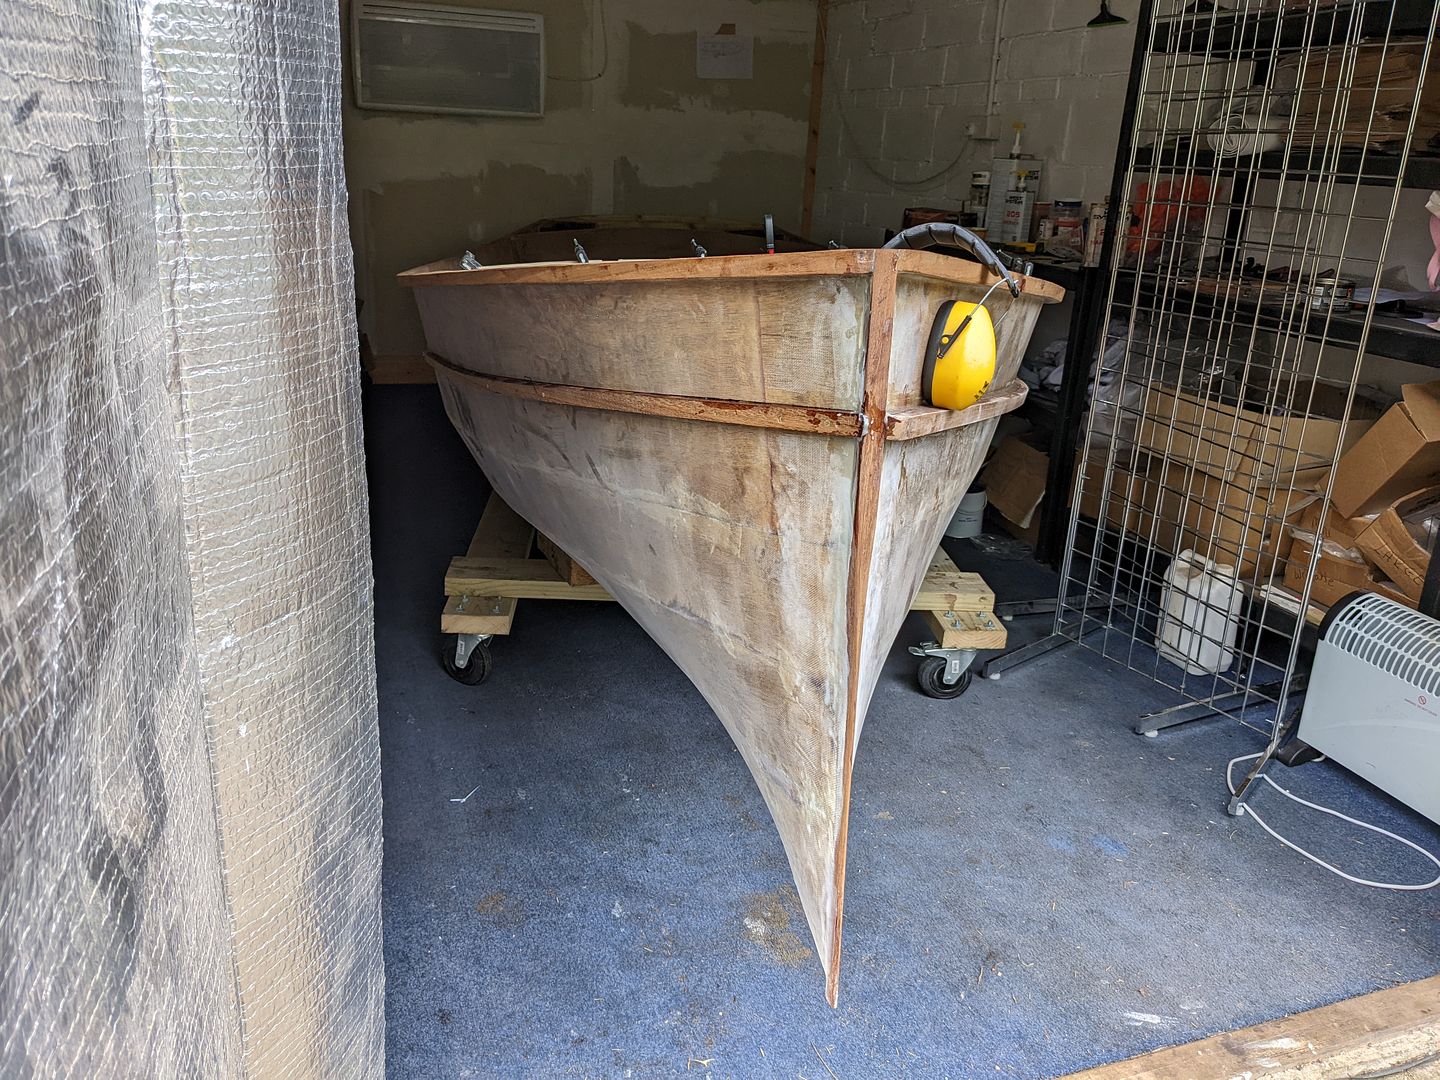
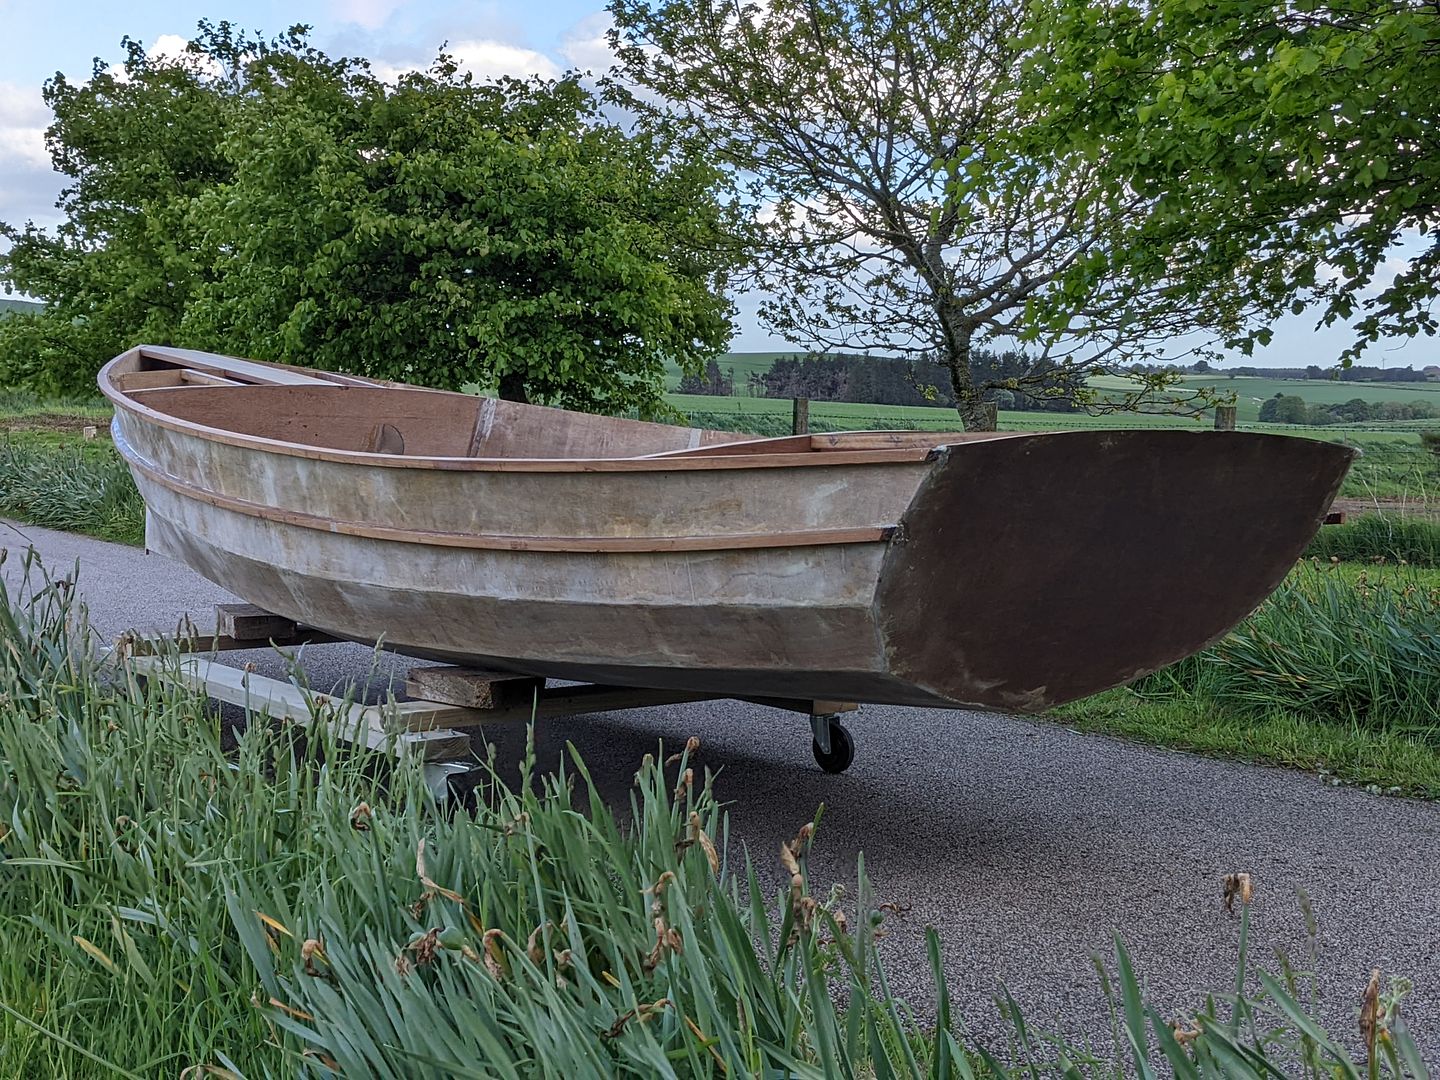
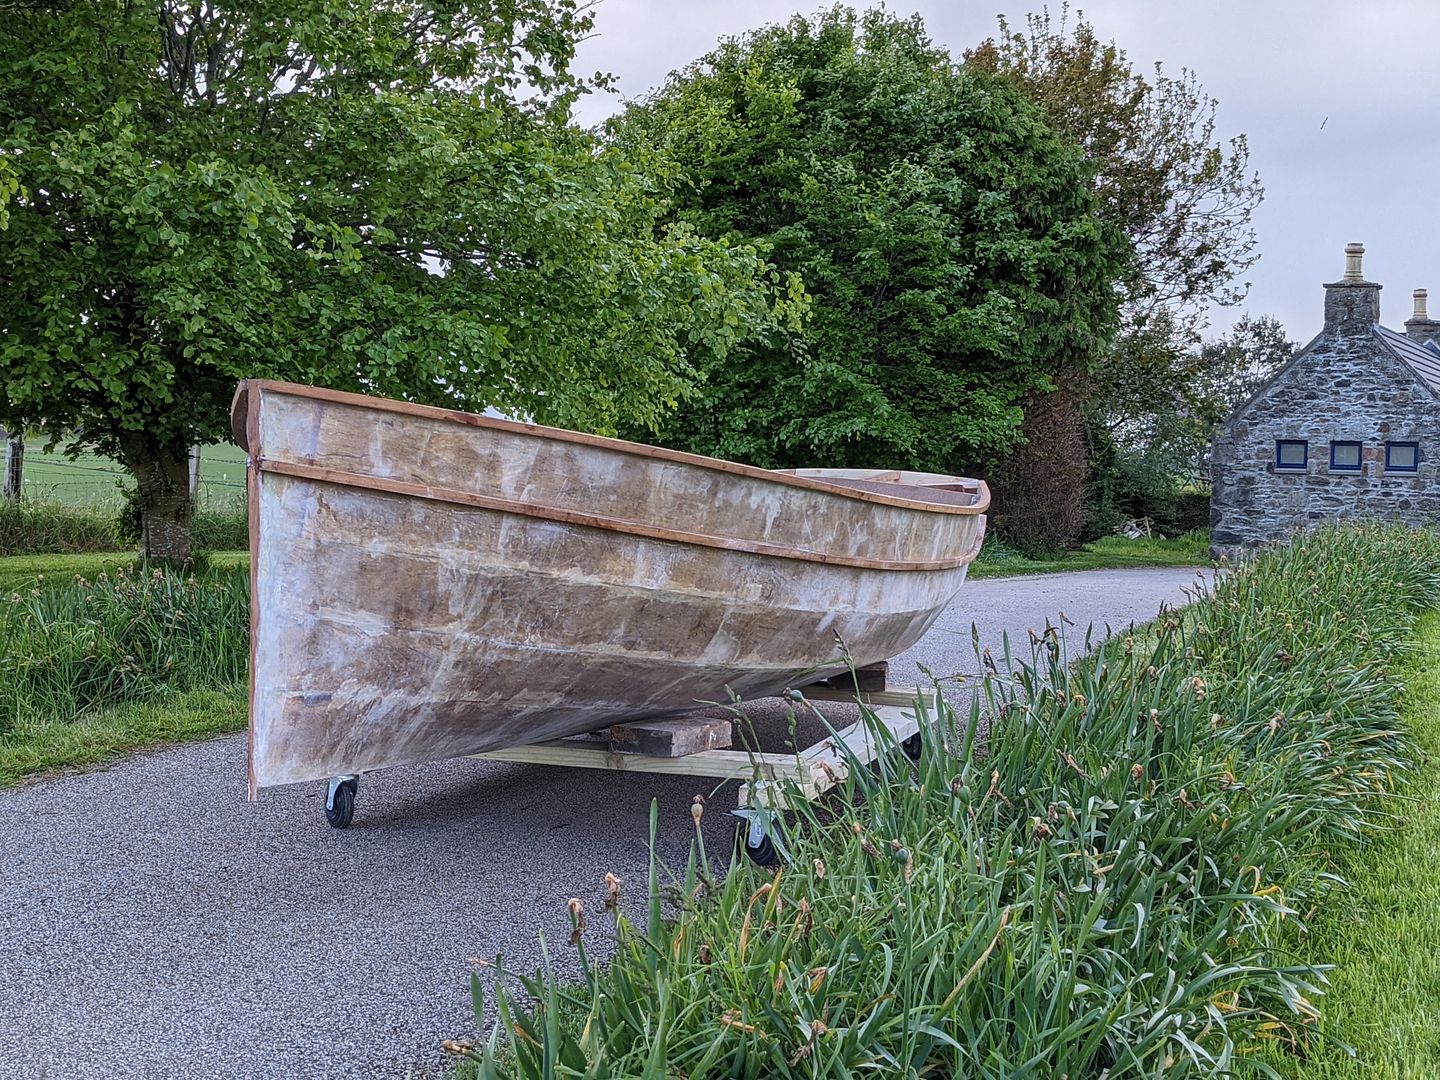
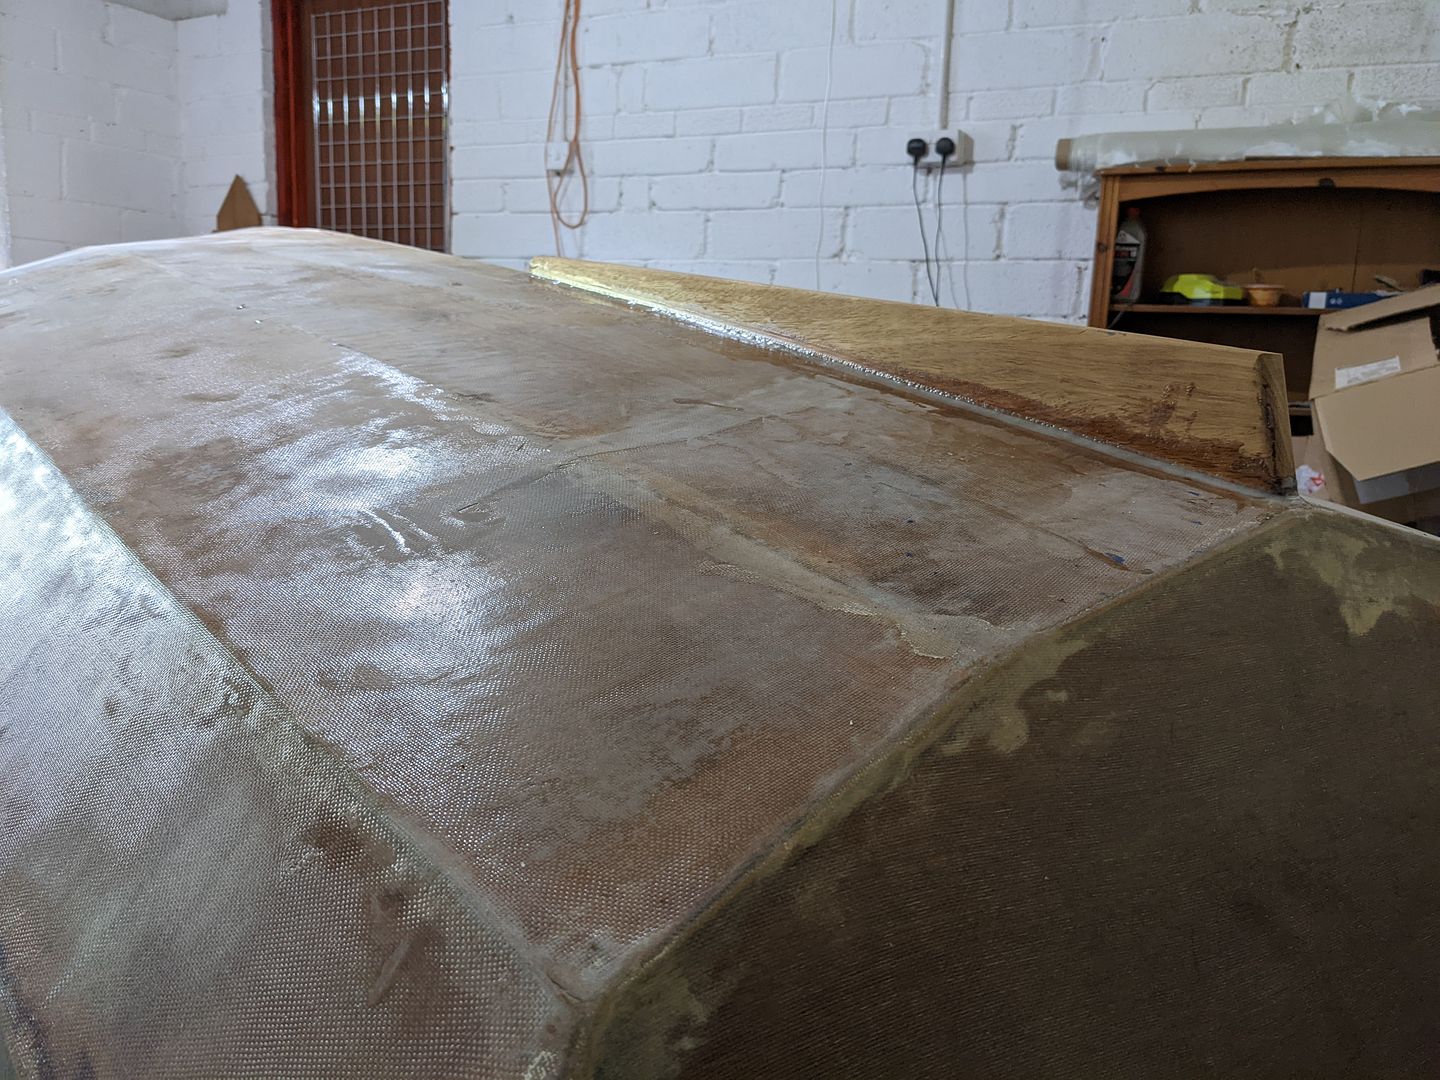
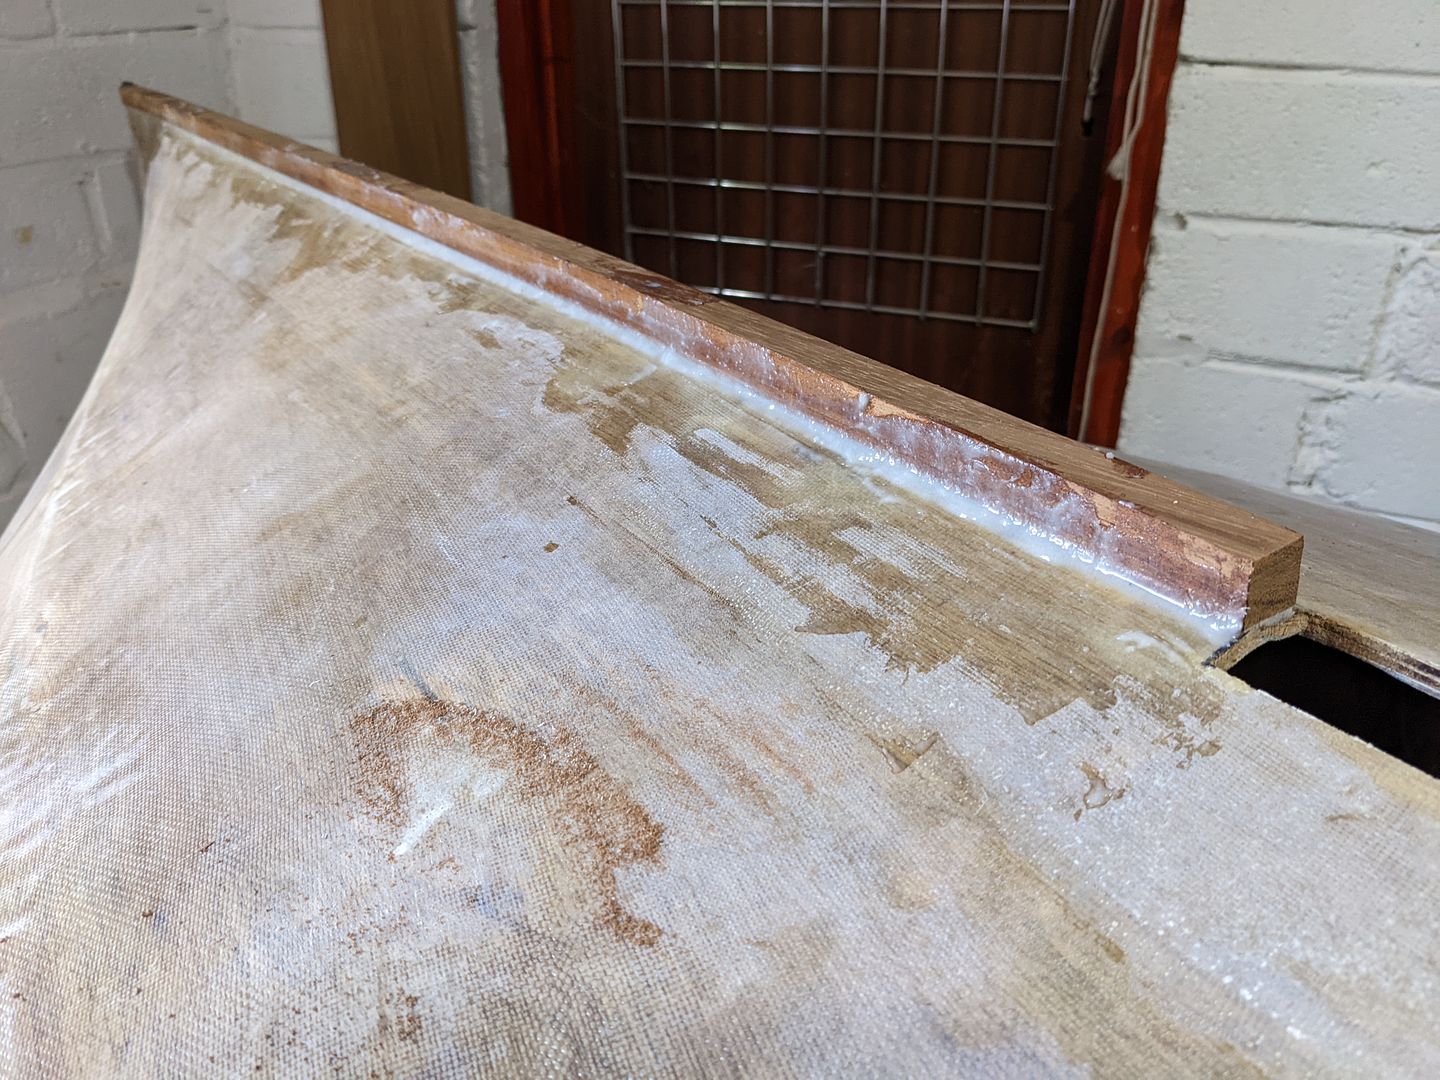
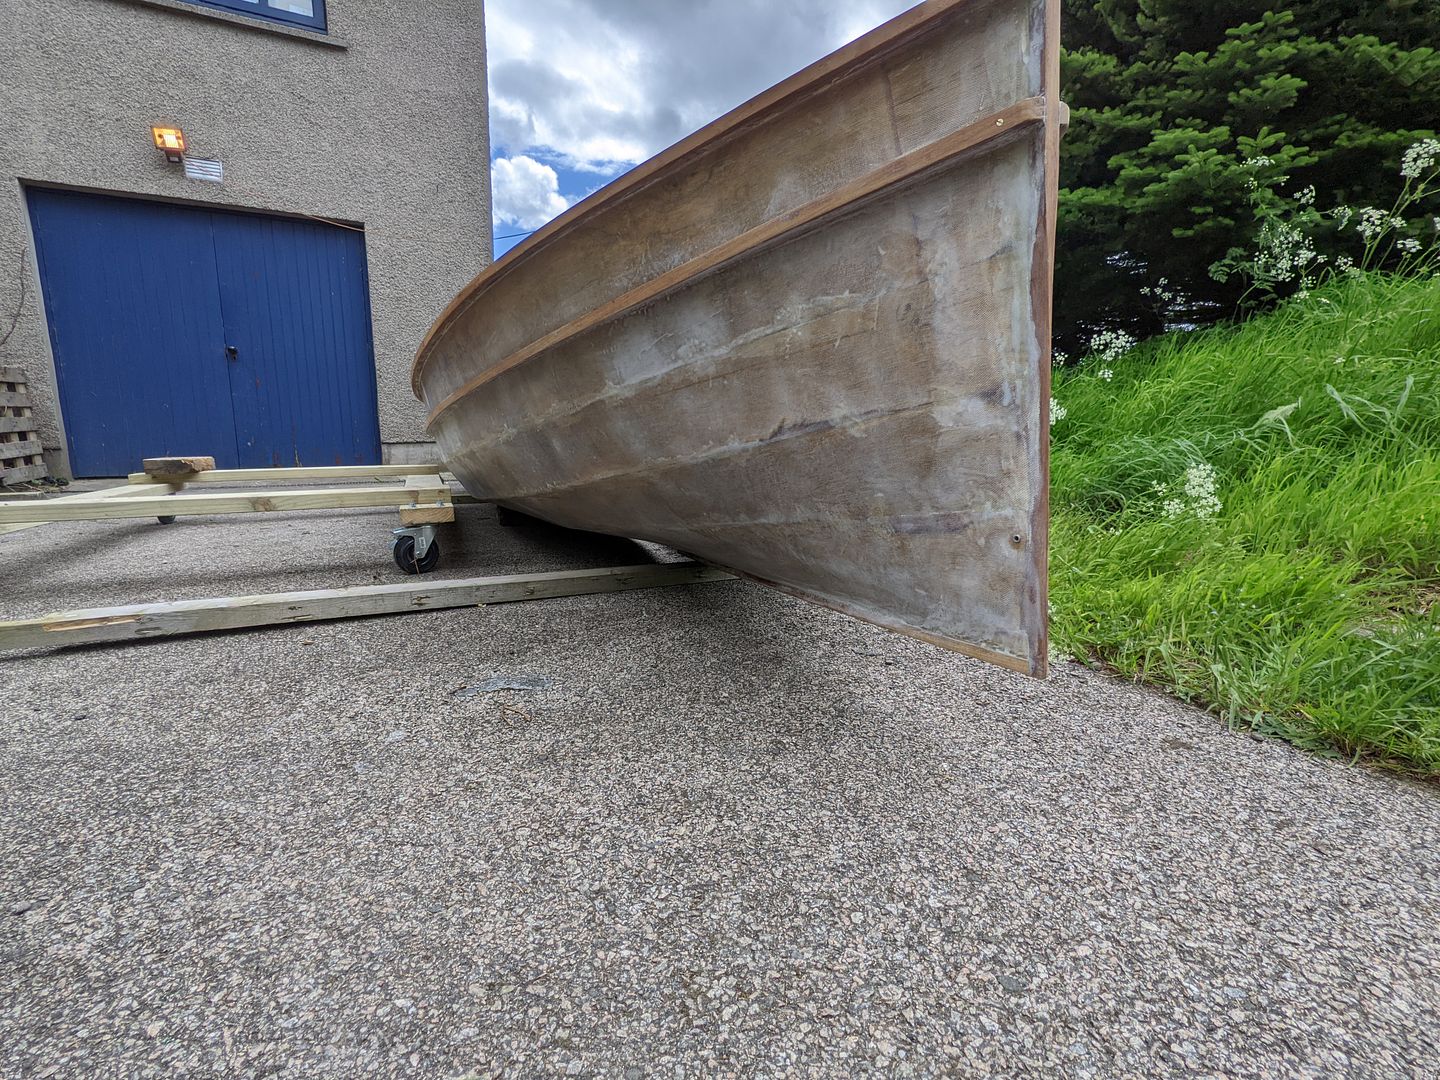
I wanted to do it, so I've inverted the boat again and added the false keel and skeg. These have been filleted with thickened epoxy. There are two more strakes to go on either side of the daggerboard case, and there are two blocks to go on the transom which mount the rudder hinges. Besides that, there are not many more bits to be added outside of the hull. Plenty more work inside, of course, plus the decking and, obviously the rig!

I wanted to do it, so I've inverted the boat again and added the false keel and skeg. These have been filleted with thickened epoxy. There are two more strakes to go on either side of the daggerboard case, and there are two blocks to go on the transom which mount the rudder hinges. Besides that, there are not many more bits to be added outside of the hull. Plenty more work inside, of course, plus the decking and, obviously the rig!

I've made some progress the last two days.
First of all, the interior of the boat is now fibreglassed. It's a messy job and involves very floppy fabric, so it's something I'd been putting off although I wanted it out of the way before moving on further with the internal bits and pieces.
Fibreglass is optional on the Campion Apple design. You do have to tape the seams, but actual glassing is discretionary. It's popular to glass the outside for abrasion resistance. It's going to be scraped on things - that's just a fact - so fibreglass on the outside helps protect the wood. It's often thought that fibreglassing the outside adds strength to the boat, which is partially true but is only really relevant if the plywood is whacked from the inside e.g. a heavy adult thumping down trying to avoid falling over. If we want to improve the hull's resistance to being punctured or stove in by hitting a stone for instance, the plywood will almost always fracture on the inside as the inner plies fail under tensile load. Therefore to improve puncture resistance from striking something outside the boat, it's actually the inside surface you need to fibreglass. So I have done both inside and outside. FYI, with the pound slumped against the US dollar, a 6kg pack of West Systems 105/205 or 206 epoxy is now up to £148 once the VAT is added...
Anyway, with the inside glassed, I was able to glue in the daggerboard case at last.
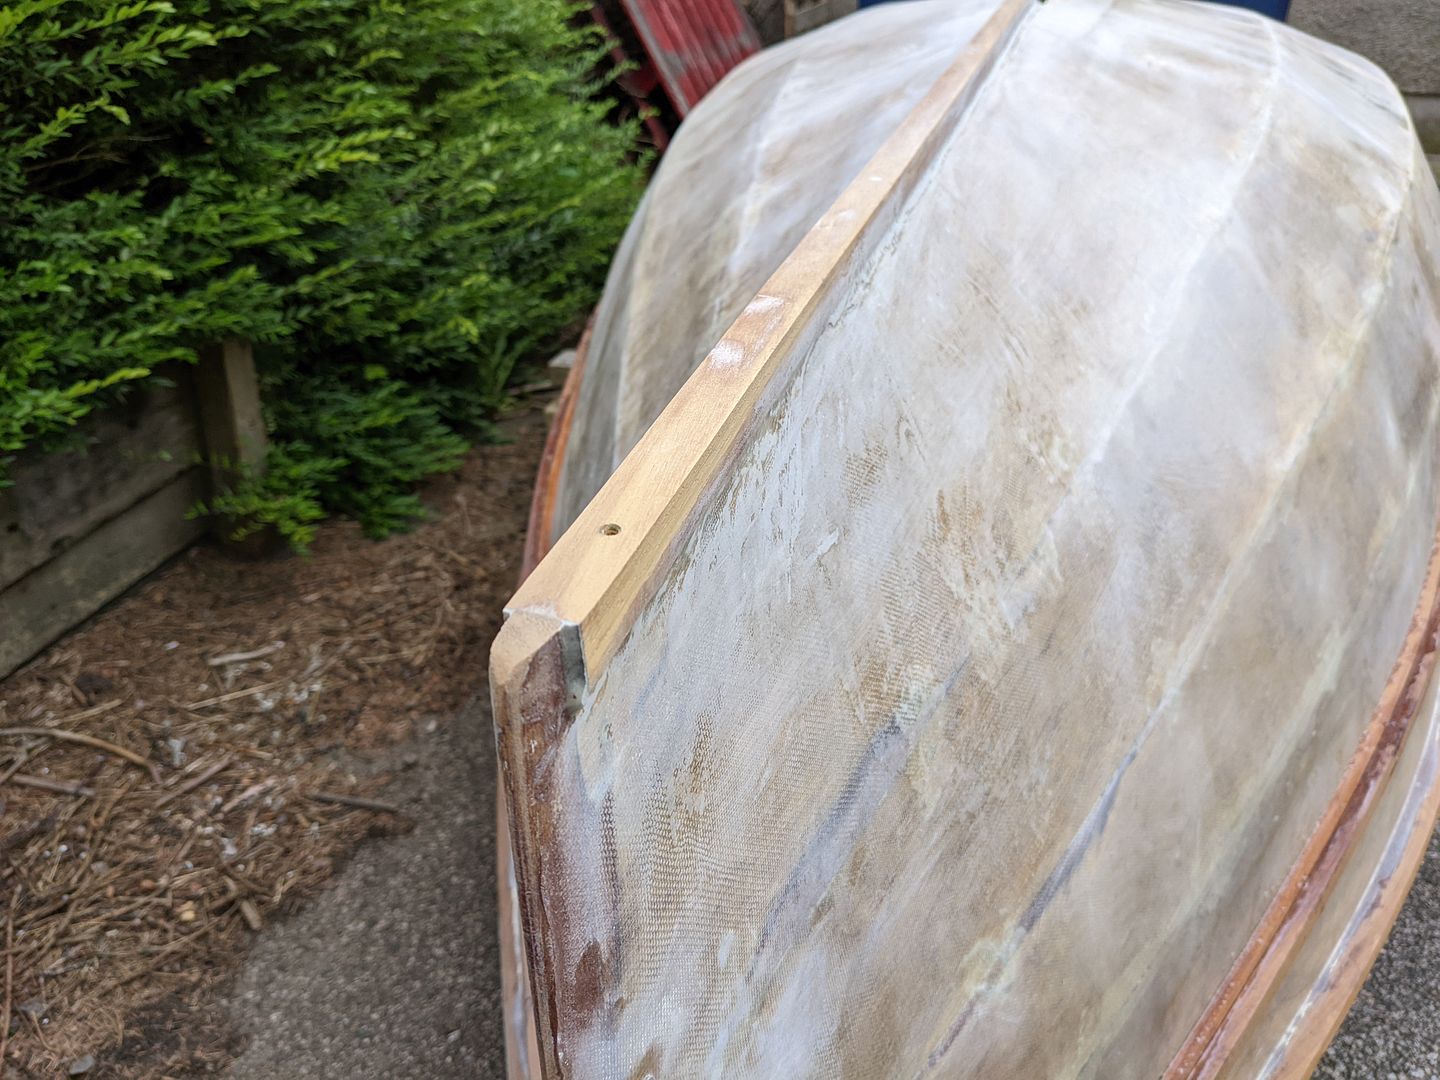
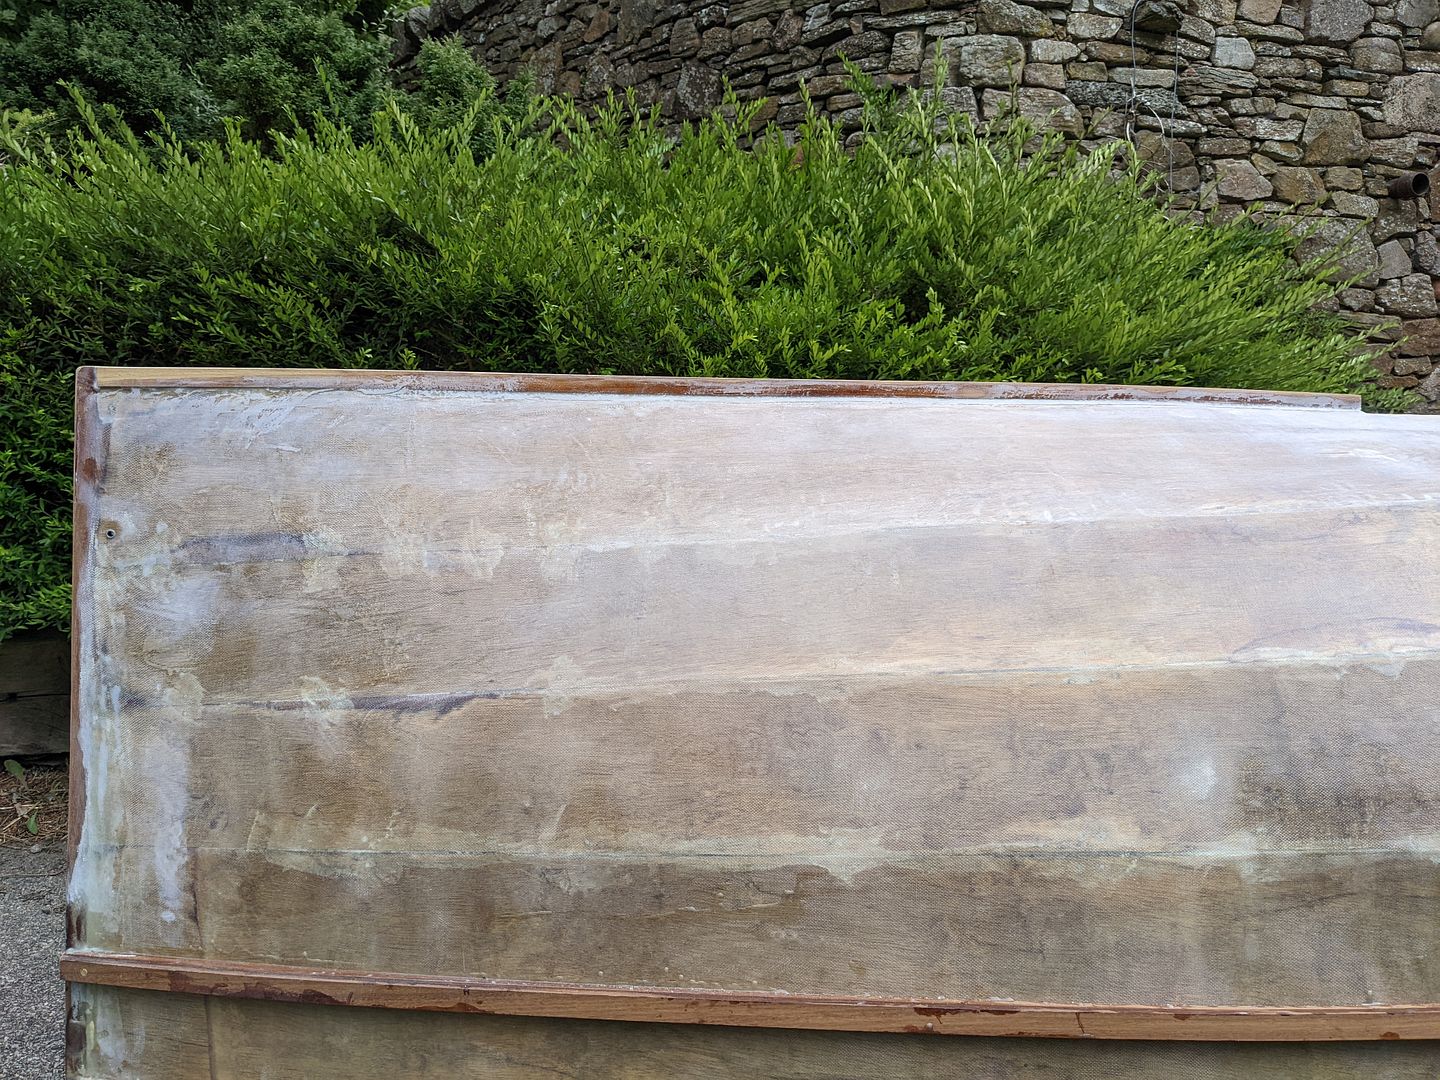
I left the epoxy fillets on the inside overnight to cure, then flipped the hull upside down on the grass to fair the case into the hull before squeezing epoxy thickened with milled fibres again into any gaps remaining.

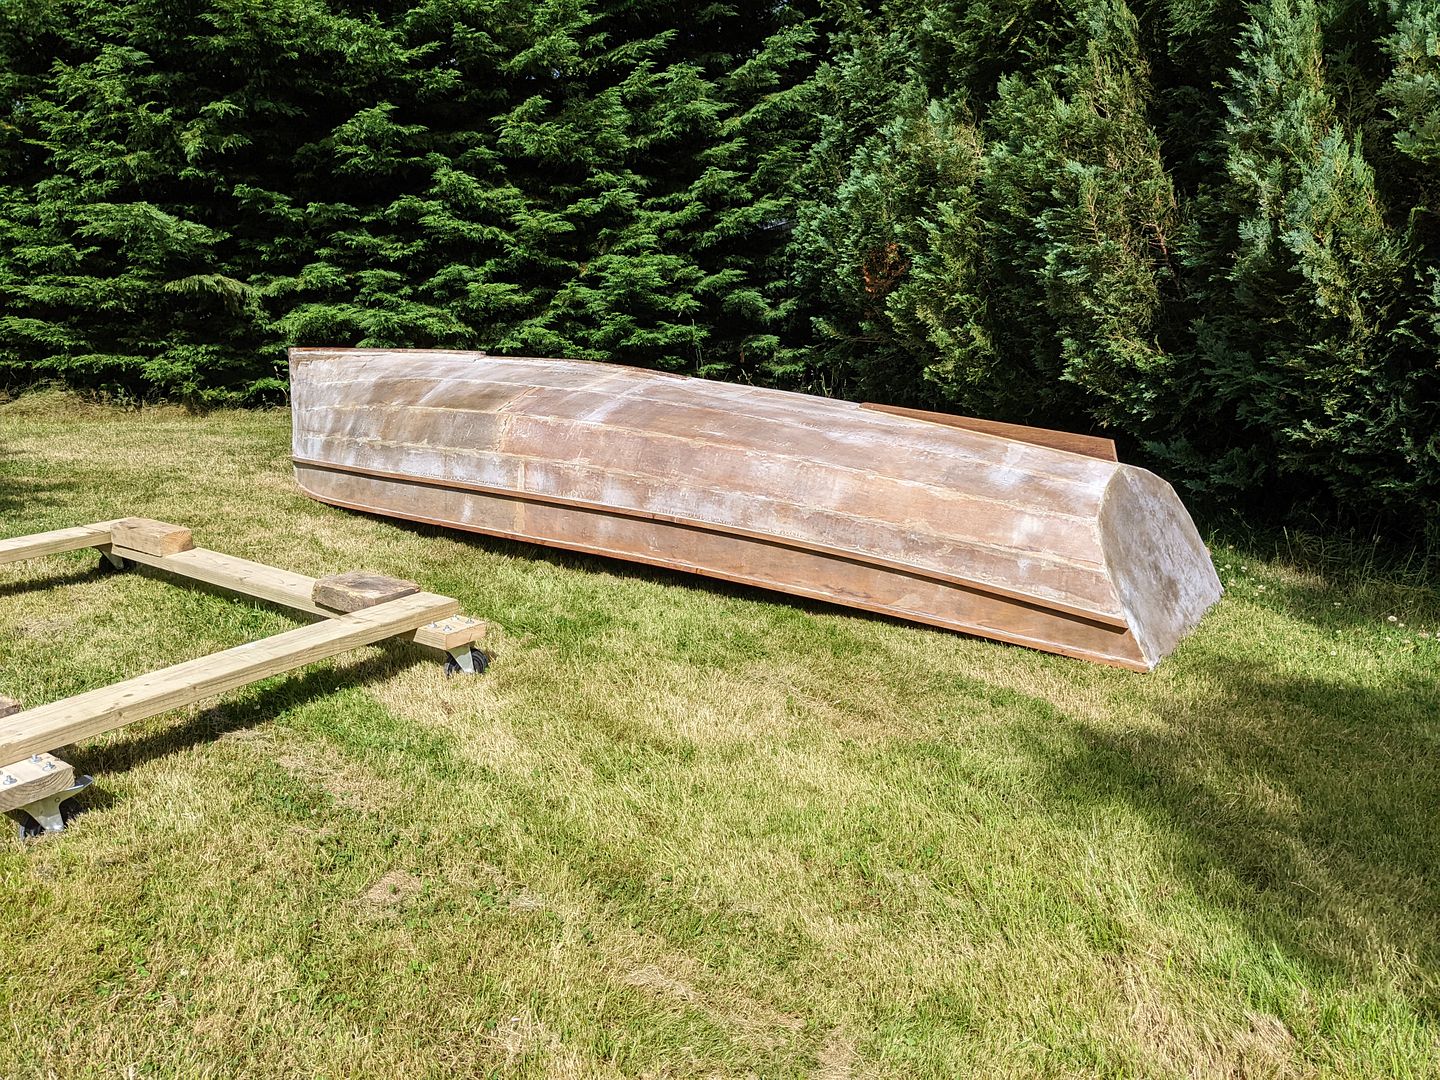
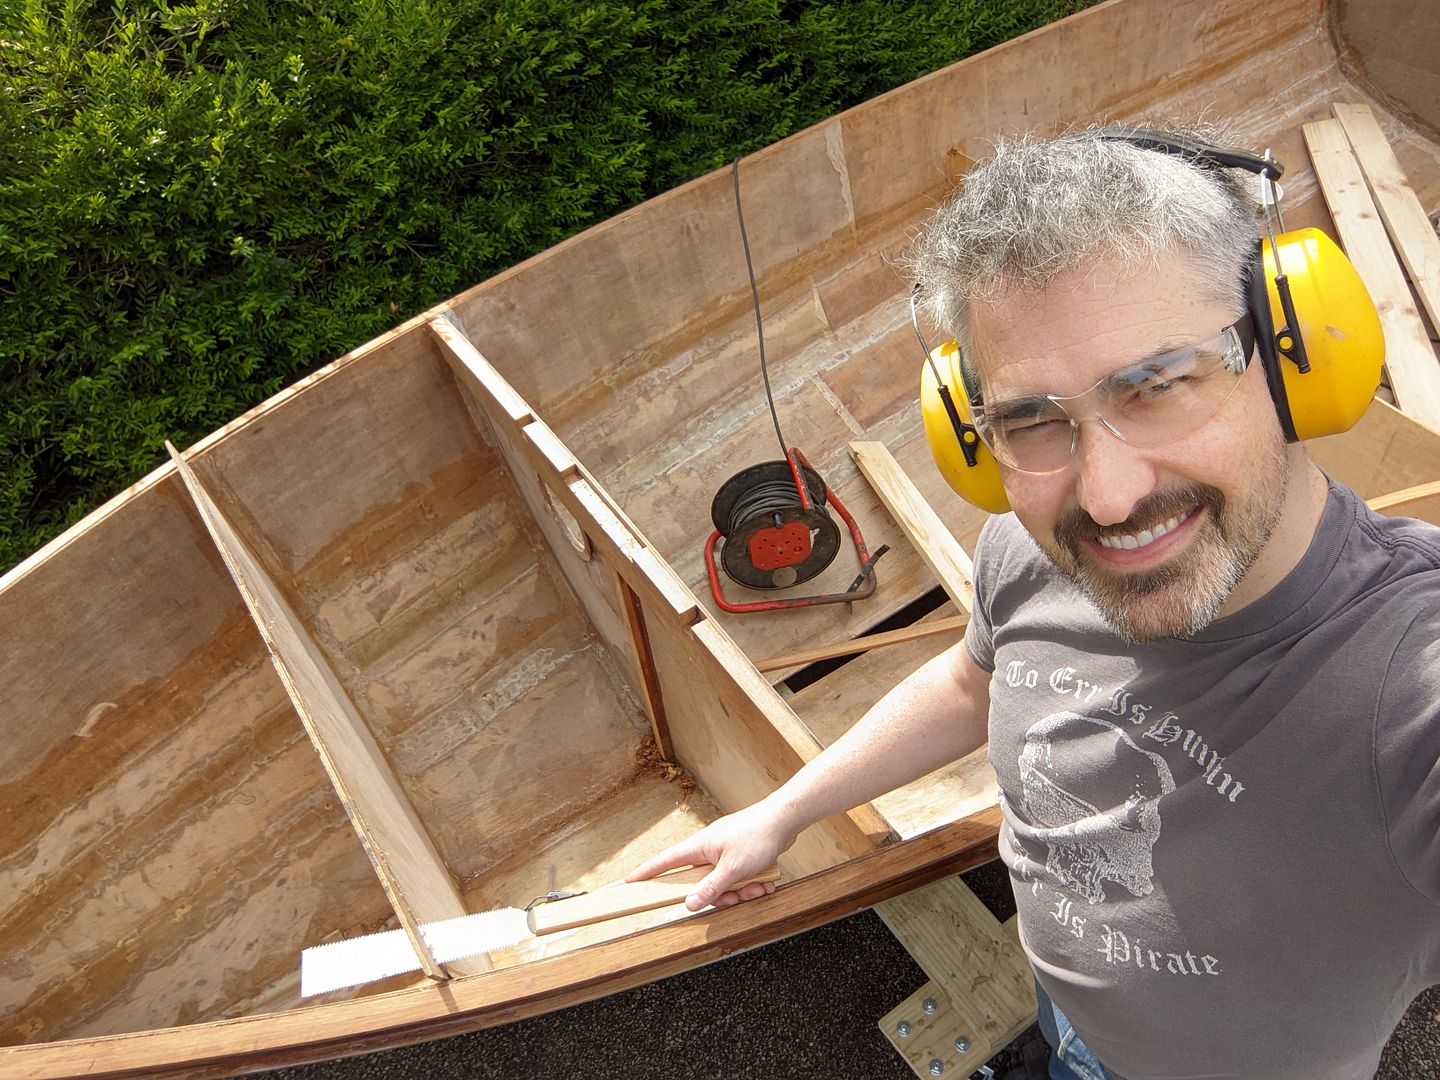
That had all day to cure and last night my daughter came to help me get the trolley back under the boat. Before doing that though, I wanted to build her confidence a bit. She was there at the beginning helping drill holes and fish tie-wraps through while I held big long wobbly plywood boards in place. Both she and her younger sister have had an impression that this thing is very flimsy, since it definitely was at the beginning. To show her how robust it was now it was fully glassed inside and out and had the gunwales on, I encouraged her to jump up and down in it. She's a careful child and not one to wreck everything they touch. Neither of my daughters break things. She's also been a ballet dancer for the last 7 years so even her jumping is lightly landing on the balls of her feet rather than crashing down on heels. The way I look at this is that a) if I didn't have total confidence in what I've built I wouldn't have told her to jump in it and b) if somehow I got that totally wrong and a small-for-her-age lightly-footed kid went through the bottom of it, then I don't want to go out on the water in it!
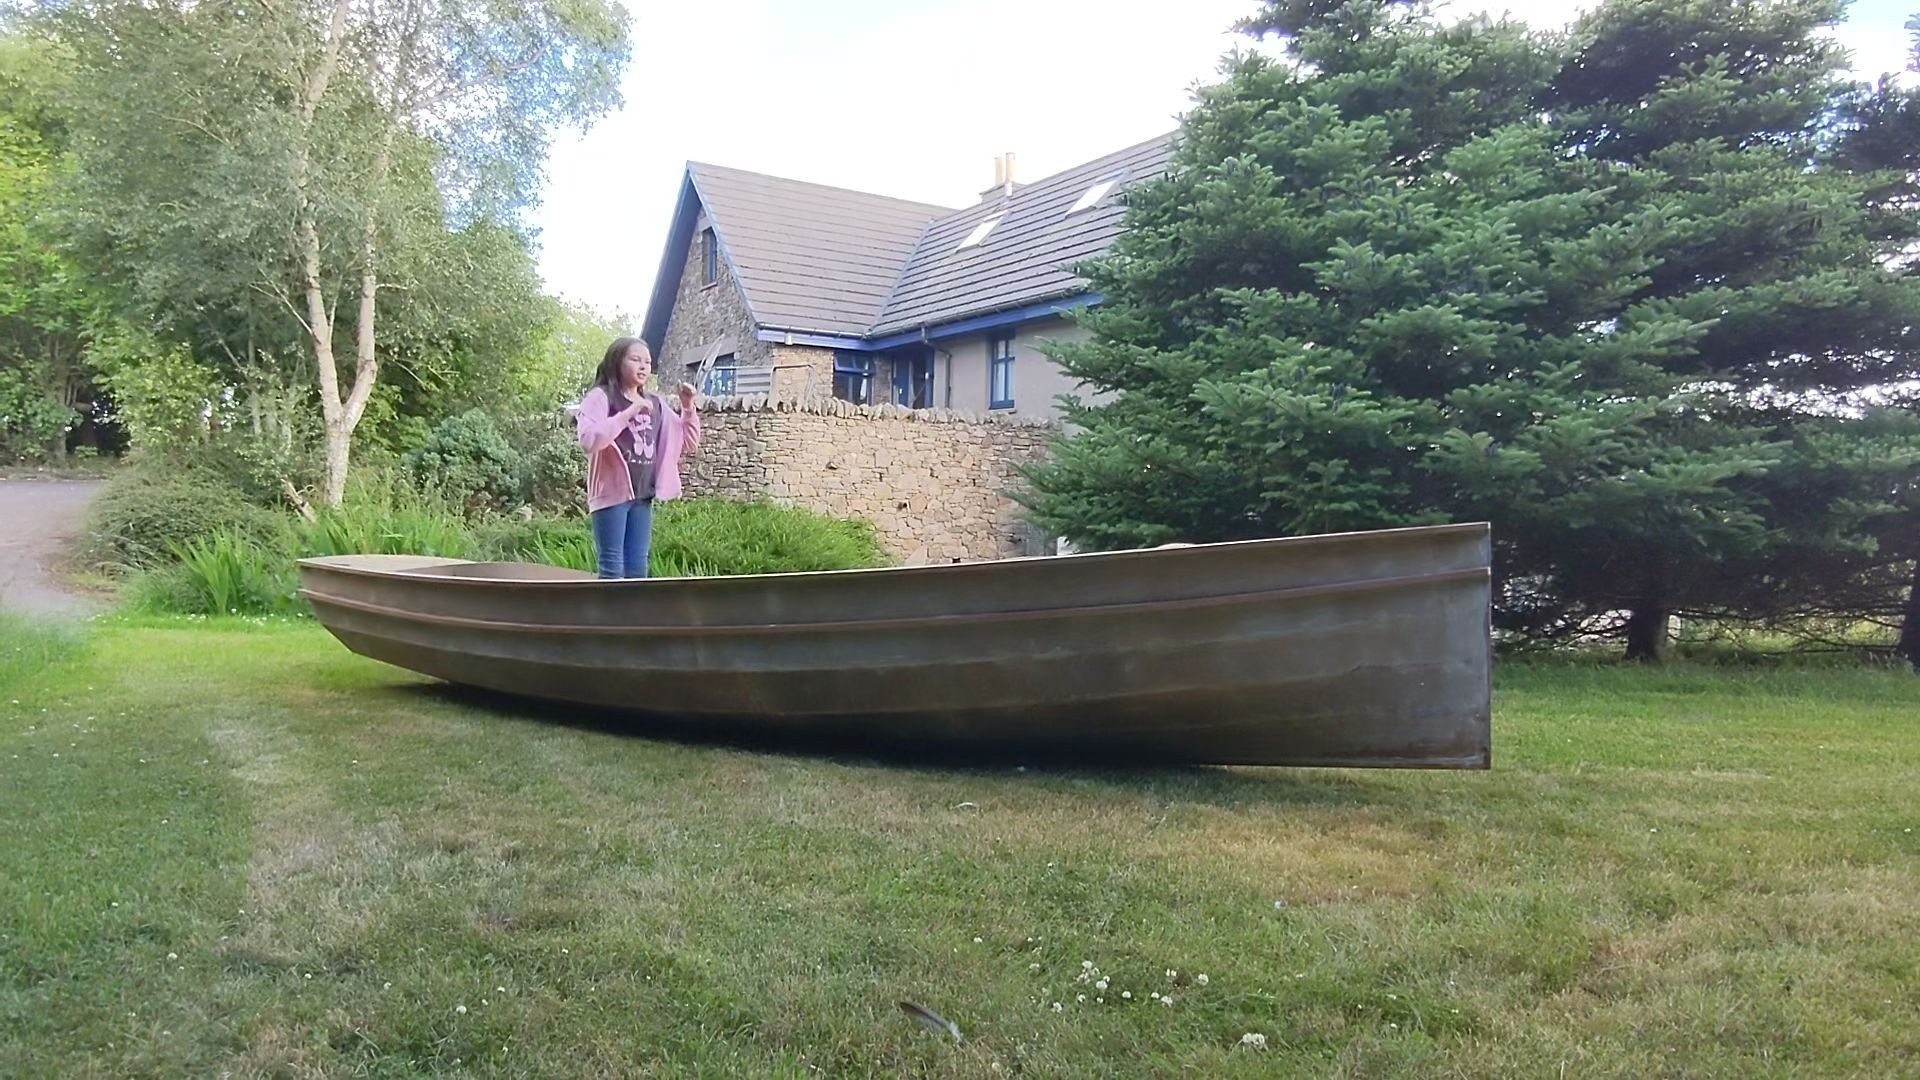
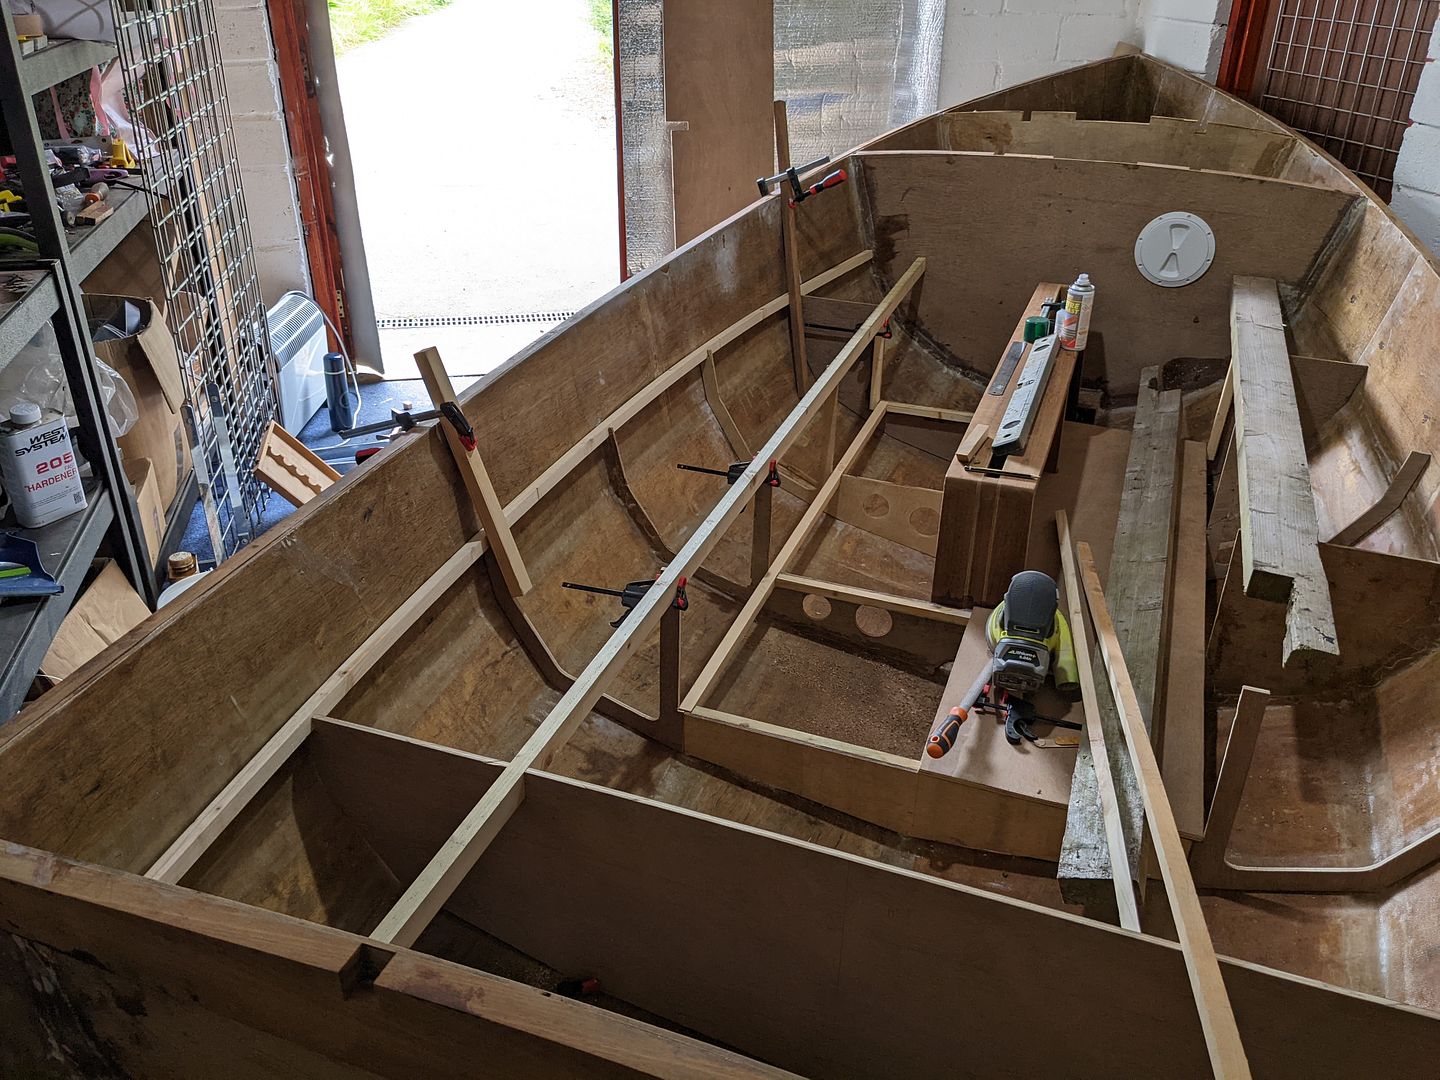
With the hull now approved by the daughter as adequate (to quote her "Ok, I'll come sailing, but I still don't really want to help much with the building") I can start filling in the missing frames inside the cockpit area. Sometimes it's easier to just cheat, and I like easy, so I made more templates for the frames from wooden spatulas tacked together with superglue.
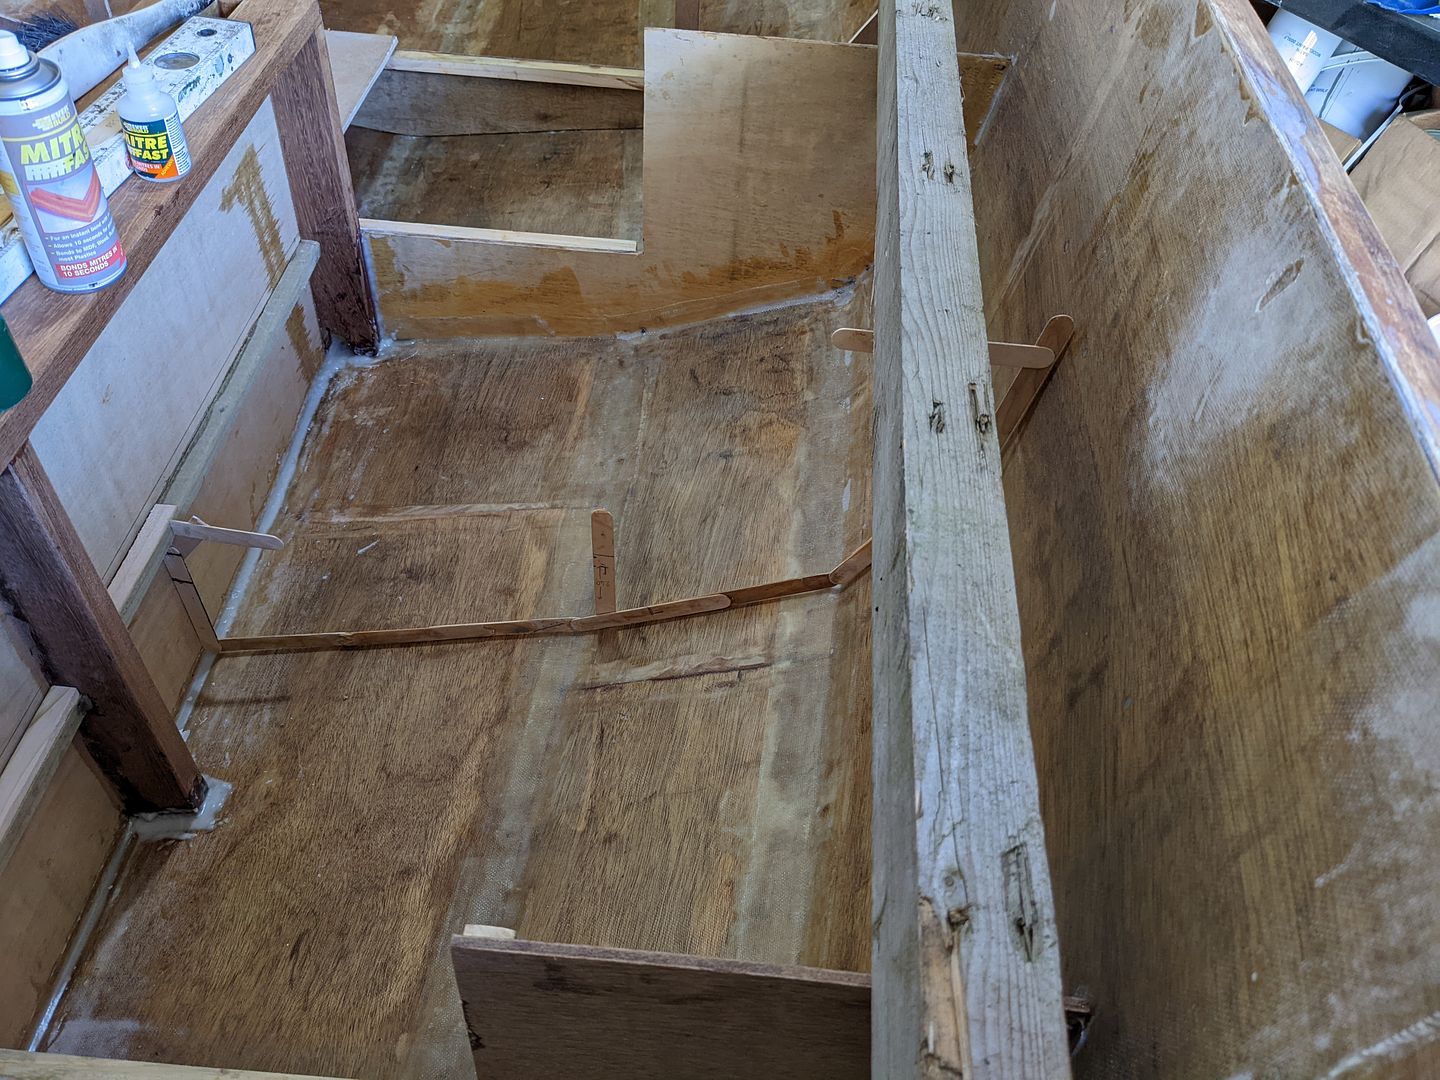
The frames I'm adding now will be in storage areas under the thwarts which I plan to hinge and make splash-proof with rubber strip seals. To make these spaces useful, the intermediate frames here are hollowed out. Strip wood will be added for gluing surface area where appropriate in due course.
The ballast tank still needs sides as well as coated fully with epoxy on the inside to protect the wood from rot, but just in case I forget I cut out the holes to help them flood and drain better. There are mouseholes at the bottom but I'll add some vent holes to let the air out at the tops of these frames after the gluing surface area strips are in place.

Obviously I'm not using grotty old 2x4s for thwarts, but these are actually straight so I've used them to help mock up the interior.
First of all, the interior of the boat is now fibreglassed. It's a messy job and involves very floppy fabric, so it's something I'd been putting off although I wanted it out of the way before moving on further with the internal bits and pieces.
Fibreglass is optional on the Campion Apple design. You do have to tape the seams, but actual glassing is discretionary. It's popular to glass the outside for abrasion resistance. It's going to be scraped on things - that's just a fact - so fibreglass on the outside helps protect the wood. It's often thought that fibreglassing the outside adds strength to the boat, which is partially true but is only really relevant if the plywood is whacked from the inside e.g. a heavy adult thumping down trying to avoid falling over. If we want to improve the hull's resistance to being punctured or stove in by hitting a stone for instance, the plywood will almost always fracture on the inside as the inner plies fail under tensile load. Therefore to improve puncture resistance from striking something outside the boat, it's actually the inside surface you need to fibreglass. So I have done both inside and outside. FYI, with the pound slumped against the US dollar, a 6kg pack of West Systems 105/205 or 206 epoxy is now up to £148 once the VAT is added...
Anyway, with the inside glassed, I was able to glue in the daggerboard case at last.
I left the epoxy fillets on the inside overnight to cure, then flipped the hull upside down on the grass to fair the case into the hull before squeezing epoxy thickened with milled fibres again into any gaps remaining.
That had all day to cure and last night my daughter came to help me get the trolley back under the boat. Before doing that though, I wanted to build her confidence a bit. She was there at the beginning helping drill holes and fish tie-wraps through while I held big long wobbly plywood boards in place. Both she and her younger sister have had an impression that this thing is very flimsy, since it definitely was at the beginning. To show her how robust it was now it was fully glassed inside and out and had the gunwales on, I encouraged her to jump up and down in it. She's a careful child and not one to wreck everything they touch. Neither of my daughters break things. She's also been a ballet dancer for the last 7 years so even her jumping is lightly landing on the balls of her feet rather than crashing down on heels. The way I look at this is that a) if I didn't have total confidence in what I've built I wouldn't have told her to jump in it and b) if somehow I got that totally wrong and a small-for-her-age lightly-footed kid went through the bottom of it, then I don't want to go out on the water in it!
With the hull now approved by the daughter as adequate (to quote her "Ok, I'll come sailing, but I still don't really want to help much with the building") I can start filling in the missing frames inside the cockpit area. Sometimes it's easier to just cheat, and I like easy, so I made more templates for the frames from wooden spatulas tacked together with superglue.
The frames I'm adding now will be in storage areas under the thwarts which I plan to hinge and make splash-proof with rubber strip seals. To make these spaces useful, the intermediate frames here are hollowed out. Strip wood will be added for gluing surface area where appropriate in due course.
The ballast tank still needs sides as well as coated fully with epoxy on the inside to protect the wood from rot, but just in case I forget I cut out the holes to help them flood and drain better. There are mouseholes at the bottom but I'll add some vent holes to let the air out at the tops of these frames after the gluing surface area strips are in place.
Obviously I'm not using grotty old 2x4s for thwarts, but these are actually straight so I've used them to help mock up the interior.
Arnold Cunningham said:
I did very similar template making when I built my boat. Just slightly bigger sticks:
Disastrous said:
Still following this with a mixture of envy and awe!
What a wonderful job you’re making of it. I’m very impressed.
What a wonderful job you’re making of it. I’m very impressed.
Huff said:
+1 ; what a joy this thread is!
Thanks everyone, that means a lot actually and like many construction projects, it can be a lonely thing at time and some interaction on forums does help me find the motivation to work through the bits which are less fun.I have an update though

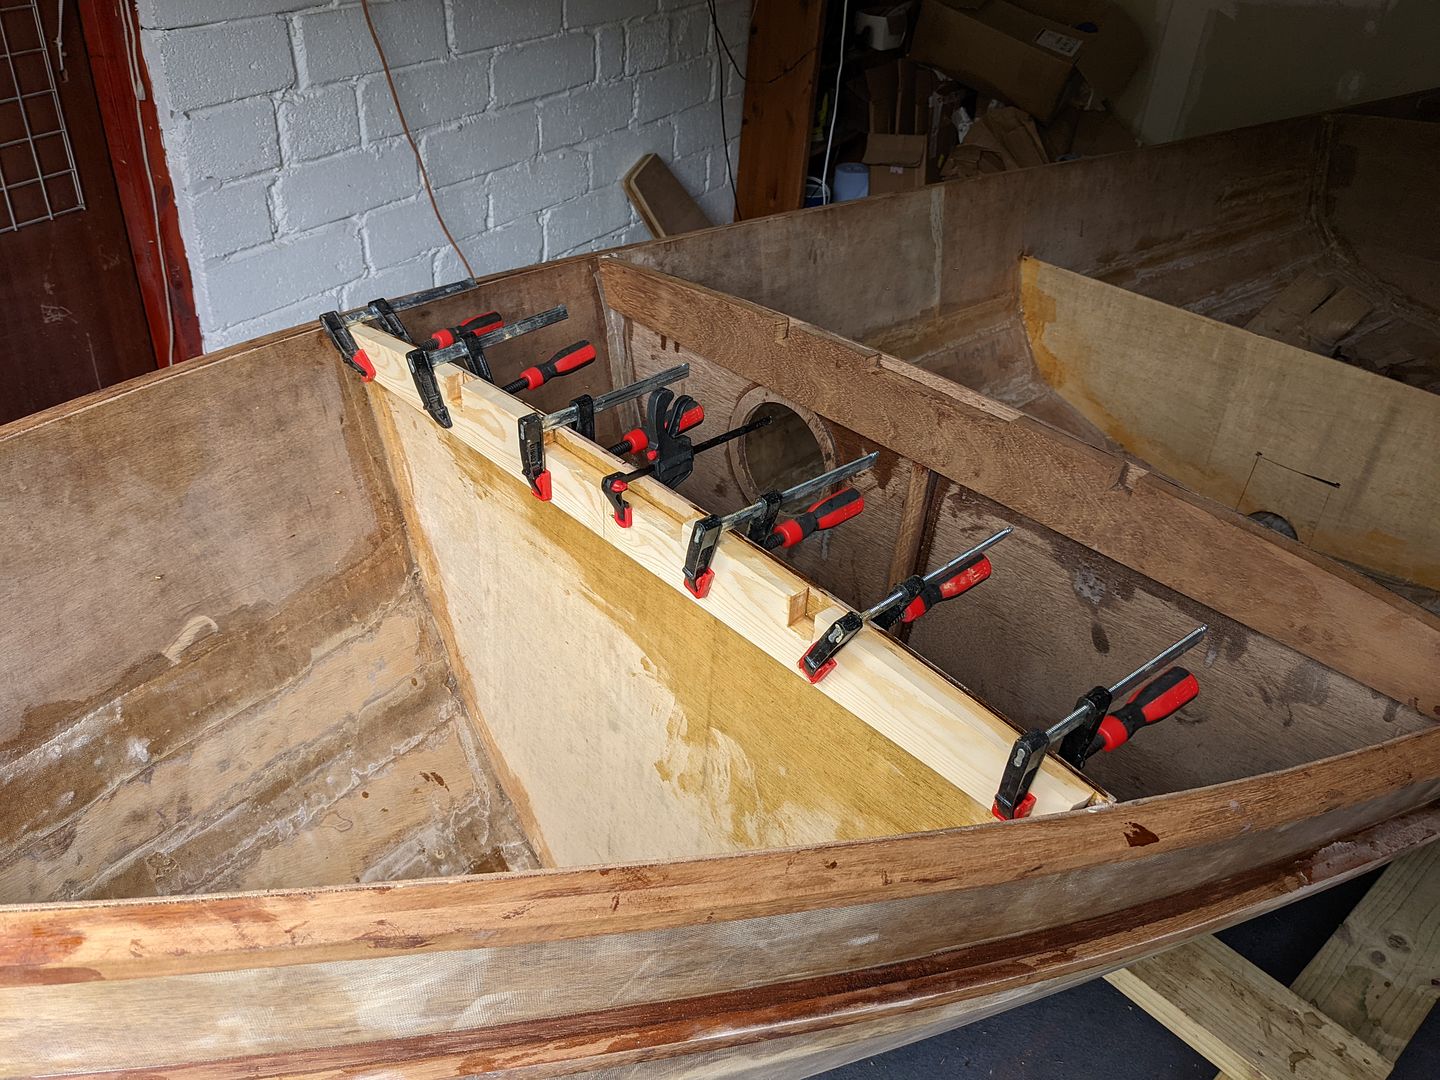
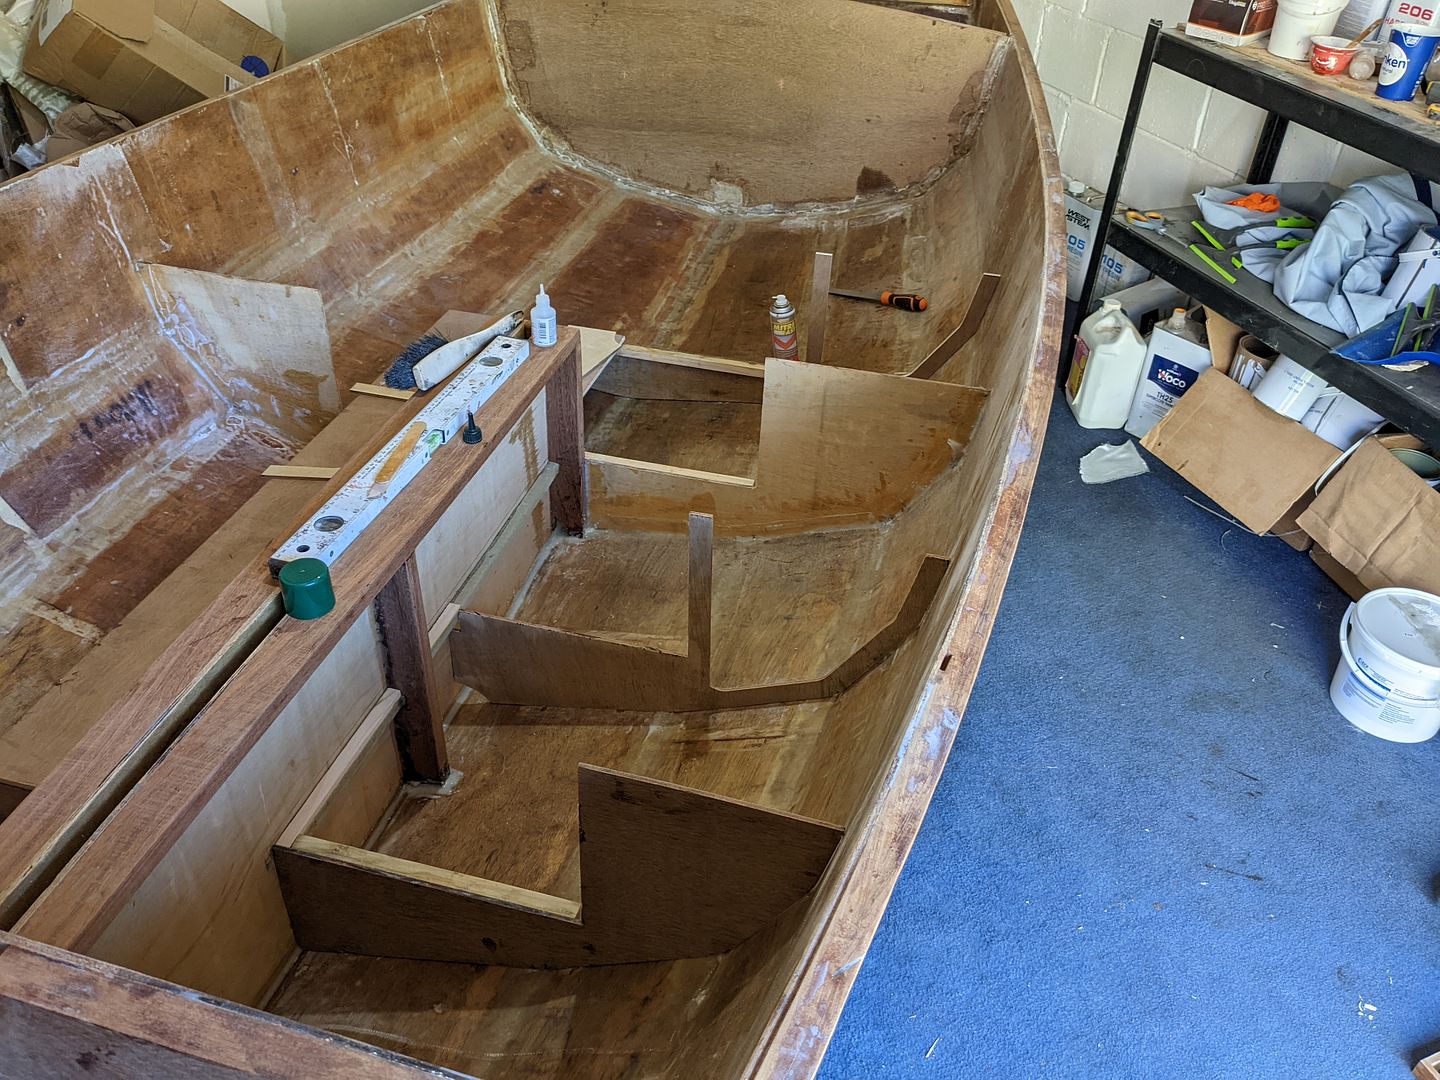
The really short version would be "I've been working with sticks again" but it's actually been a good 6 hours work milling down softwood (and replacing the blunt knives on my planer thicknesser), clamping things up, marking out lines and measurements, cutting notches out of all the frames etc but I feel like I've made some worthwhile progress even if it doesn't look like much.
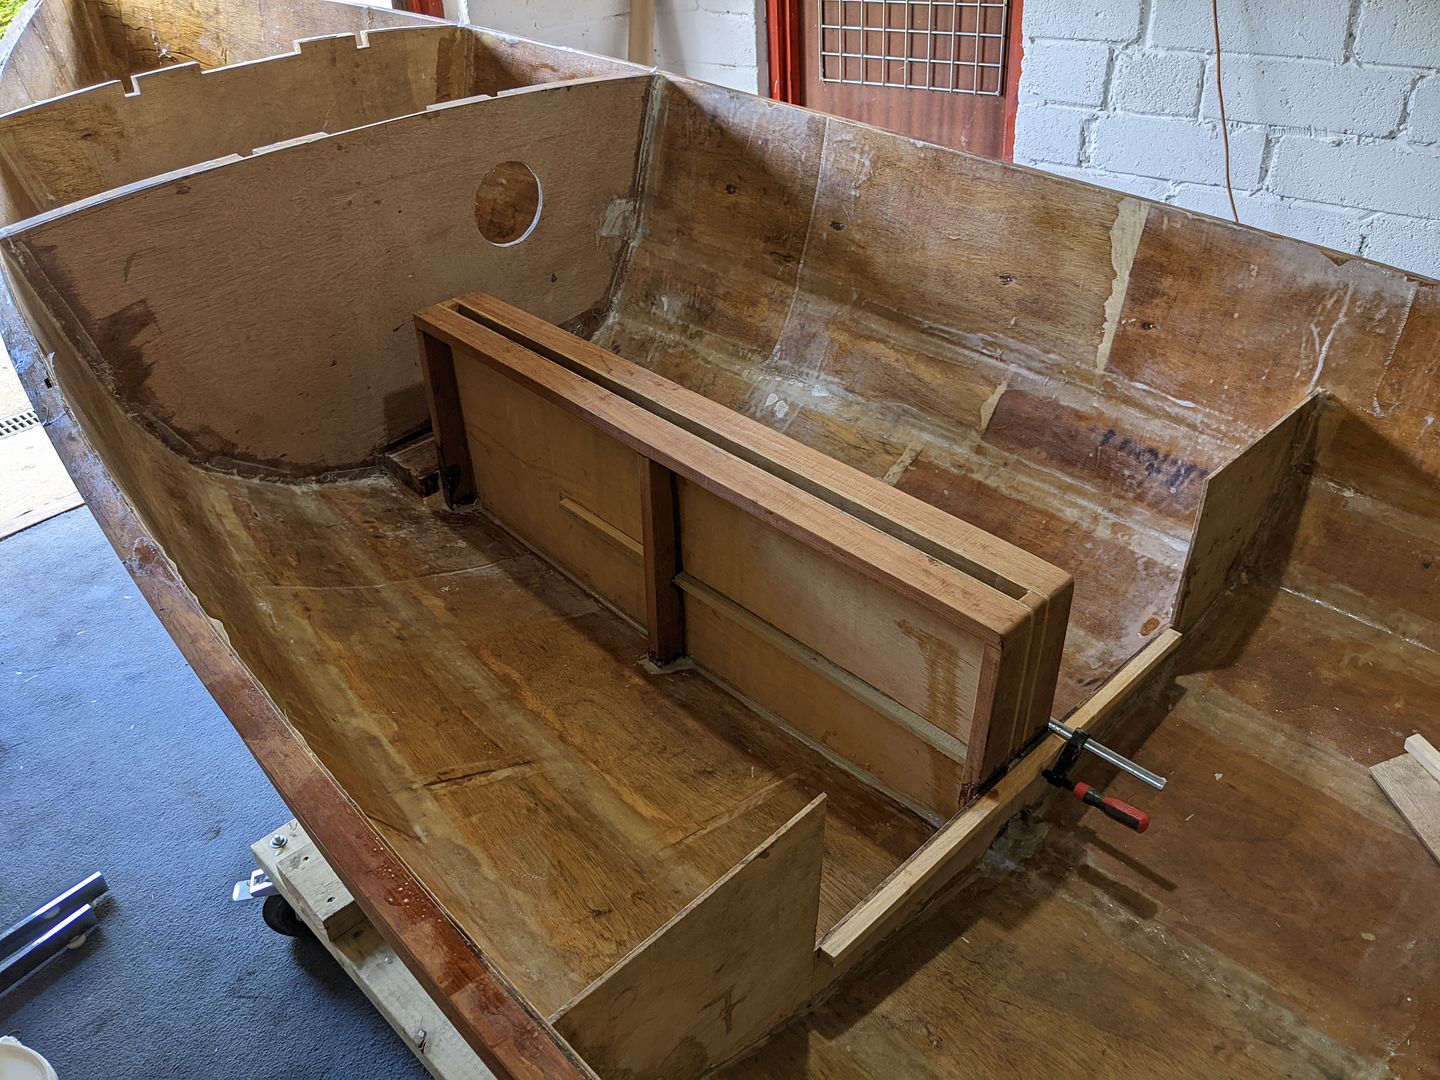
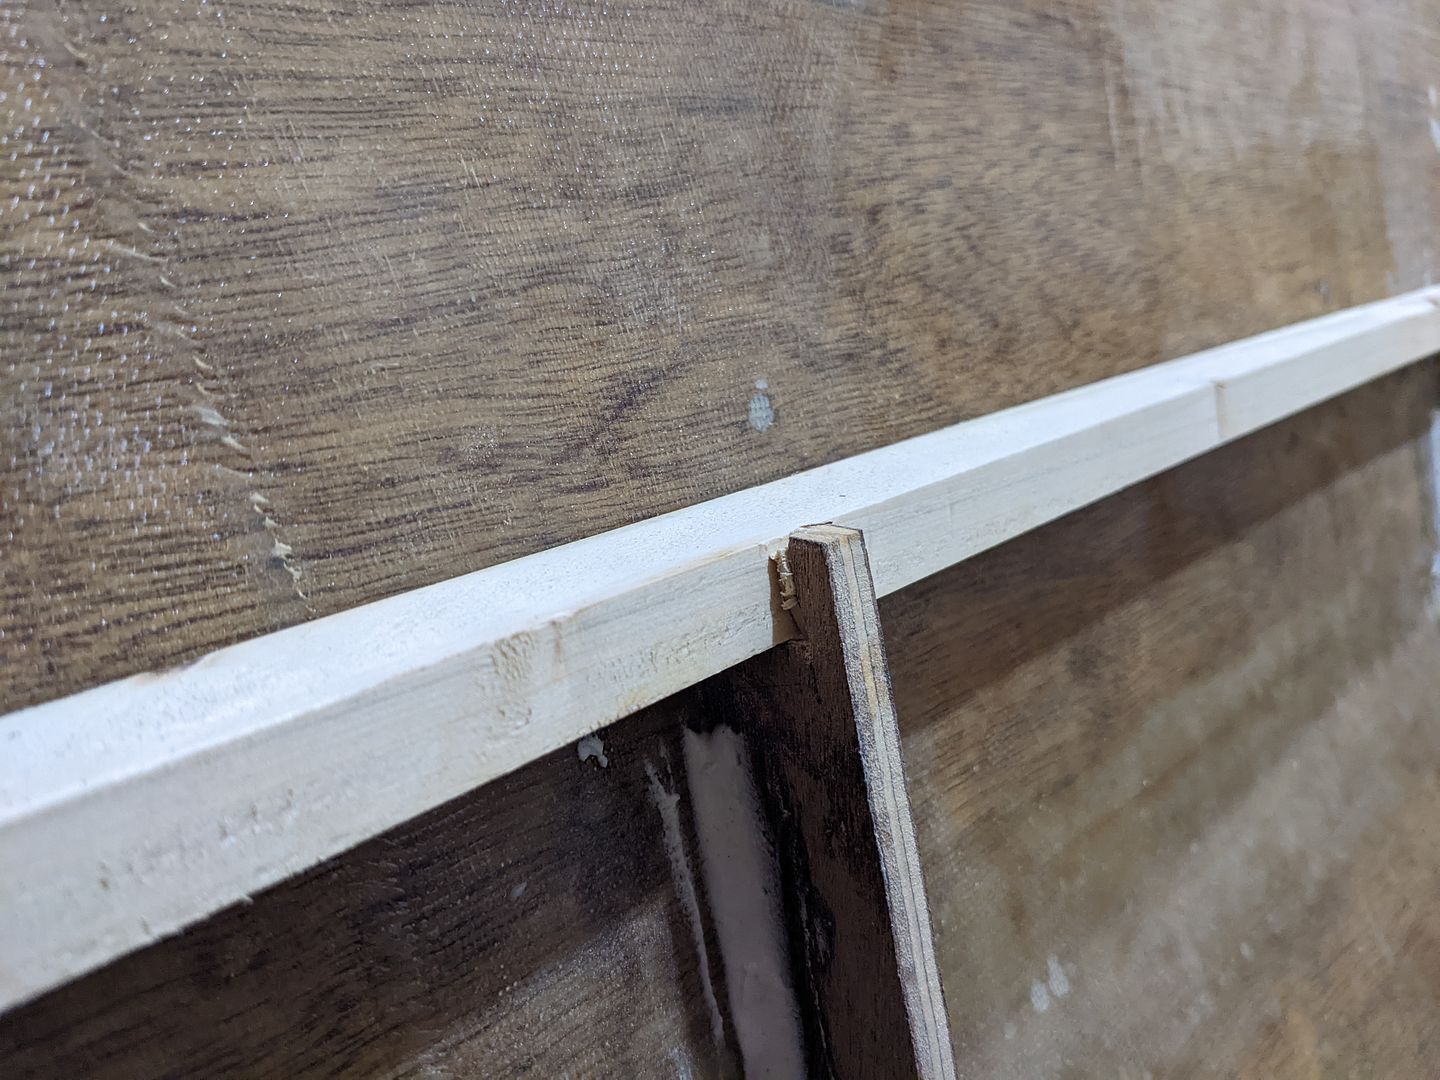
I deliberated/procrastinated over these as they need bevelled one way or another. I decided to fit them as square sections and bevel the top off horizontal. I haven't done the last part yet...
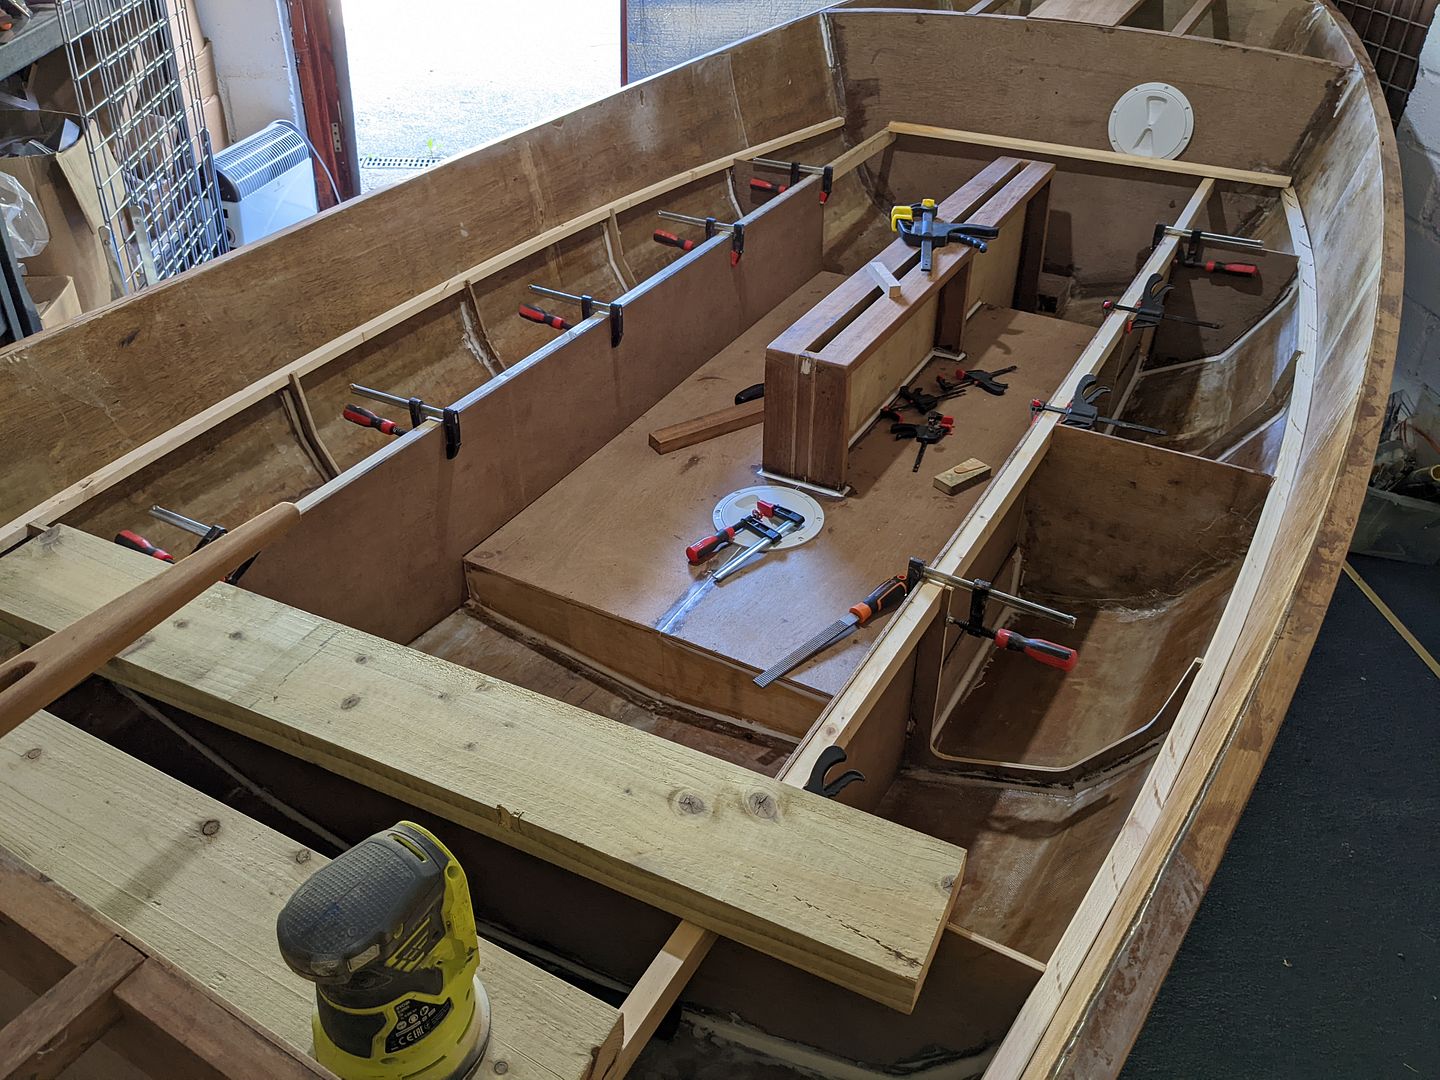
Some time later I'd cut out notches in each of the frames for a 20mm x 20mm strip along the outboard edge to support the thwarts and a 30mm x 20mm strip along the inside edge. Likewise, a 20mm x 20mm strip was laid in along the edges of the ballast tank. None of these parts are glued in yet, and the outboard strip is only very approximately clamped so the chasms visible will go when it's time to fit them permanently.
I need to box in the ballast tank but everything was moving just a little too much for my liking.
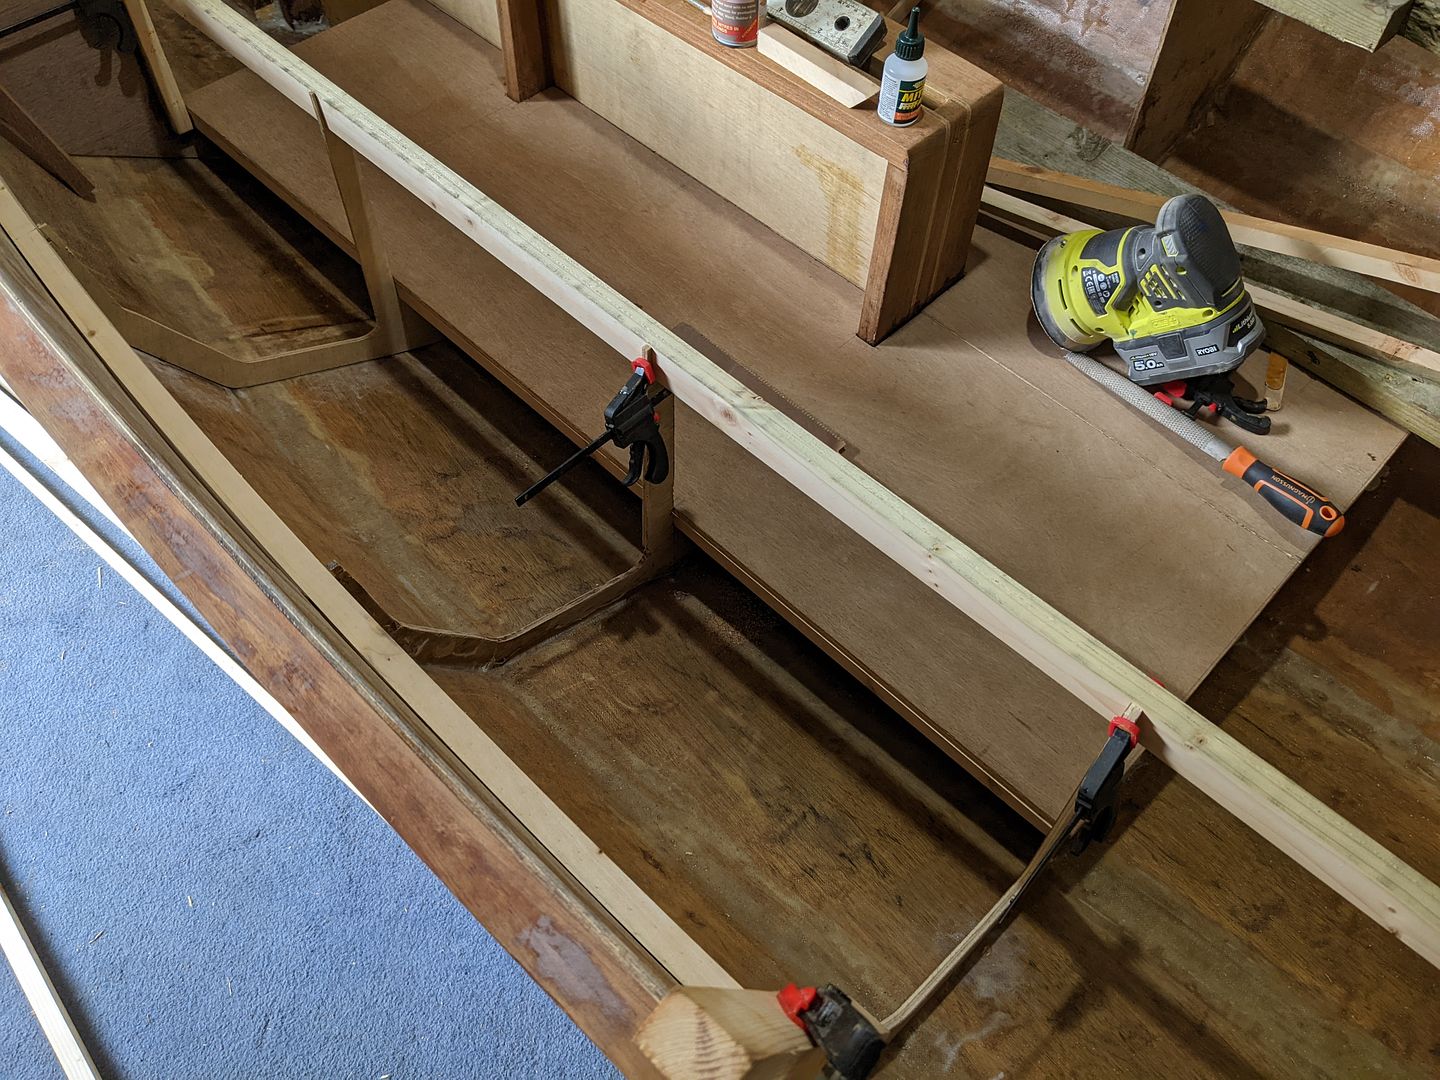
Crossing fingers that I remembered the essentials (actually I can still chain drill and rasp out anything I might have forgotten) I decided to just go for it and have glued in all the frames properly. Once this has cured I can measure up the gaps between to close in the ballast tank and the thwarts which are going to have dry(relatively) storage underneath them.
Our 17th wedding anniversary happened the other day, and as a surprise gift my wife had these made for me
Thanks for looking in!

Huff said:
This looks great fun, and wholly achievable as a home build - wish I had the space! Lovely thread and updates so far, much like.
Thanks for reading, and you're right, I'm loving this. I sincerely hope this isn't my last boat. I only wish the price of wood was much lower!Apparently one of these has been built in only a single car garage but whilst that's where mine is currently kept I do have the 75ft outbuilding where usually the cars live to lay out sheets of plywood and run boards through the planer thicknesser etc. It's a little inconvenient when I have to start up the XJ-S to move it outside left it get covered in saw dust, but I'm in a very fortunate position so I always try to keep a positive view on it.
Work space was a very big factor in choosing where to live and my wife supported that. Whereas so many of my colleagues lost their livelihoods and homes following the oil price crash in 2015 I managed to keep mine even if things have been tight since. I got off lightly!

Brother D said:
Great Build!
I've been following this guy for ages - he does give some excellent tips but you look almost 90% completed already: )
I follow a number of boat channels on YT but have never seen that one - I'll give it a look. Thanks!I've been following this guy for ages - he does give some excellent tips but you look almost 90% completed already: )
As for my own boat, I goofed. I didn't try the tank fill test as it became obvious straight away that I'd missed a seam on top, so today between other household responsibilities which have dominated, I faffed about for a while squeezing glue into the bit I'd missed and filleted it from the inside with my arm inside the access hatch. I did some power sanding of the lower rubbing strips too. They've needed attention for weeks now but it's a very messy job so I moved it outside to do it.
Today's photo shows no obvious progress and a rather dirty Jag that needs a good clean. It's been outside for the past few days since the weather has been nice, but it's ended up covered in crap anyway and may as well have stayed in the big shed where I was industriously hacking marine ply, iroko and softwoods to pieces inside. It wouldn't have ended up much dustier!
[img]
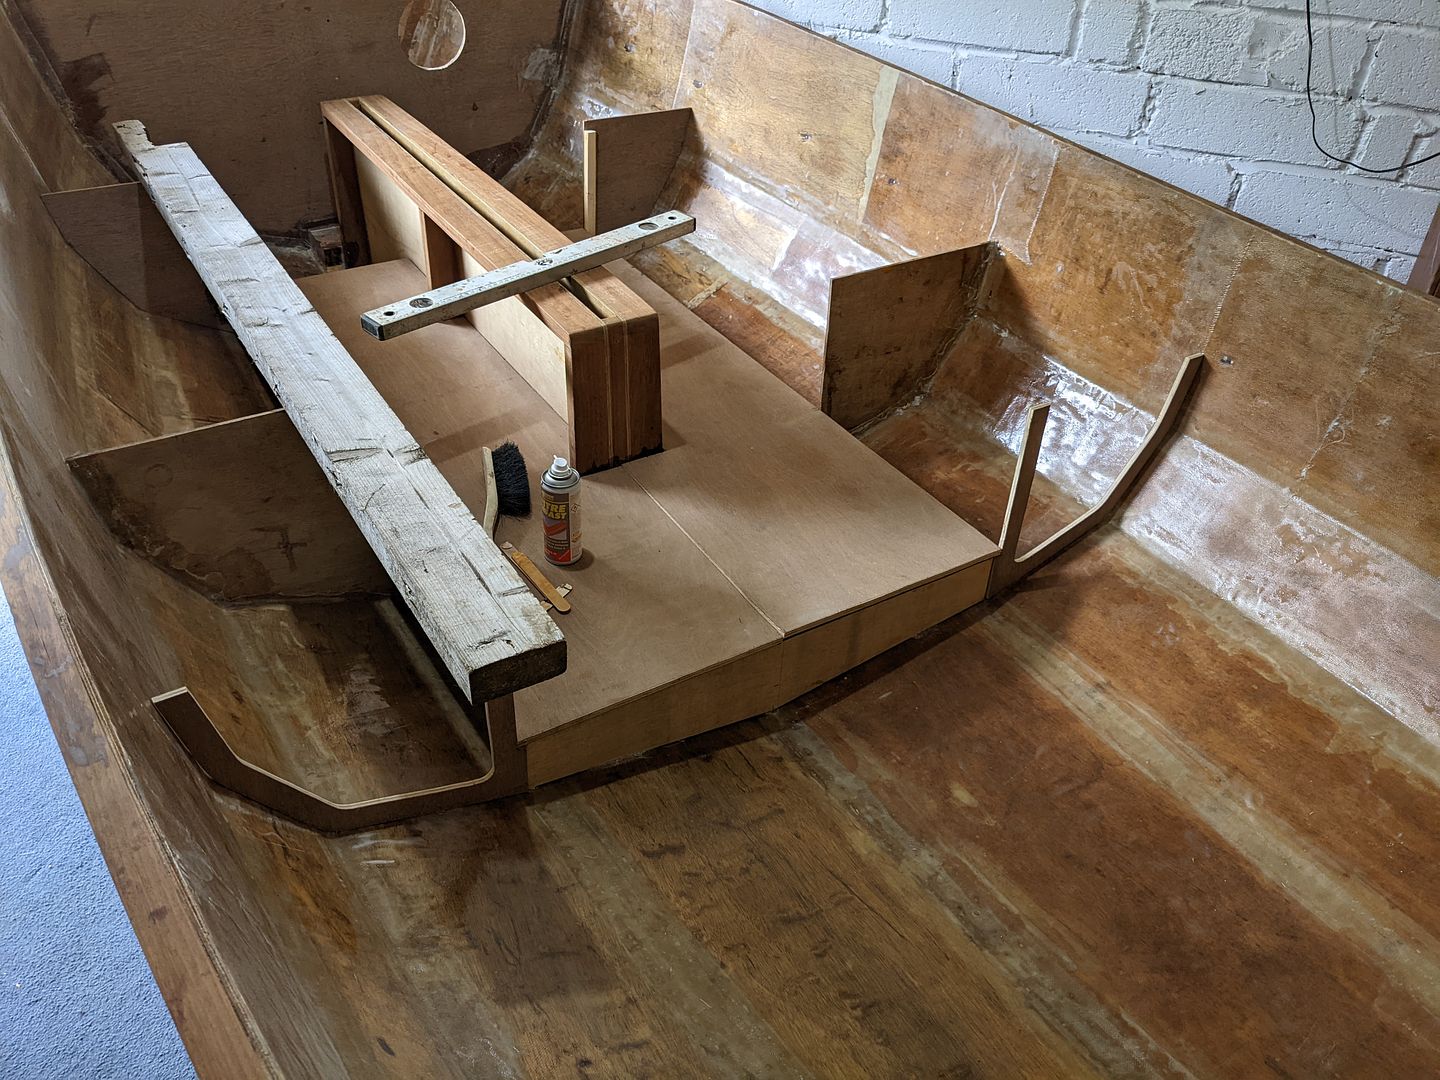
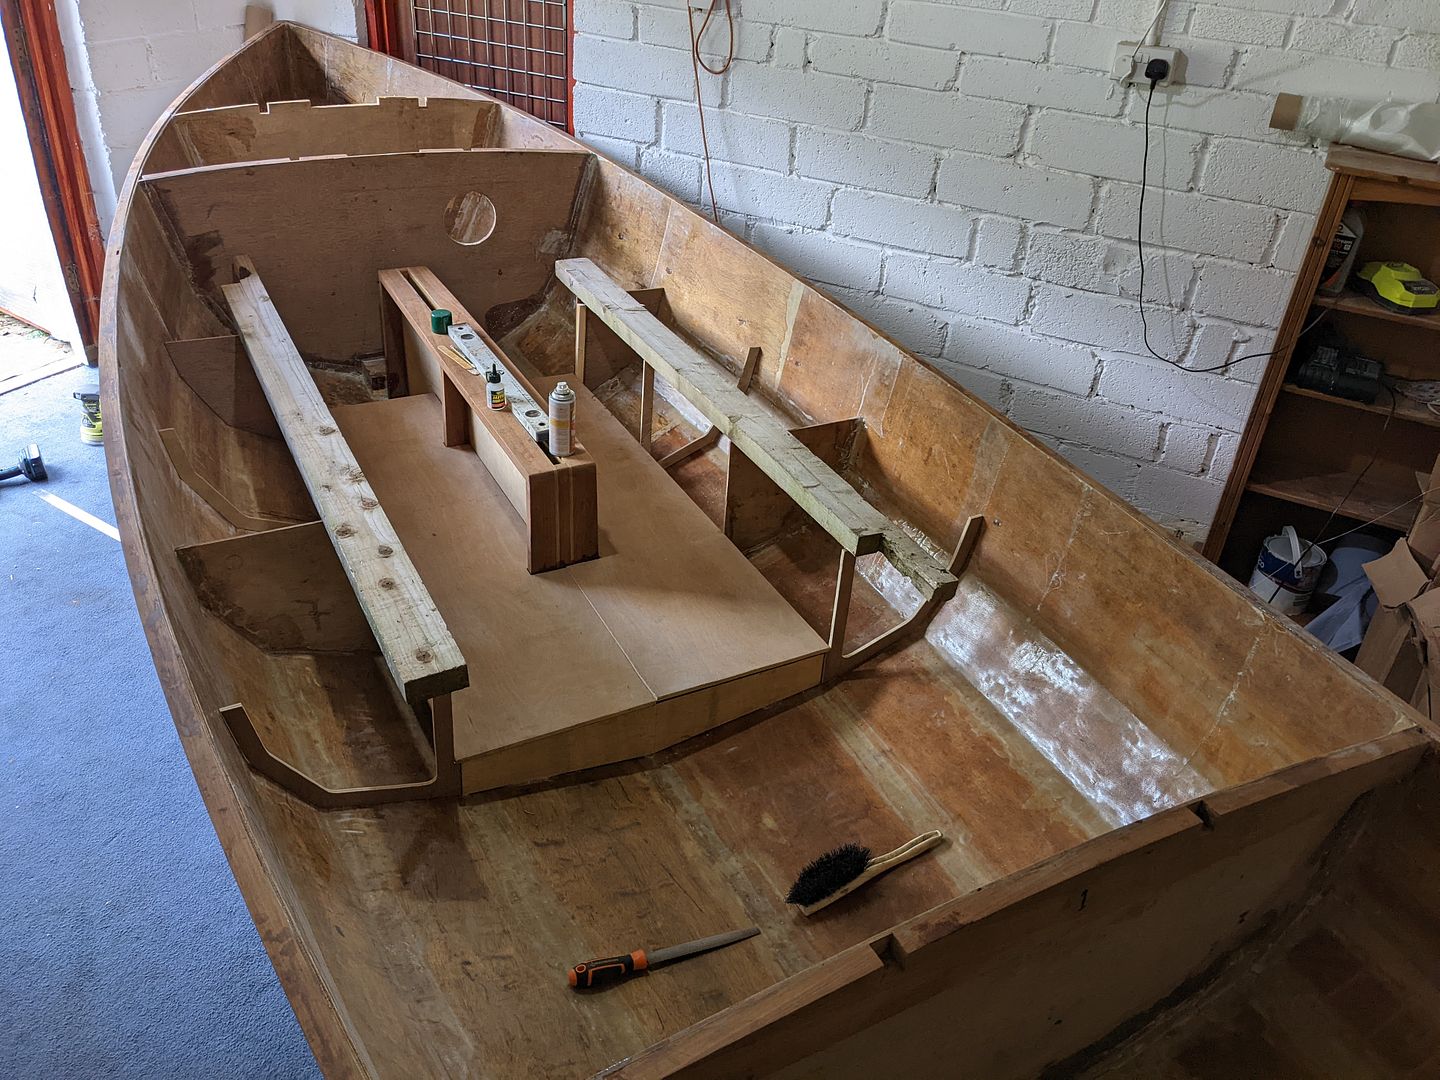
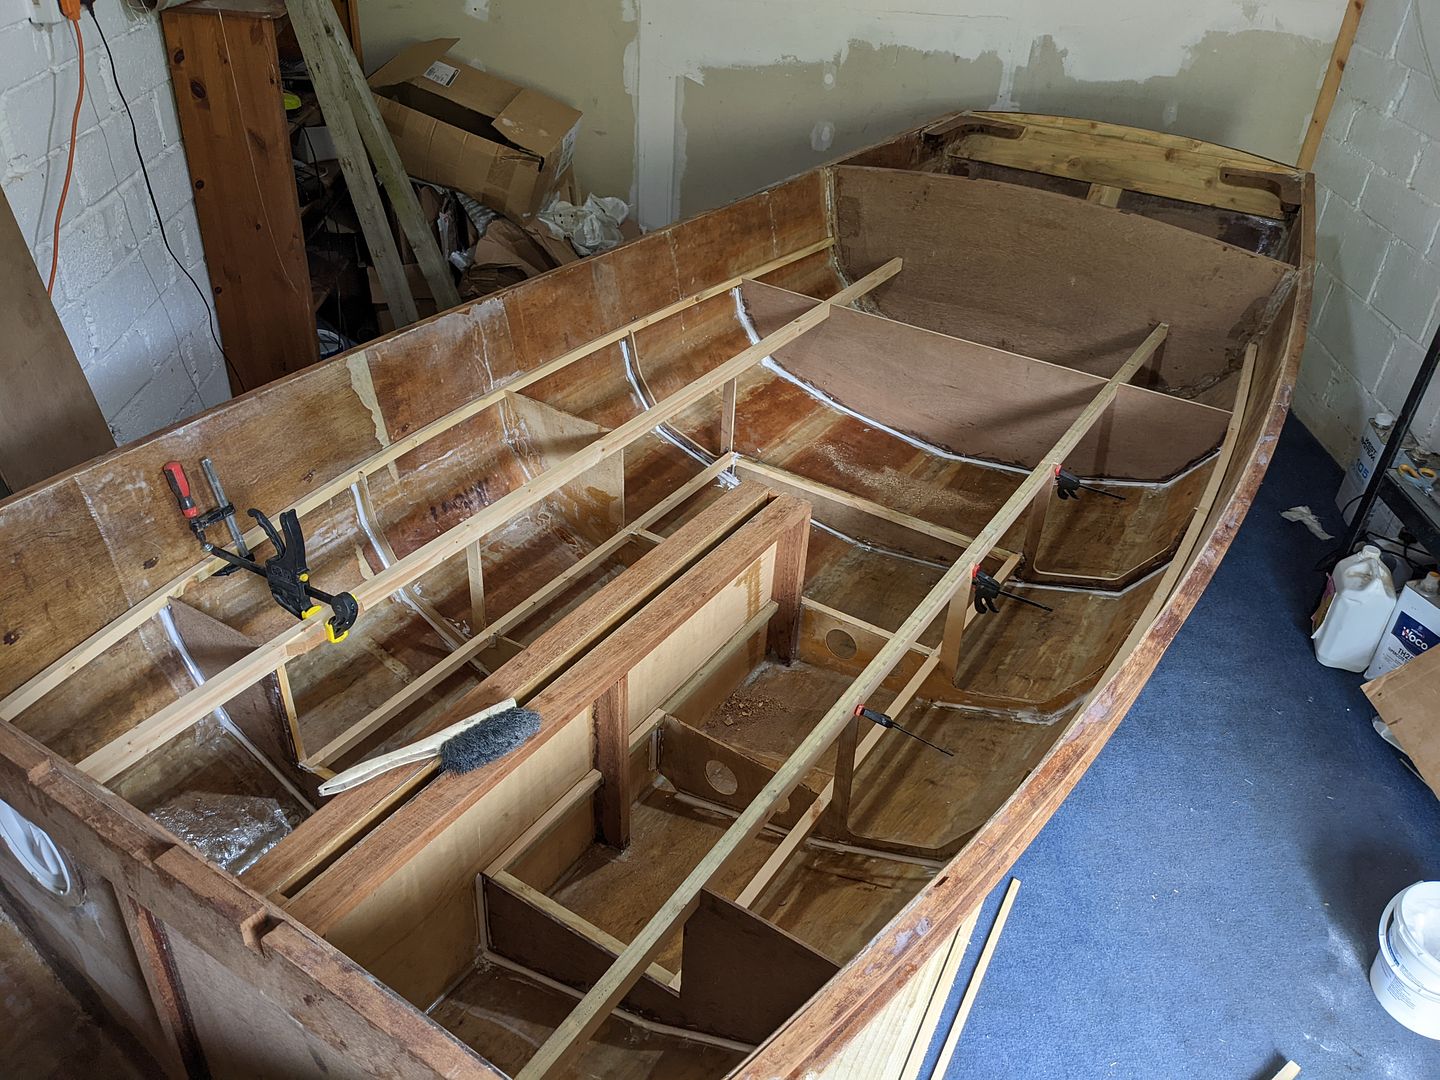
I cut out the vertical bulkheads under the thwarts which will box in the lockers. They haven't been glued in yet.
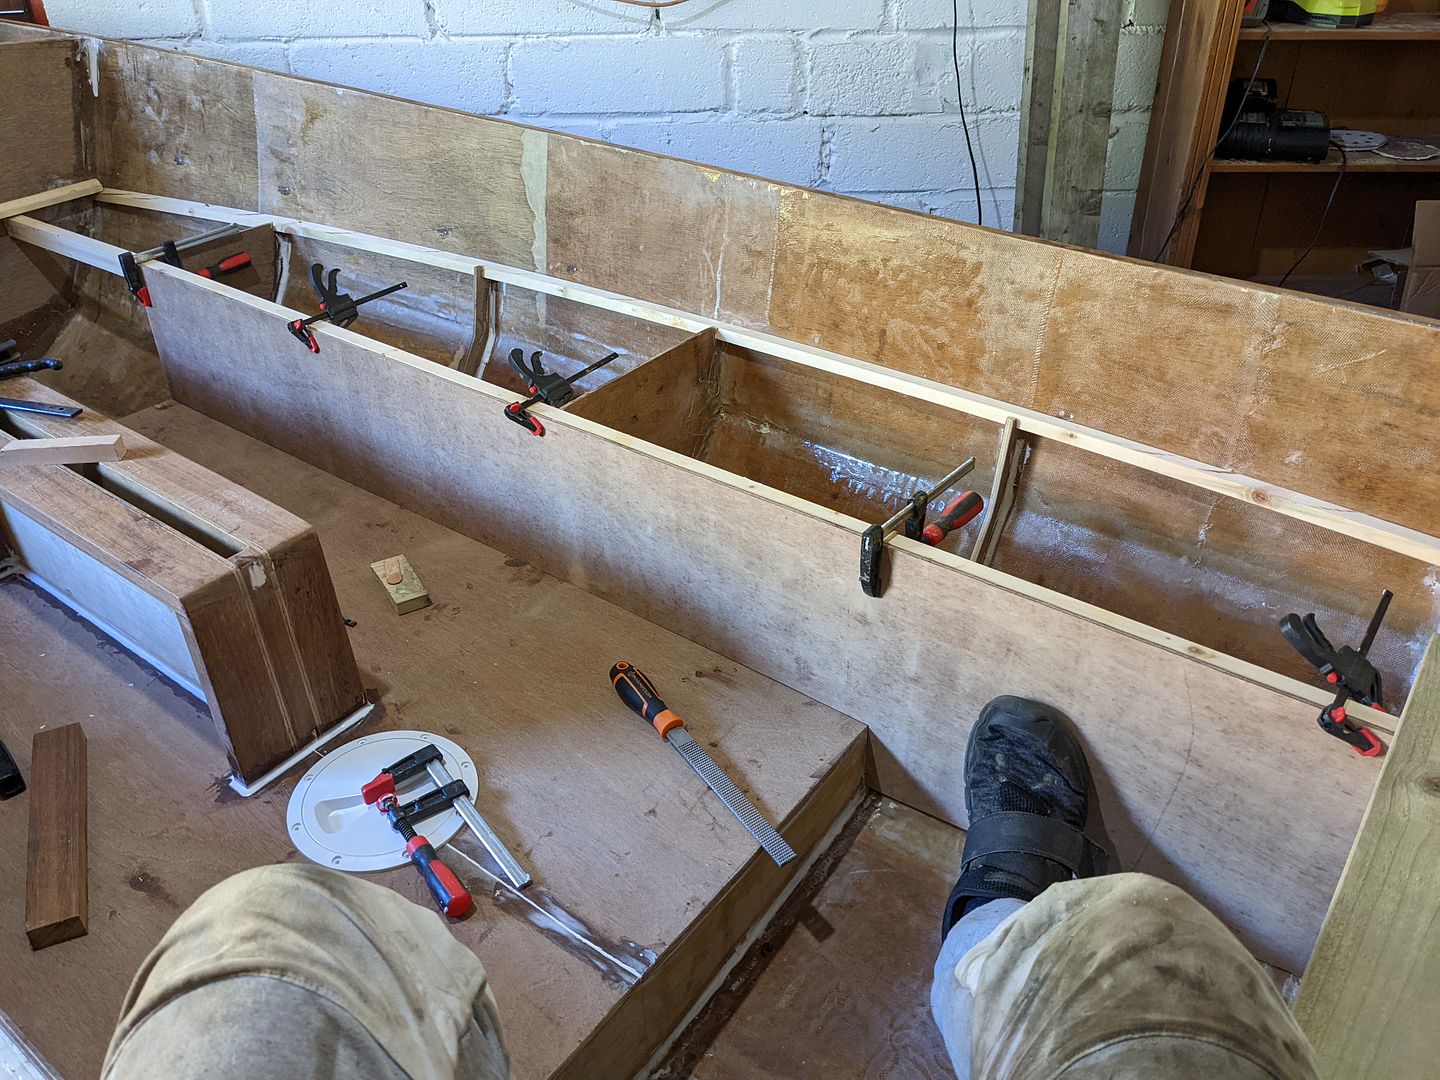
I also cut the bevel on the stringers which will support each thwart. My more experienced betters will notice that I failed to allow for this properly when I cut the notches in the frames, and because of this I'll need to add little wedges to push the stringer outboard against the hull properly.
I also cut the bevel on the stringers which will support each thwart. My more experienced betters will notice that I failed to allow for this properly when I cut the notches in the frames, and because of this I'll need to add little wedges to push the stringer outboard against the hull properly.
rolster said:
Hi, it's all coming along nicely. From my own experience many years ago after renovating a wrecked Cherub dingy, I would recomend having a look at your trailer and seeing where the rollers and supports will be and reinforcing the areas corresponding to them within the boat. After a race to get the Cherb together, I had two issues on putting the boat in the water that were no immediately apparant until i came to the first tack. No 1 being i had not left enough room between the sheets and the tiller arm to get through. Then once capsised i found out the jouney of 300 plus miles on the trailer had released the bouyancy tank wood and battons from the inner hull wood and we sank stern first! fortunately i had chosen slack tide and a helpful harbour master towed me back to the ramp. The sheet issue was easy to fix as there were two sheet locking positions on the boom and i had chosen the boom end one so moved it to mid boom and that was that solved. then a trip to the chandlers and bought allot of cascamite and expanded the space between the hull and buoyancy tanks filling them up with the cascamite and then afterwards mixing it with sawdust from one of the boat builders trash cans nearby making some enlarged fillets on the inside of the bouyancy tanks to the hull. Two days later back in the water and having fun with a couple of lessons learned carried on to other boats afterwards.
Thanks! That's a very good point actually. I don't have a trailer yet, but I am regularly browsing the classifieds for a second hand one, and the designer of my dinghy certainly has strong views on trailers to avoid the sort of dramas you've experienced.The designer recommends a trailer which can have rollers to help the boat on fine enough but he insists it's better to support the hull from runners lined with carpet or similar under the chines and for a decent length of the hull rather than the weight being point-loaded along the keel as the trailer bounces and crashes through potholes.
To that end, I'm on the lookout for a trailer I can use as a basis to modify to suit my dinghy. I am going to glass tape over the filleted joints that weren't already glass taped before, since I don't really mind the extra weight but do want to have a strong dinghy.
Tangentially related is that I've acquired a decent combination road trailer and launching dolly. It appeared on Facebook market place 3 hours away. The seller was very nice and offered to arrange a family visit to a relative part-way and towed it there to meet me. I'm between cars with a towbar at the moment so my dad loaned me his car to collect it.

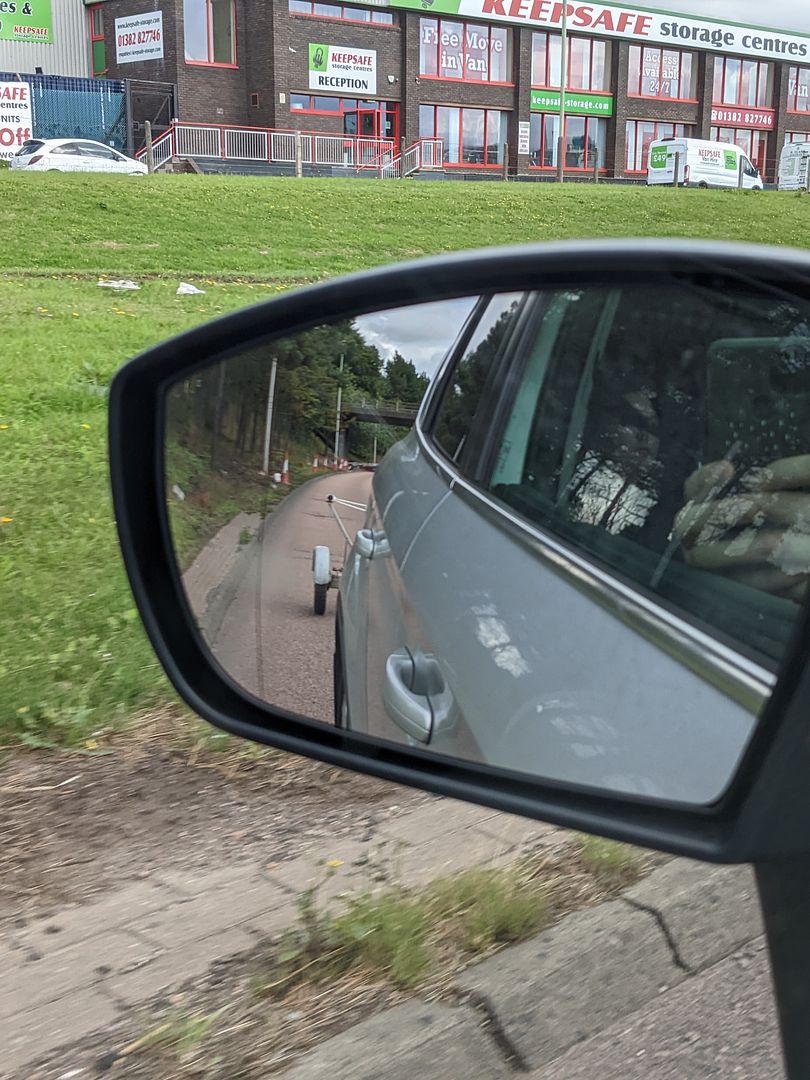
It's been a while since I've towed anything but it comes back quickly enough. We made the trip back without event and tried the boat on. As expected, the length suits the Campion Apple 16 well, and also as expected I have some cutting and welding to customise the hull supports to the boat. The designer recommends longer boards with carpet on top under the chines to support the hull over a larger area.
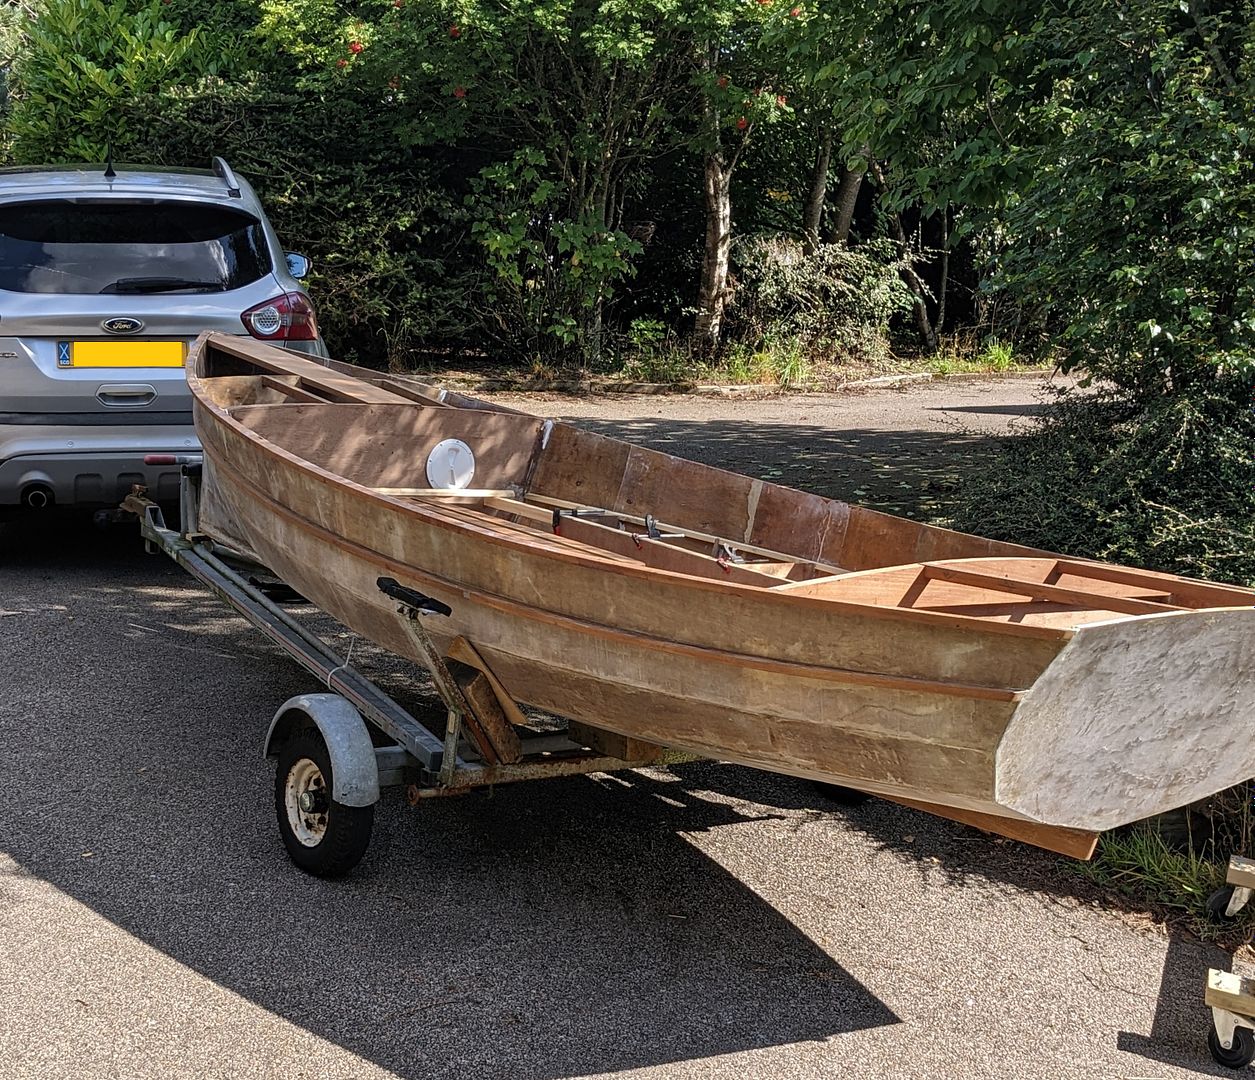
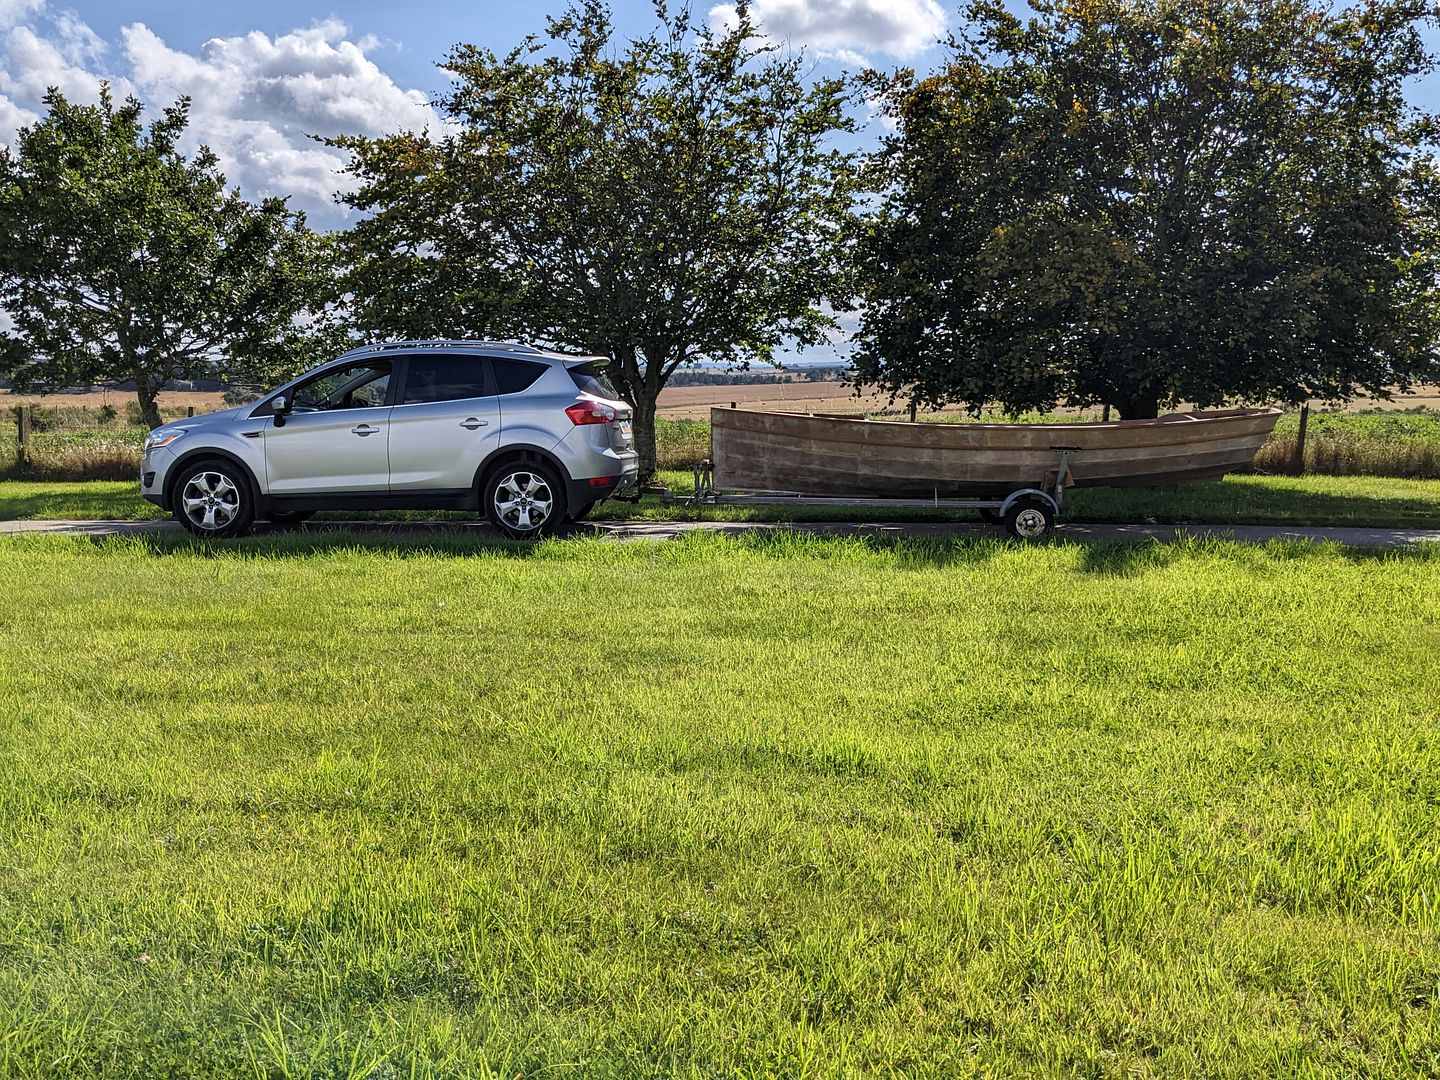
It's been a while since I've towed anything but it comes back quickly enough. We made the trip back without event and tried the boat on. As expected, the length suits the Campion Apple 16 well, and also as expected I have some cutting and welding to customise the hull supports to the boat. The designer recommends longer boards with carpet on top under the chines to support the hull over a larger area.
I'm ashamed to say I haven't touched the boat since my wife was in hospital in July. I've actually done nothing at all other than work and tile a friend's bathroom since summer - I just haven't had, well, I'm not sure what.
Anyway. I had had to defer a lot of leave from work and this meant I finished up on the 19th December. It's taken until yesterday to feel sufficiently motivated to do something practical, although my wife and I have booked ourselves onto a sail making course in Orkney this coming April which is a formal course with an online learning element to do before the practical week there in person. There will be 8 people on the course including us, and we're going to be constructing my two headsails there as the subject. The teacher says that providing I am happy with the odd wonky seam they will be perfectly serviceable, and it'll cost only the materials - about £250. I'm happy with that (and if I'm really not happy to take them I don't have to).
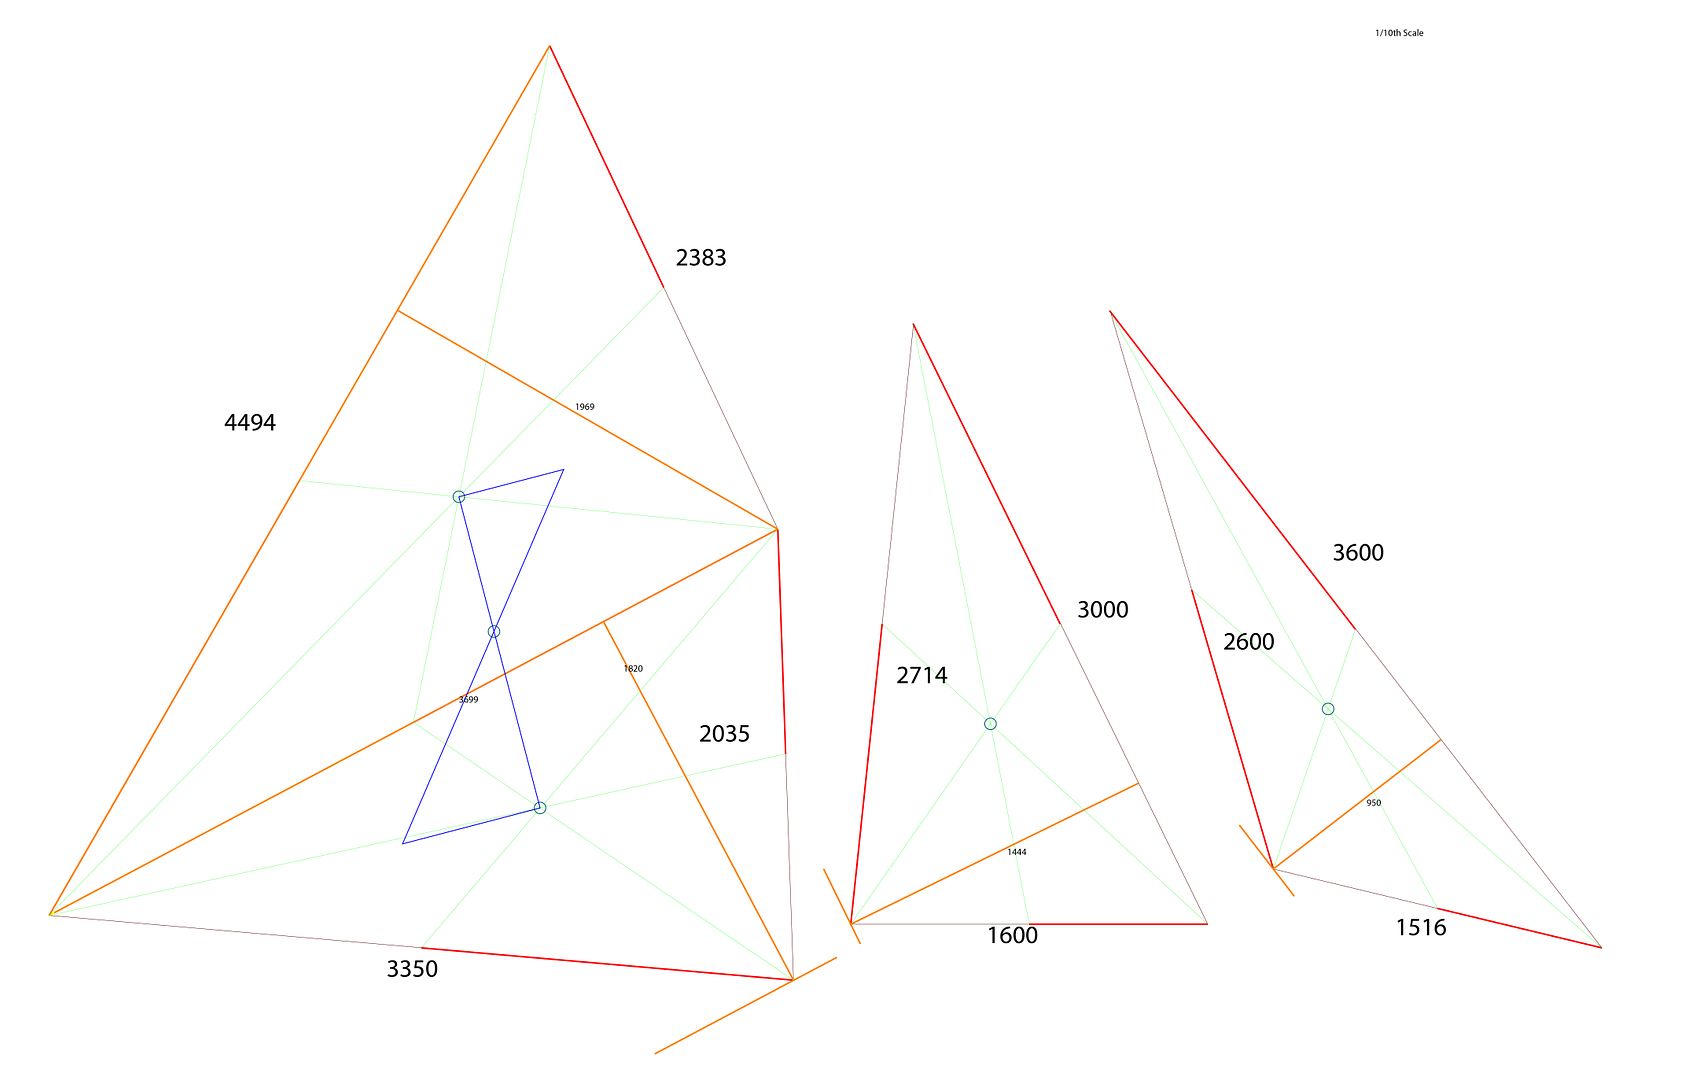
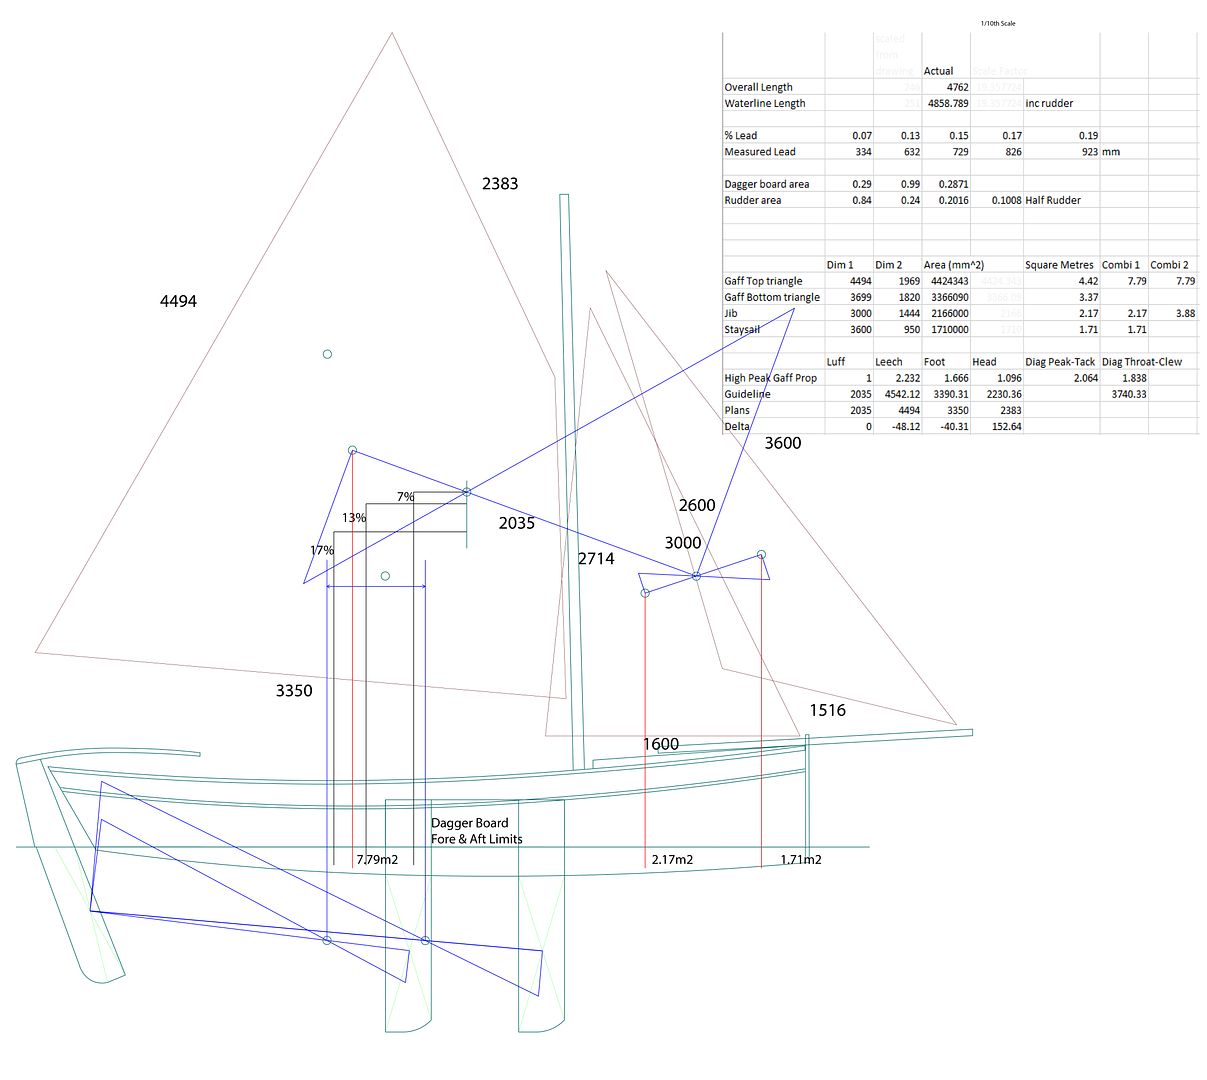
I have started the online learning on Boxing Day, because I really don't enjoy Christmas/New Year and I wanted to do something useful. I've been learning how to calculate my Centre(s) of Lateral Effort and, approximately, Resistance. The designer of the boat obviously already did this but I'm enjoying learning stuff I expect most reading already know.
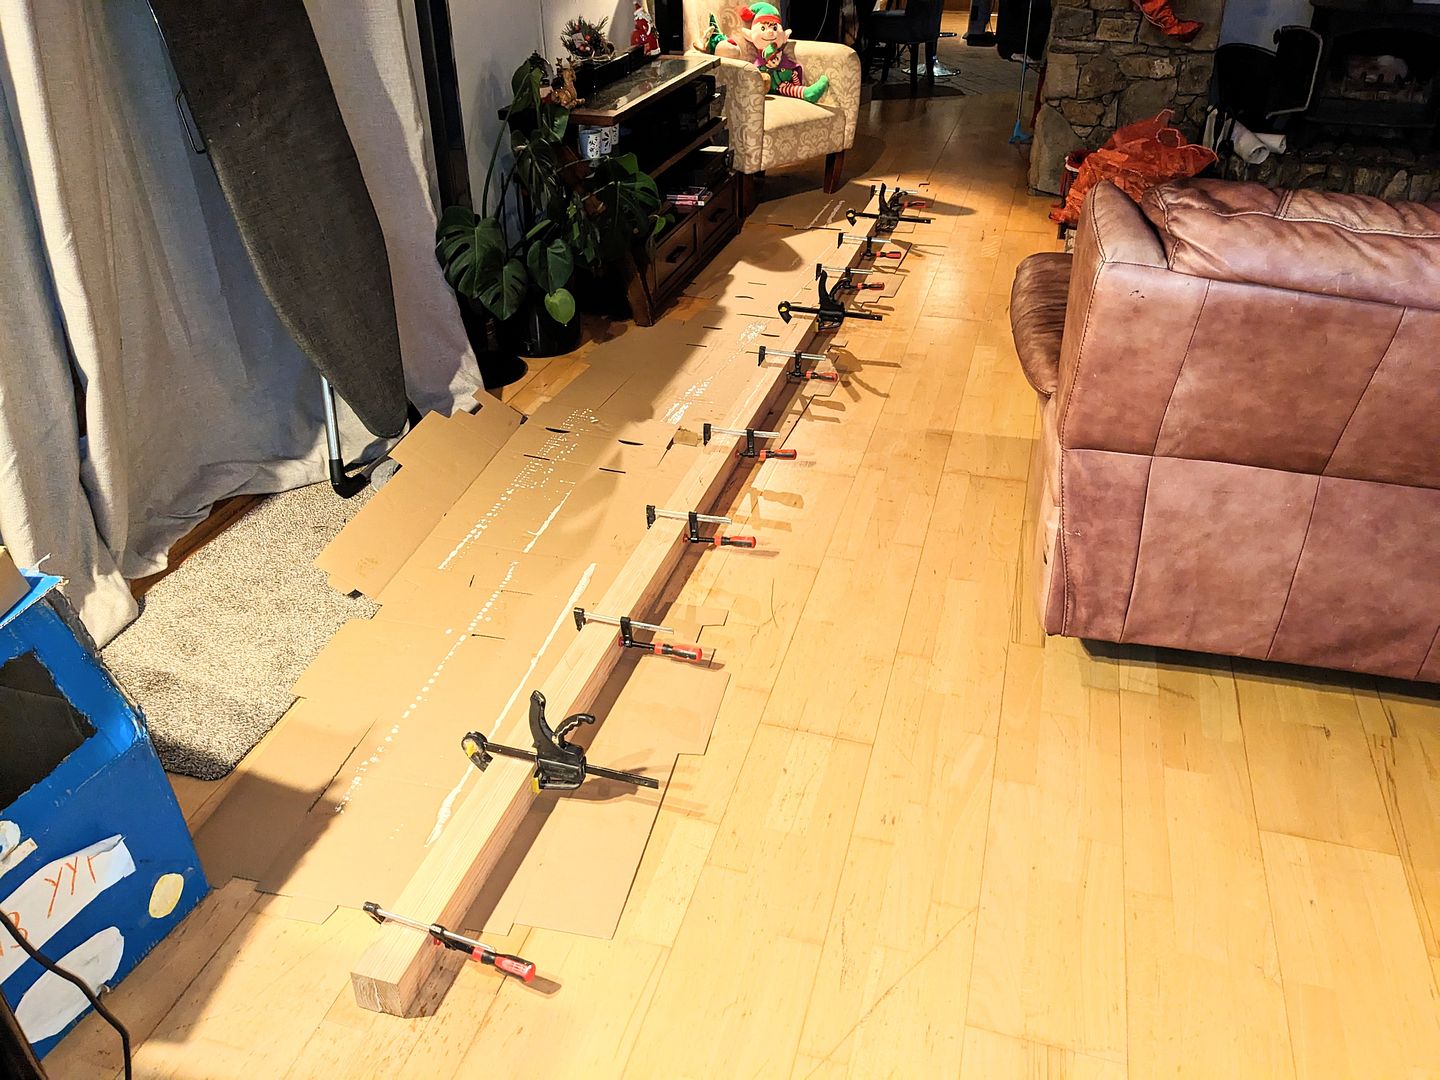
Practical progress at last though! Yesterday my daughter helped me assess the Douglas Fir I bought some time ago and we were very pleasantly surprised to find it 100mm longer than Melitele's mast. I must have been thinking clearly when I ordered it but since forgot - I had assumed the mast would need scarphed. Happily not. The mast dimensions are 4200mm tall for the keel stepped option and 70mm diameter. There's a taper down to 50 or 55mm along the top 1000 mm. The Fir board was 38~39mm thick, so we sawed it down to two boards 74mm wide. Today she helped me thickness plane them down to 35mm. Melitele has been relegated back to the big unheated shed whence it came as we need the heated garage for some equipment we bought for our business which needs a stable temperature.
All of this has resulted in us gluing Melitele's mast in our living room ??
Anyway. I had had to defer a lot of leave from work and this meant I finished up on the 19th December. It's taken until yesterday to feel sufficiently motivated to do something practical, although my wife and I have booked ourselves onto a sail making course in Orkney this coming April which is a formal course with an online learning element to do before the practical week there in person. There will be 8 people on the course including us, and we're going to be constructing my two headsails there as the subject. The teacher says that providing I am happy with the odd wonky seam they will be perfectly serviceable, and it'll cost only the materials - about £250. I'm happy with that (and if I'm really not happy to take them I don't have to).
I have started the online learning on Boxing Day, because I really don't enjoy Christmas/New Year and I wanted to do something useful. I've been learning how to calculate my Centre(s) of Lateral Effort and, approximately, Resistance. The designer of the boat obviously already did this but I'm enjoying learning stuff I expect most reading already know.
Practical progress at last though! Yesterday my daughter helped me assess the Douglas Fir I bought some time ago and we were very pleasantly surprised to find it 100mm longer than Melitele's mast. I must have been thinking clearly when I ordered it but since forgot - I had assumed the mast would need scarphed. Happily not. The mast dimensions are 4200mm tall for the keel stepped option and 70mm diameter. There's a taper down to 50 or 55mm along the top 1000 mm. The Fir board was 38~39mm thick, so we sawed it down to two boards 74mm wide. Today she helped me thickness plane them down to 35mm. Melitele has been relegated back to the big unheated shed whence it came as we need the heated garage for some equipment we bought for our business which needs a stable temperature.
All of this has resulted in us gluing Melitele's mast in our living room ??
Edited by jamieduff1981 on Thursday 29th December 19:52
Gassing Station | Boats, Planes & Trains | Top of Page | What's New | My Stuff