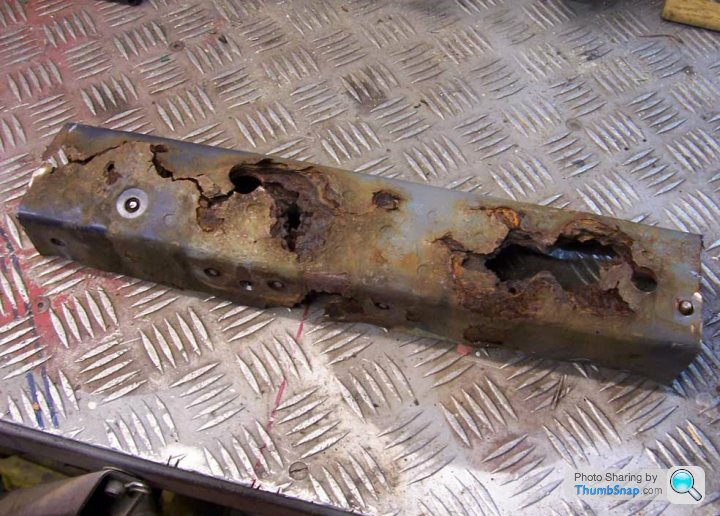
The cutting disc saga
Discussion


TVRees said:
Looks like a major job, but I see you're a professional welder, so that will be a big help. 
Please keep us posted regarding your progress.
Welding is the easy bit. IMHO anyone with reasonable hand/eye coordination could use a modern MIG with just 30 minutes or so instruction.Please keep us posted regarding your progress.
I find that by far the hardest part is in the making of the replacement panel. The better the fit the easier it is to weld, and consequently the stronger the finished repair.
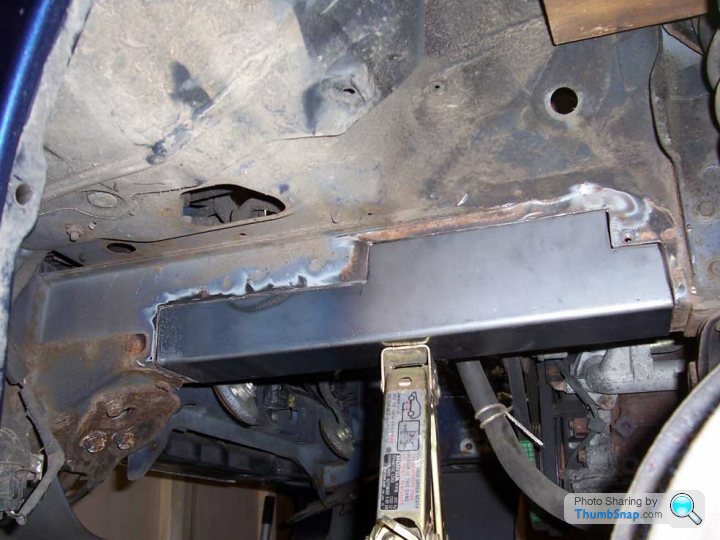
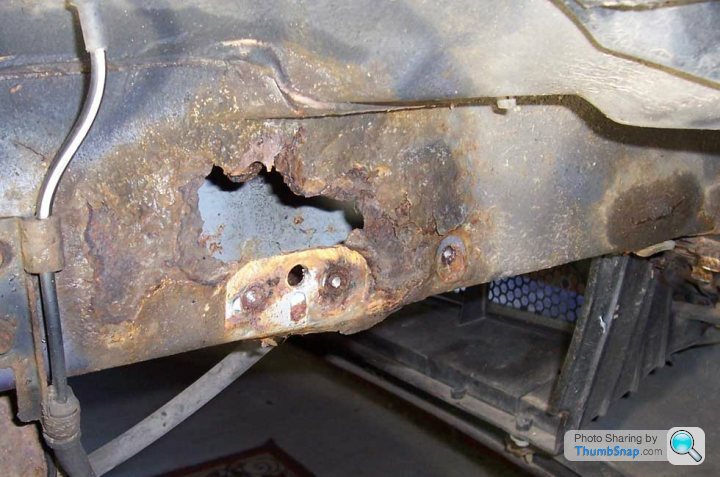
Photo shows my replacement chassis rail balanced roughly in position. I still have some holes to drill with nuts welded inside to hold the ARB.
Weld up and start on the other side. Never done chassis rails before but I'm assuming the second one goes quicker.

Paul G

Front inner wing plastic panels removed.
Rad removed.
Long bolt through top wishbone removed so w/b can be moved out of the way.
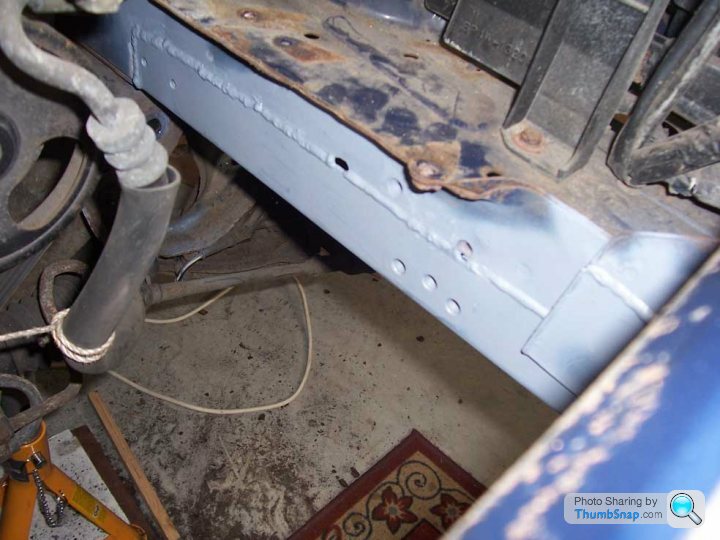
ARB removed as the brackets bolt to the new chassis. Note holes with nuts welded behind.
(These are 2 x M6 plus a spot weld. I have changed this to 3 x M8)
Air filter box & pipe removed
Power steering bottle unbolted and tied back out of the way.
Carbon filter can thing unbolted and tied back.
Anti lock sensor wire bolts to chassis. Nuts to weld in again.
I would describe it as a moderately easy job, but time consuming, hence a going rate of £800 in a resto garage.
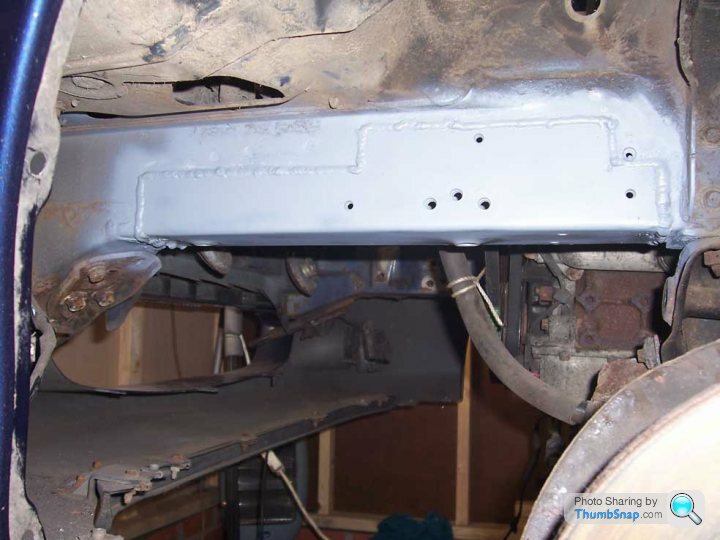
Grey primer must be dry now. Off to squirt (techy term) some blue.
Paul G
Rad removed.
Long bolt through top wishbone removed so w/b can be moved out of the way.
ARB removed as the brackets bolt to the new chassis. Note holes with nuts welded behind.
(These are 2 x M6 plus a spot weld. I have changed this to 3 x M8)
Air filter box & pipe removed
Power steering bottle unbolted and tied back out of the way.
Carbon filter can thing unbolted and tied back.
Anti lock sensor wire bolts to chassis. Nuts to weld in again.
I would describe it as a moderately easy job, but time consuming, hence a going rate of £800 in a resto garage.
Grey primer must be dry now. Off to squirt (techy term) some blue.
Paul G


buzzer said:
Very neat, a superb job! I like to see work like this.
Welding is good, can i ask what make and model of MIG you use? Mine is due replacement, its never been any good...
Thanks.Welding is good, can i ask what make and model of MIG you use? Mine is due replacement, its never been any good...
It's a Lincoln 210, which is misleading as it's 185 amps, running 15% CO2/argon and 0.8 wire.
Although it's single phase it's an industrial machine and will weld 1/4" plate all day if required.
HNY
Paul G
Gassing Station | Mazda MX5/Roadster/Miata | Top of Page | What's New | My Stuff