Tubeless Ready MTB Wheels
Discussion


Yes, pretty much.
1" wide Gorilla tape is what I used.
Some tyre/wheel compinations are very uncooperative when it comes to seating the bead for a good seal, the extra volume of air shifted by a track pump can help, but on my rear wheel, I had to use a ratchet strap around the circumference of the tyre to get it to dig into the rim rather than just pissing air out.
frisbee said:
You might not need tape, my tubeless ready wheels came ready taped for tubeless, just needed valves, tyres and sealant.
Ah OK nice one, I'll pop the tyres off tomorrow and see what's on there at the moment. From my last flat I seem to recall something that looked like red electricians tape. If they are tubeless ready then you won’t need tape, just valves and sealant.
However, depending on age/usage the tape may have got some damage since new - say, around the valve hole or near the bead from levering tyres - and you won’t know if it’s ok until you get the tyre off and have a really good inspection. Gorilla tape of/cut to the correct width will solve the issue if necessary without paying through the nose for dedicated rim tape.
Also, don’t scrimp on valves. I tried some no name ones and after eliminating everything else, turns out they were just crap valves and simply leaked. The muc off v2 I just fitted are awesome - and when discounted cost the same as the Amazon no name ones - and also Peaty’s come recommended by many.
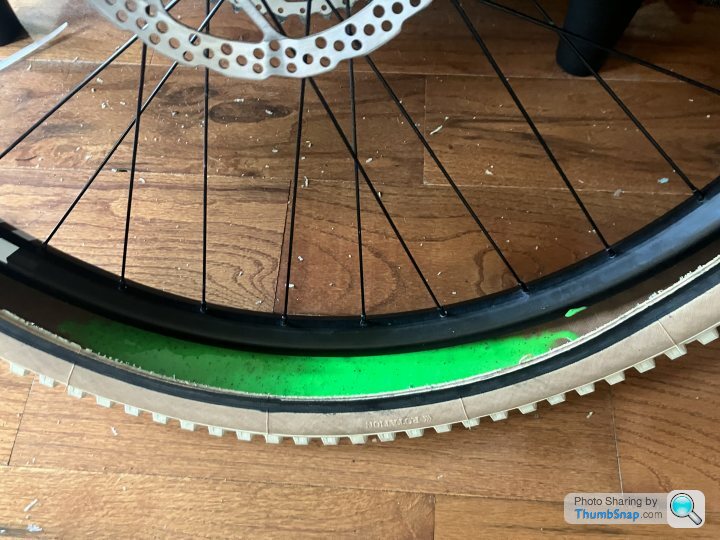
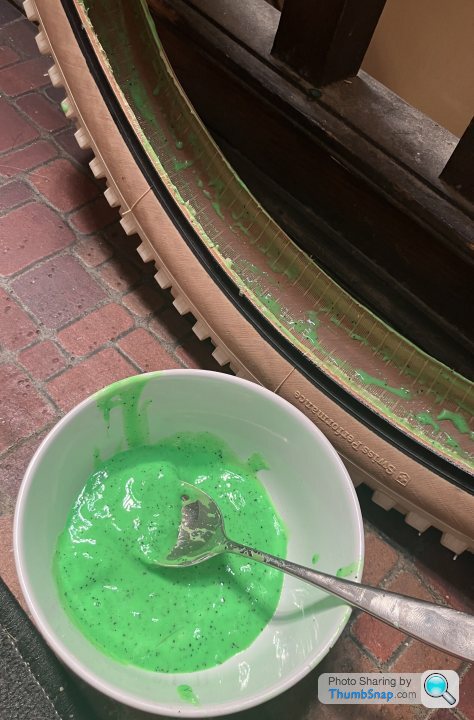
You also have this lovely mess to look forward to, especially if you are trying to seat the bead and unwittingly have the bead caught on the valve and it blasts everywhere, including on you and the walls
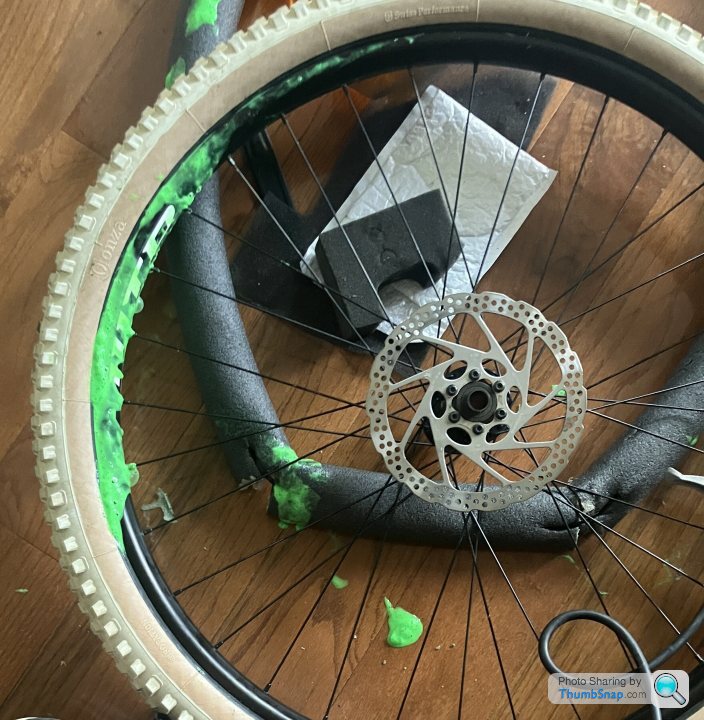
Now be a good boy and finish all of your sealant

Seriously though, as long as your tape and valves are good it should hopefully go smoothly for you.
Edited by GCH on Tuesday 20th September 20:14
Blimey, that looks a right mess 
Today was the day..... I removed the old tyres and noticed a few cuts in them, there's also damage where they've been off in the past and noticed that the rim tape was just ordinary rim tape so that would need changing. Popped down to the bike shop to get some tape but they didnt have enough on the shelf but offered to tape them in the workshop for me. Quick trip back and wheels taped and a new set of tyres as I wasn't convinced I'd get a good seal with a chewed up bead.
Got home, got them seated just fine, gave them a quick pump and they loudly popped onto the rims, deflated, removed the valve cores and popped the sealant in and pumped up and so far so good.
Looking forward to giving them a try, went for Vittoria Mezza & Mezzcal (I think) which the chap in the shop recommended.
Edited by Greendubber on Friday 23 September 15:43
For my last conversion my rims didn't need a tape (E13), there is a sort of black coating all the way around. I just cut 2 old valves from inner tubes and just put some sealant by leaving a little gap before finishing to put the tyre on, which didn't even need a tyre lever (2.8 Maxxis) . Didn't even need a compressor either.
It littlerally took 5mn with zero spill or damage or injury or swearing.
I reckon product development has gathered pace as I can't remember it being so painless in the past. Or perhaps I was just very lucky that the combo was perfectly compatible.
Perfect seal, no leaks and no puncture in 3 weeks too.
Greendubber said:
They're are holding air well, no noticeable loss over the last couple of days so happy with that.
It wasn't much if a faff to be honest, the hardest part was removing the old tyres that were an absolute nightmare to get off the rims!
Brilliant. How often did you get punctures with tubes? It would be interesting to see how you get on. I always carry a tube and an anchovies type repaint kit but I only ever had 2 issues in the past 5 years compared to a puncture every other ride with tubes (South Downs). It wasn't much if a faff to be honest, the hardest part was removing the old tyres that were an absolute nightmare to get off the rims!
GCH][url said:
You also have this lovely mess to look forward to, especially if you are trying to seat the bead and unwittingly have the bead caught on the valve and it blasts everywhere, including on you
I always inflate the tyre first and get it seated on the rim, I have the core out of the valve at this point as easier to inflate and seat the tyre. Then put the sealant in through the valve, stall core and re inflate. Much less mess.nickfrog said:
Greendubber said:
They're are holding air well, no noticeable loss over the last couple of days so happy with that.
It wasn't much if a faff to be honest, the hardest part was removing the old tyres that were an absolute nightmare to get off the rims!
Brilliant. How often did you get punctures with tubes? It would be interesting to see how you get on. I always carry a tube and an anchovies type repaint kit but I only ever had 2 issues in the past 5 years compared to a puncture every other ride with tubes (South Downs). It wasn't much if a faff to be honest, the hardest part was removing the old tyres that were an absolute nightmare to get off the rims!
nails1979 said:
I always inflate the tyre first and get it seated on the rim, I have the core out of the valve at this point as easier to inflate and seat the tyre. Then put the sealant in through the valve, stall core and re inflate. Much less mess.
Of course, but I wanted as much of the sealant as possible circulated around and coating the inside of tyre before putting the insert in and putting the last bead on...rather than putting the sealant through the valve and then having to move it around and circulate it with the insert in place. Gassing Station | Pedal Powered | Top of Page | What's New | My Stuff