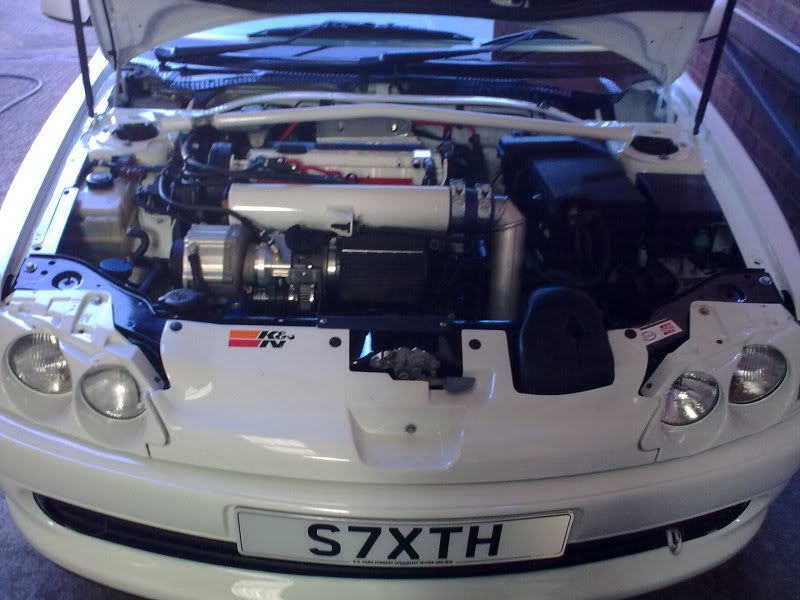
Decided to clean up the engine bay
Discussion


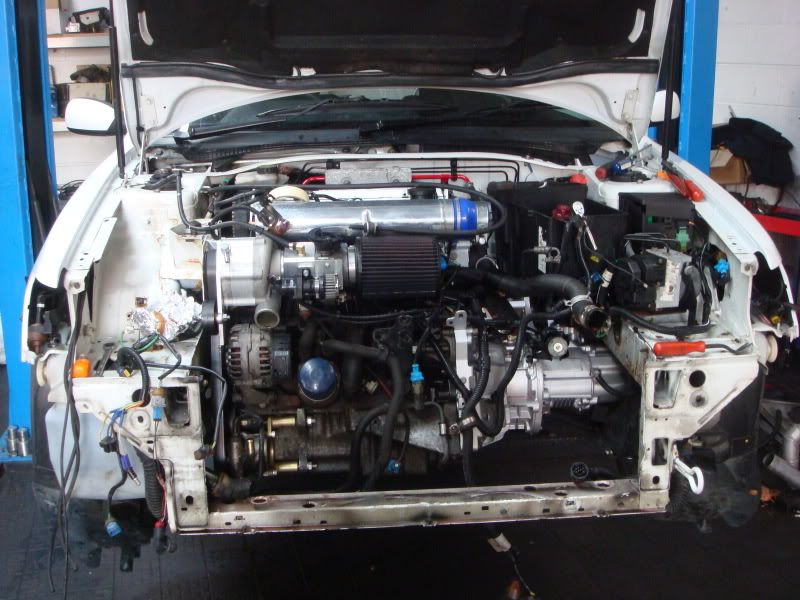
Well taxed the car last week and have done about 600 miles in a week and have totally fell back in love with it but (there is always a but), i am not happy with the engine bay due to the rusty areas here and there-
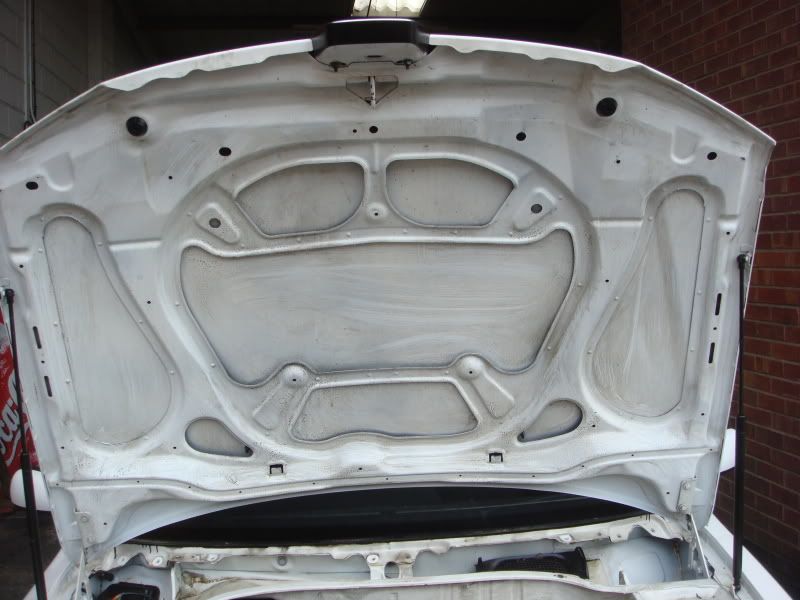
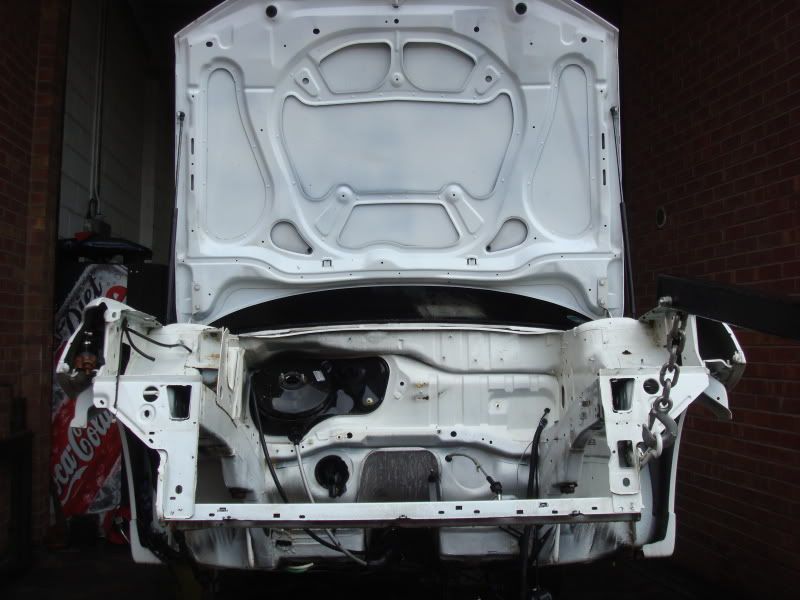
This is what it looked like before i took alot of nuts and bolts away from it-
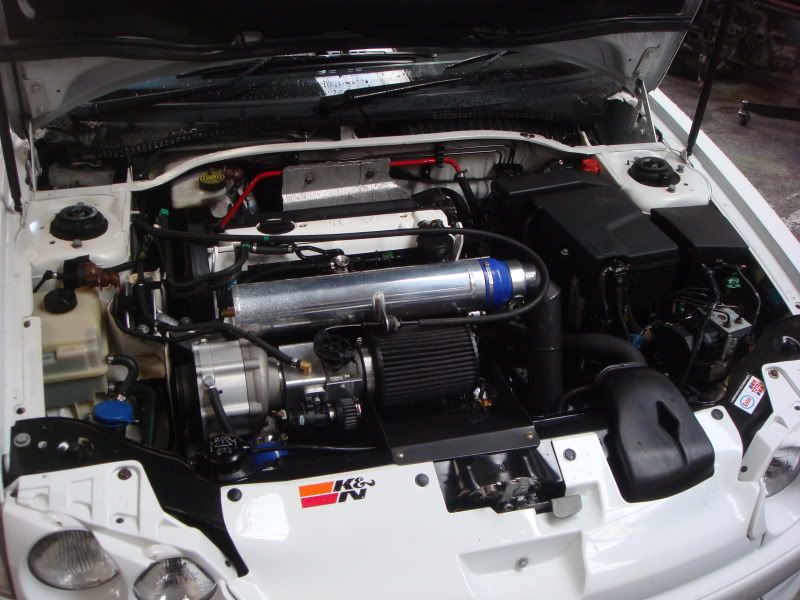
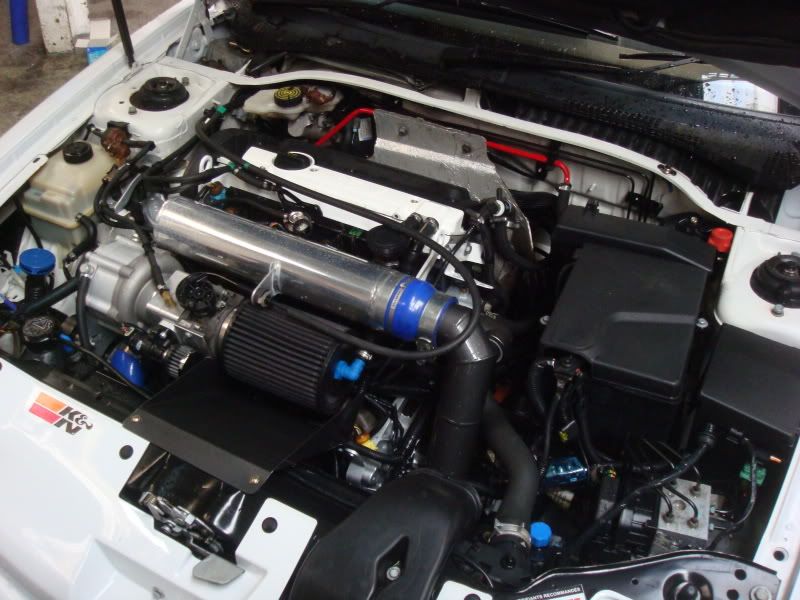
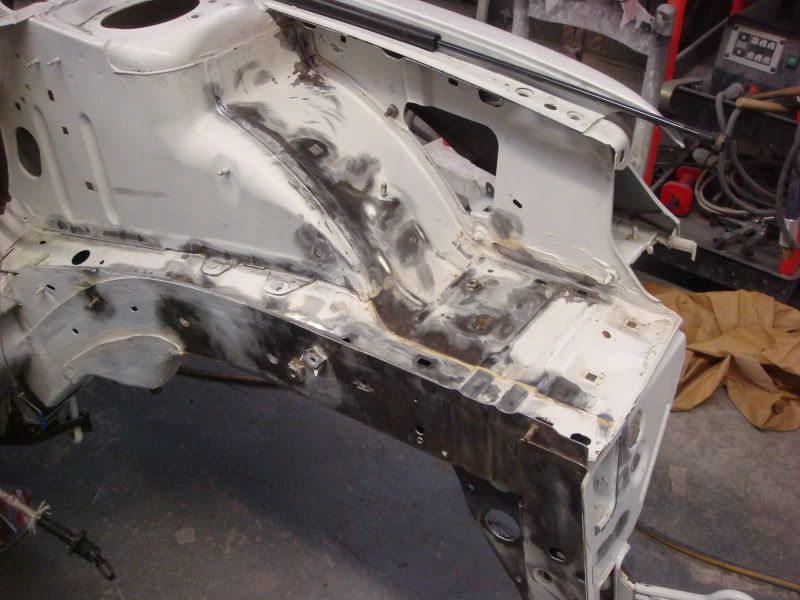
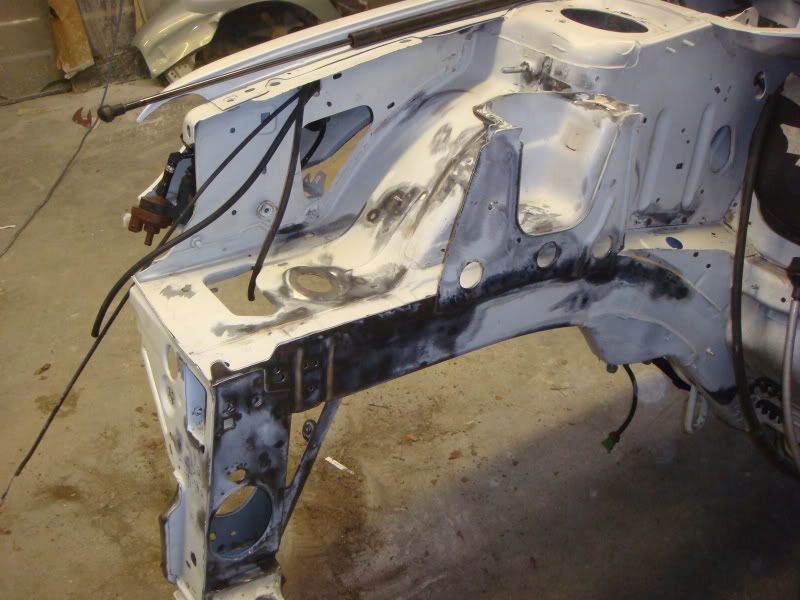
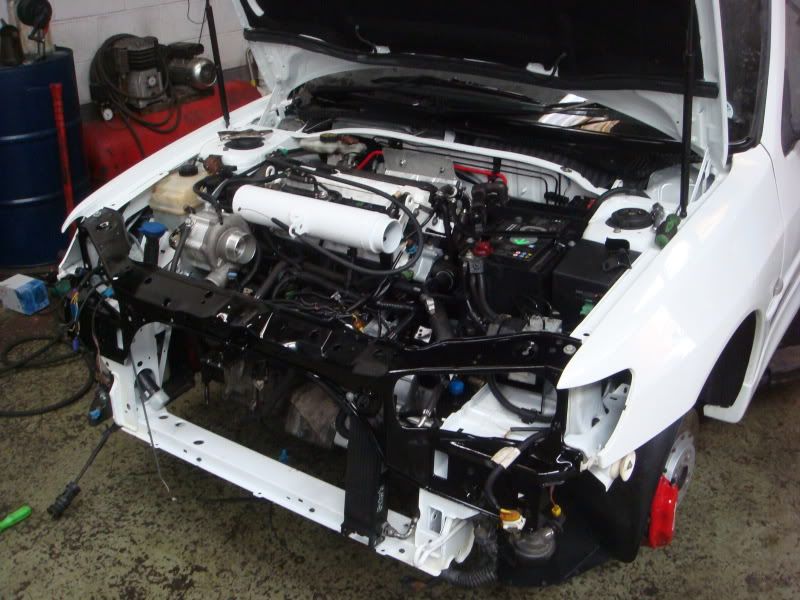
Most of you may think the bay looks ok, up close its a totally different story, it seems that the rallyes have an issue with rust in the engine bays, mine isnt bad but is there and looks horrid.
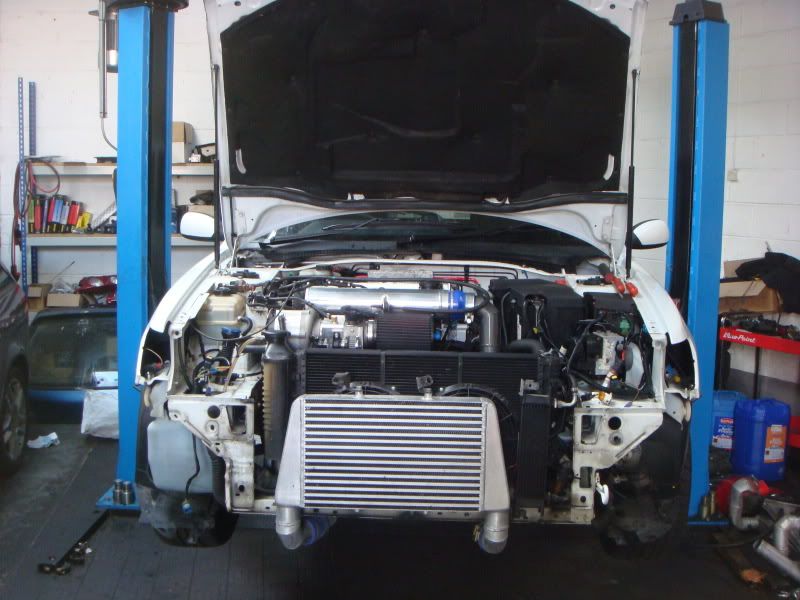
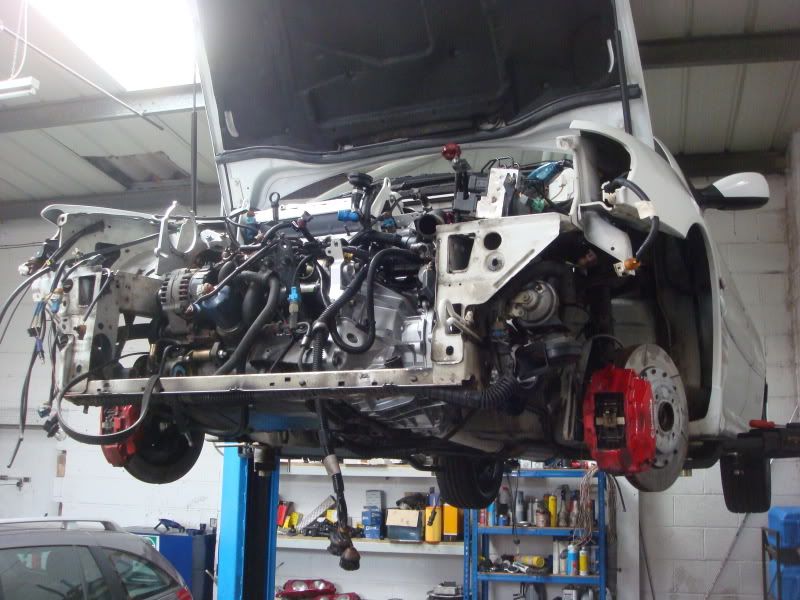
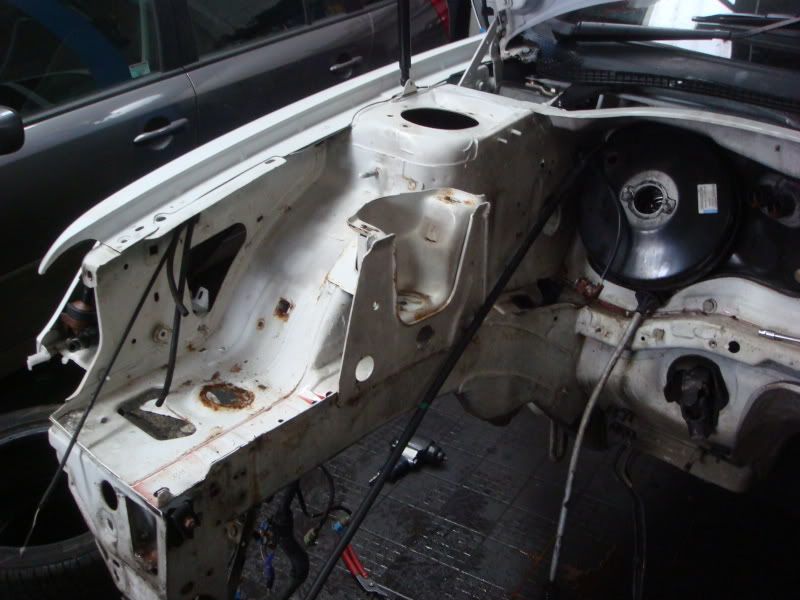
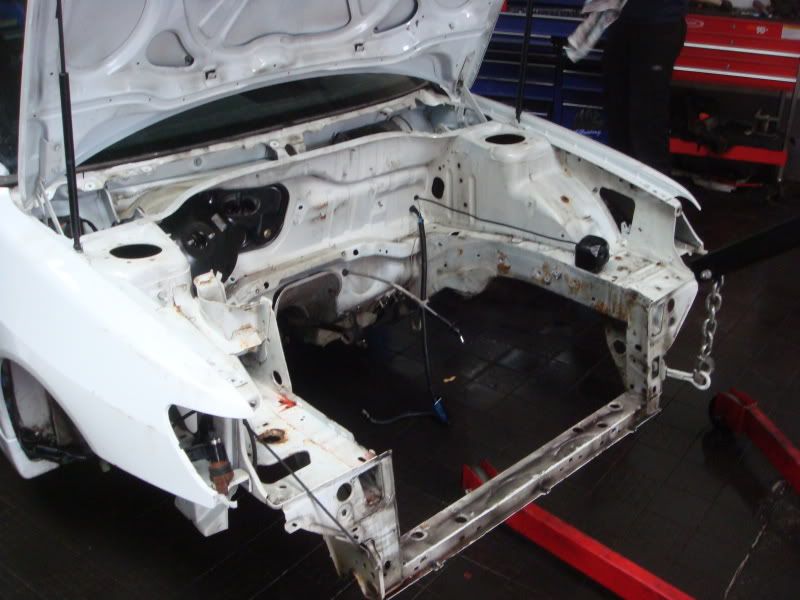
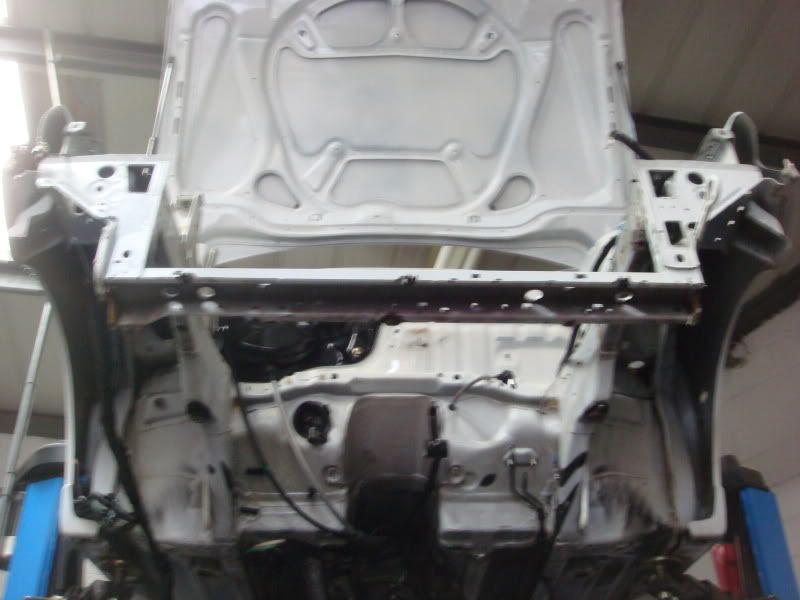
Strip down time, front removed-
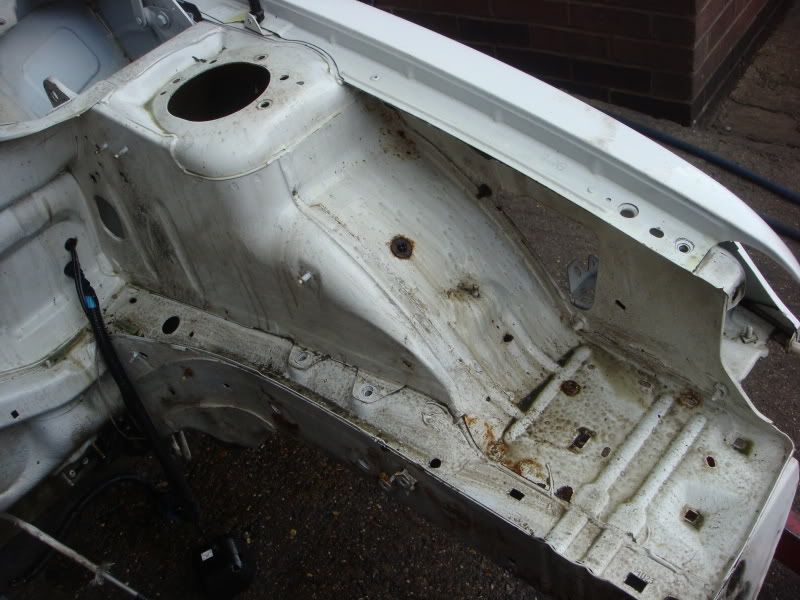
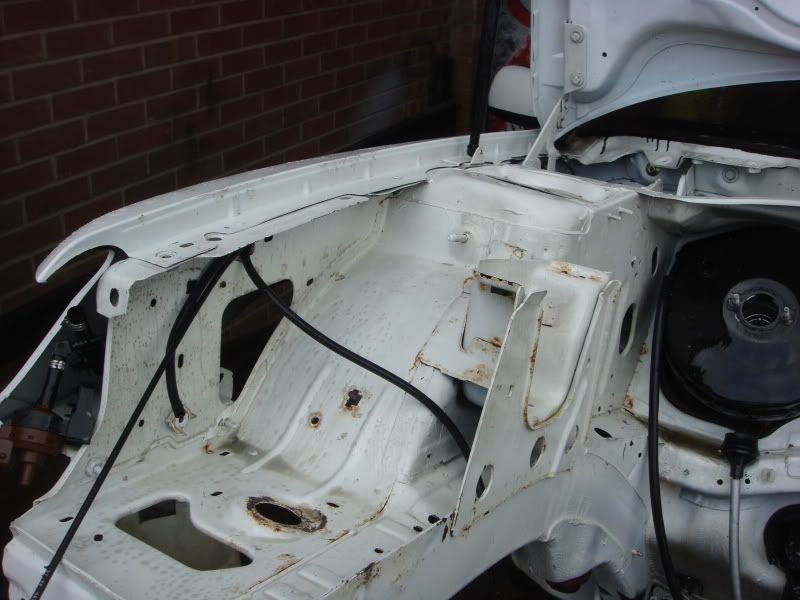
Its quite surprising how rusty some of the brackets and various bits around the chassis legs are, i know the car is getting on for ten years but i always regarded Peugeots as being very good with the rot bug. Alot of the brown and messy stuff you can see on the car above is waxoil i applied about a year ago when i first installed the charger to help.
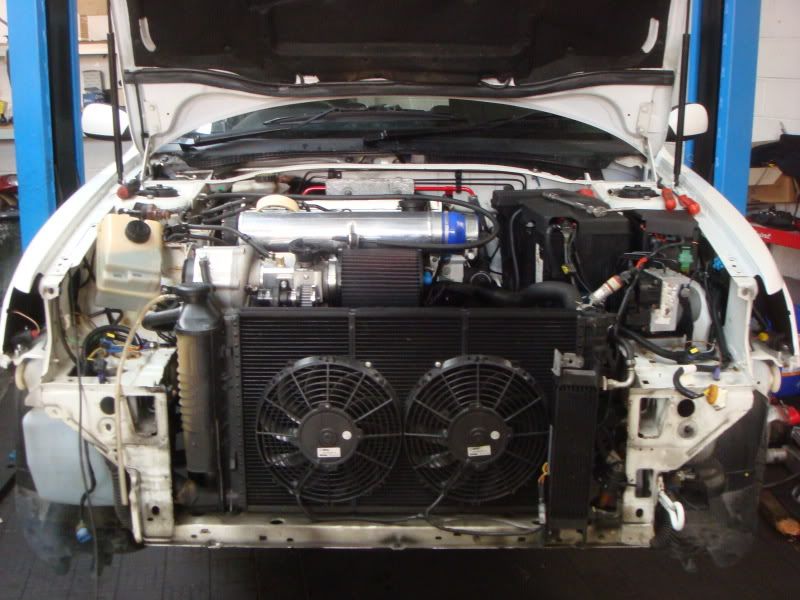
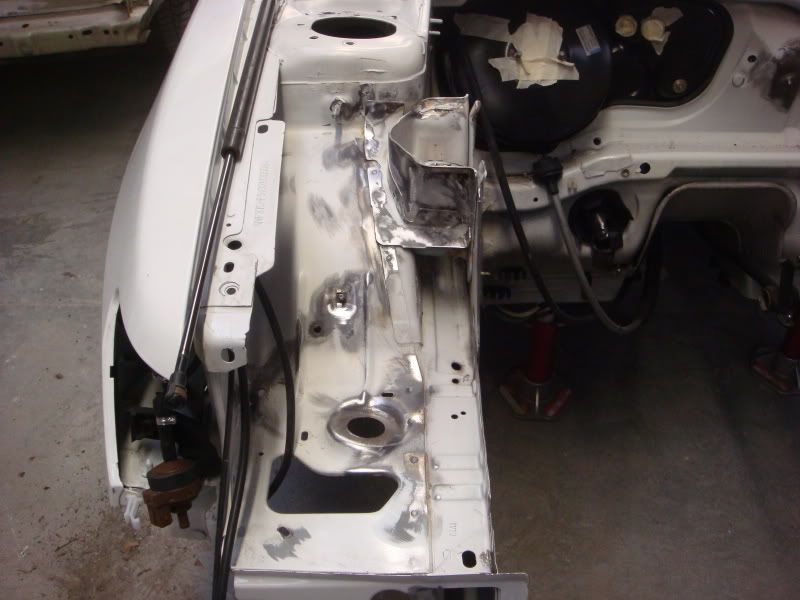
Intercooler and the pipework removed, also removed a few bits of wiring and the power steering res bottle-
Well a bit of an update today for you all, been busy today i can tell you-
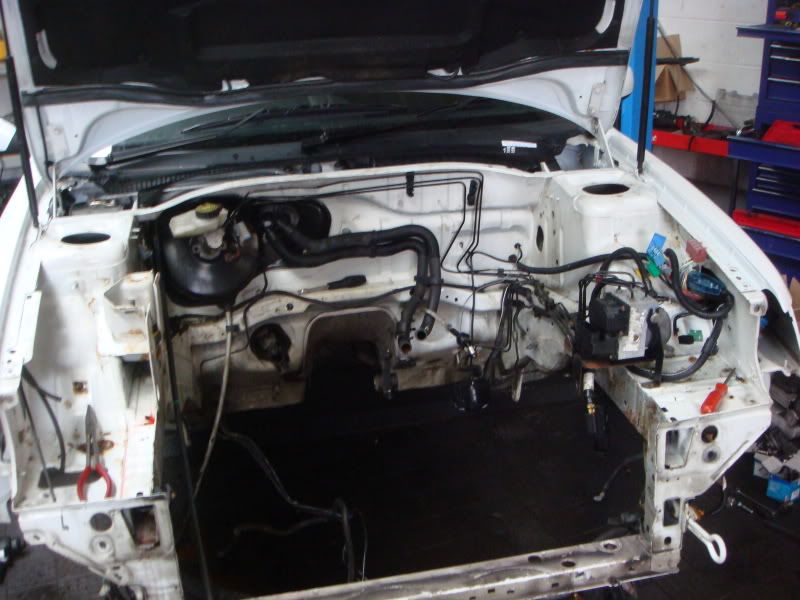
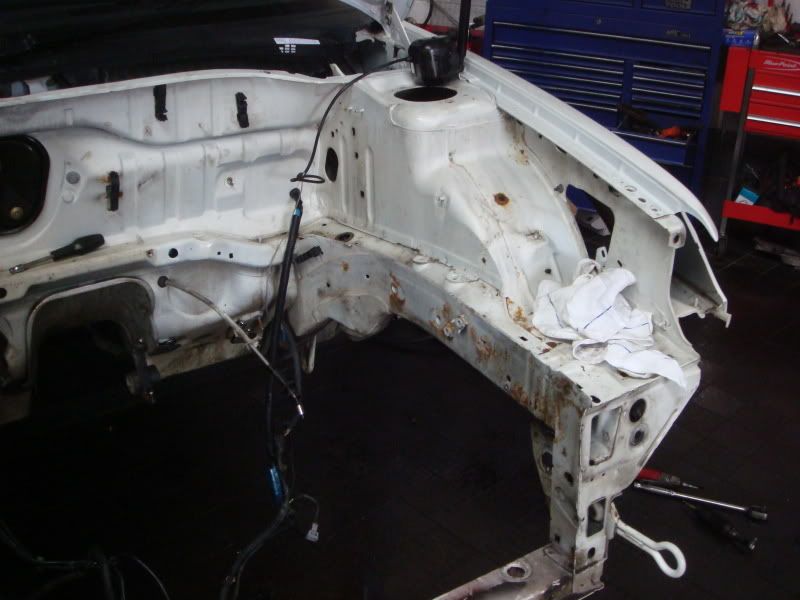
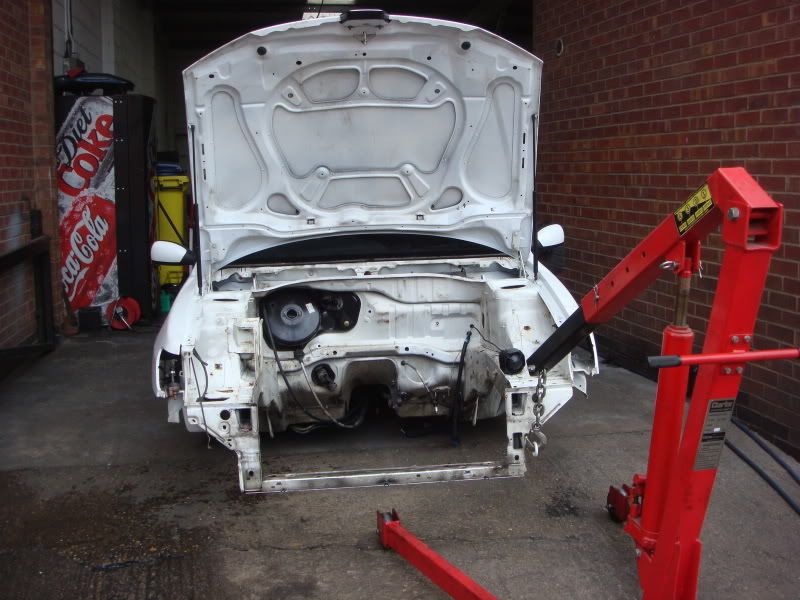
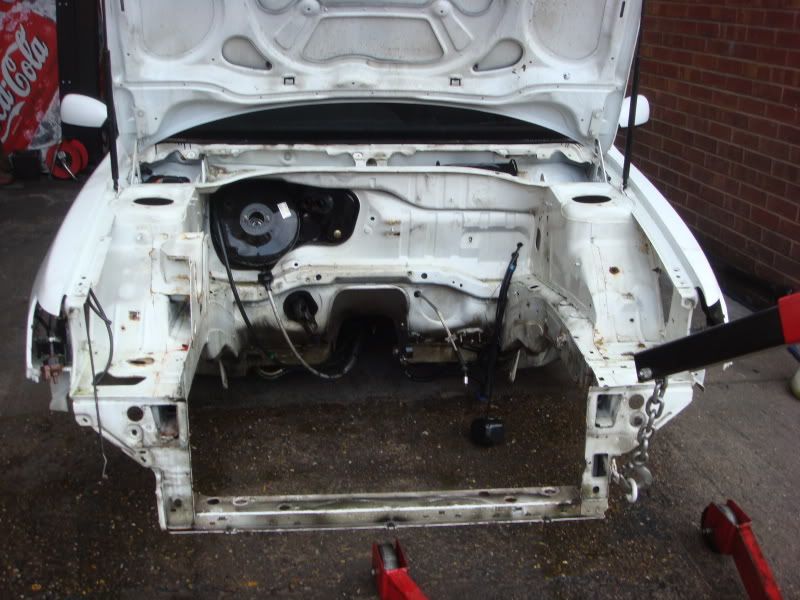
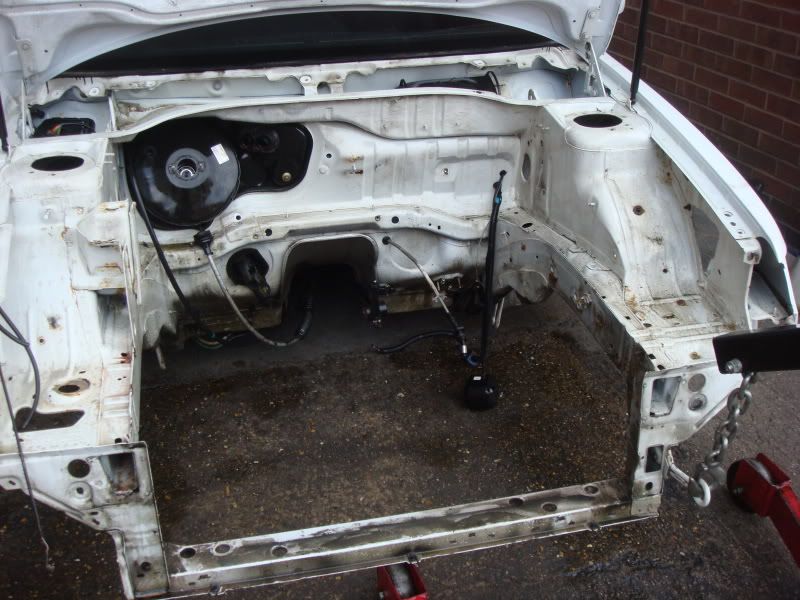
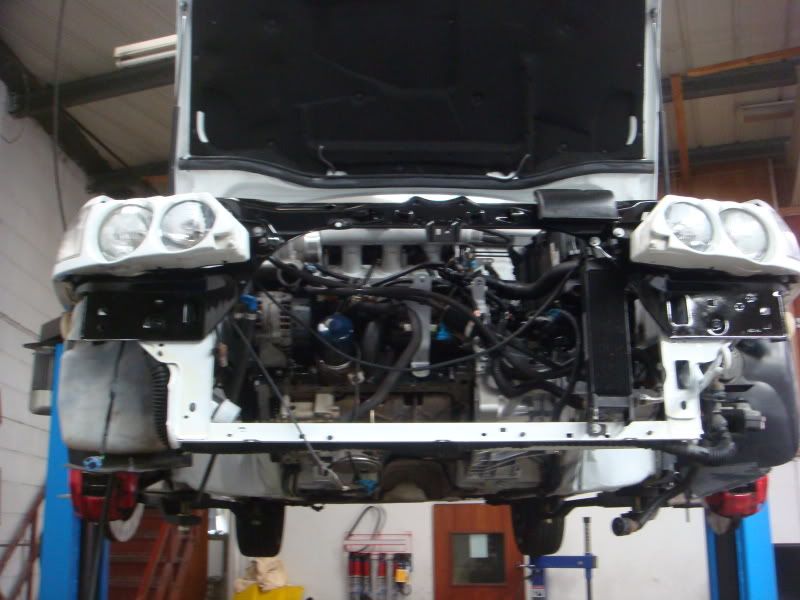
More stripping the bay out, this is where i got to yesterday, you can see my lunch on the o/s inner wing, eat and work:lol-
As you can see a long way to go.
So after buying another gti6 this morning i decided to set about removing whats left of the engine when i got back to the garage got here at 3pm and 3 hours later this is what i have been up too-
Complete hubs with the shockers intact came off-
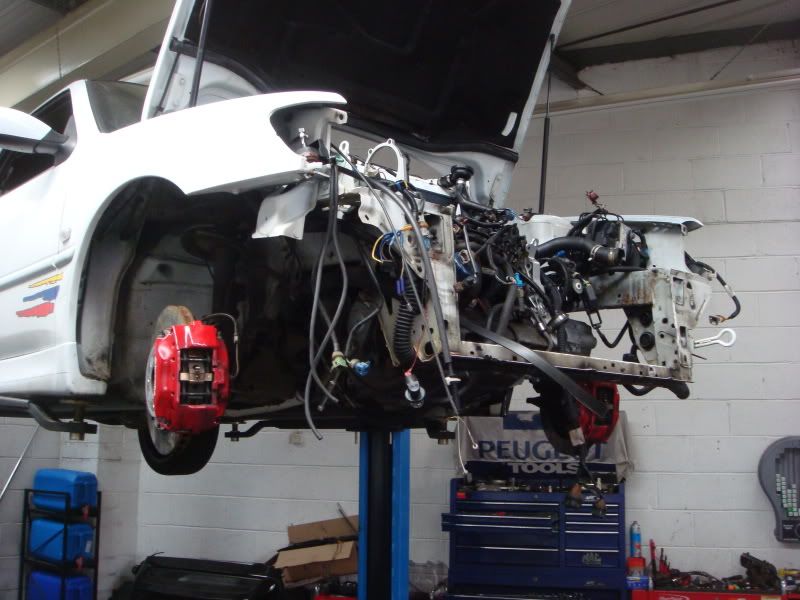
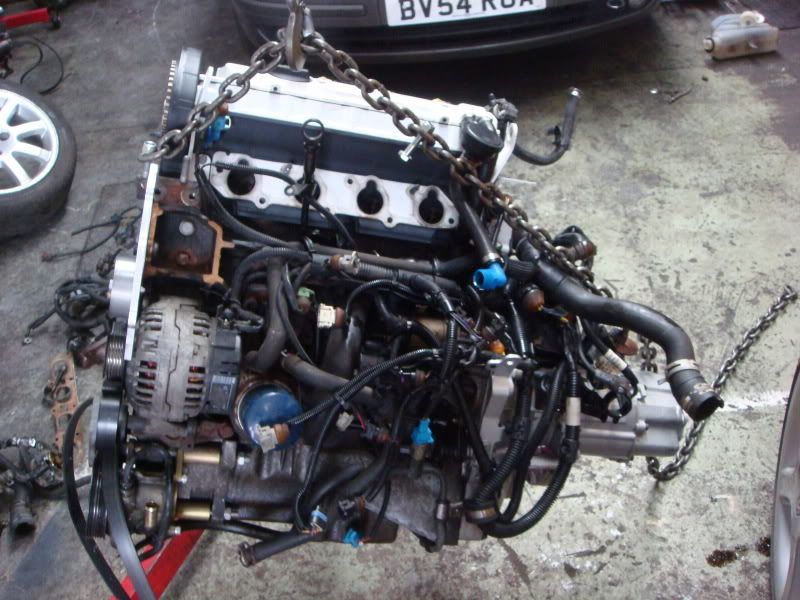
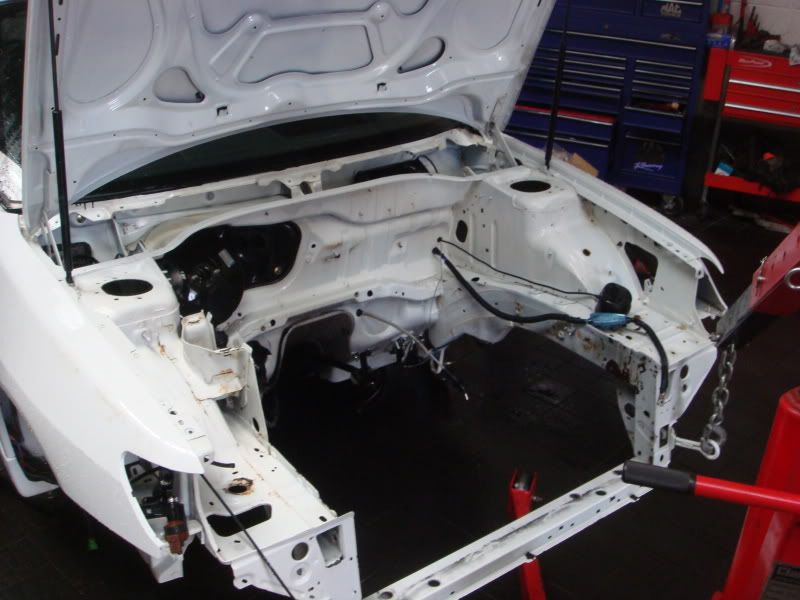
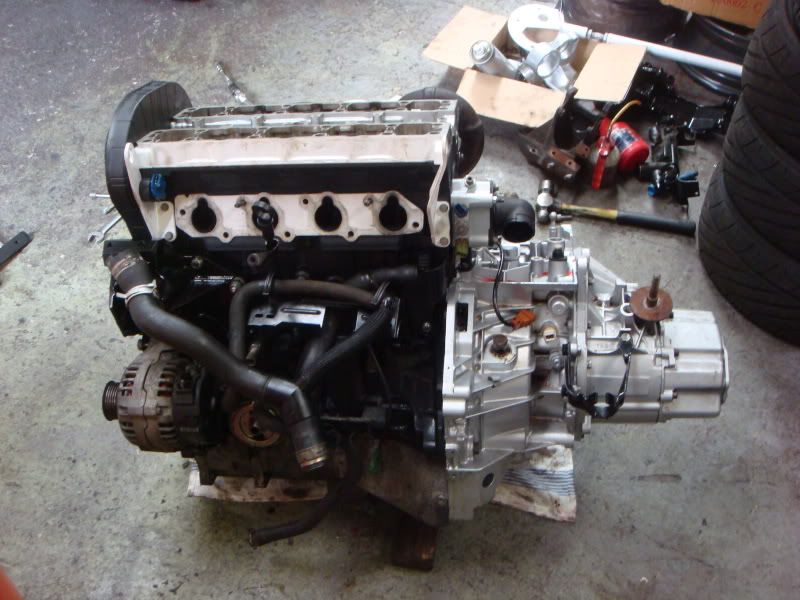
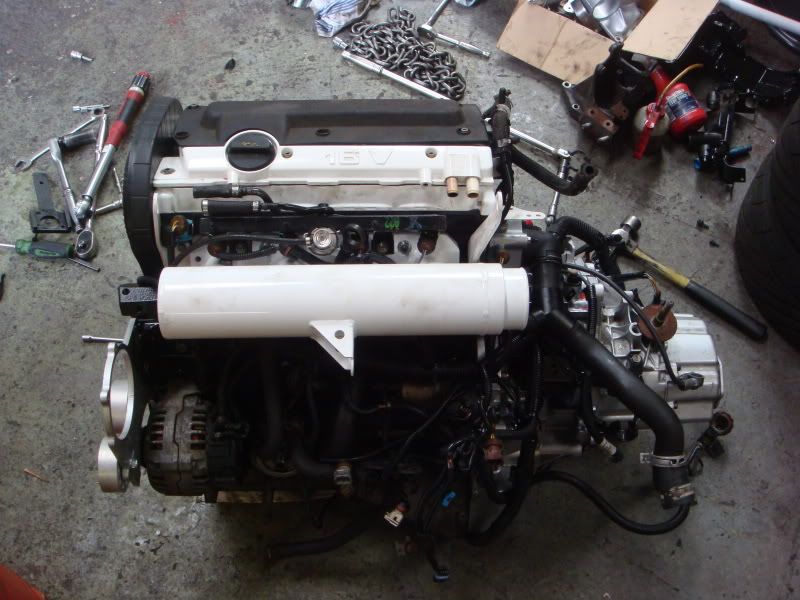
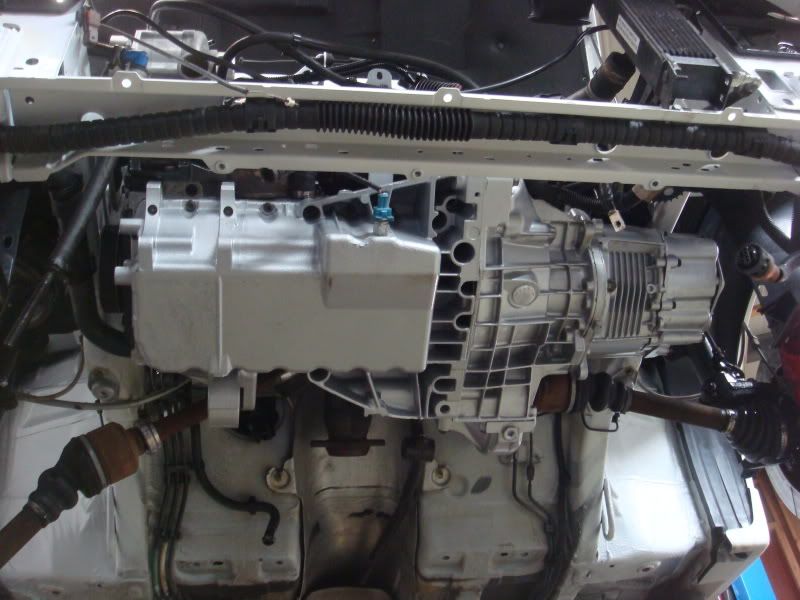
Then we came to the biggest bit of the job, the engine and box, this is what it looks like not mated to a white rallye-
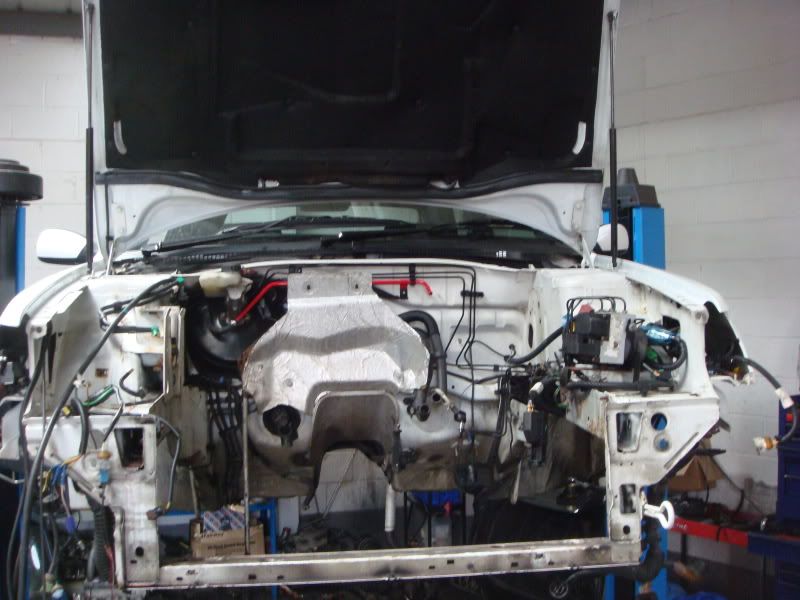
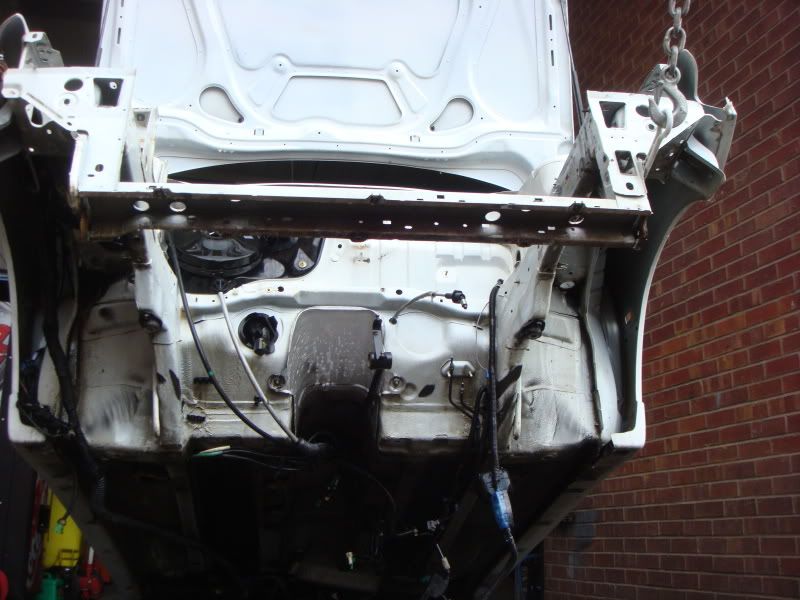
Which then left me a big hole in the engine bay-
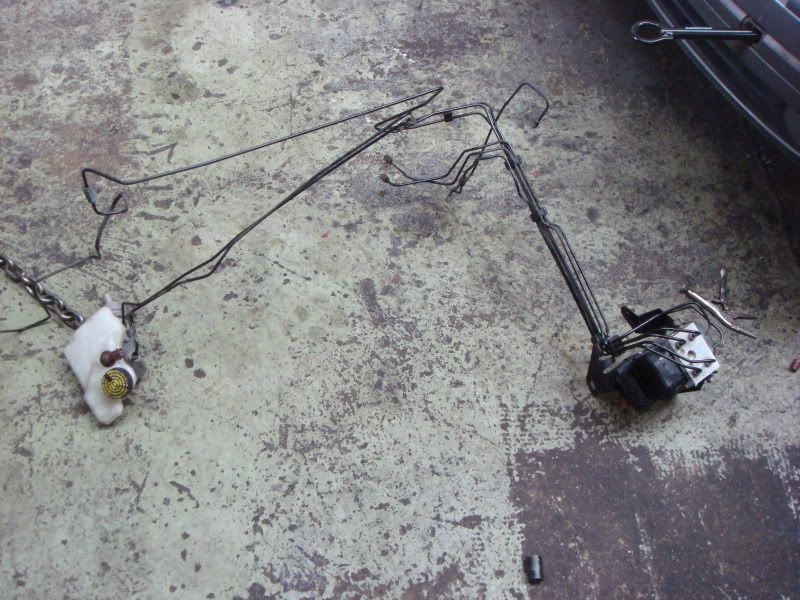
Out comes all the brake lines with the pipes complete, looks like this once removed-
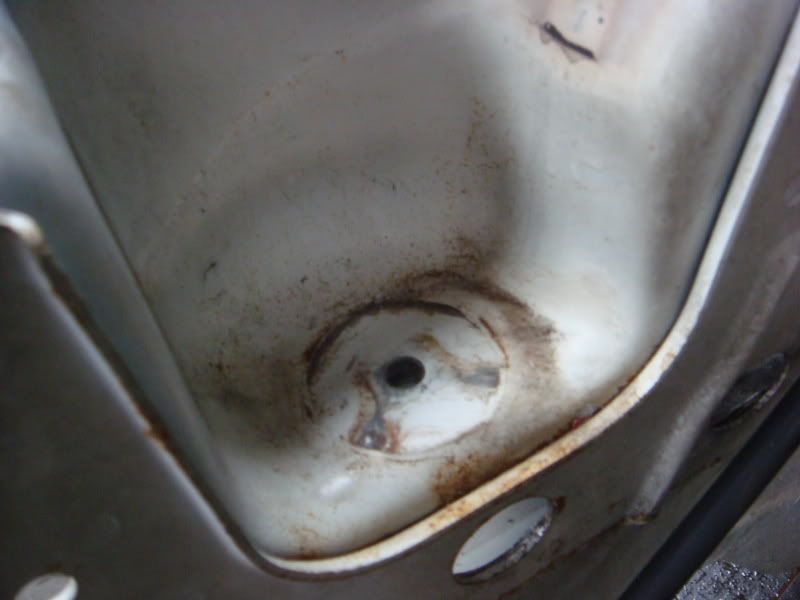
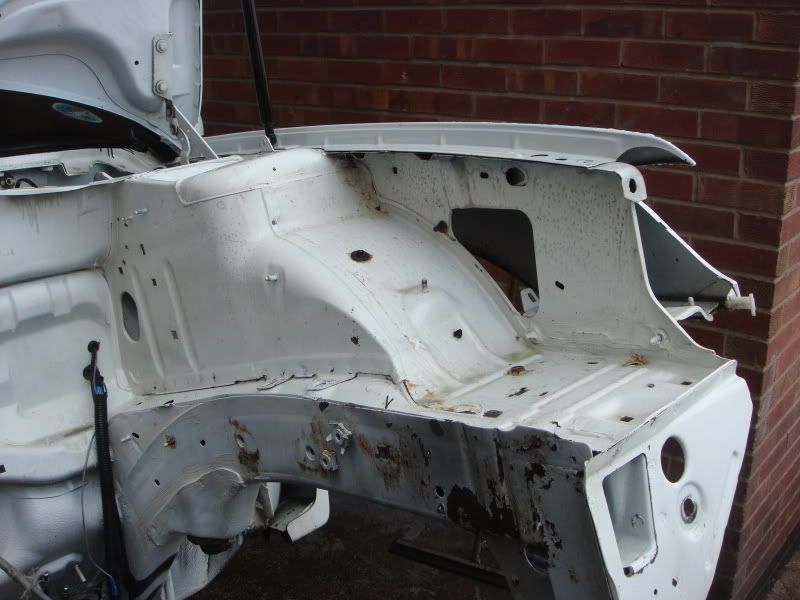
Well as you can see more and more is coming off, here are a few close ups of the rust bug, to be fair it looks like i have caught it early as another couple of cars on here that have been done were alot worse than this-
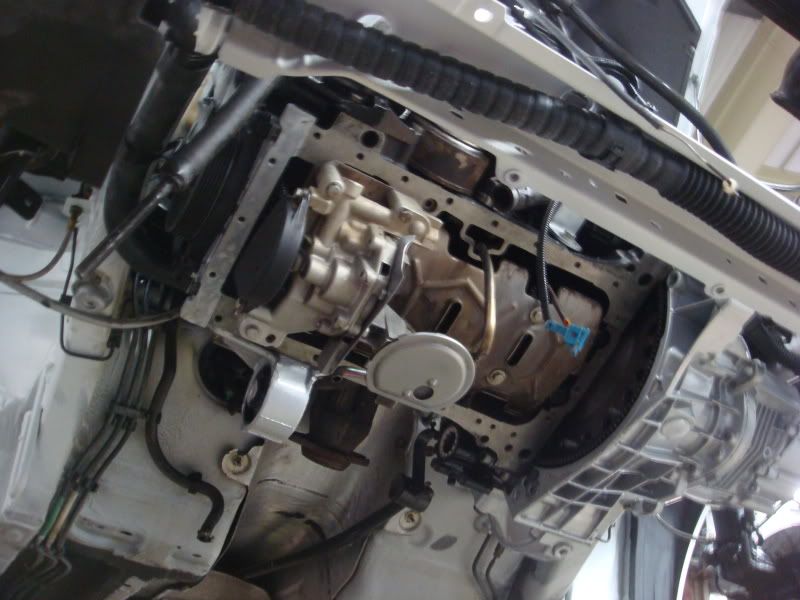
Quite a shock but the top engine mount is genuine and has never had the repair done (common to crack and pull the bolt through-
Well as you can imagine i had a mixture of all sorts on my tiled floor, gear oil, coolant, brake fluid etc you name it i had it on the floor which made it extremly slippy,think i nearly went on my ass more times than i can remember, spent 15 minutes doing this-
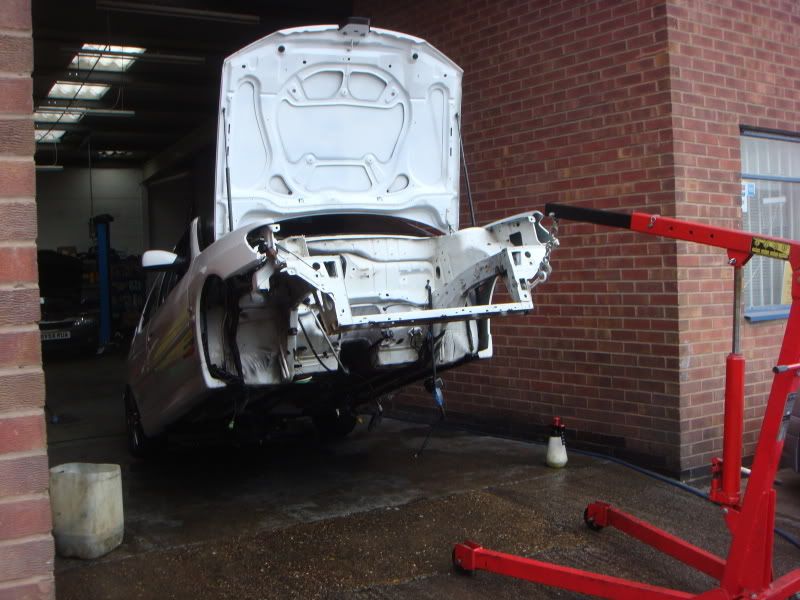
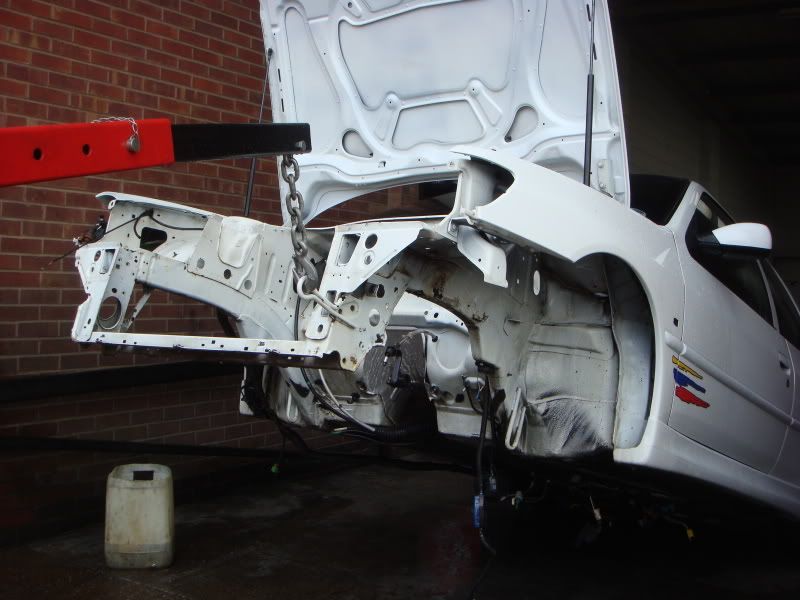
Dropped the ramp down now and attached the engine crane to the front of the car-
After shifting it across the garage on the crane i set about starting to clean all the mud and grime that was left off so i can get it ready for paint, all the arches were cleaned aswell, going to have these painted whilst we are here too, also the underside of the bonnet so removed the sound deadening-
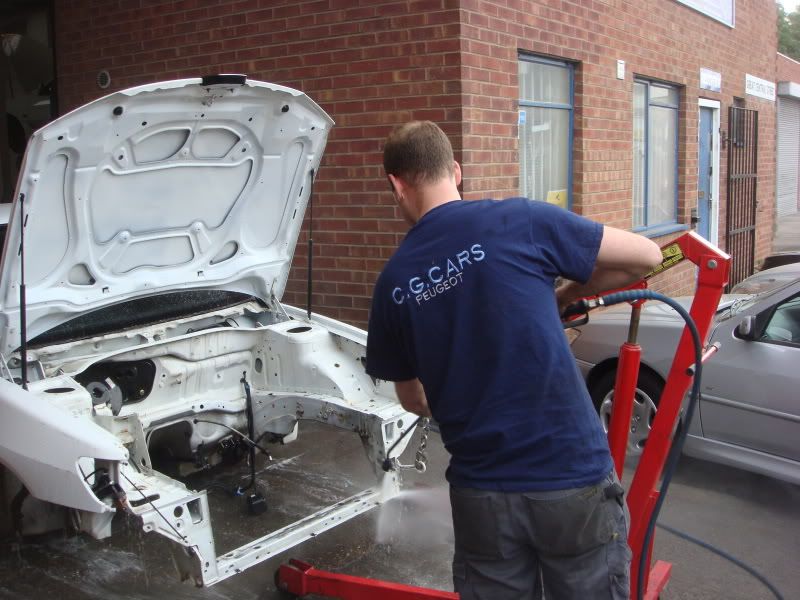
Soaked the engine bay in truck wash, this stuff is great but not to nice to your skin or eyes for that matter if the wind blows it into your face, left it to soak for 5 minutes-
Went round with a brush to give the truck wash a helping hand-
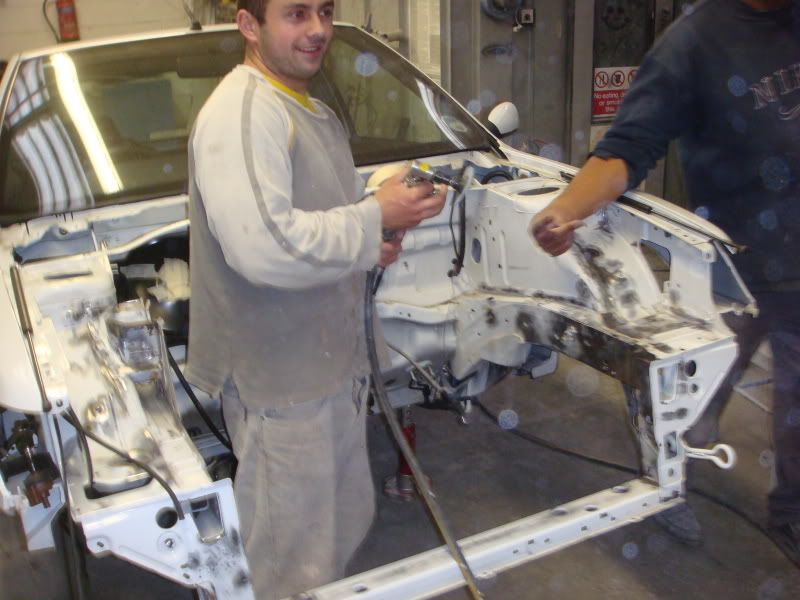
Ha ha, well as Dave was in due to him letting me down yeaterday i got him to take a few action shots, its crazy to see myself, look how bold i am not even 30 yet!! -
-
[quote="roland rat"]Carl is just a shiny/clean freak!
I'm sure he's part magpie! :lol
Looking good mate,excellent work as always :thumbsup
[/quote]
I want it to look nice and smart just how it looked when new i suppose, it was Pugfest last year that got me into this, the cars on show were just immaculate, hoping to take this to it this year, does anyone know the date?
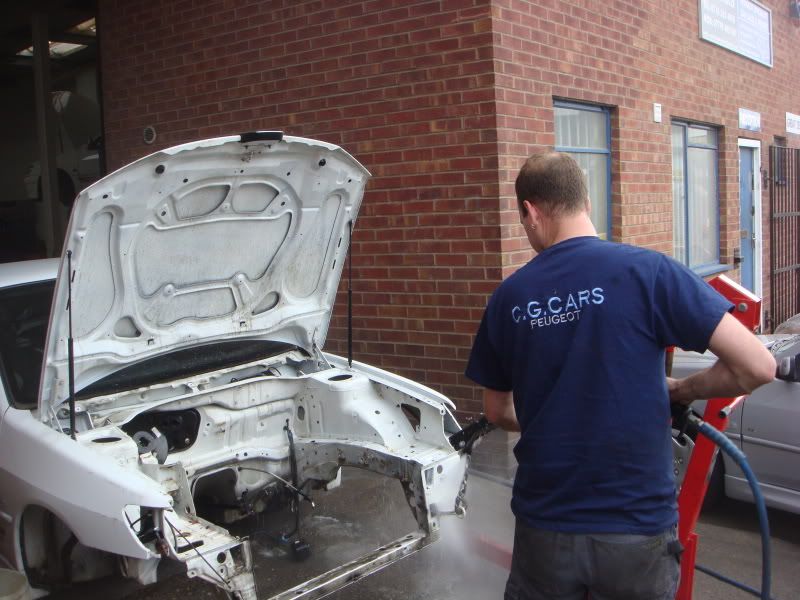
Well the truck wash and the jet wash soon set to work on all he muck that was knocking about, i think it may have had something to do with the jet wash being set to 150 degrees, soon shifts the crap, in the scuttle you should have seen the amount of mud, twigs and leaves stuck in there, quite amazing really.
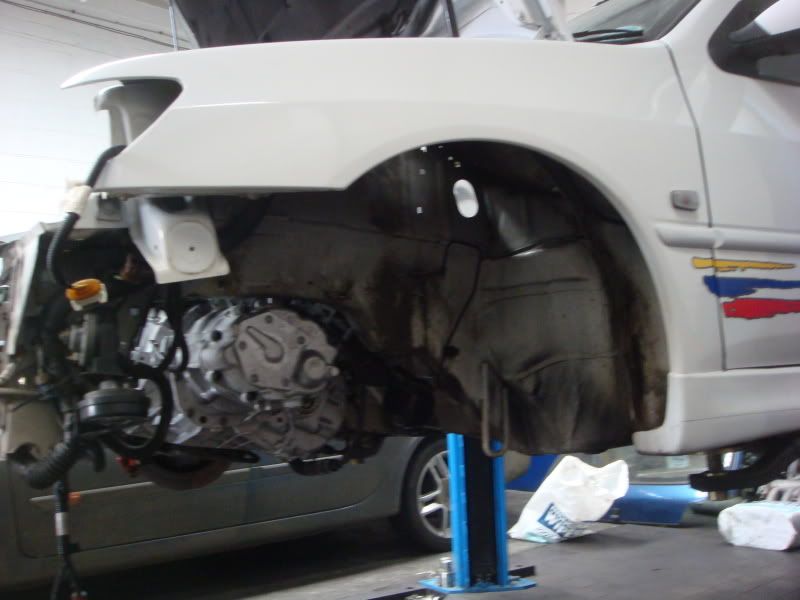
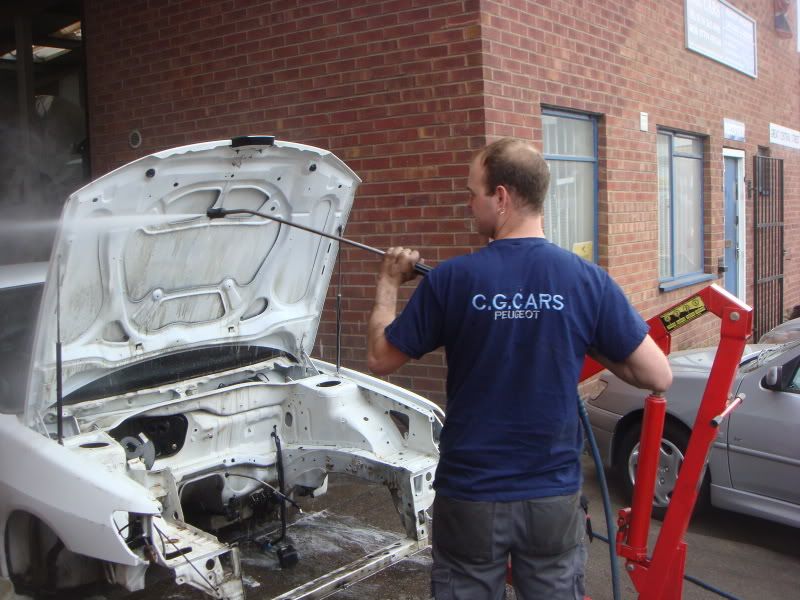
Whilst i was there i jacked the car up, quite high ok very high and set about the wheel arches and all the panels from under neath like the lower cross member and the chassis legs-
As you can see slowly all the muck etc is coming off and its starting to look quite clean, there is definately no laquer on the engine bay and wheel arches etc, you can see that just by looking at the colour of the panel work and the bay.
After a few runs with the jet wash this is what its starting to look like, just another go over should be enough-
Pushed back in the garage and back on the ramp, thats the cleanest i think i will get it-
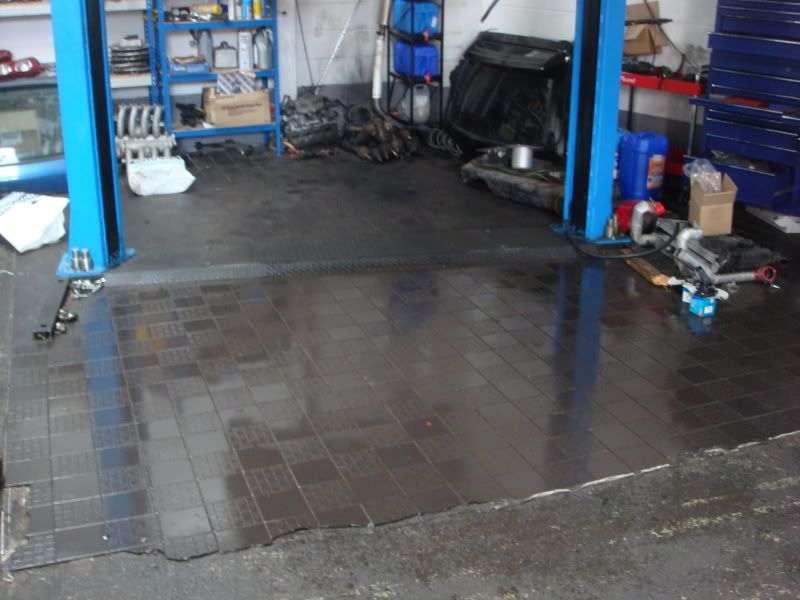
This is what i was left with, a bit of a lake in the garage and all the crap that came off it-
[IMG]http://i59.photobucket.com/albums/g284/mechanicalrepairs/rallyerefurb015.jpg
[/IMG]
Off to the paint shop in the morning hopefully.
Thanks for looking. Carl
This is what it looked like before i took alot of nuts and bolts away from it-
Most of you may think the bay looks ok, up close its a totally different story, it seems that the rallyes have an issue with rust in the engine bays, mine isnt bad but is there and looks horrid.
Strip down time, front removed-
Its quite surprising how rusty some of the brackets and various bits around the chassis legs are, i know the car is getting on for ten years but i always regarded Peugeots as being very good with the rot bug. Alot of the brown and messy stuff you can see on the car above is waxoil i applied about a year ago when i first installed the charger to help.
Intercooler and the pipework removed, also removed a few bits of wiring and the power steering res bottle-
Well a bit of an update today for you all, been busy today i can tell you-
More stripping the bay out, this is where i got to yesterday, you can see my lunch on the o/s inner wing, eat and work:lol-
As you can see a long way to go.
So after buying another gti6 this morning i decided to set about removing whats left of the engine when i got back to the garage got here at 3pm and 3 hours later this is what i have been up too-
Complete hubs with the shockers intact came off-
Then we came to the biggest bit of the job, the engine and box, this is what it looks like not mated to a white rallye-
Which then left me a big hole in the engine bay-
Out comes all the brake lines with the pipes complete, looks like this once removed-
Well as you can see more and more is coming off, here are a few close ups of the rust bug, to be fair it looks like i have caught it early as another couple of cars on here that have been done were alot worse than this-
Quite a shock but the top engine mount is genuine and has never had the repair done (common to crack and pull the bolt through-
Well as you can imagine i had a mixture of all sorts on my tiled floor, gear oil, coolant, brake fluid etc you name it i had it on the floor which made it extremly slippy,think i nearly went on my ass more times than i can remember, spent 15 minutes doing this-
Dropped the ramp down now and attached the engine crane to the front of the car-
After shifting it across the garage on the crane i set about starting to clean all the mud and grime that was left off so i can get it ready for paint, all the arches were cleaned aswell, going to have these painted whilst we are here too, also the underside of the bonnet so removed the sound deadening-
Soaked the engine bay in truck wash, this stuff is great but not to nice to your skin or eyes for that matter if the wind blows it into your face, left it to soak for 5 minutes-
Went round with a brush to give the truck wash a helping hand-
Ha ha, well as Dave was in due to him letting me down yeaterday i got him to take a few action shots, its crazy to see myself, look how bold i am not even 30 yet!!
-[quote="roland rat"]Carl is just a shiny/clean freak!
I'm sure he's part magpie! :lol
Looking good mate,excellent work as always :thumbsup
[/quote]
I want it to look nice and smart just how it looked when new i suppose, it was Pugfest last year that got me into this, the cars on show were just immaculate, hoping to take this to it this year, does anyone know the date?
Well the truck wash and the jet wash soon set to work on all he muck that was knocking about, i think it may have had something to do with the jet wash being set to 150 degrees, soon shifts the crap, in the scuttle you should have seen the amount of mud, twigs and leaves stuck in there, quite amazing really.
Whilst i was there i jacked the car up, quite high ok very high and set about the wheel arches and all the panels from under neath like the lower cross member and the chassis legs-
As you can see slowly all the muck etc is coming off and its starting to look quite clean, there is definately no laquer on the engine bay and wheel arches etc, you can see that just by looking at the colour of the panel work and the bay.
After a few runs with the jet wash this is what its starting to look like, just another go over should be enough-
Pushed back in the garage and back on the ramp, thats the cleanest i think i will get it-
This is what i was left with, a bit of a lake in the garage and all the crap that came off it-
[IMG]http://i59.photobucket.com/albums/g284/mechanicalrepairs/rallyerefurb015.jpg
[/IMG]
Off to the paint shop in the morning hopefully.
Thanks for looking. Carl
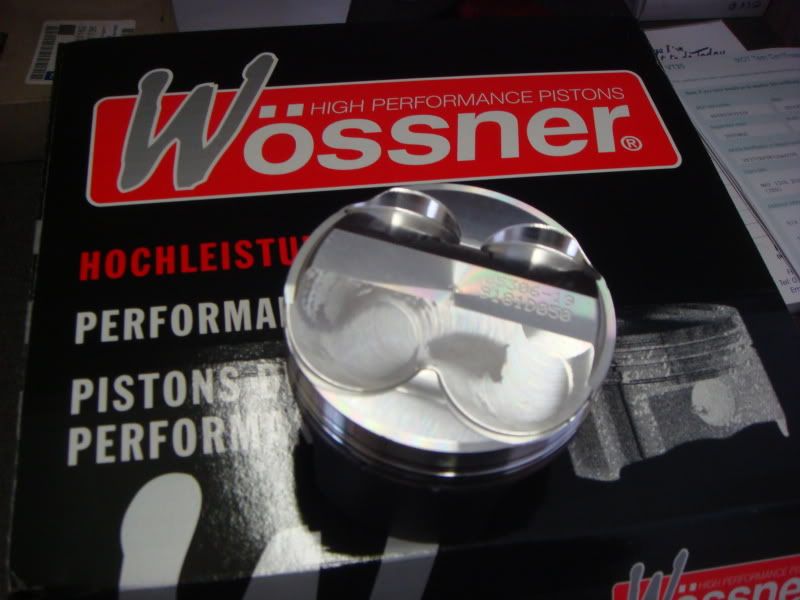
A little update for anyone interested-
Whilst the car was in pieces i decided to sort out a block to rebore and fit my new pistons too, stripped down a block and got the sand blaster out (that wasnt as much fun as i thought it would be), here are the results-
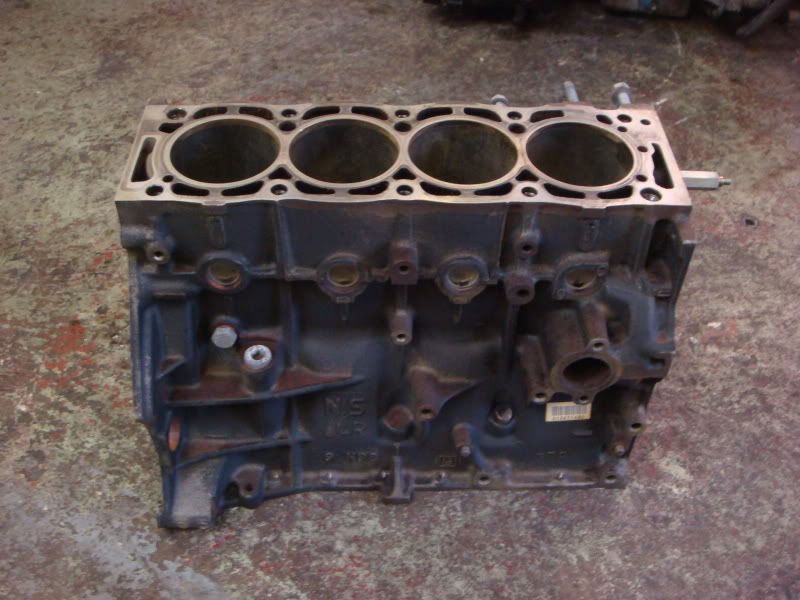
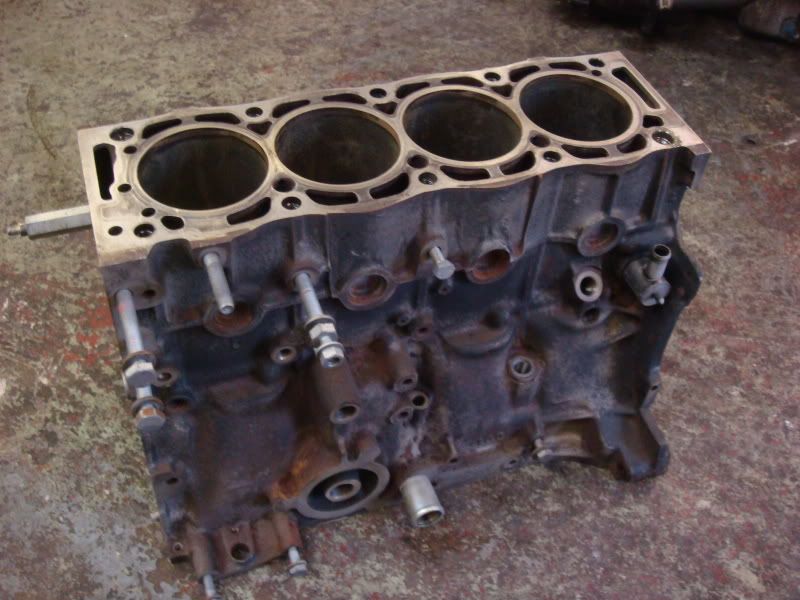
After all the grit was everywhere removing all the rust and build up of muck i had the engine degreased with a result that looks like this-
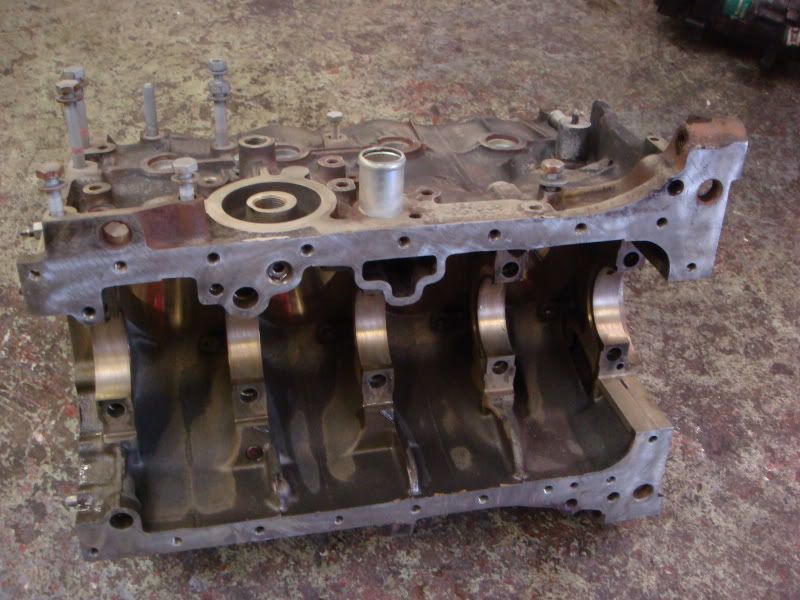
Just sent the block off this morning to have it rebored, then i will be able to fit these-
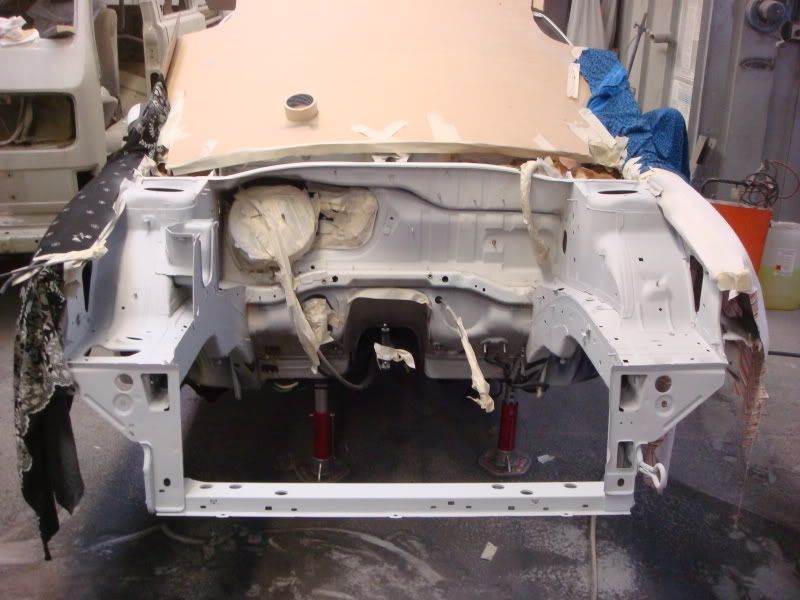
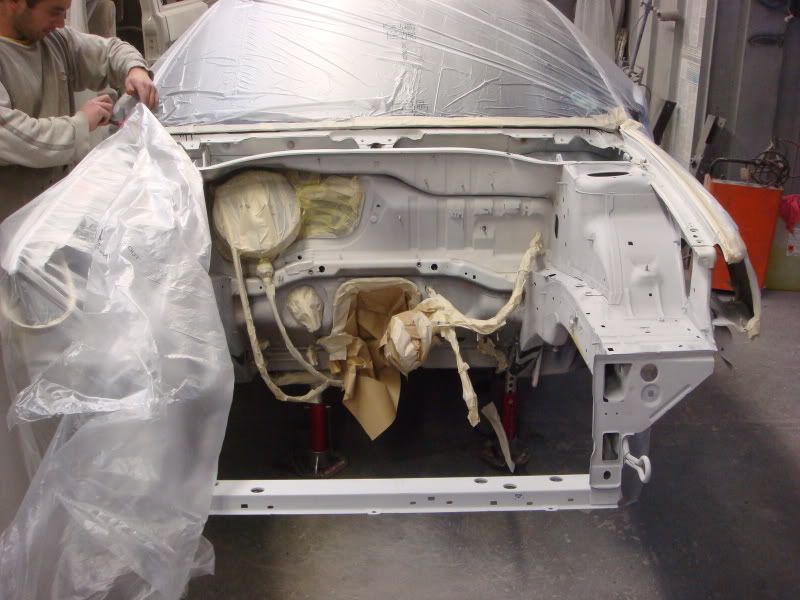
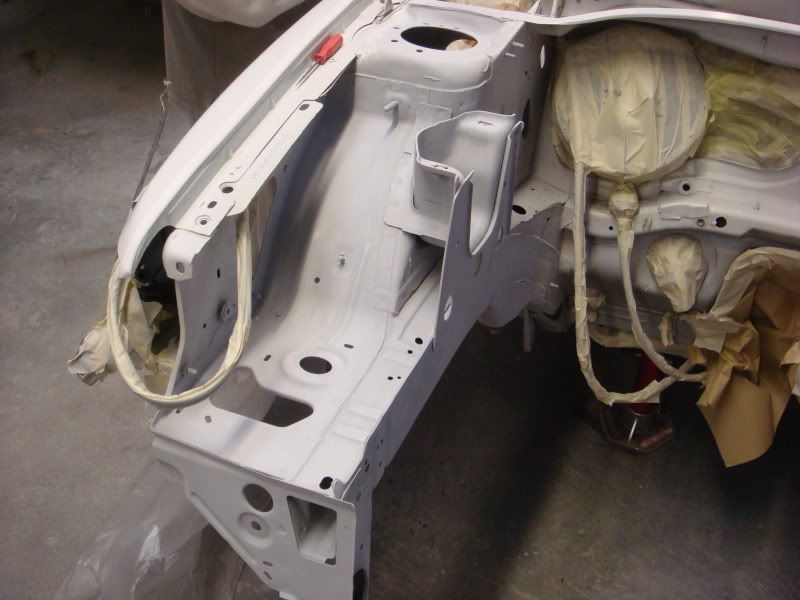
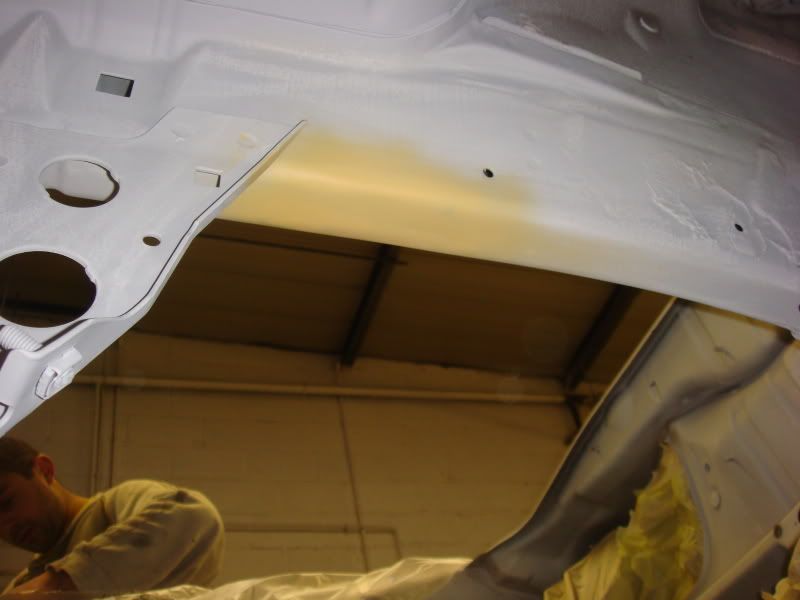
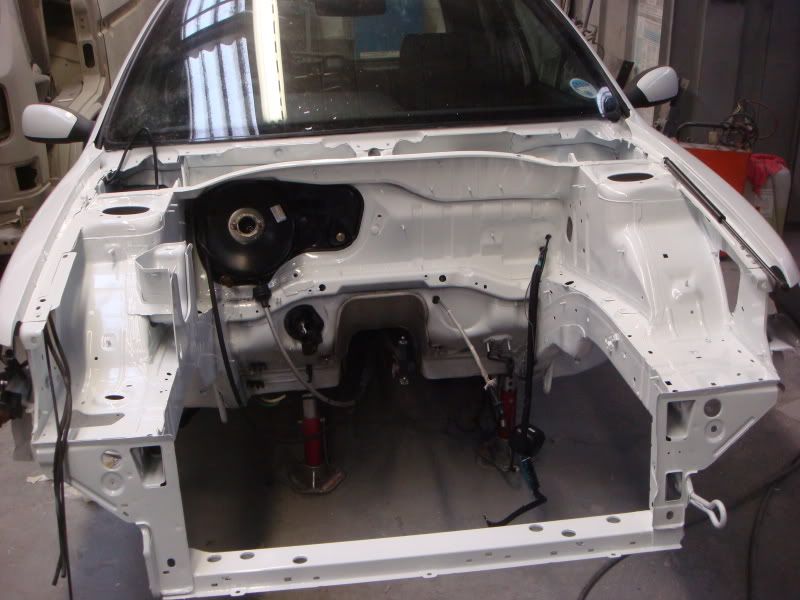
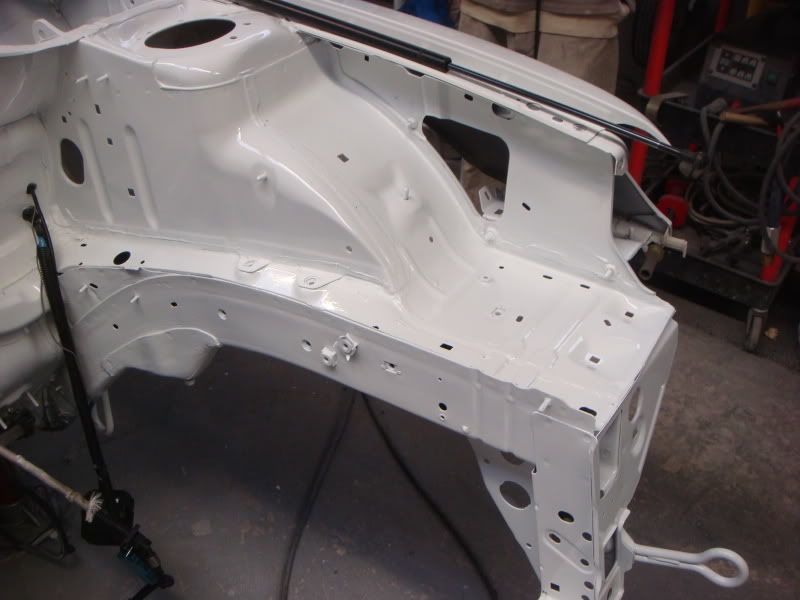
Whilst i have been doing the engine the bodyshop have been busy removing the rust and nasties in the engine bay, this is what was happening at 10 this morning, slowly getting there-
Well just been over to the bodyshop again and the car is being painted in a minute, the car has all been ust treated and all the sealer reapplied-
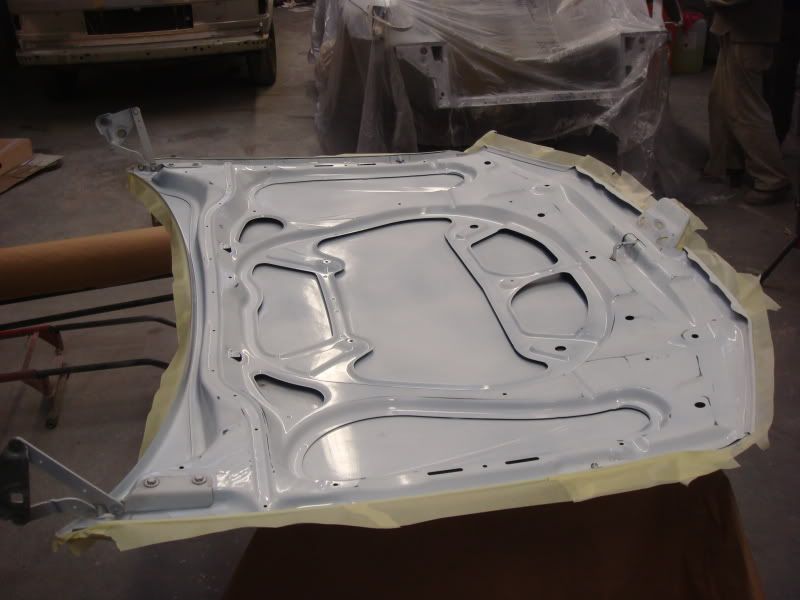
Bonnet has also been scotched ready to have a blow over, kept the hinges on so the bolts all get the paint treatment too-
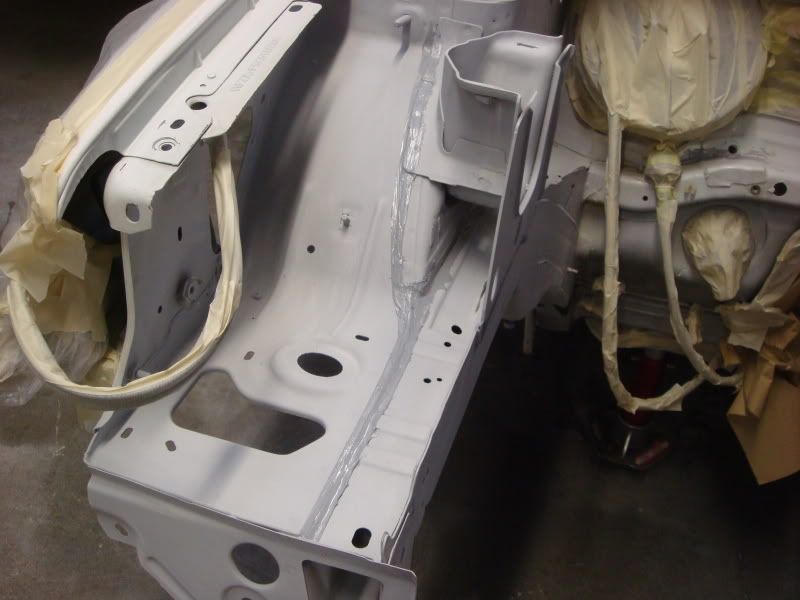
Even welded over the original airbox hole where the captive nut spins, wont be needing this so it went-
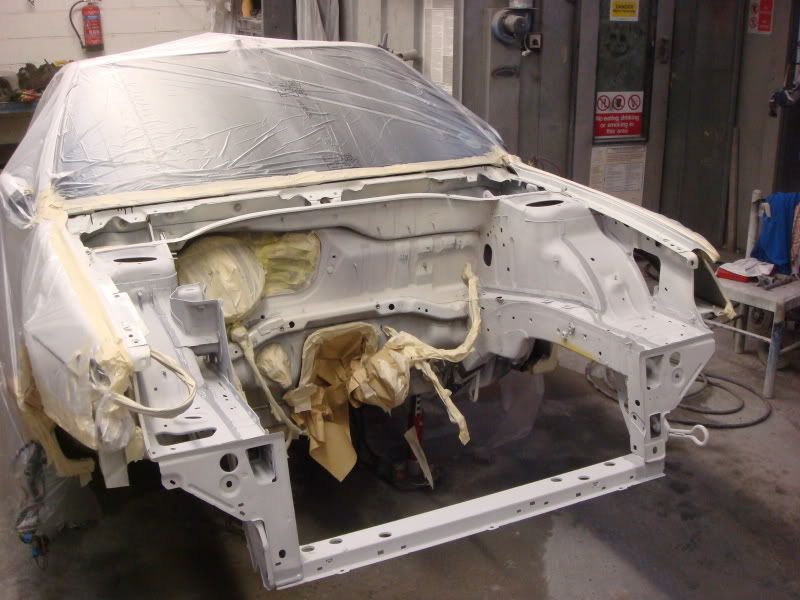
Right ready for paint-

All bagged up ready to blast, a couple of hours later and it should look better than new-
Came to work this morning and was greated to this-
Now the fun begins, remembering where everything goes.
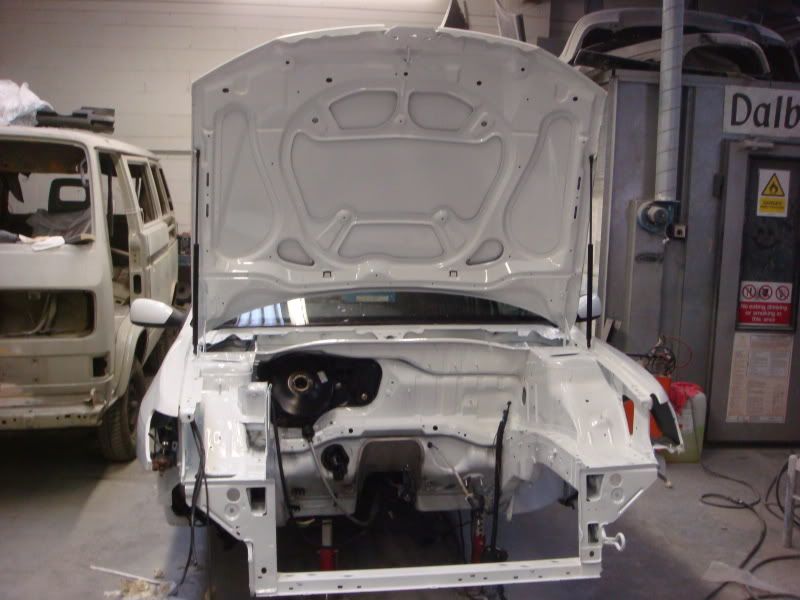
Done a little more to it this morning, not a great deal but its getting there, new sound deadening for under the bonnet and most of the bay parts are back in place-
Keep having to stop to wipe up mucky hand prints from the paint. :lol
Whilst the car was in pieces i decided to sort out a block to rebore and fit my new pistons too, stripped down a block and got the sand blaster out (that wasnt as much fun as i thought it would be), here are the results-
After all the grit was everywhere removing all the rust and build up of muck i had the engine degreased with a result that looks like this-
Just sent the block off this morning to have it rebored, then i will be able to fit these-
Whilst i have been doing the engine the bodyshop have been busy removing the rust and nasties in the engine bay, this is what was happening at 10 this morning, slowly getting there-
Well just been over to the bodyshop again and the car is being painted in a minute, the car has all been ust treated and all the sealer reapplied-
Bonnet has also been scotched ready to have a blow over, kept the hinges on so the bolts all get the paint treatment too-
Even welded over the original airbox hole where the captive nut spins, wont be needing this so it went-
Right ready for paint-
All bagged up ready to blast, a couple of hours later and it should look better than new-
Came to work this morning and was greated to this-
Now the fun begins, remembering where everything goes.
Done a little more to it this morning, not a great deal but its getting there, new sound deadening for under the bonnet and most of the bay parts are back in place-
Keep having to stop to wipe up mucky hand prints from the paint. :lol
Got a few bits delivered yesterdy from the painters, just got bored so decided to un wrap them and have a look-
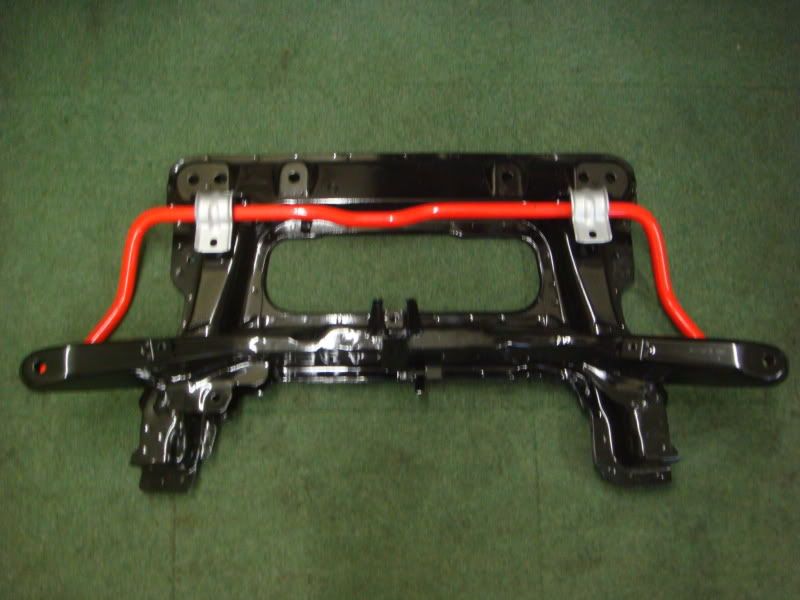
New subframe and antiroll bar-
Various brackets and gearbox bits-

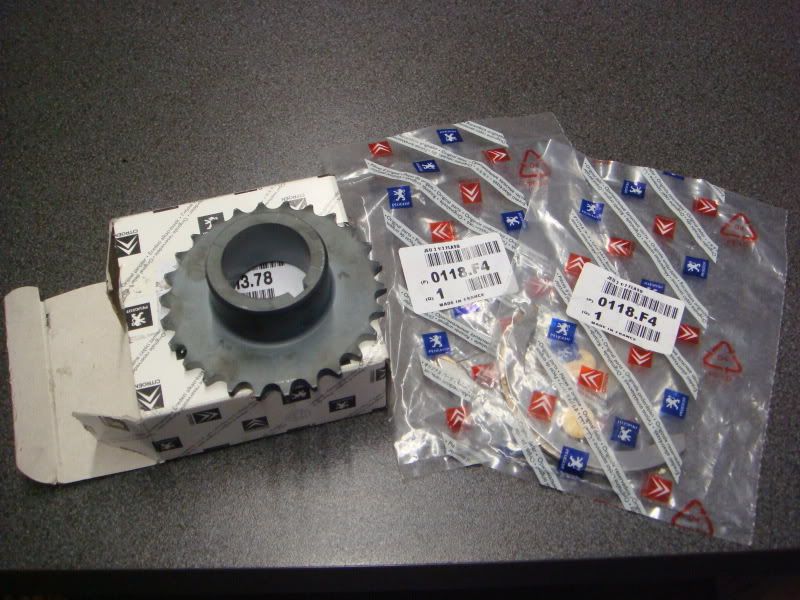
Also received a new lower oil pump drive which looks to have been modified with the spacer part part of the gear, good idea as this now means the rubber o ring that holds it all in place when the crank nut is done up is not now needed as it is keyed. Also got some new thrust washers-
Well done a little more to it today, moved it off of the far ramp and put it onto the other one in the cornner so i can move in the garage, aswell as my car in pieces and bits everywhere its just the same with customers cars (seems the bigger the place the more you tend to collect).
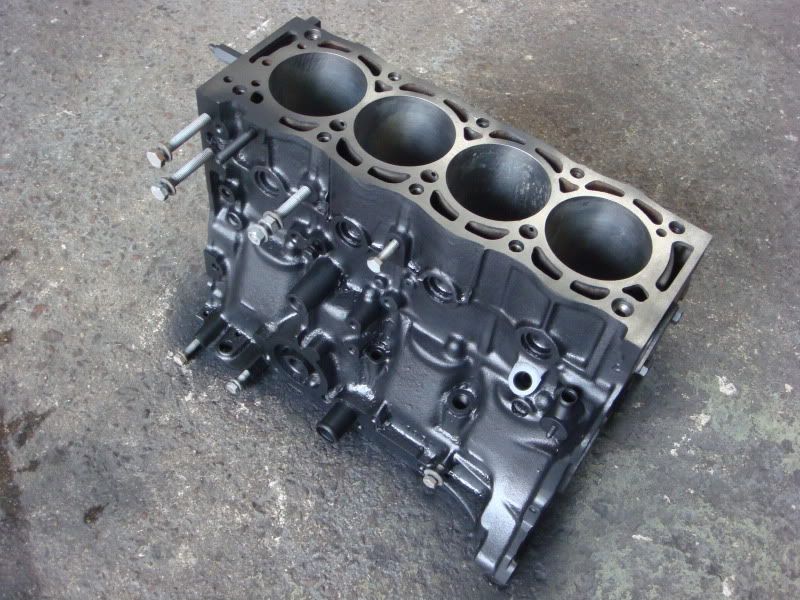
Stripped down a block and bead blasted the hell out of it (was rebored and decked last week), well as it was a nice and sunny day i decided to degrease the outside of it and add some black engine paint into the mix-
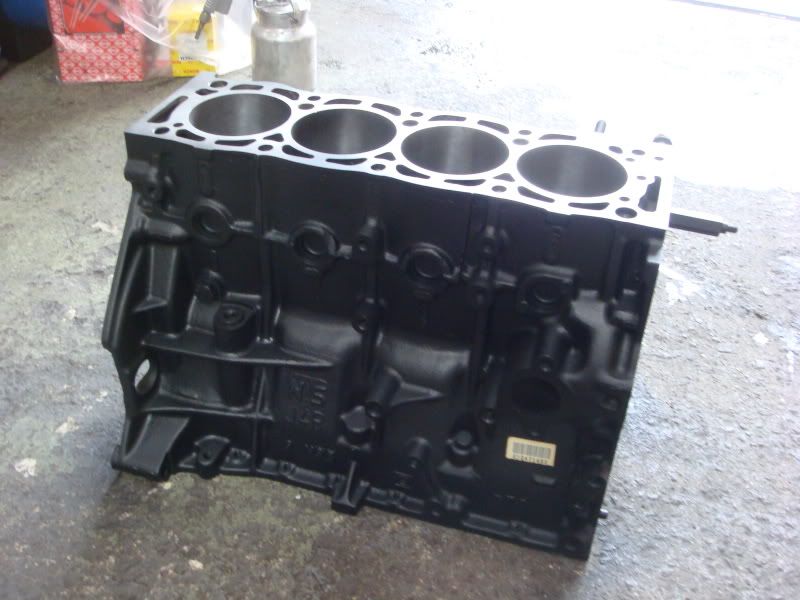
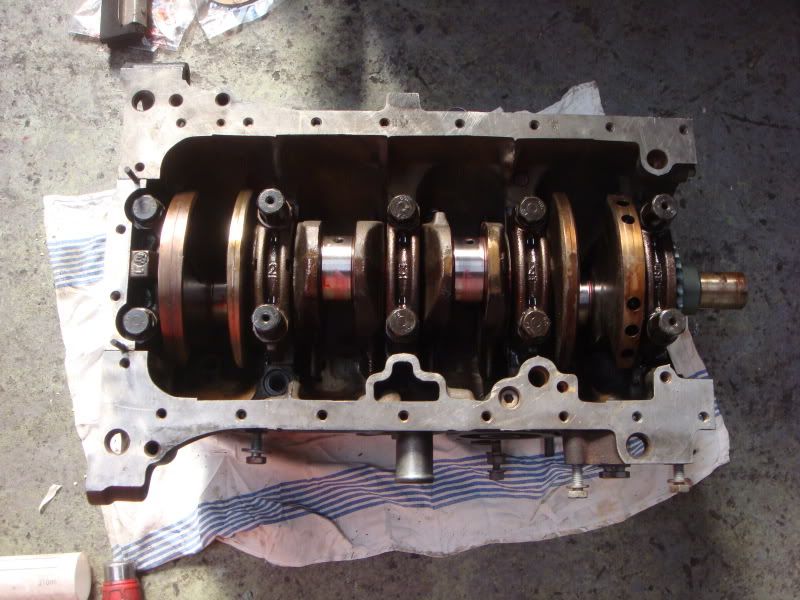
Once that was dry and it didnt take that long i set about fitting the crank into it, new bearing's and thrust washers etc and a freshly polished crank-
Then 40 minutes ago i gets a call from my painter, come and collect your bits, well with these bits back i can more a little further on, this is what i picked up-
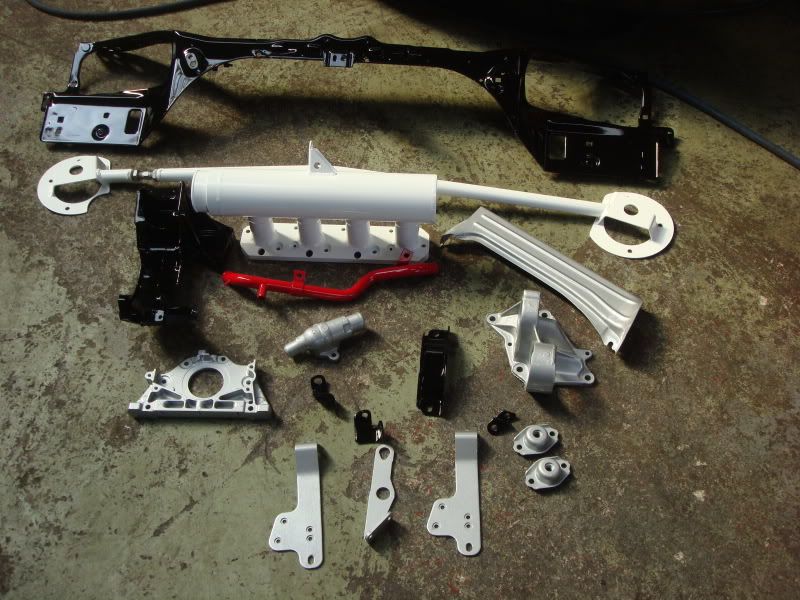
The paint finish on these bits is flawless.
Had the omp strut brace repainted white, the red was coming off in places. Front panel redone in gloss black and the engine mount then various brackets redone, well impressed with the quality.
Well thats it for now, i may come in on monday and fit a little more back up?? All depends what she indoors has planned for me:lol
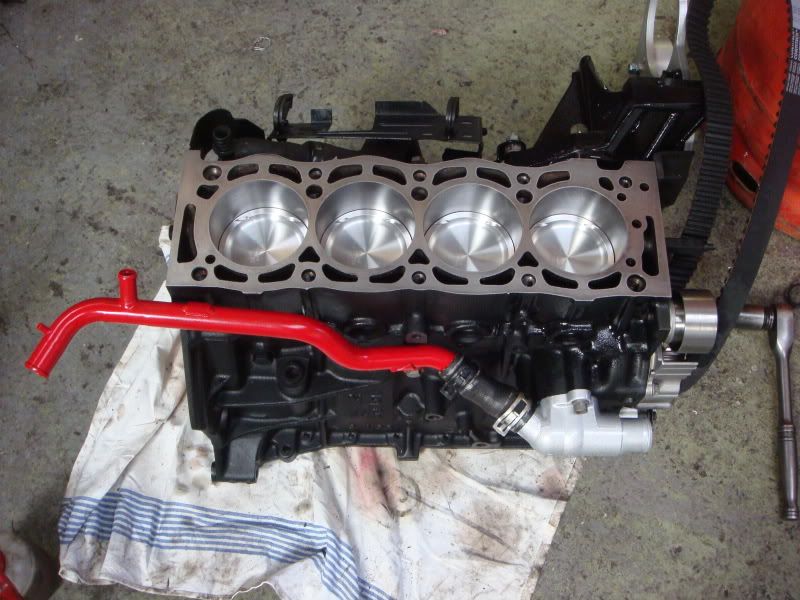
Well the pistons are now fitted to the block and a few shiney bits i had painted are too, seems a waste to have to put the head on as the pistons look so nice, coming along now-
Should have this all back together and in the car by saturday, well if i can get a few hours on it.
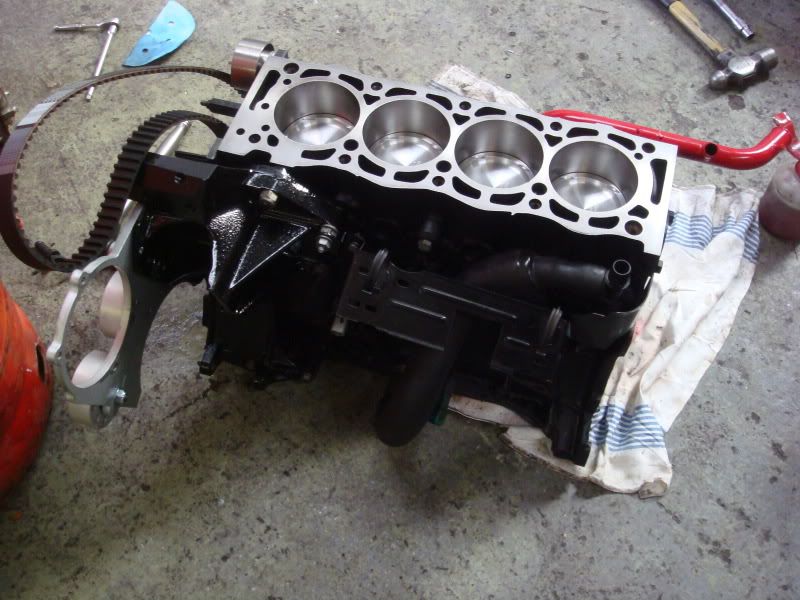
Done alot to the car today, as there wasnt a great deal in i got Dave to do most of the work and i focused on putting the Rallye back together, first off was to reaasemble the engine, starting to get there-
(notice all the grubby hand marks everywhere)
Gearbox on and mostly all the bits and pieces needed, just got to do the final stages of the head tightening and the cam covers can go on.
More or less done-
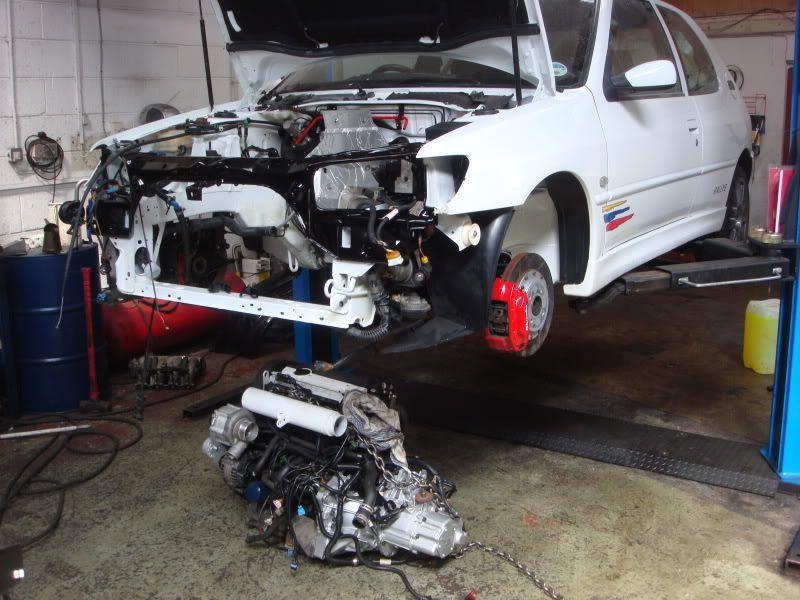
Lining it up under the car to go in, notice i have left an old sump on the engine, more about this later-
Lokking at the photo's now i wish i had the manky alternator painted as this lets the side down.
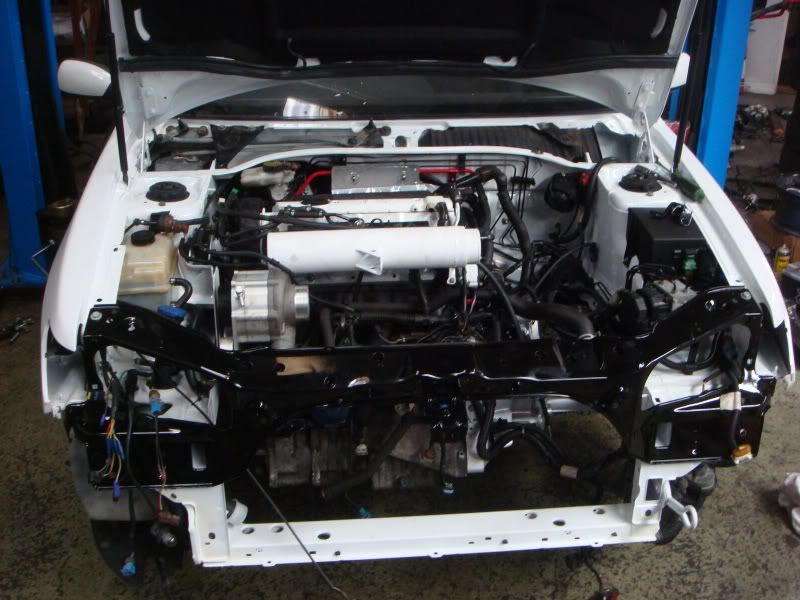
Finally got the engine and box in on two of the engine mounts and surprisingly didnt scratch any of the fresh paint-
A bit further on-
Well it certainly is starting to look like how it did before now minus the rust, coming along well, not hit and stumbling blocks yet, you have to love the morettes:unsure
Well now the sump part i mentioned earlier, took the old one off- (didnt want to scratch the new oneup slipping and sliding it along the garage floor)
Replaced it with a nice shiney one- (there is a method behind my thinking) :lol
Well last but not least for today anyway was the fitting of the shiney new subframe, have to say this really finish's the car off, now if i get cheesed off with the car being in the workshop i can put the wheels on a nd push it outside.
Not much more to do, last picture of the day-

Well i stayed at the garage for a couple of hours to tie up a few loose ends and got the car car more or less to the stage i want it.
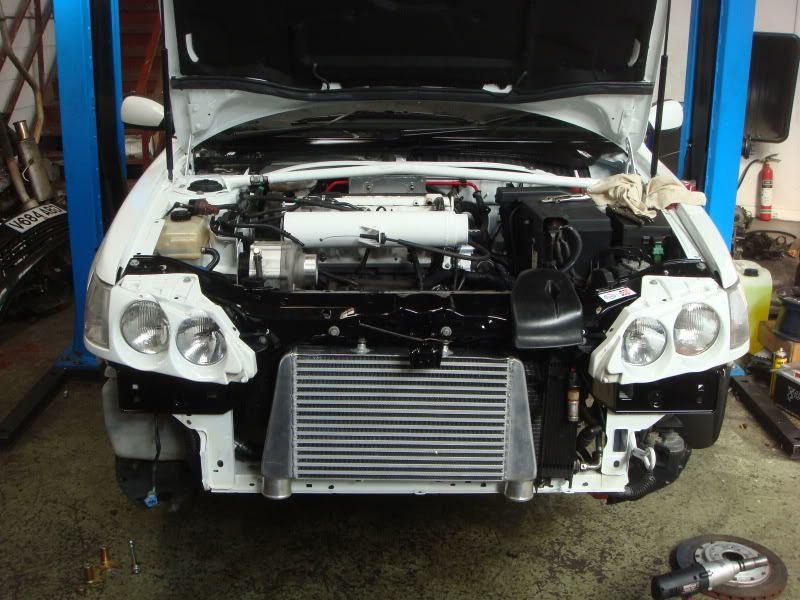
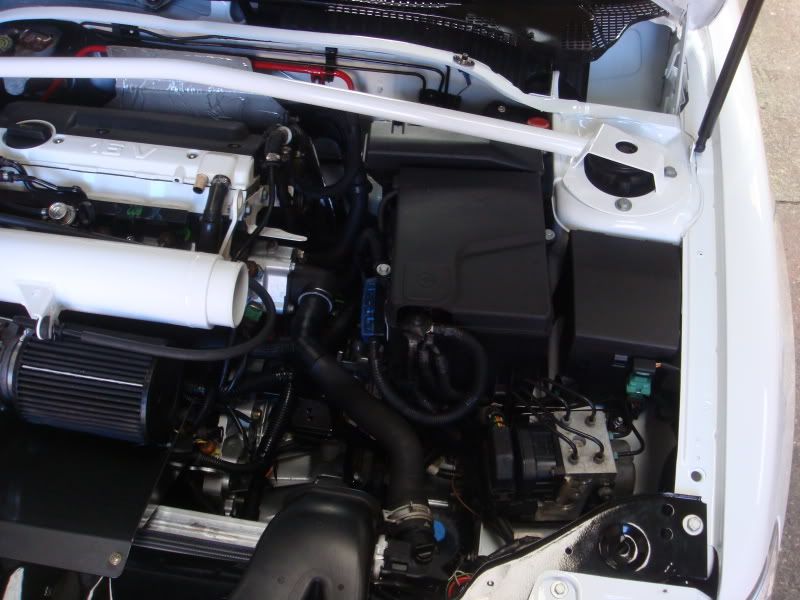
All the front is back together and all i have to do now is get the boost pipes made up, then the bumper can go back on-
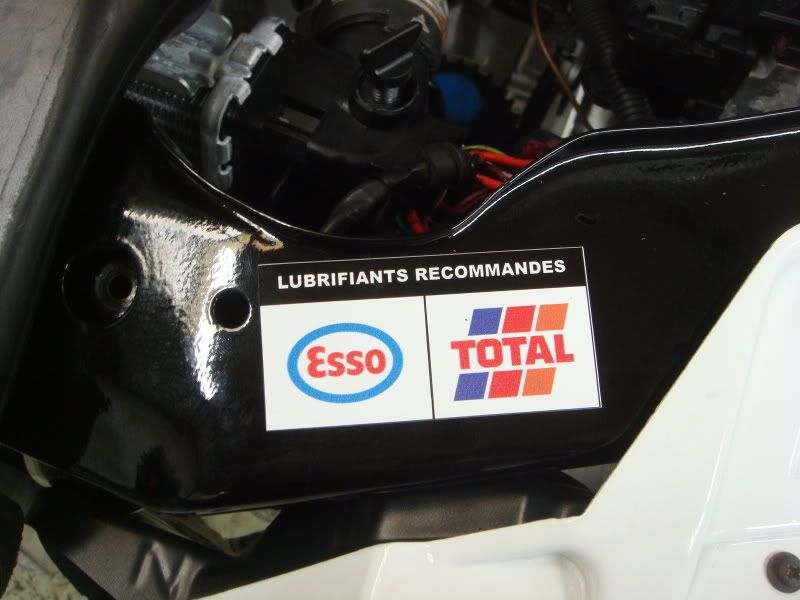
As the front was all repainted including the front panel i hade some of the esso oil stickers made up, i have made a few more than needed so if any body wants one they are £2.50 each posted
Here is a close up-
Thought i took more photo's but they seem to have vanished, hopefully on sunday the car will be back up and running, will add some more photo's when i get into work in the morning.
Well spent the afternoon on the car and it is now back on its feet, just washed off all the garage and bodyshop dust not to mention all the abrasize sand blasting grit that seems to have got everywhere-
Applied some clear waxoyl to all the hard to reach areas and the lower cross member etc, i was a bit undecided as it does make it look a little less fresh but it wont be seen when the bumper and bits are all back on-
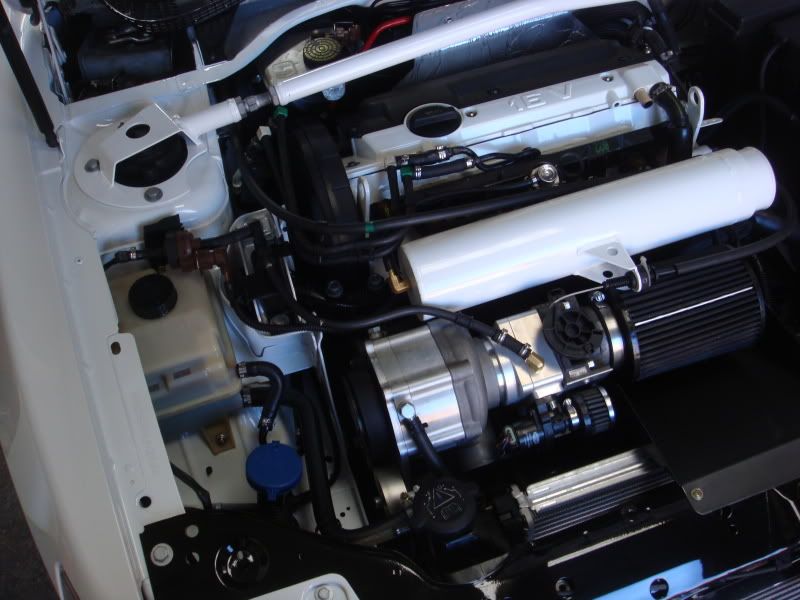
A few close up shots of the bay, i have to say i am very pleased with the end result, my empty wallet now is going to start to recover as the spending has to stop, well worth the money though-
Of to the welders tomorrow for the boost pipes to all be made, welded and fitted, much to the despair of my welders wife
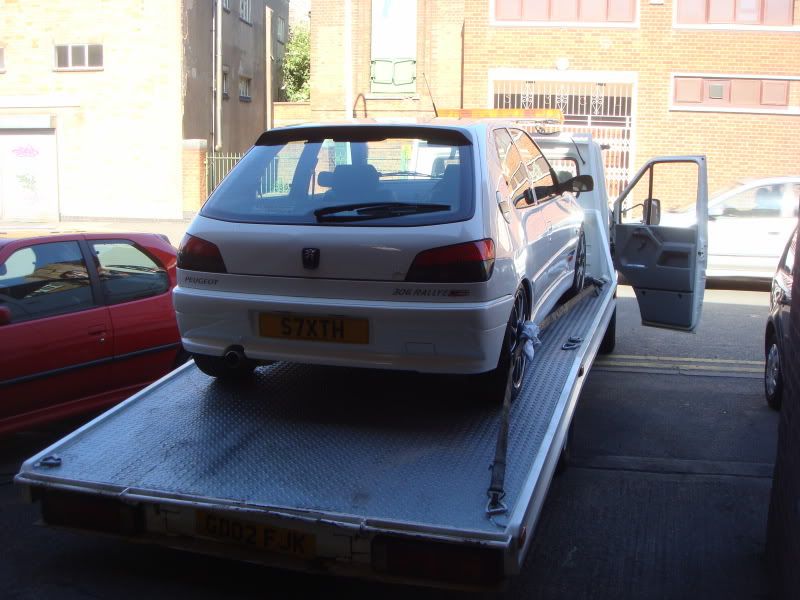
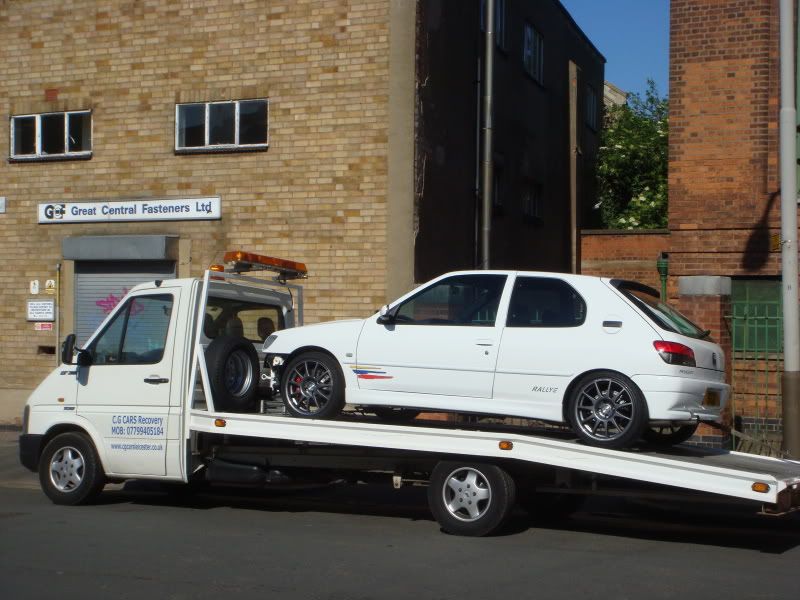
Just off to put it on the truck now...............
On the truck and ready to go-
Well, the car is now up and running, i wont say finished as i will always find something to do on it i am sure.
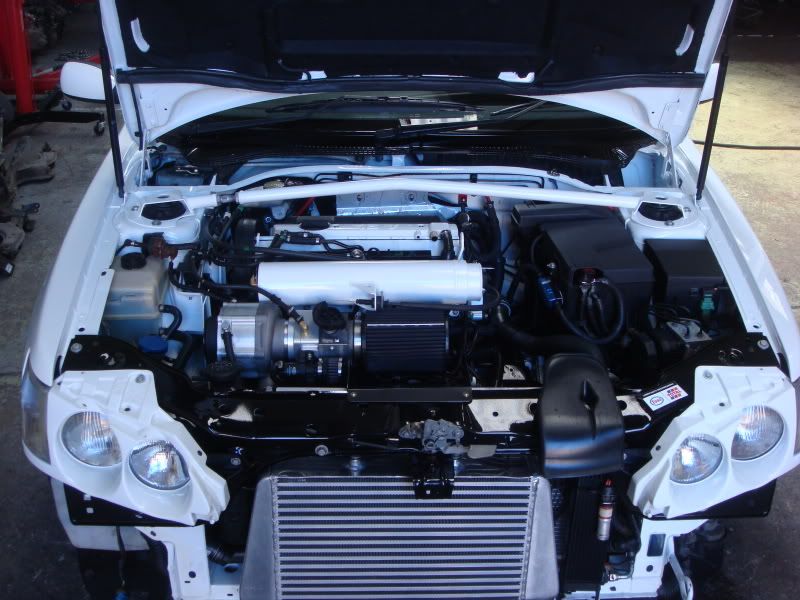
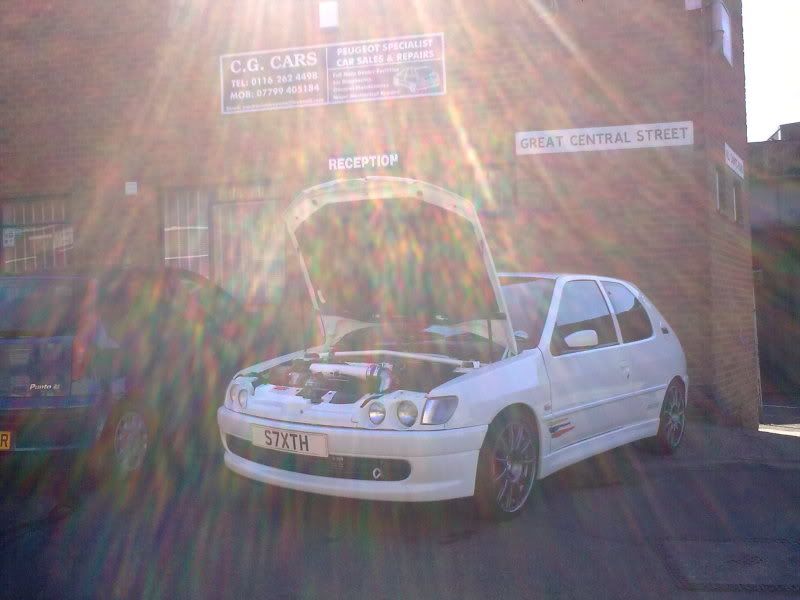
A completed picture with all the front back on-
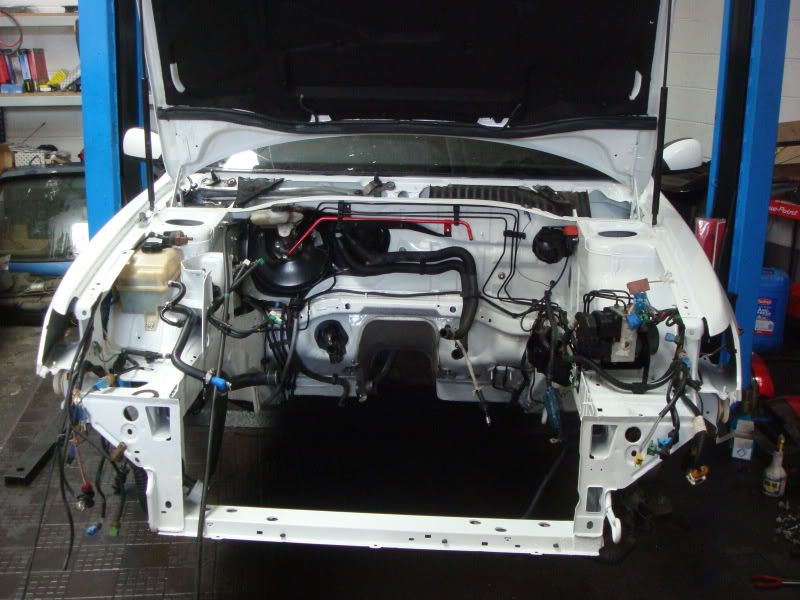
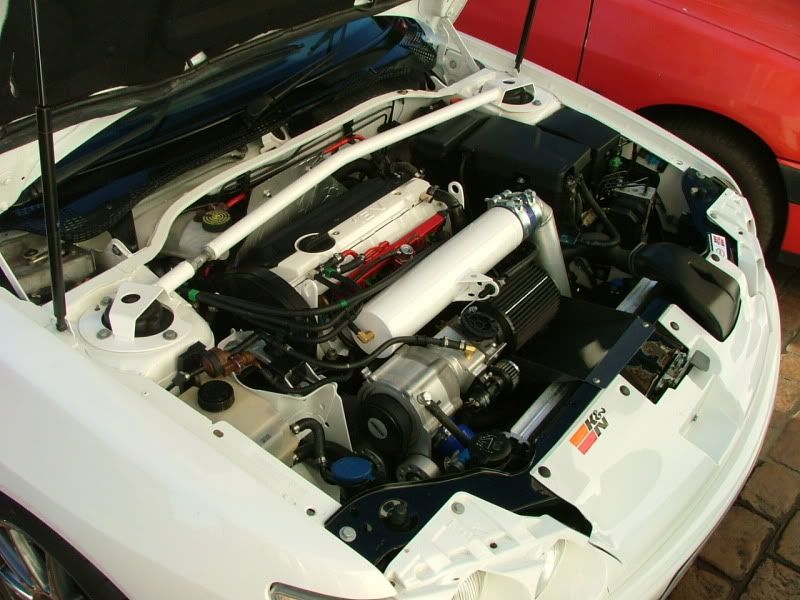
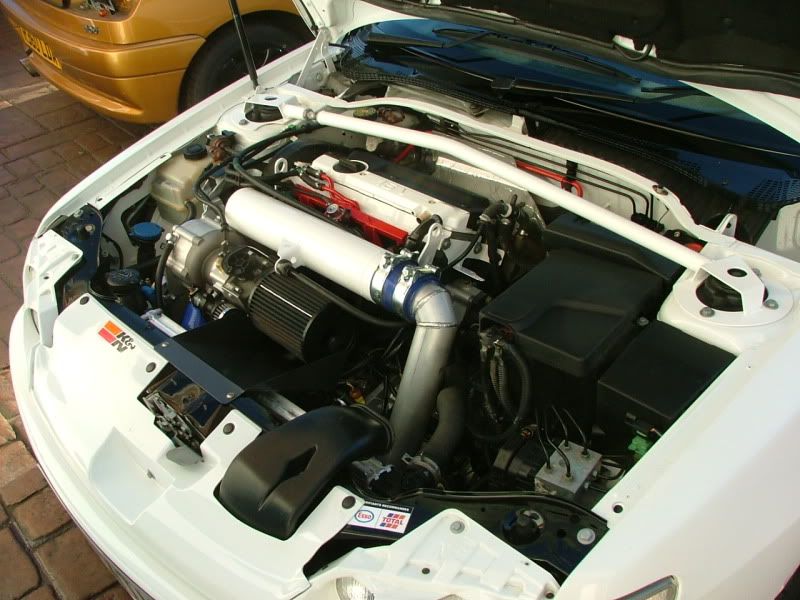
A few engine bay shots-

These photo's were taken from my phone so are not the best quality.
Carl
New subframe and antiroll bar-
Various brackets and gearbox bits-
Also received a new lower oil pump drive which looks to have been modified with the spacer part part of the gear, good idea as this now means the rubber o ring that holds it all in place when the crank nut is done up is not now needed as it is keyed. Also got some new thrust washers-
Well done a little more to it today, moved it off of the far ramp and put it onto the other one in the cornner so i can move in the garage, aswell as my car in pieces and bits everywhere its just the same with customers cars (seems the bigger the place the more you tend to collect).
Stripped down a block and bead blasted the hell out of it (was rebored and decked last week), well as it was a nice and sunny day i decided to degrease the outside of it and add some black engine paint into the mix-
Once that was dry and it didnt take that long i set about fitting the crank into it, new bearing's and thrust washers etc and a freshly polished crank-
Then 40 minutes ago i gets a call from my painter, come and collect your bits, well with these bits back i can more a little further on, this is what i picked up-
The paint finish on these bits is flawless.
Had the omp strut brace repainted white, the red was coming off in places. Front panel redone in gloss black and the engine mount then various brackets redone, well impressed with the quality.
Well thats it for now, i may come in on monday and fit a little more back up?? All depends what she indoors has planned for me:lol
Well the pistons are now fitted to the block and a few shiney bits i had painted are too, seems a waste to have to put the head on as the pistons look so nice, coming along now-
Should have this all back together and in the car by saturday, well if i can get a few hours on it.
Done alot to the car today, as there wasnt a great deal in i got Dave to do most of the work and i focused on putting the Rallye back together, first off was to reaasemble the engine, starting to get there-
(notice all the grubby hand marks everywhere)
Gearbox on and mostly all the bits and pieces needed, just got to do the final stages of the head tightening and the cam covers can go on.
More or less done-
Lining it up under the car to go in, notice i have left an old sump on the engine, more about this later-
Lokking at the photo's now i wish i had the manky alternator painted as this lets the side down.
Finally got the engine and box in on two of the engine mounts and surprisingly didnt scratch any of the fresh paint-
A bit further on-
Well it certainly is starting to look like how it did before now minus the rust, coming along well, not hit and stumbling blocks yet, you have to love the morettes:unsure
Well now the sump part i mentioned earlier, took the old one off- (didnt want to scratch the new oneup slipping and sliding it along the garage floor)
Replaced it with a nice shiney one- (there is a method behind my thinking) :lol
Well last but not least for today anyway was the fitting of the shiney new subframe, have to say this really finish's the car off, now if i get cheesed off with the car being in the workshop i can put the wheels on a nd push it outside.
Not much more to do, last picture of the day-
Well i stayed at the garage for a couple of hours to tie up a few loose ends and got the car car more or less to the stage i want it.
All the front is back together and all i have to do now is get the boost pipes made up, then the bumper can go back on-
As the front was all repainted including the front panel i hade some of the esso oil stickers made up, i have made a few more than needed so if any body wants one they are £2.50 each posted
Here is a close up-
Thought i took more photo's but they seem to have vanished, hopefully on sunday the car will be back up and running, will add some more photo's when i get into work in the morning.
Well spent the afternoon on the car and it is now back on its feet, just washed off all the garage and bodyshop dust not to mention all the abrasize sand blasting grit that seems to have got everywhere-
Applied some clear waxoyl to all the hard to reach areas and the lower cross member etc, i was a bit undecided as it does make it look a little less fresh but it wont be seen when the bumper and bits are all back on-
A few close up shots of the bay, i have to say i am very pleased with the end result, my empty wallet now is going to start to recover as the spending has to stop, well worth the money though-
Of to the welders tomorrow for the boost pipes to all be made, welded and fitted, much to the despair of my welders wife
Just off to put it on the truck now...............
On the truck and ready to go-
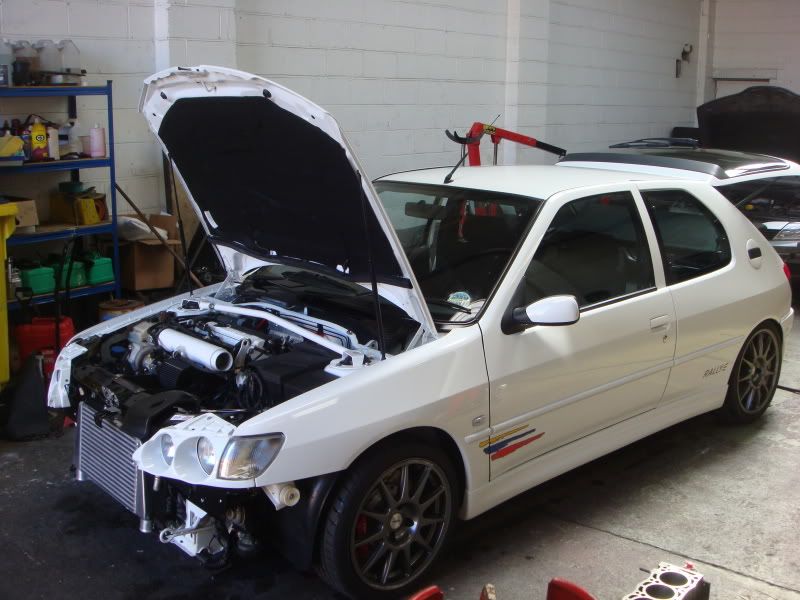
Well, the car is now up and running, i wont say finished as i will always find something to do on it i am sure.
A completed picture with all the front back on-
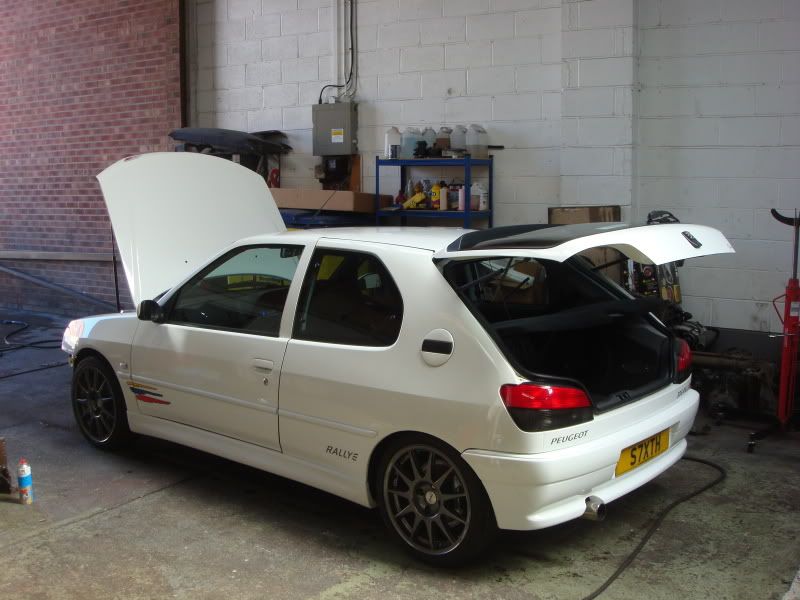
A few engine bay shots-
These photo's were taken from my phone so are not the best quality.
Carl

Gassing Station | French Bred | Top of Page | What's New | My Stuff