Airfix 1/24th Mossie, finally starting..........
Discussion


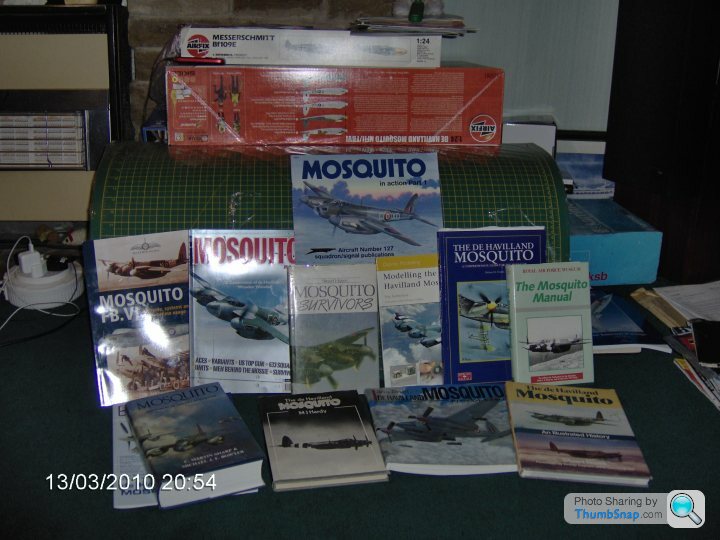
After 3 months pontificating i'm finally opening the box (or should that be hanger!)
on the Airfix Mossie.
After waiting 2 Months for Xtradecal Markings to arrive together with the MDC Sutton harness
photo-etch kit..
I've decided to do the Kit as MM403 of 464 Sqdn RCAF which was based at Thorney Island
in the Autumn of 1944.
The Aircraft featured was in the usual Day fighter scheme of Dark Green/Ocean Grey upper surfaces
and Medium Sea Grey lower surfaces, But as it was in squadron service during D-Day it can have
Invasion Stripes on its lower surfaces.
Now then do you think I might not have enough referance material then?


Best of luck and I always enjoy the 'progress' threads on here regarding tank/aircraft modeling despite me being a figure painter.
Half an hour ago, I ordered this:
https://www.historexagents.com/shop/hxproductdetai...
It's in 54mm which is around 2" tall and depicts a British soldier fighting in Afghanistan in 1842.
Half an hour ago, I ordered this:
https://www.historexagents.com/shop/hxproductdetai...
It's in 54mm which is around 2" tall and depicts a British soldier fighting in Afghanistan in 1842.
Hi TD and sorry for the late reply.
These figures (and many others in all kinds of scales) come in metal or resin kit form. I tend to assemble as much as I can, drill holes through the feet into the legs then glue 2mm brass rod into the holes- leaving around 10mm sticking out. I then drill corresponding holes in a piece of scrap timber and press into place. This acts as the base for holding the figure during the whole painting process.
I then spray it with Halfords white car primer and allow to dry for 24 hours.
I always paint the flesh parts first as the face is where the eye is drawn to so it becomes the most important area. In answer to your question, I use Windsor & Newton sable brushes and first block in the face (and later all the areas) with
Humbrol matt enamels.
I then allow that to dry for a day.
Then it's time to break out the oil paints. I use cocktail sticks to lay out a palette of the colours needed on a card as this absorbs some of the oil in the paint. On a very small face like this I'll brush on a mixture of Burnt Sienna and Yellow Ochre and, without waiting, start to remove it with a flat, dry brush. I do this from top to bottom- leaving a slight sheen on raised areas and more (darker) paint under the nose, chin, eye sockets etc. The idea is to create the illusion of shadow and light as if the sun is directly overhead. Again, without waiting, I'll dab spots of Titanium White onto the areas needing highlighted- bridge and tip of the nose, chin, forehead etc. Using a fresh brush, this is feathered into the still wet base coat. This process is done at least 3 times applying smaller and smaller dots of T/White. For the eyes, I use a flesh colour (never pure white!) then dot in the iris etc.
If you look carefully at the face and hands of the figure I posted, you can see where its painter applied the shadows and highlights- for example- his knuckles gripping the rifle are distinctly lighter than the rest of the hands.
When using this process it's important to never dilute with turps or white spirit nor use a brush that is not completely dry of those.
This is a figure, from the same period, that I finished in January: http://www.eliteminiaturas.com/Paginas/Catalogo/jc...
Again, look at the highlights on the flesh- especially on the cheeks and the knuckles.
Once the figure is complete, it's glued into a base and the groundwork is created. I rarely use the bases that come with kits but did on the one above. I painted and drybrushed the rocks and then glued Filler B Glass Bubbles (which I bought in a boat chandlers) to them to represent the snow and ice.
Sorry to have gone on a bit but it's a complex process. I paint in all scales and I've just finished the face on this 1:3 scale guy: http://www.frontiermodels.co.uk/WHY-SO-SERIOUS-BUS...
..although I think mine is better as I first completed it in flesh and then added the 'make-up' removing some as if he'd been roughed up, then shaded and highlighted the make up as you would with the flesh.
No worries mate and although I went off topic, let's get back to that aircraft!
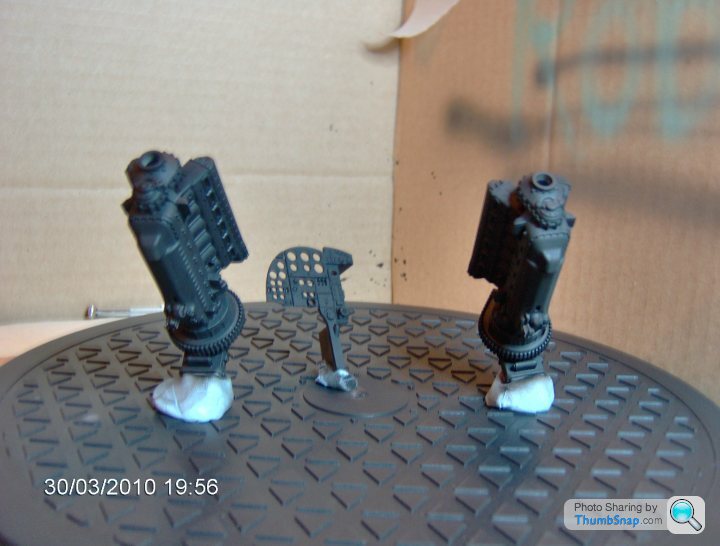
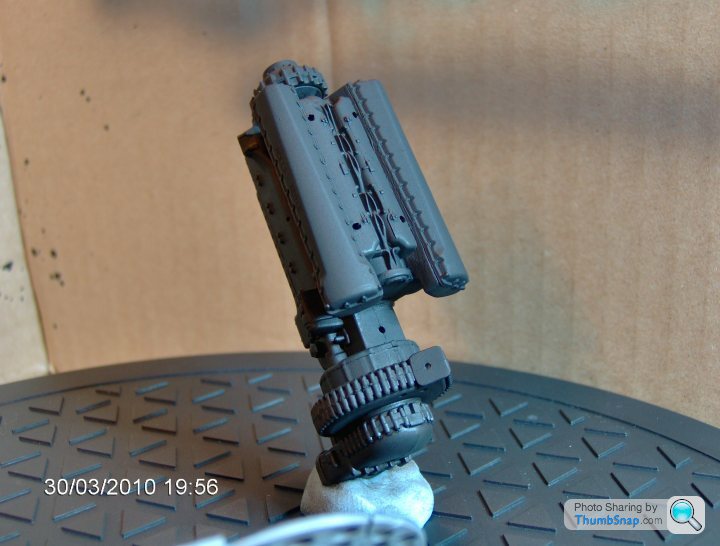
One suggestion would be to use a mixture of the engine base colour and white to (slightly) dry brush those blocks to highlight detail and then apply either Tamiya Smoke or a white spirit diluted Raw Umber oil paint to represent the oily, dark crevices.
Keep us updated.
One suggestion would be to use a mixture of the engine base colour and white to (slightly) dry brush those blocks to highlight detail and then apply either Tamiya Smoke or a white spirit diluted Raw Umber oil paint to represent the oily, dark crevices.
Keep us updated.

kenny Chim 4 said:
No worries mate and although I went off topic, let's get back to that aircraft!
One suggestion would be to use a mixture of the engine base colour and white to (slightly) dry brush those blocks to highlight detail and then apply either Tamiya Smoke or a white spirit diluted Raw Umber oil paint to represent the oily, dark crevices.
Keep us updated.
They look awesome - definitely more artistic skill required than with a mechanical subject!One suggestion would be to use a mixture of the engine base colour and white to (slightly) dry brush those blocks to highlight detail and then apply either Tamiya Smoke or a white spirit diluted Raw Umber oil paint to represent the oily, dark crevices.
Keep us updated.
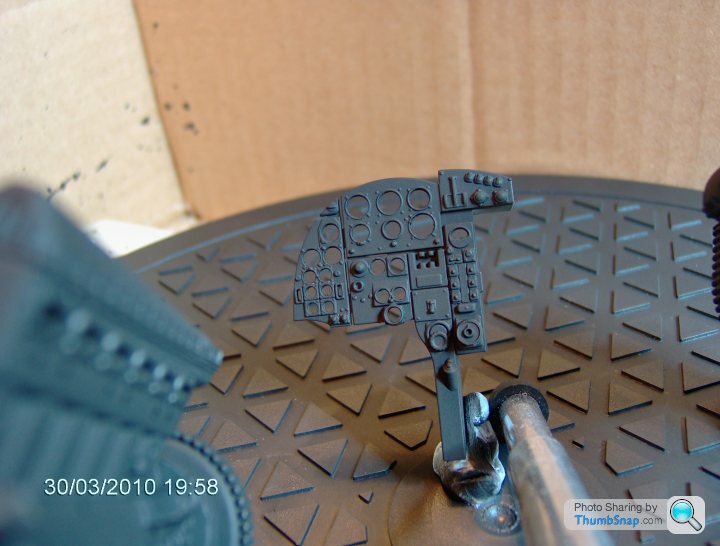
Do you have any tips for painting plastic to look like leather? On my current project there is a leather cover behind the instrument panel. The plastic part has creases mouled in it, but I havn't got much idea how to paint it realistically. I want to get the 'well worn' look, with the fine crazing on the surface if possible. I'm using acrylics and enamels, and would like to stick with them (because I already have a good range!).
Cheers,
Hi dr gn,
Much as I have always painted leather in oils, I'm pretty sure you could have a bash with enamels (sorry, I don't have much experience with acrylics). I would base coat with matt black. Let that dry and then dry brush the piece with a medium brown.
When I say dry brush, I mean very meagerly and I know you're aware of this process dr but I'll state it for others.
Open a tin of Humbrol, take a cocktail stick and remove a small blob from the bottom (I never stir these tinlets as it shortens their life- but then, I tend to only paint small areas!) Put this on a palette- not a card as I mentioned before but plastic such as the inside of a Pringles tube lid.
Then take a small flat brush (by flat I mean not round but with a flattened ferule) and add paint to the brush, then remove the bulk by wiping the bristles on a dry tissue or cloth which is free of w/spirit or turps. Gently stroke the brush over the high points of the dry black paint. You may not see much difference initially but repeat this and you'll find that the creases you mention are not being touched and are left black. This is the result you want.
Now, if you look at aged or stressed (brown) leather, the worn areas become yellow and faded so mix a blob of yellow to another one of brown and dry brush but only on the very highest areas- not as much as you did with the first sweeps. Here's an example of faded and stressed leather belting: http://www.timeline.es/figmes/f_may08_ing.htm
see how the stressed areas and highlights become yellowed- ironically, I believe the artist here used acrylics!
For final dry sweeps I would add a small amount of white to the brown/yellow mix and touch only the very prominent points. You could finish it off with a mixture of clear matt and semi gloss- 70% being the matt.
Ok, I have never done this (to represent leather), have not seen the part you need to paint but would suggest all paints are matt.
Now, here's the way I paint leather. Humbrol black 33 (leaving to dry for a day), mix of Raw Umber and Burnt Sienna, then highlighting with that mix and added Cadmium Yellow. Ivory black for any shadow touch ups.
Kenny your work and the example figure you display show so much more lifelike detail than the figure models I rather disparaged thirty years ago I feel I owe you both an apology...
they are bloody magnificent
wow
I grew up looking at "overworked" attempts to detail figures which simply didn't look "alive"
Dry brushing the engine blocks is a very good idea for the Mossie I love the detail in this kit
they are bloody magnificent
wow
I grew up looking at "overworked" attempts to detail figures which simply didn't look "alive"
Dry brushing the engine blocks is a very good idea for the Mossie I love the detail in this kit
Perdu, things have moved on so much. For example, I understand that the artist who painted this used dry powders to finish the shading and highlight effects: http://www.frontiermodels.co.uk/Pagan-LADY-OF-THE-...
kenny Chim 4 said:
Hi dr gn,
Much as I have always painted leather in oils, I'm pretty sure you could have a bash with enamels (sorry, I don't have much experience with acrylics). I would base coat with matt black. Let that dry and then dry brush the piece with a medium brown.
When I say dry brush, I mean very meagerly and I know you're aware of this process dr but I'll state it for others.
Open a tin of Humbrol, take a cocktail stick and remove a small blob from the bottom (I never stir these tinlets as it shortens their life- but then, I tend to only paint small areas!) Put this on a palette- not a card as I mentioned before but plastic such as the inside of a Pringles tube lid.
Then take a small flat brush (by flat I mean not round but with a flattened ferule) and add paint to the brush, then remove the bulk by wiping the bristles on a dry tissue or cloth which is free of w/spirit or turps. Gently stroke the brush over the high points of the dry black paint. You may not see much difference initially but repeat this and you'll find that the creases you mention are not being touched and are left black. This is the result you want.
Now, if you look at aged or stressed (brown) leather, the worn areas become yellow and faded so mix a blob of yellow to another one of brown and dry brush but only on the very highest areas- not as much as you did with the first sweeps. Here's an example of faded and stressed leather belting: http://www.timeline.es/figmes/f_may08_ing.htm
see how the stressed areas and highlights become yellowed- ironically, I believe the artist here used acrylics!
For final dry sweeps I would add a small amount of white to the brown/yellow mix and touch only the very prominent points. You could finish it off with a mixture of clear matt and semi gloss- 70% being the matt.
Ok, I have never done this (to represent leather), have not seen the part you need to paint but would suggest all paints are matt.
Now, here's the way I paint leather. Humbrol black 33 (leaving to dry for a day), mix of Raw Umber and Burnt Sienna, then highlighting with that mix and added Cadmium Yellow. Ivory black for any shadow touch ups.
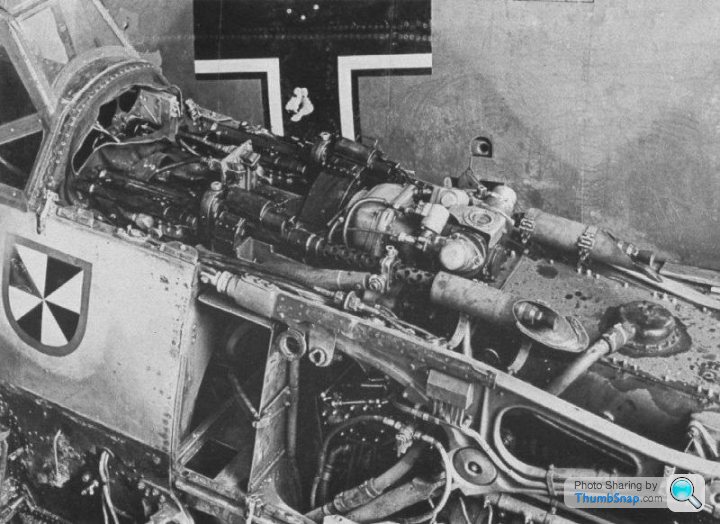
Thanks Kenny, I will try that method. It's for the instument panel rear cover on the Bf109, you can see it (badly torn) on this picture, just in front of and below the windscreen. It's a semi-circular thing:Much as I have always painted leather in oils, I'm pretty sure you could have a bash with enamels (sorry, I don't have much experience with acrylics). I would base coat with matt black. Let that dry and then dry brush the piece with a medium brown.
When I say dry brush, I mean very meagerly and I know you're aware of this process dr but I'll state it for others.
Open a tin of Humbrol, take a cocktail stick and remove a small blob from the bottom (I never stir these tinlets as it shortens their life- but then, I tend to only paint small areas!) Put this on a palette- not a card as I mentioned before but plastic such as the inside of a Pringles tube lid.
Then take a small flat brush (by flat I mean not round but with a flattened ferule) and add paint to the brush, then remove the bulk by wiping the bristles on a dry tissue or cloth which is free of w/spirit or turps. Gently stroke the brush over the high points of the dry black paint. You may not see much difference initially but repeat this and you'll find that the creases you mention are not being touched and are left black. This is the result you want.
Now, if you look at aged or stressed (brown) leather, the worn areas become yellow and faded so mix a blob of yellow to another one of brown and dry brush but only on the very highest areas- not as much as you did with the first sweeps. Here's an example of faded and stressed leather belting: http://www.timeline.es/figmes/f_may08_ing.htm
see how the stressed areas and highlights become yellowed- ironically, I believe the artist here used acrylics!
For final dry sweeps I would add a small amount of white to the brown/yellow mix and touch only the very prominent points. You could finish it off with a mixture of clear matt and semi gloss- 70% being the matt.
Ok, I have never done this (to represent leather), have not seen the part you need to paint but would suggest all paints are matt.
Now, here's the way I paint leather. Humbrol black 33 (leaving to dry for a day), mix of Raw Umber and Burnt Sienna, then highlighting with that mix and added Cadmium Yellow. Ivory black for any shadow touch ups.
Sorry for slight thread hijack. End of question!
Gassing Station | Scale Models | Top of Page | What's New | My Stuff