Bandai Perfect grade Millennium Falcon
Discussion


It’s December, so time to get something big out of the stash. This year it’s time for the Falcon in 1/72. The box is massive and crammed full of plastic, so it might take a while 
Like most Bandai kits this one is snap together, although a little bit of Tamiya extra thin helps secure some smaller bits and in closing some gaps.
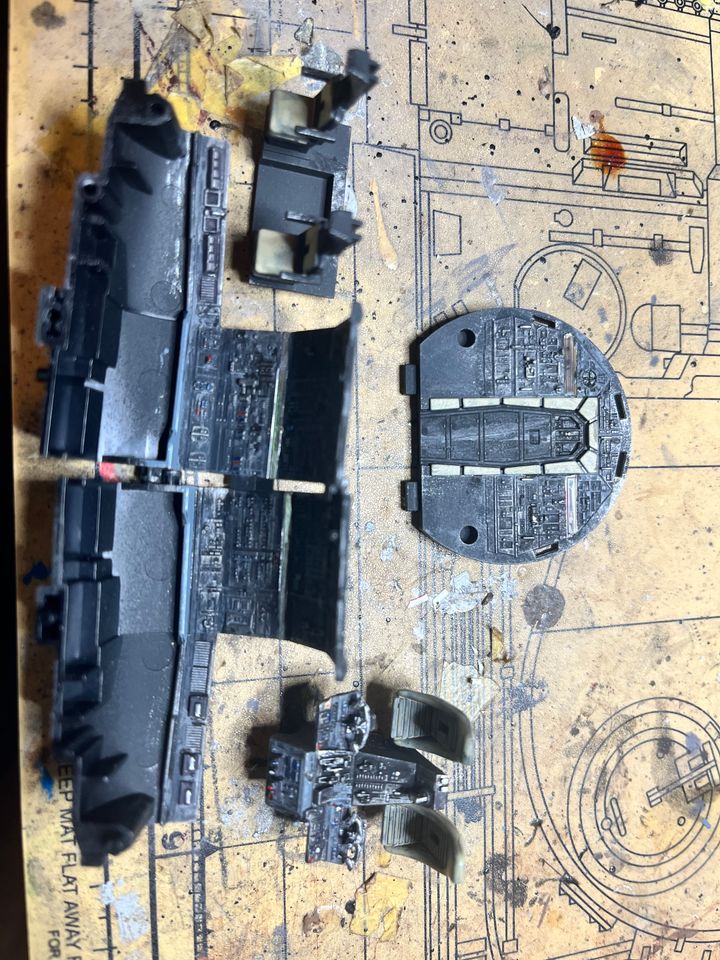
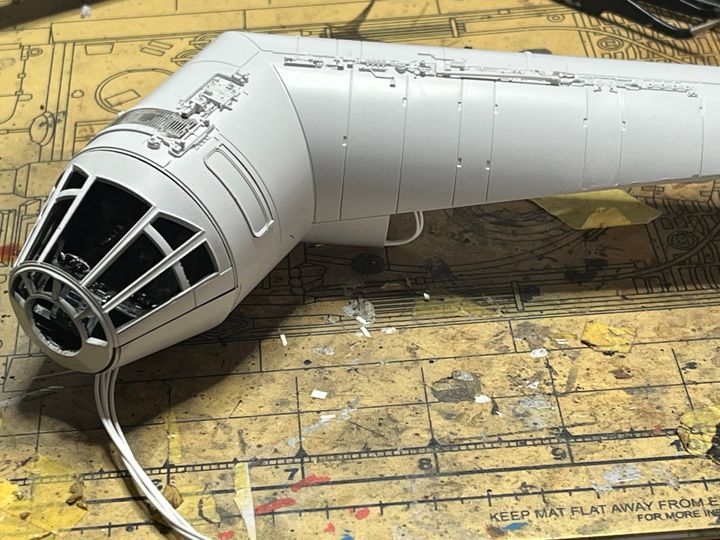
The instructions start with the cockpit, but that needs painting, so while I let the paint dry I made a start on the front mandibles.
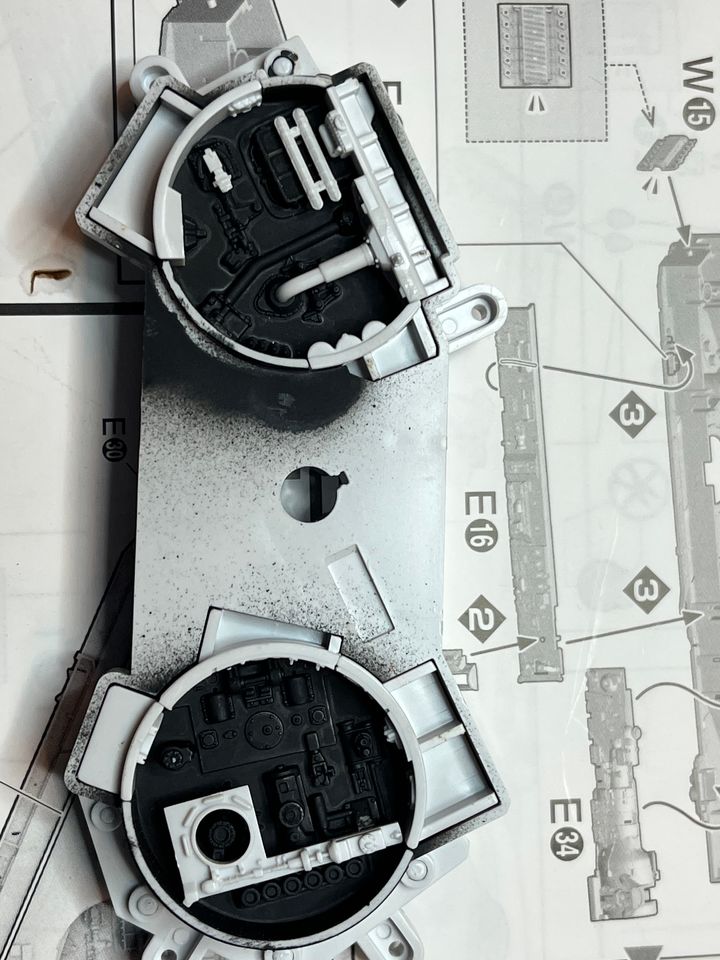
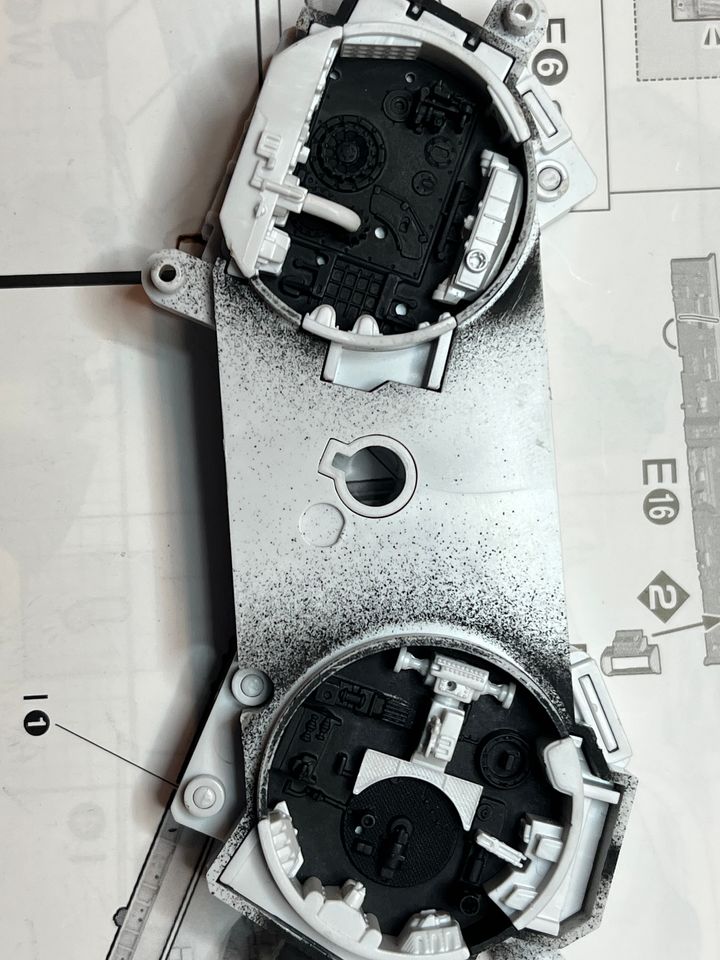
I painted the internals of the open bay’s black to give some black basing, other side shown here
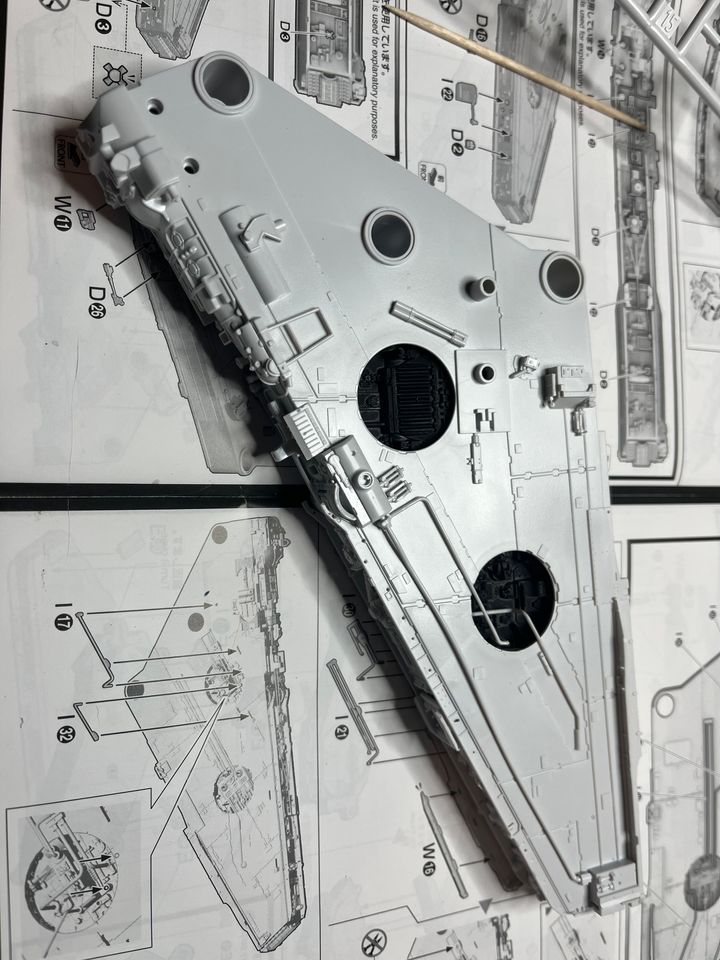
Part of the fun with these kits is spotting the kit parts used in the original miniature, there are tank mantles, engine decks and roofs plus a few battleship turrets and even half a lunar module hidden deep in one of the open bays.
Like most Bandai kits this one is snap together, although a little bit of Tamiya extra thin helps secure some smaller bits and in closing some gaps.
The instructions start with the cockpit, but that needs painting, so while I let the paint dry I made a start on the front mandibles.
I painted the internals of the open bay’s black to give some black basing, other side shown here
Part of the fun with these kits is spotting the kit parts used in the original miniature, there are tank mantles, engine decks and roofs plus a few battleship turrets and even half a lunar module hidden deep in one of the open bays.

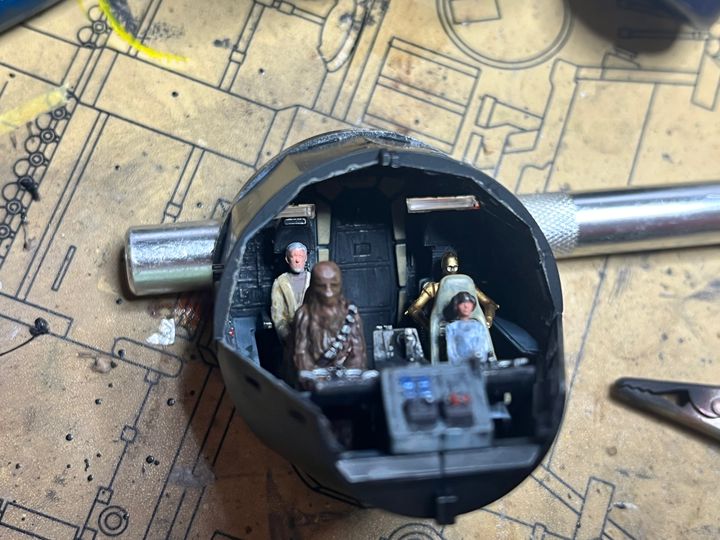
Painted up then assembled the cockpit. Bandai do provide decals for these, but they do not conform well to the modelled details so out with the airbrush, drybrushing, washes and some detailed painting.
Assembled with crew, decided to represent the Death Star escape so Luke and Han will be manning the guns. Leia looking tiny in the seat.
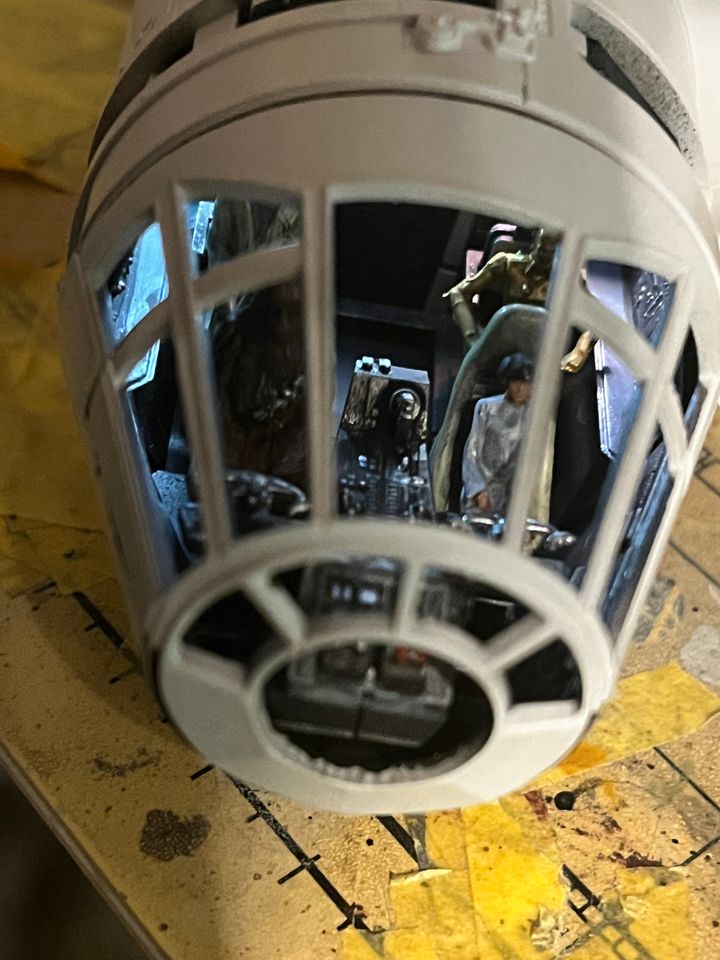
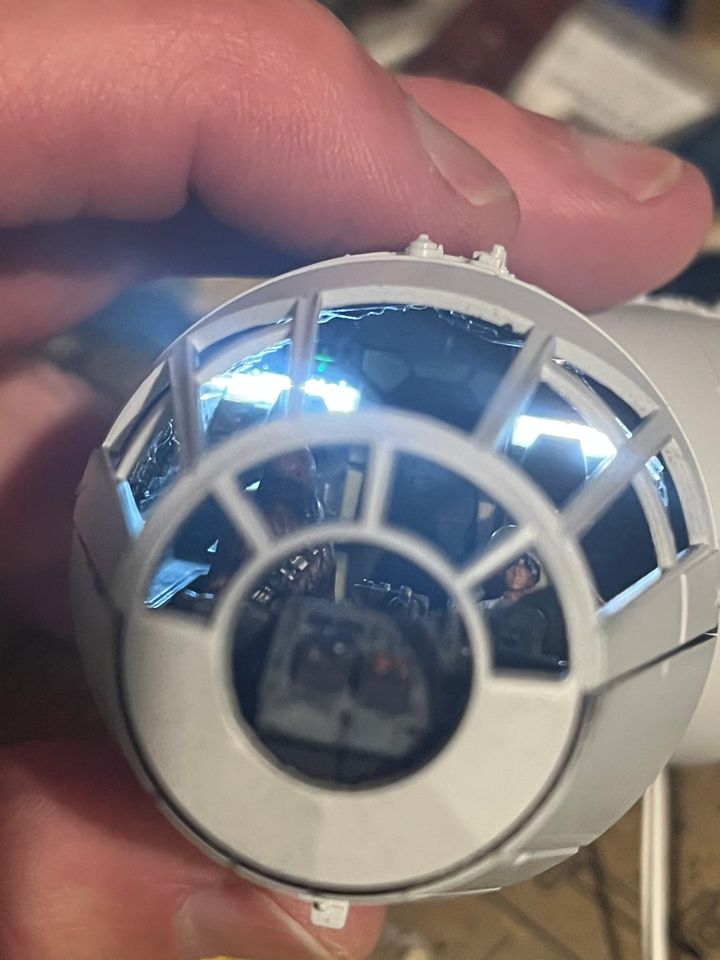
Light test
Assembled with crew, decided to represent the Death Star escape so Luke and Han will be manning the guns. Leia looking tiny in the seat.
Light test
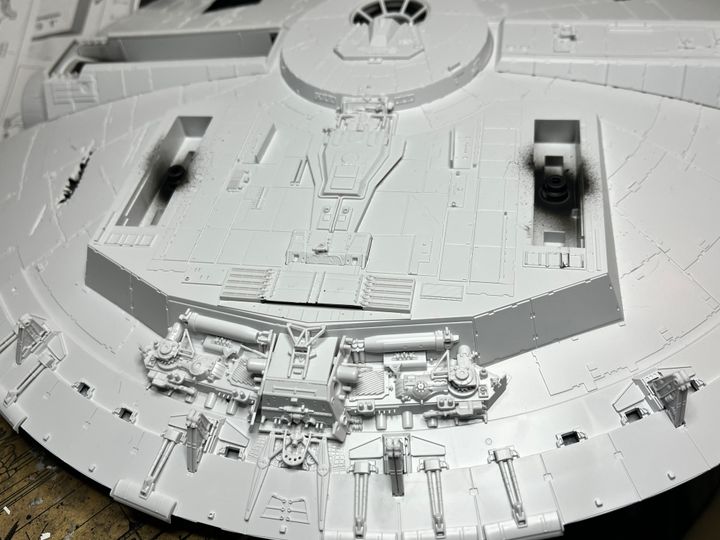
Took some detailed pics of the mandibles. Sherman suspension pieces seemed to be quite a well uses source of greeblies
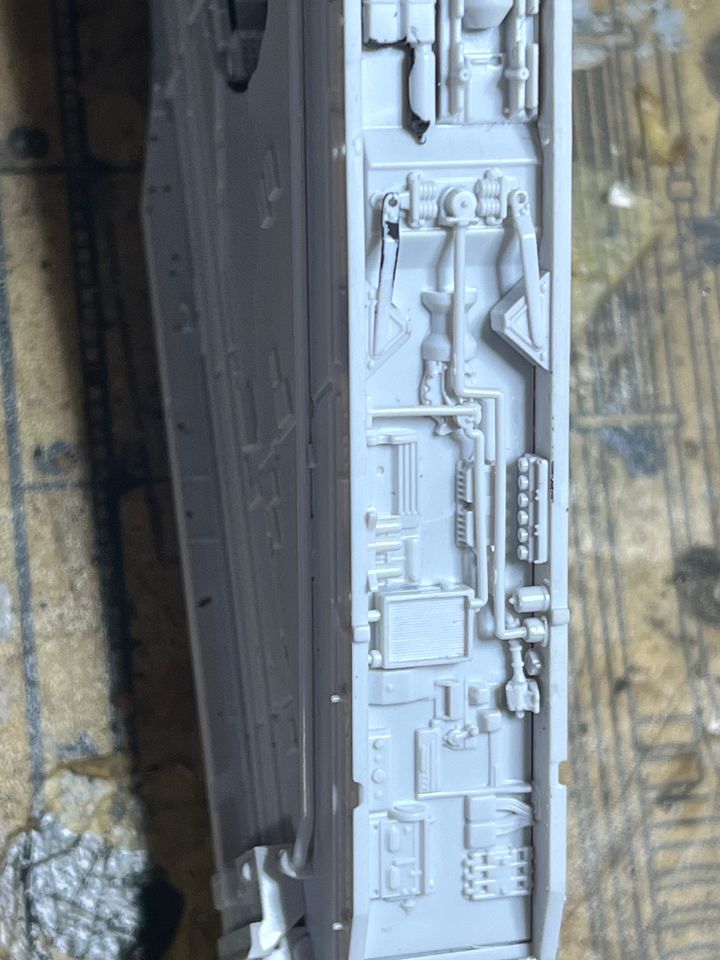
I especially like how the barrel alignment peg was kept on the mantlet.
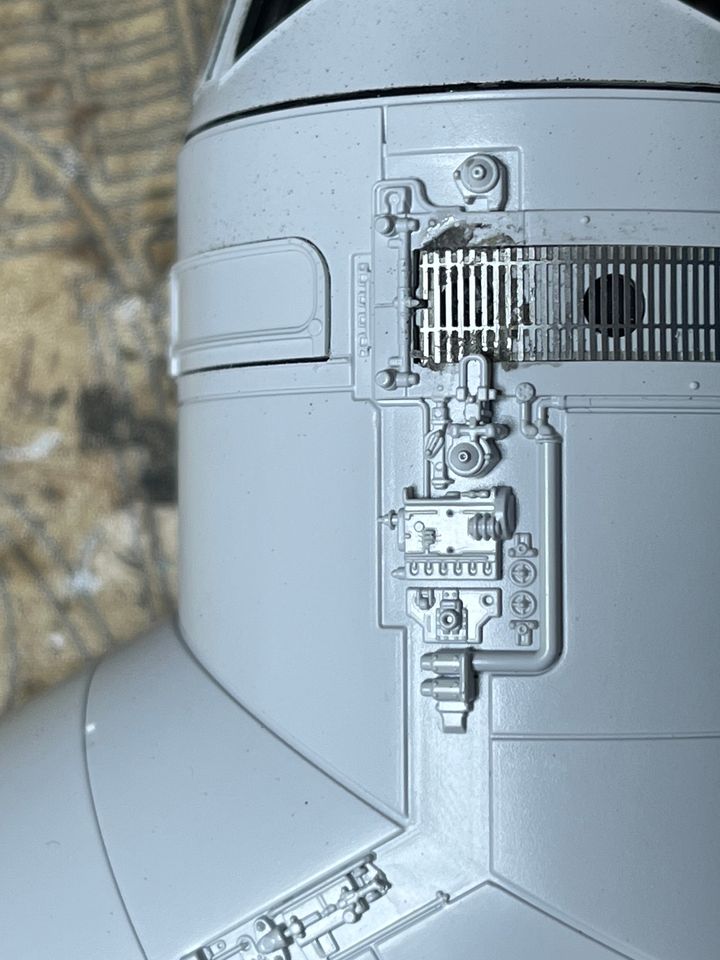
Managed to superglue some of the tape I used to keep the photoetch grill in place, will have to see what it looks like after a coat of primer.
Cockpit assembly complete for now
Major sub assemblies complete, next is the aft lower hull.
I especially like how the barrel alignment peg was kept on the mantlet.
Managed to superglue some of the tape I used to keep the photoetch grill in place, will have to see what it looks like after a coat of primer.
Cockpit assembly complete for now
Major sub assemblies complete, next is the aft lower hull.
Inbox said:
I'm in just to find out what greeblies are.
The cockpit looks amazing.
"Greeblies" are the random bits from plastic models that the model builders for the original film or TV series used to add visual interest to their creations. So you might see a suspension unit from a 1/72 Sherman tank or a turret from a 1/350 battleship alongside a gunners hatch from a 1/35 Tiger tank.The cockpit looks amazing.
Rumblestripe said:
"Greeblies" are the random bits from plastic models that the model builders for the original film or TV series used to add visual interest to their creations. So you might see a suspension unit from a 1/72 Sherman tank or a turret from a 1/350 battleship alongside a gunners hatch from a 1/35 Tiger tank.
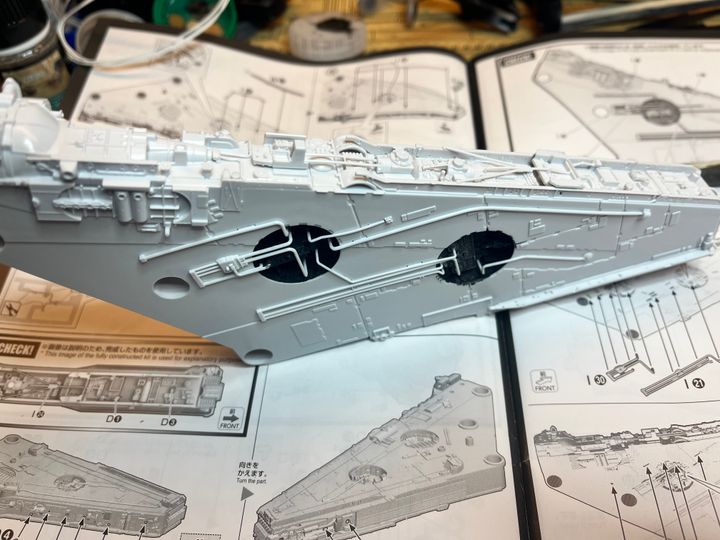
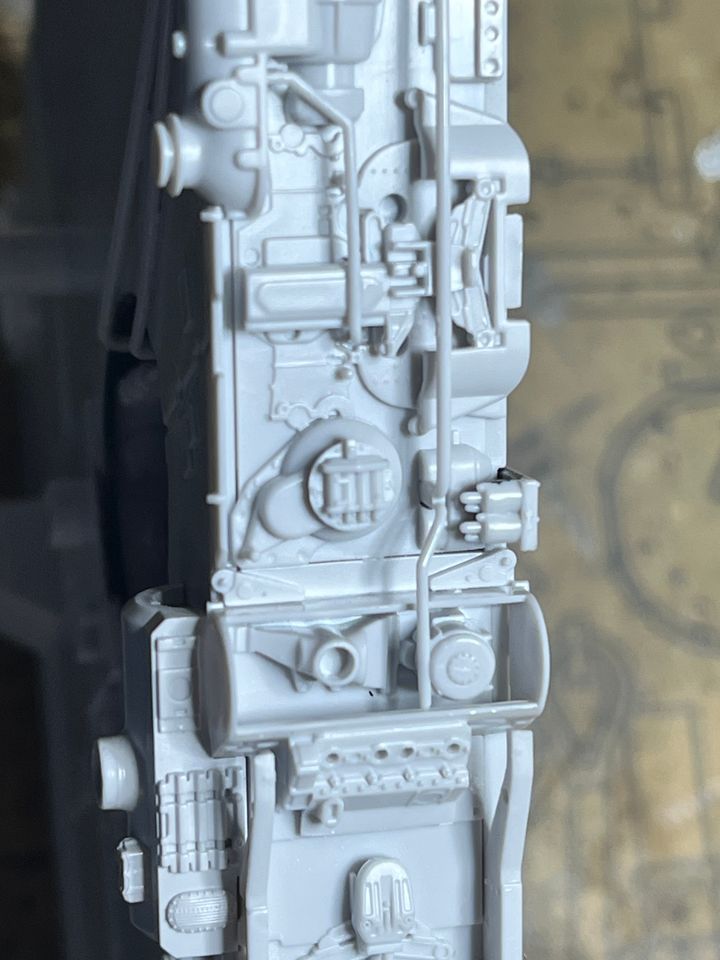
Thunderbirds used bits of sprue in some scenes.Another picture for the kit parts spotters
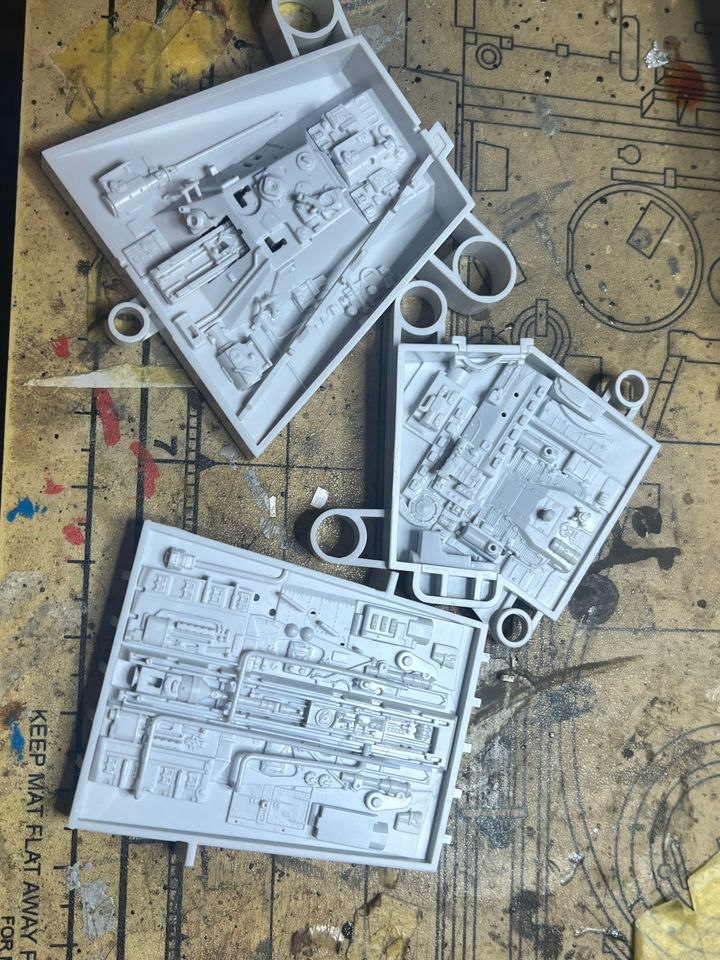
There seems to be a complete Jadgpanther upper hull, a chassis from something, a couple of jerrycans hidden away and miscellaneous engine and suspension parts. All now primed up.
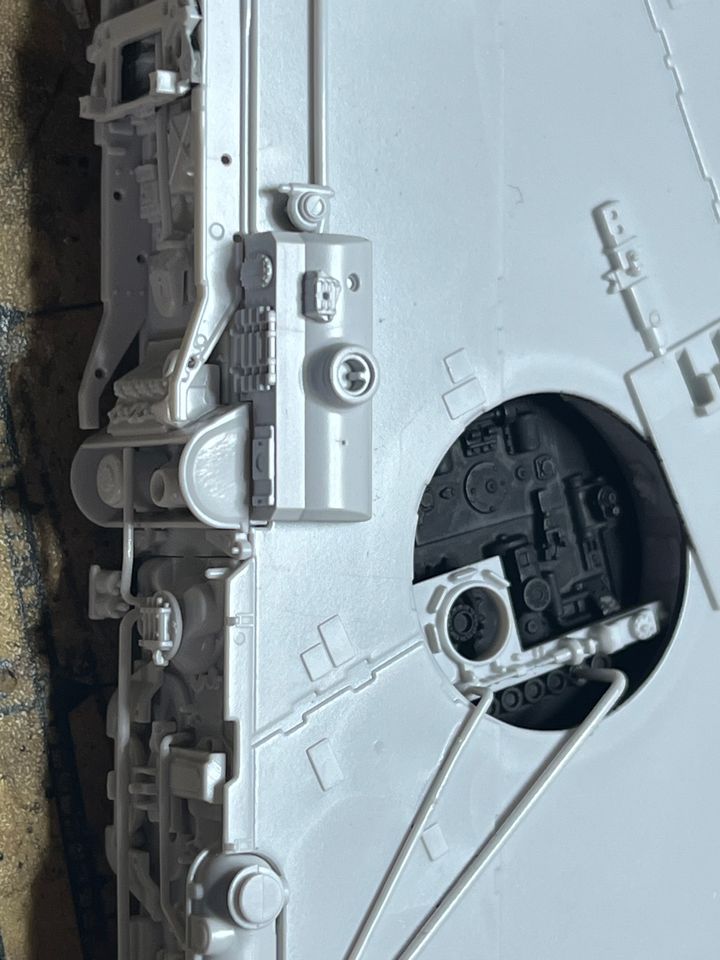
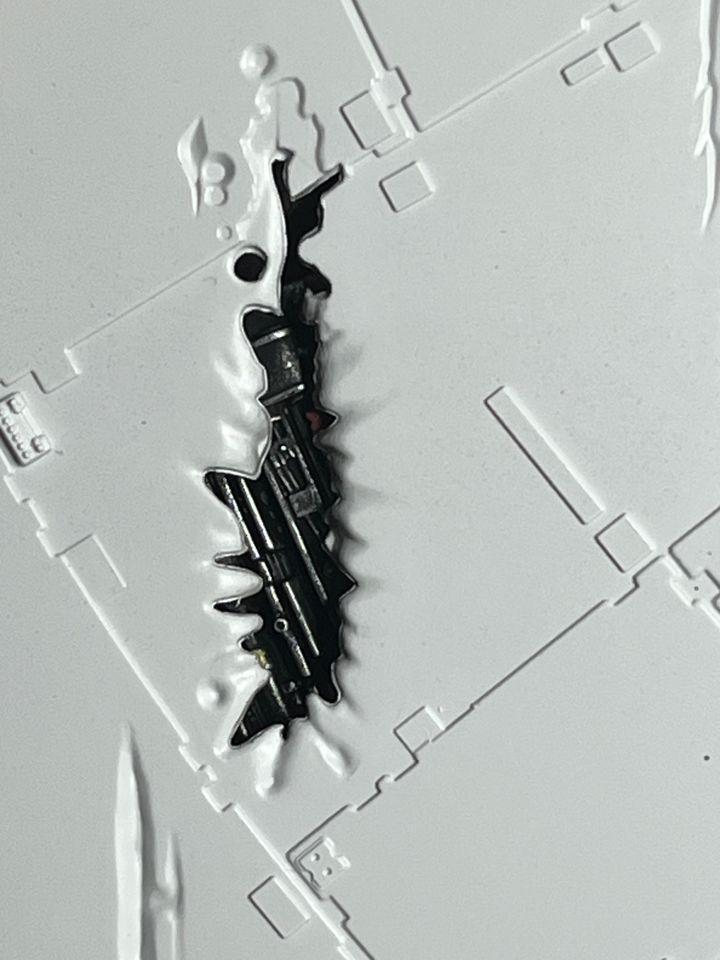
This little piece had some flory washes, dry brushed with aluminium and a few spots of red, yellow and orange added

Barely visible once installed
There seems to be a complete Jadgpanther upper hull, a chassis from something, a couple of jerrycans hidden away and miscellaneous engine and suspension parts. All now primed up.
This little piece had some flory washes, dry brushed with aluminium and a few spots of red, yellow and orange added
Barely visible once installed
Edited by MBBlat on Friday 19th December 18:25
Rear engine nozzles painted and installed, couldn’t resist testing the lights
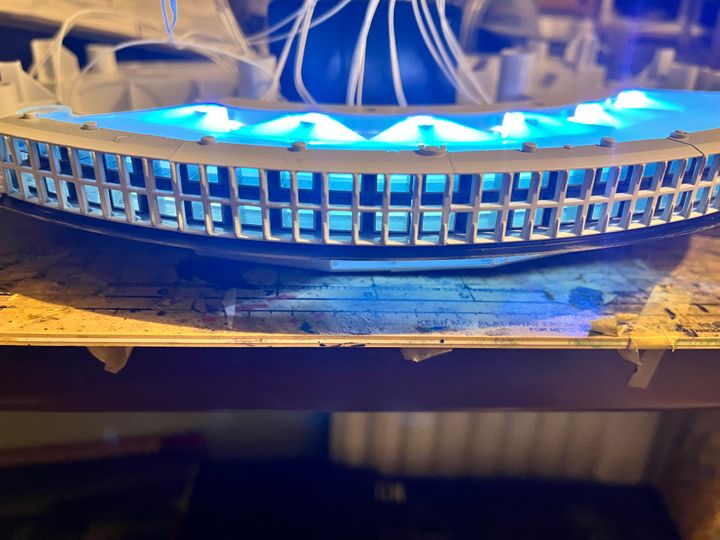
I used a little bit of Tamiya clear blue on the light channels to give it the blue glow seen in some shots. Paint is AS-12 from a rattle can over Mr Surfacer black primer, some of the black remains visible which I think gives a sense of depth to some of the greeblies.
I think I’m going to need a bigger bench
Underside mostly complete
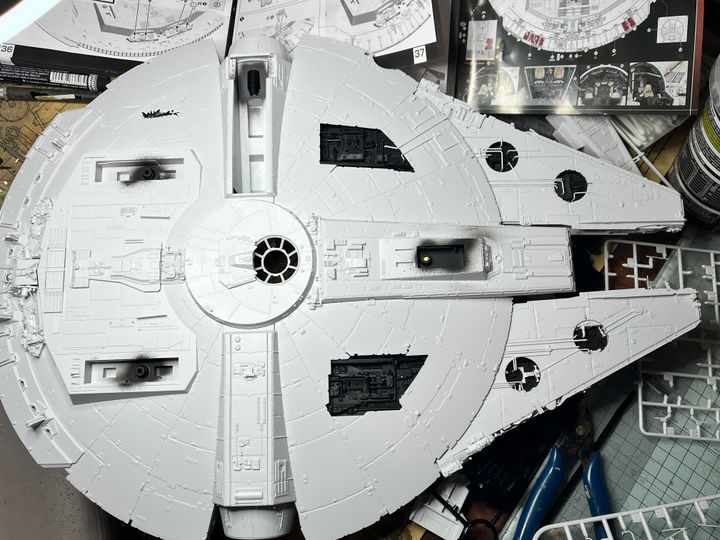
Detail view of the stern for kit part spotters
I haven’t placed all the dozer blades as there are red and grey panels underneath the missing ones and my plan is to paint those in rather than use the supplied decals.
Nest I need to decide if I fit the top before painting, or complete everything first. I also have the dilemma it might not fit in my spray booth.
Gassing Station | Scale Models | Top of Page | What's New | My Stuff