MASERATI BIRDCAGES 1:43
Discussion


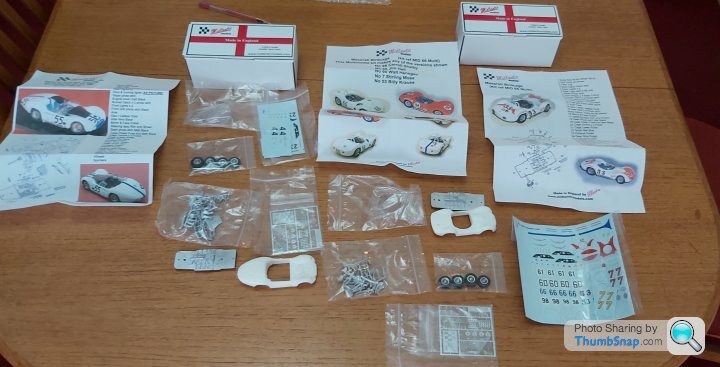
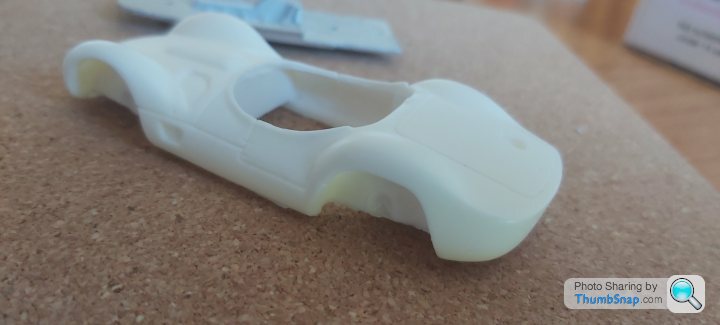
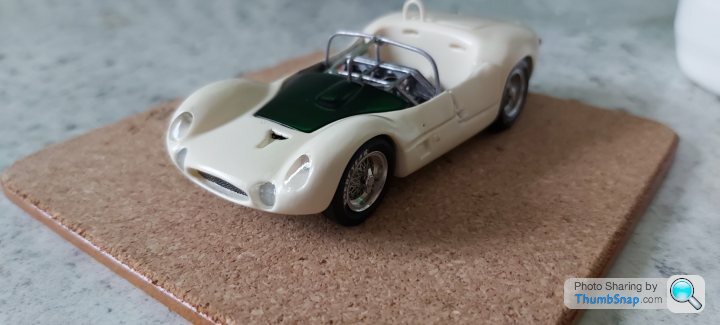
Started the Maserati,s last night. One of them is the Streamliner. The Kits are made by Midlantic models made in the UK. No engine detail but very nice kits all the same and when finished should present themsleves as nice display models.White metal parts, very nice wheels pre assembled, detailed tyres and very high quality decal sets.
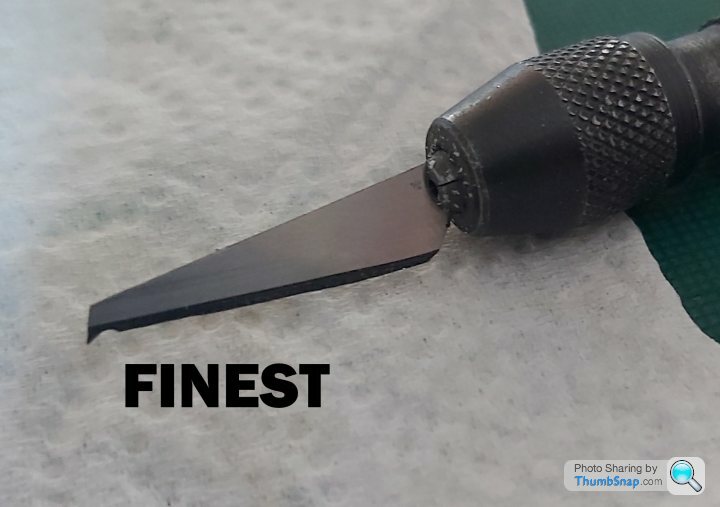
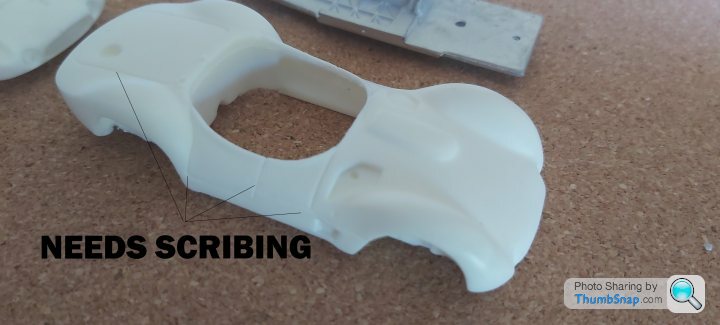
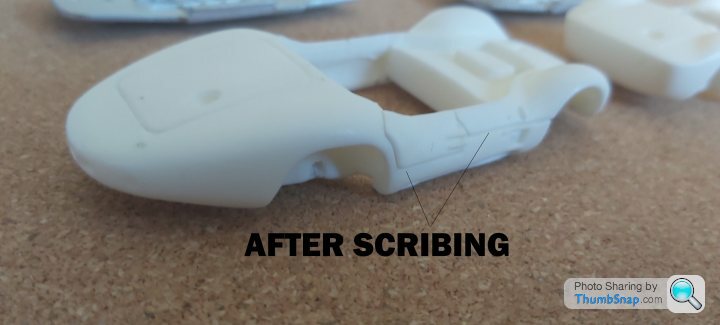
A lot of thought is going into getting the body right to make the models more realistic as the resin body has radiused door, bonnet and boot edges which need to be sharpened up, modifying a scalpel blade to use as a scriber to cut into the edges at a angle will define the edges cleaner to look like they can be opened. Im going to drill out the areas for the top headlights on the Streamliner. Ive made 2 extra headlights to go in and ordered seatbelts,footpedals to enhance the model.
File off the door hinges and bonnet clasps, use PE instead.Some fettling to do. Will start posting some pics soon if anyones interested or would want to build one of these iconic cars.
Here goes.
 .
.
A lot of thought is going into getting the body right to make the models more realistic as the resin body has radiused door, bonnet and boot edges which need to be sharpened up, modifying a scalpel blade to use as a scriber to cut into the edges at a angle will define the edges cleaner to look like they can be opened. Im going to drill out the areas for the top headlights on the Streamliner. Ive made 2 extra headlights to go in and ordered seatbelts,footpedals to enhance the model.
File off the door hinges and bonnet clasps, use PE instead.Some fettling to do. Will start posting some pics soon if anyones interested or would want to build one of these iconic cars.
Here goes.
.Thanks Chaps.
Had a couple of hours last night and a couple today.
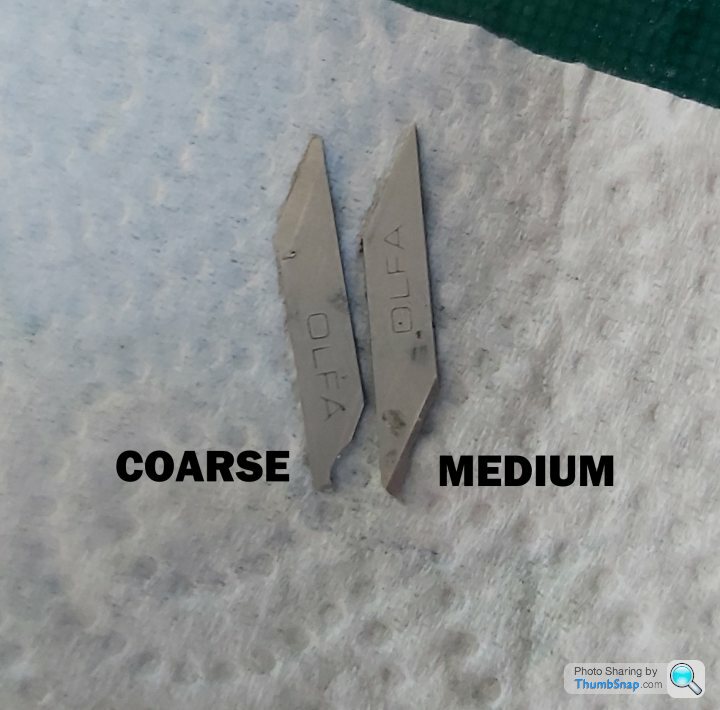
The scribes on the market are too big for 1/43 scale. Started off making three blades up to scribe out edges to the body lines.Coarse medium and a very fine one out of a scalpel blade.
 .
.
 .
.
BEFORE
 .
.
 .
.
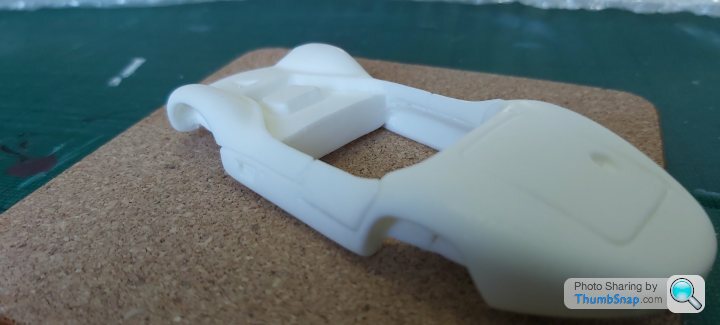
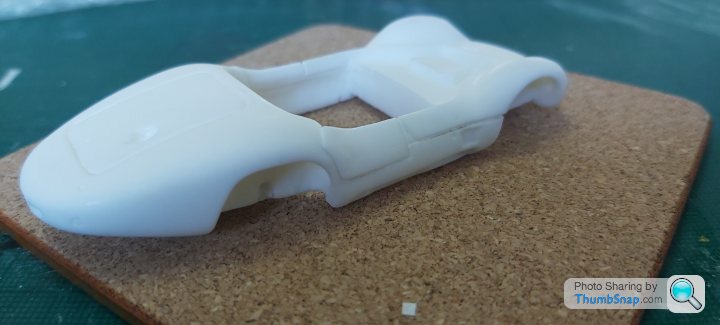
AFTER ON THE STREAMLINER
 .
.
[url]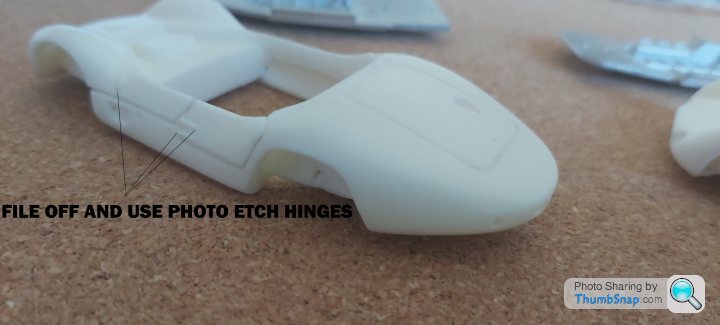 |https://thumbsnap.com/YPy2HukN[/url.
The edges look more defined now, file off the door hinges and rub down for paint, then run a panel line on later.
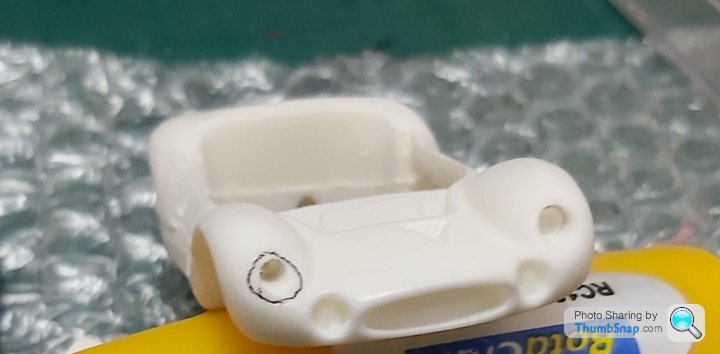
Carefully drilled out the area in stages until the diameter was correct and centred for the top lights, made up 2 decals and sealed with micro clear.
 .
.
 .
.
 .
.
Filed off the hinges and currently dremmeling out the cockpit door area to add the internal door frame and locks.
 .
.
 .
.
Doesnt look like much at the mo, will see if the extra effort pays of later.
Cheers for now
Had a couple of hours last night and a couple today.
The scribes on the market are too big for 1/43 scale. Started off making three blades up to scribe out edges to the body lines.Coarse medium and a very fine one out of a scalpel blade.
..BEFORE
..AFTER ON THE STREAMLINER
.[url]
|https://thumbsnap.com/YPy2HukN[/url.The edges look more defined now, file off the door hinges and rub down for paint, then run a panel line on later.
Carefully drilled out the area in stages until the diameter was correct and centred for the top lights, made up 2 decals and sealed with micro clear.
...Filed off the hinges and currently dremmeling out the cockpit door area to add the internal door frame and locks.
..Doesnt look like much at the mo, will see if the extra effort pays of later.
Cheers for now
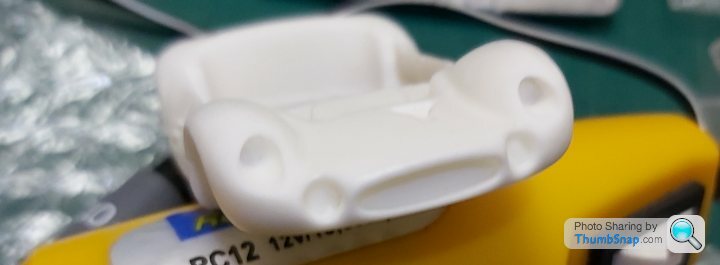
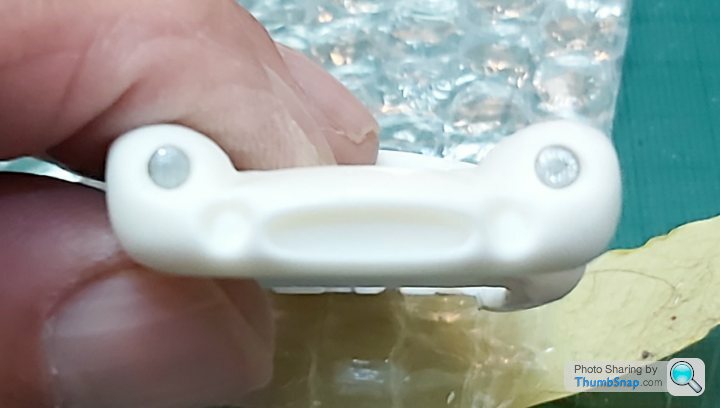
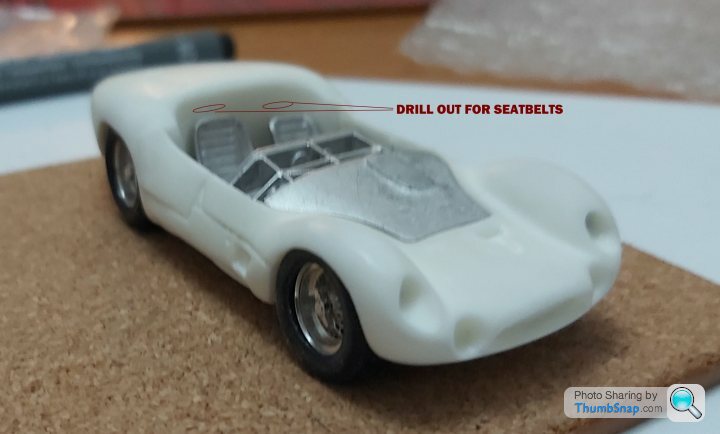
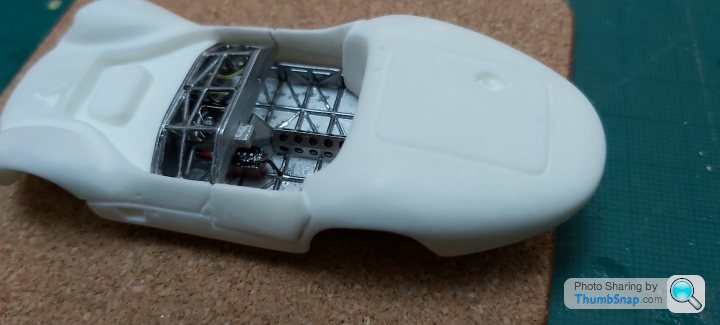
A lot more fettling to do with this small resin body, in and around the cockpit and a lot of removal to allow the wheels to sit correctly inside the wheel arches.
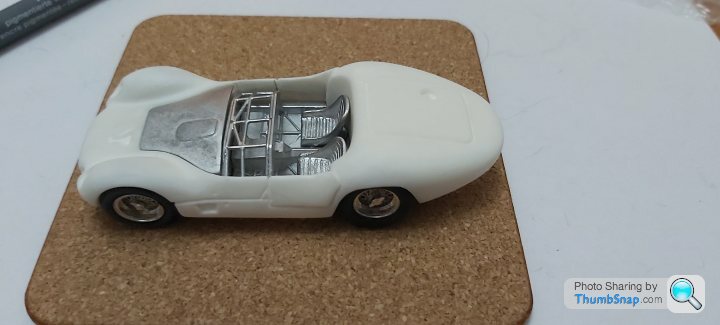
Mocking up in stages is neccesary with this kit.
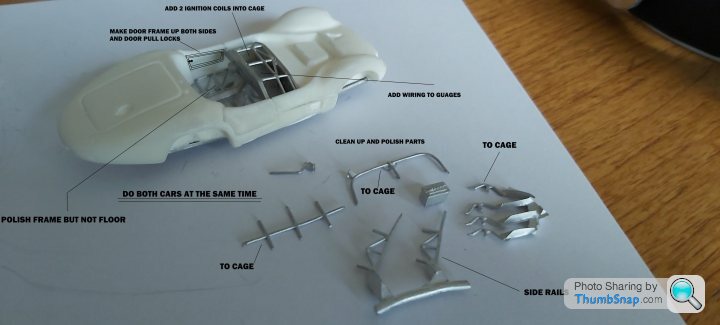
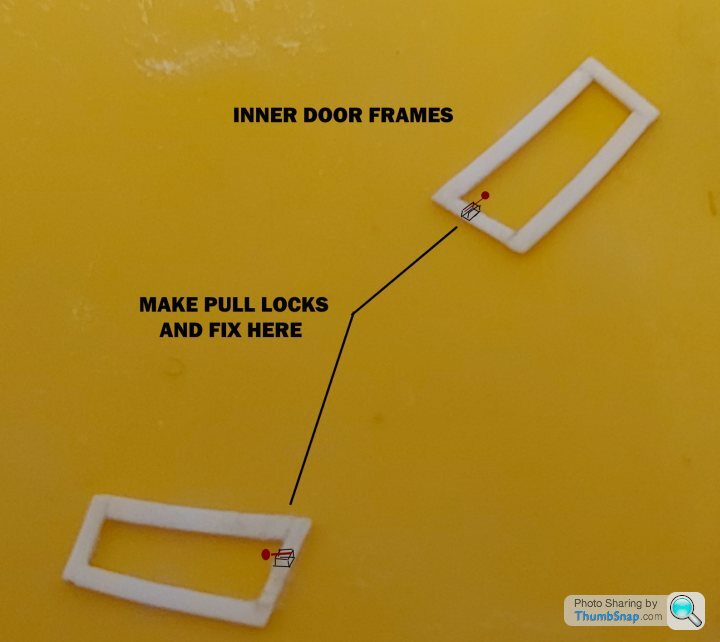
Adding more detail on the interior later on, ie the door frames made,door locks to make,two cutouts need to be made for the seatbelt harnesses and some wirring which in the end will be visable around the back of the guages.Posting will take time as what i do on this car has to be done to the other
Some pics.
Planning
 .
.
Mockup wheel assembly, cage and seats
 .
.
 .
.
Door frames
 .
.
Thats it for now.
Mocking up in stages is neccesary with this kit.
Adding more detail on the interior later on, ie the door frames made,door locks to make,two cutouts need to be made for the seatbelt harnesses and some wirring which in the end will be visable around the back of the guages.Posting will take time as what i do on this car has to be done to the other
Some pics.
Planning
.Mockup wheel assembly, cage and seats
..Door frames
.Thats it for now.
Change of plan. Trying to do two models at the same time is creating mistakes, so im doing one car first, maybey the 2nd will be even better. Who knows.
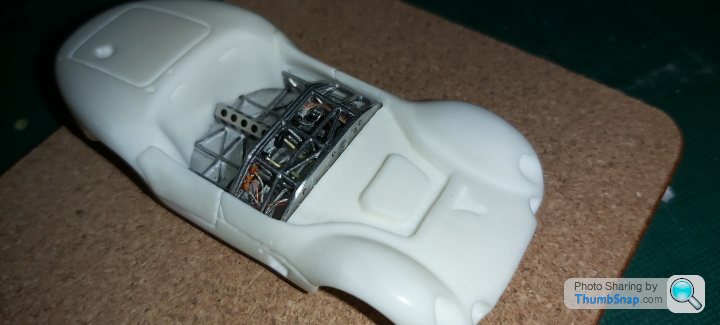
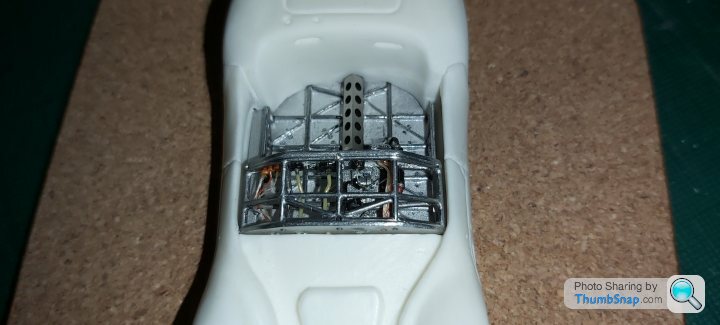
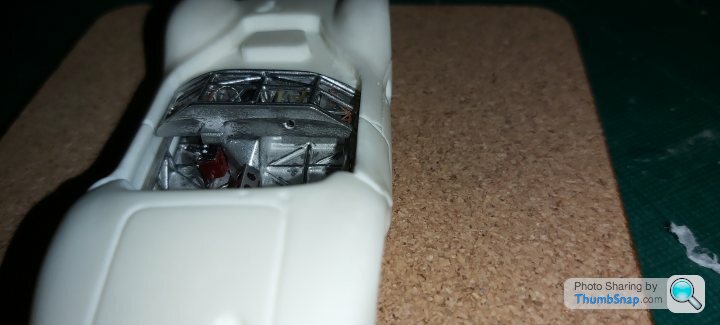
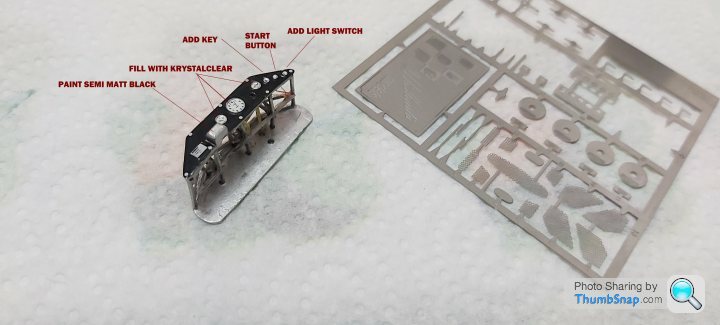
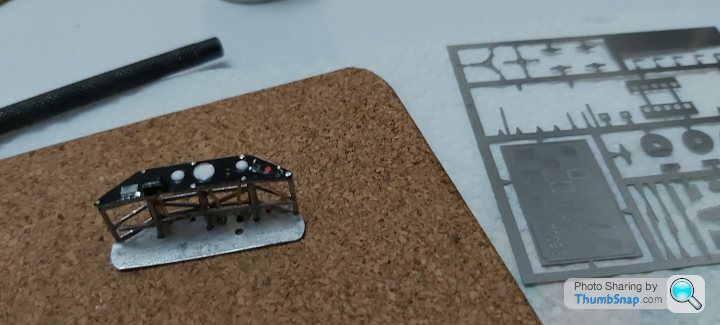
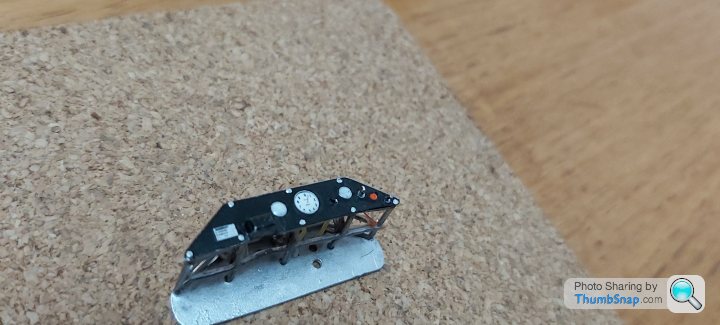
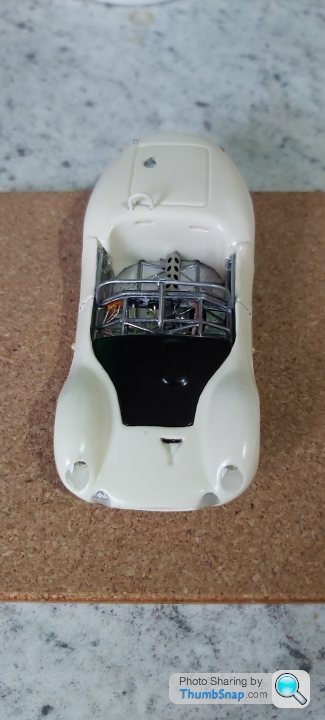
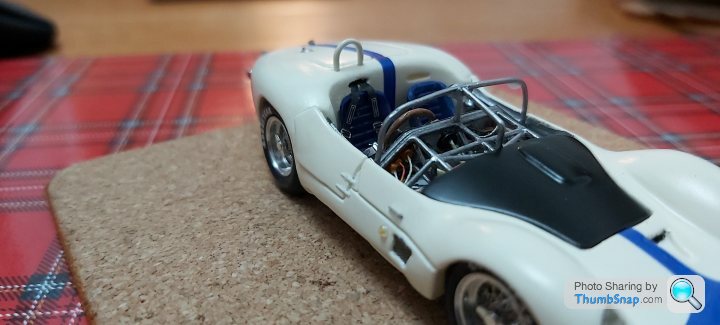
Mocking up the cockpit area which now has more details because the area behind the dash had little or no detail. As its all exposed i decided to add 3 more roundals for the ignition barrel ,fuel pump and lights.Made up 2 ignition coils and the clamp. Added foot pedals. A bit of wiring and cables.
Used chrome paint to show as U-clamps that bolted the floor to the chassis rails.Its quite difficult to see the pedals or the details, but if you look hard enough they are there.Ready to start painting.
 .
.
 .
.
 .
.
 .
.
Mocking up the cockpit area which now has more details because the area behind the dash had little or no detail. As its all exposed i decided to add 3 more roundals for the ignition barrel ,fuel pump and lights.Made up 2 ignition coils and the clamp. Added foot pedals. A bit of wiring and cables.
Used chrome paint to show as U-clamps that bolted the floor to the chassis rails.Its quite difficult to see the pedals or the details, but if you look hard enough they are there.Ready to start painting.
....Perseverant said:
I admire the detailing and the patience. I think that French Dinky 22a must be a contemporary model of a similar Maserati?
Similar but the body is much longer at the back with a longer full windscreen that goes over and around the exposed cockpit.Thankyou for your kind comment.
Regards
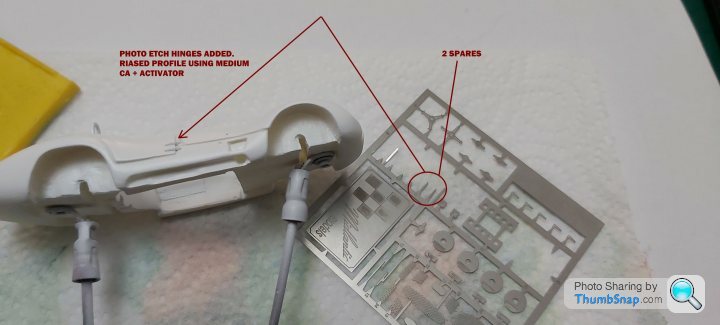
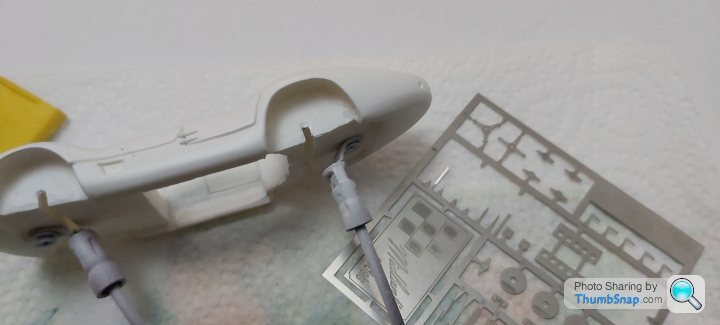
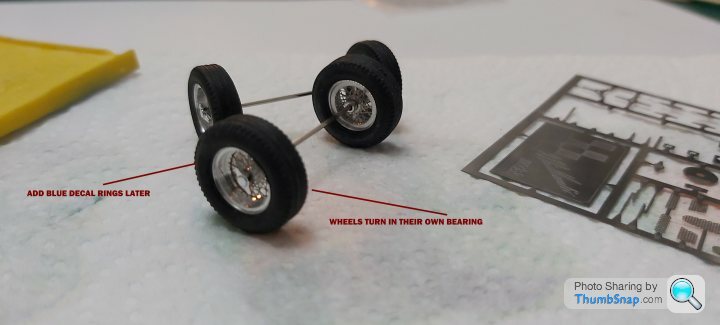
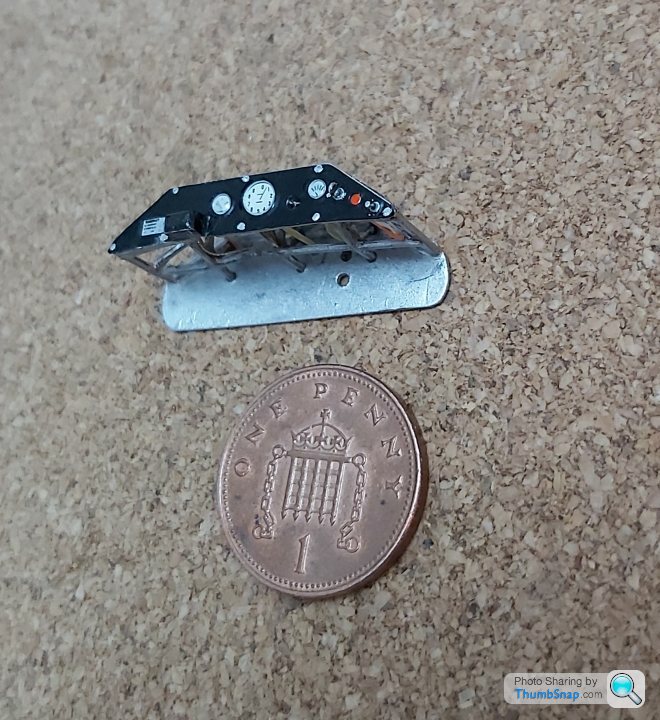
Doesnt look like much at the mo, but added the photo etch hinges and formed them with CA, primed up the body and bonnet, built the axles up . Decal for the dash and added the ignition key, start button and light switch.Filled the guages with Kristal clear. Ordered gloss racing white to continue the build.
 .
.

 .
.
 .
.
 .
.
 .
.
 .
.
Kristal clear still going off but looks ok.
 .
.
Paint and laquer the body,then it should all start to come together.Assemble the wheels and chassis elements,add the door frames,seats, seat belts then add all the rest of the details to finish this model.Quite enjoying this kit
......Kristal clear still going off but looks ok.
.Paint and laquer the body,then it should all start to come together.Assemble the wheels and chassis elements,add the door frames,seats, seat belts then add all the rest of the details to finish this model.Quite enjoying this kit
Been so busy with the day to day, but have managed to do a few bits with thismidlantic kit.
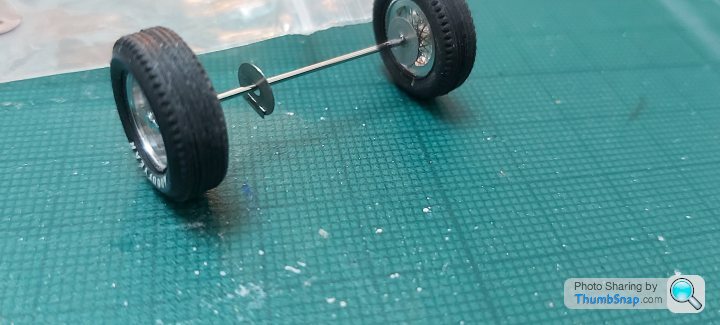
Made up the 2 part brake disks and attached the fine tyre decals.
 .
.
attached the light bezels and filled with resin, 3 chrome rivets per light to add later.Front grill .
 .
.
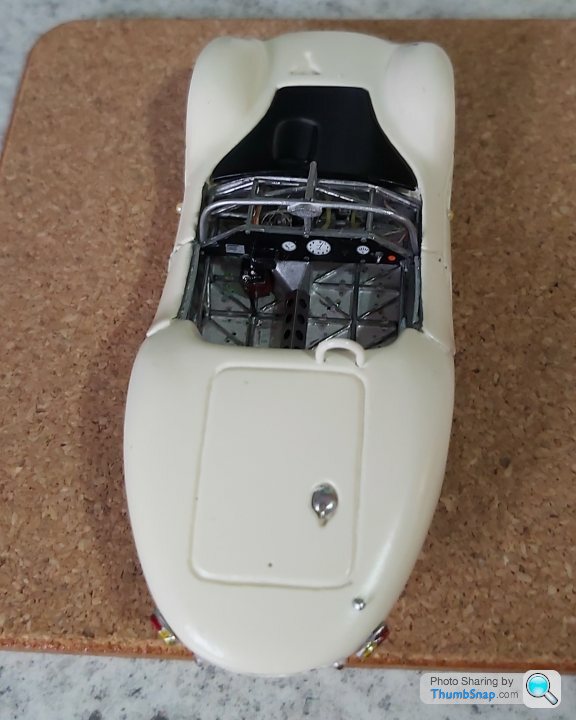
Fuel cap and rear lights,made up and fitted inner door frames, side grills added, side panel lights added
 .
.
 .
.
 .
.
To doos. Steering wheel, Gear shift, seats, seatbelts to add on, windscreen, wiper, mirror, body latches,decals and cjtrome rivet decals to finish off.
Ive decided not add numbers as there are cars on the website that show a blue bonnet yet ive been informed that historically the bonnet was origonally black.The car on display at Retromibile France didnt have numbers on it either.
Thanks for looking
Made up the 2 part brake disks and attached the fine tyre decals.
.attached the light bezels and filled with resin, 3 chrome rivets per light to add later.Front grill .
.Fuel cap and rear lights,made up and fitted inner door frames, side grills added, side panel lights added
...To doos. Steering wheel, Gear shift, seats, seatbelts to add on, windscreen, wiper, mirror, body latches,decals and cjtrome rivet decals to finish off.
Ive decided not add numbers as there are cars on the website that show a blue bonnet yet ive been informed that historically the bonnet was origonally black.The car on display at Retromibile France didnt have numbers on it either.
Thanks for looking
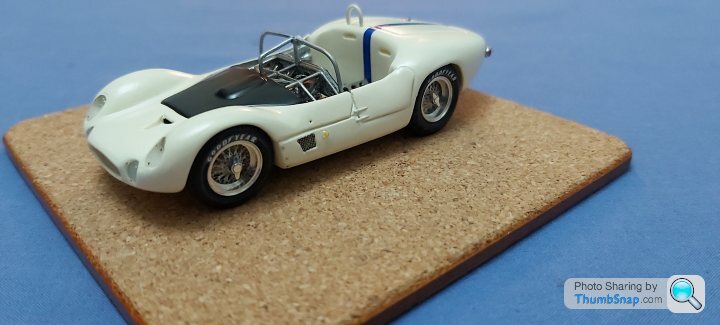
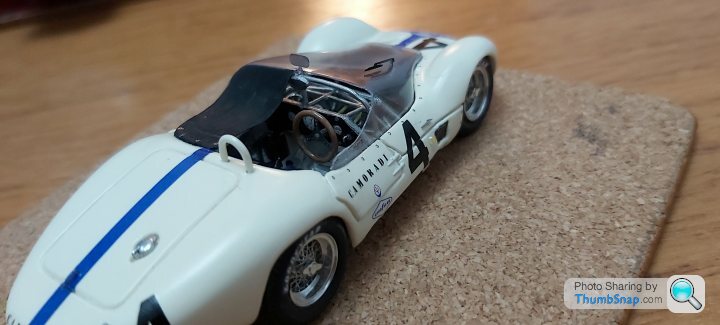
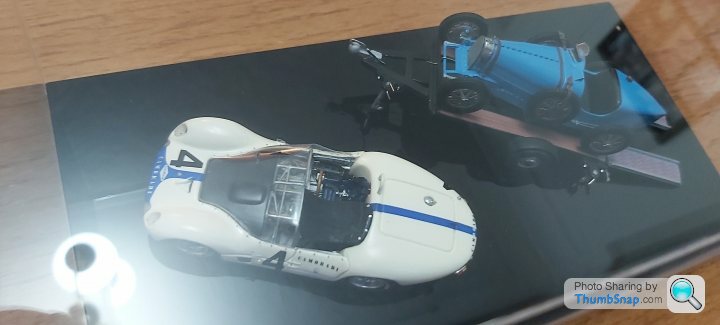
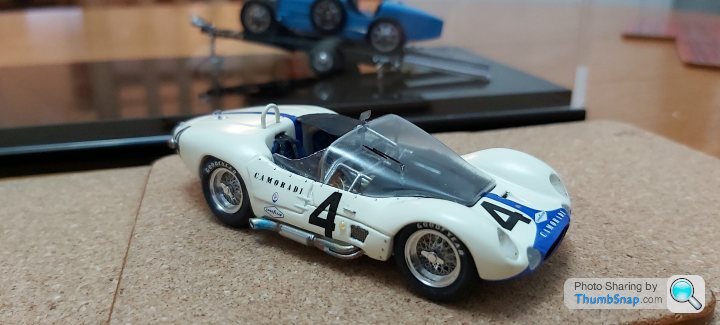
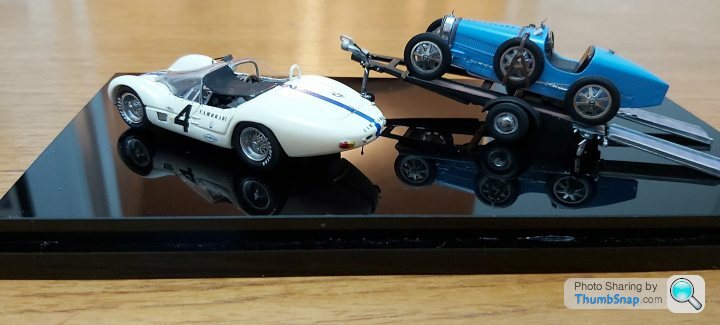
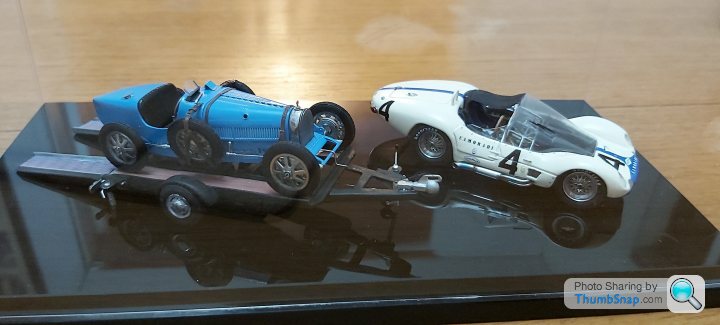
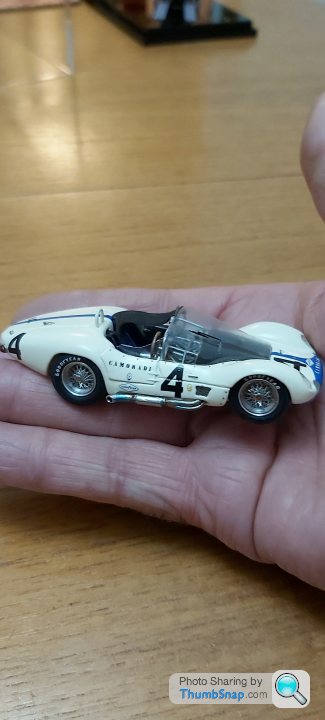
Finished the car. Its been fun adding more details to a small kit.
PE foot pedals, wiring, tubing, 3 extra clock binacles,2 x coils,igntion key + switch,inner door frames, seat belts, rivets, canopy rivets. just need to clean up the edges of the screen and replace the 3 rivets in the nearside sill.
Some photos. Trust this has been of interest to anyone especially if it helps anyone inrterested in 1/43 scale as a subject.
 .
.
 .
.
 .
.
 .
.
 .
.
 .
.
PE foot pedals, wiring, tubing, 3 extra clock binacles,2 x coils,igntion key + switch,inner door frames, seat belts, rivets, canopy rivets. just need to clean up the edges of the screen and replace the 3 rivets in the nearside sill.
Some photos. Trust this has been of interest to anyone especially if it helps anyone inrterested in 1/43 scale as a subject.
......IJWS15 said:
I struggle with 1/20th, seeing these at 1/43 . . . . . . . I am speechless.
Thankyou for your comment.Only issue with 1/43 scale is if you make a mistake it shows the model up like a sore. Best tools for the job are, toothpick, pick and place silicone tool, double sided tape, magnifier and good quality tweezers amonst the norm. l Ive been watching your project Card alpha tauri with great interest. Its coming along nicely .I have to say i wouldnt have your patience to cut, fold card to produce something like that as im sure you need to be spot on in cutting and bending, but yet have never tried so "never say never".Regards
henryk001 said:
Halmyre said:
Trivial fact - the elongated windscreen was a ruse to get past the the Le Mans requirements for a minimum windscreen height.
Yes motorsport history past and present shows a lot of rule bending that went on and still does to this day to get to the grid.Regards
This wasn't so much rule bending, but a perfectly legal interpretation of a poorly written rule, which stipulated a windscreen height, but not where it was to be measured from.

Gassing Station | Scale Models | Top of Page | What's New | My Stuff