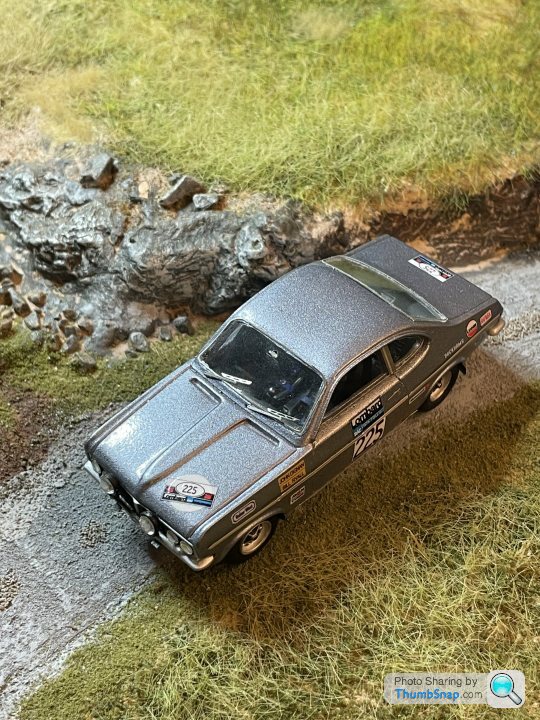
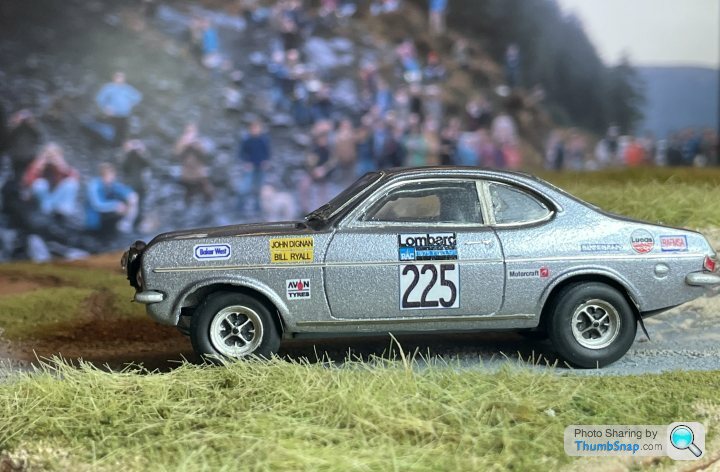
1:43 1975 Vauxhall Magnum Rally Car Custom Build
Discussion
It is coming up to Christmas and yet again stuck for a present for my Dad (see previous present idea of the MGB custom build from about 5 years ago here - https://www.pistonheads.com/gassing/topic.asp?h=0&...
I have decided to build another of his previous rally cars - this time the Vauxhall Magnum he competed in the 1975 and 1978 RAC Rally, as well as the Avon Tour of Britain (which was a great concept and I think something someone should bring back at some point)
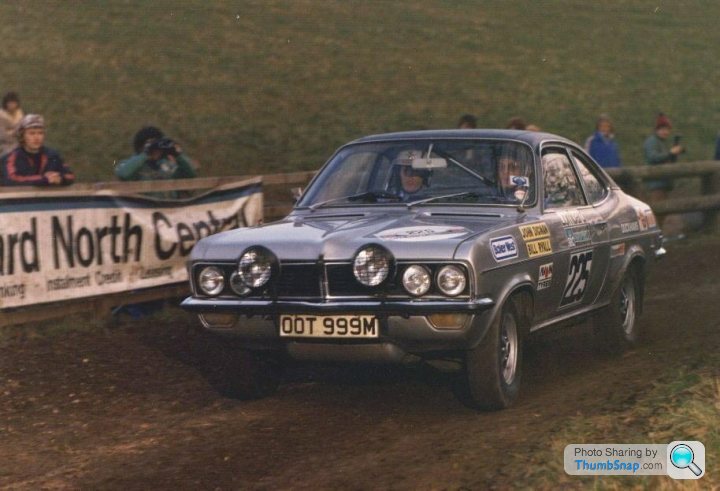
Here are the two different car schemes I could copy of his cars:
1975
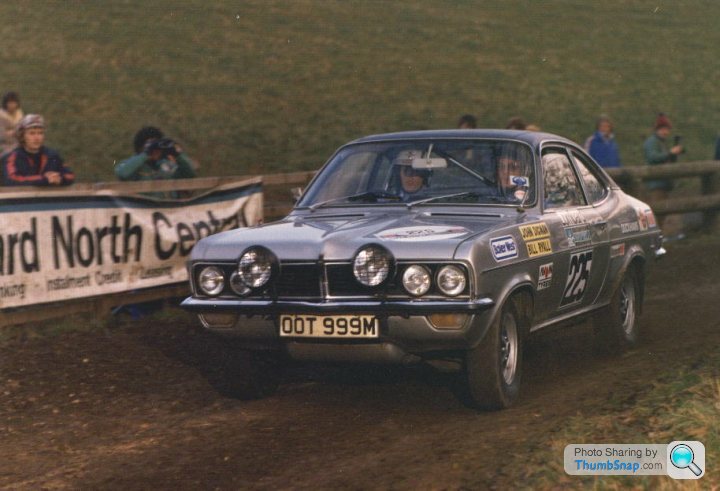
and the 1978 version
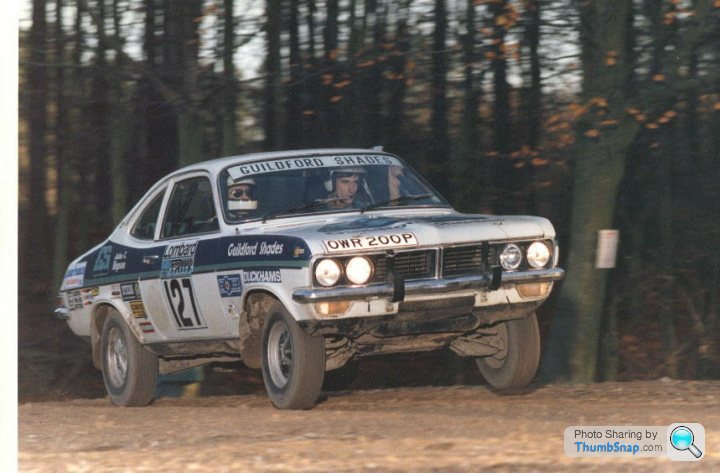
Unfortunately, these are the only pictures I have to work with, but I am hoping to do the 1978 version as he finished 55th in that car, while broke a driveshaft in the 1975 edition and retired.
I have searched for ages to find a kit of a Vauxhall Magnum and eventually one has arrived from Italy today that I hope to build into the replica of his 1978 car. It is from a company called Modellismo 90 and is the Will Sparrow version of the 1975 RAC rally Magnum - I wouldn't say it is the most detailed kit in the world, and probably loosely calling it a kit - but it gets me most of the way to what I want.
Here it is on the bench
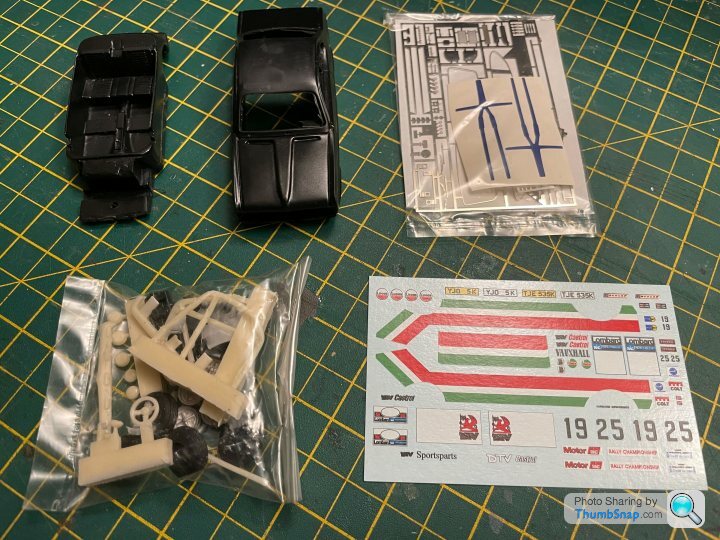
So the biggest hurdle might be the decals - luckily (or I hope I can find them) I have the decal sheets lufbramatt sent last time I did this so can get some new ones drawn up. The dillema is that the kit has good 1975 ones, so do I go for that car as I have most of the decals done, or go for the car he actually finished - that is a decision I need to make tomorrow because will need to get white primer if going 1978... choices choices.
I have decided to build another of his previous rally cars - this time the Vauxhall Magnum he competed in the 1975 and 1978 RAC Rally, as well as the Avon Tour of Britain (which was a great concept and I think something someone should bring back at some point)
Here are the two different car schemes I could copy of his cars:
1975

and the 1978 version

Unfortunately, these are the only pictures I have to work with, but I am hoping to do the 1978 version as he finished 55th in that car, while broke a driveshaft in the 1975 edition and retired.
I have searched for ages to find a kit of a Vauxhall Magnum and eventually one has arrived from Italy today that I hope to build into the replica of his 1978 car. It is from a company called Modellismo 90 and is the Will Sparrow version of the 1975 RAC rally Magnum - I wouldn't say it is the most detailed kit in the world, and probably loosely calling it a kit - but it gets me most of the way to what I want.
Here it is on the bench

So the biggest hurdle might be the decals - luckily (or I hope I can find them) I have the decal sheets lufbramatt sent last time I did this so can get some new ones drawn up. The dillema is that the kit has good 1975 ones, so do I go for that car as I have most of the decals done, or go for the car he actually finished - that is a decision I need to make tomorrow because will need to get white primer if going 1978... choices choices.
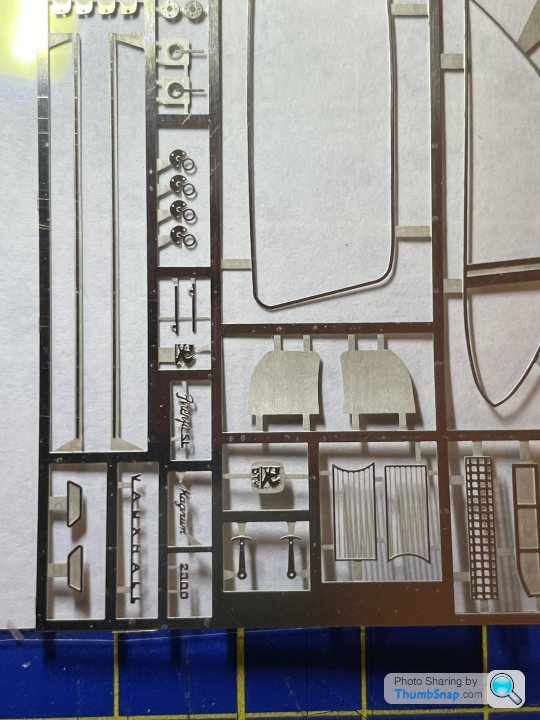
I have opened up the packets a bit more and actually I take it back on not being very detailed. Some of the etched parts look really good.
Though lots of flashing around the plastic parts and the body to clean up tomorrow before painting
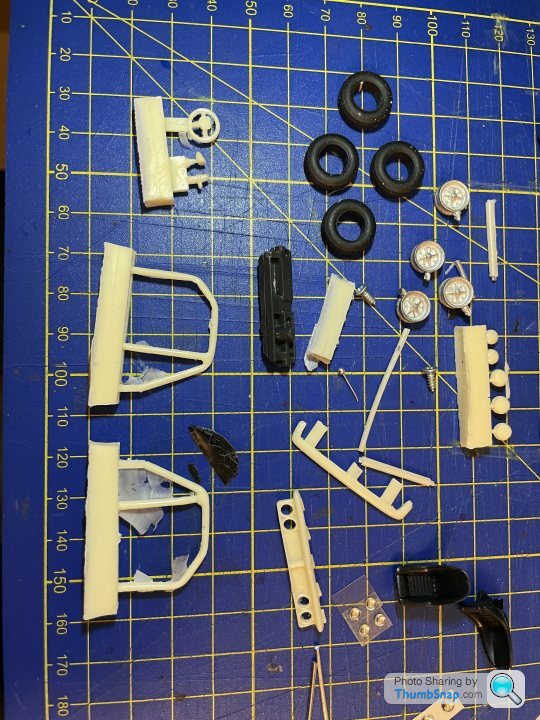
Including the body itself which also needs a hole drilled for the rear axle
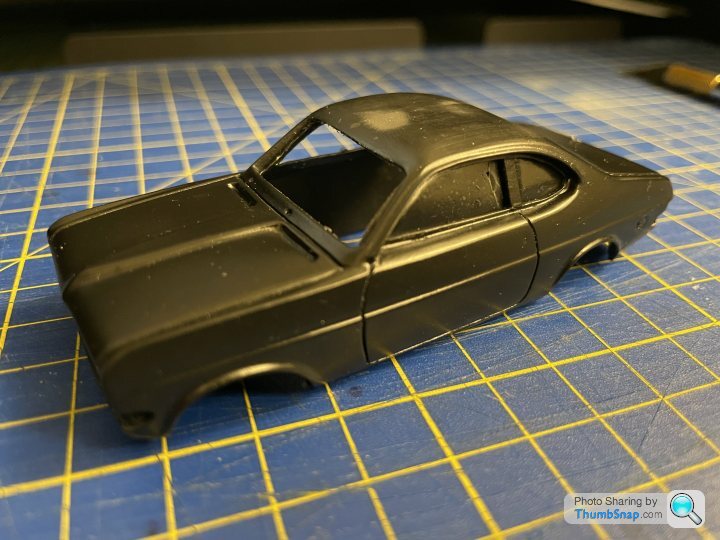
And the missing hole
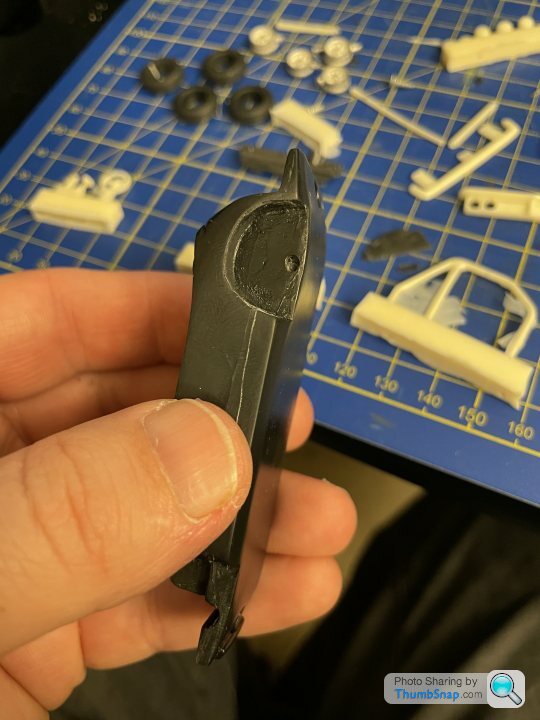
After a little further digging I have decided to go for the 1975 car, mainly because he also competed in that one for the Avon Tour with my mum and was part of the Vauxhall team itself with James Hunt. Need to research that Vauxhall silver colour now.

Though lots of flashing around the plastic parts and the body to clean up tomorrow before painting

Including the body itself which also needs a hole drilled for the rear axle

And the missing hole

After a little further digging I have decided to go for the 1975 car, mainly because he also competed in that one for the Avon Tour with my mum and was part of the Vauxhall team itself with James Hunt. Need to research that Vauxhall silver colour now.
Interesting to watch. Although these things are around, as you say, I have steered clear of buying any because I'm not a big fan of 1/43 - I wish someone would do a decent 1/18 scale HC coupe. But having seen other threads in here, it'll be interesting to see how good it looks when you've made it.
ETA - I see the decals have still got the typo "Sportsparts" in them - I seem to recall mentioning that when it was first shown and being told it was corrected for the final run.
EATA - link to a thread on our club forum talking about the various models of DTV-related cars, but you've got this one now: https://www.tapatalk.com/groups/droopsnootgroup/ds...
Edited by droopsnoot on Tuesday 14th December 13:04
droopsnoot said:
Interesting to watch. Although these things are around, as you say, I have steered clear of buying any because I'm not a big fan of 1/43 - I wish someone would do a decent 1/18 scale HC coupe. But having seen other threads in here, it'll be interesting to see how good it looks when you've made it.
ETA - I see the decals have still got the typo "Sportsparts" in them - I seem to recall mentioning that when it was first shown and being told it was corrected for the final run.
EATA - link to a thread on our club forum talking about the various models of DTV-related cars, but you've got this one now: https://www.tapatalk.com/groups/droopsnootgroup/ds...
Interesting - thanks for the link. As I am going to create most of the decals to match my Dad's car I'm not too bothered by the typo problems. My challenge will be trying to identify each of the logos for the decals from the picture above.ETA - I see the decals have still got the typo "Sportsparts" in them - I seem to recall mentioning that when it was first shown and being told it was corrected for the final run.
EATA - link to a thread on our club forum talking about the various models of DTV-related cars, but you've got this one now: https://www.tapatalk.com/groups/droopsnootgroup/ds...
Edited by droopsnoot on Tuesday 14th December 13:04
Going across the car I think they are as follows:
Boiler West? But don't really know this one.
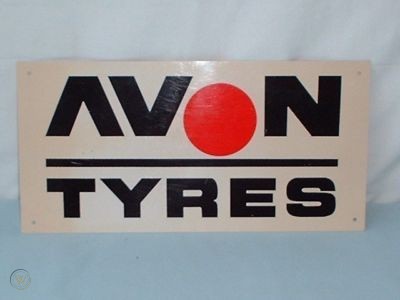
Avon Tyres -
My Dad and his co-driver's names - got from eWRC records - https://www.ewrc-results.com/profile/48752-john-di...
Lombard sticker decals - from the kit I have got already
One by the wheel arch - not sure at all this one
Duckhams Oil -

One next to it I am not sure either
And last one looks like the Vauxhall logo, but looks wrong for DTV logo of the time, so not sure too.
I have also been doing some digging to try and find more pics of the car - have this one posted by Gregor Marshall in another forum
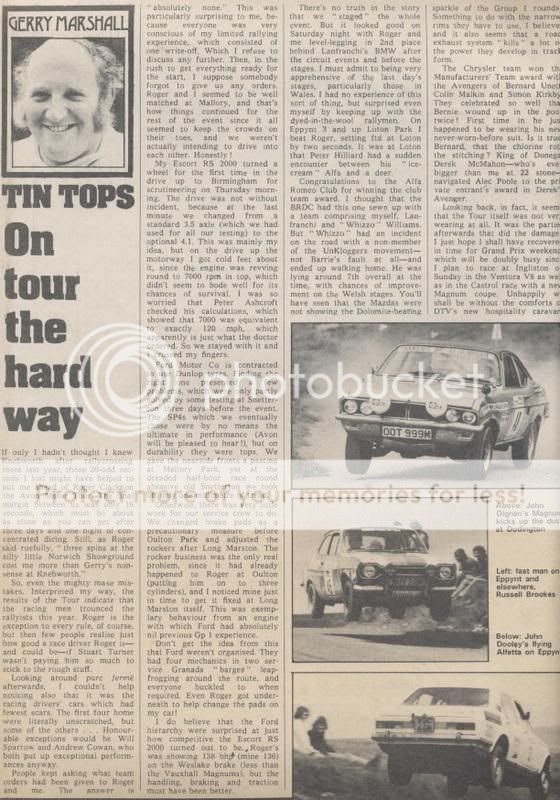
I'm still working on the colour of the car - it is a silver/blue, so trying to work out what modern Vauxhall colour is closest, I think it is Vauxhall Silver Lightning, but if anyone has better ideas that would be great.
droopsnoot said:
For photos, you could have a look around the "Golden Years of Rallying" group on Facebook - I found this photo of the later car on there, credited to Martin Ambler, for example. I'm pretty sure it's the same car, the plate isn't really readable, this is apparently the Dukeries Rally in 1978.
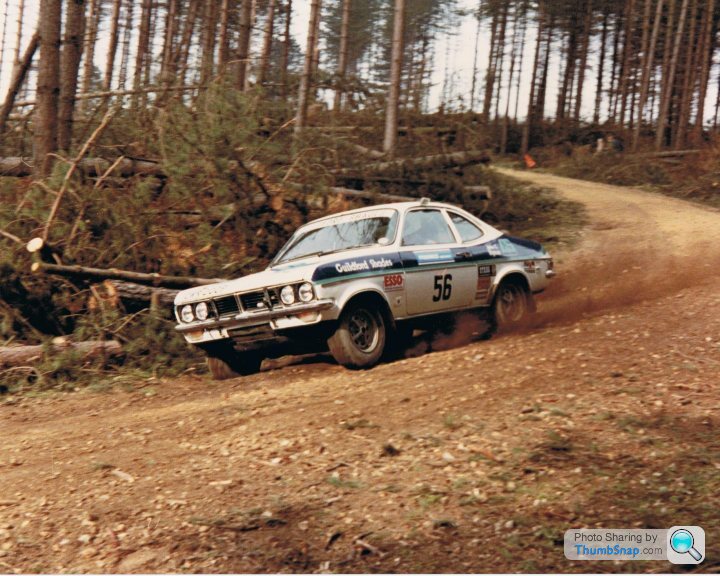
Amazing - that is his car as his name is on the rear quarter. Will have a look through
A little bit of work today on this as out this evening so didn’t get chance to do anything.
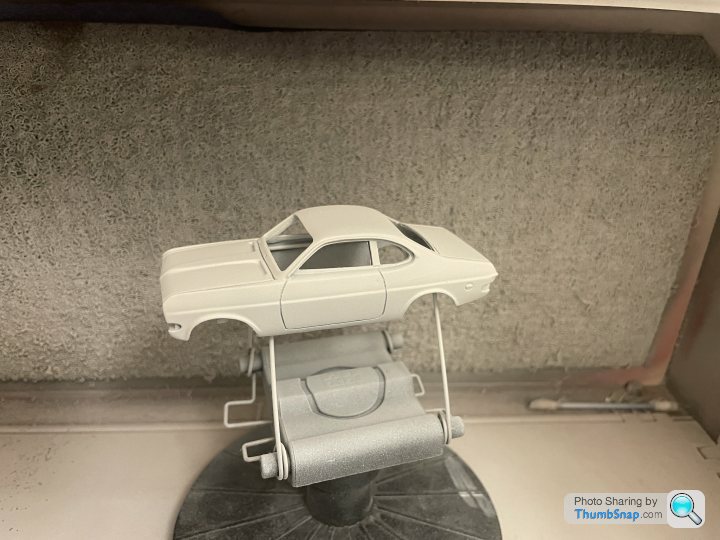
The body shell has made it into the spray booth for a quick bit of primer and looking reasonable.
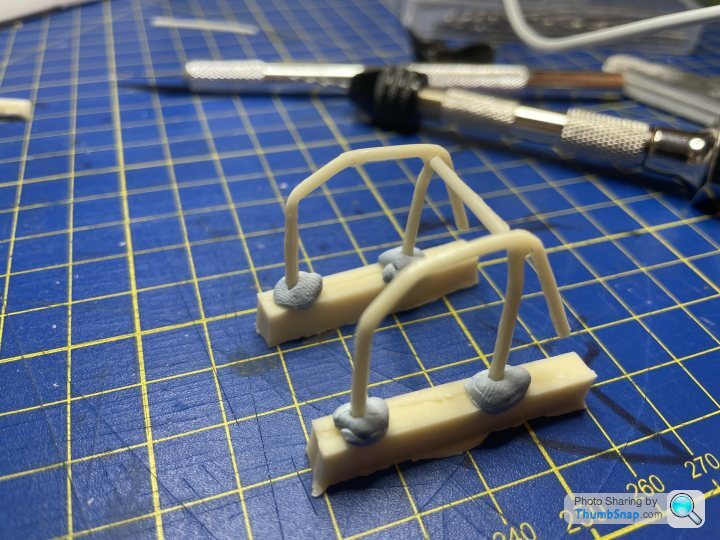
The next step was the fiddly work to get the roll cage sorted, eventually gave up on liquid moly stuff and went for rocket rapid superglue. Not the best fit in the world but it is all hidden under the shell.
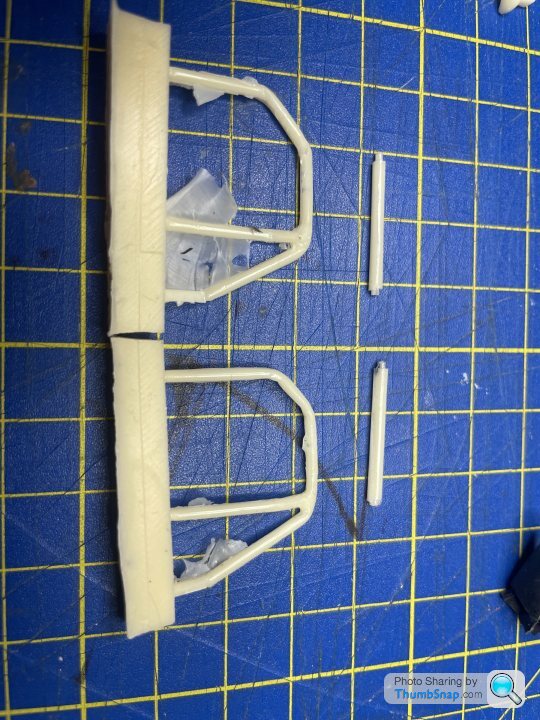
Once cleared the flashing I realised I shouldn’t have taken it off the spur, so bluetac in place to help
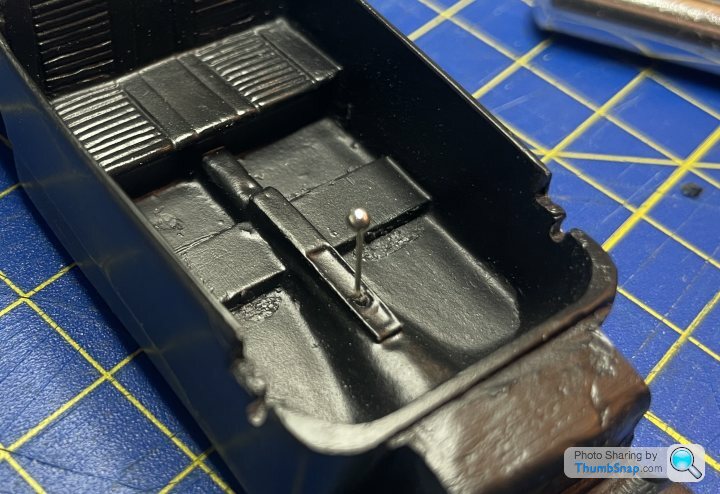
Also drilled out a hole for the very nice gear stick
And that was about it.
I have managed to pick up the paint for the shell, and spent some time corresponding with photographers from Facebook golden rallying years group.
I also had lovely correspondence with Gregor Marshall (son of Gerry), as both our dad’s did the Avon/Texaco Tours together in Vauxhalls.
Some more photos from 1975 Rally
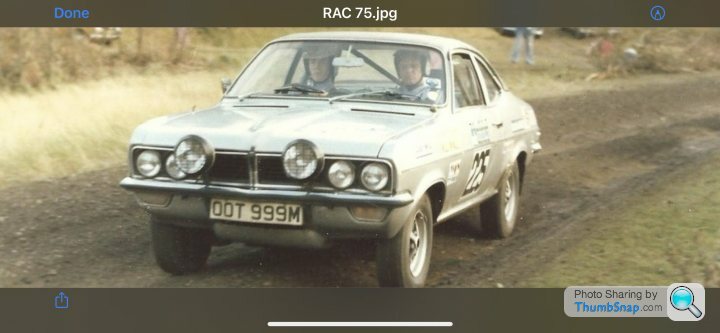
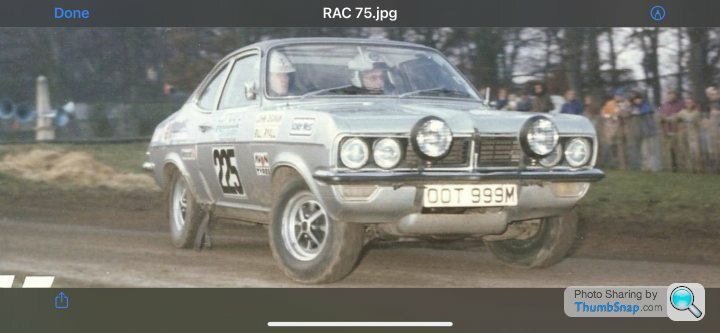
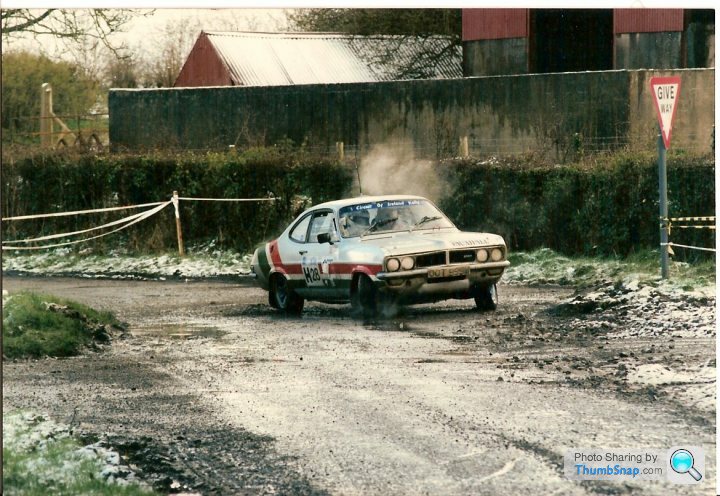
And then found some from a retro colour scheme in an Irish rally the car did in 1994 - not with my dad though.
The body shell has made it into the spray booth for a quick bit of primer and looking reasonable.

The next step was the fiddly work to get the roll cage sorted, eventually gave up on liquid moly stuff and went for rocket rapid superglue. Not the best fit in the world but it is all hidden under the shell.

Once cleared the flashing I realised I shouldn’t have taken it off the spur, so bluetac in place to help

Also drilled out a hole for the very nice gear stick

And that was about it.
I have managed to pick up the paint for the shell, and spent some time corresponding with photographers from Facebook golden rallying years group.
I also had lovely correspondence with Gregor Marshall (son of Gerry), as both our dad’s did the Avon/Texaco Tours together in Vauxhalls.
Some more photos from 1975 Rally


And then found some from a retro colour scheme in an Irish rally the car did in 1994 - not with my dad though.

Edited by RacingPete on Wednesday 15th December 23:34
After an evening off it is time to get to some detail and crack open the paint and magnifying glasses.
Everything is a bit tiny at times and this is the first time I have worked with etched parts for a model, so after a quick check on YouTube on best techniques I have cracked on.
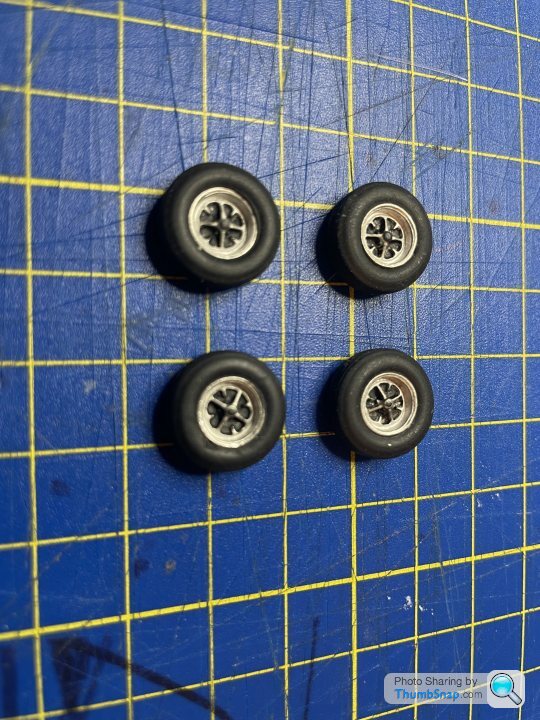
First was to posting up the wheels, left the silver metal they came in and just painted the black middle parts as per pics above.
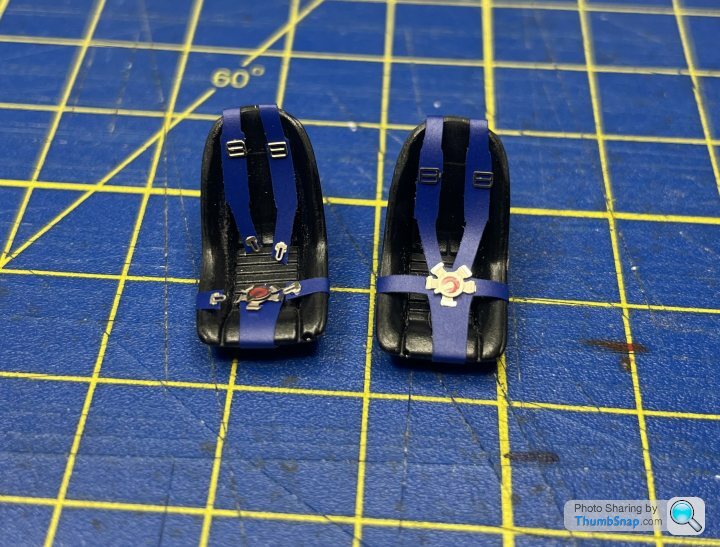
And then it was time to tackle the seats. The kit comes with separate etched bits for the buckles and harness, with a blue sticker for the straps. I went for the harness buckled in first, and then had a go with it unstrapped which took a little bit more cutting out - wish I had done on both seats to be honest, but will just pretend the navigator seat is strapped to stop it rattling on a shake down or something.
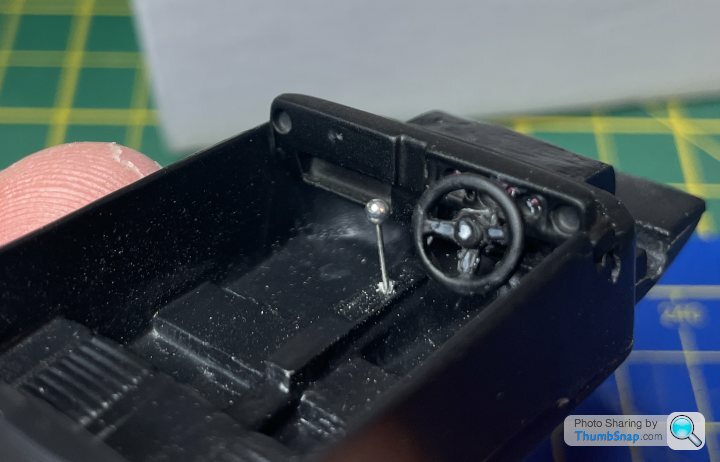
Final job tonight was to sort out the dash too, was very hard to paint any dials so just made some marks to represent it.
Pretty pleased with how the etched stuff looks on those seats.
Everything is a bit tiny at times and this is the first time I have worked with etched parts for a model, so after a quick check on YouTube on best techniques I have cracked on.
First was to posting up the wheels, left the silver metal they came in and just painted the black middle parts as per pics above.

And then it was time to tackle the seats. The kit comes with separate etched bits for the buckles and harness, with a blue sticker for the straps. I went for the harness buckled in first, and then had a go with it unstrapped which took a little bit more cutting out - wish I had done on both seats to be honest, but will just pretend the navigator seat is strapped to stop it rattling on a shake down or something.

Final job tonight was to sort out the dash too, was very hard to paint any dials so just made some marks to represent it.

Pretty pleased with how the etched stuff looks on those seats.
droopsnoot said:
ETA - I see the decals have still got the typo "Sportsparts" in them - I seem to recall mentioning that when it was first shown and being told it was corrected for the final run.
So, just to answer this one. They have not changed it on the main decal sheet but have included a new one with it to fix that issue. 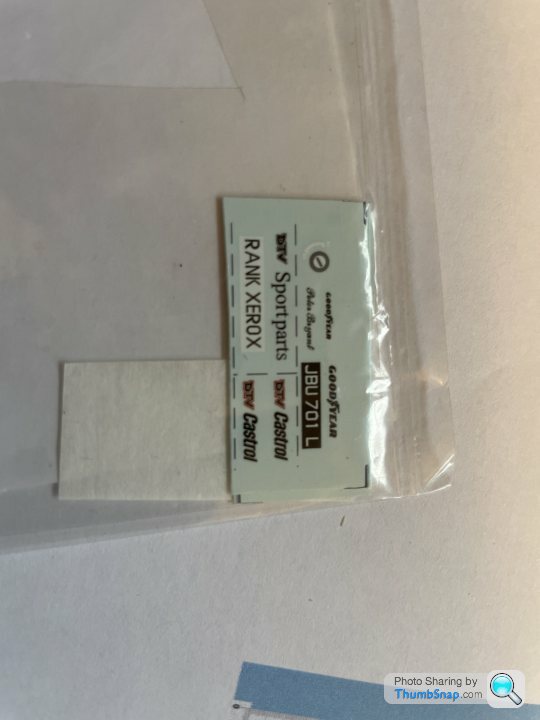
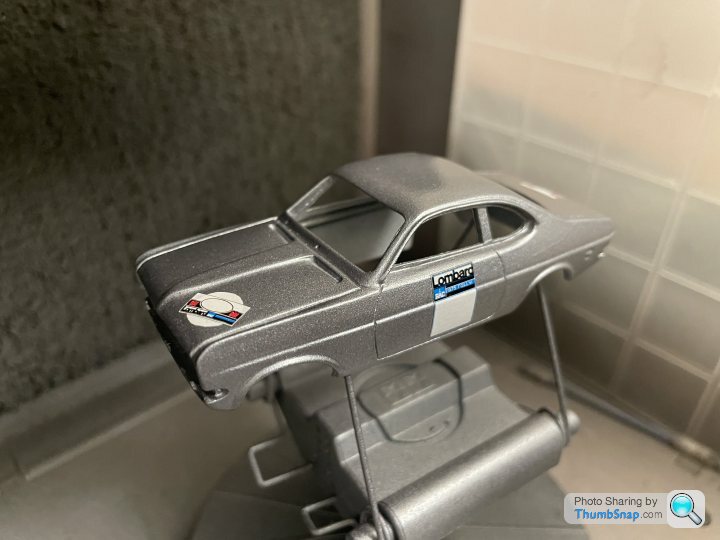
I have been working on the body for the last few days. I decided to go with Vauxhall Silver Lightening for the colour and used a Halfords rattle can.
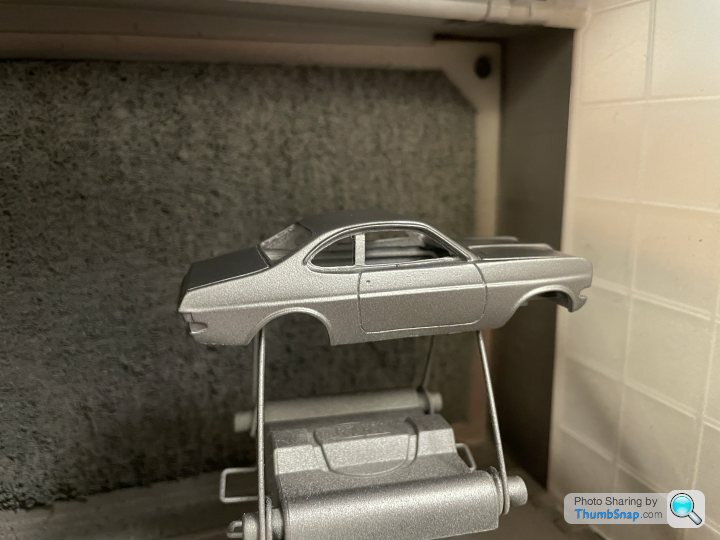
It is probably a little more blue than the original car, and not sure if it was metallic either, but looks pretty reasonable.
I then applied lacquer and started on the decals. I realised the printed sheets I have were for a laser printer, so ordered some for the inkjet I have at home. Which meant I could only add the ones on the sheet that work.
Still working on getting all the decals accurate. Stuck on the rear ones.
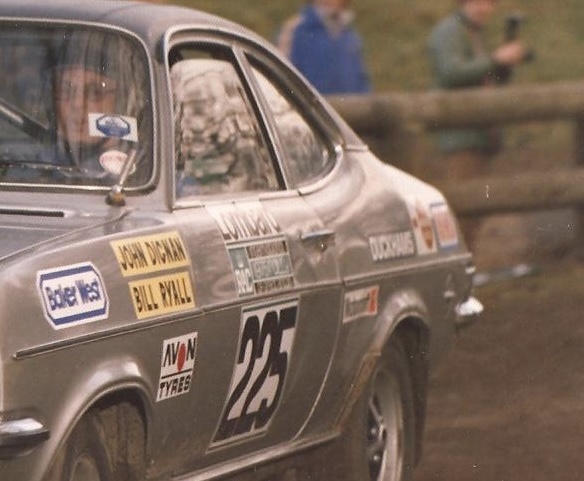
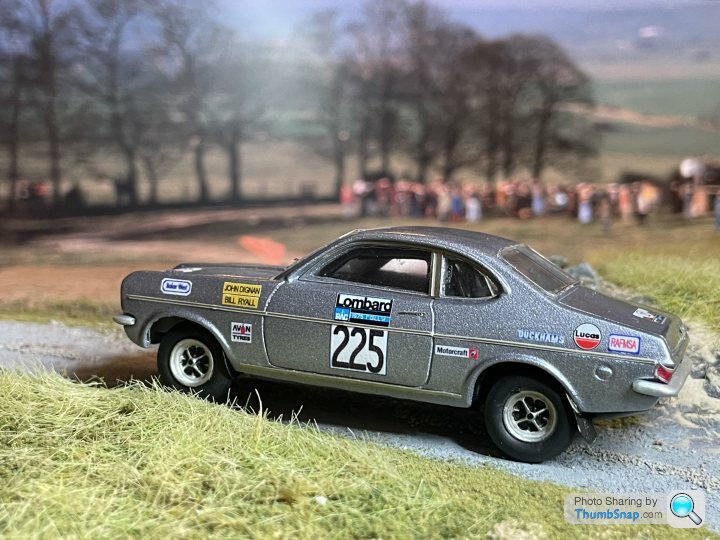
So I think the one before rear wheel arch is Motorcraft (seems strange as they are Ford parts specialist, but found the logo on Blomqvist’s Saab in same Rally, so think it is correct). And the one at the end is RACMSA logo as found similar on my dad’s Mitsubishi Colt in Cyprus Rally.
Question, do you lacquer the body after applying the decals as have been holding off adding anything else to body till they are all on?

It is probably a little more blue than the original car, and not sure if it was metallic either, but looks pretty reasonable.
I then applied lacquer and started on the decals. I realised the printed sheets I have were for a laser printer, so ordered some for the inkjet I have at home. Which meant I could only add the ones on the sheet that work.

Still working on getting all the decals accurate. Stuck on the rear ones.

So I think the one before rear wheel arch is Motorcraft (seems strange as they are Ford parts specialist, but found the logo on Blomqvist’s Saab in same Rally, so think it is correct). And the one at the end is RACMSA logo as found similar on my dad’s Mitsubishi Colt in Cyprus Rally.
Question, do you lacquer the body after applying the decals as have been holding off adding anything else to body till they are all on?
Edited by RacingPete on Sunday 19th December 20:06
Tonight’s jobs.
I have decided I can’t work out the red round logo on the back of the car so going to substitute with Lucas logo as Dad always ran them.
With the decal paper arriving I was ready to finish graphics and get them printed.
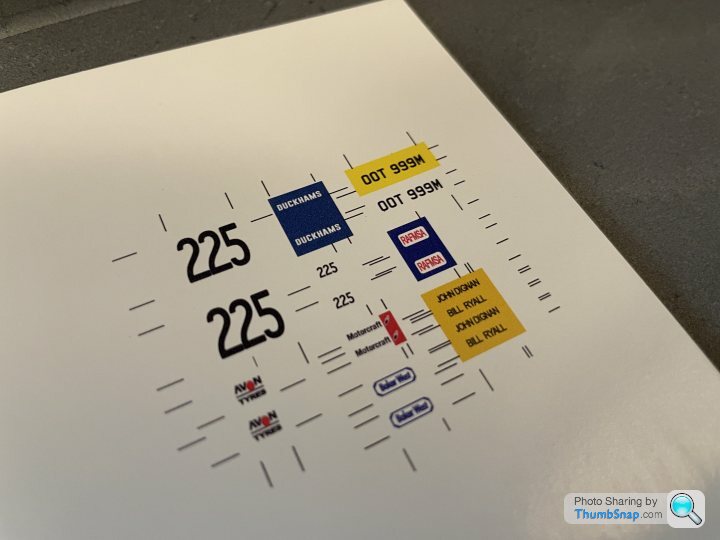
The black lines are the cut points, and I have over extended anything not white so that I am not trying to cut spot on to the edge of the logo. Pretty pleased with these.
While this was ongoing drying etc, I started on the grille and bumpers.
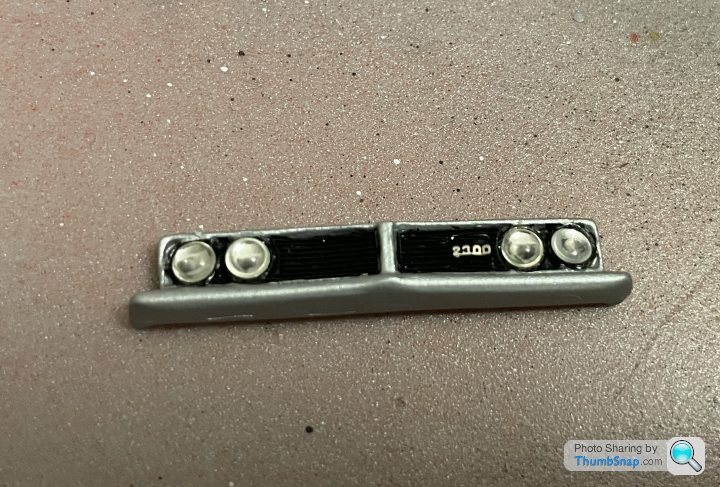
The grille parts were slightly oversized for the etching, so I have rested on top rather than trying to force into the gaps.
Rear bumper also painted, both using Vallejo chrome with an airbrush.
I have decided I can’t work out the red round logo on the back of the car so going to substitute with Lucas logo as Dad always ran them.
With the decal paper arriving I was ready to finish graphics and get them printed.

The black lines are the cut points, and I have over extended anything not white so that I am not trying to cut spot on to the edge of the logo. Pretty pleased with these.
While this was ongoing drying etc, I started on the grille and bumpers.

The grille parts were slightly oversized for the etching, so I have rested on top rather than trying to force into the gaps.
Rear bumper also painted, both using Vallejo chrome with an airbrush.
We are now getting near full assembly with most of the parts nearing completion….
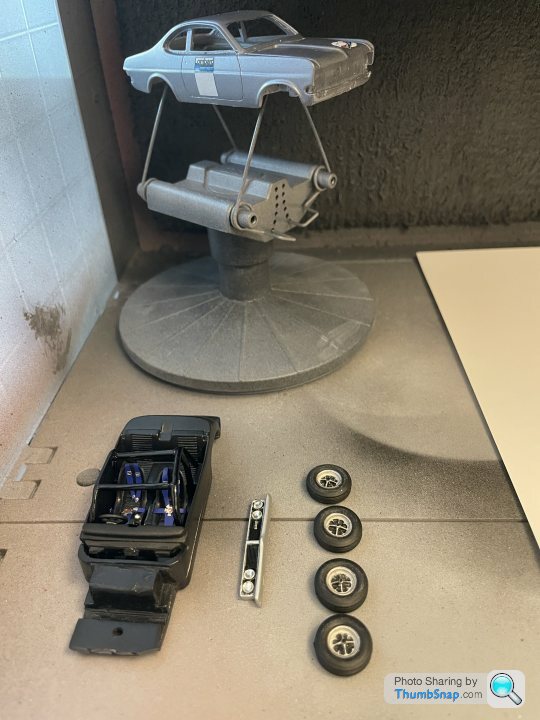
…though I do feel that I’m 80% there but only 20% of the effort!
Last night was all about decals, and finally got them all on the car - some might be slightly too small, but think they will do
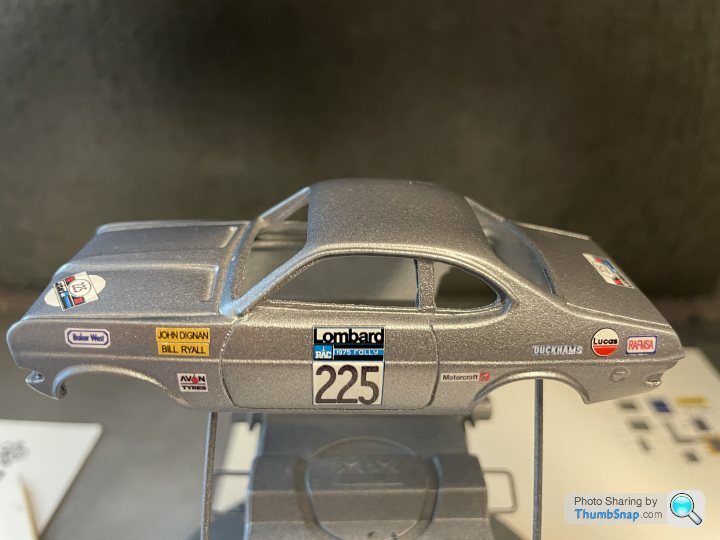
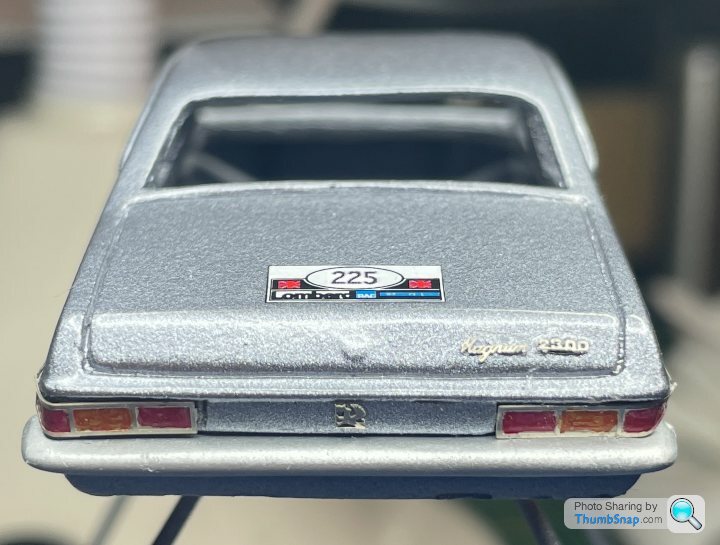
Tonight was all about the etched parts.
Starting with the rear and the bumper, lights, and Vauxhall and magnum 2300 logos. These are absolutely tiny.
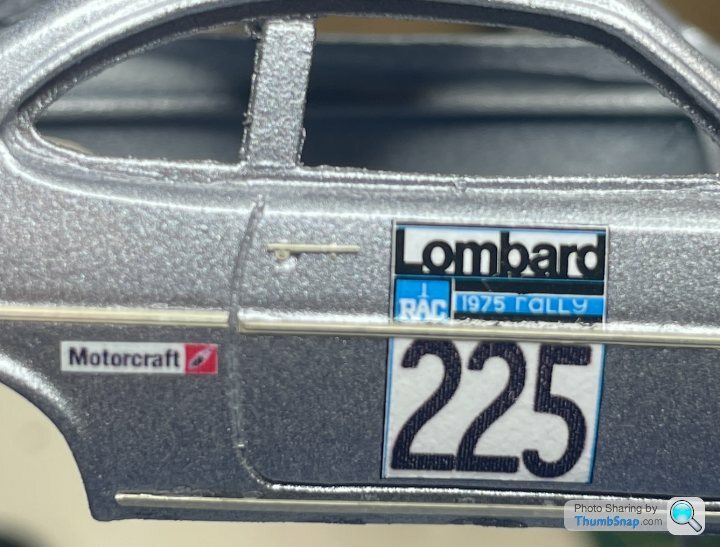
Then onto the side, with the chrome trim and door handles.
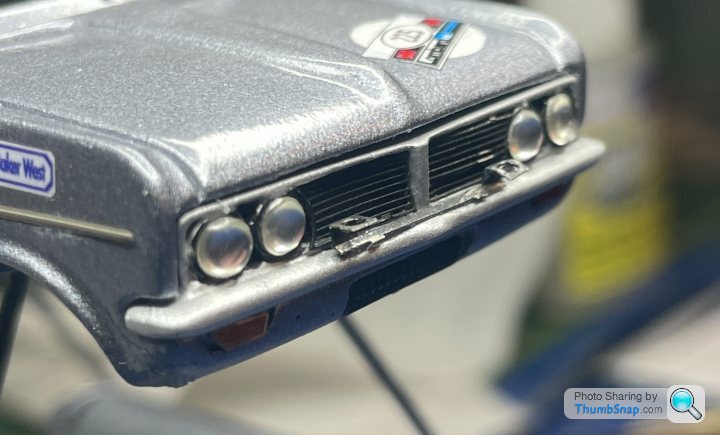
Then to the front, with whole grille and bumper assembly, and then the addition of the spot rack and lower grille
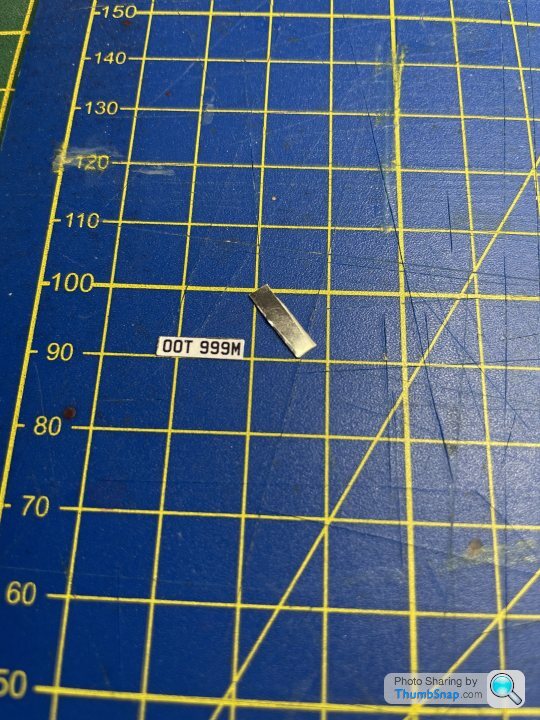
There wasn’t any good way to attach the number plates so have used some off cut off the etching to add the decals
I have also modified the roll cage to add a cross beam as you can see in the original photo above.

…though I do feel that I’m 80% there but only 20% of the effort!
Last night was all about decals, and finally got them all on the car - some might be slightly too small, but think they will do

Tonight was all about the etched parts.
Starting with the rear and the bumper, lights, and Vauxhall and magnum 2300 logos. These are absolutely tiny.

Then onto the side, with the chrome trim and door handles.

Then to the front, with whole grille and bumper assembly, and then the addition of the spot rack and lower grille

There wasn’t any good way to attach the number plates so have used some off cut off the etching to add the decals

I have also modified the roll cage to add a cross beam as you can see in the original photo above.
Into the final stretch now and all bits attached to the body
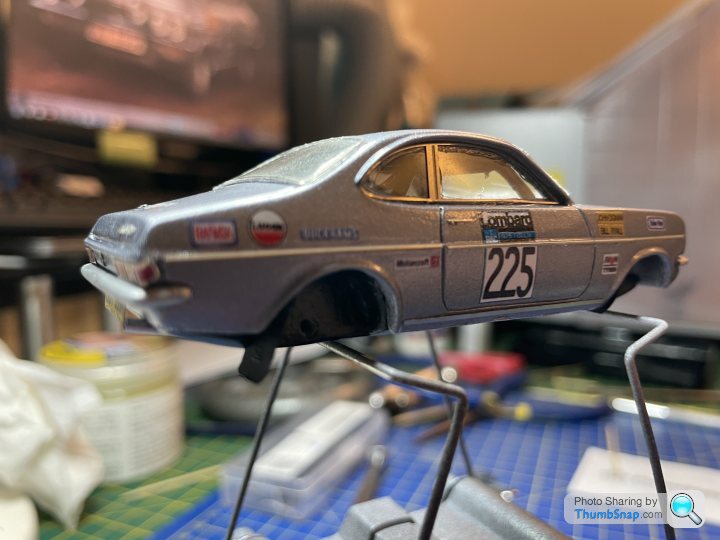
Not too keen on the way the front and rear windows fit as the site on the body, rather than recessed in the openings. Will have to do.
Then into sorting the wheels, which meant a measure 5 times and drill once approach on the pillar drill
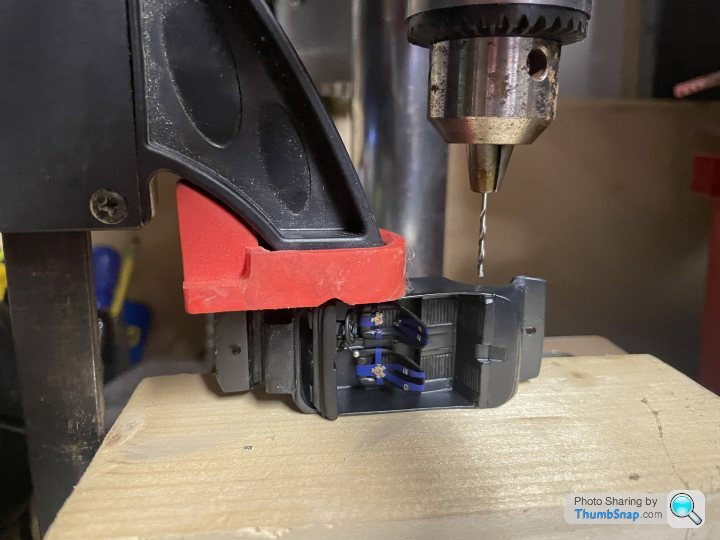
Luckily that went very smoothly and managed to come out where the hole is on the other side.
Then it was time to stick body and chassis together, these are actually held in by self tapping screws. Then glueing wheels to the metal axels, made sure to keep them upright.
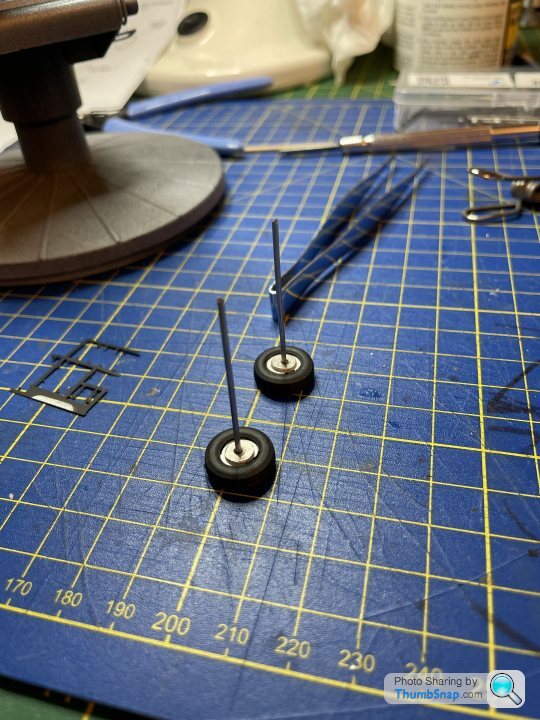
When it came to put the wheels on the other side I had to cut off around 1cm to get the wheels under the arches correctly.
Then once together and back on the shelf I wasn’t happy. The front wheels made the front very low, so I had to build a spacer to raise the body up. This meant the chassis (which isn’t very detailed showing) - back out with the paints.
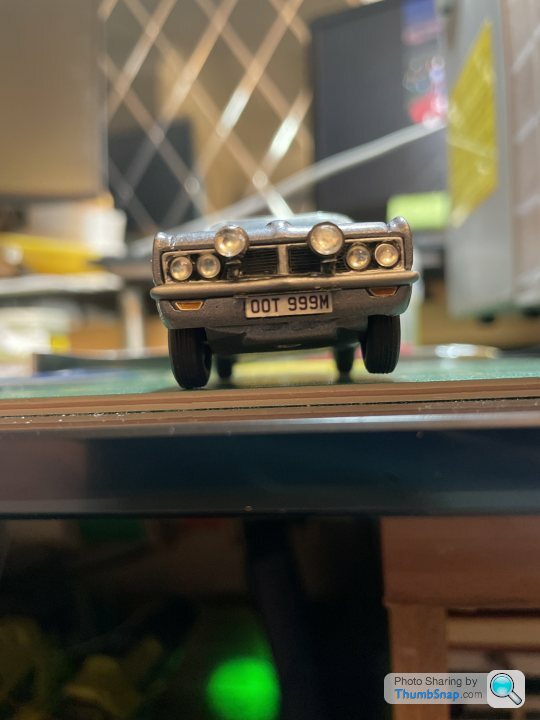
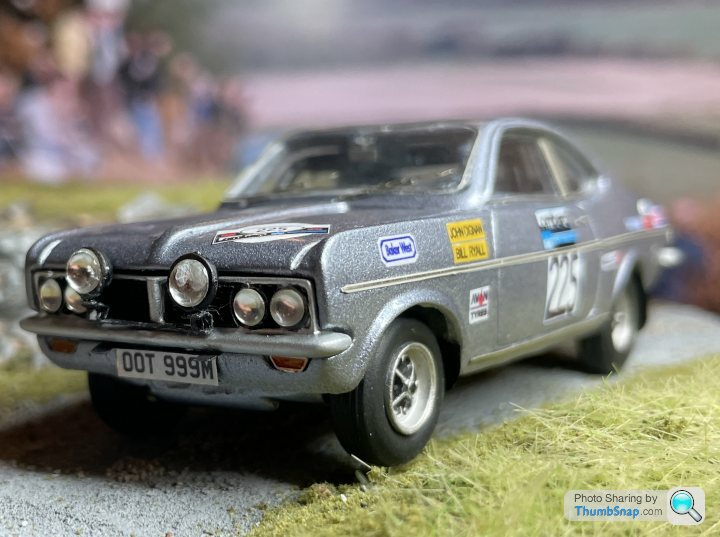
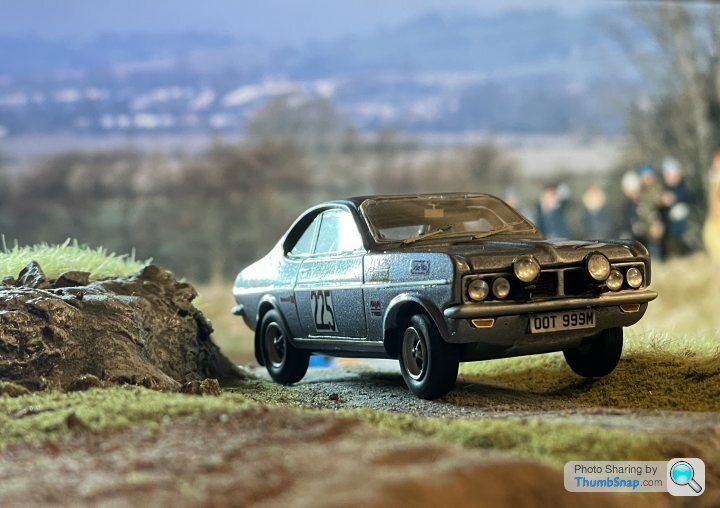
So finishing off with the mud guards and we are all done!

Not too keen on the way the front and rear windows fit as the site on the body, rather than recessed in the openings. Will have to do.
Then into sorting the wheels, which meant a measure 5 times and drill once approach on the pillar drill

Luckily that went very smoothly and managed to come out where the hole is on the other side.
Then it was time to stick body and chassis together, these are actually held in by self tapping screws. Then glueing wheels to the metal axels, made sure to keep them upright.

When it came to put the wheels on the other side I had to cut off around 1cm to get the wheels under the arches correctly.
Then once together and back on the shelf I wasn’t happy. The front wheels made the front very low, so I had to build a spacer to raise the body up. This meant the chassis (which isn’t very detailed showing) - back out with the paints.

So finishing off with the mud guards and we are all done!
Gassing Station | Scale Models | Top of Page | What's New | My Stuff


