1:24th Mercedes SLC rally build
Discussion


Stepping out of my comfort zone by creating a build thread is to keep me honest and the build on track, despite it being quite a quick bosh-bosh lightweight project. I`m not a fan of the longer wheelbase and roof line of the C107 but there`s a longer story as to why this and a sister kit are on my shelf...but for now I`m just going to get going with annotated pics.
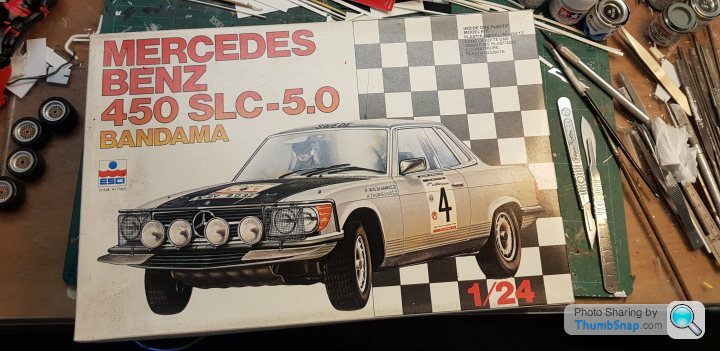
An old issue of the kit, late 70s vintage, contemporary with the real cars, still available in an Italeri box:
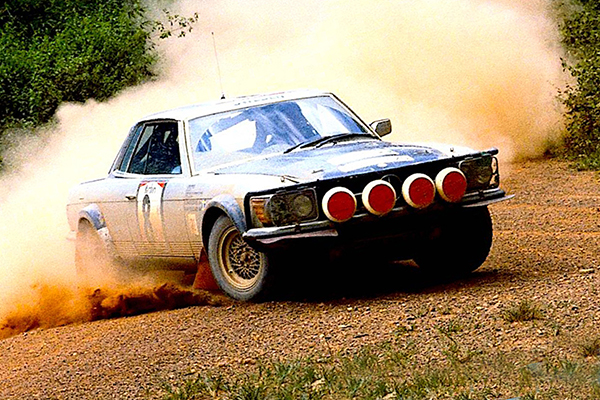
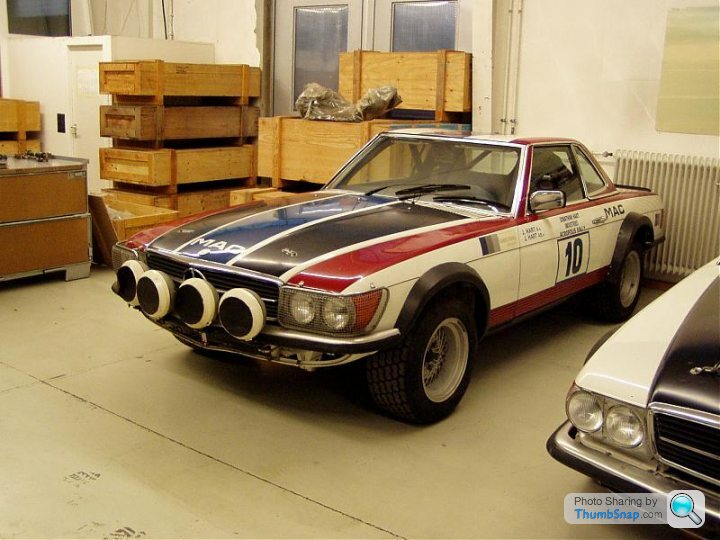
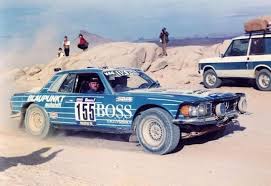
Keeping the build easy I`m going for an early car with original standard wheel arches like this:
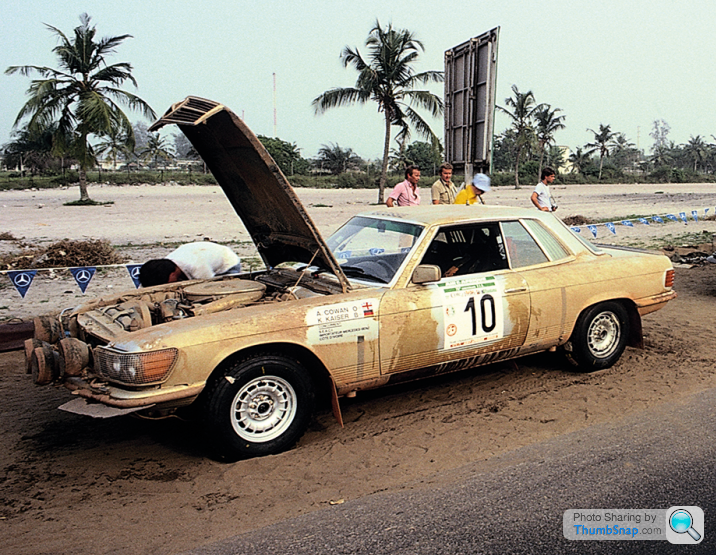
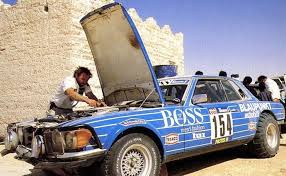
But about as dusty as this......though it may get more like the former if weathering doesn`t go well...or the old decals disintegrate...
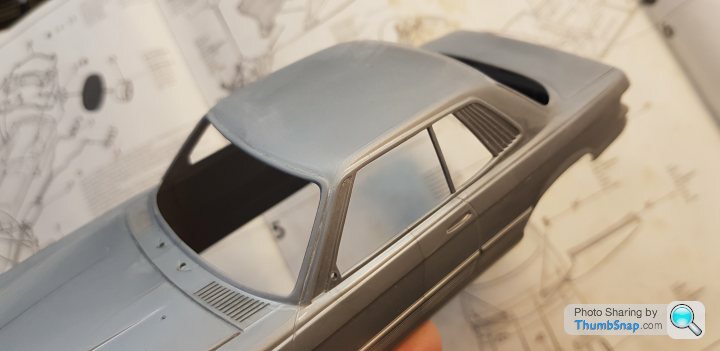
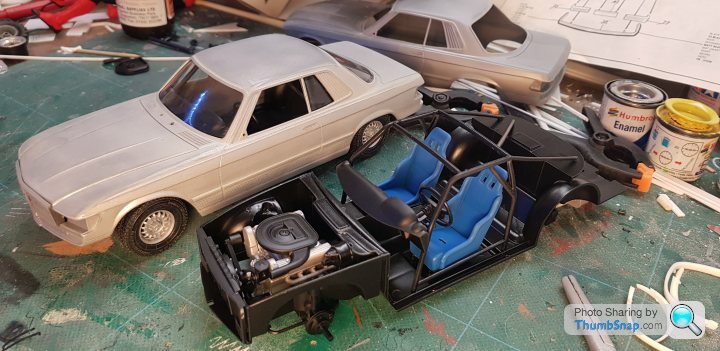
Nicely shaped and proportioned body, some fine and not-so-fine trim engraving. Bonnet shut lines deep to aid the option of cutting it open...I will resist..
Beautiful wheels
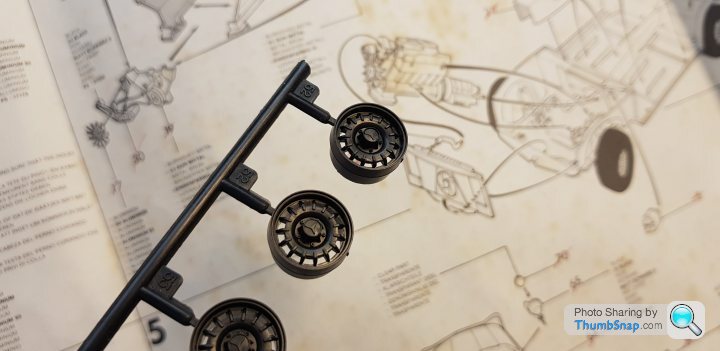
Moulded seat belts in the super-crisp interior panels!
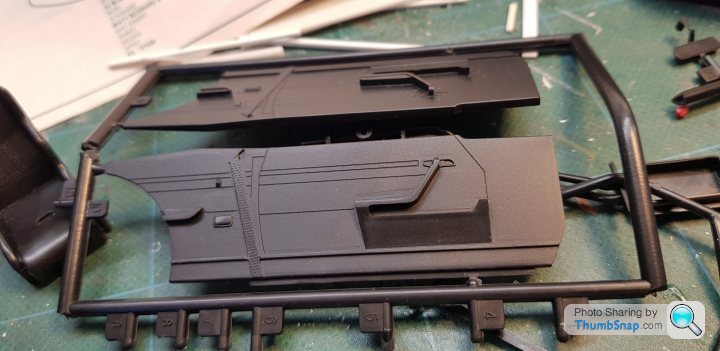
Separate suspension, exhaust and good looking V8
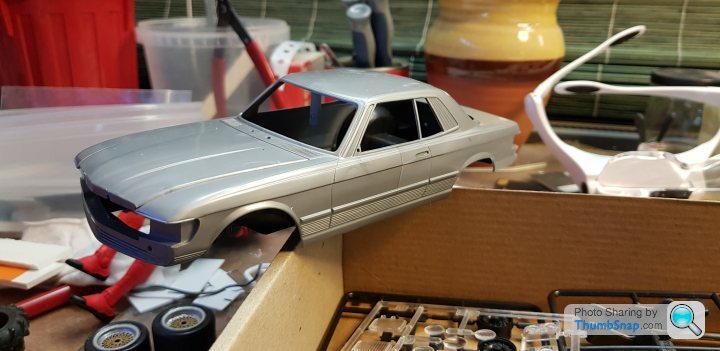
To the build: mould seams easy to tackle, first with needle files, then a fine sanding pad. Window aperture, wheelarch, sill and valance edges filed, scraped with a blade then sanded with the pad to lose the sharp moulded edges. Difficult to gauge progress as moulded flow lines in the silver plastic follow the seams needing filing, but primer coat will reveal if these areas need a little more work.
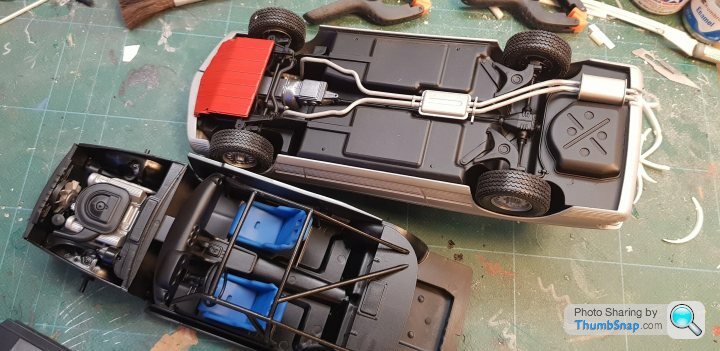
Suspension pieces locate well in the floorpan. I chose to glue the stub axles supplied rather than trap them in the assembly to allow rotation, they were too loose and would apply lots of camber under the weight of the finished model. Not a good look...
Heated blade staked over the tie-rod pins, we`ll have posable steering.
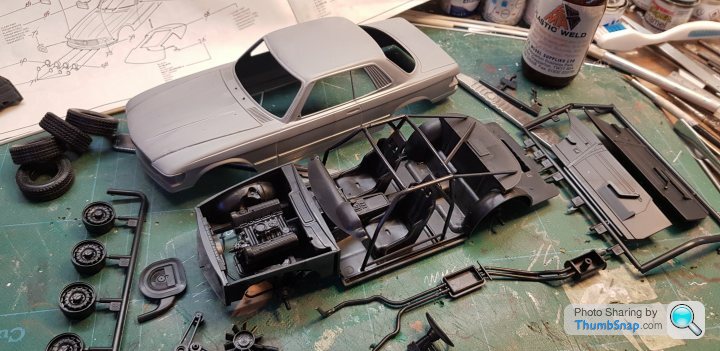
So a Now Show and one Wittertainment later we`ve got a body and some sub-assemblies ready for primer and colour in the morning. I`d usually not bother with the engine in a closed-bonnet shelf model but it looked too nice to leave out despite the top of it being the best aspect.
Now should I open the sister kit and build almost in parallel? It would need front arches and sand tires for the rear under crudely radiussed arches...
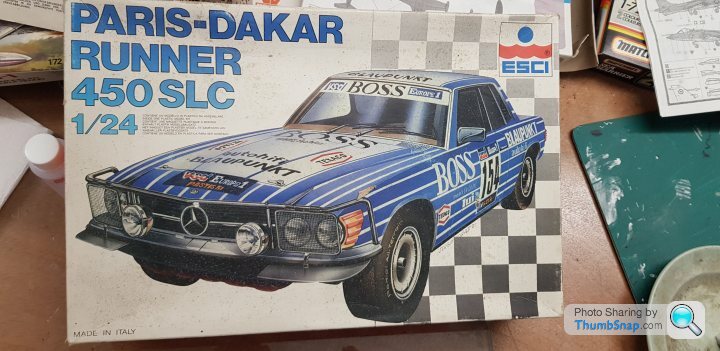
An old issue of the kit, late 70s vintage, contemporary with the real cars, still available in an Italeri box:
Keeping the build easy I`m going for an early car with original standard wheel arches like this:
But about as dusty as this......though it may get more like the former if weathering doesn`t go well...or the old decals disintegrate...
Nicely shaped and proportioned body, some fine and not-so-fine trim engraving. Bonnet shut lines deep to aid the option of cutting it open...I will resist..
Beautiful wheels
Moulded seat belts in the super-crisp interior panels!
Separate suspension, exhaust and good looking V8
To the build: mould seams easy to tackle, first with needle files, then a fine sanding pad. Window aperture, wheelarch, sill and valance edges filed, scraped with a blade then sanded with the pad to lose the sharp moulded edges. Difficult to gauge progress as moulded flow lines in the silver plastic follow the seams needing filing, but primer coat will reveal if these areas need a little more work.
Suspension pieces locate well in the floorpan. I chose to glue the stub axles supplied rather than trap them in the assembly to allow rotation, they were too loose and would apply lots of camber under the weight of the finished model. Not a good look...
Heated blade staked over the tie-rod pins, we`ll have posable steering.
So a Now Show and one Wittertainment later we`ve got a body and some sub-assemblies ready for primer and colour in the morning. I`d usually not bother with the engine in a closed-bonnet shelf model but it looked too nice to leave out despite the top of it being the best aspect.
Now should I open the sister kit and build almost in parallel? It would need front arches and sand tires for the rear under crudely radiussed arches...
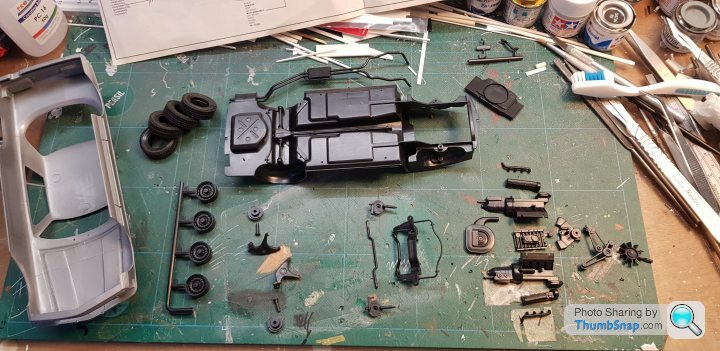
So that was yesterday evening and first squirts of aerosol were this morning before the world went orange:
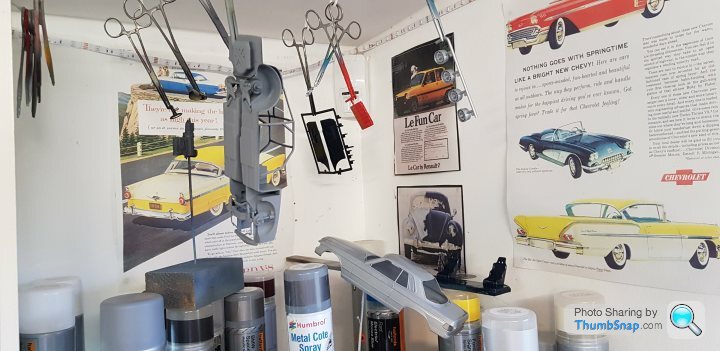
Jumbly paint corner pic shows parts after through the shed door and into the garden spraying: Halfords grey primer on everything except the sump guard (white primer) then Halfords matt black on interior parts, to be followed by satin black for preferred sheen. I find both their matt and especially satin draw out mould flow lines unless the plastic is primed first, the matt covers best then satin just for the sheen. Seats are in a random blue and will be matt lacquered. Sump guard is now a Fiat orangy red, think the real parts might have been a kevlar variant despite box art showing a metal finish. Body has a Vauxhall silver coat, might be enough, might need a Tamiya fine-particle spray silver on top, day light will tell. Engine sprayed Humbrol brushed steel, a bit dark but buffs up nicely. I`ll use this one as practice for the second engine for the blue car I`m almost certain I`ll start now. Wheels primed the sprayed Tamiya Mica silver. All rattle cans.
Gone dark and wet so no more spraying today but would be good progress to glue the manifolds on to the exhaust run, prep the grille and bumpers, see how the spot lights are meant to fit etc.
Good to see this one as a WIP, looking forward to seeing it progress.
I have one too, but not quite complete - possibly something mildly important like the floorpan missing?! The previous owner's paintwork needs stripping too. I think the rest is there however, so I'm looking to chuck a spare floorpan underneath just to hold it up in the air. As long as it looks good on the shelf as a kerbside build I'll be happy.
Although might it fit on top of the Tamiya S600 Coupe I also have?........

Spotted, a friend can attest that the double-skined bulkhead can a terminal rot spot on these, a missing floor must be similarly serious! And expensive to fix...cut n shut could be the best option!
No progress since above post apart from visually confirming I went a bit quick and wet with the silver on the body. It's all sunk back so needs a good sanding and will probably go straight to a Tamiya silver spray can for the next coat...if I've got one with enough paint in...
So little modelling has been done lately I've got about 6 weeks backlog of Wittertainment to enjoy. Looking forward to a good binge! Sounds and beverage choice are critical to achieving full modelling heaven I find.
gruffgriff said:
Spotted, a friend can attest that the double-skined bulkhead can a terminal rot spot on these, a missing floor must be similarly serious! And expensive to fix...cut n shut could be the best option!
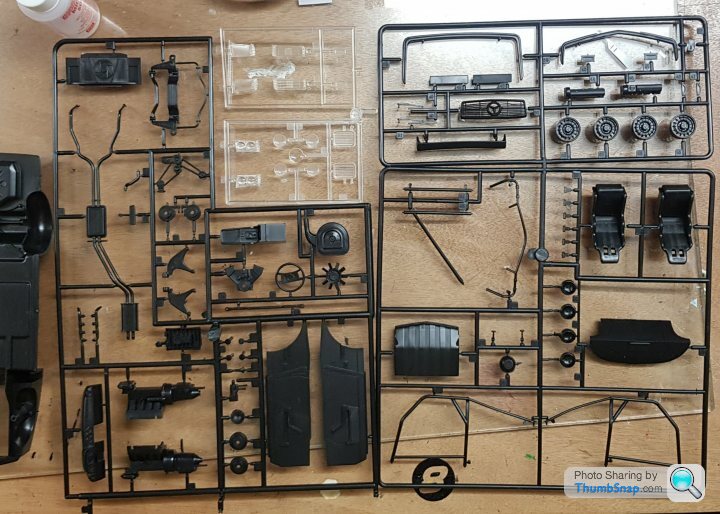
Thanks!I wonder if you could possibly do me a favour with the unstarted kit - would you be able to get a photo of all the sprues please? I could then work out what I have missing on mine.
I feel the need to fill in a little of the back story and set goals for this, now `these` builds. I absorbed these two kits in to my collection with the intention to build for a 450 5.0 SLC owning friend whos car is featured here:
https://www.classicandsportscar.com/features/merce...
So those 20 years of ownership flew by and the real SLC has a new custodian and for gifts, my pal will only accept year-specific Campagnolo Super Record rear mechs to fill gaps in his collection, plastic models will no longer do. Well, his loss, I`m not about to bid on that rare `68 derailleur for his xmas pressie….
Anyway. I`ve had a big purge of kits via ebay, reduced the stock, shock-horror the ones I wouldn`t ever sell after previous purges, the cream, the definitely will build, real plans for etc etc. I got some good prices and some not so good BUT the knowledge my carefully selected niche models now reside with enthusiasts, some of whom even intend to build them and share pics to prove, is liberating. I still have the very core ones I wouldn`t ever sell, the cream, the definitely will build, real plans for etc etc…..just fewer…. These SLC kits evaded the purge because of the connection to my friend but now that purpose has been lost I was about to list them….but more than a little remorse over those kits that have gone, the thought of the low financial return of each, that I haven`t finished anything in so long, that these could get away with a bosh-bosh build with dusty weathering to hide any crudeness in the mouldings or failure of the decals, write a build thread to ensure I keep focus and finish the buggers, might be fun…so here I am.
These will not be hi-res faithful replicas of specific cars. I will cut corners, eschew detail and muck about for fun to make shelf models.
Progress! Despite kids running my matt black stock down necessitating a trip to Halfords ...and them not having any on the shelf! Will have to fall back on using satin and their matt lacquer for the dull sheen.
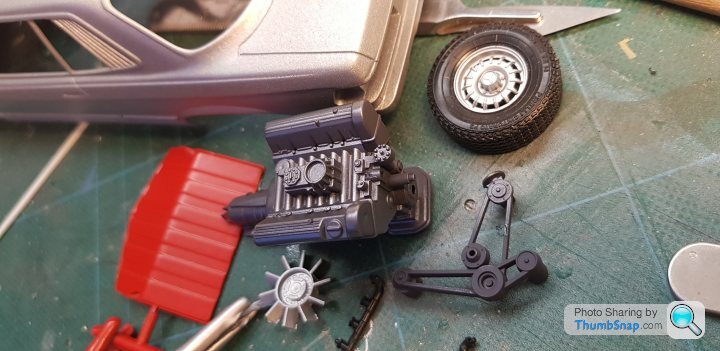
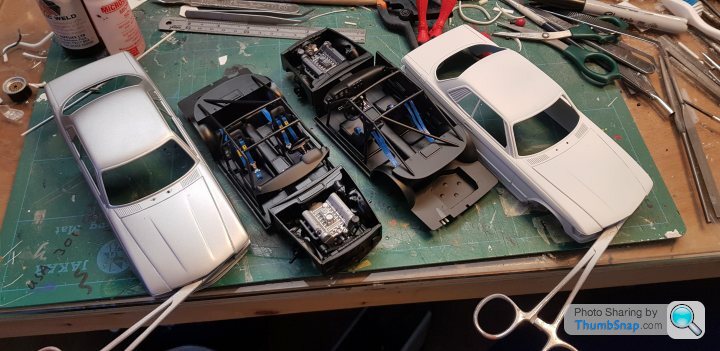
First kit: Wheels looking exceptional in silver, superb toolmaking. Shame about the very square and unrealistic Esci tyres but the prominent tread should benefit the dirtying/weathering. The engine and ancillaries are sprayed Humbrol polished steel, part scrubbed with a toothbrush to show before and after buffing. I love that spray, the way it covers and the effect you get when wiped or brushed. Colour is totally wrong for the MB 117 engine, iron block, ali heads, pressed steel valve covers
Sump guard will be very toned down when dusty.
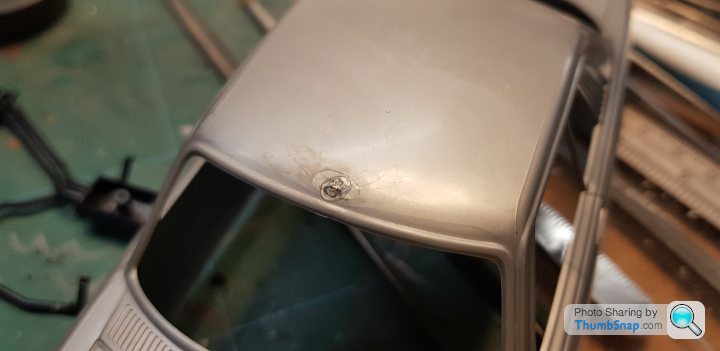
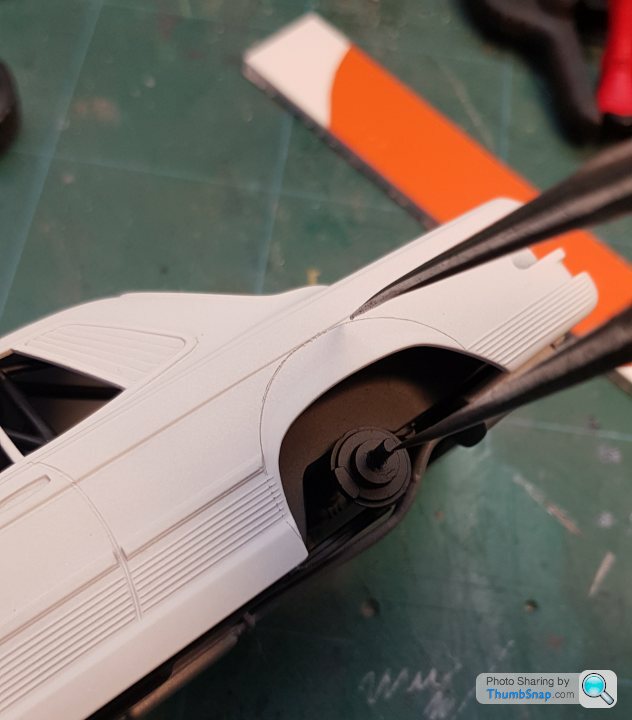
Second kit started to play catch-up so finishing runs parallel. Filling the hole in the roof of the second body left by the moulding gate tab having snapped off in the box. Superglue with actuator to harden it off. Mould split lines, moulding flow lines and the sharp moulded edge around the window opening show well in this pic.
Second floorpan coming together, I`m spraying the underside, interior floor and glued-in roll cage together, all black. Those seats are blue, just too dark to contrast with the black interior. They`ll need to be lighter.

Two engines! Humbrol polished aluminium on the left and polished steel on the right. Polished aluminium doesn`t really buff to a sheen higher than effect out of the can, but is more representative of the head and valve cover colour. Polished steel on right looks cooler but again not accurate. Spraying block and heads/covers separately would be the right thing to do but…...it`s all moot when I`m not cutting the bonnet open and the sump guard shields the underside, this effort to paint anything is utterly wasted. Wonder how one of these would look in a `32 rod……nah, would have to address the sink marks but the injection system would look intriguing without the air cleaner covering it..plenty of scope for wiring the distributor and fuel lines from the fi block..

Two kits, two sets of everything. One pair of interior panels has been primed and sprayed black, the other pair virgin black plastic. Why did I bother?
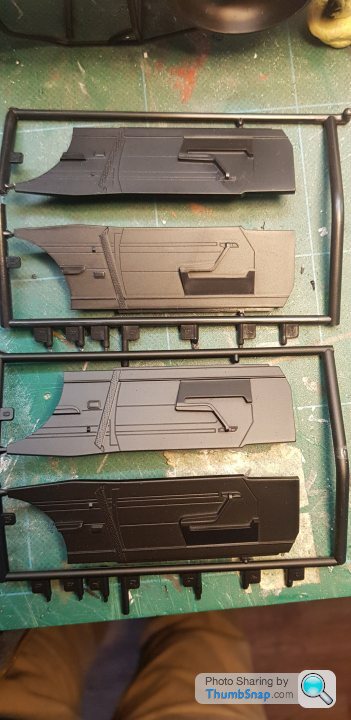
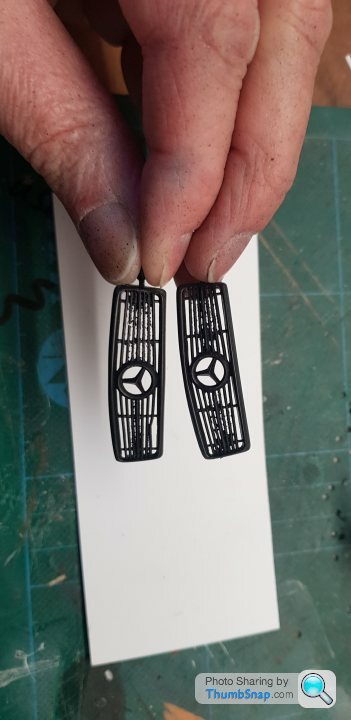
Grilles. One a bit damaged out of the box but hey, rally car! A bit of moulding flash to lose between the grille bars so hoped some solvent would just melt it away…nope…just congealed a mess so waiting for it all to dry off and will get a scalpel blade in there, like I should have done in the first place.
First kit: Wheels looking exceptional in silver, superb toolmaking. Shame about the very square and unrealistic Esci tyres but the prominent tread should benefit the dirtying/weathering. The engine and ancillaries are sprayed Humbrol polished steel, part scrubbed with a toothbrush to show before and after buffing. I love that spray, the way it covers and the effect you get when wiped or brushed. Colour is totally wrong for the MB 117 engine, iron block, ali heads, pressed steel valve covers
Sump guard will be very toned down when dusty.
Second kit started to play catch-up so finishing runs parallel. Filling the hole in the roof of the second body left by the moulding gate tab having snapped off in the box. Superglue with actuator to harden it off. Mould split lines, moulding flow lines and the sharp moulded edge around the window opening show well in this pic.
Second floorpan coming together, I`m spraying the underside, interior floor and glued-in roll cage together, all black. Those seats are blue, just too dark to contrast with the black interior. They`ll need to be lighter.
Two engines! Humbrol polished aluminium on the left and polished steel on the right. Polished aluminium doesn`t really buff to a sheen higher than effect out of the can, but is more representative of the head and valve cover colour. Polished steel on right looks cooler but again not accurate. Spraying block and heads/covers separately would be the right thing to do but…...it`s all moot when I`m not cutting the bonnet open and the sump guard shields the underside, this effort to paint anything is utterly wasted. Wonder how one of these would look in a `32 rod……nah, would have to address the sink marks but the injection system would look intriguing without the air cleaner covering it..plenty of scope for wiring the distributor and fuel lines from the fi block..
Two kits, two sets of everything. One pair of interior panels has been primed and sprayed black, the other pair virgin black plastic. Why did I bother?
Grilles. One a bit damaged out of the box but hey, rally car! A bit of moulding flash to lose between the grille bars so hoped some solvent would just melt it away…nope…just congealed a mess so waiting for it all to dry off and will get a scalpel blade in there, like I should have done in the first place.
Good to see your continuing progress. I think you've got the right attitude to it as well, no point in getting up on super-detailing when it's just meant to look decent on the shelf.
I've got my Bandama Rally issue out and compared it with your complete kit, basically I'm missing the floorpan, suspension and a pair of wheels. Given that the rally car pieces mean it couldn't be built as standard I'll just make some sort of modified mutation out of it. Wonder if I can adapt some bodykit parts off something else to give it a colour-coded 1980s look?.......
As a bonus, it also looks as if it can donate some 7" headlight lenses to a Monogram '57 Chevy I'm just about to rebuild.
tangerine_sedge said:
The sprue gate is on the centre front of the roof? What were the kit designers thinking? I've seen some bad placements, normally on smaller components, but this takes the biscuit!
Quite! And not uncommon for Europen and Japanese tooling of this era in my experience. An example of why we like tinkering with old kits right?! Much pleasure to be had making a reasonably presentable sow's ear even if we can't, or don't want to, reach silk purse levels with what we've got!Just to clarify Tangerine, the gate is on the underside of the roof but the tab left behind tore a hole rather than snapping off when it got deflected by a previous owner/the other parts in the box pushing it/a light gust of wind...
You`re welcome to a set of my MB alloy wheels Spotted though I doubt you`d be keeping any build of yours close to standard...this looks really cool imho, cut the body down to r107 wheelbase, extra arches..mean looking!:
Anyway, getting further through the process of basic assembly after block colouring of sub-assemblies, as is always the case with cars. This is the donkey work, the real fun bit is getting close.
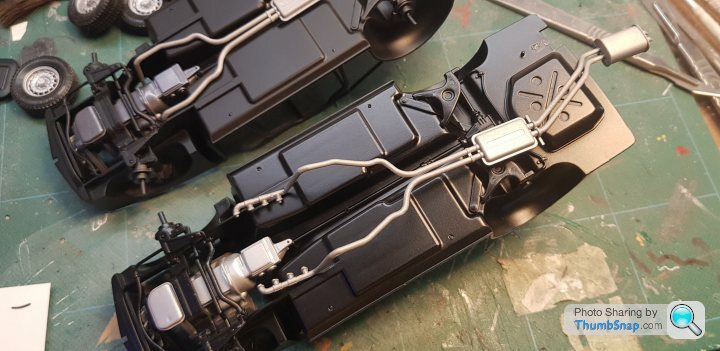
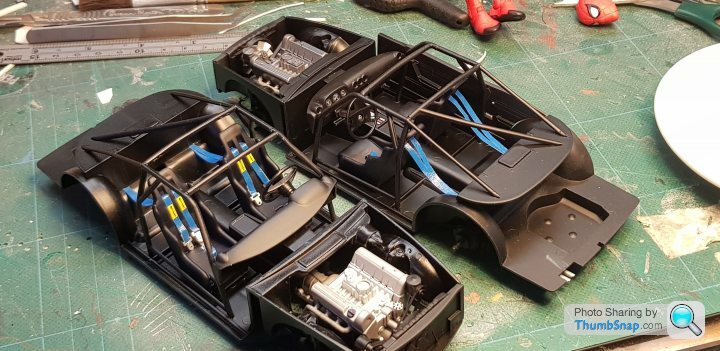
Two floor and cage assemblies, one matt, one satin black....not through choice but children stealing my matt paint. It matters not, both will be sandy. I`m feeling liberated at not giving flips - see the unfinished mould seams on the exhaust! - but questioning why I painted the engines,went to the trouble of fitting the pulleys and fan, they`ll not be seen but also those parts won`t bring value to the parts box so hey-ho, they`re in. I used the floor and engine as a jig to glue the manifolds to the exhaust run. Sprayed the whole thing Humbrol aluminium and enjoyed them almost snapping in place. Nothing worse than a blowing manifold joint...apart form trying to glue downpipes to bolted up manifolds in 24th scale.
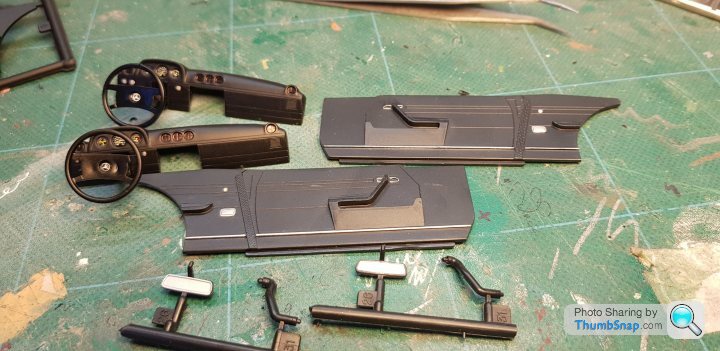
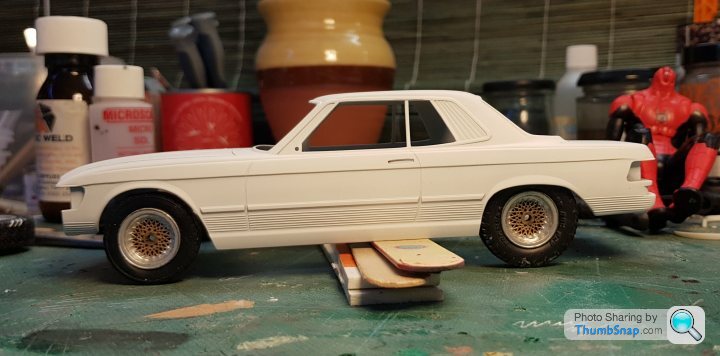
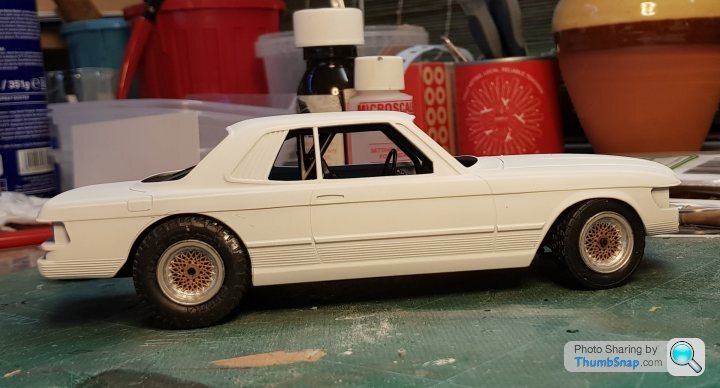
Early car mocked up showing only minor tweaking will have it sitting very nicely. Seats definitely blue now. Too light though... `Screen trim looks a bit chunky and toy like but I`m confident I can cheat the eye come finishing time.
There are 3 dash dial decals supplied.. I see more dials...not sure I can be bothered as the light picks up in the engraving of each...dark interior...maybe just a scratch of the black down to the base plastic colour will enhance. See my lovely ejector pin marks under where the rear seat would be! Keeping those obvs, will be dark in there once closed over by the roof..but the dust and sand wash that will inevitably dirty the interior might show them up...ah well...
You`re welcome to a set of my MB alloy wheels Spotted though I doubt you`d be keeping any build of yours close to standard...this looks really cool imho, cut the body down to r107 wheelbase, extra arches..mean looking!:
Anyway, getting further through the process of basic assembly after block colouring of sub-assemblies, as is always the case with cars. This is the donkey work, the real fun bit is getting close.
Two floor and cage assemblies, one matt, one satin black....not through choice but children stealing my matt paint. It matters not, both will be sandy. I`m feeling liberated at not giving flips - see the unfinished mould seams on the exhaust! - but questioning why I painted the engines,went to the trouble of fitting the pulleys and fan, they`ll not be seen but also those parts won`t bring value to the parts box so hey-ho, they`re in. I used the floor and engine as a jig to glue the manifolds to the exhaust run. Sprayed the whole thing Humbrol aluminium and enjoyed them almost snapping in place. Nothing worse than a blowing manifold joint...apart form trying to glue downpipes to bolted up manifolds in 24th scale.
Early car mocked up showing only minor tweaking will have it sitting very nicely. Seats definitely blue now. Too light though... `Screen trim looks a bit chunky and toy like but I`m confident I can cheat the eye come finishing time.
There are 3 dash dial decals supplied.. I see more dials...not sure I can be bothered as the light picks up in the engraving of each...dark interior...maybe just a scratch of the black down to the base plastic colour will enhance. See my lovely ejector pin marks under where the rear seat would be! Keeping those obvs, will be dark in there once closed over by the roof..but the dust and sand wash that will inevitably dirty the interior might show them up...ah well...
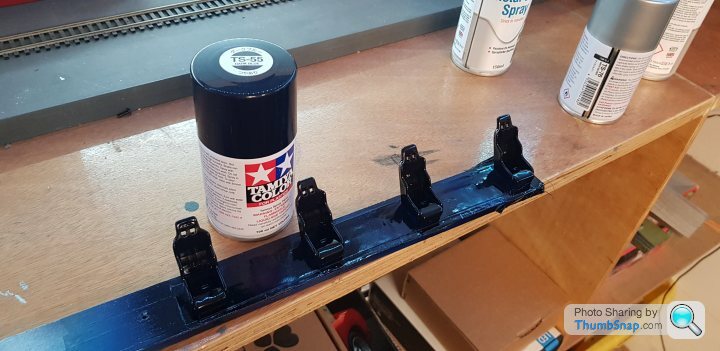
Against the mantra of these builds I`ve been sweating a detail......between very sparse painting guidance in the instructions (strangely the later blue car`s instructions are more developed and even feature different drawings for the assemblies, but still not the colour info one would expect) and image searches turned up nothing concrete I`ve conceded the dark blue I painted over with a much lighter shade was probably about right for period racing seats so have resprayed dark again.
How bloody freaky are Tamiya sprays??!! Squirted out the shed door on a chilling damp winter evening, the gloss levels are staggering...shame to matt them down!
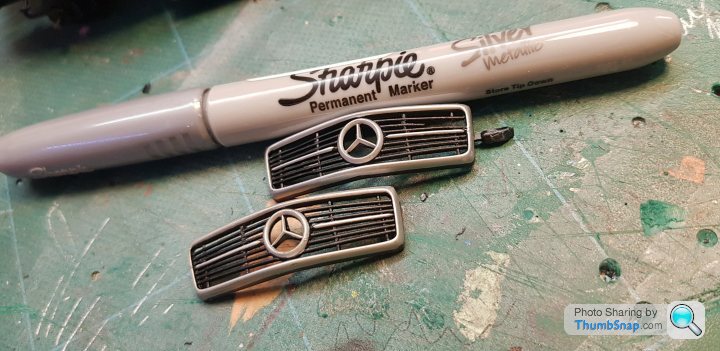
As they dried the silver sharpie picked out some trim and the instrument decals found their homes....the three extra "dials" I identified in the centre of the dash turn out to be two vents and a clock. I`ll leave them with a black sharpie run around inside to give some totally invisible and pointless contrast...
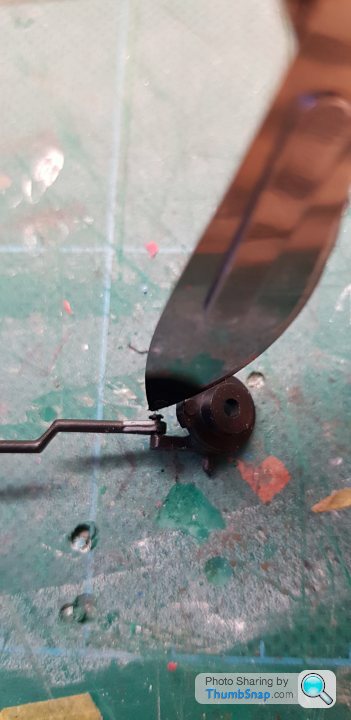
For these picking out the rear view mirror with a the silver sharpie is enough for me. On the left as coloured, on the right after a bit of scraping around the edge lip to neaten up. Prob takes just as long as rolling a bit of bare metal foil in but the pen was on the table and no one will ever look..
Silver sharpie over sprayed black on the grilles. They look absolutely s te so have been resprayed black, will get a good sanding and much finer use of the sharpie pen for the three pointed star and ring. They don`t need to be amazing as they`re masked by spotlights and will be dusted up but really, I`ve got to do better.
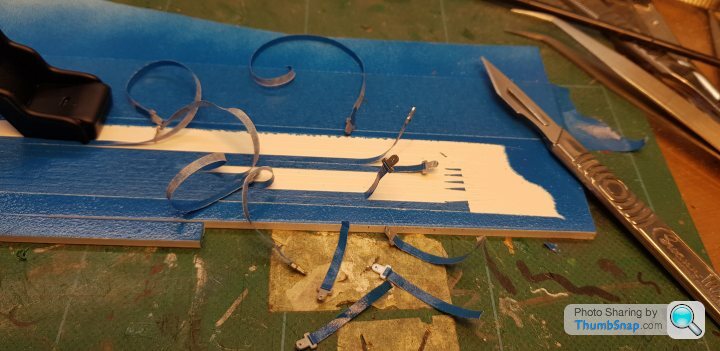
Going back to darker seats was based on interpreting a period image that suggested the harnesses were a lighter blue which seem to fit with practice then, the Britax decals backed up the theory so despite not being clear on accuracy I`m happier this choice is a bit more period appropriate. Good enough..and relax/get a grip! To reflect the now happier, chilled mindset on these, I`m very cool with using sprayed masking tape for the belts and not wondering why, if Esci went to the trouble of tooling up buckles, they only did 3 per seat and without a clasp..so going with the `casual glance` standard that`s what I`ve used...
Now on a roll, looking forward to tomorrow.
This modelling session was supported by Kronenbourg 1664, Craig Charles, the last two episodes of I`m Sorry I Haven`t A Clue (guffawing made placing tiny decals quite difficult) and another wittertainment. I`m on holiday.
How bloody freaky are Tamiya sprays??!! Squirted out the shed door on a chilling damp winter evening, the gloss levels are staggering...shame to matt them down!
As they dried the silver sharpie picked out some trim and the instrument decals found their homes....the three extra "dials" I identified in the centre of the dash turn out to be two vents and a clock. I`ll leave them with a black sharpie run around inside to give some totally invisible and pointless contrast...
For these picking out the rear view mirror with a the silver sharpie is enough for me. On the left as coloured, on the right after a bit of scraping around the edge lip to neaten up. Prob takes just as long as rolling a bit of bare metal foil in but the pen was on the table and no one will ever look..
Silver sharpie over sprayed black on the grilles. They look absolutely s
te so have been resprayed black, will get a good sanding and much finer use of the sharpie pen for the three pointed star and ring. They don`t need to be amazing as they`re masked by spotlights and will be dusted up but really, I`ve got to do better.Going back to darker seats was based on interpreting a period image that suggested the harnesses were a lighter blue which seem to fit with practice then, the Britax decals backed up the theory so despite not being clear on accuracy I`m happier this choice is a bit more period appropriate. Good enough..and relax/get a grip! To reflect the now happier, chilled mindset on these, I`m very cool with using sprayed masking tape for the belts and not wondering why, if Esci went to the trouble of tooling up buckles, they only did 3 per seat and without a clasp..so going with the `casual glance` standard that`s what I`ve used...
Now on a roll, looking forward to tomorrow.
This modelling session was supported by Kronenbourg 1664, Craig Charles, the last two episodes of I`m Sorry I Haven`t A Clue (guffawing made placing tiny decals quite difficult) and another wittertainment. I`m on holiday.
Tyres for the cut-arched Dakar car....kit comes with stock arches and wheels...hmmm
Must be something workable in here...?
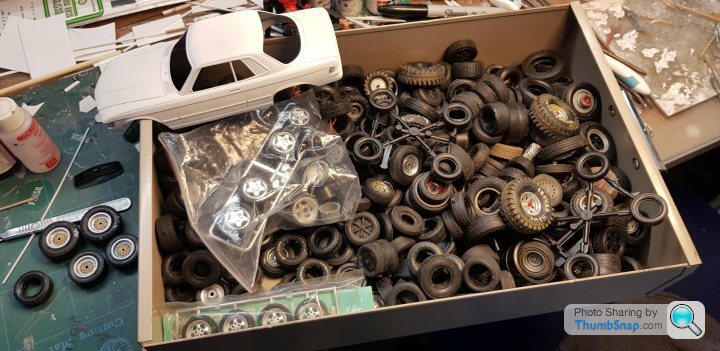
Esci lattice wheels, MPC pickup truck rears and possibly the only (just) usable part of Escis abomination of a 250 SWB kit for the fronts!
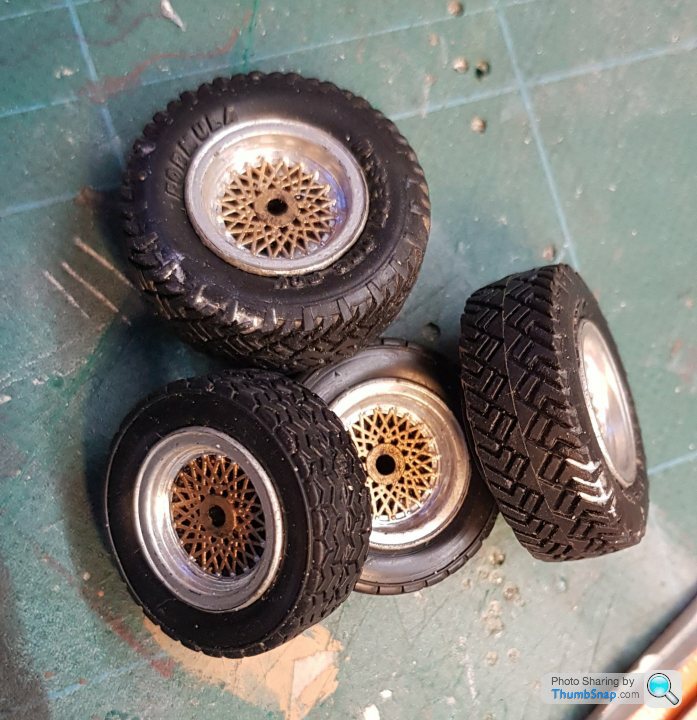
Yup!
Scribey scribey
That's it!
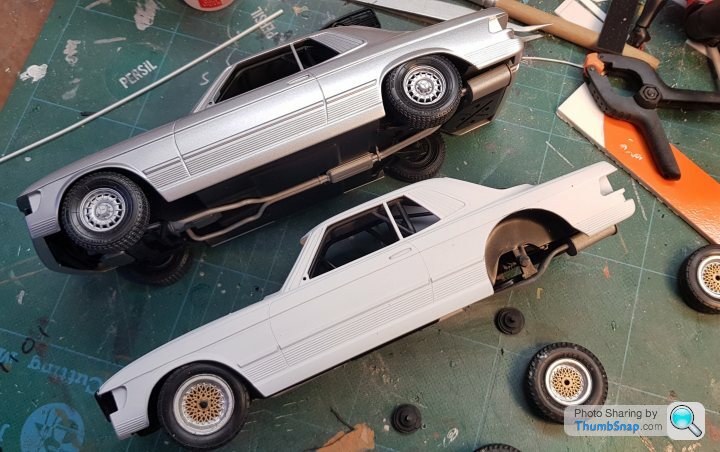
Fix the rear hubs a little low and bend down the front arms to raise ride height and we've got a complimentary pair of early and developed cars.
On to the front arches!
Must be something workable in here...?
Esci lattice wheels, MPC pickup truck rears and possibly the only (just) usable part of Escis abomination of a 250 SWB kit for the fronts!
Yup!
Scribey scribey
That's it!
Fix the rear hubs a little low and bend down the front arms to raise ride height and we've got a complimentary pair of early and developed cars.
On to the front arches!
dr_gn said:
Good idea with the marker on the grille. I’ve heard people use Molotow (sp?) markers for chrome, which is supposed to be very good. Have you come across them?
Happy Christmas!
I can confirm the Molotow markers are excellent. Easy to use, either direct from then nib, or by pooling and using a brush, and is the best 'chrome' I've ever used (although I've never tried alclad).Happy Christmas!
Gassing Station | Scale Models | Top of Page | What's New | My Stuff