2001 Discovery
Discussion
I've always had a love of the film, and for many years no model of the Discovery was available. I was going to get the kit but in the end did not, as I had some other things to do I bought an Ender 3D Pro printer. So 4 weeks after it arrived, having built a couple of reasonable looking things using some STL files and its Creality software,it then started to print some 'balls of wool' and things went wrong, It was suggested I switched to the latest version of Ultimaker Cura for the slicing and reduced the print temperature. This appears to have solved many of the issues (the printer came with a cut down old version of that software I am told) and we how have a mini version of Hogwarts school, and a 6" fairy door with balcony on the wall.
Thats when I saw it, a 5' long version of the Discovery, downloaded it, and then saw the upgrade, open podbay door with interior and pod. If anyone is interested I will post its build.
Last night I created the top half of the Command Module at 0.12mm resolution and 22 hours later that was done and I am quite impressed with its quality, not high level kit quality, but certainly far from bad, and better than garage kit quality with a relatively high level of panelwork and such on the structure. The aim when complete is to light with LED's inside the cockpit and the pod bay.
Good day Dr Gn, yes I did look at the SLS printers, but this came up at a VERY good price, and far more critically I intend to use it to make some prototype parts that must be made in a very specific plastic, this I have found is available in a form that can be used in this type of printer. the accuracy is important to an extent but 0.15 - 0.2 will work. This is really a crazy test and setup exercise before that takes place.
By the way I am loving the steam engine write up and envy the metalwork machinery. However at at work I do have access to a 3 axis CNC Router (3M x 2M, and 3M x 2M CNC Laser amongst other 'toys' which is great for Plastics and Wood/composite alloy/plastic hybrids. However the last 20 years were spent in system & firmware design work and only ever saw finished articles and troubleshot issues, this is really a case of muck in and learn some new skills and so I watch what happens and how things are done with great interest.
I am now printing Pt3, another 18+ hour print and will put some shots up if it works, but Pt 1 & 2 did so thats a start.
Ozzie Dave said:
Good day Dr Gn, yes I did look at the SLS printers, but this came up at a VERY good price, and far more critically I intend to use it to make some prototype parts that must be made in a very specific plastic, this I have found is available in a form that can be used in this type of printer. the accuracy is important to an extent but 0.15 - 0.2 will work. This is really a crazy test and setup exercise before that takes place.
By the way I am loving the steam engine write up and envy the metalwork machinery. However at at work I do have access to a 3 axis CNC Router (3M x 2M, and 3M x 2M CNC Laser amongst other 'toys' which is great for Plastics and Wood/composite alloy/plastic hybrids. However the last 20 years were spent in system & firmware design work and only ever saw finished articles and troubleshot issues, this is really a case of muck in and learn some new skills and so I watch what happens and how things are done with great interest.
I am now printing Pt3, another 18+ hour print and will put some shots up if it works, but Pt 1 & 2 did so thats a start.
Thanks Ozzie Dave - Fair enough if it was a decent price. I've got a Prusa FDM printer, and it's great for more general stuff like machining jigs and fixtures etc. I was going to get a resin printer for scale models, but the pace of development is so fast that 4k versions were becoming available at the time, so I waited (and still haven't got one).By the way I am loving the steam engine write up and envy the metalwork machinery. However at at work I do have access to a 3 axis CNC Router (3M x 2M, and 3M x 2M CNC Laser amongst other 'toys' which is great for Plastics and Wood/composite alloy/plastic hybrids. However the last 20 years were spent in system & firmware design work and only ever saw finished articles and troubleshot issues, this is really a case of muck in and learn some new skills and so I watch what happens and how things are done with great interest.
I am now printing Pt3, another 18+ hour print and will put some shots up if it works, but Pt 1 & 2 did so thats a start.
I've found that flatted down filler primer can give good results on larger FDM models, but it's a long process to get it right.
Anyway good luck with the build - this thread needs pictures...
This is what its meant to look like:
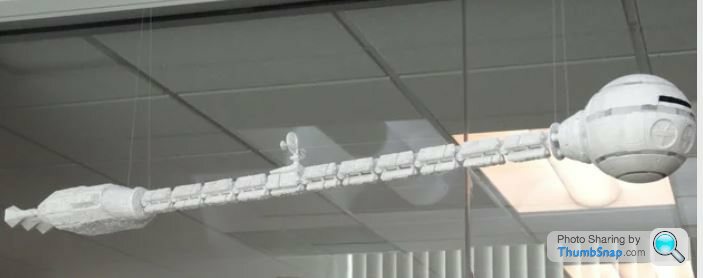
and so far: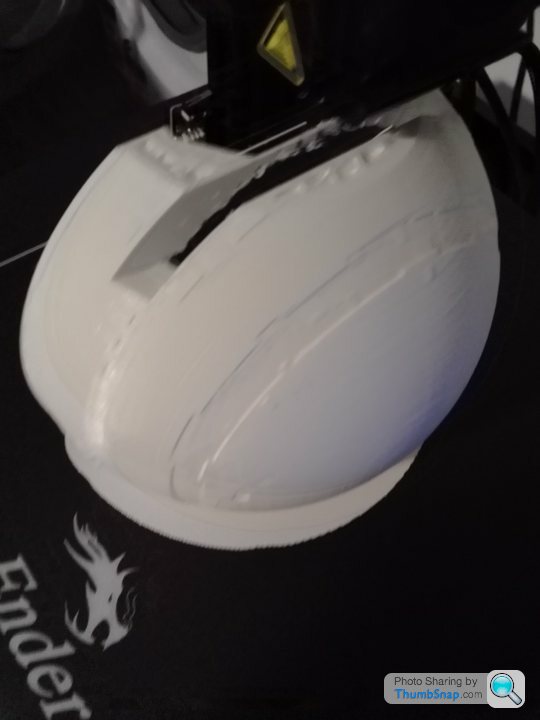
the collar behind is being redone after a power glitch caused it to stop, and restarting half way through caused a line through the print, still luckey it happened at the 10 Hr mark.
The revised version I am using has an updated CM module with better smoothing and instead of a single 'ball' is 2 halves and a collar behind. the top half has the 'window' separate to allow lighting behind. The lower half has a pod bay door open along with an interior with pods and extending 'launch platform' .

and so far:

the collar behind is being redone after a power glitch caused it to stop, and restarting half way through caused a line through the print, still luckey it happened at the 10 Hr mark.
The revised version I am using has an updated CM module with better smoothing and instead of a single 'ball' is 2 halves and a collar behind. the top half has the 'window' separate to allow lighting behind. The lower half has a pod bay door open along with an interior with pods and extending 'launch platform' .
Edited by Ozzie Dave on Sunday 4th July 04:14
The collar was meant to look like this:
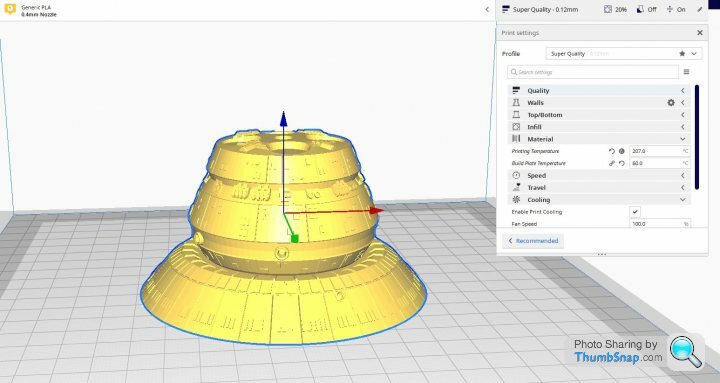
but after the power issue had a obvious flaw, but it does allow you to see both how the slicer creates the form with a sandwich section between the 2 layers of plastic, and gives a quite good idea of the resolution, you can see the layer lines but they show up more in the photos.
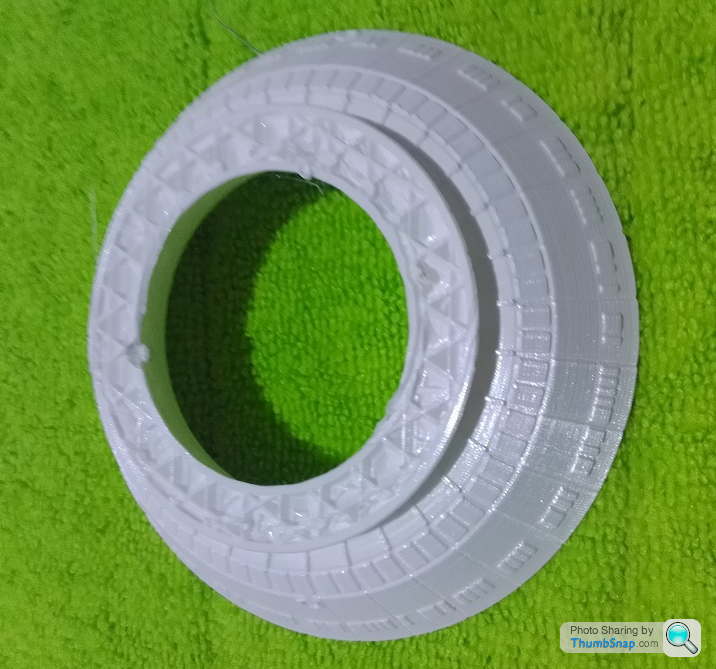
its 100mm diameter.

but after the power issue had a obvious flaw, but it does allow you to see both how the slicer creates the form with a sandwich section between the 2 layers of plastic, and gives a quite good idea of the resolution, you can see the layer lines but they show up more in the photos.

its 100mm diameter.
To be fair that looks very good - the resolution gets less relevant at big scales I guess.
Some materials you can vapour polish, which reduces the visibility of the layers by dissolving the surface very slightly. Disadvantage it softens any sharp detail.
Also, if you spray it with paint and a final very matt varnish, it can reduce reflections off imperfections, whereas gloss often - literally - highlights them. Worth testing out on small bits though.
Are you assembling it onto a steel tube or something?
It will be assembled onto a steel rod due to its length, all parts being prepared for a 6mm 'spine' , this shows well on the finished collar part:
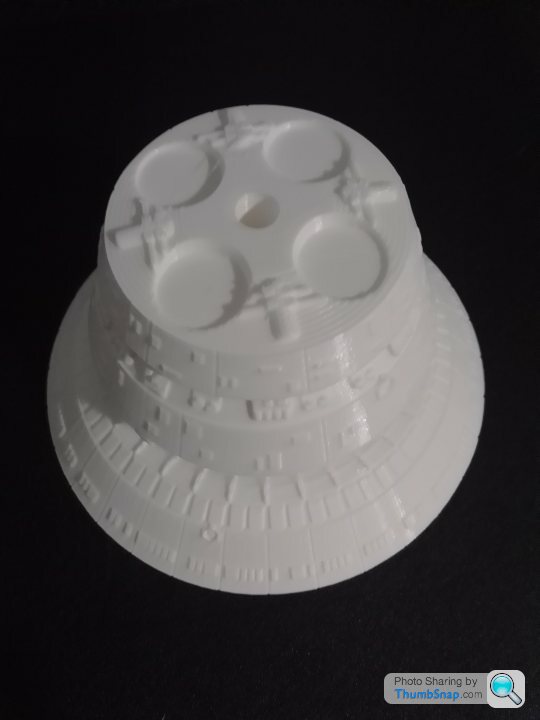
it also shows the moulding quite well. I am considering using some smoothing of the larger faces using some of the chemicals we have at the workshop, I know this could work , but I can now argue the part that did not work 'can find a greater good' as a test piece. As you say at this scale not much will show.
The original was sprayed by the builders in Anti flash white, then highlighted, this was to stop glare under spotlights when filming and is semi matt I believe, which will also help the imperfections showing.
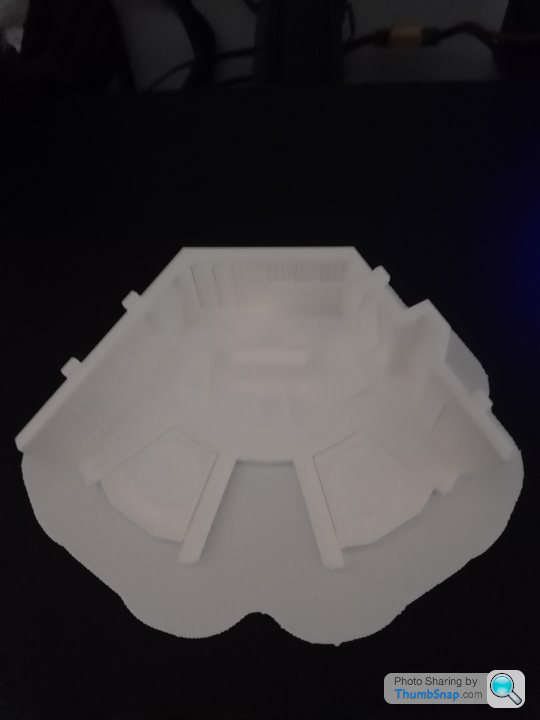
I printed the interior of the pod bay last night, its shown through the open podbay door (yes I should say "open the Podbay door please HAL."should be known by many. It is about 18mm diameter and through this you can see the lit interior. The pod fitting in its launch platform outside.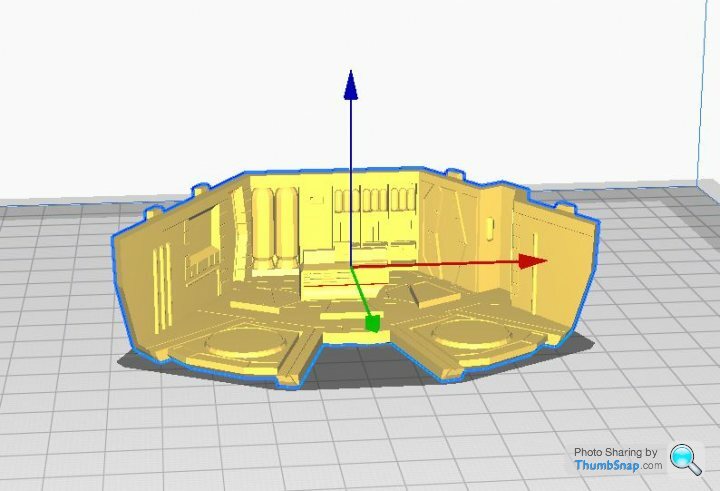
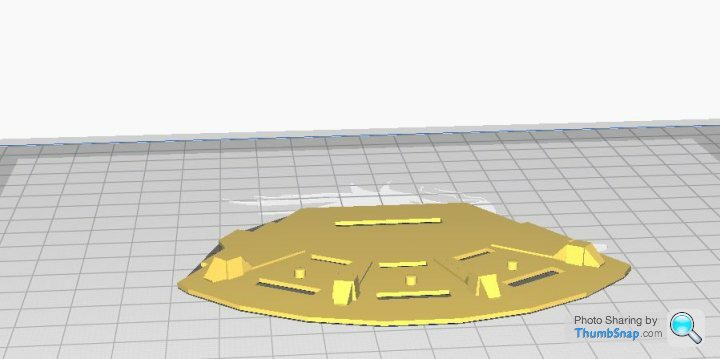
this makes only a very limited view, especially with the 16mm pod just outside on the plaftorm, and 2 more inside on their platforms. Its far from accurate, but is a good representation and just adds to it, the ceiling going over it having cut outs for diffusers for the single LED above that lights the window and pod bay.
and the roof with lighting ports

it also shows the moulding quite well. I am considering using some smoothing of the larger faces using some of the chemicals we have at the workshop, I know this could work , but I can now argue the part that did not work 'can find a greater good' as a test piece. As you say at this scale not much will show.
The original was sprayed by the builders in Anti flash white, then highlighted, this was to stop glare under spotlights when filming and is semi matt I believe, which will also help the imperfections showing.
I printed the interior of the pod bay last night, its shown through the open podbay door (yes I should say "open the Podbay door please HAL."should be known by many. It is about 18mm diameter and through this you can see the lit interior. The pod fitting in its launch platform outside.

this makes only a very limited view, especially with the 16mm pod just outside on the plaftorm, and 2 more inside on their platforms. Its far from accurate, but is a good representation and just adds to it, the ceiling going over it having cut outs for diffusers for the single LED above that lights the window and pod bay.

and the roof with lighting ports

That certainly would be an issue, my thought was to apply some form of contact adhesive inside the dome area and then apply some aluminium foil as it wont be seen. That way that problem can be used to illuminate the windows and pod bay without it 'leaking out' where its not needed. One big advantage is that I tried painting the bay and was really unimpressed by my effort, I could do better when I was 12. So its just print another and try again. No cleaning the parts off or trying to fix. having said that its looking into it via a 20mm hole in a 100mm sphere with a 16mm pod only 4mm outside the hole. so cant see much anyhow, just annoyed me.
painting the detail is certainly an issue, the pod bay is about 80 x 60 x 20. and although it has some 'detail' its not like painting a kit. The biggest reason is the layers. Athough they are set at 0.12mm and the detail is fine it is like lots of tiny capillaries when trying to paint. this means paint will 'wick' to where you dont want it and sharp lines are almost impossible. it is also impossible due to the shape of the parts to 'flat these areas back to make that easier. I am now thinking of flat painting areas and using highlighting with some sort of adhesive tape on that. larger areas may also see the tape idea.
The Command sphere I will try sanding to allow the shading for different panels as I cant see any other option.
While messing about on that I am printing the spine modules. These are 3 sections that fit onto an oversized nut, with a collar between each. As for time , each section (3 parts) takes 5 hours to print and you need 11 sets
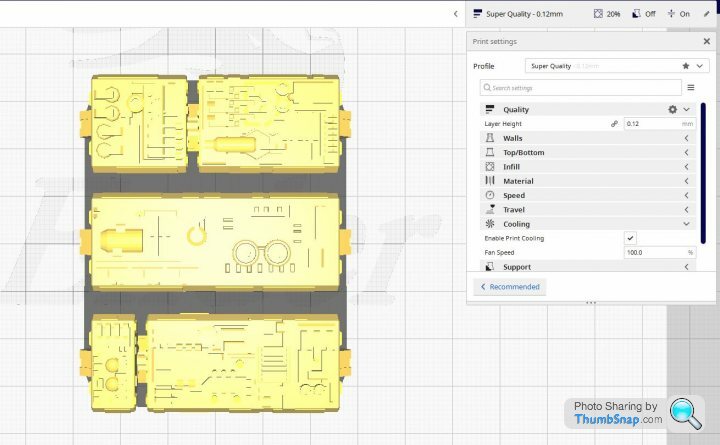
, plus the spacers (2 hours) then the antenna unit (another 5-6 hours). The good news are these are flat while and far easier than the CM sections some of which were up to 20 hours!
At the same time I am todding up costs and its looking like even with the 1m of clear PETG used (149m left) we are looking at a total cost of about $70AU, inc paints & lighting compared to the Mobius kit with CM extras that was closer to $400 before paints or lighting etc. both being scaled at about 160:1
I am also trying some new LED peco units that come with their own diffuser lens and adhesive backing and run happily on 9V, had a few left over from some jobs at work and otherwise have a number of 100M runs of them with 8mm spacing that are only 3mm wide.
The Command sphere I will try sanding to allow the shading for different panels as I cant see any other option.
While messing about on that I am printing the spine modules. These are 3 sections that fit onto an oversized nut, with a collar between each. As for time , each section (3 parts) takes 5 hours to print and you need 11 sets

, plus the spacers (2 hours) then the antenna unit (another 5-6 hours). The good news are these are flat while and far easier than the CM sections some of which were up to 20 hours!
At the same time I am todding up costs and its looking like even with the 1m of clear PETG used (149m left) we are looking at a total cost of about $70AU, inc paints & lighting compared to the Mobius kit with CM extras that was closer to $400 before paints or lighting etc. both being scaled at about 160:1
I am also trying some new LED peco units that come with their own diffuser lens and adhesive backing and run happily on 9V, had a few left over from some jobs at work and otherwise have a number of 100M runs of them with 8mm spacing that are only 3mm wide.
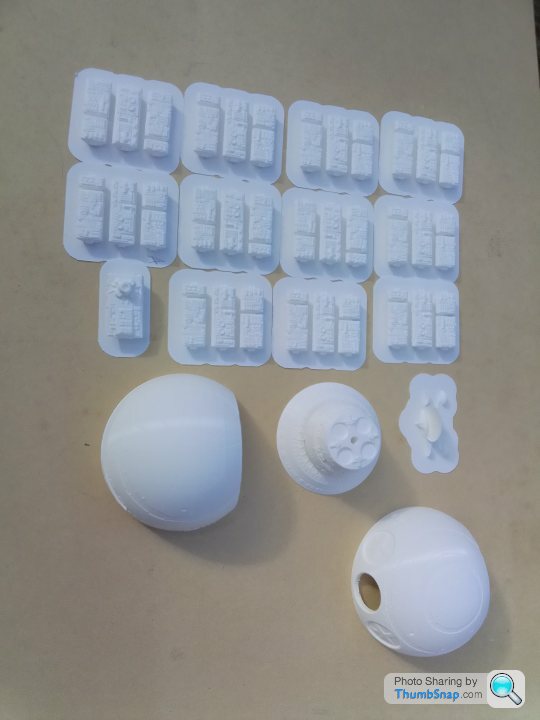
After a few hours printing we have all 11 spine modules, the communications module and the dishes. the CM top and lower domes and the collar between the two. the size is quite large as the complete unit is well over 1m in length. I have deliberately left the modules on the bed platform they are made on to make painting at this point easier. each unit then is separated and fixed to a 3 sided nut that fits onto the metal shaft. small collars fit and space between all these parts. The exterior is matt, so that is being primed.
the pod bay interior in the movie is gloss white and matt black rubber. however the black floor did not look right so I have decided to just highlight a few panels leaving the rest white. other than the black its a blue screen panel and some 'red bottles'. Its not film accurate, just a representation and there is only a few mm of room to allow you to see in anyhow once the pod is in position. It may well have been more sensible to just crop and shot from the movie, print and then stick a little way inside the hole, but we have got this far and that may not suit the lighting so well.
I have not bothered to tally the time properly on the printing, but sphere modules were 19 hrs each, spine modules 6 hrs each and the pod bay interior was another 6 hours.
Next is to strip off the base plates and spray the rear in primer, then top coat then I will print the nuts then print the nuts and assemble these modules
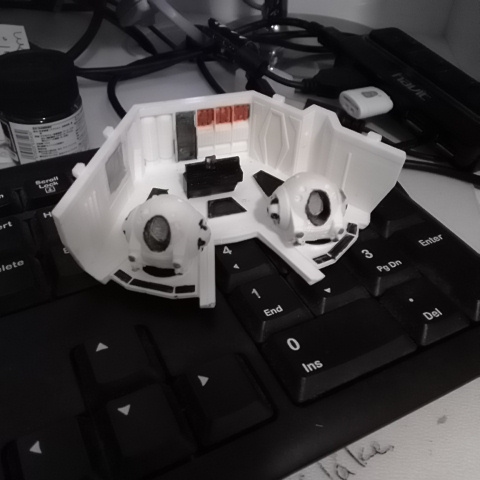
thats how I will leave the pod bay, you can only see it between a pod in the hatch and the outside of the hanger door, thats about 2-3mm as a crescent. The Command module is now 'light insulated with 'cooking foil' stuck in place to stop light out where its not wanted.
As for parts, well these have just been primed:
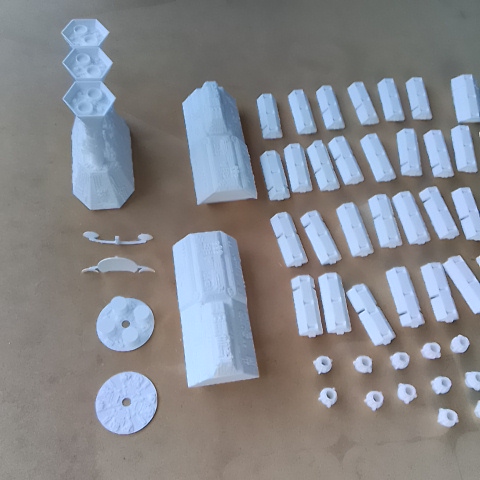
next will be some matt white over the 'panels' then creating the parts for the engine module and spine pods. the 'rocket nozzles are seperate parts and fit tightly into the engine base and are yet to be aligned.
I clicked on the link expecting to see this....
But that is awesome. I've only seen the film once about 25 years ago and loved the production design and atmosphere of the film, even if I didn't quite understand all of it. I like the old model based special effects films, CGI never really seems as realistic to me somehow.

But that is awesome. I've only seen the film once about 25 years ago and loved the production design and atmosphere of the film, even if I didn't quite understand all of it. I like the old model based special effects films, CGI never really seems as realistic to me somehow.
Cool model  .
.
I haven't tried it, but you can get wood filled PLA that you can sand to get rid of the layering. It looks wood colour so needs painting (unless you are after something that looks like mdf...)
I have an ender 3 Pro too. I have mainly printed bits for the toylander and lithophanes for low level birthday presents. I would like to do some models in time, but still have a healthy 'to print' list...
The resin printers have a lot of post processing, materials are expensive, and they aren't as structural as FDM or SLS.
I have upgraded the motherboard on the ender to a silent board (v4.2.7 about £20 from aliexpress), and the transformation noise wise is amazing - I highly recommend it.
 .
. I haven't tried it, but you can get wood filled PLA that you can sand to get rid of the layering. It looks wood colour so needs painting (unless you are after something that looks like mdf...)
I have an ender 3 Pro too. I have mainly printed bits for the toylander and lithophanes for low level birthday presents. I would like to do some models in time, but still have a healthy 'to print' list...
The resin printers have a lot of post processing, materials are expensive, and they aren't as structural as FDM or SLS.
I have upgraded the motherboard on the ender to a silent board (v4.2.7 about £20 from aliexpress), and the transformation noise wise is amazing - I highly recommend it.
Thanks Pete for the comment on the silent board, that may help some issues here at present (especially on the 20+ print time parts) and the unit is confined to the garage and still I get complaints about the noise which actually is not bad at all.
I have taken Dr Gn's suggestion about priming the sphere and have primed that with a plastic primer and will try and sand it back, however the level of the printing lines showing is very small, and I suspect may even not be noticeable when its sprayed matt white. However I will wet and dry it back before painting that. The other modules actually look really good with a slight level of the printing lines showing through amongst all the other printed stuff on it, so those I will prime a few times then paint without flatting back.
It was meant to be a learning exercise in the printing with a few different plastics and never meant for really close examination, but just got slightly carried away as I was more and more surprised at the quality and size of a free set of file and upgrades on thingiverse.
A final comment, you are correct its not a Land Rover although its getting more than large enough to go in the garage.
I have just about printed all the parts now, and have used a 5/8" steel rod for the spine, it got scratched up sliding the parts into place, each module is 3 major outside pieces and 3 links to combine holding parts at the correct angle. The spine itself is about 1m long.
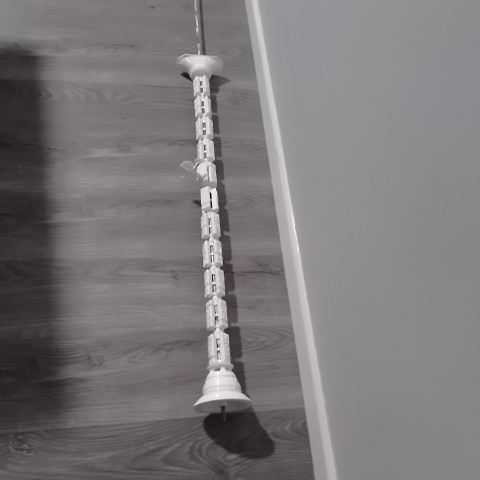
the engine module about 25cm long, and hollow, which could make it a perfect place to fit a PP9 battery by making one of the cowling covers removable. Unlike a normal kit parts are printed on all sides and tend to be much thicker, so the cowling covers are about 5mm thick, as are the position beams for them, meaning they can be tapped.
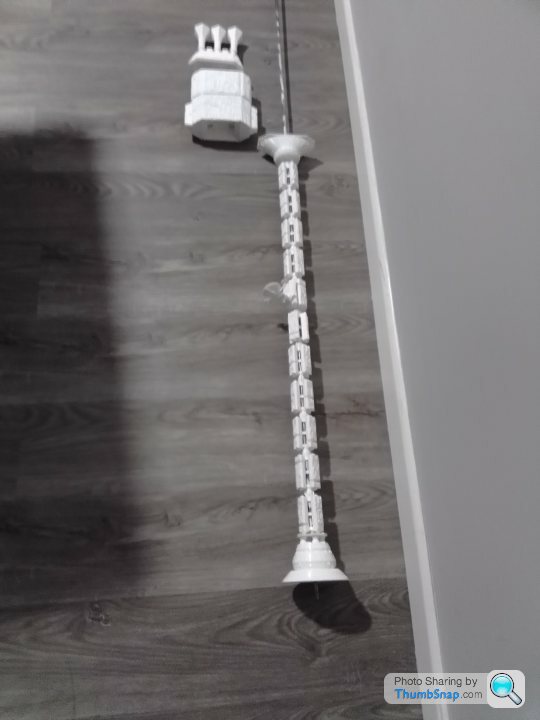
the front is the connector to the command module which adds a further 20cm, and half way down the spine is the antennas on their connection, this actually pivots.The idea is next to clean up the parts again and give another coat of matt white. Almost none of the parts have required filling the files are so good.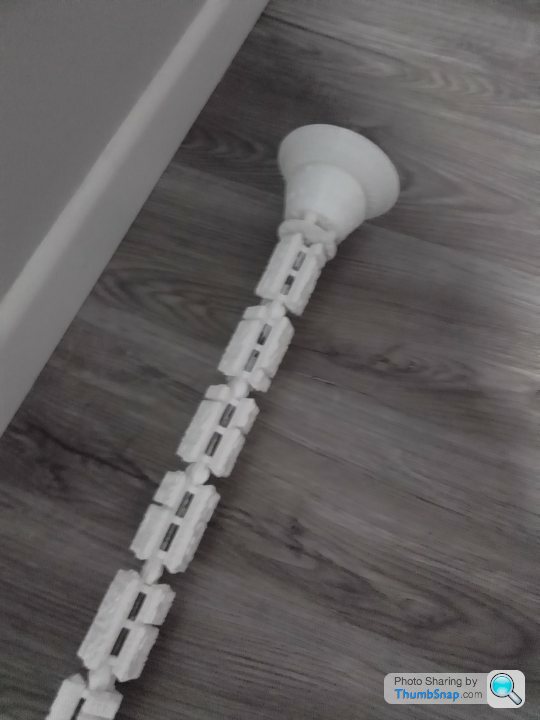
trouble is I am determined to now follow the suggestion and fill the command module 'lines' on the outside, rescribe and paint, then weather (which I have never done before) I also think I will use the spine rod as the + wire for the LEDs in the CM and then run the - in the stand. I am also thinking of using the extending pod as the on/off switch for the light!
Its used 1 Kg of PLA and 5 m pf PET-G, so the paint cans of matt white and primer have cost more than the actual material used cost.

the engine module about 25cm long, and hollow, which could make it a perfect place to fit a PP9 battery by making one of the cowling covers removable. Unlike a normal kit parts are printed on all sides and tend to be much thicker, so the cowling covers are about 5mm thick, as are the position beams for them, meaning they can be tapped.

the front is the connector to the command module which adds a further 20cm, and half way down the spine is the antennas on their connection, this actually pivots.The idea is next to clean up the parts again and give another coat of matt white. Almost none of the parts have required filling the files are so good.

trouble is I am determined to now follow the suggestion and fill the command module 'lines' on the outside, rescribe and paint, then weather (which I have never done before) I also think I will use the spine rod as the + wire for the LEDs in the CM and then run the - in the stand. I am also thinking of using the extending pod as the on/off switch for the light!
Its used 1 Kg of PLA and 5 m pf PET-G, so the paint cans of matt white and primer have cost more than the actual material used cost.
Looking very good. Is there any sag in the rod? Was thinking tube might be good since less self-weight, or even carbon fibre tubing. I suppose if you're suspending it with wire at 1/3 points it will not be apparent anyway?
I find that for priming white, Tamiya White Fine Surface Primer covers extremely well.
One of the many issues I've found when painting FDM parts is that the porosity tends to give tiny bubbles when curing. Possibly due to the solvent being able to get into the surface, then randomly coming back out again. I think the secret to avoiding it is to use lots of very, very thin coats.
I'm really tempted to build one myself looking at yours, but maybe scale it down by 75% !
It was meant to be at 50% as i thought it was too big, but I printed the first half of the CM at 100% by accident, and so carried on. I also thought about tube, with that being used to run the earth wire inside, but ended up just picking up the steel rod for a few dollars. The advantage is that I can also change it easily by pulling it off the rod even now. I may still do that but have found getting the correct tube difficult as its imperial rather than metric in size. There is little discernible sag which surprised me, but will go on a pair of arms above the signed photo by Dullea & Lockwood in my office.
I used primer as you suggested, but used an automotive bumper primer and found this gives a really good surface to work on, however ended up using automotive paint as using a 'kit' paint resulted in a chemical reaction and it 'crazing'. I suspect this wont be an issue if I decide to weather it, but may be an issue if I do some of the colour changes on the 'dome'.
I am really surprised at the quality of some parts, and may still do something stupid like printing the lower section of the pod bay on the SLA next door to the office, this is really as painting is almost impossible with the ridges from the buildup and with the design of the part. This is not the case with the sphere and it will be filled and smooth on the outside.
I will shortly be trying some printing in Delrin, as its really about getting in practice for creating some special self lubricating bearings, it just got slightly out of hand!
However i have always wanted to build something like this, and the fact I have not built a kit in 35+ years meant I was not, although very tempted, going to spend $3-500 to build it with the extra detail and lighting kits I would have wanted.. the sad point being 1 have 2 different versions of the rocket nozzles at the back, and I am tempted to put one of the high intensity LEDs in each of them and creating a new one that is a composite of the white plastic and frosted cle, especially with the battery pack so close.
The other thing I can say its a great project to disappear to for an hour or so when someone puts rubbish on the TV, and the part printing means if you are not happy with a result, just do it again until you are happier.
Gassing Station | Scale Models | Top of Page | What's New | My Stuff


