Anyone experienced kits by Model Factory Hiro - Japan?
Discussion
I am tempted to treat myself to a model from a company in Japan - Model Factory Hiro. It is expensive (£600) and I have searched the internet to find reviews of their kits but with no luck. The car is the Aston Martin DBR1/2 tin the guise that it won Le Mans in 1959. I used to make model cars (40 years ago!) and I have just retired and rather fancy making this as a project. From the images it seems to be a mix of metal and resin parts while the wheels are individually spoked. I wonder what the more seasoned modelers on here think of this kit? Any advice welcomed...
https://www.atelier-d-camara.com/1-12-maquette-en-...
https://www.atelier-d-camara.com/1-12-maquette-en-...
Hi!. I built my Ferrari 250 GTO, started in 2018 and took about a year to build in between work etc.
Heres the link to the build. Might give you a idea on whats involved. A lot of patience is the key factor.
Its not for the faint hearted though.If you have time on your hands its a great way to escape.
Extremely detailed kit and considering the amount of different materials, i would say it was value for money.
Its still showing up nicely in a sealed case and i still enjoy admiring the superb detail of this model
Trust this helps you to decide one way or another.
https://www.pistonheads.com/gassing/topic.asp?h=0&...
Hi Henry I have just read your build thread, very interesting and you built a stunning model. I don’t know if the Aston has moving engine components but wow, that’s incredible. I read that you used a 0.25mm drill, I assume that was in a special modeller’s drill: what tools would you suggest I need for one of these models?
Also, do you still have any links the online resources you mention? What did you use to paint the body, the finish is amazing. Oh, and out of interest, what did you use to get the detailed photos, I assume not a phone!
Sorry to bombard you with questions
Also, do you still have any links the online resources you mention? What did you use to paint the body, the finish is amazing. Oh, and out of interest, what did you use to get the detailed photos, I assume not a phone!
Sorry to bombard you with questions

Your Model will have all the exotic materials that the ferrari had except engine internals. Tiny rivits, nickel silver wire, white metal parts (needs cleaning, i used a ultra sonic cleaniing bath and bonding faces need to be scratched to get a good bond) brass, plastic and rubber parts.The instructions initially confused me but after reading them several times realised the manufacturers way of thinking.The room should be lit using daylight LED bulbs if working in the evening
On line resources. Hobbycraft and the usual 2 main E-shops we all use for tools and materials.
MainTools
Head band magnifier
MICROBOX Drill sets 0.3mm-1.6mm & 1.0 - 2.0mm & wire guage drills 61-80
Micro drill chuck set
Tweezer set
Needle file set (Diamond coated ones quite cheap nowadays)
Modellers scalpel + blades
Side cutters
Pliers set
Dremel or similar
Jewellers screwdrivers
Micromesh polishing kit (Emery cloth set 1000 to 12000 grit)
Zap CA glue, Thin, Medium & Thick
Fast activator for CA
Micro crystal clear (PVA),
Micro sol, Micro set for decals
Tamiya masking tape and tape for curves
Tamiya etch primer for metal & plastic(spray can)
Tamiya (TS) gloss (gives a nice coat if warmed up 4 coats) Spray can
Tamiya (TS) clear (gives a nice coat if warmed up 2 coats) Spray can
Tamiya polish or any nano car polish
Modellers paint turntable and croc grips for spraying small parts.
Double side carpet tape. (used to stand the wheel ferrals up to allow the spokes to be dropped on once bent to shape then glued and also to keep any smal parts in place, prevents loss of tiny components)
Patience a lot of it.
Tea, Coffe or stronger stuff
Pretty much it, im sure theresd more but as you go along with your build you will more than likely need some other tools needed to your requirments
The photos were taken with my old Nokia 8 phone.
Trust this helps you.
Start a build thread on here and you will get loads of remarks and help from other budding modellers.
I did and am really thankful of the help and advise even negative comments that helped me finish my cars.
The Wwweb has also been a good source of historical information.
Enjoy, dont rush, walk away from it if it becomes difficult then go back and have another go. I thought the wheels were impossible at first. With perseverance and a bit of thinking always got me through
Thanks Henry, that's really useful. I will let you know if I bite the bullet.
p.s. I will need to use a specific colour so I doubt Tamiya offer it in their range. That said, the colour of DBR1/2 as it was when it won Le Mans is somewhat of a mystery. Most of the contemporary photos are in B&W and the few that are colour are of dubious value because they are over 60 years old and Kodachrome changes colour over the years. All part of the fun I suppose when attempting to build a model of a specific car at a particular moment.
p.s. I will need to use a specific colour so I doubt Tamiya offer it in their range. That said, the colour of DBR1/2 as it was when it won Le Mans is somewhat of a mystery. Most of the contemporary photos are in B&W and the few that are colour are of dubious value because they are over 60 years old and Kodachrome changes colour over the years. All part of the fun I suppose when attempting to build a model of a specific car at a particular moment.
Here it is i think.
California Sage for Aston Martin DBR1 code 2629M.
https://www.hiroboy.com/Aston_Martin_Paints_60ml--...
Thres a few companies that will mix up the colour in aerosol form, make sure its acrylic based. At 1/12th scale aerosol works just fine
If your going to go for it.
Hiroboy who are the UK distributor is your friend for all sorts of parts, transkits and materials.
Ive looked at your aston Martin kit. A very nice subject indeed
Well I've placed my order for the DBR1/2 so I'm committed now! I retire this month so it will be a retirement project for the winter months. I'm looking forward to the research because although the car exists, and I have seen it, I want to model it in it's 1959 Le Mans guise. The car has changed quite a lot over the years so it will be fun getting the details, including the colour, corect. I must say I am slightly nervous because I've not attempted a build like this before, and I am a perfectionist! Expect lots of questions in the coming months... 

generationx said:
Wow, helluva way to reignite a hobby and a beautiful subject. I'm looking forward to everything you post about this!
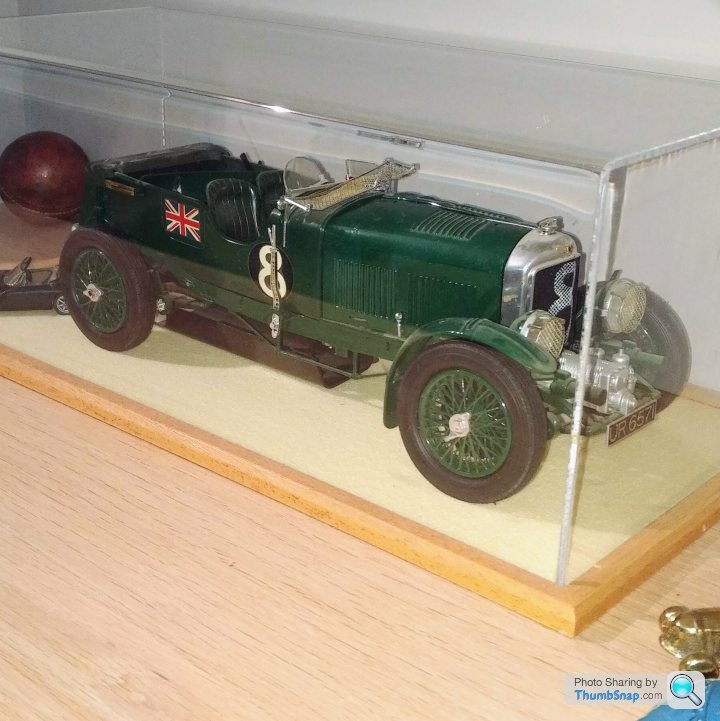
Indeed, that's way I am a little anxious about what I can achieve. I used to build decent (in my opinion) car models but that was 35 years ago but good enough that I still have the Airfix 1:12 Bentley that I built on display in my study. As an Aston chap I couldn't resist the opportunity to build my own DBR1/2. I just hope I can do it justice. I will certainly have the time on my hands I just hope my eyesight is still good enough 
p.s. you will spot the Bentley needs to go into the workshop to have the rear mudguard fitted back!

Cheers Dave, I expect the Bentley will get a refresh at the same time. Like fixing the loose undertray and replacing the broken rear wing. My mum kept it safe for me in a shoebox when I moved house in '93 and I rediscovered it in the top her wardrobe when she died in 2014 - bless her!
p.s. The TVR is a model of my Griff 500...
p.s. The TVR is a model of my Griff 500...
It is categorically not California Sage. That is the metallic khaki sort of colour of the Aston Project Cars.
The Hiro colour might be the right one and they have the wrong name.
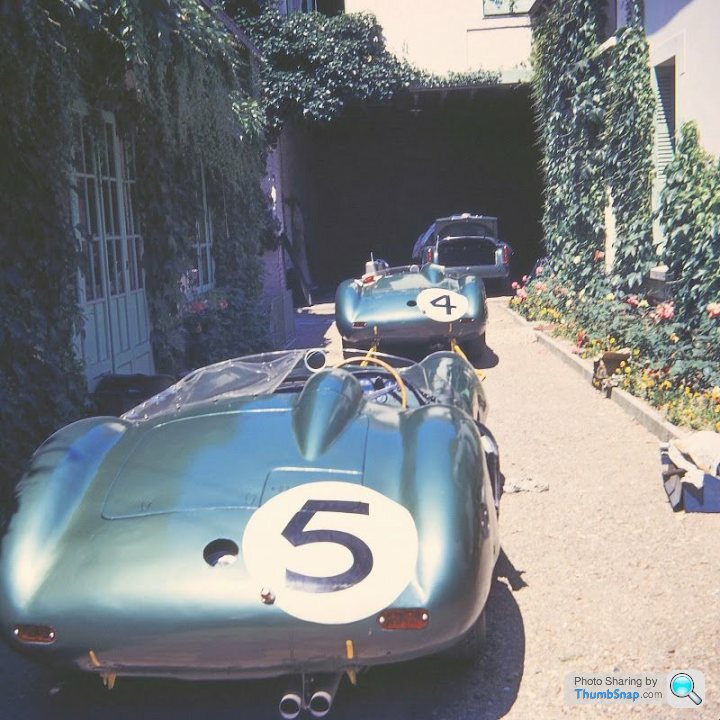
The DBR1s were Aston Martin racing metallic green and there are some good colour photos by Brian Joscelyne of the cars untraced at the Hotel de France. Before they got dirty. The Le Mans bodywork is different and not as attractive as the other races, with a high tail and clear plastic tonneau cover.
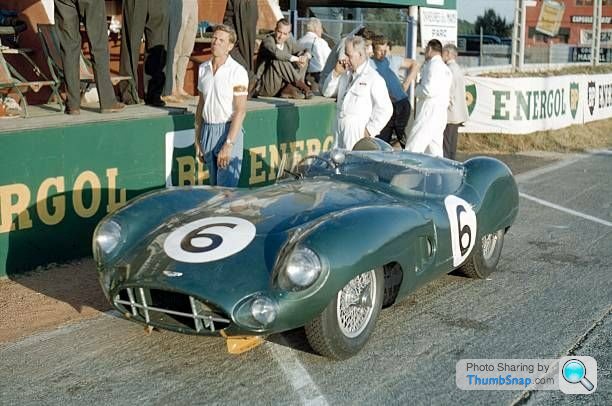
Thanks, I'll get onto the AMHT to see if I can access Brian Joscelyne's photos. Regarding the tonneau cover, I am not convinced it was clear plastic. I know some models now show it like that but video footage of the two cars finishing at Le Mans shows it to be flapping around more like grey vinyl or double duck.
ETA here's a great pic taken before the start. Do you think that's clear plastic? Hard to tell. Mind you I didn't realise the cars had a windscreen wiper!

ETA here's a great pic taken before the start. Do you think that's clear plastic? Hard to tell. Mind you I didn't realise the cars had a windscreen wiper!

Edited by RichB on Friday 18th June 23:24
Hi Steve, I managed to find some quite interesting photos just on the internet.
You are spot on about the clear vinyl, in this image of Shelby/Salvadori's car, at Hotel de France pre race, you can see the front wing through the tonneau. Looks like there was a stiffening rod supporting it along the driver's side.
p.s. I noticed that their car lost it's windscreen wiper at some stage during the race!

Gassing Station | Scale Models | Top of Page | What's New | My Stuff


