Decal trouble - Tamiya spitfire mkVb
Discussion
Hi all,
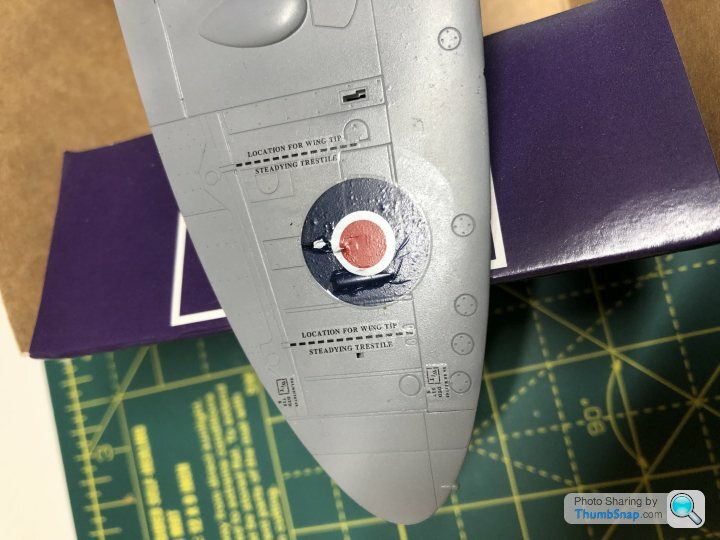
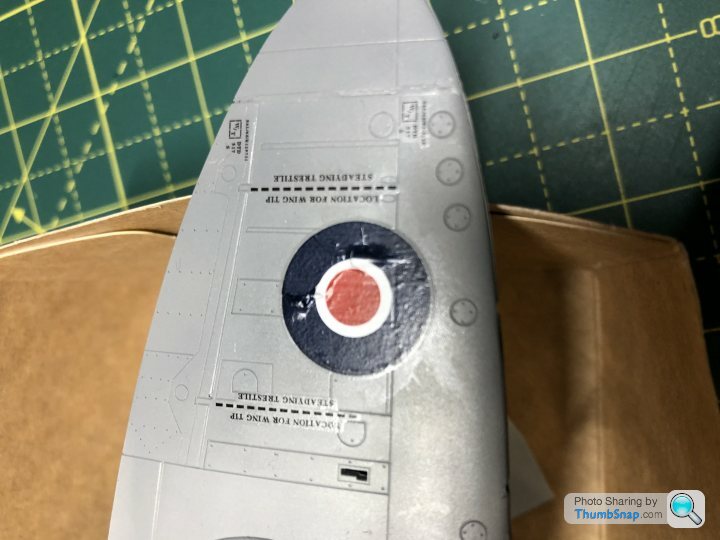
I’ve been making steady progress with my Tamiya mkVb spitfire, but I’ve run into real trouble with the decals (sure we just called them “transfers” when I was a kid!), specifically, the roundels on the underside of the wing. They’re in two parts, and no matter what I tried, I could not get them to lie flat over the raised details they go over. I put a couple of coats of aqua gloss over the paint before I applied them, and used microset on the surface, and multiple applications of microsol on the decal. They look pretty rubbish, and I’m getting nervous about the more visible upper wing surface roundels. What might I have done wrong here?
Thanks in advance for any advice - always much appreciated.
I’ve been making steady progress with my Tamiya mkVb spitfire, but I’ve run into real trouble with the decals (sure we just called them “transfers” when I was a kid!), specifically, the roundels on the underside of the wing. They’re in two parts, and no matter what I tried, I could not get them to lie flat over the raised details they go over. I put a couple of coats of aqua gloss over the paint before I applied them, and used microset on the surface, and multiple applications of microsol on the decal. They look pretty rubbish, and I’m getting nervous about the more visible upper wing surface roundels. What might I have done wrong here?


Thanks in advance for any advice - always much appreciated.
dr_gn said:
You need decal softener. Get some MicroSol, apply it as per instructions and see what happens. If you’re lucky it will solve the issue.
I’ve been applying microsol over a period of a few days. Should I be attempting to press the decal down with a cotton bud or similar?I had wondered about the temperature of the water I used to remove the decals from their backing - would warmer water help make the decal itself more pliable?
new_bloke said:
dr_gn said:
You need decal softener. Get some MicroSol, apply it as per instructions and see what happens. If you’re lucky it will solve the issue.
I’ve been applying microsol over a period of a few days. Should I be attempting to press the decal down with a cotton bud or similar?I had wondered about the temperature of the water I used to remove the decals from their backing - would warmer water help make the decal itself more pliable?
I've had issues recently with decals cracking, and warmer water to remove them from the carrier film helped a lot.
You can use a cotton bud after the Micro Sol has had a chance to work - dampen it first in warm water, and carefully roll it or prod it on the decal - don't wipe it.
You could also try using a hairdryer to heat the decals when the MicroSol has been applied.
Tamiya decals are sometimes quite tricky to apply, which is odd, because the rest of the kits are usually perfect. If you've only applied the underwing roundels, you could consider getting aftermarket decals from Hannants (Xtradecal), thay have always been spot-on when I've used them.
Whatever, it should be salvageable with some care.
Roundel being right over that oblong lump is the big problem. I've successfully pressed the odd microsol soaked decal over big irregularities with wet kitchen roll, wet to prevent the roll sticking to the decal, but only when decal material allows...scale motorsport stuff is exceptionally compliant but not all are! You may consider slicing the decal along the crown of that lump to split it locally to help it form flat around the upstand and touch-in with paint the resulting split in decal colour on the lump itself afterward?
Simpo Two said:
I'm not in this league, I just slide the buggers on, adjust if needed with a soft brush and dab any excess water away.
As well as it not fitting over the two bumps, which doesn't surprise me, it looks like there's grit underneath it...
MicroSol wrinkles decals like crazy. They usually magically disappear overnight though. Any remaining imperfections often get lost under a coat of decent matt varnish - it's the reflections and shadows of the bumps you see most. Get rid of the reflections and the lumps pretty much disappear.As well as it not fitting over the two bumps, which doesn't surprise me, it looks like there's grit underneath it...
That's one of the reasons why - despite the real things being "shiny in real life", gloss coated models at small scales often look s
 t: Every over scale surface detail inherent with the moulding or casting process is - literally - highlighted.
gruffgriff said:
Roundel being right over that oblong lump is the big problem. I've successfully pressed the odd microsol soaked decal over big irregularities with wet kitchen roll, wet to prevent the roll sticking to the decal, but only when decal material allows...scale motorsport stuff is exceptionally compliant but not all are! You may consider slicing the decal along the crown of that lump to split it locally to help it form flat around the upstand and touch-in with paint the resulting split in decal colour on the lump itself afterward?
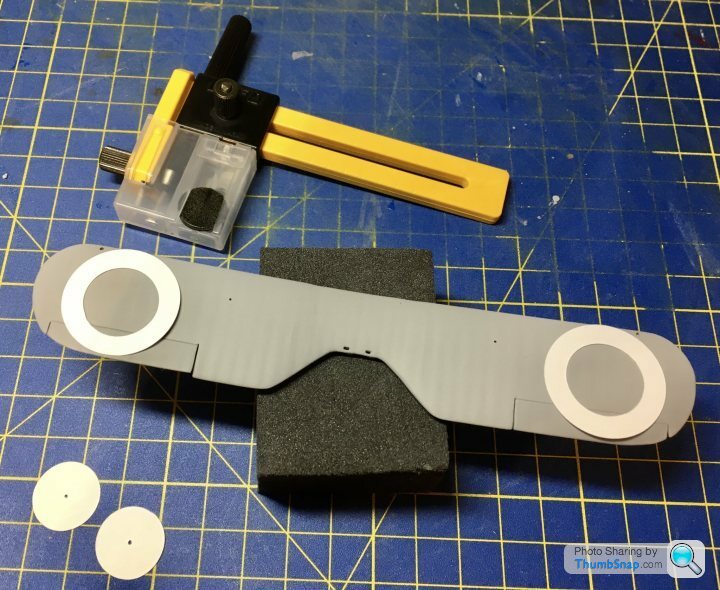
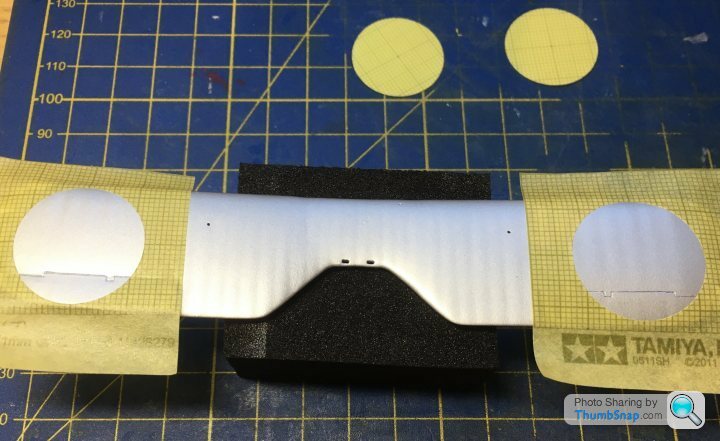
That's certainly one way around it if all else fails.The other thing for roundels like this is to buy an Olfa circle cutter, make masks and paint them on. You can pre-shade them if you're into all that too.
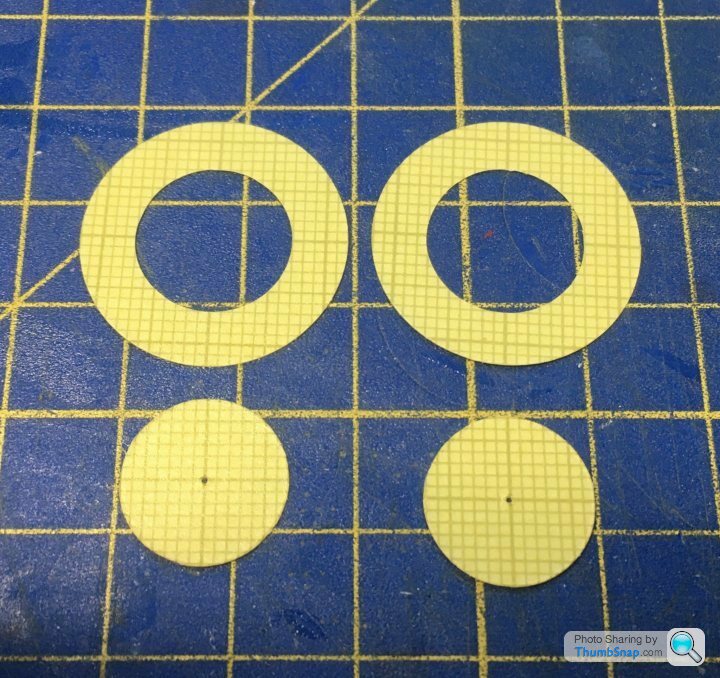
dr_gn said:
That's certainly one way around it if all else fails.
The other thing for roundels like this is to buy an Olfa circle cutter, make masks and paint them on. You can pre-shade them if you're into all that too.


Does anyone know of a smaller scale version of this circle cutter? I'm tending to build 1/72 and would like to paint some of the roundels, but all of the circle cutters I've seen don't seem to go small enough.The other thing for roundels like this is to buy an Olfa circle cutter, make masks and paint them on. You can pre-shade them if you're into all that too.


Cheers
srob said:
dr_gn said:
That's certainly one way around it if all else fails.
The other thing for roundels like this is to buy an Olfa circle cutter, make masks and paint them on. You can pre-shade them if you're into all that too.


Does anyone know of a smaller scale version of this circle cutter? I'm tending to build 1/72 and would like to paint some of the roundels, but all of the circle cutters I've seen don't seem to go small enough.The other thing for roundels like this is to buy an Olfa circle cutter, make masks and paint them on. You can pre-shade them if you're into all that too.


Cheers
lufbramatt said:
Not cheap, but the DSPIAE MT-EC circle cutter will cut very accurate circles down to about 1mm dia. It's based on an industrial ball bearing race rather than being rotated around a point like a compass so very easy to use.
Thanks. That looks good, and may be useful for other things too. Quick search and most places look out of stock but I'll have a proper look later.dr_gn said:
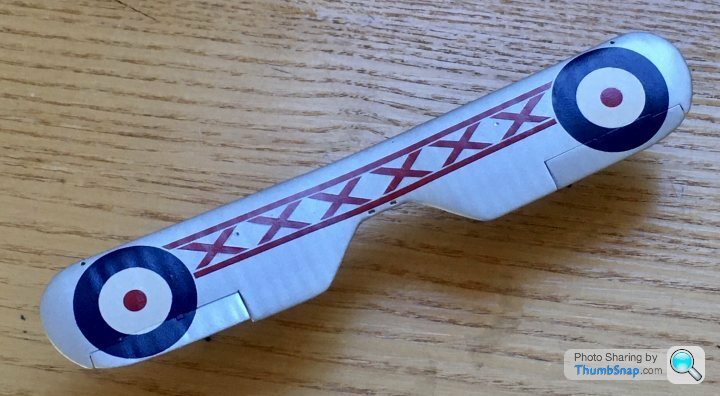
That is the upper wing from a 1:72 Airfix Bristol Bulldog. If you need anything smaller - for the central red dots for example, a simple punch and die set would probably be the most versatile and cheapest option.
I think it would be handy for a few things, including making masks for spraying wheels. I have a pretty steady hand and reasonable brushes but I struggle to hand paint the tyres on 1:72s!Thanks for the thoughts. I think I've retrieved them as best I can now. I also had a nightmare (and threw my toys out of the pram a bit) with the yellow wing leading edge stripe decals. I'm going to try and mask and paint those instead. I don't want this to put me off getting back into the hobby, but it is starting to become a bit daunting (especially when I see some of the work that folks are sharing in this forum!).
I will certainly investigate that circle cutter and have a go at cutting masks for roundels. Is there any recommended mask material to use for this kind of thing?
Cheers!
I will certainly investigate that circle cutter and have a go at cutting masks for roundels. Is there any recommended mask material to use for this kind of thing?
Cheers!
new_bloke said:
Thanks for the thoughts. I think I've retrieved them as best I can now. I also had a nightmare (and threw my toys out of the pram a bit) with the yellow wing leading edge stripe decals. I'm going to try and mask and paint those instead. I don't want this to put me off getting back into the hobby, but it is starting to become a bit daunting (especially when I see some of the work that folks are sharing in this forum!).
I will certainly investigate that circle cutter and have a go at cutting masks for roundels. Is there any recommended mask material to use for this kind of thing?
Cheers!
I agree - once you start trying to correct decals or weathered paintwork, once the decals have been applied, modelling becomes a nightmare. I will certainly investigate that circle cutter and have a go at cutting masks for roundels. Is there any recommended mask material to use for this kind of thing?
Cheers!
So, I masked and painted the leading edge stripes, which went ok, until I removed the masking tape, removing some of the offending roundel decal at the same time!
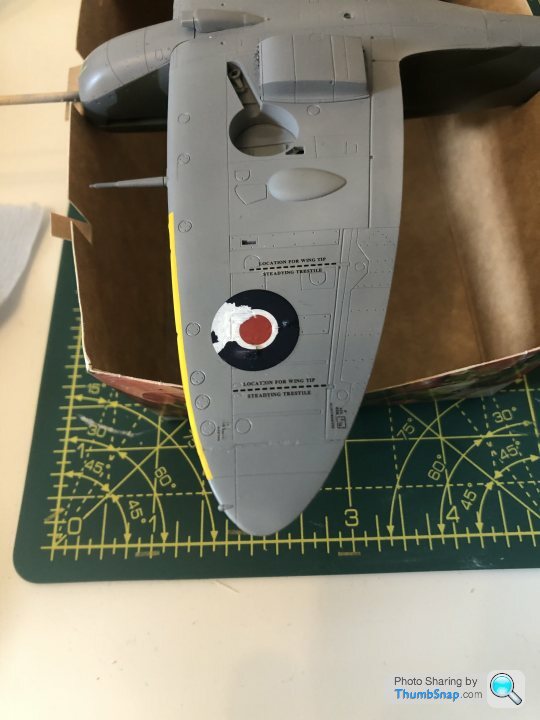
After the swearing stopped, I decided to follow dr_gn’s suggestion and mask / paint the the remaining markings. It’s not gone badly (IMO) for a first attempt, and I think the results are way better than decals:
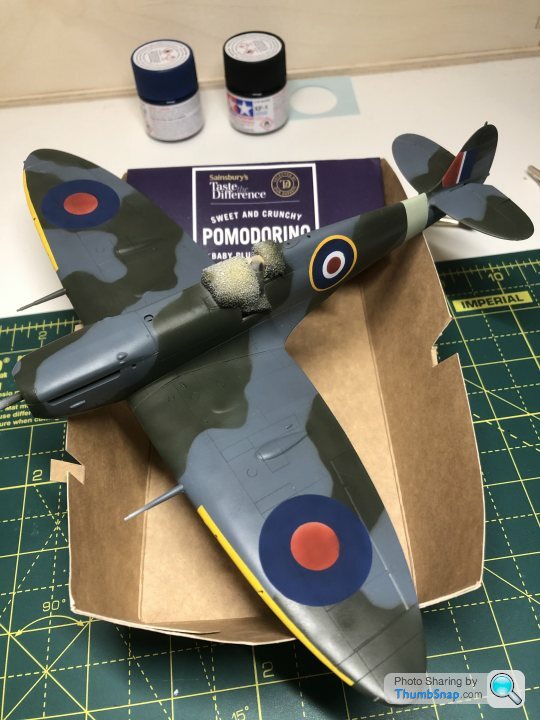
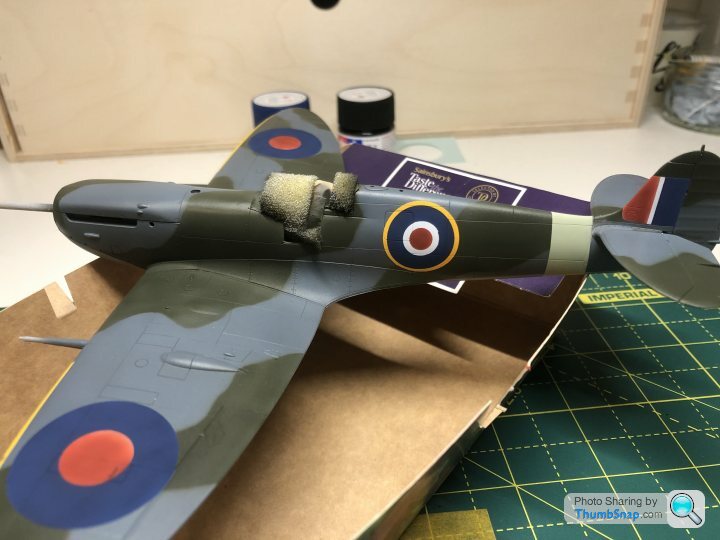
In the end I used a flex-i-file circle cutter as the Ofla one I bought first couldn’t go small enough in diameter - it’ll go all the way down to 3mm.
I think I may be reaching the limits of my cheapie Amazon airbrush now - that’s next on the upgrade list!

After the swearing stopped, I decided to follow dr_gn’s suggestion and mask / paint the the remaining markings. It’s not gone badly (IMO) for a first attempt, and I think the results are way better than decals:


In the end I used a flex-i-file circle cutter as the Ofla one I bought first couldn’t go small enough in diameter - it’ll go all the way down to 3mm.
I think I may be reaching the limits of my cheapie Amazon airbrush now - that’s next on the upgrade list!
Gassing Station | Scale Models | Top of Page | What's New | My Stuff


