Discussion
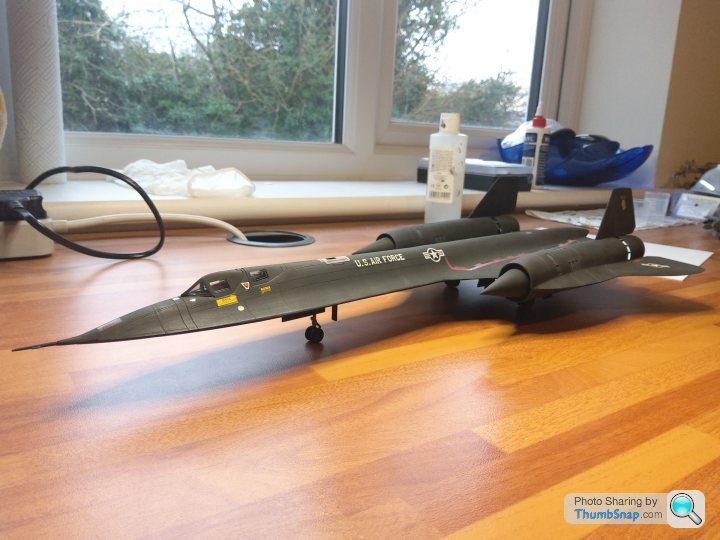
This old 1980s kit was sat in my parents' loft until last year, one my dad had acquired before me & my sister arrived and he never got around to building.
Having not built a kit for 25-odd years I thought I'd use this as a means of getting back into it before starting on some newer kits I've recently purchased, on the basis there were hardly any parts to it despite being quite a large model.
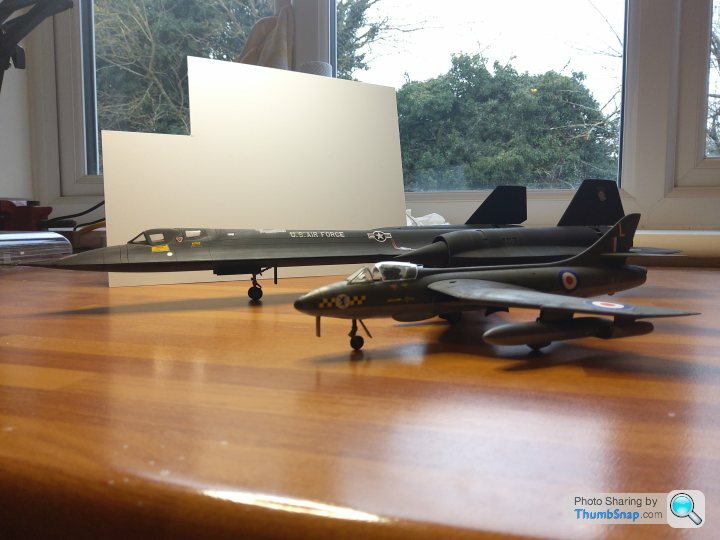
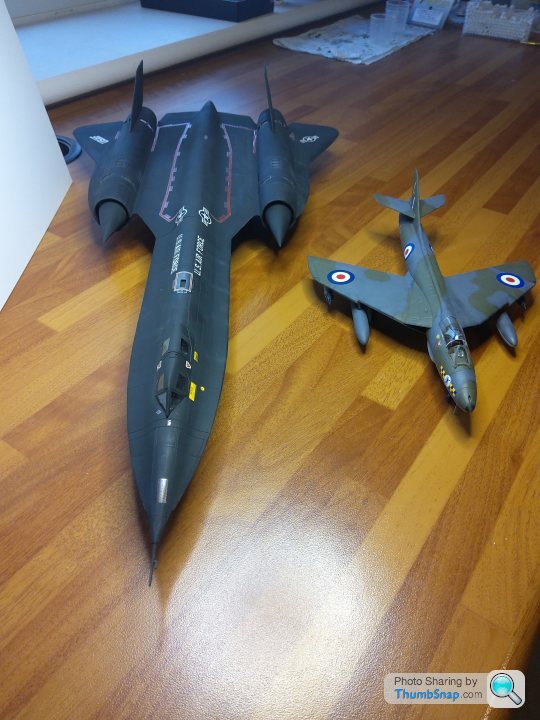
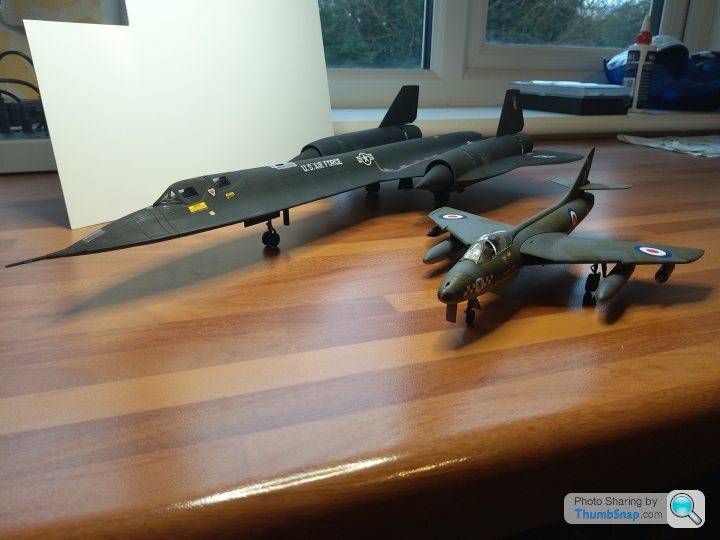
I got most of the way there before realising the 30-year old decals were unusable so had to order some replacements- so I had a go at the Revell Hawker Hunter in the meantime which also got finished off today.
The SR-71 kit wasn't great- how much of it was the kit and how much of it was down to being sat in the loft for 30+ years I don't know, but there were significant fit issues and warping- fortunately mostly on the underside which won't really be seen. Due to the limitations of the kit and just wanting to 'build something' I didn't go to town trying to correct too much so it's essentially out of the box bar the replacement decals (which were also a bit of a struggle).
Happy with how it's turned out though. It's done the job of well and truly getting me back into the hobby after 25+ years which was the main aim!
The decal scheme I've gone with also isn't quite right for the aircraft ID I've chosen, as it should be in the later 'minimal marking' scheme, but I just love the look of them with the USAF 'full markings' so it went with that, even if it doesn't quite tie in with the tail number I've used. I can't imagine anyone who comes round and sees it will notice


dr_gn said:
Nice work - looks great. Every Academy kit I’ve built has had terrible decals - thick but also brittle.
Cheers!Regarding the decals, even the aftermarket ones I brought weren't great- super fragile (one bit came apart simply from being in the water), and very thick film which made it tough to get it look like it hadn't just been stuck on. Although I guess that could also partly be due to the colour scheme, black does seem to show up the film much easier.
Squirrelofwoe said:
dr_gn said:
Nice work - looks great. Every Academy kit I’ve built has had terrible decals - thick but also brittle.
Cheers!Regarding the decals, even the aftermarket ones I brought weren't great- super fragile (one bit came apart simply from being in the water), and very thick film which made it tough to get it look like it hadn't just been stuck on. Although I guess that could also partly be due to the colour scheme, black does seem to show up the film much easier.
dr_gn said:
Yes, it’s called “silvering”. It’s caused by a layer of air within the rough matt surface keeping the decal from seating properly. If you use a gloss coat, or use gloss paint, this can reduce the issue. Then overcoat with Matt, satin or gloss to get the final sheen. On things like the red lines, I’d also put a dab of Klear under the decal to eliminate any air.
Thanks I'll keep that in mind.I did use a coat of Tamiya clear (the non-matt one) over the model before adding the decals, but it was the first time I've used it and it was hard to keep track of the coverage given the dark colour of the model. I also picked up some micro-sol and micro-set but still trying to figure out the best way to use these. Would I be right in thinking this would do a similar job in preventing air under under the decals?
I also finished up with a coat of Tamiya matt clear after applying the decals.
Still very much learning so all advice is greatly appreciated.
Squirrelofwoe said:
dr_gn said:
Yes, it’s called “silvering”. It’s caused by a layer of air within the rough matt surface keeping the decal from seating properly. If you use a gloss coat, or use gloss paint, this can reduce the issue. Then overcoat with Matt, satin or gloss to get the final sheen. On things like the red lines, I’d also put a dab of Klear under the decal to eliminate any air.
Thanks I'll keep that in mind.I did use a coat of Tamiya clear (the non-matt one) over the model before adding the decals, but it was the first time I've used it and it was hard to keep track of the coverage given the dark colour of the model. I also picked up some micro-sol and micro-set but still trying to figure out the best way to use these. Would I be right in thinking this would do a similar job in preventing air under under the decals?
I also finished up with a coat of Tamiya matt clear after applying the decals.
Still very much learning so all advice is greatly appreciated.
On decals with a lot of visible carrier film, as well as applying to a gloss (or gloss/satin) surface, I dot a bit of Klear (thin acrylic varnish) under the deal first. This spreads out under the decal on application, and displaces any trapped air.
I use MicroSol, all the time, no issues, applied on top and around the decal. Then when dry, apply another gloss coat overall, and then when that's dry, the final matt or satin.
El stovey said:
That looks great BUT I think the USAF markings don’t quite tie in with the tail number you’ve used?
In their first post,Squirrelofwoe said:
The decal scheme I've gone with also isn't quite right for the aircraft ID I've chosen, as it should be in the later 'minimal marking' scheme, but I just love the look of them with the USAF 'full markings' so it went with that, even if it doesn't quite tie in with the tail number I've used. I can't imagine anyone who comes round and sees it will notice 

El stovey said:
kiseca said:
That's a great looking build. Such a beautiful shape too.
Revell are releasing a 1/48 new tool Blackbird later this year. I'm really looking forward to seeing that. It's definitely on my shopping list!
That’ll be massive!Revell are releasing a 1/48 new tool Blackbird later this year. I'm really looking forward to seeing that. It's definitely on my shopping list!

Unfortunately size isn't a problem that I've let control my model buying habits in the past. It will be joining a 1/24 Airfix Mosquito, 1/48 Revell B1-B and a 1/72 Trumpeter Tu-22 Blinder...
The Mossie is almost complete despite the fact I don't yet have anywhere to put it.
dr_gn said:
El stovey said:
That looks great BUT I think the USAF markings don’t quite tie in with the tail number you’ve used?
In their first post,Squirrelofwoe said:
The decal scheme I've gone with also isn't quite right for the aircraft ID I've chosen, as it should be in the later 'minimal marking' scheme, but I just love the look of them with the USAF 'full markings' so it went with that, even if it doesn't quite tie in with the tail number I've used. I can't imagine anyone who comes round and sees it will notice 


kiseca said:
It will indeed 
Unfortunately size isn't a problem that I've let control my model buying habits in the past. It will be joining a 1/24 Airfix Mosquito, 1/48 Revell B1-B and a 1/72 Trumpeter Tu-22 Blinder...
The Mossie is almost complete despite the fact I don't yet have anywhere to put it.
Fantastic. Some of those must be really big, especially the b1.
Unfortunately size isn't a problem that I've let control my model buying habits in the past. It will be joining a 1/24 Airfix Mosquito, 1/48 Revell B1-B and a 1/72 Trumpeter Tu-22 Blinder...
The Mossie is almost complete despite the fact I don't yet have anywhere to put it.
El stovey said:
dr_gn said:
El stovey said:
That looks great BUT I think the USAF markings don’t quite tie in with the tail number you’ve used?
In their first post,Squirrelofwoe said:
The decal scheme I've gone with also isn't quite right for the aircraft ID I've chosen, as it should be in the later 'minimal marking' scheme, but I just love the look of them with the USAF 'full markings' so it went with that, even if it doesn't quite tie in with the tail number I've used. I can't imagine anyone who comes round and sees it will notice 


The 1/48 one will be MASSIVE - this one is a shade under half a meter long I think. So much black paint! I've made a start on the 1/72 Victor B.2 and had to stock up on white paint, I couldn't imagine building these larger aircraft in the bigger scales.
Cheers for the comments all.
Dr_gn - I'll give that a go with the Micro Sol, thanks.
El stovey said:
Fantastic. Some of those must be really big, especially the b1.
The B1 is the longest, the Mosquito has the largest wingspan, at something just over 580mm. I think the B1 will be somewhere around 750-800mm long when complete.The B1 has a centre section that's basically the top of the wing box and the centre upper half of the fuselage. It's pretty much big enough to make a decent chest armour plate

kiseca said:
The B1 is the longest, the Mosquito has the largest wingspan, at something just over 580mm. I think the B1 will be somewhere around 750-800mm long when complete.
The B1 has a centre section that's basically the top of the wing box and the centre upper half of the fuselage. It's pretty much big enough to make a decent chest armour plate
Quoting myself... I was wrong and underestimated both. Just checked the boxes. The Mossie's wingspan is 688mm, and the B1 beats that if the wings are in the unswept position at 860mm. It's 920mm long. Just short of a metre!The B1 has a centre section that's basically the top of the wing box and the centre upper half of the fuselage. It's pretty much big enough to make a decent chest armour plate

Apparently they need a lot of filler, too. The fit of the nose to the mid section is terrible according to the builds I've seen online.
kiseca said:
It will indeed 
Unfortunately size isn't a problem that I've let control my model buying habits in the past. It will be joining a 1/24 Airfix Mosquito, 1/48 Revell B1-B and a 1/72 Trumpeter Tu-22 Blinder...
The Mossie is almost complete despite the fact I don't yet have anywhere to put it.
I've got the trio of V-bombers in 1/72 and would also like to get the Tu-160, Tu-95, and B-52 in 1/72 at some point. I've also got some 1/350 scale ships to get through. Haven't thought about display space yet - so I feel your pain! 
Unfortunately size isn't a problem that I've let control my model buying habits in the past. It will be joining a 1/24 Airfix Mosquito, 1/48 Revell B1-B and a 1/72 Trumpeter Tu-22 Blinder...
The Mossie is almost complete despite the fact I don't yet have anywhere to put it.

Gassing Station | Scale Models | Top of Page | What's New | My Stuff


