1/8 Citroën Big 6
Discussion
Scale Models isn’t a sub forum I venture into all that often, despite a bit of an addiction to scale models. When I was a youngster, my father bought me a model kit to build during a holiday to Devon, must have been in the late 90’s. The kit was an Airfix Boeing 777, Singapore colours on the box but with a second option of the BA Landor colours inside. At the age of six, that kit got me hooked onto two subjects; model building and aeroplanes.
From then on, model building became my main hobby. Up to around the age of perhaps fifteen, I built literally countless models, usually WWII aircraft but also the odd modern airliner. I’m sure the hundreds of models are still packed away in my parent’s attic, however the 777 I’d built with my father in the 90’s triggered something in my brain; for the past few years now I’ve been employed to fly Boeing airliners for a living. Admittedly not the ‘triple’, nevertheless recent events have seen me with plenty of down time, which brings me on to this big Citroën.
Alongside aircraft, I’ve always had a passion for cars, especially “interesting” or “quirky” cars. I’m unashamedly a fan of Citroën, not so much the modern examples but more the classic models, particularly the Traction Avant, DS, SM and 2cv. A few years ago browsing the Bay, I came across a 1/8 Heller scale kit of the Citroën Big 6, or Traction Avant 15CV 6-cylinder. I must have won it, because it’s been sat in a cupboard at home for ages. The wife-to-be, fed up with such an enormous box in the way, has suggested that with all this free time on my hands while UK aircraft are banned from flying, perhaps I ought to actually build the kit.
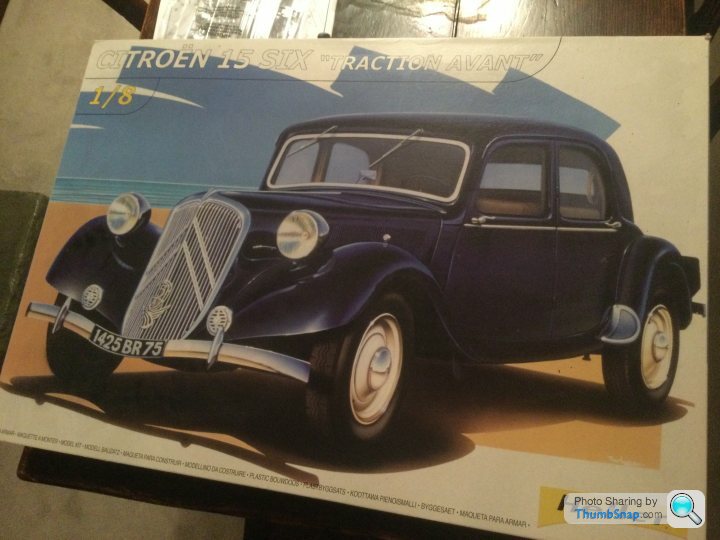
She’s especially displeased in fact, as there’s not only a rather large Traction in bits in a box in the house, but also a full size Traction in the garage, getting in her way of piling up junk in there. However I suspect having a real car to reference for this build will be exceptionally useful.
The kit apparently has 1054 pieces, once finished will be about eight inches wide and almost two feet long. Damned if I know where I’ll put it, but we can cross that bridge when we get there. For reference, here’s the roof panel next to a 1/18 Traction for comparison...
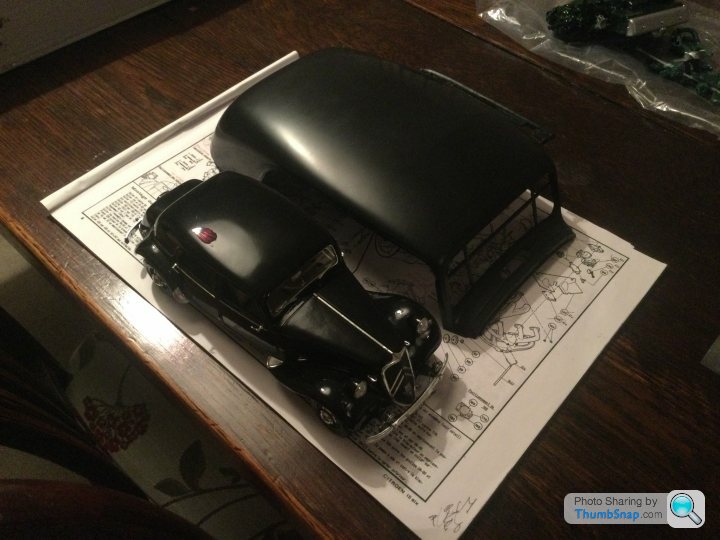
...and a box full of many parts, loads of black plastic, clear parts, chrome parts, rubber parts, wires to make into springs for gear selector mechanisms, foam bits to become interior parts, the list is almost endless.
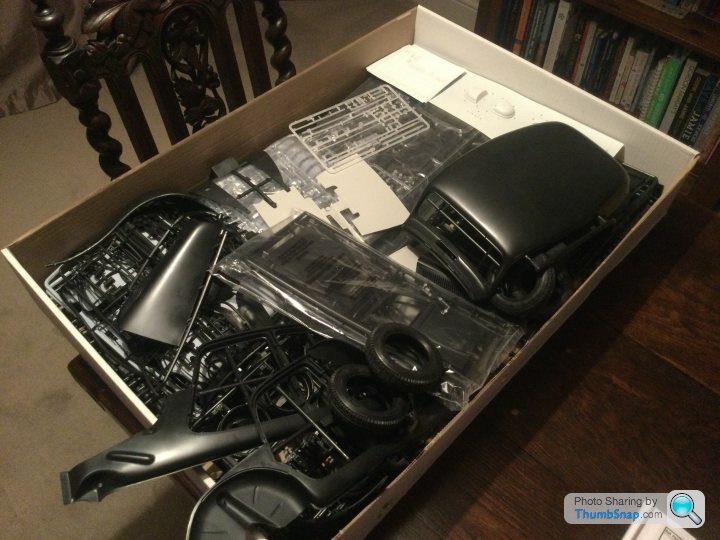
I actually made a start on the kit a few years back, however I’m not sure I got past the first page of instructions. Proceedings began with the engine, plus ancillaries. It appears I’ve assembled and painted up the main block, head plus gearbox which unusually is ahead of the engine - the Traction Avant pioneering front wheel drive placed the gearbox at the front, as transverse engines weren’t a thing yet and Citroën considered this layout ideal. The FWD layout meant the car didn’t require a transmission tunnel, combined with a monocoque construction negating the requirement for separate chassis, suddenly the Traction Avant had an exceptionally low CofG and also sat much lower than other cars of the period. This led to its popularity as a getaway car and with less-esteemed members of the German secret police during WWII.
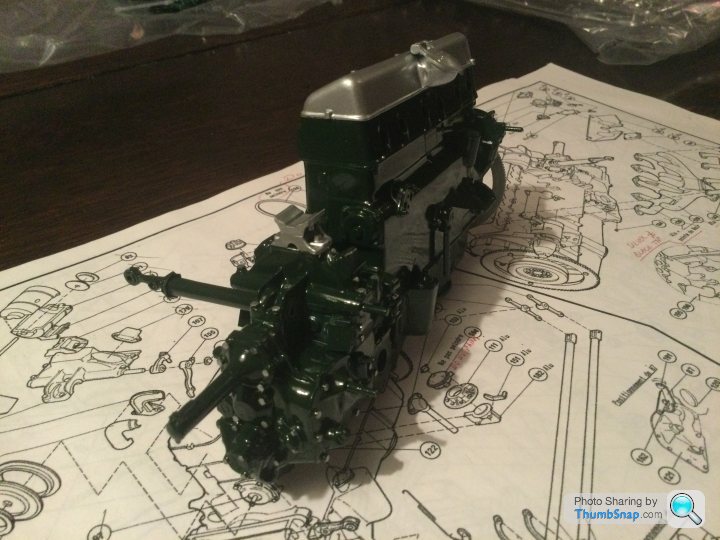
Anyway I digress, so far I have a reasonably complete block, sprayed in what looks suspiciously like Tamiya’s BRG gloss. Not an absolute match to the real thing, but close enough for now.
The first step is to complete the engine plus ancillaries, get it all painted up and then suitably weathered, a few paint chips, spots of surface rust, weeping oil leaks, other grime. I intend to base the condition of the model on my real car; bodywork in excellent condition, but very much a used and usable example under the skin. I also need to decide whether I’m going to go the extra mile and fit working electrics, as I think that would really set the model off nicely.
If anyone has built this kit before, I’d be very interested to hear how it went, any potential sticking points or tips would be appreciated. If there’s enough interest, I’ll try to run this as a build thread as things progress, in which case I’ll endeavour to take better photos than the dark last-minute ones above!
From then on, model building became my main hobby. Up to around the age of perhaps fifteen, I built literally countless models, usually WWII aircraft but also the odd modern airliner. I’m sure the hundreds of models are still packed away in my parent’s attic, however the 777 I’d built with my father in the 90’s triggered something in my brain; for the past few years now I’ve been employed to fly Boeing airliners for a living. Admittedly not the ‘triple’, nevertheless recent events have seen me with plenty of down time, which brings me on to this big Citroën.
Alongside aircraft, I’ve always had a passion for cars, especially “interesting” or “quirky” cars. I’m unashamedly a fan of Citroën, not so much the modern examples but more the classic models, particularly the Traction Avant, DS, SM and 2cv. A few years ago browsing the Bay, I came across a 1/8 Heller scale kit of the Citroën Big 6, or Traction Avant 15CV 6-cylinder. I must have won it, because it’s been sat in a cupboard at home for ages. The wife-to-be, fed up with such an enormous box in the way, has suggested that with all this free time on my hands while UK aircraft are banned from flying, perhaps I ought to actually build the kit.

She’s especially displeased in fact, as there’s not only a rather large Traction in bits in a box in the house, but also a full size Traction in the garage, getting in her way of piling up junk in there. However I suspect having a real car to reference for this build will be exceptionally useful.
The kit apparently has 1054 pieces, once finished will be about eight inches wide and almost two feet long. Damned if I know where I’ll put it, but we can cross that bridge when we get there. For reference, here’s the roof panel next to a 1/18 Traction for comparison...

...and a box full of many parts, loads of black plastic, clear parts, chrome parts, rubber parts, wires to make into springs for gear selector mechanisms, foam bits to become interior parts, the list is almost endless.

I actually made a start on the kit a few years back, however I’m not sure I got past the first page of instructions. Proceedings began with the engine, plus ancillaries. It appears I’ve assembled and painted up the main block, head plus gearbox which unusually is ahead of the engine - the Traction Avant pioneering front wheel drive placed the gearbox at the front, as transverse engines weren’t a thing yet and Citroën considered this layout ideal. The FWD layout meant the car didn’t require a transmission tunnel, combined with a monocoque construction negating the requirement for separate chassis, suddenly the Traction Avant had an exceptionally low CofG and also sat much lower than other cars of the period. This led to its popularity as a getaway car and with less-esteemed members of the German secret police during WWII.

Anyway I digress, so far I have a reasonably complete block, sprayed in what looks suspiciously like Tamiya’s BRG gloss. Not an absolute match to the real thing, but close enough for now.
The first step is to complete the engine plus ancillaries, get it all painted up and then suitably weathered, a few paint chips, spots of surface rust, weeping oil leaks, other grime. I intend to base the condition of the model on my real car; bodywork in excellent condition, but very much a used and usable example under the skin. I also need to decide whether I’m going to go the extra mile and fit working electrics, as I think that would really set the model off nicely.
If anyone has built this kit before, I’d be very interested to hear how it went, any potential sticking points or tips would be appreciated. If there’s enough interest, I’ll try to run this as a build thread as things progress, in which case I’ll endeavour to take better photos than the dark last-minute ones above!
Today I’ve got the kit out, spread across the floor to take stock of what’s ahead. Although I’ve built large and complex models before, I think this Citroën will quite easily take the biscuit. I always like to set everything out before starting a project, get a feel for the parts, check condition of the sprues, read through the instructions and decide what level of detail and finish I’m going for.
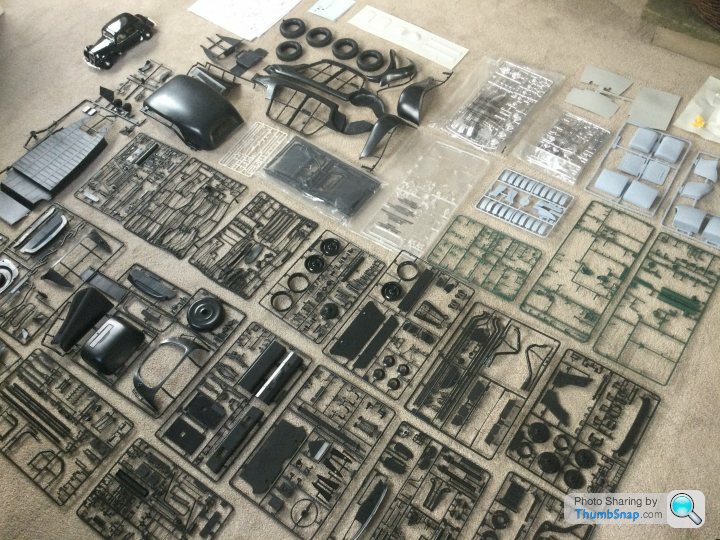
Despite having made an initial start a few years ago, I only completed the first step of the instructions, and partially into step two. I’ve decided to restart the project from scratch, but using the bits I’ve already assembled. As mentioned previously, I’ll be aiming for a finish as close to my own car as possible, so expecting exterior bodywork to be by and large in a concours condition, however the oily bits will be far less of a “factory condition” and more representative of the almost 70-year old vehicle.
It won’t be built OOB either, I’ve already identified certain parts that will be replaced by fabricated metal parts, extra detailing added where necessary and also working electrics - probably in the form of working lights, however whether I go down the standard bulb or LED route is yet to be decided. I will also need to make a mold of the tail lamps and make a cast resin duplicate, as the kit is missing one.
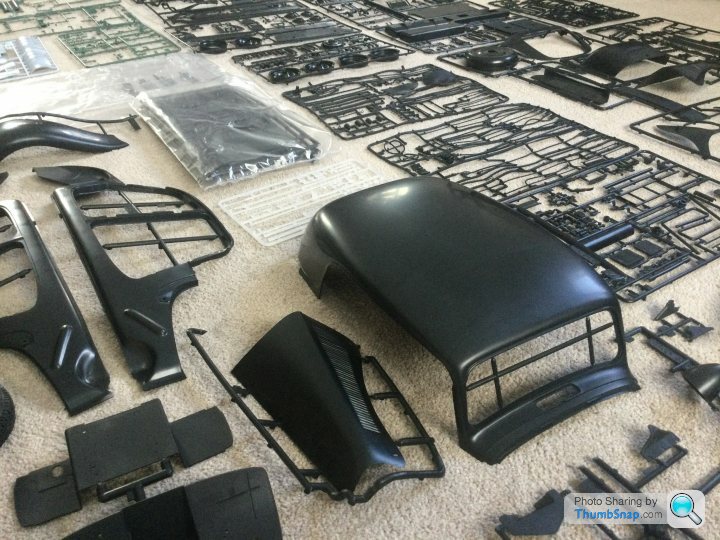
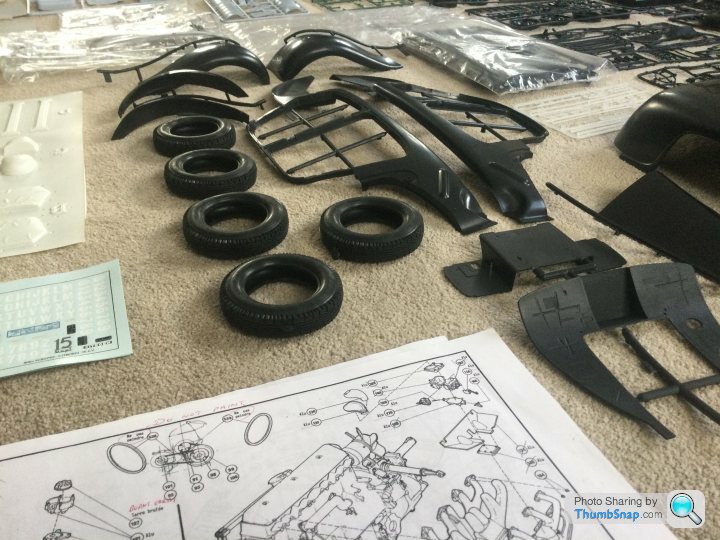
1/18 Big 6 for size comparison.
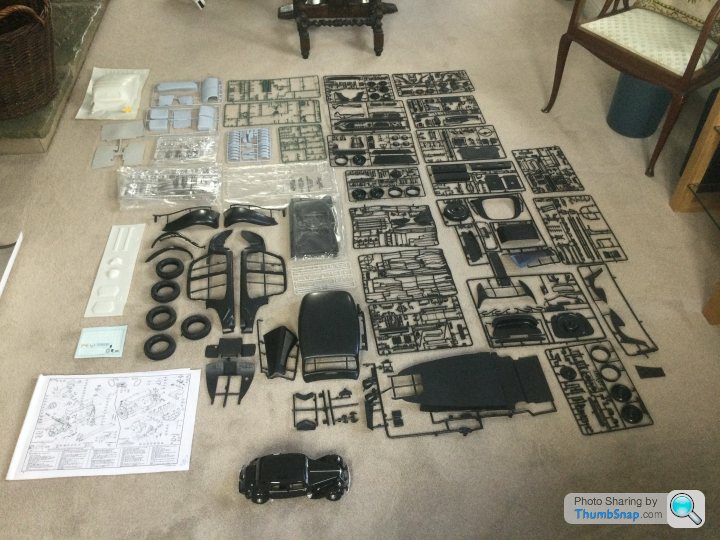
Over 40 individual sprues, mostly black plastic for bodywork, subframe, exhaust system, front axles, wheels and suspension. Green plastic for gearbox, engine and engine bay ancillaries, grey rubber for interior door cards and seats, several chrome sprues for the brightwork, transparent sprues, some resin sprues and a couple of rubber sprues for various hoses, HT leads, wiring and God knows what else. Vac formed headliner and other interior trim, although I may trim this with real fabric.
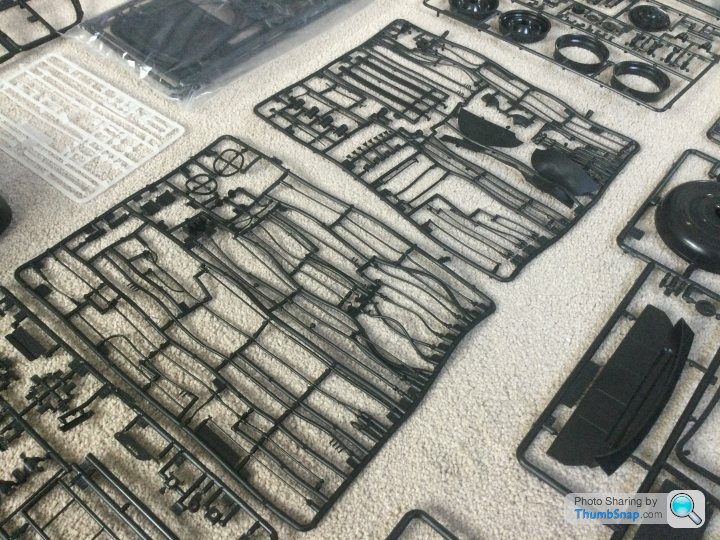
Rubber sprues including simulating wiring, HT leads, fan belts, water hoses. No, the carpet isn’t dirty, it’s just a stupidly thick pile that shows every footprint...
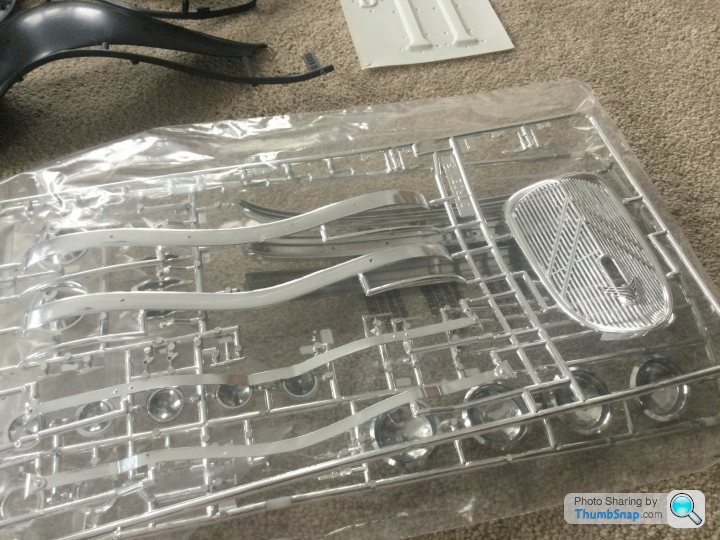
Various bits of brightwork. The radiator grille is absolutely enormous, I keep surprising myself with the scale, I think I’m looking for a tiny nut or bolt on a sprue, then suddenly find something twice the size I’m looking for.
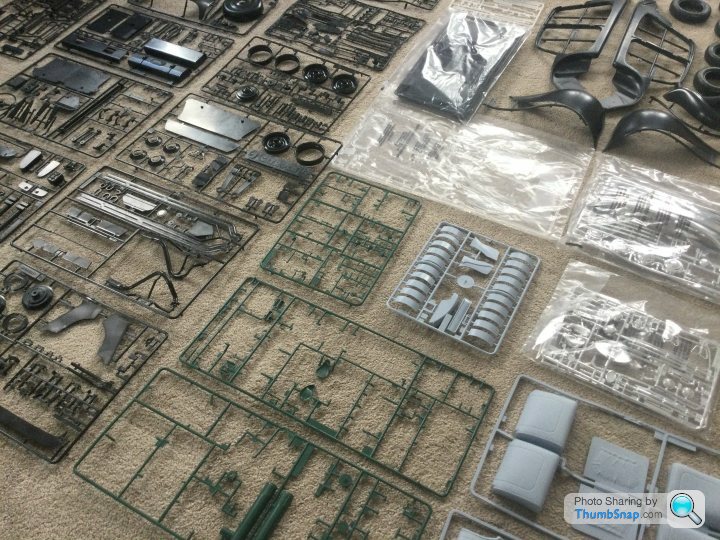
Bare green sprues an indication of progress made in the past. There’s a few little odds and sods left, including the air cleaner, but the main bulk of the engine has been assembled. However, it’s going to be repainted and weathered in due course, as currently it looks rather too clean.
Looking at the kit like this, it makes you realise this is more an exact 1/8th scale replica of a real Big 6, not just a plastic kit that will ultimately look like one eventually. The subframe assembly is an exact scaled down version of the real thing, the same components going together, just in miniature for example. Even the UJ’s require assembling, the spark plugs fit into the engine; attached to HT leads, going to the distributor cap, clamped to the dizzy, bolted to the block. Even the springs in the gear selector fork mechanisms require fabricating and installing from delicate wire.
Given I’ve now taken stock, next thing is to order up some 2mm and 1mm brass rod, complete the ancillaries and get every painted up. Then, start adding seven decades of grime and wear and tear, before assembling into a complete engine. Very excited for how it’ll turn out.

Despite having made an initial start a few years ago, I only completed the first step of the instructions, and partially into step two. I’ve decided to restart the project from scratch, but using the bits I’ve already assembled. As mentioned previously, I’ll be aiming for a finish as close to my own car as possible, so expecting exterior bodywork to be by and large in a concours condition, however the oily bits will be far less of a “factory condition” and more representative of the almost 70-year old vehicle.
It won’t be built OOB either, I’ve already identified certain parts that will be replaced by fabricated metal parts, extra detailing added where necessary and also working electrics - probably in the form of working lights, however whether I go down the standard bulb or LED route is yet to be decided. I will also need to make a mold of the tail lamps and make a cast resin duplicate, as the kit is missing one.


1/18 Big 6 for size comparison.

Over 40 individual sprues, mostly black plastic for bodywork, subframe, exhaust system, front axles, wheels and suspension. Green plastic for gearbox, engine and engine bay ancillaries, grey rubber for interior door cards and seats, several chrome sprues for the brightwork, transparent sprues, some resin sprues and a couple of rubber sprues for various hoses, HT leads, wiring and God knows what else. Vac formed headliner and other interior trim, although I may trim this with real fabric.

Rubber sprues including simulating wiring, HT leads, fan belts, water hoses. No, the carpet isn’t dirty, it’s just a stupidly thick pile that shows every footprint...

Various bits of brightwork. The radiator grille is absolutely enormous, I keep surprising myself with the scale, I think I’m looking for a tiny nut or bolt on a sprue, then suddenly find something twice the size I’m looking for.

Bare green sprues an indication of progress made in the past. There’s a few little odds and sods left, including the air cleaner, but the main bulk of the engine has been assembled. However, it’s going to be repainted and weathered in due course, as currently it looks rather too clean.
Looking at the kit like this, it makes you realise this is more an exact 1/8th scale replica of a real Big 6, not just a plastic kit that will ultimately look like one eventually. The subframe assembly is an exact scaled down version of the real thing, the same components going together, just in miniature for example. Even the UJ’s require assembling, the spark plugs fit into the engine; attached to HT leads, going to the distributor cap, clamped to the dizzy, bolted to the block. Even the springs in the gear selector fork mechanisms require fabricating and installing from delicate wire.
Given I’ve now taken stock, next thing is to order up some 2mm and 1mm brass rod, complete the ancillaries and get every painted up. Then, start adding seven decades of grime and wear and tear, before assembling into a complete engine. Very excited for how it’ll turn out.
I’ve spent most of the evening reading a couple of build threads over on Britmodeller, as suggested. One by a chap called Roy, another by Bengalvensis(?), both exceptionally talented model builders! It’s extremely useful to be able to see the kit come together ahead of time.
I have begun work on the engine ancillaries this afternoon, namely the fuel pump and distributor. The fuel pump appears to be made up of at least five parts, including a clear bowl on top, when I’m sure Heller could have got away with a single piece! Still, the real pump isn’t a single piece so as far as I’m concerned, it’s fair game. Tomorrow each part will be given a base coat, before weathering and details added, at which point they’ll be stashed away until it’s time to be installed. I’ll share some pics as soon as I have something to show for! Currently the parts are setting to a basic rig prior to painting.
I’ve been comparing my 1/8 block with my 1/1 block, it’s clear that I’ve got the wrong green...
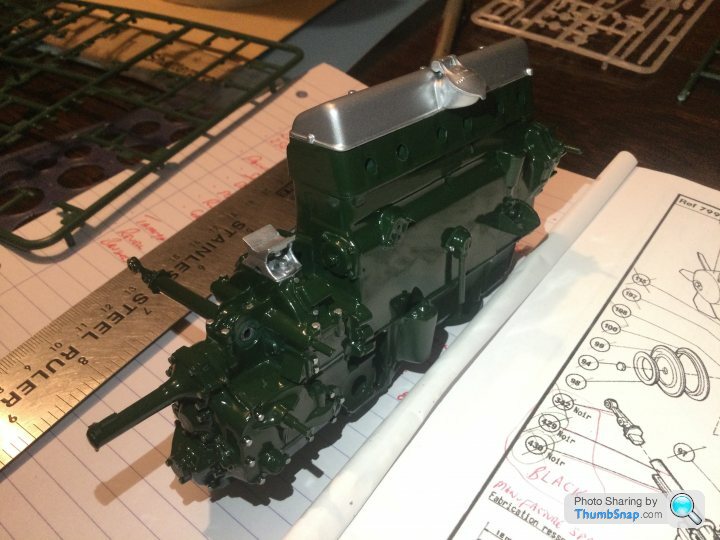
I believe I sprayed it with Tamiya TS-9, would look excellent on an MGB but it’s far too dark and glossy for a Traction engine, although it does look smart. The best match I’ve found is Humbrol 76 for the engine, with a slightly more yellow-green for the rocker cover, based off my own engine. The real engine is also a matt finish, only made shiny by the thin film of oil that will need replicating.
Looking through the Heller instructions, it suggests a whole load of bits painted green, however again, comparing against the one outside suggests certain smaller components may well be black, grey, silver and so on. One such example are the gear selector rods, which are most definitely black on my car. Talking of which, I’ve ordered in some 1mm and 1.5mm brass rod, as the rods supplied in the kit are a flexible nylon! I’ll remove the nylon clevis pins and make new selector rods, in due course.
Some have asked about the real car, here she is.
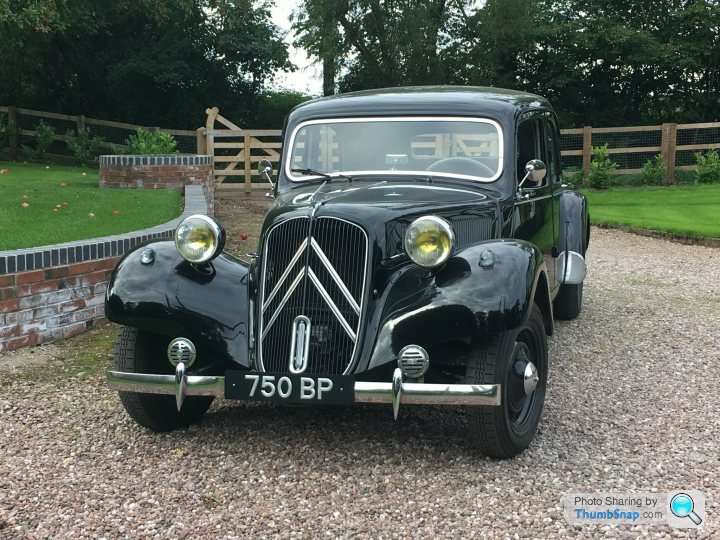

She’s a 1953 4-cylinder Normale, so not the same as the 6-cylinder in the Heller kit. However, where possible, I will use the real car as a basis for the colours and weathering on the Heller model. For example, I have a suspicion that a majority of the green paint on my gearbox has disappeared, something that will be reflected on the model.
I have also been playing around with some little 3mm bulbs. It has been discovered that the chrome headlamps in the kit have a 2.5mm hole to accept the part representing the headlamp bulb. The actual bulb fits nicely and on a basic bench test, does a very promising job of illuminating the headlamp in a realistic manner. More on this later.
I have begun work on the engine ancillaries this afternoon, namely the fuel pump and distributor. The fuel pump appears to be made up of at least five parts, including a clear bowl on top, when I’m sure Heller could have got away with a single piece! Still, the real pump isn’t a single piece so as far as I’m concerned, it’s fair game. Tomorrow each part will be given a base coat, before weathering and details added, at which point they’ll be stashed away until it’s time to be installed. I’ll share some pics as soon as I have something to show for! Currently the parts are setting to a basic rig prior to painting.
I’ve been comparing my 1/8 block with my 1/1 block, it’s clear that I’ve got the wrong green...

I believe I sprayed it with Tamiya TS-9, would look excellent on an MGB but it’s far too dark and glossy for a Traction engine, although it does look smart. The best match I’ve found is Humbrol 76 for the engine, with a slightly more yellow-green for the rocker cover, based off my own engine. The real engine is also a matt finish, only made shiny by the thin film of oil that will need replicating.
Looking through the Heller instructions, it suggests a whole load of bits painted green, however again, comparing against the one outside suggests certain smaller components may well be black, grey, silver and so on. One such example are the gear selector rods, which are most definitely black on my car. Talking of which, I’ve ordered in some 1mm and 1.5mm brass rod, as the rods supplied in the kit are a flexible nylon! I’ll remove the nylon clevis pins and make new selector rods, in due course.
Some have asked about the real car, here she is.


She’s a 1953 4-cylinder Normale, so not the same as the 6-cylinder in the Heller kit. However, where possible, I will use the real car as a basis for the colours and weathering on the Heller model. For example, I have a suspicion that a majority of the green paint on my gearbox has disappeared, something that will be reflected on the model.
I have also been playing around with some little 3mm bulbs. It has been discovered that the chrome headlamps in the kit have a 2.5mm hole to accept the part representing the headlamp bulb. The actual bulb fits nicely and on a basic bench test, does a very promising job of illuminating the headlamp in a realistic manner. More on this later.
Personal opinion - I would definitely cut off all the original moulded-in nuts, bolts and fasteners, and replace them with machined metal items from RB Motion or Top Studio. At that scale you might even be able to use ME or BA fasteners. It will give a more engineered look to mechanical items.
Must admit I can’t clearly see whether you’ve done this or not already from the photos.
Must admit I can’t clearly see whether you’ve done this or not already from the photos.
dr_gn said:
Personal opinion - I would definitely cut off all the original moulded-in nuts, bolts and fasteners, and replace them with machined metal items from RB Motion or Top Studio. At that scale you might even be able to use ME or BA fasteners. It will give a more engineered look to mechanical items.
Must admit I can’t clearly see whether you’ve done this or not already from the photos.
I’d painted them silver, however comparison to the actual car shows this to be wrong. I had a look this morning, the front my gearbox appeared to be painted black, however a good majority of that paint is no longer present and it showing the bare metal instead. So the green will be going, on the gearbox at least. Must admit I can’t clearly see whether you’ve done this or not already from the photos.
An investigation through my paint stash has revealed a fair few are beyond hope, dried up and useless. I suppose it’s been a few years since I last launched into a mega project like this. As such, I’m awaiting for some fresh stock to arrive in the post, along with a few other bits such as a new selection of brushes, tapes and so on. Either way the gearbox will be painted up to look like fresh metal, then given a coat of black, which will then be weathered back to the metal. Oil stains added, a bit of grim stuck to the oil... that’s more like it.
Muddle238 said:
dr_gn said:
Personal opinion - I would definitely cut off all the original moulded-in nuts, bolts and fasteners, and replace them with machined metal items from RB Motion or Top Studio. At that scale you might even be able to use ME or BA fasteners. It will give a more engineered look to mechanical items.
Must admit I can’t clearly see whether you’ve done this or not already from the photos.
I’d painted them silver, however comparison to the actual car shows this to be wrong. I had a look this morning, the front my gearbox appeared to be painted black, however a good majority of that paint is no longer present and it showing the bare metal instead. So the green will be going, on the gearbox at least. Must admit I can’t clearly see whether you’ve done this or not already from the photos.
An investigation through my paint stash has revealed a fair few are beyond hope, dried up and useless. I suppose it’s been a few years since I last launched into a mega project like this. As such, I’m awaiting for some fresh stock to arrive in the post, along with a few other bits such as a new selection of brushes, tapes and so on. Either way the gearbox will be painted up to look like fresh metal, then given a coat of black, which will then be weathered back to the metal. Oil stains added, a bit of grim stuck to the oil... that’s more like it.
Dr Gn - indeed, most likely I’ll go for the painted fasteners option, as that’s accurate to my own engine, although weathering may well reveal some to have “lost” their paint. Some artistic licence will be required however, as mine isn’t quite the same engine as the kit, certain things are in different places and also a few components are completely different; air filter assembly for example.
Drawweight - £150 may have been what I paid for this on the Bay several years ago, I can’t be completely sure however. That being said, to purchase one complete as a finished model would be many hundreds of pounds, so I consider it good value! Of course, there is the additional cost of materials, plus “extras”, metalwork, electrics, fabrics for the interior and so on.
Drawweight - £150 may have been what I paid for this on the Bay several years ago, I can’t be completely sure however. That being said, to purchase one complete as a finished model would be many hundreds of pounds, so I consider it good value! Of course, there is the additional cost of materials, plus “extras”, metalwork, electrics, fabrics for the interior and so on.
Progress update
Plenty of time consuming work on assembling and painting various bits. Good progress made on the engine and gearbox, the old BRG gloss from a few years ago has now been completely repainted. Most of my efforts have so far have been concentrated on the gearbox, the whole thing was painted silver using a knackered brush and stippled on to give a cast texture. This is to represent the basic metal casting, second step was to brush paint in a satin black, allowed to cure until just touch-dry, before being gently worked off using a cotton bud damp with white spirit.
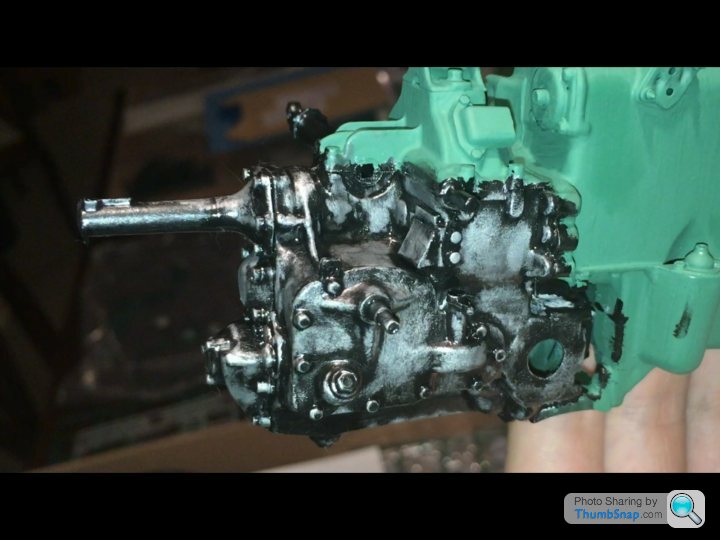
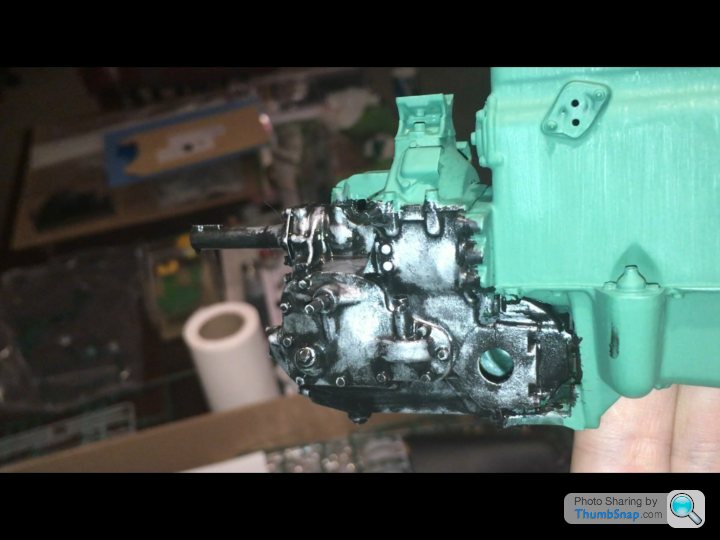
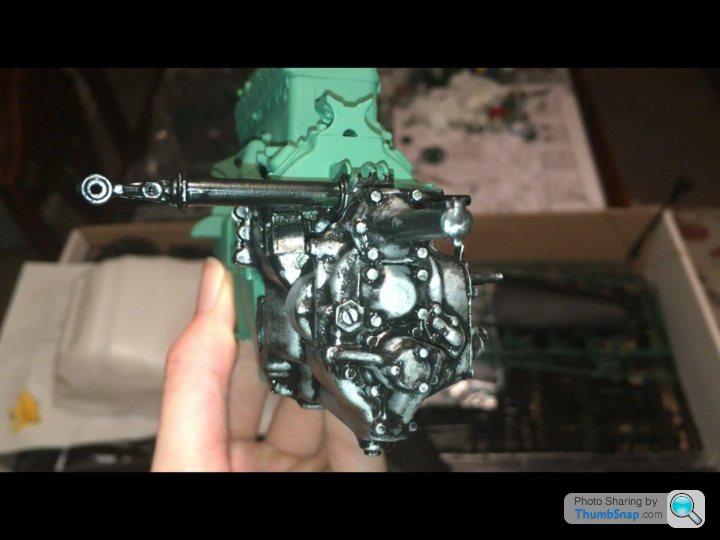
Apologies for the photo quality, or lack of, they were taken via phone cam. Don’t look too much into the colour on the block yet, plenty of work to go on that bit yet.
There’s a brown wash still to go on the gearbox, grime to be added plus some further detailing. However I’m quite pleased with the way the main gearbox casing has turned out, certainly looks more metal-like than the plastic that it really is. Inevitably it’ll all be hidden eventually anyway.
Plenty of time consuming work on assembling and painting various bits. Good progress made on the engine and gearbox, the old BRG gloss from a few years ago has now been completely repainted. Most of my efforts have so far have been concentrated on the gearbox, the whole thing was painted silver using a knackered brush and stippled on to give a cast texture. This is to represent the basic metal casting, second step was to brush paint in a satin black, allowed to cure until just touch-dry, before being gently worked off using a cotton bud damp with white spirit.


Apologies for the photo quality, or lack of, they were taken via phone cam. Don’t look too much into the colour on the block yet, plenty of work to go on that bit yet.
There’s a brown wash still to go on the gearbox, grime to be added plus some further detailing. However I’m quite pleased with the way the main gearbox casing has turned out, certainly looks more metal-like than the plastic that it really is. Inevitably it’ll all be hidden eventually anyway.
Gassing Station | Scale Models | Top of Page | What's New | My Stuff


