'84 Tamiya Frog Re-commissioning / Upgrading
Discussion
Thought I’d start a separate thread for my ’84 Tamiya Frog, and a few minor mods I’m making. These first images have probably been posted in various other threads before, but whatever. There might be some useful info for anyone wanting to run a vintage RC car after many years.
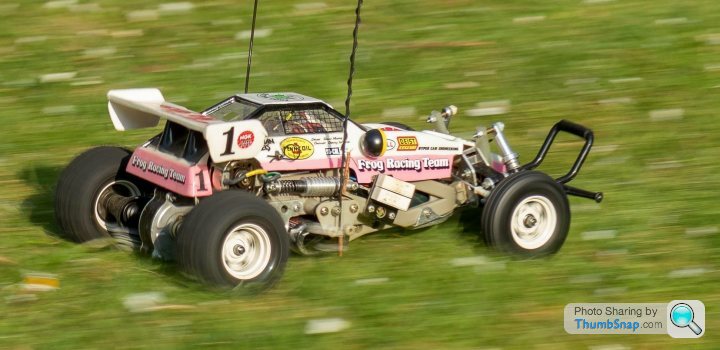
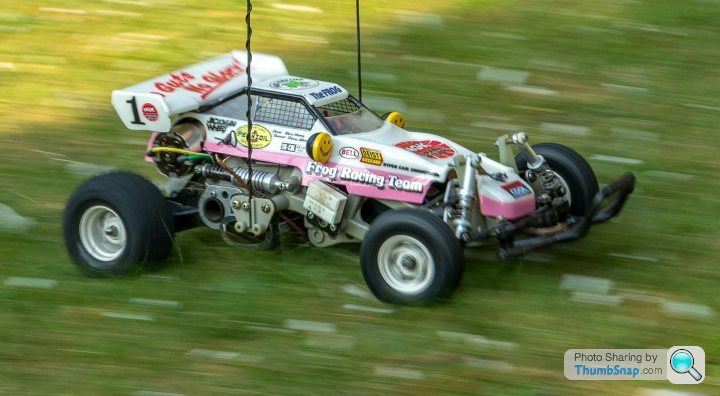
It’s been a shelf queen for 30-odd years, but lockdown has prompted me to fiddle with it. First thing I bought were new standard tyres – really to make it look nice on the shelf. However, once fitted they looked so nice I couldn’t resist trying it out again:
Battery:
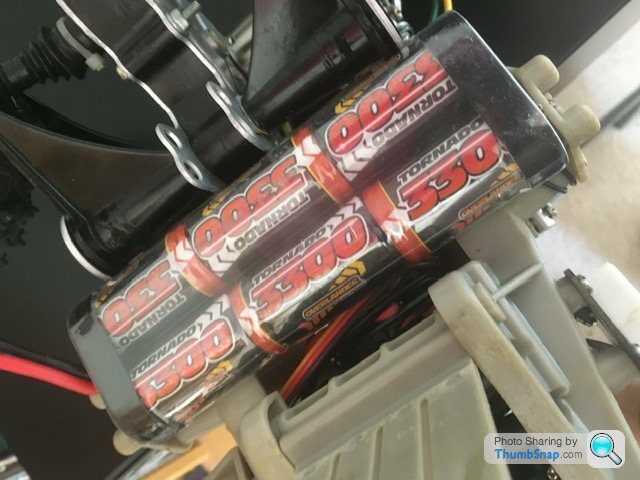
I fitted an Overlander 3300 NiMh battery, and it ran fine. Originally it had a 1200 mAH hump pack Tamiya NiCd. Strange thing is I’m still only getting about 20 minutes’ run time. I tried a 5000 mAH pack from my son’s Mad Bull, but it required some spacers to be installed on the side holders. It seemed a bit heavy, and it was while running with this pack that I snapped a rear trailing arm. The 3300 battery could really do with some spacers to make it a better fit - it rattles about a bit:
Suspension:
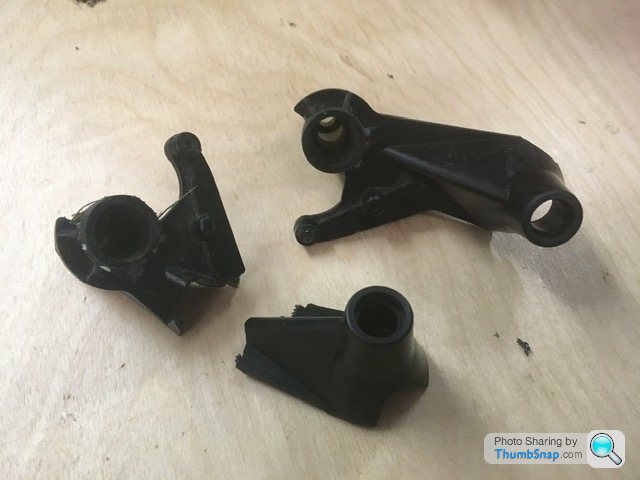
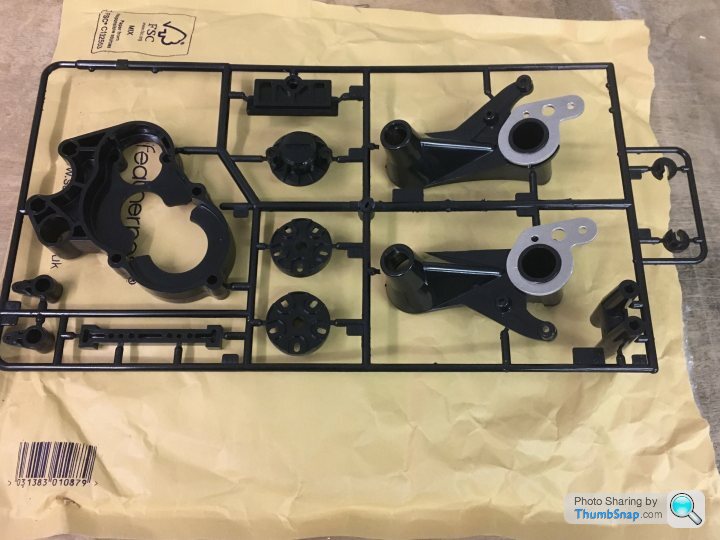
The original plain ABS on aluminium suspension bearings were very worn., so the broken arm was a blessing in disguise.Time Tunnel Models supplied a new set, and their aluminium carriers. The suspension is now much smoother, and the ride height restored to what it should be. BTW the front shocks were an original upgrade from MRP I fitted back in the day. I think I got them from an advert in Radio Race Car Magazine:
Steering:
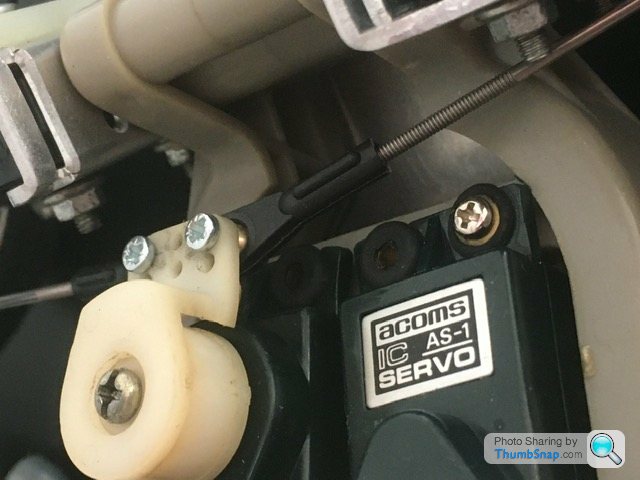
Even when new, the steering was very loose, mainly in the kingpin department. I’m going to address that by making some non-standard bushes, but in the meantime I’ve fitted decent ball joints to the servo end, instead of the bent metal rod ends:
Electronics:
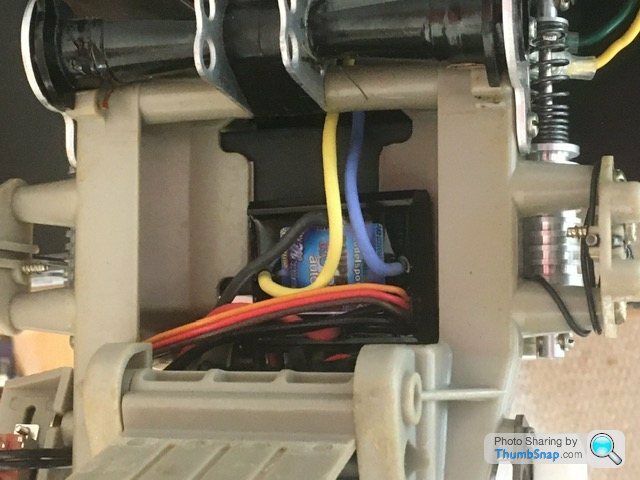
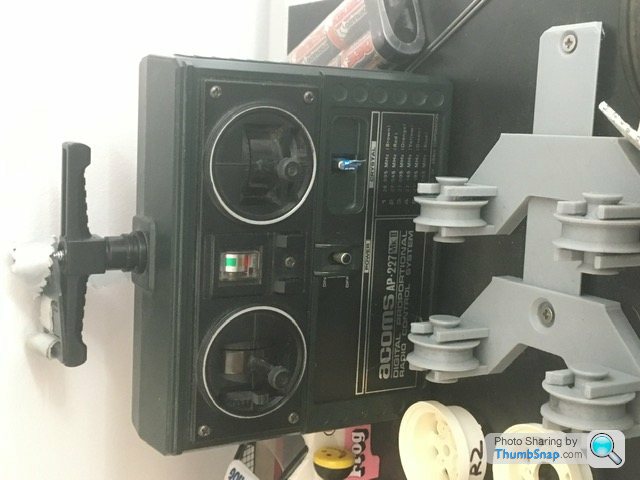
I’ve fitted a Viper ESC, to eliminate the Rx battery pack, 3-step controller and its servo. The originals are still in place for the retro look. The ESC fits above the battery with loads of room to spare. I’m also keeping the original Acoms AP227 Rx and Tx. The ESC control plug needed the polarity switching to be compatible – an easy job by swapping pins. The ESC works very well, but I’ve not had a full battery through it yet, so can’t comment on battery life:
Cosmetics:
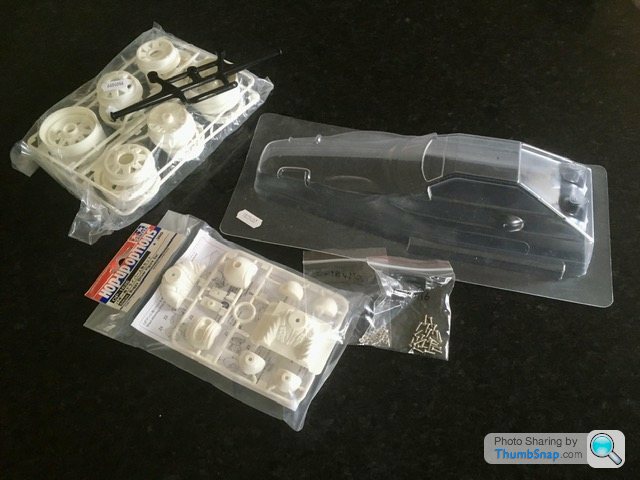
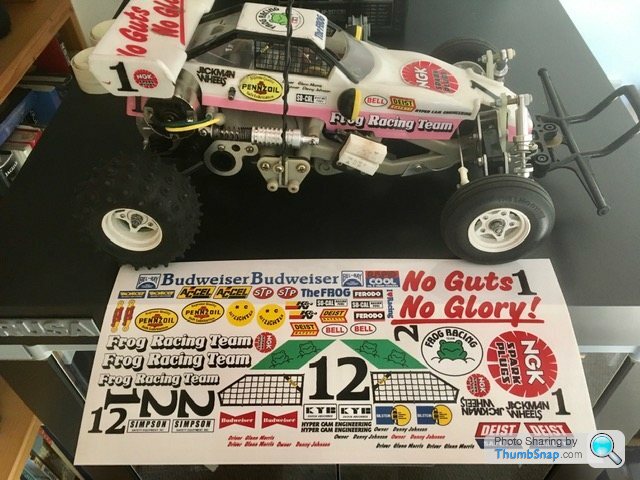
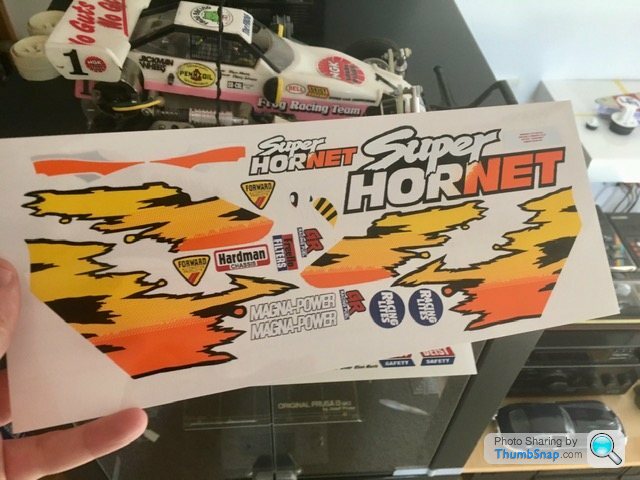
I wanted to keep the original body safe, and also run it on the drive, so I got a new body for running, and a set of Tamiya Subaru Brat wheels. Tyres are on back order; I think it will look better with the wider front tyres. I’ll also fit a driver head after painting it. I’ll end up using Tamiya PS spray cans because I believe the PC pots are no longer made. Got some original spec. stickers from MCI racing in Canada. The only difference seems to be the lack of Tamiya logos, but luckily I've got some spare originals. For some reason they also sent a set of Super Hornet decals:
The bumper was non-original to start with. It was pretty worn, so I got a new one. The original was shorter, and round section. Unavailable for decades I believe. I’ve read some Tamiya forums, and the variation in parts over the years is unbelievable, as are the lengths some people go to, to retain original specs. I considered getting a re-release Frog, but in the end couldn’t justify yet another toy, especially a duplicate.
Still waiting for some stuff on back order, but so far so good.
It’s been a shelf queen for 30-odd years, but lockdown has prompted me to fiddle with it. First thing I bought were new standard tyres – really to make it look nice on the shelf. However, once fitted they looked so nice I couldn’t resist trying it out again:


Battery:
I fitted an Overlander 3300 NiMh battery, and it ran fine. Originally it had a 1200 mAH hump pack Tamiya NiCd. Strange thing is I’m still only getting about 20 minutes’ run time. I tried a 5000 mAH pack from my son’s Mad Bull, but it required some spacers to be installed on the side holders. It seemed a bit heavy, and it was while running with this pack that I snapped a rear trailing arm. The 3300 battery could really do with some spacers to make it a better fit - it rattles about a bit:

Suspension:
The original plain ABS on aluminium suspension bearings were very worn., so the broken arm was a blessing in disguise.Time Tunnel Models supplied a new set, and their aluminium carriers. The suspension is now much smoother, and the ride height restored to what it should be. BTW the front shocks were an original upgrade from MRP I fitted back in the day. I think I got them from an advert in Radio Race Car Magazine:


Steering:
Even when new, the steering was very loose, mainly in the kingpin department. I’m going to address that by making some non-standard bushes, but in the meantime I’ve fitted decent ball joints to the servo end, instead of the bent metal rod ends:

Electronics:
I’ve fitted a Viper ESC, to eliminate the Rx battery pack, 3-step controller and its servo. The originals are still in place for the retro look. The ESC fits above the battery with loads of room to spare. I’m also keeping the original Acoms AP227 Rx and Tx. The ESC control plug needed the polarity switching to be compatible – an easy job by swapping pins. The ESC works very well, but I’ve not had a full battery through it yet, so can’t comment on battery life:


Cosmetics:
I wanted to keep the original body safe, and also run it on the drive, so I got a new body for running, and a set of Tamiya Subaru Brat wheels. Tyres are on back order; I think it will look better with the wider front tyres. I’ll also fit a driver head after painting it. I’ll end up using Tamiya PS spray cans because I believe the PC pots are no longer made. Got some original spec. stickers from MCI racing in Canada. The only difference seems to be the lack of Tamiya logos, but luckily I've got some spare originals. For some reason they also sent a set of Super Hornet decals:


The bumper was non-original to start with. It was pretty worn, so I got a new one. The original was shorter, and round section. Unavailable for decades I believe. I’ve read some Tamiya forums, and the variation in parts over the years is unbelievable, as are the lengths some people go to, to retain original specs. I considered getting a re-release Frog, but in the end couldn’t justify yet another toy, especially a duplicate.
Still waiting for some stuff on back order, but so far so good.
Got the body roughly cut out this morning; one of the few times I’ve used a Dremel on a model. It was great for final trimming to the cut lines:
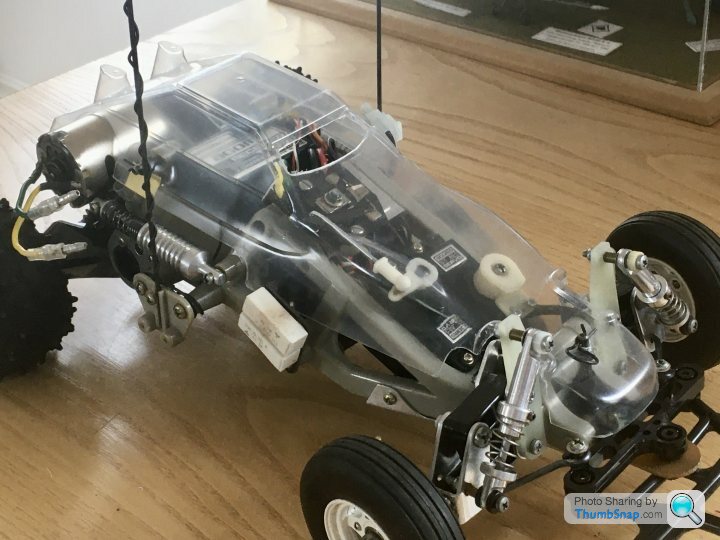
It looks cloudy because there’s a very thin protective film on the outside. I don’t remember it being on the original.
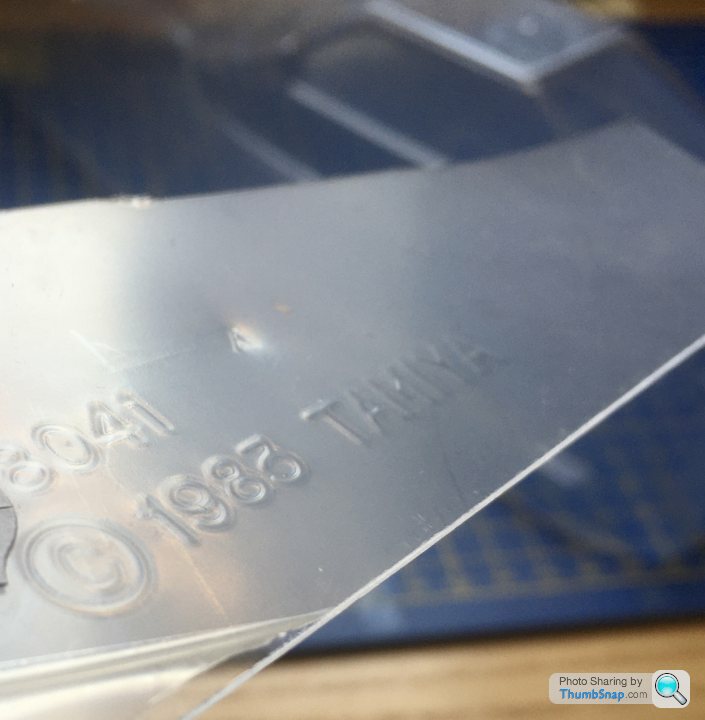
Looks like it’s from the original 1983 vac-form moulds, although the re-release ones like this don’t feature the pre-cut Rx switch holes. I never used mine because it meant you couldn’t fully remove the body, which seemed a bit daft.

I got half way through rebuilding one of these before other projects beckoned. I thought the same split of colours but a dark and light green combo might work, in the style of an actual frog.
Dr: If you want to run modern hex-drive buggy wheels there is an alloy Tamiya adapter available: Part nr 53913. I think you need long axles too, I can dig around and find the number later maybe - I used this on a Grasshopper and it really freshened the look.
Dr: If you want to run modern hex-drive buggy wheels there is an alloy Tamiya adapter available: Part nr 53913. I think you need long axles too, I can dig around and find the number later maybe - I used this on a Grasshopper and it really freshened the look.
generationx said:
I got half way through rebuilding one of these before other projects beckoned. I thought the same split of colours but a dark and light green combo might work, in the style of an actual frog.
Dr: If you want to run modern hex-drive buggy wheels there is an alloy Tamiya adapter available: Part nr 53913. I think you need long axles too, I can dig around and find the number later maybe - I used this on a Grasshopper and it really freshened the look.
Thanks - I've seen those adapters, but I think the Brat wheels will do, and at least it'll keep it Tamiya.Dr: If you want to run modern hex-drive buggy wheels there is an alloy Tamiya adapter available: Part nr 53913. I think you need long axles too, I can dig around and find the number later maybe - I used this on a Grasshopper and it really freshened the look.
AlexC1981 said:
There seems to be a lot going on under that body shell. The Frog looks more complicated than the bathtub chassis you get on later Tamiyas.
As you already have an original shell done in the box art paint and decal scheme, have you considered anything different for the new shell?
Yes, it's quite tightly packed in some areas, particularly the throttle linkage under the right hand bulge. I don''t think CAD was available in 1982, so someone did their measurements right...As you already have an original shell done in the box art paint and decal scheme, have you considered anything different for the new shell?
I believe the other 'official' scheme was what Generationx suggested: pale and dark green, split as per the pink and white. I think the built-up model in Beatties Sheffield had that scheme. I'm definitely sticking with white and pink though.
I painted mine yellow and white instead of pink and white. Picked it up from mum and dads a few months back with a view to getting it going again, but put it back when I remembered how floppy the steering and front suspension had got.
I replaced the rear wheels with something like the ones off the Fox, as I got sick of shredding the original soft spiky balloon tyres. It’s also got an additional body, made by TMS I think.
I’ve had a re-release Hotshot for ten years, that I’ve never got round to building, and a BNIB Tamiya RC Honda S2000 that I bought when I had my real one. Again, never got round to building that, and sold the real one years ago.
Sorry for the thread hijack, I’ll watch with interest and maybe get my Frog out again and set about restoring it.
The-Wanderer said:
I painted mine yellow and white instead of pink and white. Picked it up from mum and dads a few months back with a view to getting it going again, but put it back when I remembered how floppy the steering and front suspension had got.
I replaced the rear wheels with something like the ones off the Fox, as I got sick of shredding the original soft spiky balloon tyres. It’s also got an additional body, made by TMS I think.
I’ve had a re-release Hotshot for ten years, that I’ve never got round to building, and a BNIB Tamiya RC Honda S2000 that I bought when I had my real one. Again, never got round to building that, and sold the real one years ago.
Sorry for the thread hijack, I’ll watch with interest and maybe get my Frog out again and set about restoring it.
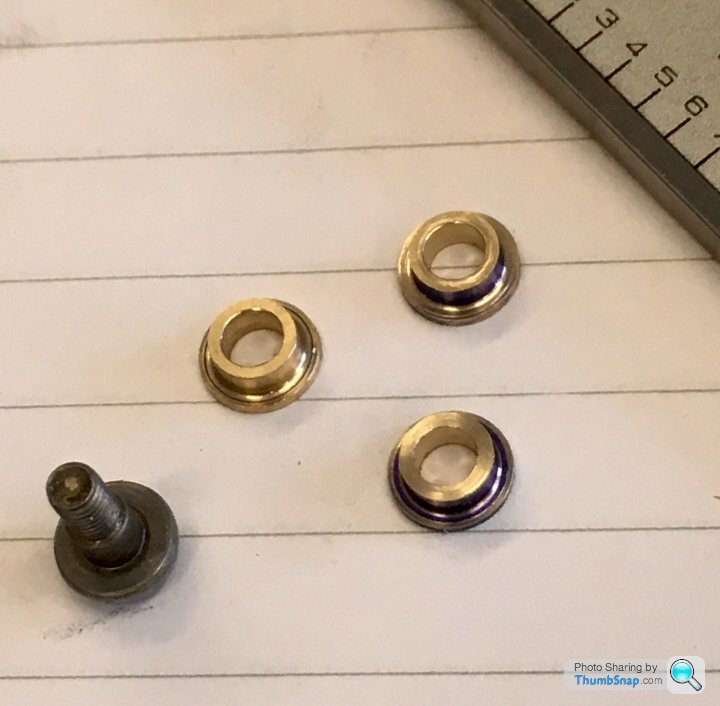
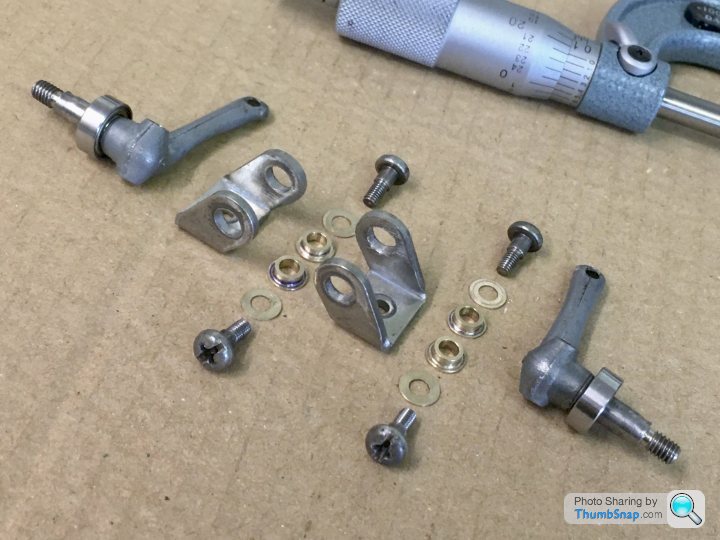
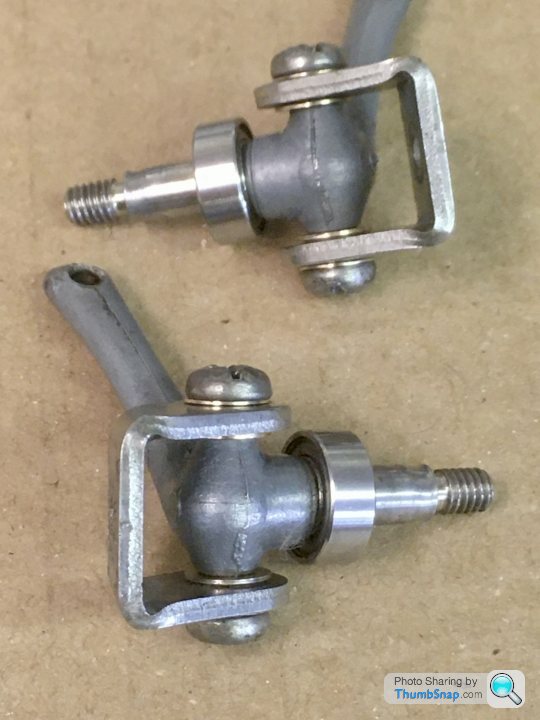
I’m working in the front suspension and steering now. I’ve fitted ball joints on the steering arms, and am machining some top hat bushes out of brass to take up the inherent play in the kingpins. The arms were new when I restored it, plus if the radius arms are adjusted right, it takes a lot of front to back movement out.I replaced the rear wheels with something like the ones off the Fox, as I got sick of shredding the original soft spiky balloon tyres. It’s also got an additional body, made by TMS I think.
I’ve had a re-release Hotshot for ten years, that I’ve never got round to building, and a BNIB Tamiya RC Honda S2000 that I bought when I had my real one. Again, never got round to building that, and sold the real one years ago.
Sorry for the thread hijack, I’ll watch with interest and maybe get my Frog out again and set about restoring it.
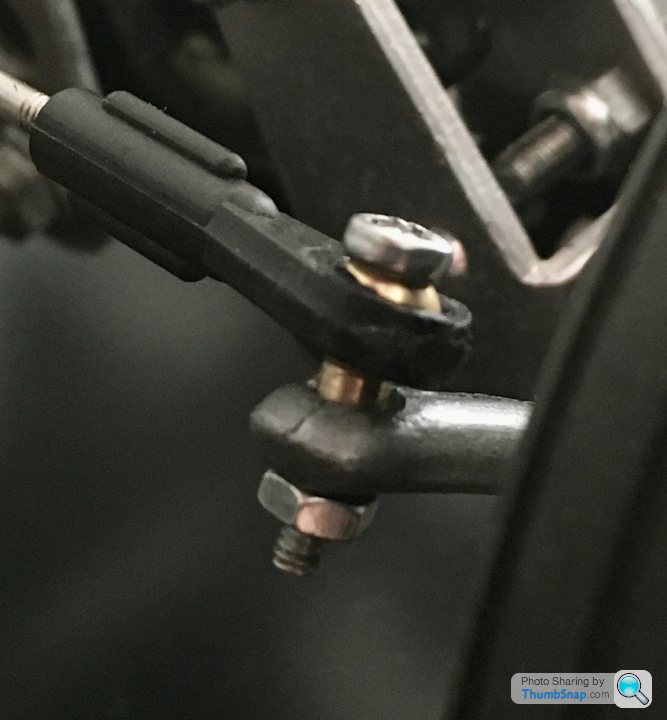
It became apparent why the servo ends of the steering arms were bent metal rather than ball joints. With uncompressed suspension the anhedral angle causes the ball joints to bind, especially towards full lock. I’ve made some small stepped spacers to fit into the steering arms to raise the balls and lessen the angle. All ok now:
The other thing which I forgot to mention was filling some worn holes in the ABS chassis with Araldite, and re-drilling to take out slop. Worked well, but don’t forget to plug the through holes with Blu-Tack, otherwise the epoxy will run straight through after a few minutes...

The other thing which I forgot to mention was filling some worn holes in the ABS chassis with Araldite, and re-drilling to take out slop. Worked well, but don’t forget to plug the through holes with Blu-Tack, otherwise the epoxy will run straight through after a few minutes...
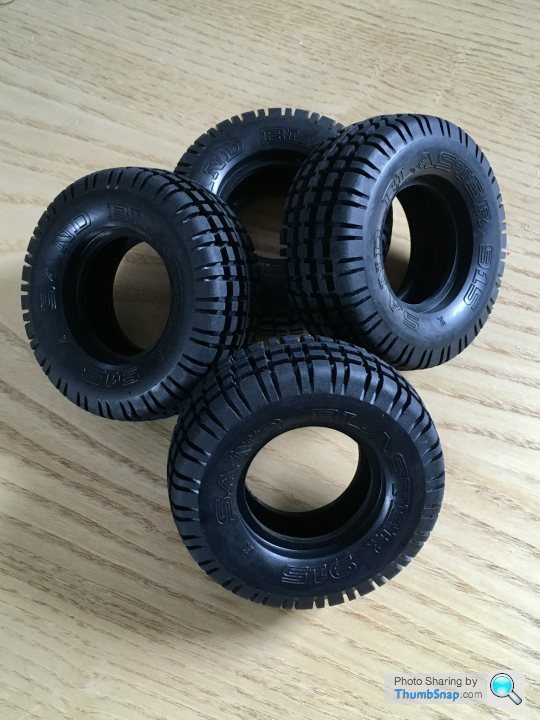
Got the tyres today:
So installed them and fitted the wheels:
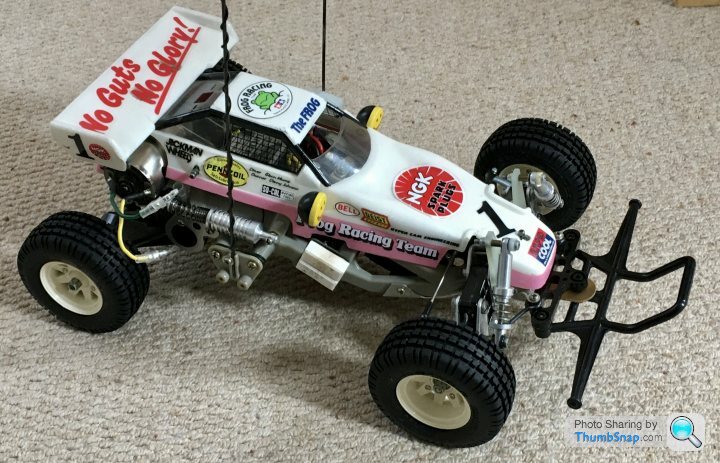
I like the look of the fronts, and the slightly higher front ride height:
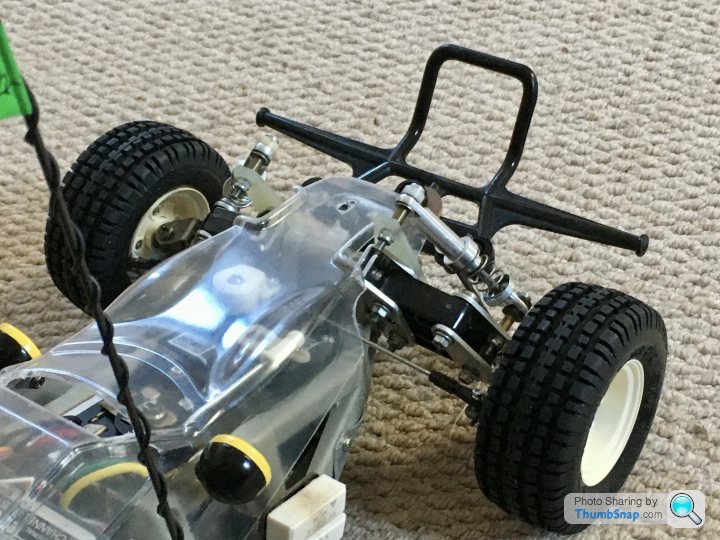
Shame the rears aren’t a tad wider, but there we go. One slight issue is that the dish on the fronts results in the inner edge of the tyres just touching the rubber bushes of MRP damper mounts on full lock. Luckily it’s easy enough to sort with a limit collar on the Tx (if it’s actually an issue), but could have been a show stopper.
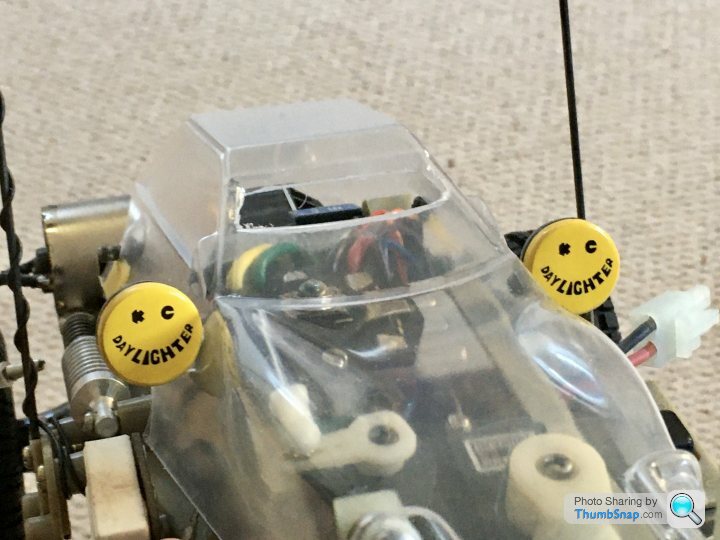
Also sprayed the lights and put the stickers on:

So installed them and fitted the wheels:

I like the look of the fronts, and the slightly higher front ride height:

Shame the rears aren’t a tad wider, but there we go. One slight issue is that the dish on the fronts results in the inner edge of the tyres just touching the rubber bushes of MRP damper mounts on full lock. Luckily it’s easy enough to sort with a limit collar on the Tx (if it’s actually an issue), but could have been a show stopper.
Also sprayed the lights and put the stickers on:

Rich135 said:
That is so cool. I loved the Frog when I was young but ended up with Hornet and then a Boomerang - I can't recall why I didn't get the Frog.
To be fair some of the engineering of it is pretty shoddy - lots of pressed metal and aluminium/ABS contact in the suspension, and the kingpins and upright bushings are a joke. I restored a Rough Rider years ago and the difference in quality was pretty stark. OK the Frog would out-perform a Rough Rider in pretty much every way, but I think it would be worn out much sooner. Still, sentimental value is a strange thing...So I ran the mildly upgraded spec. Frog today - overall it's great: I can run on all surfaces around the garden without wearing the tyres out. Even did a bit of drifting on dry leaves on the block paving. Also, the machined steering bushes mean it stays where you point it for the first time.
Strange thing is, IIRC back in the day I was getting about 15 - 20 minutes' run time from a 1200 mAh Tamiya hump pack. Today, I got 13 minutes, despite a 3300 mAh battery, ESC and ball races throughout. Even if my memory is totally wrong and I only got 10 minutes out of it previously, that should still equate to about 25 minutes just with the higher capacity battery. Something's not right. Any ideas?
Strange thing is, IIRC back in the day I was getting about 15 - 20 minutes' run time from a 1200 mAh Tamiya hump pack. Today, I got 13 minutes, despite a 3300 mAh battery, ESC and ball races throughout. Even if my memory is totally wrong and I only got 10 minutes out of it previously, that should still equate to about 25 minutes just with the higher capacity battery. Something's not right. Any ideas?
Possibly a daft question, but was the battery fully charged?
I recently bought some Overlander batteries and when I first tried them was disappointed in the run time. Put them on a smart charger fully for the first time and got a lot longer out of them.
I also suspect memory plays tricks on us, and wonder how much time you spent caning it today versus before...
Always impressed with your modelling threads.
You'd be horrified by my work on my old TA01 Lancia Delta. Found an old HPI Subaru shell - doesn't fit that well and the let's just say I should have tried the blue spray I found with the shell on some spare board first - 15yr old spray doesn't always keep! So I now have a largely silver (oddly that can worked perfectly), badly fitting Subaru body with blue spots
After a LOT of hammer from my 8yr old and I (LOTS of drifting on an effectively hard core drive, 4ft scale grass etc) a suspension arm let go and it threw a driveshaft. 20mins looking around the drive located the key bits (thankfully!)...found an old screw that looked roughly right and whacked it all back together for more hammer. Massively robust cars (8yr old managed to barrel roll it - Colin McRae would have been pleased) that are dead easy to fix
I'll treat the 2x Tamiya tanks that are next on the list with a little more care. It'll help that they don't travel at nuts speed (I must bought an uprated motor for the Lancia/now Subaru not long after buying it and it's a rocket!).
I recently bought some Overlander batteries and when I first tried them was disappointed in the run time. Put them on a smart charger fully for the first time and got a lot longer out of them.
I also suspect memory plays tricks on us, and wonder how much time you spent caning it today versus before...
Always impressed with your modelling threads.
You'd be horrified by my work on my old TA01 Lancia Delta. Found an old HPI Subaru shell - doesn't fit that well and the let's just say I should have tried the blue spray I found with the shell on some spare board first - 15yr old spray doesn't always keep! So I now have a largely silver (oddly that can worked perfectly), badly fitting Subaru body with blue spots

After a LOT of hammer from my 8yr old and I (LOTS of drifting on an effectively hard core drive, 4ft scale grass etc) a suspension arm let go and it threw a driveshaft. 20mins looking around the drive located the key bits (thankfully!)...found an old screw that looked roughly right and whacked it all back together for more hammer. Massively robust cars (8yr old managed to barrel roll it - Colin McRae would have been pleased) that are dead easy to fix

I'll treat the 2x Tamiya tanks that are next on the list with a little more care. It'll help that they don't travel at nuts speed (I must bought an uprated motor for the Lancia/now Subaru not long after buying it and it's a rocket!).
Murph7355 said:
Possibly a daft question, but was the battery fully charged?
I recently bought some Overlander batteries and when I first tried them was disappointed in the run time. Put them on a smart charger fully for the first time and got a lot longer out of them.
I also suspect memory plays tricks on us, and wonder how much time you spent caning it today versus before...
Always impressed with your modelling threads.
You'd be horrified by my work on my old TA01 Lancia Delta. Found an old HPI Subaru shell - doesn't fit that well and the let's just say I should have tried the blue spray I found with the shell on some spare board first - 15yr old spray doesn't always keep! So I now have a largely silver (oddly that can worked perfectly), badly fitting Subaru body with blue spots
After a LOT of hammer from my 8yr old and I (LOTS of drifting on an effectively hard core drive, 4ft scale grass etc) a suspension arm let go and it threw a driveshaft. 20mins looking around the drive located the key bits (thankfully!)...found an old screw that looked roughly right and whacked it all back together for more hammer. Massively robust cars (8yr old managed to barrel roll it - Colin McRae would have been pleased) that are dead easy to fix
I'll treat the 2x Tamiya tanks that are next on the list with a little more care. It'll help that they don't travel at nuts speed (I must bought an uprated motor for the Lancia/now Subaru not long after buying it and it's a rocket!).
Thanks, yes fully charged with a smart charger. It’s had about 5 charges altogether.I recently bought some Overlander batteries and when I first tried them was disappointed in the run time. Put them on a smart charger fully for the first time and got a lot longer out of them.
I also suspect memory plays tricks on us, and wonder how much time you spent caning it today versus before...
Always impressed with your modelling threads.
You'd be horrified by my work on my old TA01 Lancia Delta. Found an old HPI Subaru shell - doesn't fit that well and the let's just say I should have tried the blue spray I found with the shell on some spare board first - 15yr old spray doesn't always keep! So I now have a largely silver (oddly that can worked perfectly), badly fitting Subaru body with blue spots

After a LOT of hammer from my 8yr old and I (LOTS of drifting on an effectively hard core drive, 4ft scale grass etc) a suspension arm let go and it threw a driveshaft. 20mins looking around the drive located the key bits (thankfully!)...found an old screw that looked roughly right and whacked it all back together for more hammer. Massively robust cars (8yr old managed to barrel roll it - Colin McRae would have been pleased) that are dead easy to fix

I'll treat the 2x Tamiya tanks that are next on the list with a little more care. It'll help that they don't travel at nuts speed (I must bought an uprated motor for the Lancia/now Subaru not long after buying it and it's a rocket!).
The mind plays tricks indeed, which is why I also assumed 10 minutes run time. Ah well.
Sounds like you’re having lots of fun with your old cars - which is great.
300bhp/ton said:
I can’t see that runtime from a 1200 pack. Probably more like 5-8 mins.
It was an off-white colour, offset hump on top and a silver sticker underneath. Was that the capacity?Absolutely sure it was longer than five minutes. Even if it was only 8, that should give me 22 minutes on increased capacity alone, not considering the ball races and eliminating the electric fire spec. resistors. I’m still at about half that run time. It is deceptive - on the first run a few weeks back I thought it was about 20 minutes, but actually timing it today, it’s less. Mostly on block paving too, not grass.
dr_gn said:
It was an off-white colour, offset hump on top and a silver sticker underneath. Was that the capacity?
Absolutely sure it was longer than five minutes. Even if it was only 8, that should give me 22 minutes on increased capacity alone, not considering the ball races and eliminating the electric fire spec. resistors. I’m still at about half that run time. It is deceptive - on the first run a few weeks back I thought it was about 20 minutes, but actually timing it today, it’s less. Mostly on block paving too, not grass.
When I started racing we used 1700mAh NiCd packs. It was a struggle to get 5 mins with them. Albeit with modified motors most of the time. A much smaller pack, even on a stock motor 27 turn motor is going to have limited runtime.Absolutely sure it was longer than five minutes. Even if it was only 8, that should give me 22 minutes on increased capacity alone, not considering the ball races and eliminating the electric fire spec. resistors. I’m still at about half that run time. It is deceptive - on the first run a few weeks back I thought it was about 20 minutes, but actually timing it today, it’s less. Mostly on block paving too, not grass.
Also NiCd are very memory prone, so may not fully charge. And it is really all about current. Capacity of a battery will be done usually at a low amp draw. If you are exceeding this, then you may find larger batteries may not always produce better runtimes if their amp draw capability is lower.
Is your new battery NiMh? It may take several cycles to get it working well. They will often false peak when charging. LiPo will give much better results overall.
Gassing Station | Scale Models | Top of Page | What's New | My Stuff


