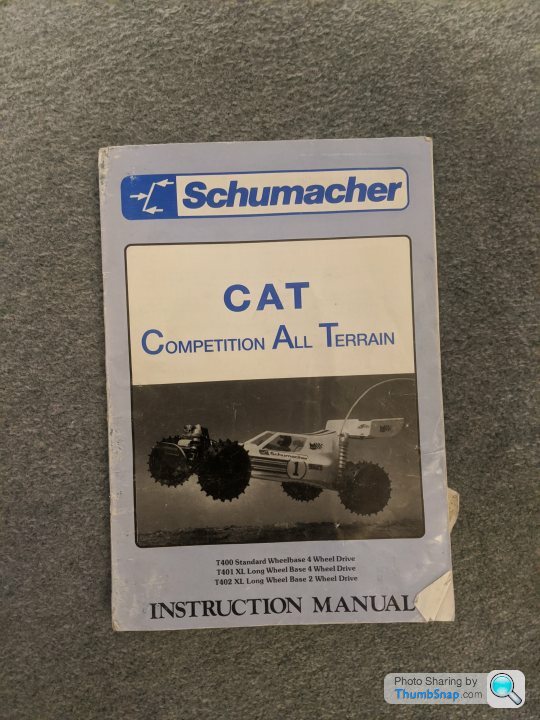
Schumacher CAT XLS build
Discussion


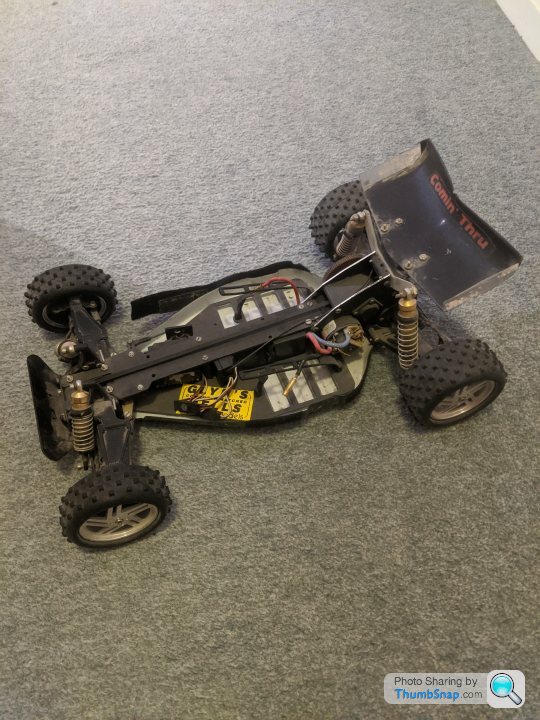
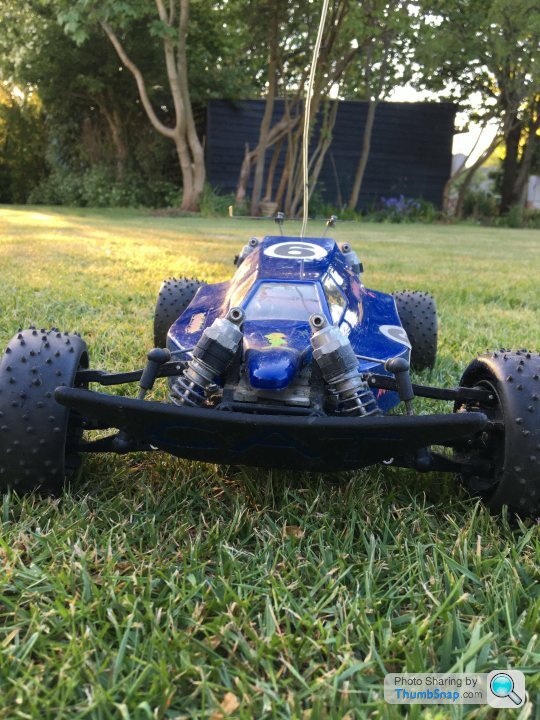
So following on from the "What 4wd buggy" thread, this arrived this morning....
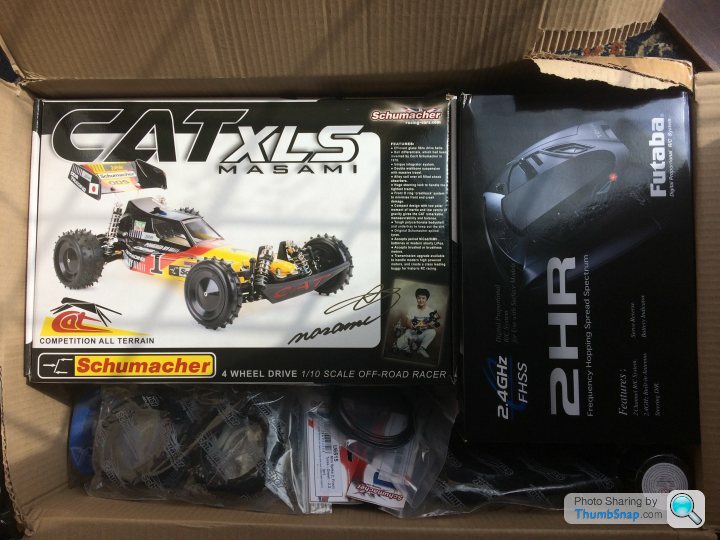
Needed another radio set after donating my old Acoms set to my son.
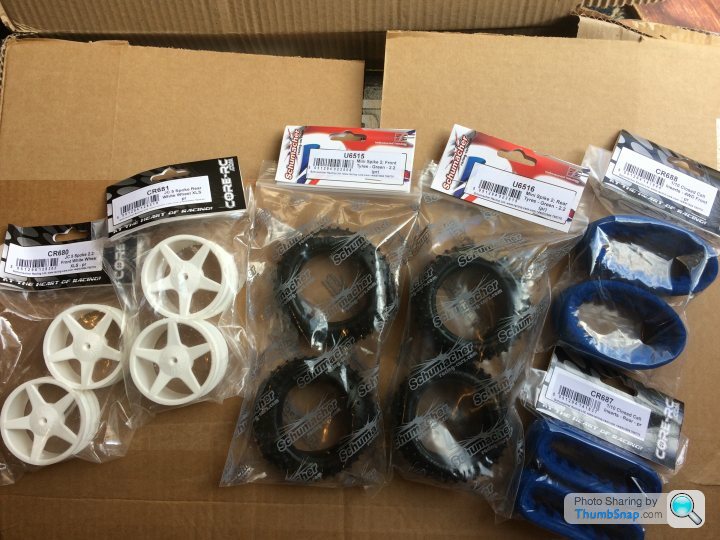
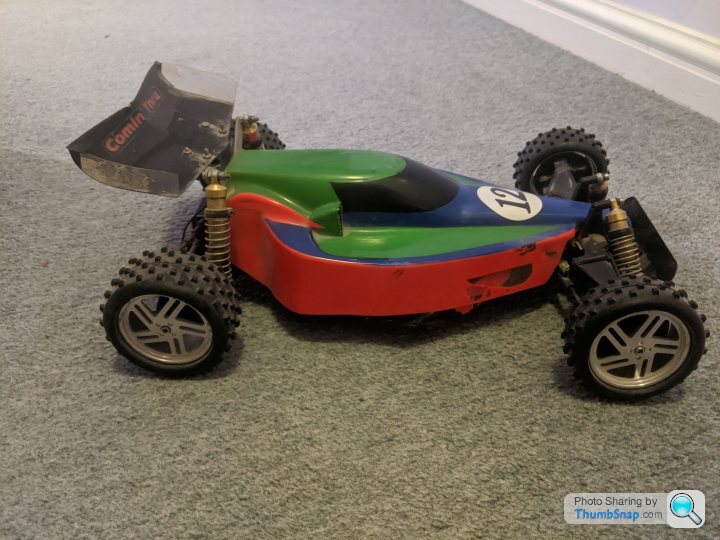
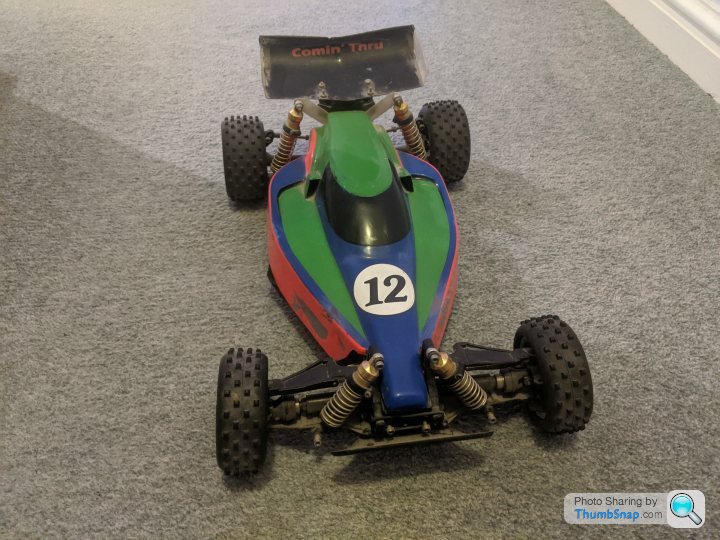
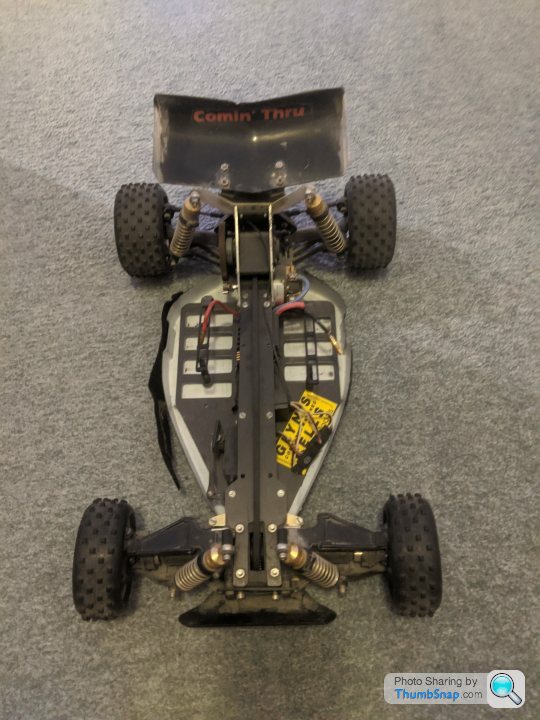
Added a set of more modern 2.2" wheels with suitable tyres so I can keep the 2" spikes for show:
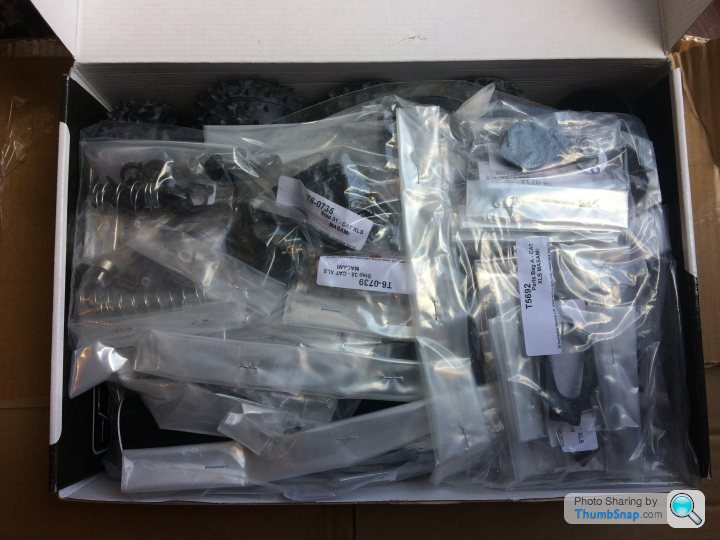
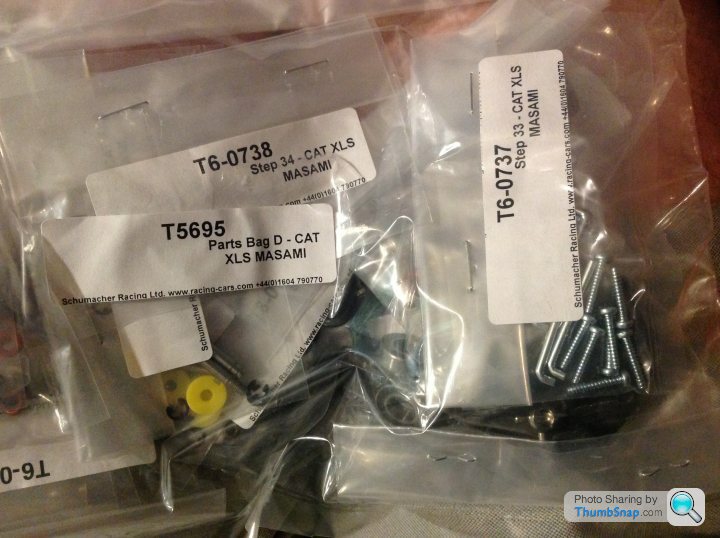
Kit box is so full it bulges and all the bits are individually bagged, somewhat different to a Tamiya RC kit!
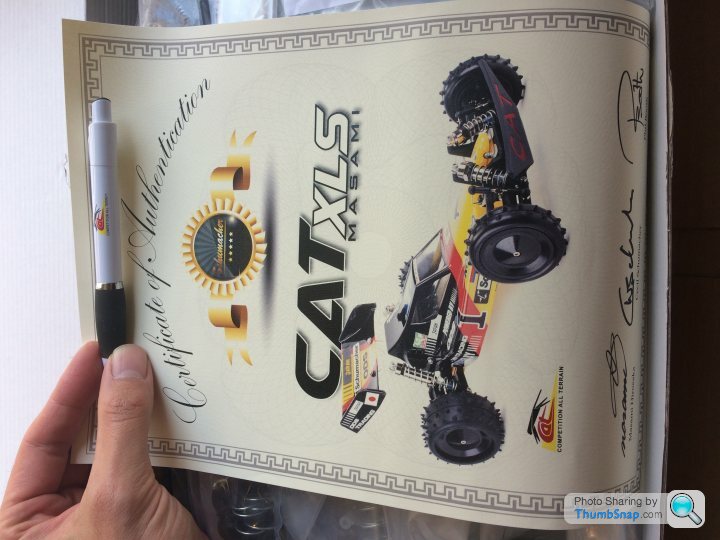
Nice additions are a Schumacher CAT branded pen and a Certificate of authenticity in a carboard tube
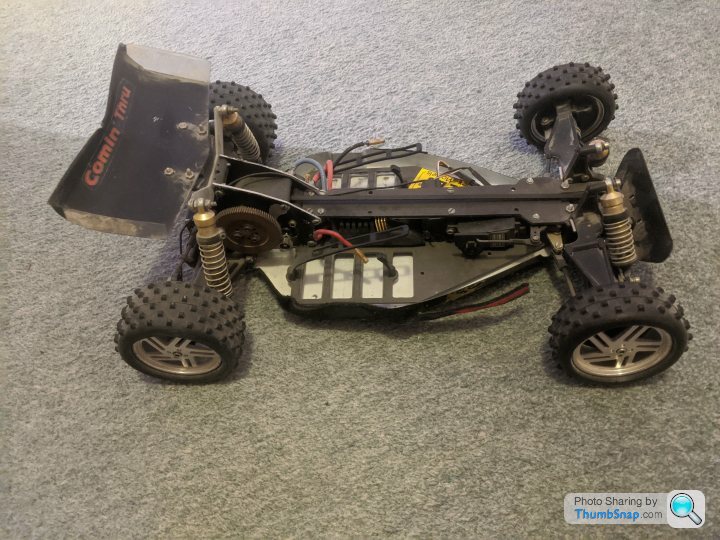
Will be building it up with the electronics from one of my old touring cars. Not quite period correct but still 20 years old!
Trinity D4 Copperhead 12x2 mod motor, KO Propo FET servo and a MRT VTrac ESC. Won't be crazy brushless fast but was decent kit back in the day. I have a Hitec metal geared servo back at my parents somewhere if the KO servo proves to be unsuitable, I remember them being slightly fragile. Looks like you can still get spare gear sets though.


Needed another radio set after donating my old Acoms set to my son.
Added a set of more modern 2.2" wheels with suitable tyres so I can keep the 2" spikes for show:
Kit box is so full it bulges and all the bits are individually bagged, somewhat different to a Tamiya RC kit!
Nice additions are a Schumacher CAT branded pen and a Certificate of authenticity in a carboard tube
Will be building it up with the electronics from one of my old touring cars. Not quite period correct but still 20 years old!
Trinity D4 Copperhead 12x2 mod motor, KO Propo FET servo and a MRT VTrac ESC. Won't be crazy brushless fast but was decent kit back in the day. I have a Hitec metal geared servo back at my parents somewhere if the KO servo proves to be unsuitable, I remember them being slightly fragile. Looks like you can still get spare gear sets though.
badgerade said:
Oh dear I feel a purchase coming on! I used to lust after these in RC model magazines when I was a teenager..
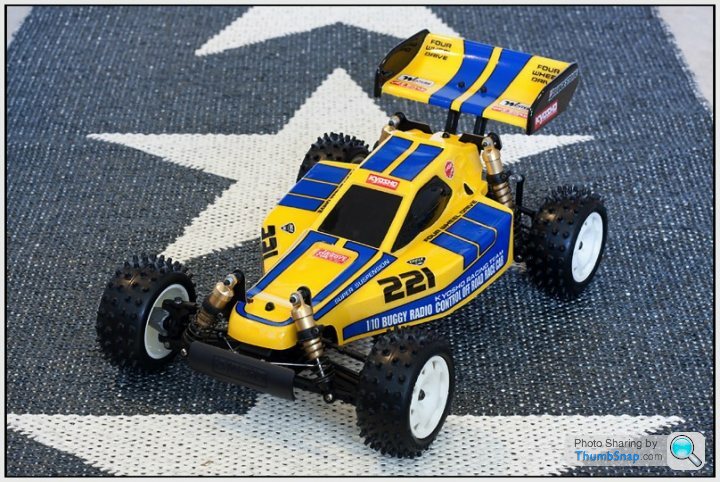
I remember Schumacher always seemed to clean up at National and International comps, the best I got to was a Kyosho Optima Mid, which was a huge leap forward from by first Tamiya BoomerangFirst impressions- this is going to be a very different build experience to the Tamiya buggy I've just made! Very complex in comparison but that's a good thing imo.
Lots of tiny bearings, c-clips, metal pins, rubber sealed ball races and more drilling, gluing, soldering and thread-locking. Alloy shock bodies are beautifully machined and the gearbox side plates are machined rather than stamped like the originals.
Contrary to some reviews the shell does have overspray film on so that's a bonus. Need to decide on colours quick as the lexan undertray is one of the first things to install.
lufbramatt said:
First impressions- this is going to be a very different build experience to the Tamiya buggy I've just made! Very complex in comparison but that's a good thing imo.
Lots of tiny bearings, c-clips, metal pins, rubber sealed ball races and more drilling, gluing, soldering and thread-locking. Alloy shock bodies are beautifully machined and the gearbox side plates are machined rather than stamped like the originals.
Contrary to some reviews the shell does have overspray film on so that's a bonus. Need to decide on colours quick as the lexan undertray is one of the first things to install.
I don't recall it being a particularly big deal to remove it from an assembled car though, just a few screws in the underside and the upper chassis holds it all together while you have it apart..Just be a bit careful. It was always the prongs of the lower chassis that hold the front gearbox that broke so chassis changes were not uncommon repairs. Quite often the whole car would get stripped and rebuilt on a Sunday morning ready for afternoon racing. A race in itself with many an argument over Sunday lunch being dished up. Its all fairly easy once you get to know where things go and all the threads are tapped etc. Universal Joints were always a bLots of tiny bearings, c-clips, metal pins, rubber sealed ball races and more drilling, gluing, soldering and thread-locking. Alloy shock bodies are beautifully machined and the gearbox side plates are machined rather than stamped like the originals.
Contrary to some reviews the shell does have overspray film on so that's a bonus. Need to decide on colours quick as the lexan undertray is one of the first things to install.
 h though with the little fibreglass tool which was next to useless at anything but tearing up your hand.
 and pay lots of attention to the rear gearbox. Ok so it was an early original SWB I started with but initial build was really tight and performance was dire and hugely disappointing the first time out. but some rebuild tweaking and it flew.
Mind you it's about 30 years since i last wrenched on one so maybe a pinch of salt needed.
Edited by 8.4L 154 on Tuesday 5th May 22:12
Good man Matt! If you get into a CAT mindset the build won’t be too tricky, as said above once you know one it can be rebuilt in no time, I’d have my original stripped and rebuilt in the evening after a days racing. I’m thinking hard now what might trip you up ........ you’ll need really fine circlip pliers for the dampers. When you solder the balls onto the front anti roll bar use a helping hand to hold the bar vertically and rest it on something insulating (the fibreglass UJ tool) - then the solder will fill the ball and stop it sliding down the bar as it cools. If you can find an original set of instructions follow them - the Masami edition ones have some odd sequences at times! Have you watched the clip on YouTube of Cecil explaining his design thinking when he built the original?

Great to see another XLS on the way on PH.
My tip would be to leave off the undertray until the end - it is easy enough to do later, and gives you more practice with the annoying long screws that hold the front gearbox in place, sandwiching about 8 layers of bits that don’t want to line up :-)
You should also install the steering to the upper chassis deck BEFORE you fit the top deck in place. Pay attention to the clearance of the plastic steering parts; some filing is needed so you can tighten the screws against the metal inserts without binding up the plastic cranks.
Weirdly, I had no problem at all fitting the universals, when I remember it being agony back in the 80s with the same fibreglass tool. I heard the plastics may be a little more flexible now, or perhaps they’ve just printed much clearer instructions showing the technique. Anyway, it’s a doddle compared to finding suitably small circlip pliers to assemble the shocks...
Last tip: use a small blowtorch to solder the ends on to the anti roll bar. Loads easier than trying to do it with an iron.
72twink said:
Have you watched the clip on YouTube of Cecil explaining his design thinking when he built the original?
I'd love to understand the reasoning behind the overly complicated differential and rear pullybox arrangement. I think one of the first upgrades was to the aftermarket diff kit which looks similar to the pro upgrade nowAll these threads on the XLS also got me thinking about the integrator set-up. In addition to the complexity, I just don’t see how having the rear diff feed power to the integrator, that is then sat across the rear drive, means all can work as desired. Anyway, as above, they scrapped this with the next design, by making the original read diff solid and the integrator into the rear diff.
OP - a top tip for you. Because of the roller hubs on the front diff it’s vital you put the nut and bolt that passes through the diff (and therefore the diff output with the nut cut-out) the right way round. Get it wrong (as Dad/I did back in the day) means you can’t tension the diff as the roller hub will spin away. You then have to dismantle the uv joints and start over.
OP - a top tip for you. Because of the roller hubs on the front diff it’s vital you put the nut and bolt that passes through the diff (and therefore the diff output with the nut cut-out) the right way round. Get it wrong (as Dad/I did back in the day) means you can’t tension the diff as the roller hub will spin away. You then have to dismantle the uv joints and start over.

Good tips, thanks all. Was planning on using a blow torch for the roll bar ends.
Re. The integrator setup, I was having a think about this. I think it comes down to a couple of features he must have considered important- mainly being able to adjust the front:rear torque split. The integrator is averaging the speed of the two rear outdrives and allowing a degree of slip to vary the torque being sent to the front. It also means that you only need one set of reduction gearing between the layshaft and the axles, but can still keep the lower deck free to run a stick battery pack across as the drive belt runs under the chassis (a belt from the layshaft to the front diff would mean having to run saddle pack batteries, or adding another layshaft to run the belt at high level like a Tamiya tao3, heavy and draggy). Presumably the later drum diff setup means a locked 50:50 front rear torque split?
Whether or not it works as intended I'm not too fussed about, I think it's an interesting bit of design and part of the appeal of the kit :-)
Putting the diff in the spur gear meant that it only had to handle half the torque, the output is then geared up via the belt and the drive then intergrated to get drive to front diff - it was dropped because everyone struggled to set it up well. That said my Masami runs the pro drivetrain with solid layshaft and drum diff.
Don’t worry about the front diff bolt direction, you don’t get the one way shafts in this edition.
Don’t worry about the front diff bolt direction, you don’t get the one way shafts in this edition.
Gassing Station | Scale Models | Top of Page | What's New | My Stuff