Build choice for club contest? Help required!
Discussion
Tuesday 8th, week and a bit's time, Watford club night competition theme is "raffle build-ups". So, help me and chose which of these I've 'won' in club raffles over the years to build please!
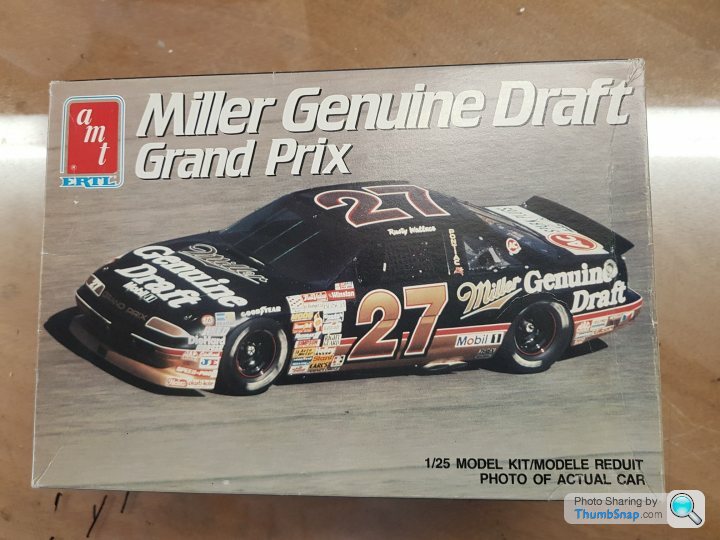
If there's such a thing, the Nascar actually looks good in the black and gold with the Pontiac nose, I'll definitely keep and make it rather than donate it back..
W124 is a bit simple, gappy and flat-fronted but the instructions show lots of emergency wagon combinations of red and white that appeal...decals are knackered though. Will have to break out letraset letters...Did contemplate a 2-tone met green "stance" style with "big inch rimz" but it deserves better.....or does it?
Cadillac is a keeper too and will companion a similar vintage v-16 previously built...even decided on colours...but, and prob a blessing in my case, the engine block is missing so will be keeping the bonnet shut and not bothering with any details under it...
Mustang GTO: Jon you're right, it is a much better kit in the plastic than the drastic box images portray. Decals unusable again so maybe a street or 'launch' look in purply-blue all over...so many bits though....
So chuffed to have got the Fall Guy pickup but it is generic and inaccurate as the hero truck. Short bed instead of long, wheels and tyres not that close, but it's Colt Seevers' truck and has to be done....just whether to fix the bed length or run with it as-is....this won't have an opening hood!
"Now, I'm not one to kiss and tell but I've been seen with Farrah..."
There's a squashed Esci Diablo not in the image that would take a week to get straight let alone build so that's not on the table!
All of them will need lots of corner cutting to finish in time but what's the verdict? I've canvassed our members via our FB page too and I really need to be off and running tomorrow, Sunday, afternoon....weather looks compliant from here!
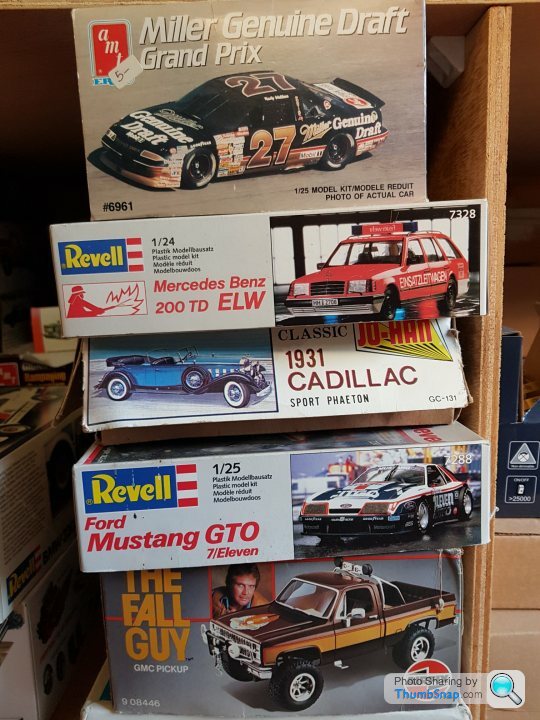

As you've mentioned it, It has to be this, doesn't it? https://www.autoblog.com/2019/05/17/german-police-...
With over-spray on my fingers and solvent fumes in my nostrils, here is the report from day one of last-minute-rushed-club-night-competition-entry-nascar-build:
Having joined the (Watford, WSMC) club soon after passing my driving test and now approaching 5-score, just through long-service I`ve been `lucky` enough to `win` several Nascar kits at club events over the decades....also many Corvettes...the second most passed-over models in all my fellow modellers` stashes behind the ubiquitous AMT Nascar kit.....so the contents of this one are pretty familiar. Where in the past I fell on my sword and selflessly built the Nascars `won` to prevent them returning to the merry-go-round of unloved plastic, in those instances I`d limited the effort required by building as `slammers` or `shelf-model`, i.e. hood glued shut to negate the need to build the engine, only the basic suspension parts used to simply locate the wheels as there`d be no effort put in to the undercarriage, interiors thrown together and sprayed entirely in black, none of that polished lacquer top-coat palaver...so they looked amateurish but jazzy and didn`t owe me much time. I`ve got a week to do better this time.
So the to the kit. Generic chassis and interior I believe shared with AMT`s other Nascars of the period (this one is Rusty Wallace`s 1990 Winston Cup car, I believe he won quite a bit around that time), GM small block, smooth body with lift off hood and trunk, rubber tyres, nice looking decals. Everything moulded in grey with lots of extra bonus plastic in the form of flash, safely protected by the intricate roll cage parts. A very good boxfull of parts.
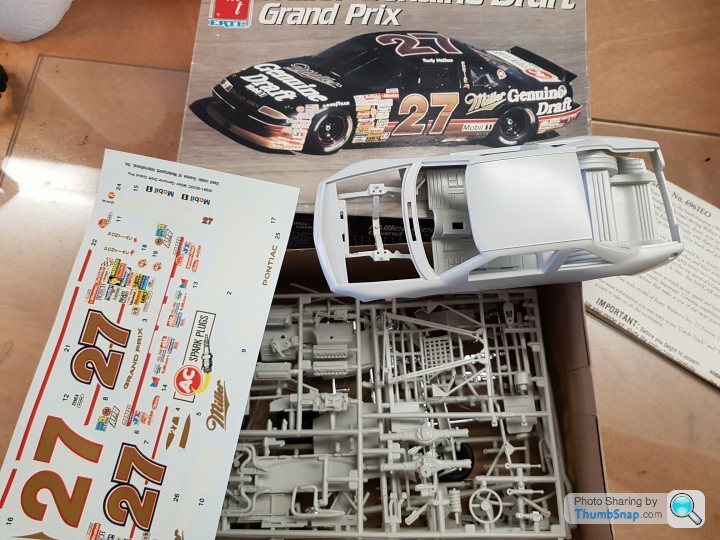
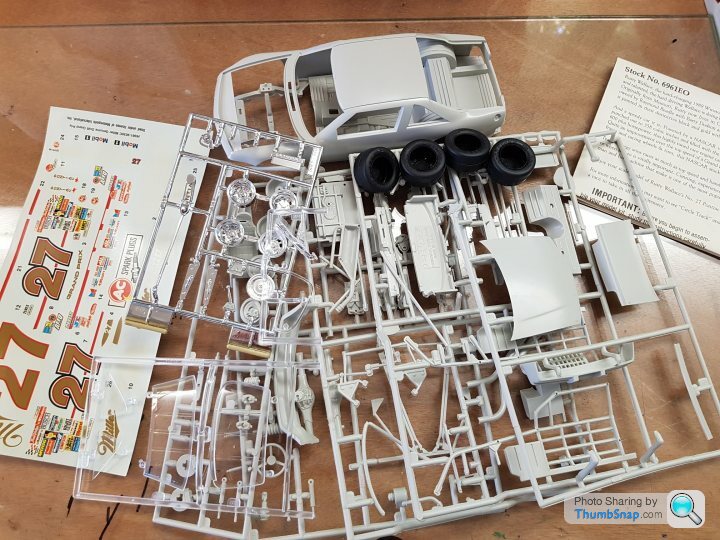
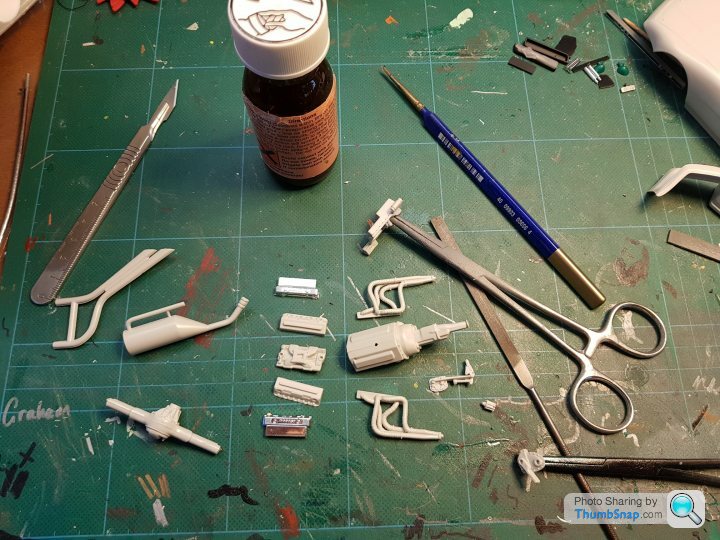
Instructions start with the engine and I thought I`d take the hint and get in to it on familiar ground. I`ve built more V8s than you can shake a long cam at, flat sixes a-plenty, V12s, a V16, screaming turbo 4-cylinders.....Block and `box called out as a steel colour and heads and manifold aloooominum so tried something new and solvented block halves then used this as a jig to solvent heads and manifold together as a sub-assembly so both can be painted separately then brought together after paint. I solvented some of the other obvious 2-part assemblies at the same time so they can cure off; rear axle halves, rad halves, exhaust and tips etc...
I should have said before, I don`t airbrush and aerosol as much as poss before detailing by hand. Halfords, Tamiya, Humbrol, those odd ones you see in B&Q...
So engine parts and sub-assemblies built/prepared by colour and sprayed separately. Humbrol brushed steel metalcote, Halfords aluminium, Valspar bright silver etc
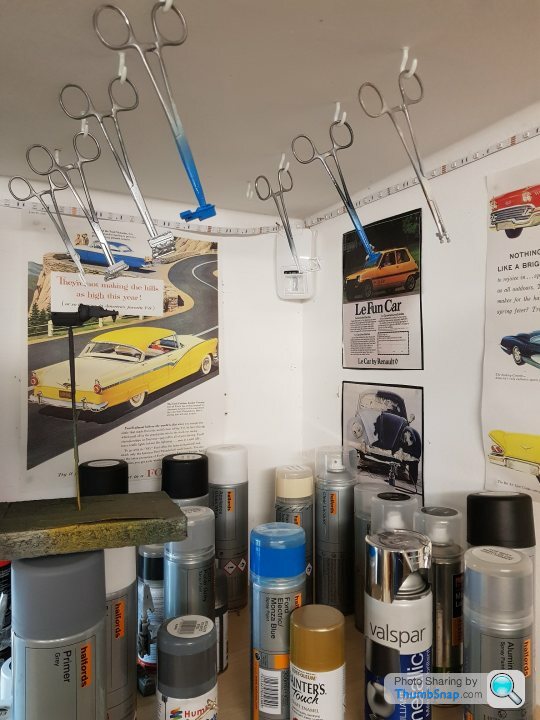
Sump and waterpump called out in `blue`...so just used the nearest I had. Blue is a bit Ford I thought....and I used a Ford colour...
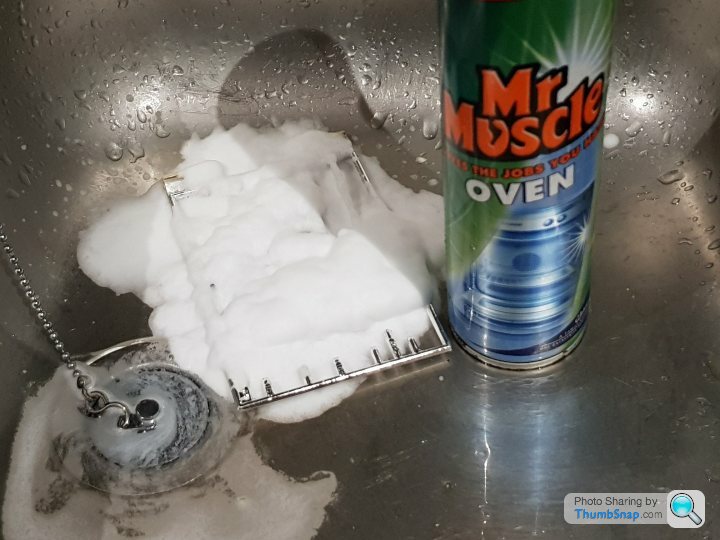
Nearly tea time so came in from the shed to strip chrome parts with MrMuscle spray oven cleaner in the sink. Just a couple of minutes and the chrome is gone, alas also from the rear view mirror I didn`t spot on the runner....no worries though. Like it matters.... AMT`s chrome is always a bit thick but so I like to get back to the crisp plastic before painting. Wheels need to be black and the jack is not going to be chrome!
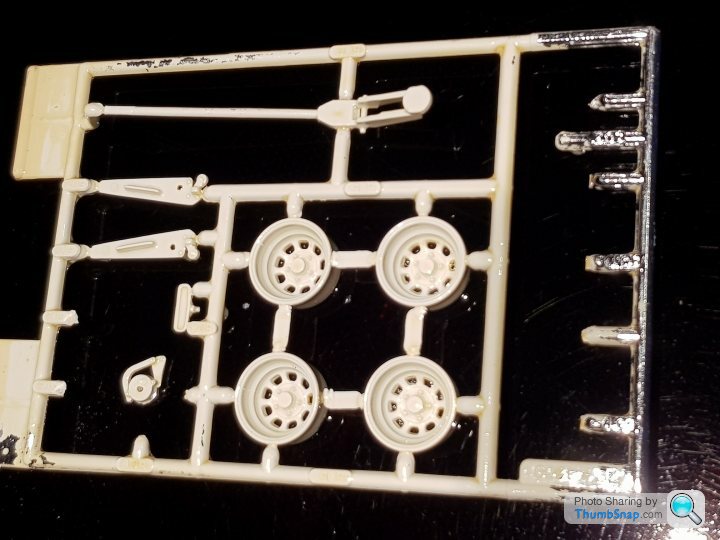
Needed to run a sharp pointy blade around all the wheel openings to clear flash but they look so much sharper naked.
Very little danger of sanding off body detail, the only sharp bits are the hood pins! Ah, the joy of working a bar of soap...the usual mould seam removal still required of course but one can sand with a little less care than usual without fear of losing something important! Front and rear bumpers needed to be fixed on and after needle-filing edges straight and true, especially around tool-split lines, they fitted fine. I chose to hold in-place and smear superglue along the inside join with a curved scalpel blade. Bit of a tidy up with a file behind the rear bumper as it`ll be seen with the trunk lid off, but the front seam should be out of sight. No need to go mad and fill and blend the seams on the outside as the whole thing is black, a convenient colour to lose and small gaps...plus blending the rear bumper corners by filing them down to the body would break through it`s moulded thickness and I`m not about to get the filler out to build the body out..hood and trunk lid will forever be separate of course.
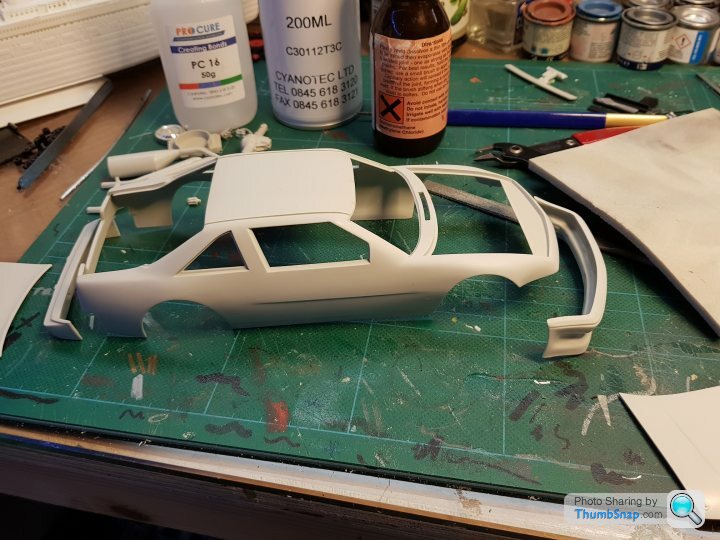
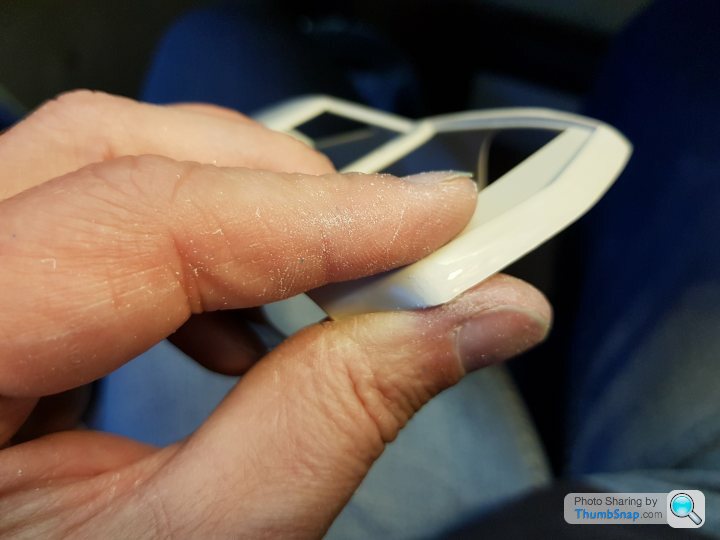
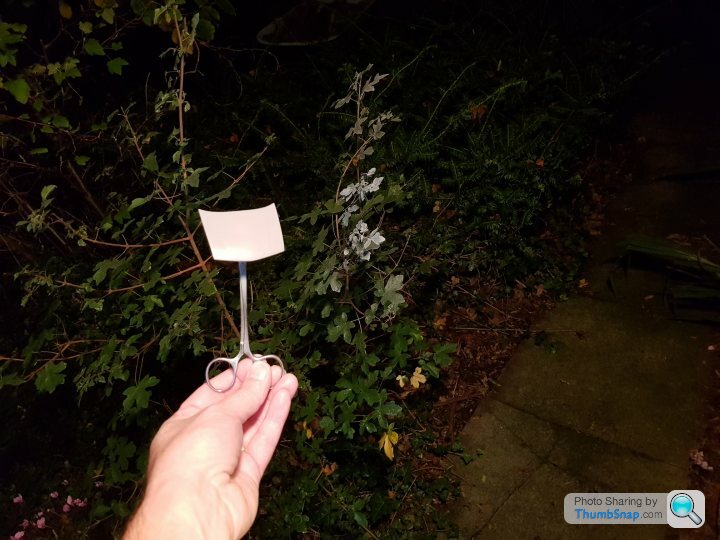
Mounted the body for spraying by super-glueing a bit of runner to a strip of masking tape burnished down to the inside of the roof, then pinched the runner with a surgical type clip. Benefits of this method being I can vouch for the tenacity of grip from the tape, I can hang a body upside down to dry and the tape peels off easy when finished. Stuck the hood and trunk lid on double-sided tape on one of my sticks.....only for the hood to fall in to the bush paint-side-down...aerosols...I spray out the door of the shed....gets interesting this time of year...the plant in the image is not a silver-leafed variety, it`s been all sorts of colours in the past!
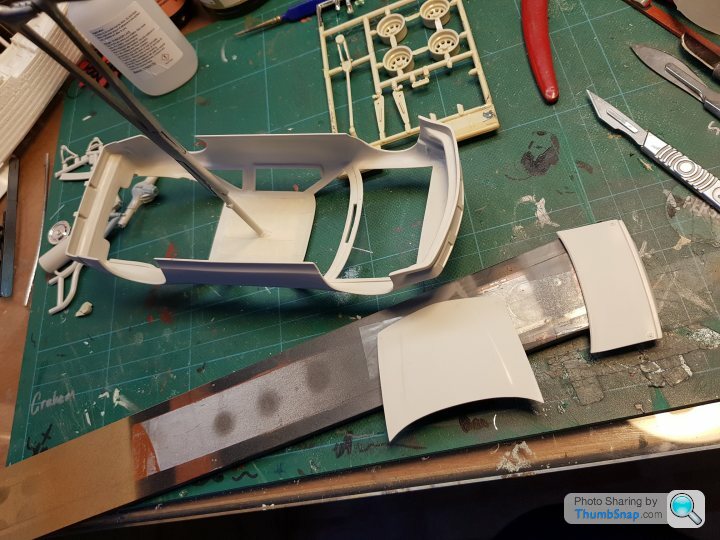
So, body prepped and primed (Halfords grey, will go Half matt black as it covers really well, Tamiya gloss clear, mask and (I forget which but test spray looks promising but not got much left and don`t know where I got it) gold lower body, decals, Tamiya clear, wheels in black, engine parts in colours and chassis plate and roll cage parts shown to each other and a night of flash removal planned tomorrow!
Having joined the (Watford, WSMC) club soon after passing my driving test and now approaching 5-score, just through long-service I`ve been `lucky` enough to `win` several Nascar kits at club events over the decades....also many Corvettes...the second most passed-over models in all my fellow modellers` stashes behind the ubiquitous AMT Nascar kit.....so the contents of this one are pretty familiar. Where in the past I fell on my sword and selflessly built the Nascars `won` to prevent them returning to the merry-go-round of unloved plastic, in those instances I`d limited the effort required by building as `slammers` or `shelf-model`, i.e. hood glued shut to negate the need to build the engine, only the basic suspension parts used to simply locate the wheels as there`d be no effort put in to the undercarriage, interiors thrown together and sprayed entirely in black, none of that polished lacquer top-coat palaver...so they looked amateurish but jazzy and didn`t owe me much time. I`ve got a week to do better this time.
So the to the kit. Generic chassis and interior I believe shared with AMT`s other Nascars of the period (this one is Rusty Wallace`s 1990 Winston Cup car, I believe he won quite a bit around that time), GM small block, smooth body with lift off hood and trunk, rubber tyres, nice looking decals. Everything moulded in grey with lots of extra bonus plastic in the form of flash, safely protected by the intricate roll cage parts. A very good boxfull of parts.


Instructions start with the engine and I thought I`d take the hint and get in to it on familiar ground. I`ve built more V8s than you can shake a long cam at, flat sixes a-plenty, V12s, a V16, screaming turbo 4-cylinders.....Block and `box called out as a steel colour and heads and manifold aloooominum so tried something new and solvented block halves then used this as a jig to solvent heads and manifold together as a sub-assembly so both can be painted separately then brought together after paint. I solvented some of the other obvious 2-part assemblies at the same time so they can cure off; rear axle halves, rad halves, exhaust and tips etc...
I should have said before, I don`t airbrush and aerosol as much as poss before detailing by hand. Halfords, Tamiya, Humbrol, those odd ones you see in B&Q...
So engine parts and sub-assemblies built/prepared by colour and sprayed separately. Humbrol brushed steel metalcote, Halfords aluminium, Valspar bright silver etc


Sump and waterpump called out in `blue`...so just used the nearest I had. Blue is a bit Ford I thought....and I used a Ford colour...
Nearly tea time so came in from the shed to strip chrome parts with MrMuscle spray oven cleaner in the sink. Just a couple of minutes and the chrome is gone, alas also from the rear view mirror I didn`t spot on the runner....no worries though. Like it matters.... AMT`s chrome is always a bit thick but so I like to get back to the crisp plastic before painting. Wheels need to be black and the jack is not going to be chrome!


Needed to run a sharp pointy blade around all the wheel openings to clear flash but they look so much sharper naked.
Very little danger of sanding off body detail, the only sharp bits are the hood pins! Ah, the joy of working a bar of soap...the usual mould seam removal still required of course but one can sand with a little less care than usual without fear of losing something important! Front and rear bumpers needed to be fixed on and after needle-filing edges straight and true, especially around tool-split lines, they fitted fine. I chose to hold in-place and smear superglue along the inside join with a curved scalpel blade. Bit of a tidy up with a file behind the rear bumper as it`ll be seen with the trunk lid off, but the front seam should be out of sight. No need to go mad and fill and blend the seams on the outside as the whole thing is black, a convenient colour to lose and small gaps...plus blending the rear bumper corners by filing them down to the body would break through it`s moulded thickness and I`m not about to get the filler out to build the body out..hood and trunk lid will forever be separate of course.


Mounted the body for spraying by super-glueing a bit of runner to a strip of masking tape burnished down to the inside of the roof, then pinched the runner with a surgical type clip. Benefits of this method being I can vouch for the tenacity of grip from the tape, I can hang a body upside down to dry and the tape peels off easy when finished. Stuck the hood and trunk lid on double-sided tape on one of my sticks.....only for the hood to fall in to the bush paint-side-down...aerosols...I spray out the door of the shed....gets interesting this time of year...the plant in the image is not a silver-leafed variety, it`s been all sorts of colours in the past!


So, body prepped and primed (Halfords grey, will go Half matt black as it covers really well, Tamiya gloss clear, mask and (I forget which but test spray looks promising but not got much left and don`t know where I got it) gold lower body, decals, Tamiya clear, wheels in black, engine parts in colours and chassis plate and roll cage parts shown to each other and a night of flash removal planned tomorrow!
Right. That was Sunday, Monday and Tues went by with no progress....the idea behind going self-employed was to enhance the work/life balance.....
An hour or so Weds eve in the shed did not get the chassis and roll-cage prepped - that`s still to do - but it did lead me to find (or not!) the inevitable missing parts.
Kits from our annual raffle are always a bit of a pig-in-a-poke, the raffle being treated by all members, and I include myself, as a dumping ground for the unloved, broken, plundered, decayed unwanted junk one accumulates. And also last year`s raffle wins in some cases. I`ve seen the same Arii Corvette go round at least 5 times in the last decade.....
It`s a running joke with us that we have more lots than members and multiple `wins` are common and indeed necessary to close the night with everything claimed. At one extreme we have a fellow member eagerly wining back kits he`s regretting putting in only an hour before, at the other wins are rejected like knighthoods and can be passed over several times before some selfless soul takes them out of the game. Woe betide anyone who misses raffle night, as these lowest of dregs have been known to get posted through the absentee`s letter box late at night...
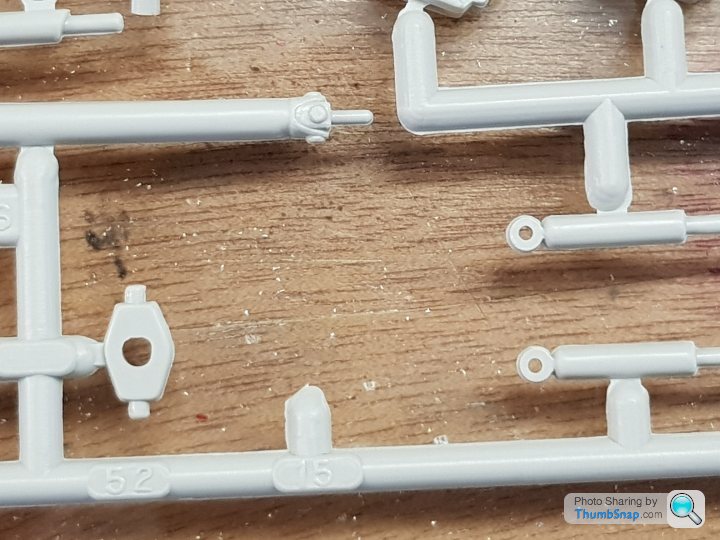
So the Cadillac doesn`t have an engine block (but bizarrely does have the heads, sump etc) and this Nascar didn`t have a fan or set of pulleys:
No problem, having previously thrown some together without engines, the spares box should provide:
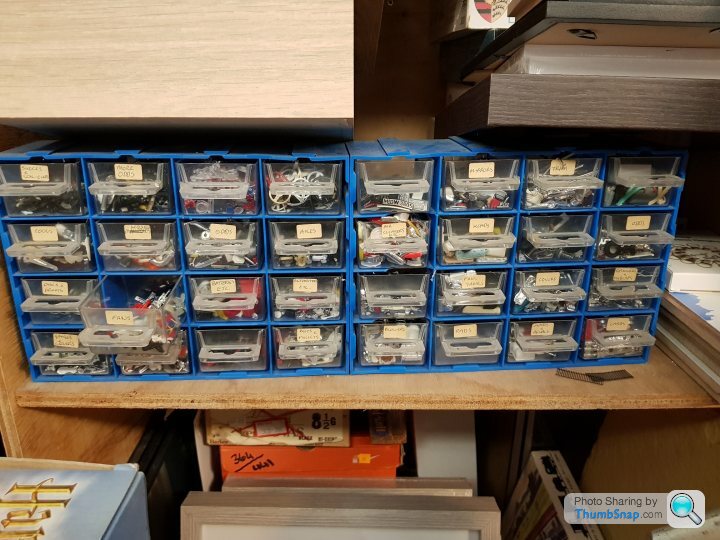
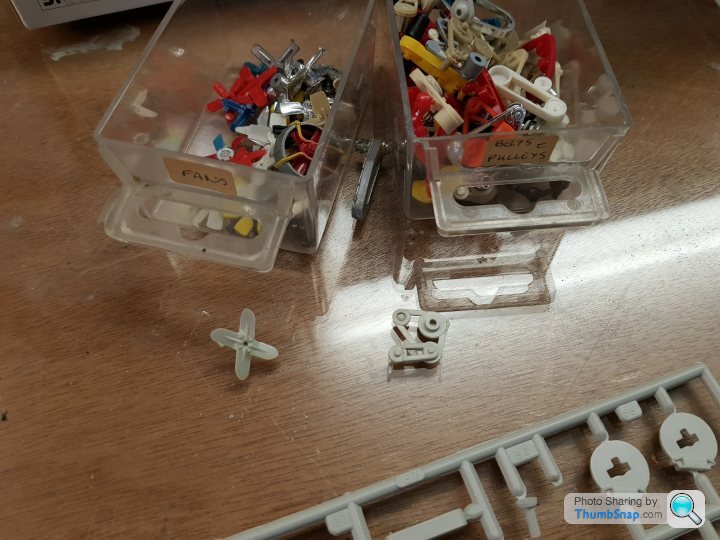
And provide it did, but I was surprised, assuming as I mentioned before the chassis and engines were generic, that the pulleys were mirrored. The aux pulley runs to the sump mounted oil pump to the right on this engine, not left as from it`s original intended motor:
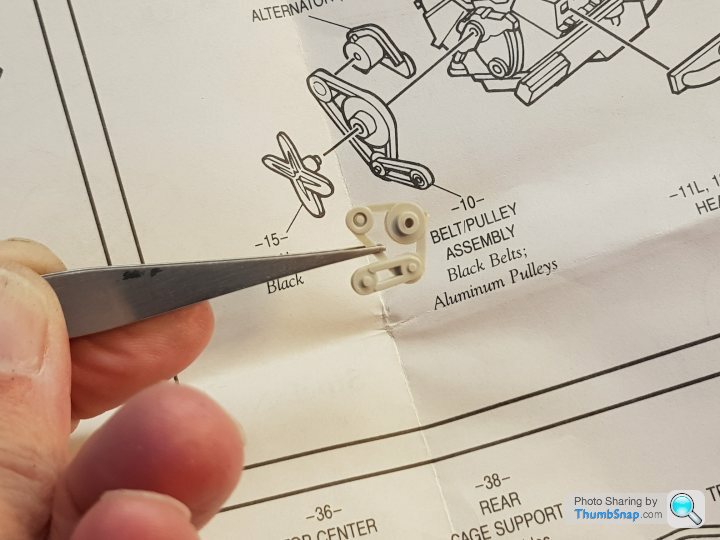
Sharp knife to separate, I`ll stick it back on when I`ve got the engine assembly together to position it:
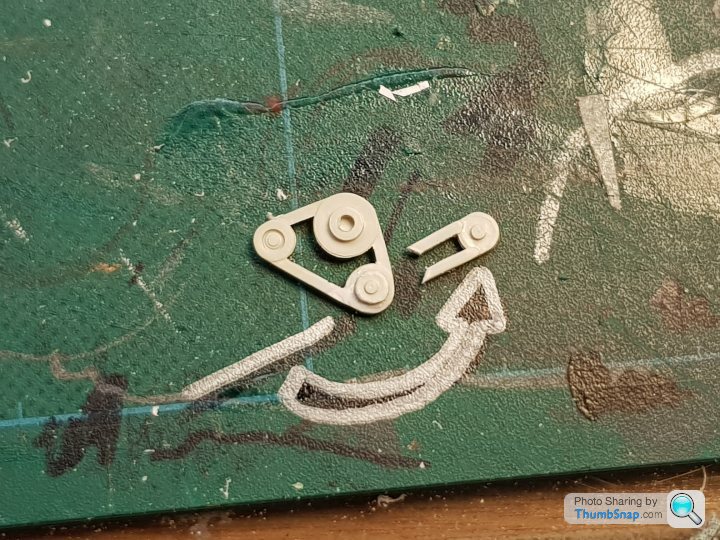
Meanwhile, had to move quick to prevent the solvent puddle engulfing some parts...clumsy:
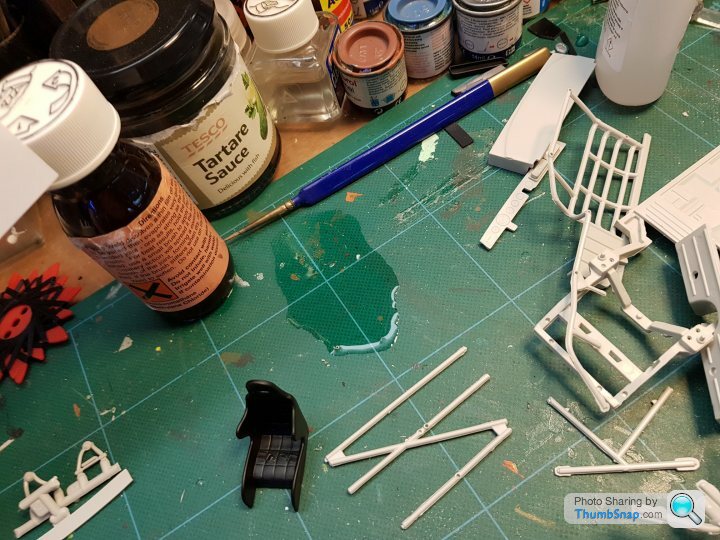
Decided despite instructions calling out everything inside to be `black`, specifically chassis, floor and roll-cage, that I`ll loosely follow some images of one of the real cars which has a light grey look inside. Black will just be a dark hole though the windows. So having tried Humbrol 64 grey I went lighter with a Halfords Ford Dove Grey for the underside of the hood and trunk lid:
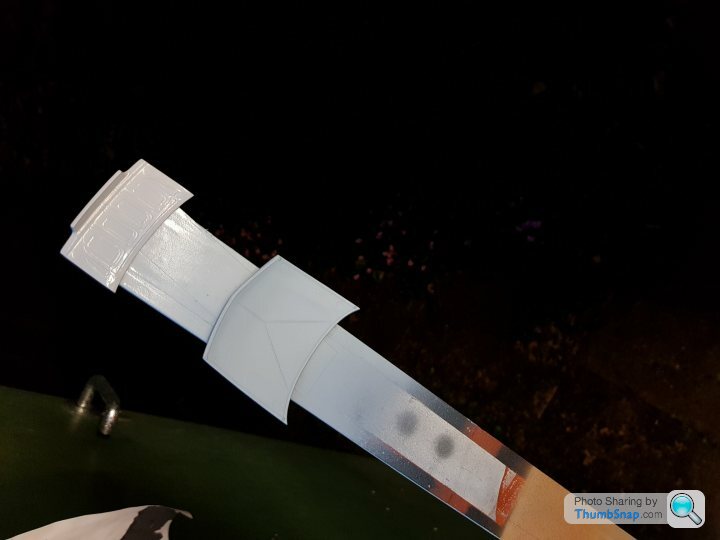
and will use the same for most of the hard bits inside. Committed to the inside of the body remaining black now though. That`s now in matt black, just because Halfords stuff covers so well, inside loosely masked off to keep the Tamiya aersol clear lacquer spray on the outside only. Hood and trunk lid similarly loosely masked and paint kept away from edges so it doesn`t run under the tape. Good coat on the outside faces but will sharpie those edges to keep the split between grey and black neat. Hopefully...:
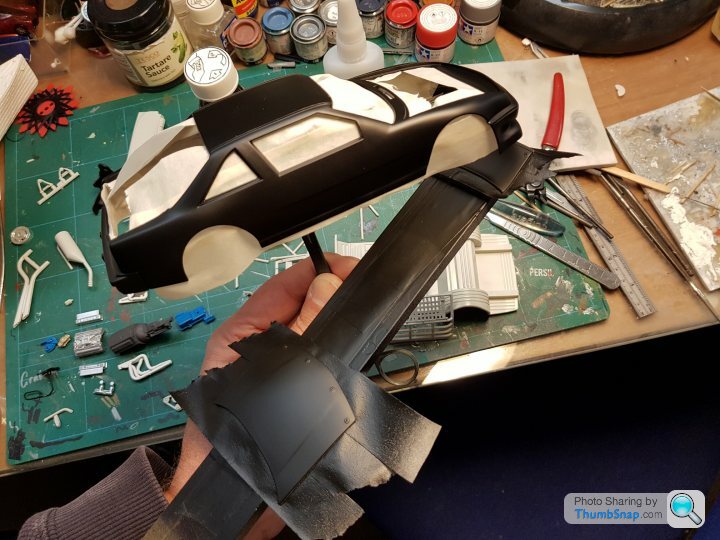
Some paint blown on the seat, axle, radiator, spoiler and other single items.....now to the shed! Lots to do....
An hour or so Weds eve in the shed did not get the chassis and roll-cage prepped - that`s still to do - but it did lead me to find (or not!) the inevitable missing parts.
Kits from our annual raffle are always a bit of a pig-in-a-poke, the raffle being treated by all members, and I include myself, as a dumping ground for the unloved, broken, plundered, decayed unwanted junk one accumulates. And also last year`s raffle wins in some cases. I`ve seen the same Arii Corvette go round at least 5 times in the last decade.....
It`s a running joke with us that we have more lots than members and multiple `wins` are common and indeed necessary to close the night with everything claimed. At one extreme we have a fellow member eagerly wining back kits he`s regretting putting in only an hour before, at the other wins are rejected like knighthoods and can be passed over several times before some selfless soul takes them out of the game. Woe betide anyone who misses raffle night, as these lowest of dregs have been known to get posted through the absentee`s letter box late at night...
So the Cadillac doesn`t have an engine block (but bizarrely does have the heads, sump etc) and this Nascar didn`t have a fan or set of pulleys:

No problem, having previously thrown some together without engines, the spares box should provide:


And provide it did, but I was surprised, assuming as I mentioned before the chassis and engines were generic, that the pulleys were mirrored. The aux pulley runs to the sump mounted oil pump to the right on this engine, not left as from it`s original intended motor:

Sharp knife to separate, I`ll stick it back on when I`ve got the engine assembly together to position it:

Meanwhile, had to move quick to prevent the solvent puddle engulfing some parts...clumsy:

Decided despite instructions calling out everything inside to be `black`, specifically chassis, floor and roll-cage, that I`ll loosely follow some images of one of the real cars which has a light grey look inside. Black will just be a dark hole though the windows. So having tried Humbrol 64 grey I went lighter with a Halfords Ford Dove Grey for the underside of the hood and trunk lid:

and will use the same for most of the hard bits inside. Committed to the inside of the body remaining black now though. That`s now in matt black, just because Halfords stuff covers so well, inside loosely masked off to keep the Tamiya aersol clear lacquer spray on the outside only. Hood and trunk lid similarly loosely masked and paint kept away from edges so it doesn`t run under the tape. Good coat on the outside faces but will sharpie those edges to keep the split between grey and black neat. Hopefully...:

Some paint blown on the seat, axle, radiator, spoiler and other single items.....now to the shed! Lots to do....
Speckled Hen, Spotify and myself had a very pleasant and productive evening in the shed yesterday. Turned in after 1am......
For a little immediate gratification I glued the head and manifold assembly plus sump to the block. It`s still a life-less assembly of painted parts but plenty of detail to paint-in and shading/highlighting to come. This step also allowed to positioning and glueing of the oil pump belt and pulley:
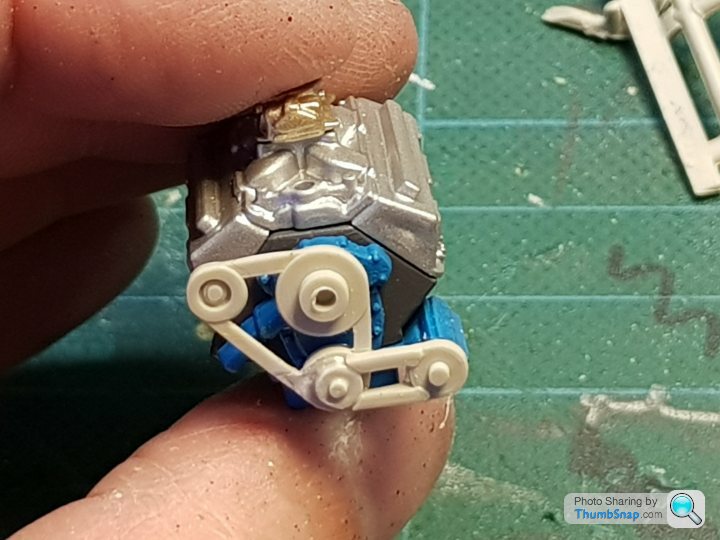
I find it rather horrifying to see these parts so close up in my images; not that it was needed but respect for my contemporaries here has grown in the face of the close-up lens.....lots of your stuff looks good at the inch when my stuff is definitely in the `acceptable at 2-foot range`!
Had then to knuckle down and remove flash from the many, many tubular roll-cage parts. Of course if one is removing flash, despite the futility, one feels the conviction to de-seam too.....favourite oval-with-sharp-corners and flat needle files and the scrape and slice of a pointy blade for many an hour spent and pile of swarf accumulated:
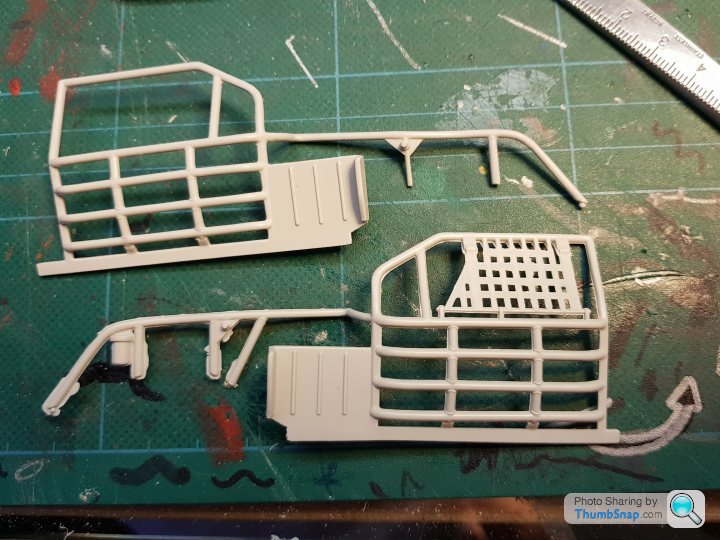
Having to draw the line somewhere, it was on to a mix of solvent and activated superglue for assembly having checked things like the seat can be fitted through the gaps; specifically it`s shown to be assembled to the floor then the cage built over, but I wanted to paint the floor and cage as-one then fit all the interior `stuff` afterwards. Dry fitted the fuel tank plate (more in a bit) to aid positioning of rear cage bars during assembly and checked fit of engine and rad:
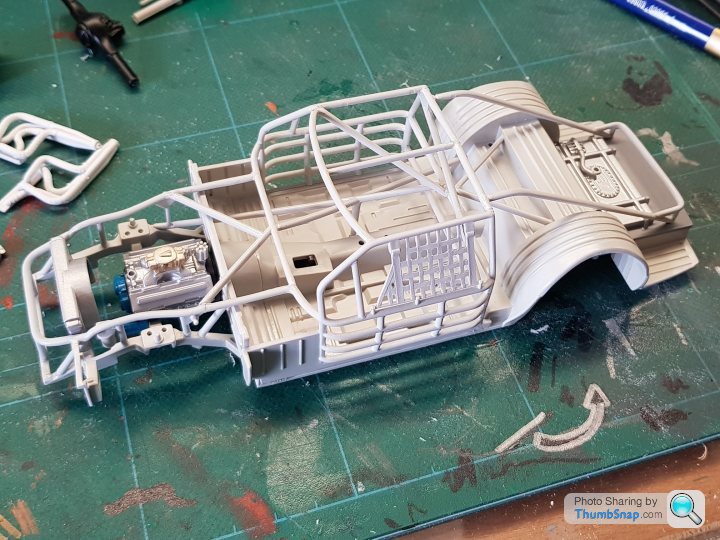
All good and doable so on with the grey primer followed by that dove grey:
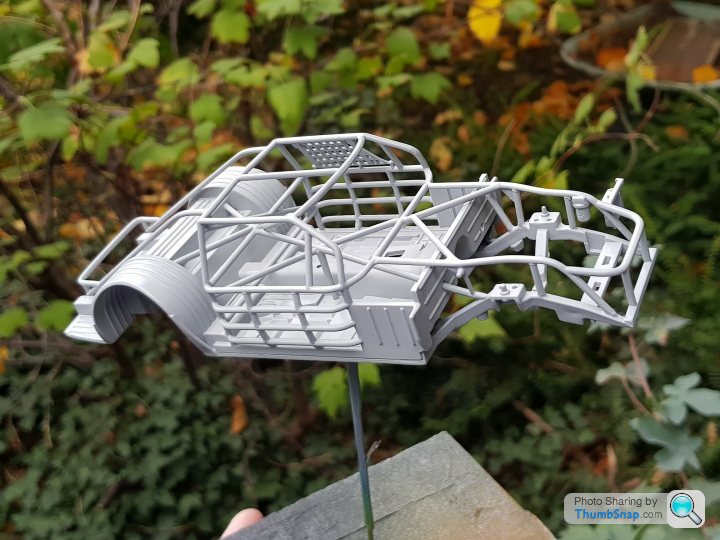
One-piece fuel tank plate was first sprayed with the dove grey, the `floor` area pretty crudely masked and the tank itself sprayed with Halfords aluminium, 2 light coats to avoid a heavy coat finding it`s way under the tape:
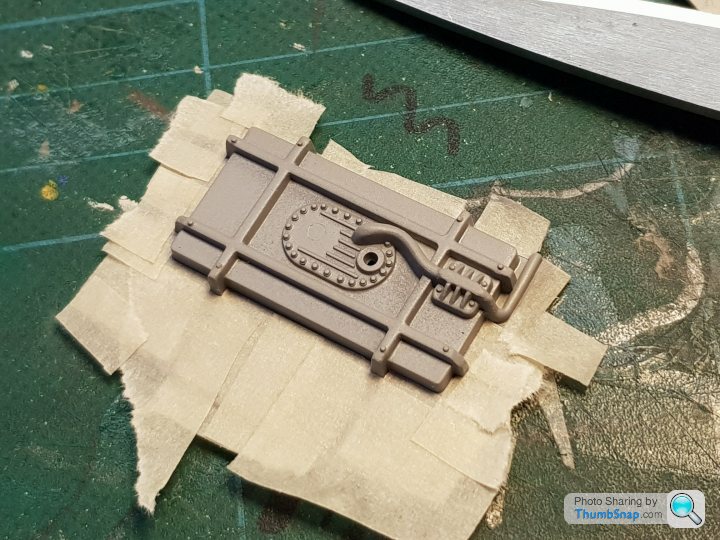
That went well enough and on to a proper short-cut; retaining straps by black Sharpie. Just running over the top face of the very 3d straps, no way am I going down the sides!!:
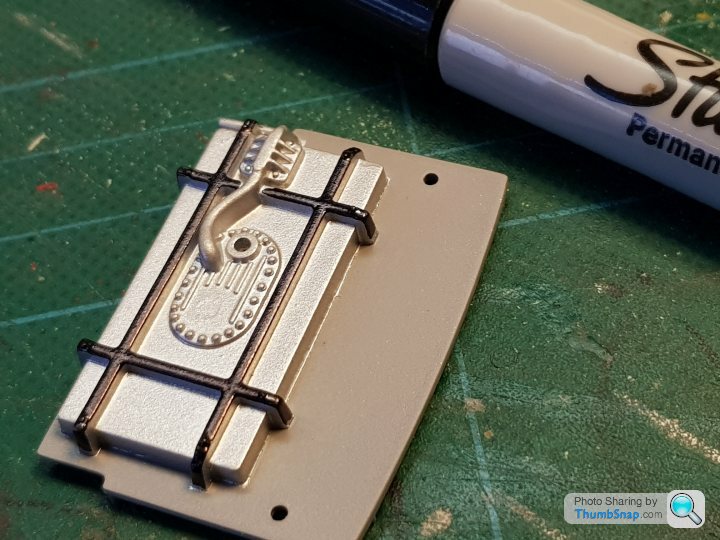
The trusty Sharpie came to my rescue as having wet sanded in the shower this afternoon, I had too many exposed edges of base plastic....shoddy, shoddy..I was flatting the Tamiya gloss for the next coat and fell foul of not having much black thickness under it...So...I`ve sharpied those pesky edges and given body, hood and trunk lid a good flowing coat of Tamiya clear and we`ll see tomorrow if the pen ink has blended out..Immediately on spraying it showed up very prominently, but after just a few mins, and being cautious of letting sleeping dogs lie, a quick peek suggested I might be saved...but then it may have been the light giving false hope. Anyway, `tis done....:
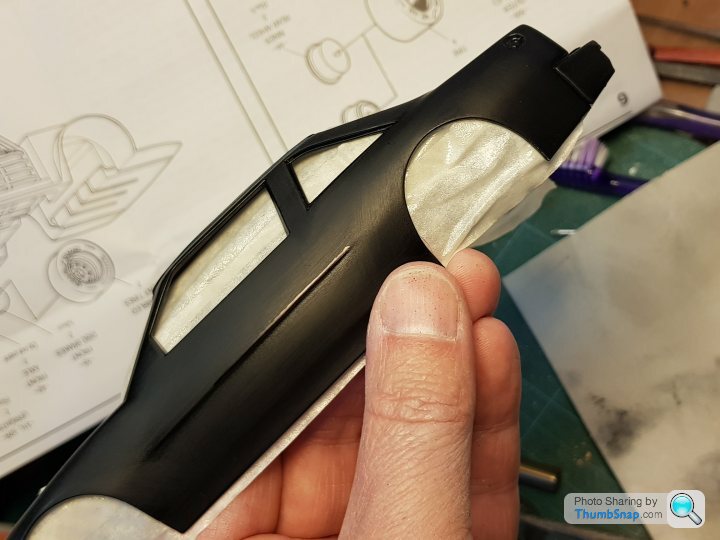
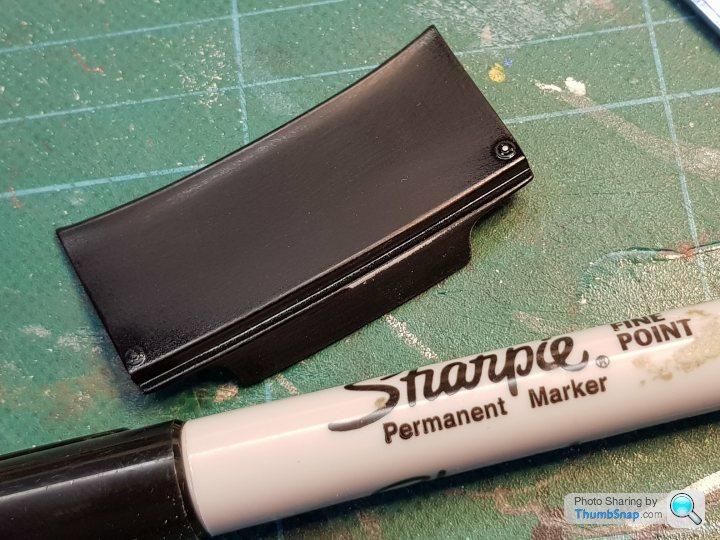
Cleaned up a few more bits and sprayed away in the dark outside the shed, it seemed to get milder as the evening went on. No horrible surprises this morning anyway:
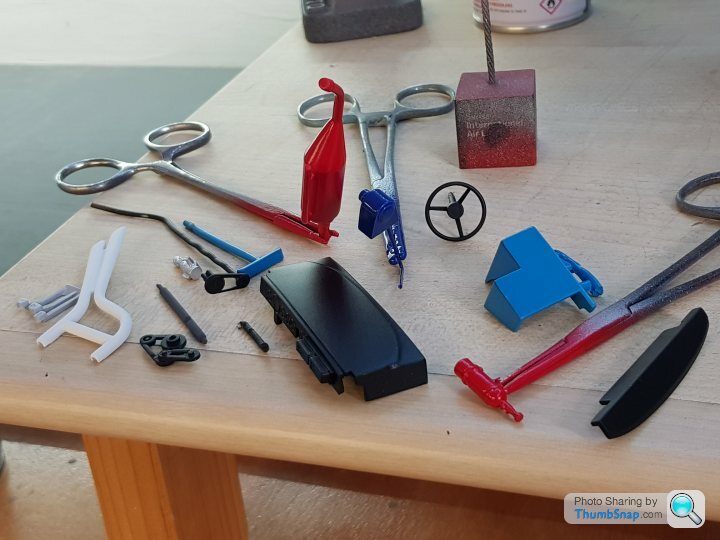
So can`t work on it tonight and so much to do to complete for Tuesday eve, epsecially the rush-and-pay-the-price decalling and final lacquer....first job in the morn is to mask and spray the lower gold on the body, regardless of how the black and lacquer looks on inspection...decal it up during the day, final lacquer by end of play...lots of chassis assembly to enjoy though.....and black-out the window edges.......
Good evening!
For a little immediate gratification I glued the head and manifold assembly plus sump to the block. It`s still a life-less assembly of painted parts but plenty of detail to paint-in and shading/highlighting to come. This step also allowed to positioning and glueing of the oil pump belt and pulley:

I find it rather horrifying to see these parts so close up in my images; not that it was needed but respect for my contemporaries here has grown in the face of the close-up lens.....lots of your stuff looks good at the inch when my stuff is definitely in the `acceptable at 2-foot range`!
Had then to knuckle down and remove flash from the many, many tubular roll-cage parts. Of course if one is removing flash, despite the futility, one feels the conviction to de-seam too.....favourite oval-with-sharp-corners and flat needle files and the scrape and slice of a pointy blade for many an hour spent and pile of swarf accumulated:

Having to draw the line somewhere, it was on to a mix of solvent and activated superglue for assembly having checked things like the seat can be fitted through the gaps; specifically it`s shown to be assembled to the floor then the cage built over, but I wanted to paint the floor and cage as-one then fit all the interior `stuff` afterwards. Dry fitted the fuel tank plate (more in a bit) to aid positioning of rear cage bars during assembly and checked fit of engine and rad:

All good and doable so on with the grey primer followed by that dove grey:

One-piece fuel tank plate was first sprayed with the dove grey, the `floor` area pretty crudely masked and the tank itself sprayed with Halfords aluminium, 2 light coats to avoid a heavy coat finding it`s way under the tape:

That went well enough and on to a proper short-cut; retaining straps by black Sharpie. Just running over the top face of the very 3d straps, no way am I going down the sides!!:

The trusty Sharpie came to my rescue as having wet sanded in the shower this afternoon, I had too many exposed edges of base plastic....shoddy, shoddy..I was flatting the Tamiya gloss for the next coat and fell foul of not having much black thickness under it...So...I`ve sharpied those pesky edges and given body, hood and trunk lid a good flowing coat of Tamiya clear and we`ll see tomorrow if the pen ink has blended out..Immediately on spraying it showed up very prominently, but after just a few mins, and being cautious of letting sleeping dogs lie, a quick peek suggested I might be saved...but then it may have been the light giving false hope. Anyway, `tis done....:


Cleaned up a few more bits and sprayed away in the dark outside the shed, it seemed to get milder as the evening went on. No horrible surprises this morning anyway:

So can`t work on it tonight and so much to do to complete for Tuesday eve, epsecially the rush-and-pay-the-price decalling and final lacquer....first job in the morn is to mask and spray the lower gold on the body, regardless of how the black and lacquer looks on inspection...decal it up during the day, final lacquer by end of play...lots of chassis assembly to enjoy though.....and black-out the window edges.......
Good evening!
r159 said:
I’m sure those MEK bottles just want to fall over...
You could always do what I do with my Microsol, which is also kept in a tall skinny container that's just waiting to be knocked over. Keep a spare bottle, decant a small amount into it from the full one, and use that. Won't stop it falling over, but will at least restrict the amount that gets spilled.Sunday eve and not nearly as much modelling progress has been made for the time that has passed....
First task of the day was to mask the body to get the gold down. So I wasted time playing with the wheels...and engine...and everything else....
A not-particularly accurate but very neat solution to the red wheel-rim lining learnt form an ancient Scale Auto Modeler mag is to spray a patch of red on something non-absorbant and flat, then dip the wheel down into the still wet paint and voila, neat red rims! Overscale but sod it, I like it:
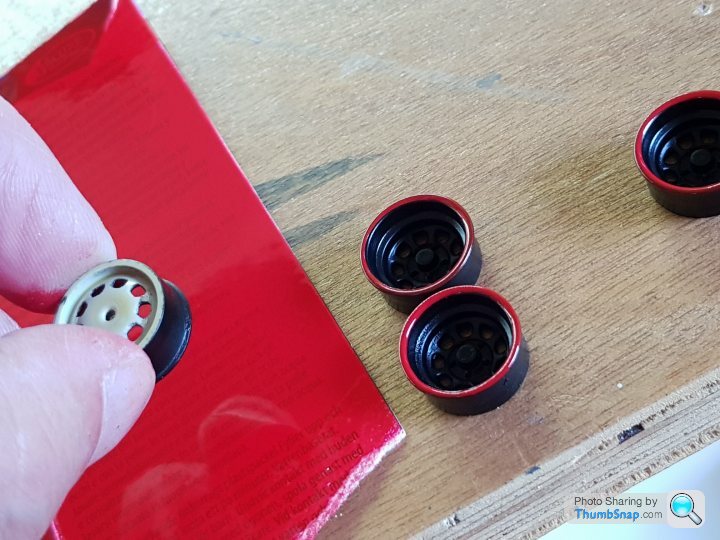
Sprayed up the last suspension bits (shocks and springs) in silvers and Humbrol polished steel metalcote for the springs. And prop shaft.
Enough procrastinating, got on to the body masking. The colour split is covered by the red stripe of the decals apart from a crowded area in among the sponsor stickers behind the front wheel. These stickers are part of the full side decal that includes the big race number and looks like a tight fit on the body side so to avoid losing a bit of decal top or bottom trying to line it up covering a possibly wayward colour split, I needed to make that colour split pretty accurate, guided by the decal. I closely cut side decals, eyeballed in place and taped off.....fingers crossed. The gold is a random from a diy or craft shop and is a lovely vibrant shade that flows on pretty smoothly. It will show-up the decals which are not metallic though.....
2 coats and de-mask. Looks ok..... My sharpie colouring-in seems to have blended out invisibly under the lacquer too. Which was nice.
Gold felt dry so gave the once-taped edge a quick wipe with lighter fluid to remove a little bit of tape residue and..............bugger. Damn and bugger. The gold dissolved under lighter fluid! Only one spot but can be seen from space:
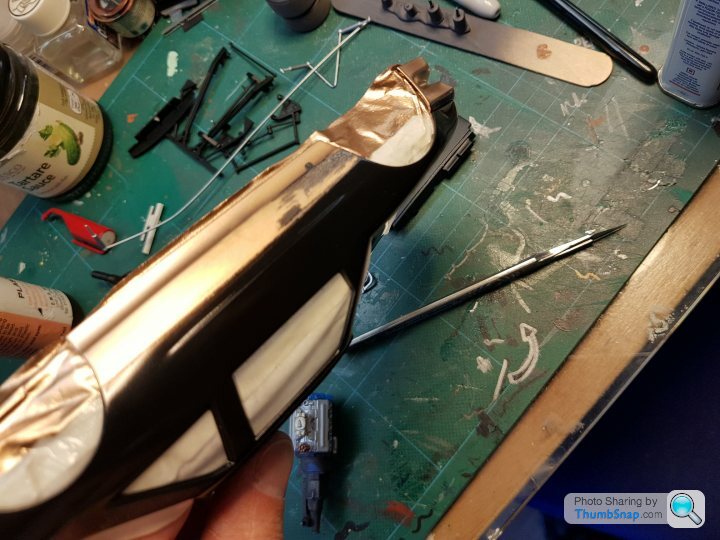
I possibly experienced that in the past but I did a good job of forgetting it....
I`d better get back out there and mask and spray that little bit. It needed to be decalled by now! Tick tock, tick tock....
First task of the day was to mask the body to get the gold down. So I wasted time playing with the wheels...and engine...and everything else....
A not-particularly accurate but very neat solution to the red wheel-rim lining learnt form an ancient Scale Auto Modeler mag is to spray a patch of red on something non-absorbant and flat, then dip the wheel down into the still wet paint and voila, neat red rims! Overscale but sod it, I like it:

Sprayed up the last suspension bits (shocks and springs) in silvers and Humbrol polished steel metalcote for the springs. And prop shaft.
Enough procrastinating, got on to the body masking. The colour split is covered by the red stripe of the decals apart from a crowded area in among the sponsor stickers behind the front wheel. These stickers are part of the full side decal that includes the big race number and looks like a tight fit on the body side so to avoid losing a bit of decal top or bottom trying to line it up covering a possibly wayward colour split, I needed to make that colour split pretty accurate, guided by the decal. I closely cut side decals, eyeballed in place and taped off.....fingers crossed. The gold is a random from a diy or craft shop and is a lovely vibrant shade that flows on pretty smoothly. It will show-up the decals which are not metallic though.....
2 coats and de-mask. Looks ok..... My sharpie colouring-in seems to have blended out invisibly under the lacquer too. Which was nice.
Gold felt dry so gave the once-taped edge a quick wipe with lighter fluid to remove a little bit of tape residue and..............bugger. Damn and bugger. The gold dissolved under lighter fluid! Only one spot but can be seen from space:

I possibly experienced that in the past but I did a good job of forgetting it....
I`d better get back out there and mask and spray that little bit. It needed to be decalled by now! Tick tock, tick tock....
With carrier bag and masking tape I've got more of the gold over the damaged area. Better not happen again as regardless of the dawning that I'll not complete for Tuesday anyway, the can is effectively empty now. Valspar enamel spray does not like lighter fluid which I have historically found to be super-safe on plastic and painted parts...
So the body doesn't have the decal decoration or sealing lacquer coat the schedule demands...but no reason not to have jolly fun assembling more of the engine, chassis and interior. Not all there yet but the oily bits are going nicely....
[url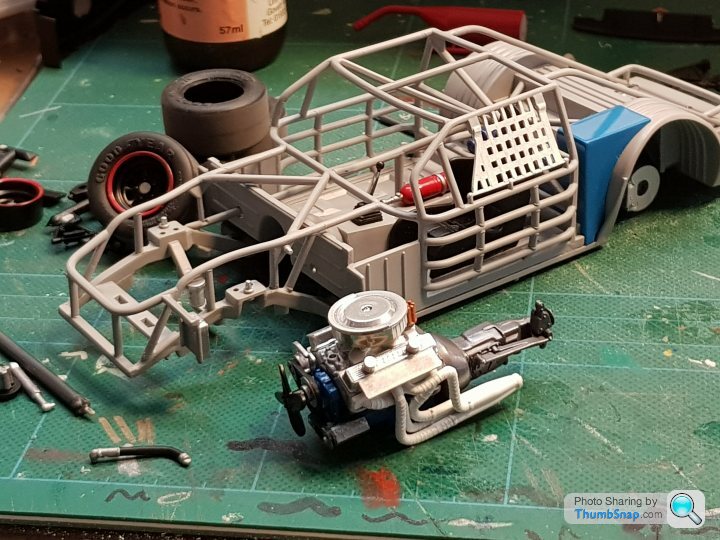 |https://thumbsnap.com/mzMvDWvH[/url]
[url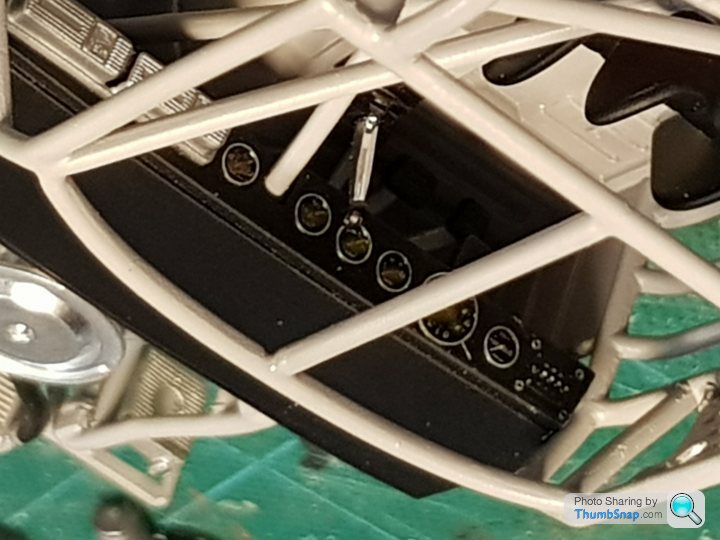 |https://thumbsnap.com/WdhDjblj[/url]
[url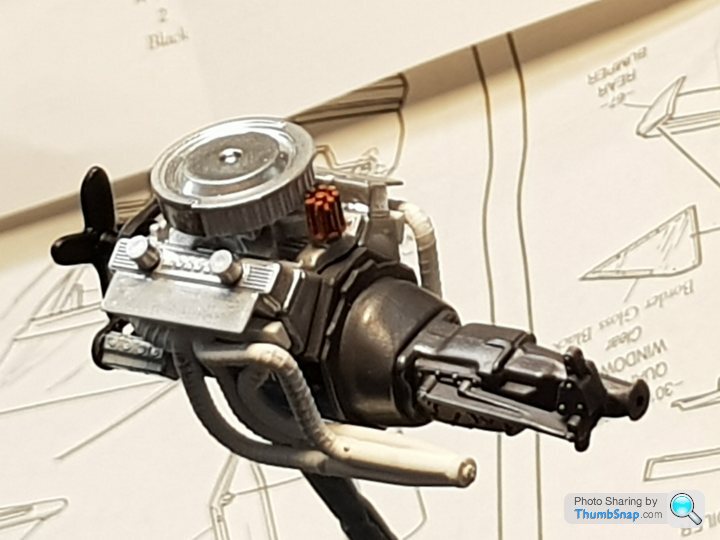 |https://thumbsnap.com/7cfu74f3[/url]
[url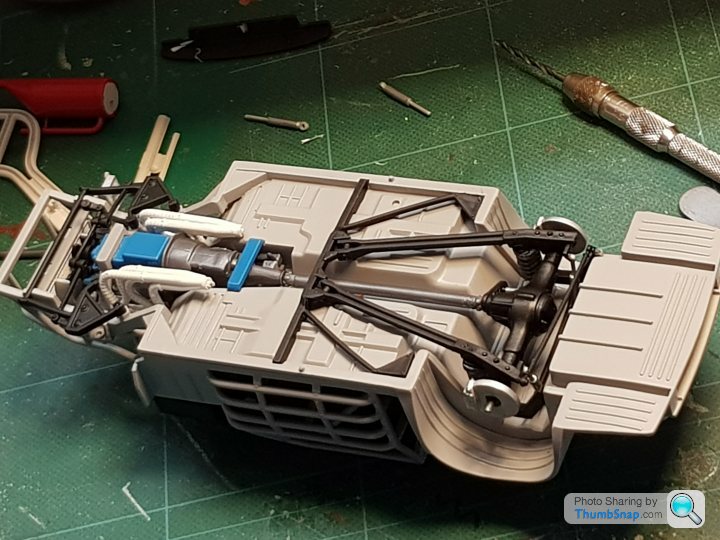 |https://thumbsnap.com/NbnoQtyp[/url]
[url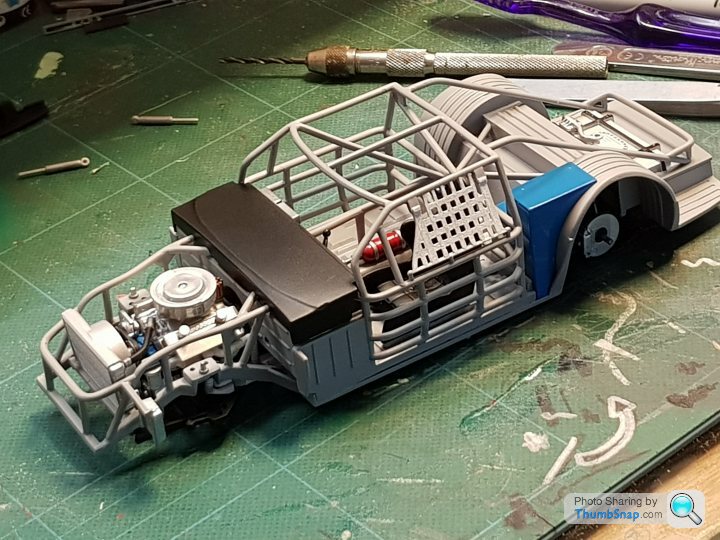 |https://thumbsnap.com/HyqEHwxY[/url]
So the body doesn't have the decal decoration or sealing lacquer coat the schedule demands...but no reason not to have jolly fun assembling more of the engine, chassis and interior. Not all there yet but the oily bits are going nicely....
[url
 |https://thumbsnap.com/mzMvDWvH[/url]
[url
 |https://thumbsnap.com/WdhDjblj[/url]
[url
 |https://thumbsnap.com/7cfu74f3[/url]
[url
 |https://thumbsnap.com/NbnoQtyp[/url]
[url
 |https://thumbsnap.com/HyqEHwxY[/url]
Thanks for the encouragement gents, but it`s going to need a bit more than that now!
Absolutely kidding myself I could build this to ANY standard in a week but not only is it going to be entered in to Tuesday night`s club competition unfinished, I need to rethink the body decoration entirely..........
Life and work, plus the acceptance that it`s gone well enough so far that finishing properly in it`s own time will be the respectful conclusion, rather than boshing it to claim completion, I squirreled only for an hour or so tonight. Images don`t show anything apart from added wheels, and these aren`t even finished (Daughter, where`s my pot of acrylic white?!) and properly attached, but that`s pretty much the chassis in block colours and assembled. Still a bit lifeless and in need of texture, but happy-ish with it, despite some of the horrors visible in the close-up images...Think I mentioned I prefer to review my work with glasses off....
The colour split on the body is shocking and I`d planned to wipe off the Valspar gold now I know lighter fluid dissolves it, but applying two decals to the black bonnet brought home to me that this kit is almost 30 years old and AMT decals were carp when fresh....carrier film looks like grease-proof paper! So they`re no bloody good....wonder if there`s a fresh aftermarket replacement scheme available...or to do something arty....or that cut-away idea lurking at the back of the mind....
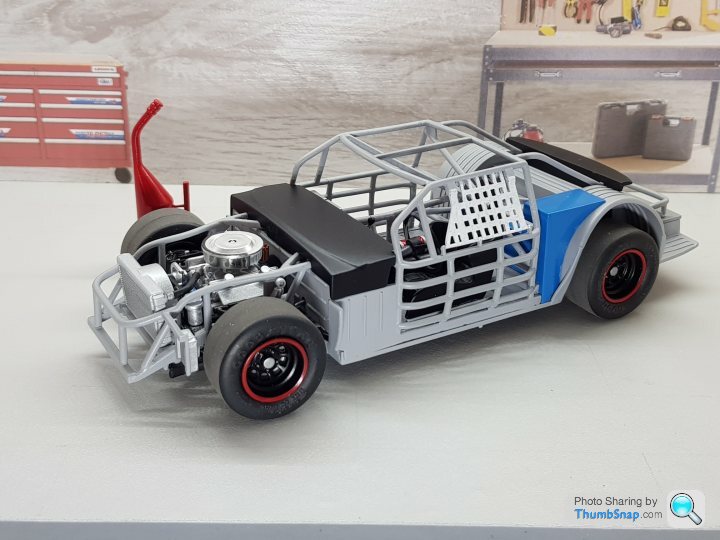
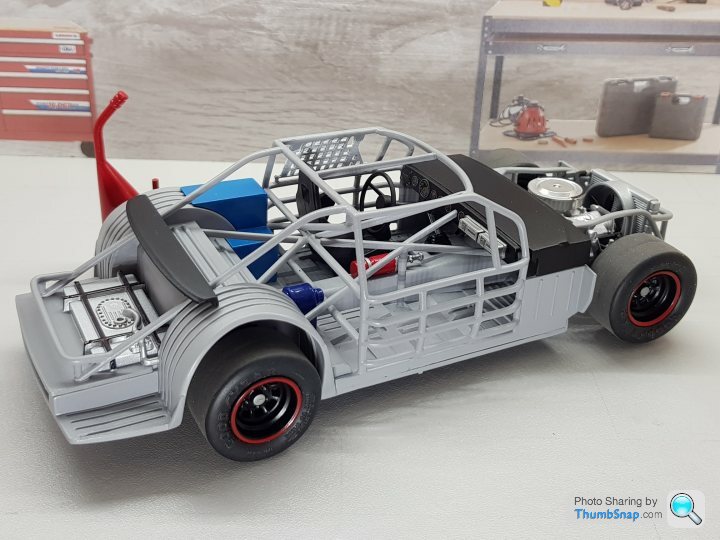
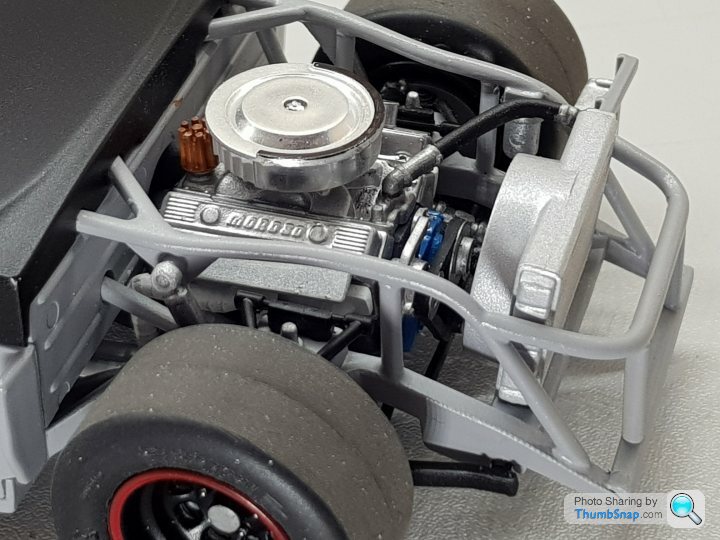
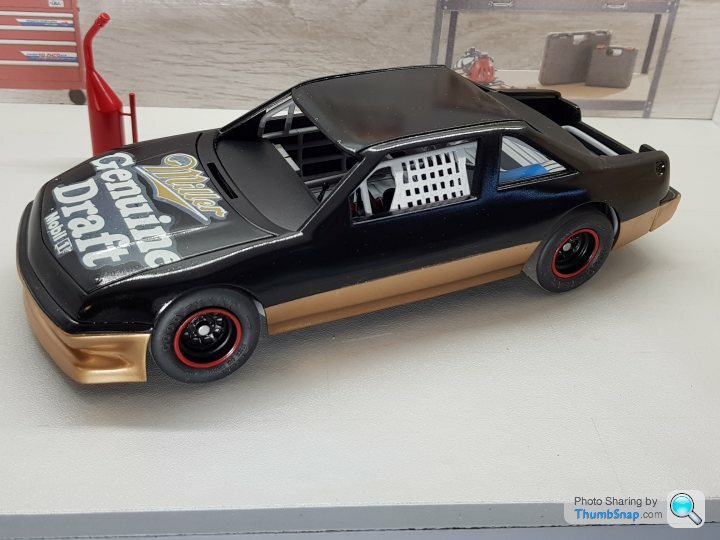
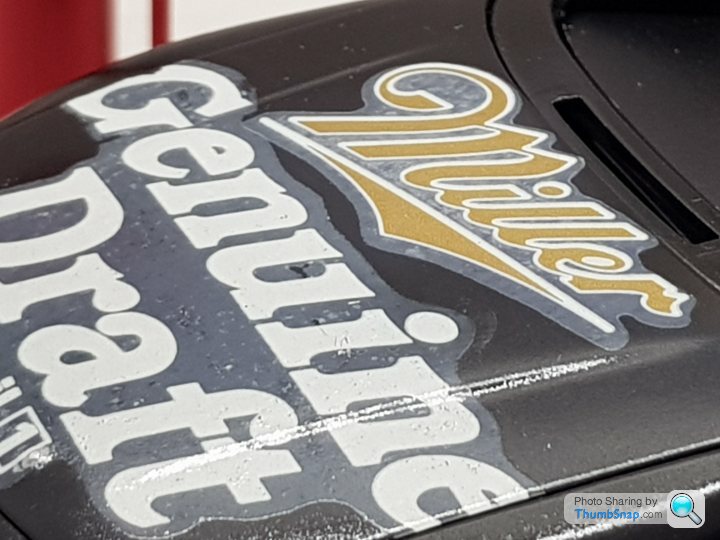
So that`s as far as it goes for the club competition, but I`ll do it justice and finish off soon, somehow...
Absolutely kidding myself I could build this to ANY standard in a week but not only is it going to be entered in to Tuesday night`s club competition unfinished, I need to rethink the body decoration entirely..........
Life and work, plus the acceptance that it`s gone well enough so far that finishing properly in it`s own time will be the respectful conclusion, rather than boshing it to claim completion, I squirreled only for an hour or so tonight. Images don`t show anything apart from added wheels, and these aren`t even finished (Daughter, where`s my pot of acrylic white?!) and properly attached, but that`s pretty much the chassis in block colours and assembled. Still a bit lifeless and in need of texture, but happy-ish with it, despite some of the horrors visible in the close-up images...Think I mentioned I prefer to review my work with glasses off....
The colour split on the body is shocking and I`d planned to wipe off the Valspar gold now I know lighter fluid dissolves it, but applying two decals to the black bonnet brought home to me that this kit is almost 30 years old and AMT decals were carp when fresh....carrier film looks like grease-proof paper! So they`re no bloody good....wonder if there`s a fresh aftermarket replacement scheme available...or to do something arty....or that cut-away idea lurking at the back of the mind....


So that`s as far as it goes for the club competition, but I`ll do it justice and finish off soon, somehow...
Gassing Station | Scale Models | Top of Page | What's New | My Stuff


 And there`s no saving anything consumed by the puddle that evaporates quick enough in the jar but too slowly when spilt! If only I had foresight and decant into a more appropriate vessel before it`s too late......